• Skip to primary navigation
  • Skip to main content
  • Skip to primary sidebar

The Polka Dot Chair logo

  • SEWING
    • Free Sewing Patterns
    • Bag Patterns
    • Costumes
    • Apparel
    • Learn to Sew
    • Beginner Friendly
    • Embroidery Projects
    • Tips & Techniques
    • All Sewing
  • QUILTING
    • Quilt Blocks
    • Learn to Quilt
    • Free Patterns
    • Quilt Patterns
    • All Quilting
  • CRAFTS
    • Disney
    • Cricut
    • Printables
    • All Crafts
  • HOLIDAYS
    • Seasonal Projects
    • Valentine’s Day
    • Easter
    • 4th of July
    • Halloween
    • Thanksgiving
    • Christmas
    • All Holidays
  • TUTORIALS
  • ABOUT
    • About Me
    • My Fabric Collections
    • Published Books
    • Press
    • FAQ’s
    • Contact
  • SUBSCRIBE
  • SHOP
menu icon
go to homepage
  • SHOP
  • TUTORIALS
  • SEWING
  • QUILTING
  • SUBSCRIBE
  • CRAFTS
  • HOLIDAY PROJECTS
  • ABOUT
    • Published Books
    • My Fabric Collections
  • CONTACT
    • Facebook
    • Instagram
    • Pinterest
    • YouTube
  • subscribe
    search icon
    Homepage link
    • SHOP
    • TUTORIALS
    • SEWING
    • QUILTING
    • SUBSCRIBE
    • CRAFTS
    • HOLIDAY PROJECTS
    • ABOUT
      • Published Books
      • My Fabric Collections
    • CONTACT
    • Facebook
    • Instagram
    • Pinterest
    • YouTube
  • ×

    Home » Sewing

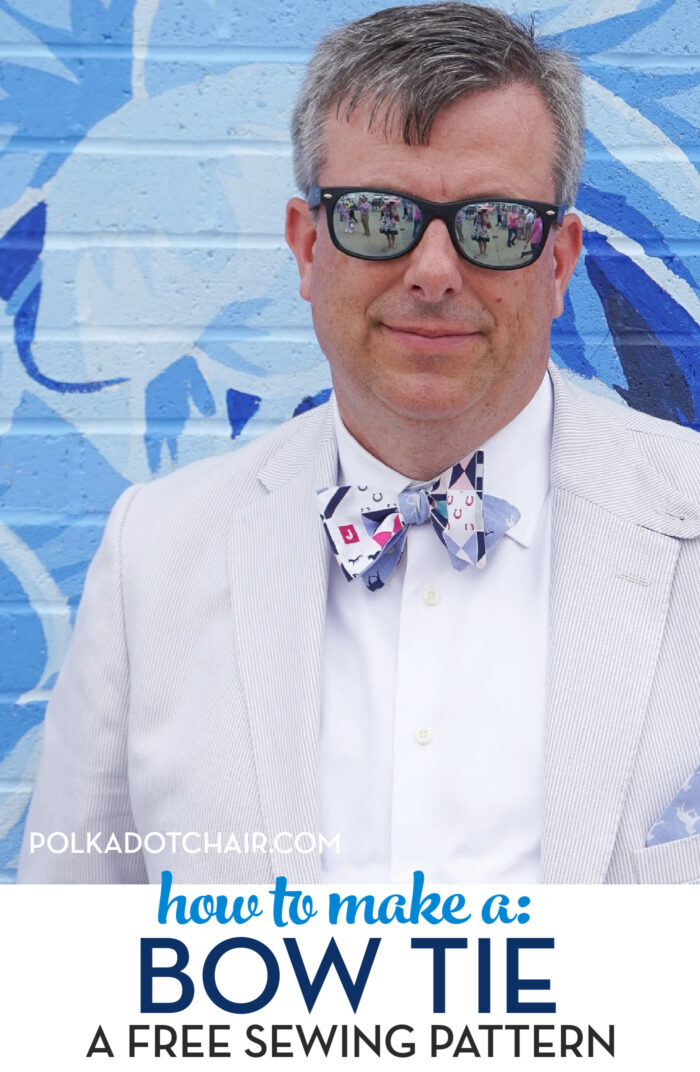
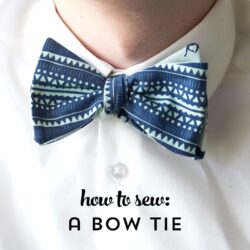
    How to Make a Bow Tie That Ties!

    Updated: Jun 8, 2022 by Melissa Mortenson · This post may contain affiliate links · This blog generates income via ads · 25 Comments

    Learn how to sew a bow tie that really ties! A free simple free sewing tutorial on polkadotchair.com

    My husband loves to wear bow ties and has been bugging me for years to make some for him. I’m happy to say that I have figured it out, and am excited to share this free sewing pattern that teaches you how to make a bow tie. I’ve even included a free pattern piece for you as well! Keep reading for more info!

    man wearing pink blue bow tie in front of blue wall

    A few years ago my husband decided he was only going to wear bow ties. The decision was based partially on the fact that we live in the South, and partially on the fact that bow ties are easier to keep clean.

    Table of Contents
    • How to Sew a Bow Tie; About our Pattern
    • How Much Fabric is Needed to Make a Bow Tie?
    • What Fabric Should I Use to Make a Bow Tie?
    • How do you make a bow tie out of fabric?
    • Bow Tie Supplies
    • How to Get the Pattern Piece
    • Sewing Instructions for Bow Tie Pattern
    • Bow Tie Construction Tips

    He’s managed to amass quite the collection of ties over the years and has asked me to make him a bow tie more than a few times. Usually when he could not find one that he liked at the store (for example, he needed a specific color for a Derby outfit).

    Learn how to sew a bow tie that really ties! A free simple free sewing tutorial on polkadotchair.com
    Learn how to sew a bow tie that really ties! A free simple free sewing tutorial on polkadotchair.com

    I wanted to get this tutorial written before Derby so that you guys could stitch up your own ties for the big event! You can also use this to make a great DIY gift for a Dad for Father’s Day.  

    How to Sew a Bow Tie; About our Pattern

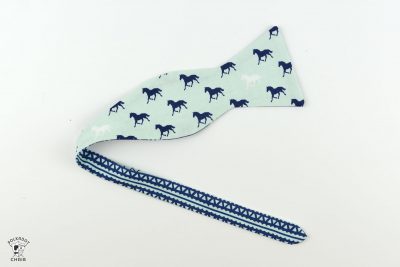
    This bow tie pattern is for a double-sided bow tie that ties traditionally and features an adjustable length so it can be resized for many neck sizes. The bow tie should fit teens up to a men’s XL shirt size.

    Learn how to sew a bow tie that really ties! A free simple free sewing tutorial on polkadotchair.com

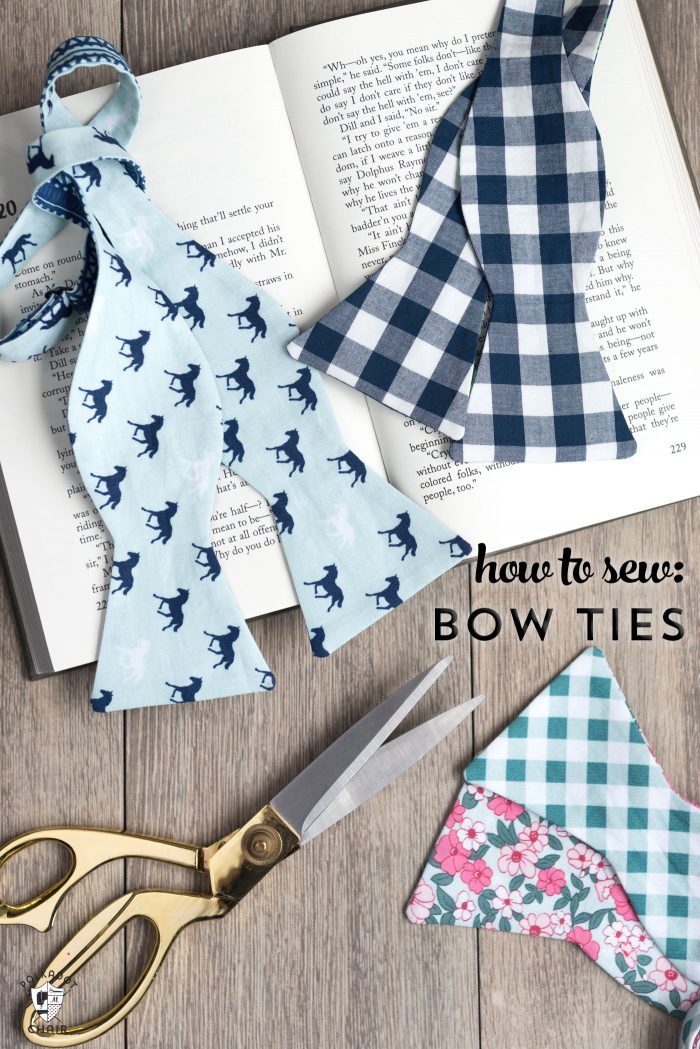
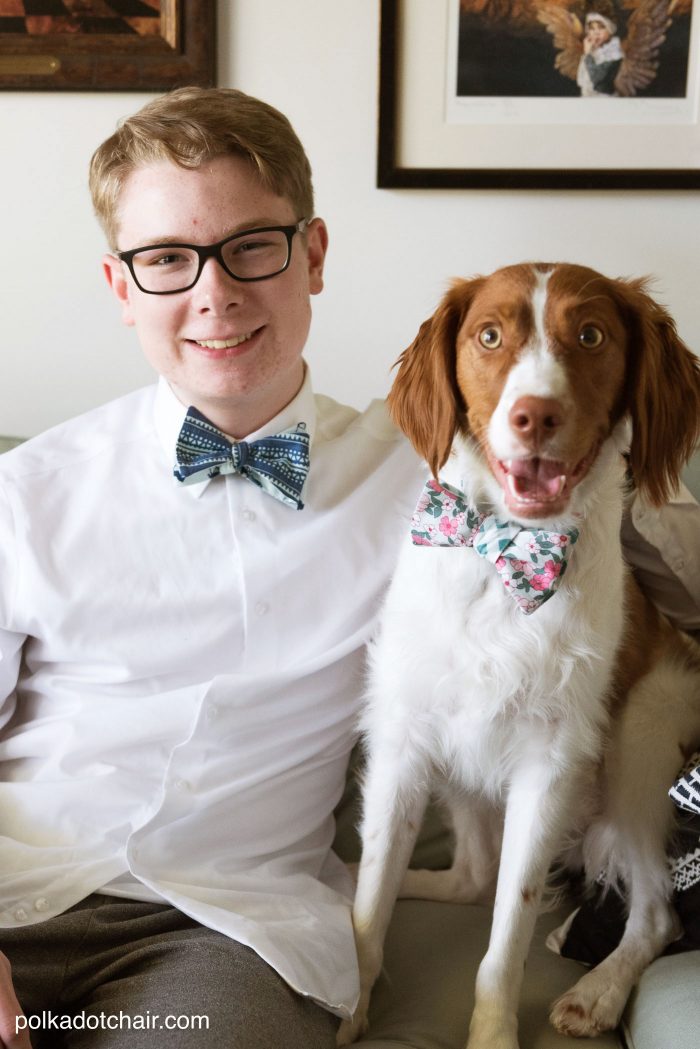
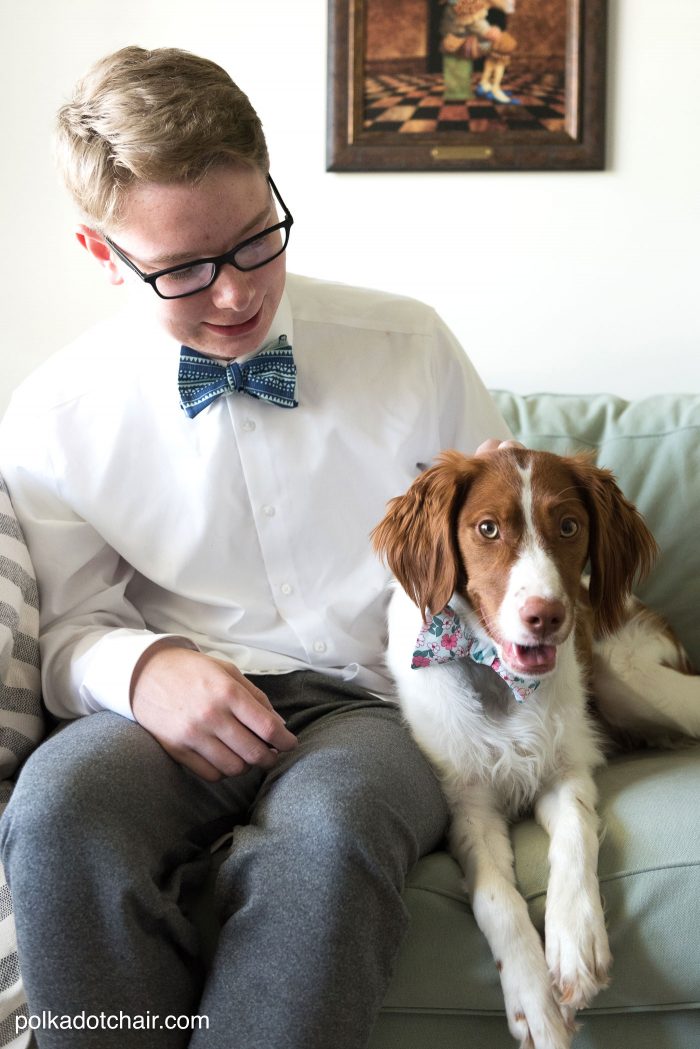
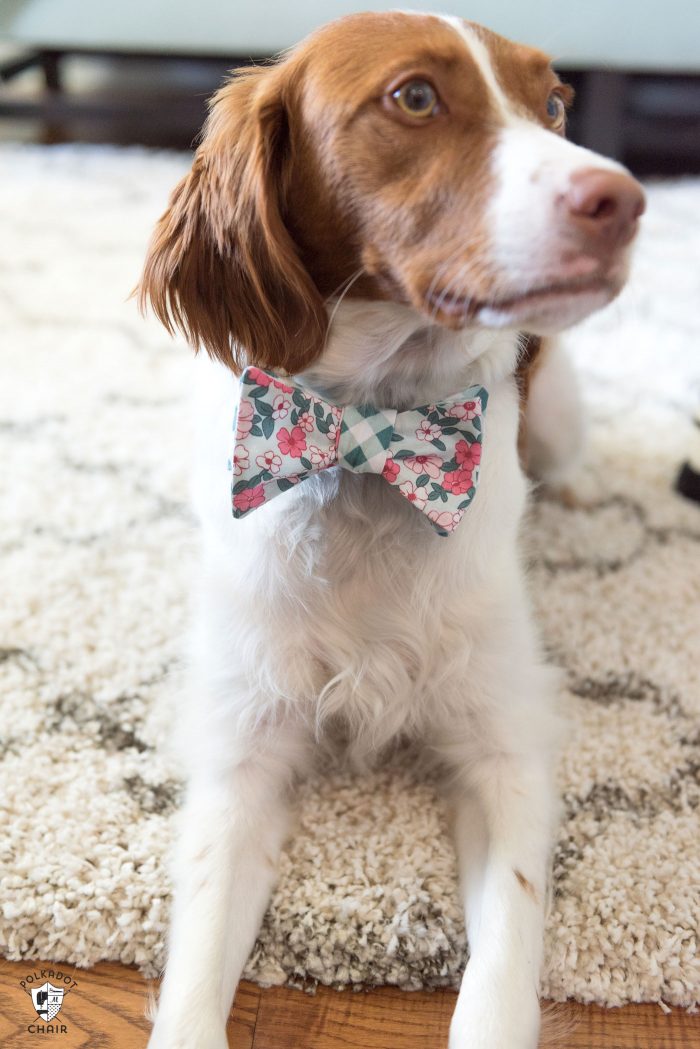
    This particular bow tie is one that ties. It’s not a “fake” bow tie (my husband’s term not mine). It’s also adjustable. The same bow tie fits my husband, my son, and as you can see our dog *wink*.  

    It should also fit a guy that is larger than my husband since when he had the tie on there was still room to adjust it to be larger. I know that you can make bow ties in specific lengths, but I prefer to make ones that adjust. Especially if you’re giving it as a gift.

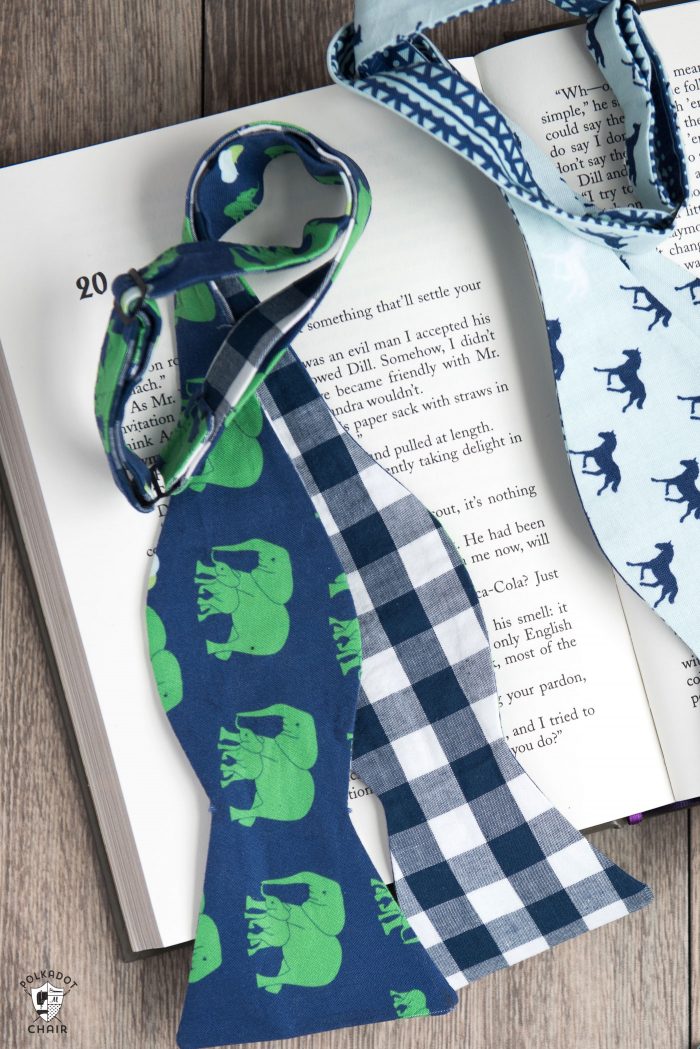
    I based the pattern for the tie on my husband’s favorite bow tie shapes. I tested the pattern by making a bunch of ties to make sure the finished product had his “blessing”. I’m happy to say that the pattern passed the test *wink*.

    Learn how to sew a bow tie that really ties! A free simple free sewing tutorial on polkadotchair.com

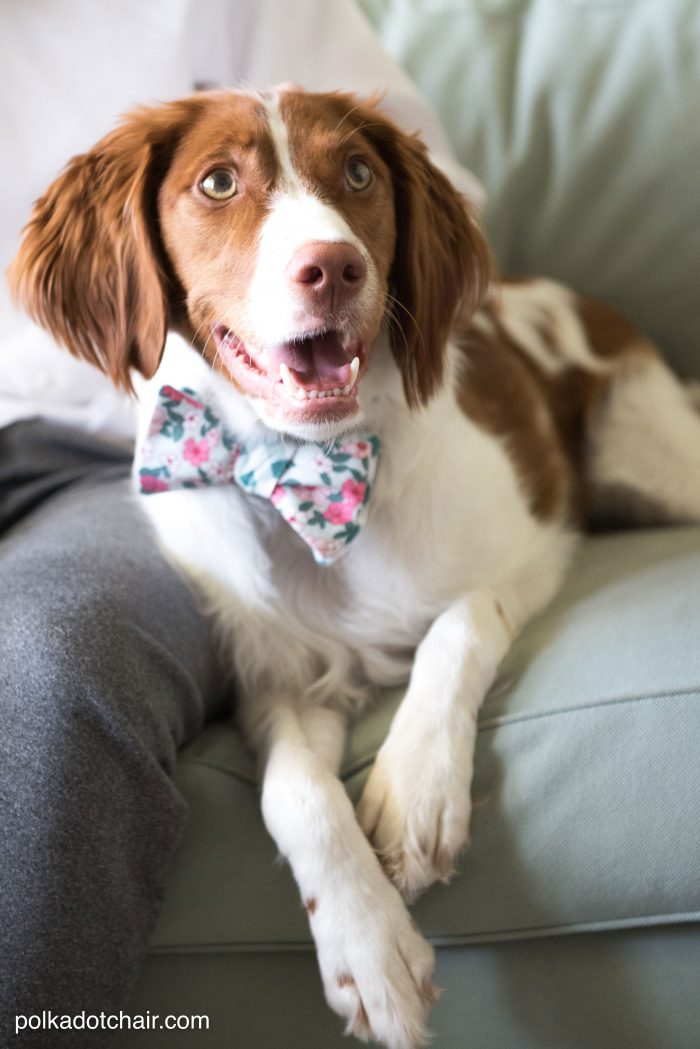
    While I was taking photos of the finished bow ties, my teenage son was getting tired of me taking his photo and asked if someone else could “pose” for him. I asked him WHO he thought was going to wear the bow tie instead of him (we are down to two kids on our house and don’t really have any neighbors close by). He suggested the dog, and well, things got pretty silly after that!

    How Much Fabric is Needed to Make a Bow Tie?

    You will need ¼ yard of two kinds of fabric. One fabric for the front and one for the back. You can also use a Fat Quarter of fabric, which is a precut fabric that is readily available.

    What Fabric Should I Use to Make a Bow Tie?

    I made my bow tie out of quilting weight cotton. Which is readily available and comes in a multitude of colors and prints. Other fabrics that would make nice bow ties include:

    • Seersucker
    • Men’s Shirting Material
    • Yarn-Dyed Woven Fabrics

    How do you make a bow tie out of fabric?

    Learn how to sew a bow tie that really ties! A free simple free sewing tutorial on polkadotchair.com

    Bow Tie Supplies

    To make the bow tie you’ll need:

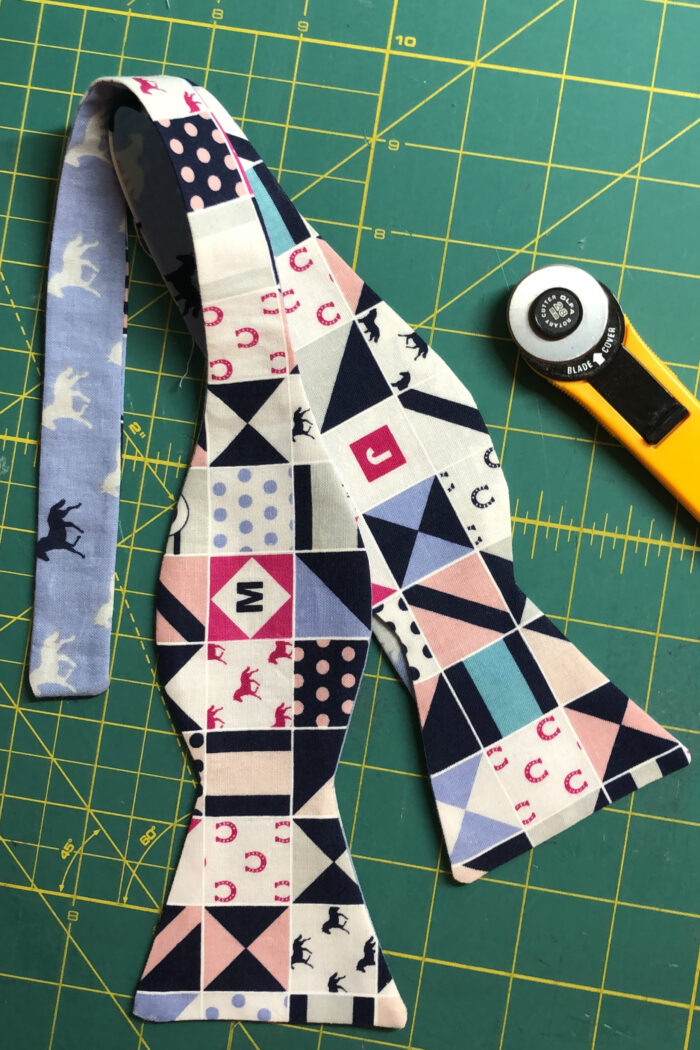
    • 1 Fat Quarter of Fabric for Front of Bow Tie – fabrics used are from my Wonderland Two Fabric line, my Derby Style line, and Safari Party line.
    • 1 Fat Quarter of Fabric for Back of Bow Tie
    • ½ yard of 20″ wide Shape Flex Interfacing (purchase from Amazon here)
    • 2 Tri-Glides (purchase from Amazon here)
    • 1 package of ½″ wide Stitch Witchery (purchase from Amazon here)
    • Paper to trace pattern pieces

    How to Get the Pattern Piece

    Fill out this form and we will send you a printable copy of the bow tie pattern piece.

    Sewing Instructions for Bow Tie Pattern

    Learn how to sew a bow tie that really ties! A free simple free sewing tutorial on polkadotchair.com

    How to Make a Bow Tie

    Melissa Mortenson
    How to make a traditional bow tie that ties with an adjustable neck strap.
    4 from 1 vote
    Pin It! Share by Email Share on Facebook
    Prep Time 30 mins
    Active Time 2 hrs
    Total Time 2 hrs 30 mins

    Equipment

    • Sewing Machine
    • Basic Sewing Tools
    • Small Sharp Scissors
    • Pins

    supplies

    • 1 piece Fabric for Bow Tie Front Either ¼ yard of fabric or 1 Fat Quarter of Fabric.
    • 1 piece Fabric for Bow Tie Back Either ¼ yard of fabric or 1 Fat Quarter of Fabric.
    • ½ Yard Shape Flex Interfacing
    • 1 package ½ wide Stitch Witchery
    • 2 Tri-Glides

    Instructions
     

    Step one

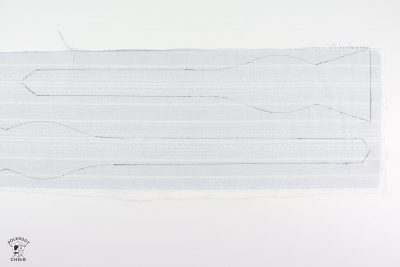
    • Cut a piece of Shape Flex interfacing to 10" x 20". Iron it onto the wrong side of your bowtie fabric outside piece.
      It won't fit the whole fat quarter (a fat quarter is 22" long), don't worry we will fix that later. Just butt the edge of the shape flex up to the edge of the fat quarter on one side.
    • A few things to note. If your fabric is directional (i.e. it has an up and a down), make sure you cut out a right bow tie pattern piece and a left bow tie pattern piece.
      Otherwise half of your bow tie will be upside down. This means that you'll have to flip the pattern piece when you cut out the 2nd piece. Just look at the photo if you get confused.
      Learn how to sew a bow tie that really ties! A free simple free sewing tutorial on polkadotchair.com
    • Also, the longer of the two tie pieces is exactly 22" long. If your fat quarter is slightly smaller than that it's okay. I included a generous amount of extra length to allow the bow tie to be fully adjustable.
    • Trace your two tie pattern pieces onto the fused fabric. (Important: Fuse First, then CUT).
    • Cut out. I found it helpful to use a small rotary cutter when I cut out my pieces, do whatever is easier for you. Just make sure you have smooth cuts.
    • For the bit of the longer bowtie piece that is not covered by interfacing, cut a scrap of interfacing and fuse it to the bowtie after you cut it out so that the entire piece is fused.
    • Cut out the two tie pieces from your tie back fabric (this fabric does not need interfacing).

    Step Two

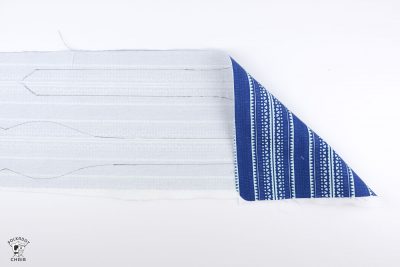
    • Place two of your shorter tie pieces together, right sides facing. Pin well.
    • Stitch together using a ¼" seam allowance. Be careful to stitch precisely around the curves and pivot at the corners.
      On one side of the bowtie leave a 3" opening in the straight part of the bow tie piece right past where the curve meets the straight section of the tie. Don't leave your opening in the curved section of the tie.
      You also only need one opening, so stitch around the entire perimeter of the piece EXCEPT for that section. (The start of the opening is noted on the pattern piece)
      Learn how to sew a bow tie that really ties! A free simple free sewing tutorial on polkadotchair.com
    • Carefully clip the curves and corners of the sewn tie piece. Be sure not to cut through your stitching lines.  
      Using a dowel or unsharpened pencil turn the bow tie piece right side out work with the piece until it resumes its shape.
      Learn how to sew a bow tie that really ties! A free simple free sewing tutorial on polkadotchair.com
    • Press well, making sure to fold the opening flush with the rest of the bowtie as you press.
    • Place a piece of stitch witchery in the opening of the tie piece and press to close the opening. Repeat all steps for other tie pieces.
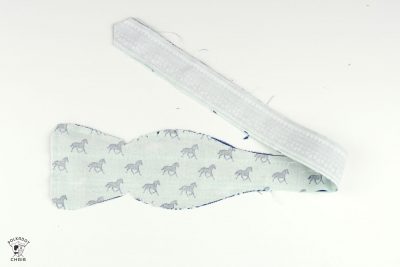
    Assembly

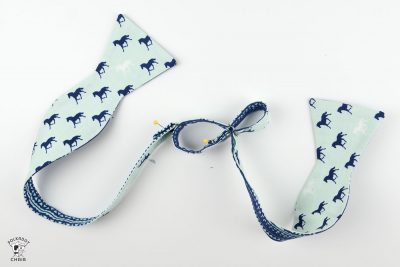
    • Feed the shorter tie piece through one side the tri-glide one time. Pin in place
      Learn how to sew a bow tie that really ties! A free simple free sewing tutorial on polkadotchair.com
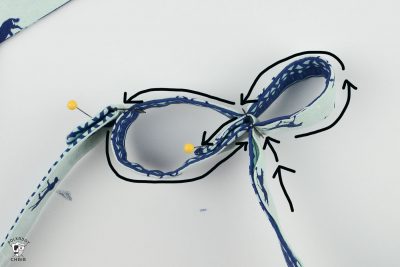
    • Feed the other tie piece through one side of a second tri-glide, then back through the other side of the same tri-glide.
      Next, feed the end of the bow tie piece through the 1st tri-glide (on the side not occupied by the 1st bow tie piece).
      Then feed the end of the 2nd bow tie piece back through the center tri-glide that coming in from underneath. I made the diagram above to help you figure that part out. Just follow the arrows. Pin in place.
      Learn how to sew a bow tie that really ties! A free simple free sewing tutorial on polkadotchair.com
    • To finish the tie, just hand stitch the ends of the tie in place. Many people like to use contrasting thread or decorative stitches for this part, but just do it as you like!
    Keyword Apparel, Sewing
    PRINT
    Tried this tutorial?Let us know how it was!

    Bow Tie Construction Tips

    Sewn bow tie on green cutting mat with rotary cutter

    One:

    Take the time to press your project during each step. Also, make sure that you clip your seams and use a Hera tool or other object (a dull bamboo skewer works well too) to push the corners out. This will give you a nice crisp finish.

    Two:

    Pay attention to the fabric you use. If it is too thick you will have a hard time getting it through the tri-glide. You can use a thinner fabric for the back of the tie if you want a thicker one on the front.

    Three:

    Check the sizing. My son and husband fit this bow tie well. My husband wears a 16 ½ shirt. If you need to make it bigger, it’s really easy. Just lengthen the tie section of the pattern. Just use a ruler and draw a straight line. Lengthen 1″ at a time per increase in shirt collar size.

    That’s it! Now go make a bunch of bow ties!

    Learn how to sew a bow tie that really ties! A free simple free sewing tutorial on polkadotchair.com
    Learn how to sew a bow tie that really ties! A free simple free sewing tutorial on polkadotchair.com
    Learn how to sew a bow tie that really ties! A free simple free sewing tutorial on polkadotchair.com
    Learn how to sew a bow tie that really ties! A free simple free sewing tutorial on polkadotchair.com

    You May Also Like:

    • Bow Tie Quilt Block Tutorial for the Block Challenge
    • Bow Tie Pillow Sewing Pattern
    • Derby Style Fabric by Melissa Mortenson for Riley Blake Designs
    Learn how to sew a bow tie that really ties! A free simple free sewing tutorial on polkadotchair.com

    More Projects You May Enjoy

    • New! All Ears Pouch Pattern & Sew Along
    • Sewing Machine Needles Explained & Printable Guide
    • Color Combination Ideas for your Next Quilt or Sewing Project
    • 25 Free Patchwork Quilted Pillow Patterns

    • Share
    • Email

    About Author

    Melissa Mortenson

    Melissa Mortenson is a blogger, designer, and content creator. She is the Polka Dot Chair blog founder and has been sharing fresh and creative ideas with readers since 2008. She is the author of “Project Teen, Handmade Gifts your Teen will Actually Love.” Her work and designs have been featured on HuffPost, TODAY, Pioneer Woman, HGTV, BuzzFeed, Better Homes & Gardens, and many other established publications. Her first fabric line, “Derby Style,” debuted in January 2015 through Riley Blake Designs.  Additional fabric collections have followed it in subsequent years. A mom of 3, she considers herself lucky to be living in Kentucky.

    Reader Interactions

    Comments

    1. Sheila Perl says

      May 24, 2017 at 4:28 pm

      Wow, your bow ties look great!!

      Reply
    2. Denise says

      May 25, 2017 at 11:51 am

      Would you make any changes for silk, satin, other fabrics? Thanks

      Reply
    3. Karen Flanigan says

      May 25, 2017 at 1:01 pm

      I made bowties for my son as a Christmas gift using Kaffe Fassett fabric. He loves them, and he asked me to make coordinating pocket squares to go with them. Your tutorial is great – wish I’d had it when I was sewing mine.

      Reply
    4. Ruby Schlesinger says

      May 29, 2017 at 4:47 pm

      This is soooo adorable! I love bowties. My husband is not a fan of it, but I’ll make a couple and once he puts it on, I bet he’ll love it. Thank you for the tutorial!

      Reply
    5. Mariyn Krzus says

      May 31, 2017 at 5:27 pm

      Re bow tie that ties, having a tough time threading the tie ends through the tri-glides. The photo had me terribly confused with all sorts of arrows but no indication of which side should be up (right or wrong fabric side). I guess I’m thick, but I just don’t get the diagram. Can anyone help? Thank you.

      Reply
      • Melissa Mortenson says

        June 01, 2017 at 1:41 pm

        You want the bow tie to be right side up as you pass it through the tri-glides. You will put the end of the tie through the bottom of one side of the tri glide over the bar then back through the other side of the tri glide. If it doesn’t fit well, then go and trim you seam allowances down to help reduce the bulk a bit. The only way to learn is to just do it. Don’t feel bad. It took me half a dozen tries to get it the right way the first time I made one.

        Reply
    6. Muriel says

      August 16, 2017 at 2:09 pm

      I need to make this bow tie for a 20″ neck. How and where do I increase the length?

      Reply
    7. Sally says

      August 30, 2017 at 4:58 pm

      What kind of hardware did you use? All I can find is for clip on bow ties. Yours look great!

      Reply
    8. Marti says

      January 09, 2018 at 6:53 am

      I’m so disappointed that the tutorial won’t open or download. My dad’s birthday is Sunday and I’d really like to make him this tie!

      Reply
      • Penelope Cooper says

        January 13, 2018 at 4:57 pm

        Marti – it opens for me. Here’s the link, try again!
        https://www.polkadotchair.com/2017/05/how-to-sew-a-bow-tie-out-of-fabric.html/2

        Reply
    9. Patti Williamson says

      March 04, 2018 at 11:38 pm

      I just made 7bowties and a long tie for a wedding party. They turned out great. Really like your tutorial. Thank you

      Reply
    10. Tanya says

      March 14, 2019 at 9:56 pm

      Can’t wait to try, just wondering on type of fabric you used? Is it quilters cotton or something thicker ?

      Reply
      • Melissa Mortenson says

        March 14, 2019 at 10:07 pm

        Yes, Quilting cotton

        Reply
    11. Joshua Nicholas says

      March 17, 2019 at 4:45 pm

      Would any changes be made for using silk or satin?

      Reply
      • Melissa Mortenson says

        March 17, 2019 at 5:56 pm

        No, But I would to a “test” on scrap fabric to make sure the interfacing does not mess up your fabric when pressed.

        Reply
    12. Diane says

      April 10, 2019 at 6:55 am

      Thank you so much for this pattern! I made my brother-in-law two bow ties over 25 years ago and he still wears them! I have been asked to make more since his new “retirement job” requires him to dress up. I will be making plenty of these!

      Reply
    13. Renee Cook says

      May 19, 2019 at 4:01 pm

      When you lay the completed tie out on table, should half be one pattern and the other half be the coordinating pattern? That is what I see in the diagram. Or should one side be all one pattern on one side and they coordinating on the other side ?

      Reply
      • Melissa Mortenson says

        May 27, 2019 at 8:33 pm

        No, it should all be the same pattern, but the pieces should be mirror images of each other.

        Reply
    14. Mary Pat Killian says

      July 18, 2019 at 7:19 pm

      Hi

      Just want to say thank you for this pattern. I was thrilled to see your dog with the bow tie. I’m making it my golden retriever.

      Reply
      • Melissa Mortenson says

        July 19, 2019 at 4:33 pm

        Awww… so cute!

        Reply
    15. Jasmine says

      July 30, 2019 at 10:52 pm

      Hi!
      I am using this great to follow pattern/tutorial to make bow ties for my friends wedding party. I made a test bowtie in the final fabric and have run into a few challenges. First this pattern extended to the max length only just fits my fiancé who has a 16″ neck and several of the groomsmen in the wedding party have necks all the way up until 20″. Have any of you added additional length to this pattern? If so do you add it equally to both pieces or to the longer piece only? Second challenge is that the combination of fabric with one side interfaced is a but thick and nearly impossible to adjust within the trip glides. I clipped my seam allowances with pinking shears and clipped the corners as well, but still it is very tight. Any tips/tricks would be greatly appreciated as I have to make 6 more of these. Thank you!

      Reply
      • Melissa Mortenson says

        August 01, 2019 at 1:38 pm

        You can add length to the pattern. Just extend the end of one of the bow ties by however many inches you need. Just use a ruler and draw it on to the pattern piece before you cut it out. I wonder if your bow tie slides are a bit smaller than mine. If all else fails, you can use buttons and button holes to attach the two bow tie ends together. Just stitch button holes in one side of the tie and small buttons on the other side.

        Reply
    16. Justine Matey says

      October 21, 2019 at 7:31 am

      I made the bow ties for my groom and groomsmen for my wedding! Following this tutorial and pattern worked out great, they came out perfect! The only thing I would change would be the length… all the men said their bow ties were all a little too tight!

      Reply
    17. Jenn says

      May 30, 2020 at 10:14 am

      Can you make one from a single fat quarter if you want the same fabric front and back?

      Reply
      • Melissa Mortenson says

        May 31, 2020 at 8:54 pm

        I don’t think so. I haven’t tried it myself but you need a lot of length for the back part of the bowtie.

        Reply

    Leave a Reply Cancel reply

    Your email address will not be published. Required fields are marked *

    This site uses Akismet to reduce spam. Learn how your comment data is processed.

    Primary Sidebar

    Hello! It’s nice to meet you.

    I’m Melissa. I like to design things, like fabric, printables, and projects.

    I’m also a Mom and a Maker. I am like most of you, just trying to do my best every day. Some days I succeed, many days I fail.  I find joy in creating, if you do too, then I hope that you find something here bring a little “happy” to your life.  Find out more about me here.

    COPYRIGHT POLICY

    All my images and text are copyrighted. You may NOT use any images from this site in any kind of Video (this includes YouTube). If you would like to feature my work, you may use ONE (1) NON-COLLAGED image and must “follow” link back to my original blog post. You may NOT edit, crop, or change my images in any way without written permission. You MAY NOT print out or copy and distribute any text, images or patterns from this site. All patterns, content, instructions, and templates are for personal use ONLY! Thank you! Violators will be reported.

    Footer

    ↑ back to top

    About

    • Privacy Policy
    • Disclaimers
    • About Melissa
    • Instagram
    • Facebook
    • YouTube
    • Pinterest

    Newsletter

    • Sign Up! for emails and updates

    Contact

    • Contact
    • FAQ
    • Press
    • Published Books
    • Fabric Collections

    Welcome to the Polka Dot Chair! Here you’ll find easy, step-by-step, sewing, quilting, and crafting projects. We design projects for Makers of all skill levels. Beginners are welcome!

    DISCLAIMER:

    While every effort has been made to ensure the accuracy of the content on this website, the information is made available without warranty of any kind. The Polka Dot Chair accepts no responsibility or liability, whether direct or indirect, as to the currency or accuracy of the information, nor any consequence of its uses. This website is not intended to substitute the advice of a professional.

    Copyright © 2022 Polka Dot Chair

    [ Placeholder content for popup link ] WordPress Download Manager - Best Download Management Plugin