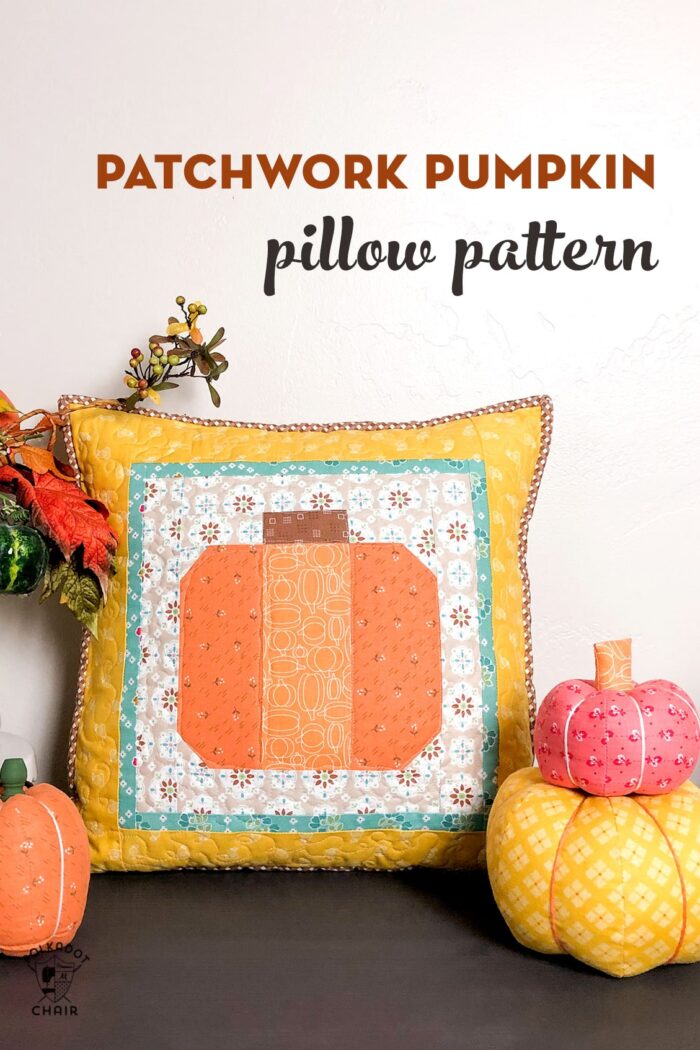
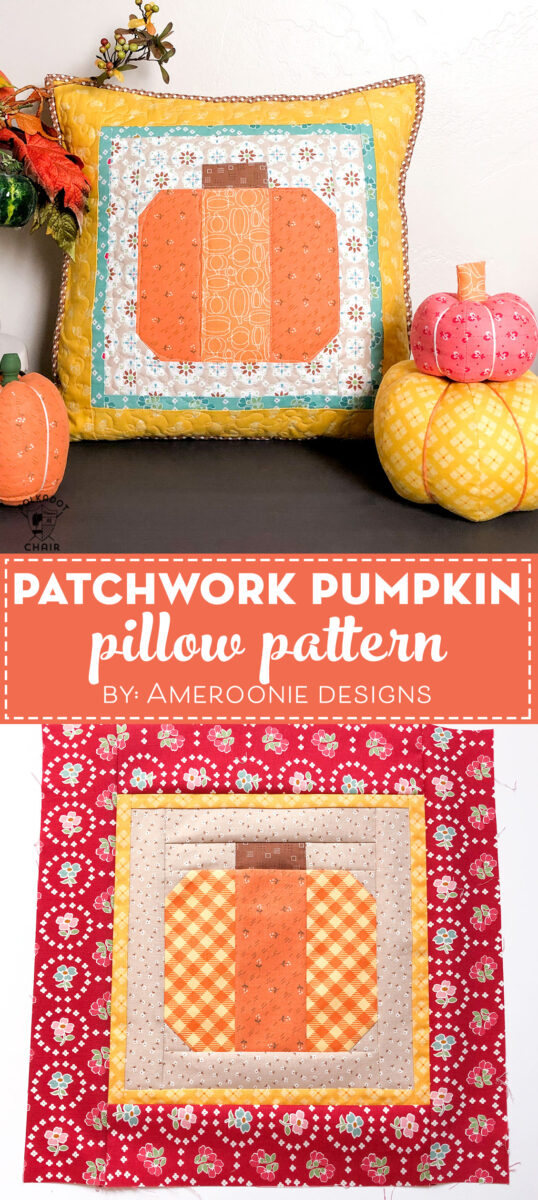
How to Make a Cute Patchwork Pumpkin Pillow
Amy Chappell created this adorable Patchwork Pumpkin pillow and I love how it turned out! Today she’s sharing a full tutorial teaching you how to make the pumpkin quilt block and how to turn it into an adorable pillow perfect for Fall!
With our recent move to Wyoming, I find myself with a large covered porch. I have some chairs made for me by my dad and a fun glider swing I really enjoy. I think it’s going to be a fun place to decorate so I thought I would start with some fall throw pillows.
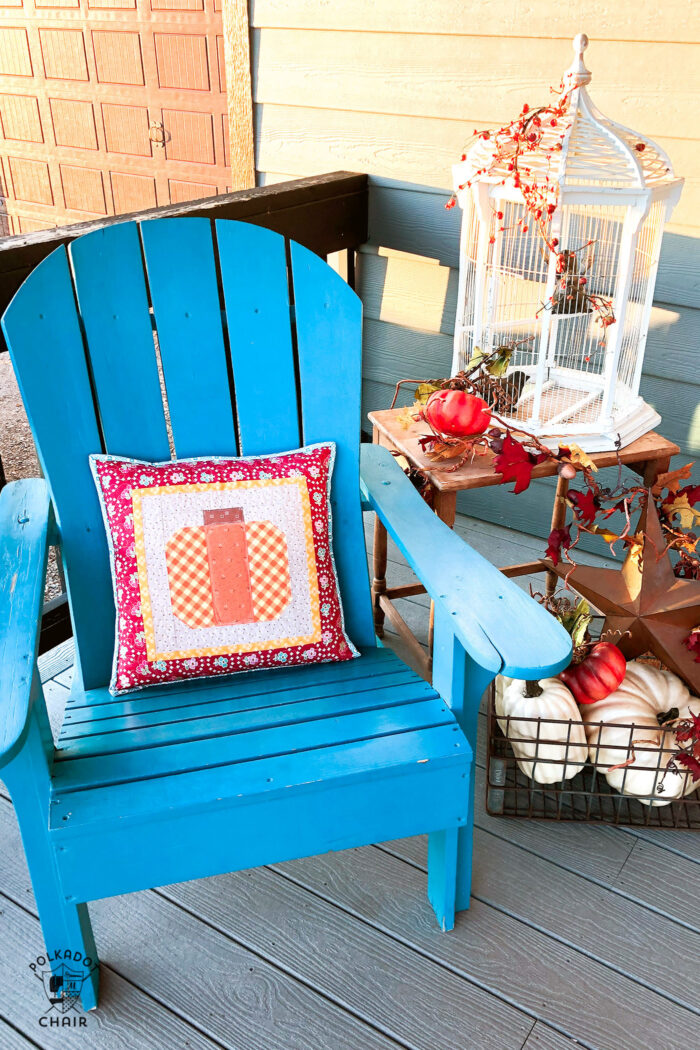
These Pieced Pumpkin pillows are quick and simple. They are great for showing off favorite fabrics and the pattern is fat quarter friendly.
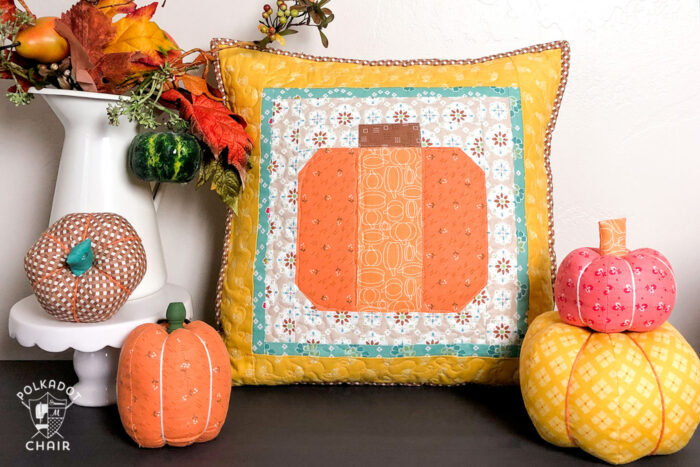
If you want to make some dimensional fabric pumpkins to coordinate with your pumpkin pillow, you can find a tutorial on my blog
Pieced Pumpkin Pillow tutorial:
The directions are for a 16” pillow cover.
Supplies for Patchwork Pumpkin Quilt Block Pillow:
Fabric:
- Small pieces of brown and orange fabrics, fat eighths of background (light brown) and accent fabrics (yellow) and a fat quarter of border fabric (red).
- ½ yard of fabric for the back of quilt sandwich and pillowBinding fabric.
Other supplies:
- 14- 16” zipper
- Batting
Cutting Directions:

Cut From Orange & Brown Fabric:
3- 3” X 7” rectangles- orange (2 in one fabric print, 1 in another orange fabric *optional)
1- 1 ½” X 3” rectangle- brown (stem)
Cut From the Background fabric (light brown):
2- 1 ½” X 3” rectangles
4- 1 ½” squares
2- 1 ¾” X 8” strips
2- 1 ¾” X 10 ½” strips
Cut From Accent fabric (yellow):
2- 1” X 10 ½” strips
2- 1” X 11 ½” strips
Cut From Border Fabric (red):
2- 3” X 11 ½” strips
2- 3” X 16 ½” strips
Patchwork Pumpkin Pillow Assembly Directions:
Time needed: 2 hours
How to Make the Pumpkin Quilt Block Pillow
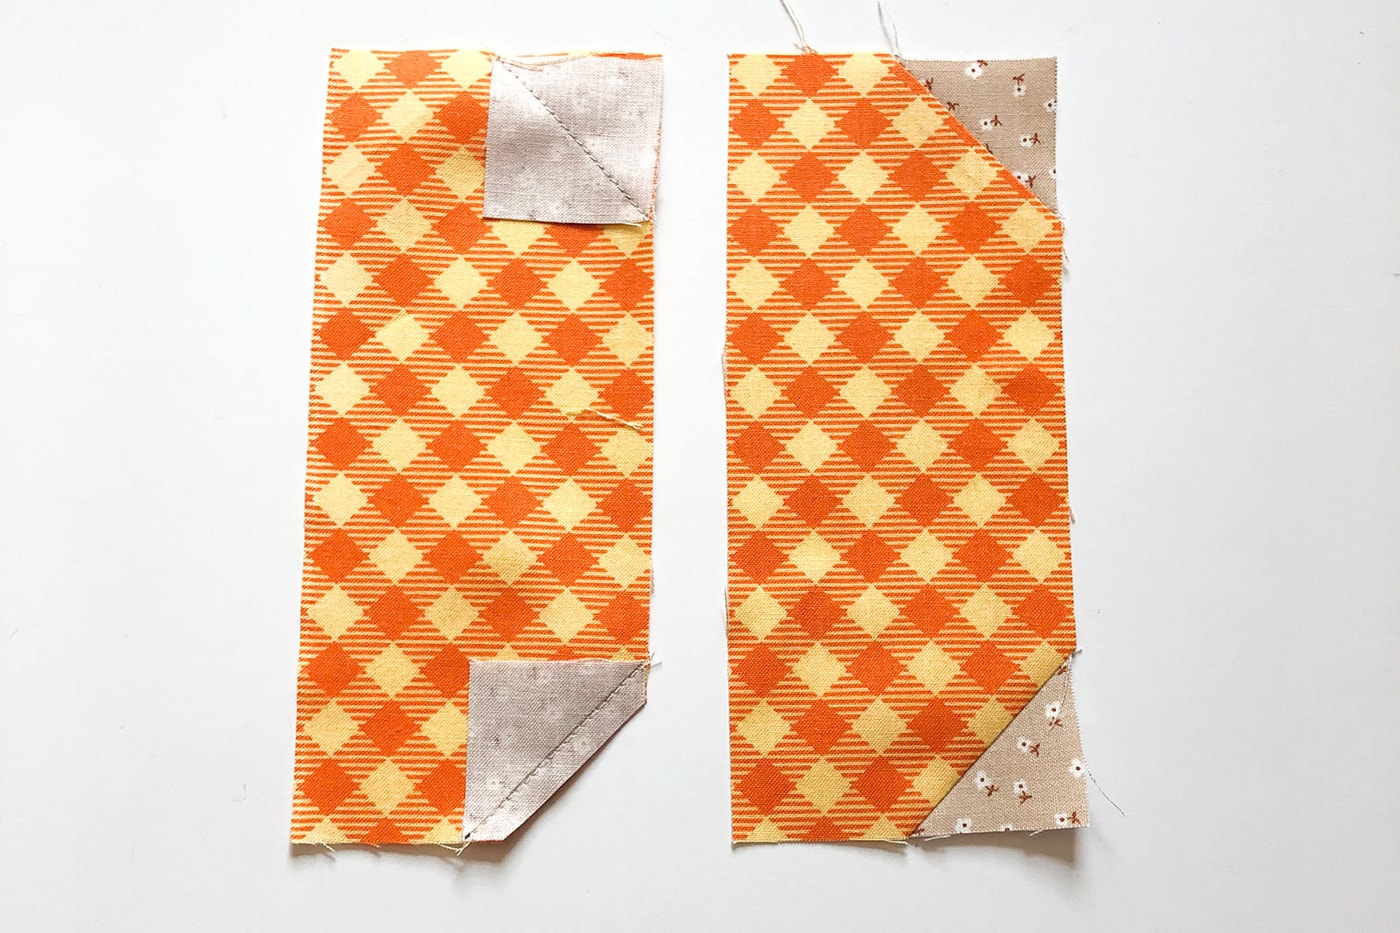
- Create the Pumpkin Shape
Take four 1 ½” squares and draw a line diagonal from one corner to the other.
Place the squares on the two outer corners of 2 of the orange rectangles.
Sew along the drawn line.
Cut ¼” away from the stitch line.
Press the background fabric away from the orange fabric.
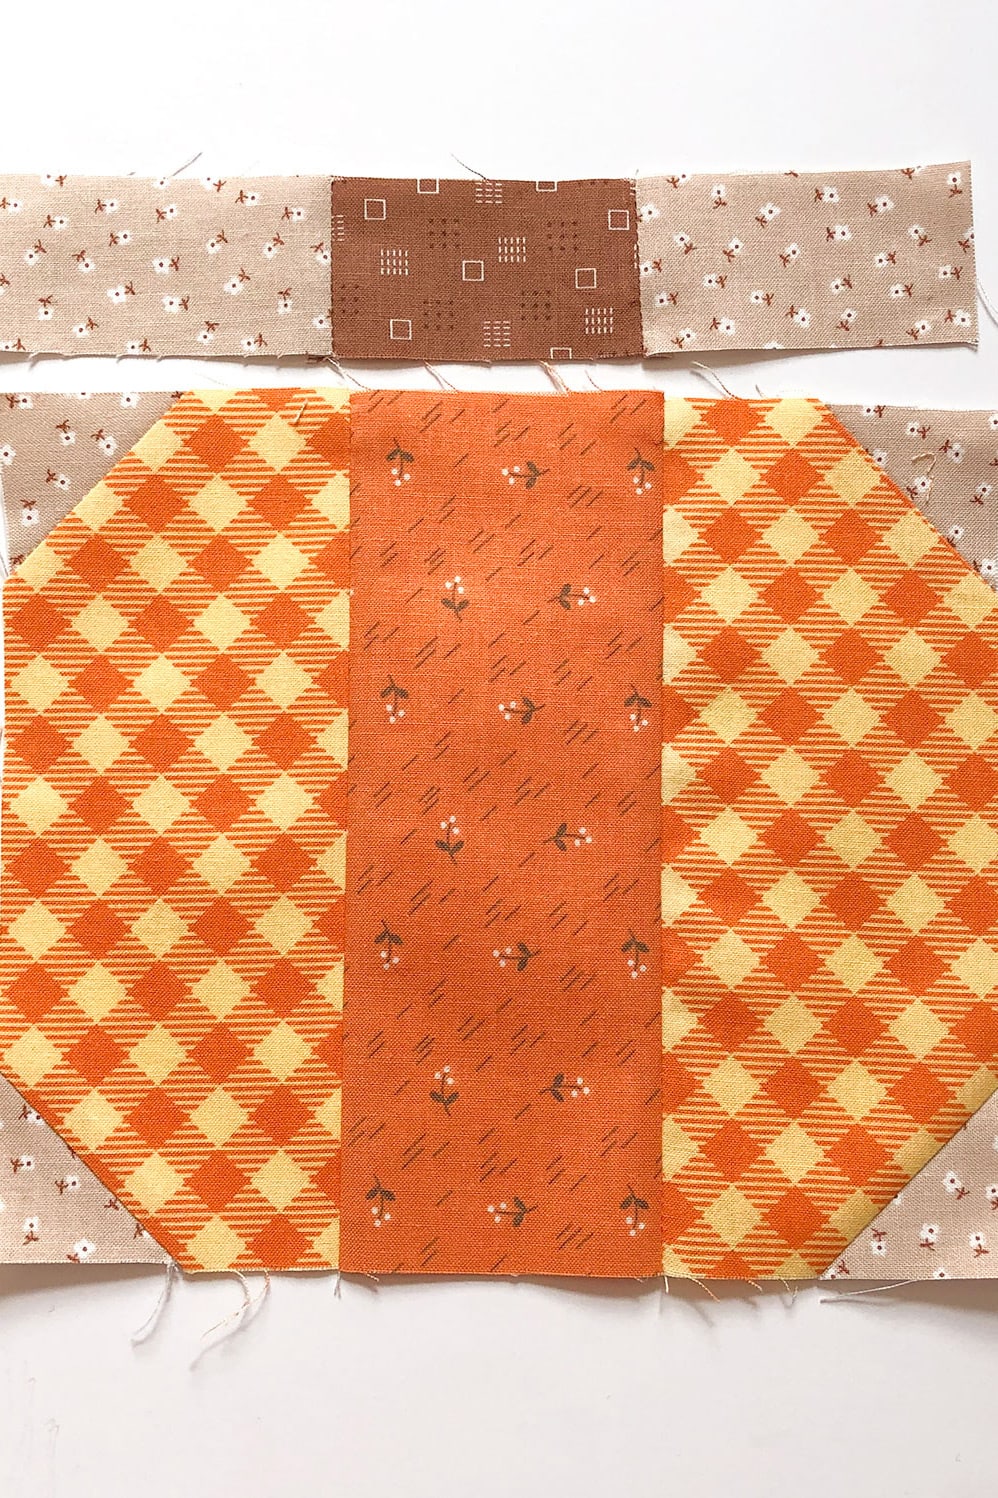
- Assemble the Patchwork Pumpkin
Sew the three orange rectangles together with the four background corners on the outside edges. Press the seam allowance toward the center rectangle.
Next, sew the 1 ½” X 3” background rectangles to either side of the brown rectangle of the same size on the short sides. Press the seam allowance toward the background fabric.
Sew the stem block on top of the pumpkin block, nesting the seams.
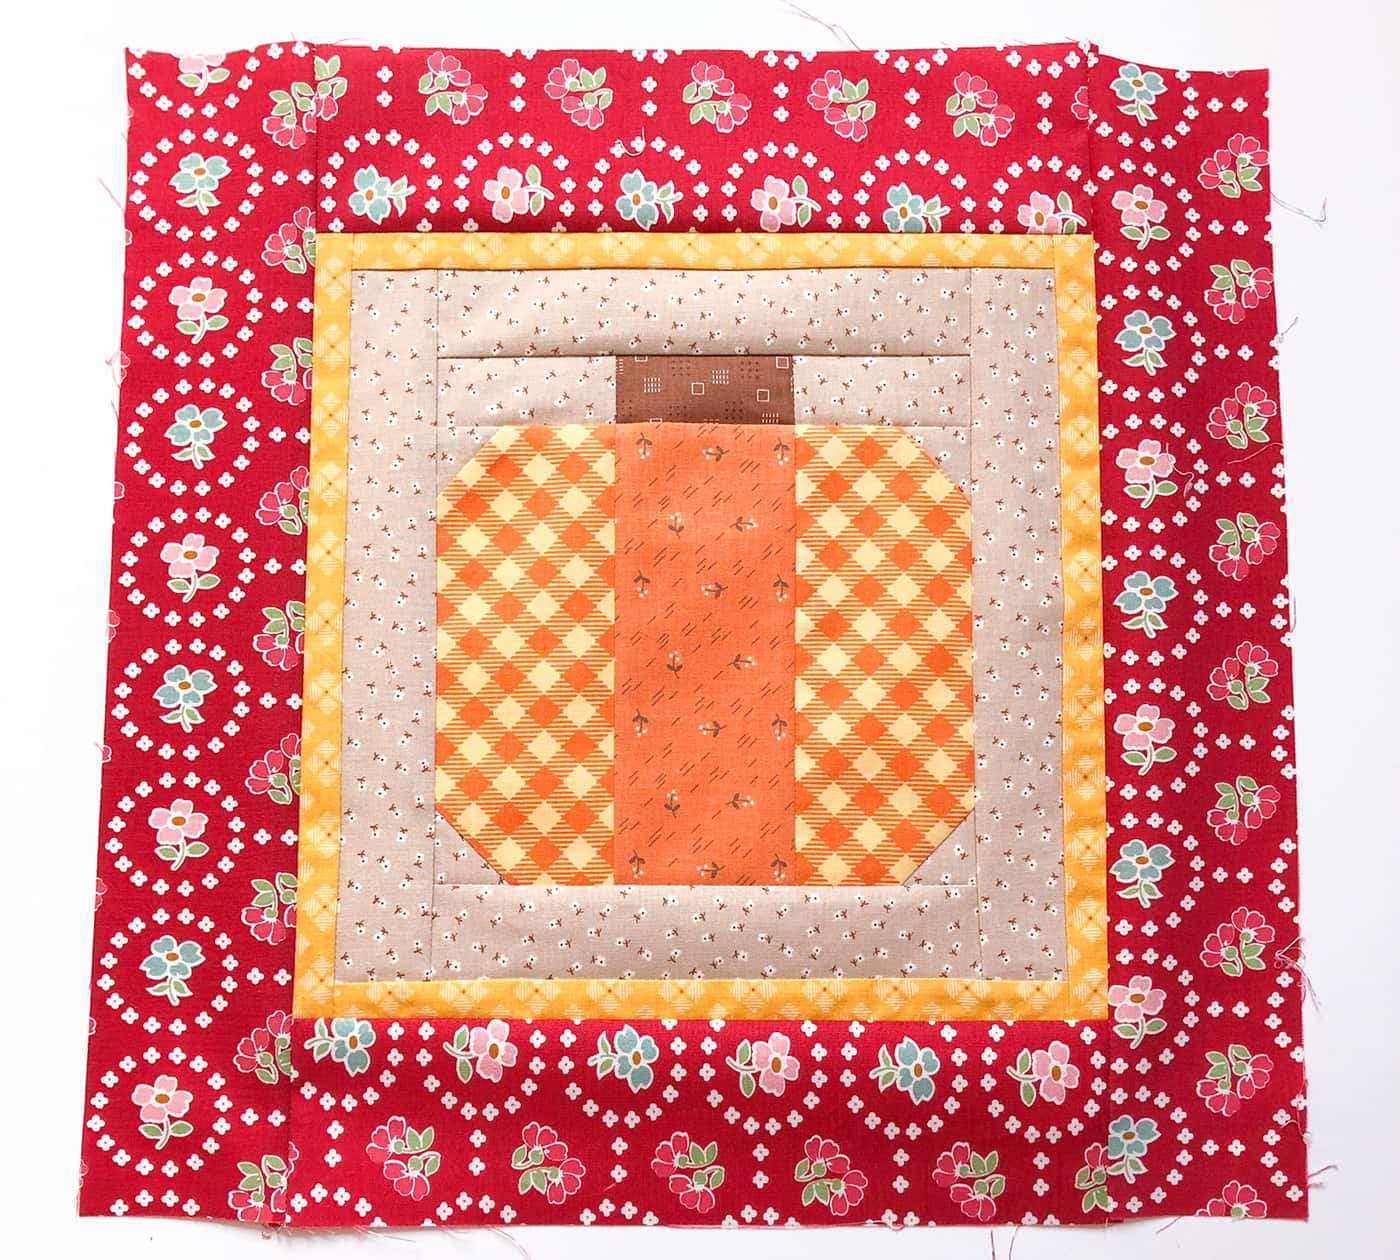
- Add Borders
Sew the 1 ¾” X 8” background fabric strips to the top and bottom of final pumpkin block, add the 1 ¾” X 10 ½” background fabric strips to the sides of the final pumpkin block.
Sew the 1” X 10 ½” accent strips to the top and bottom of the block.
Next, sew the 1” X 11 ½” accent strips to the sides of the block.
Add the 3” X 11 ½” border strips to the top and bottom of the block, and sew the 3” X 16 ½” border strips to the sides of the block.
- Quilt & Assemble Pillow
Make a quilt sandwich and quilt the pillow front as desired.
Create a back for the pillow using your favorite method. I use a covered zipper pillow back- you can find my tutorial on my blog.
I added my pillow back using binding, but you could just sew the front and back right sides together and then turn right side out as well.
Some other Pillow projects you might want to try:
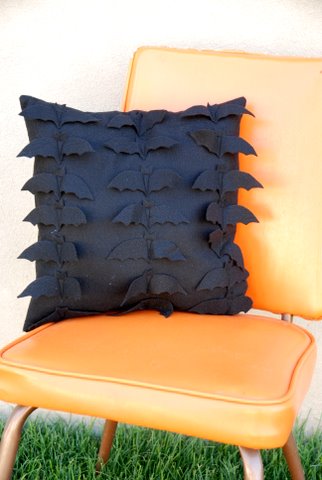
My Batty Felt Pillow is one of my most popular projects ever!
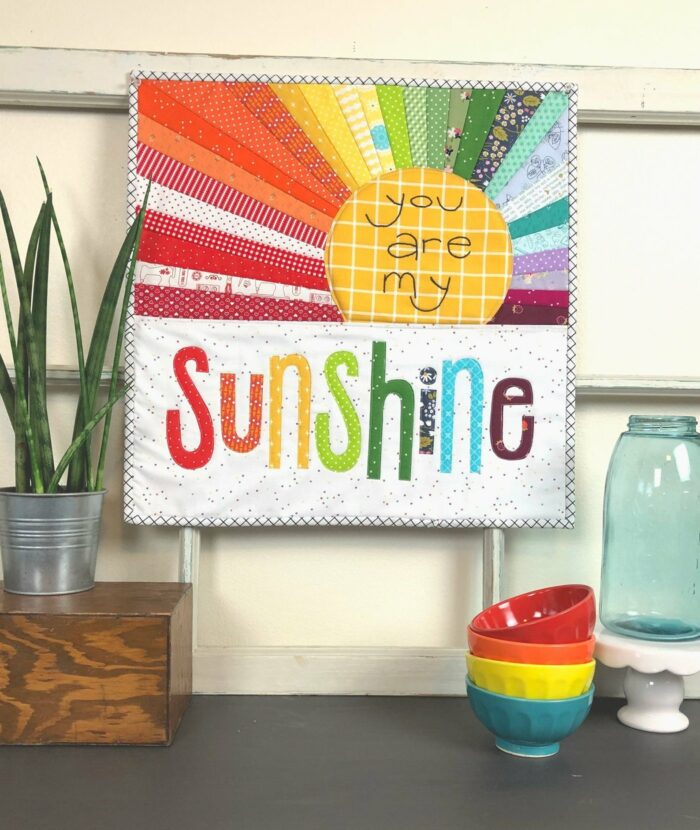
My Rainbow Sunshine Pillow or Mini quilt is a fantastic statement piece that lets you play around with many different techniques.
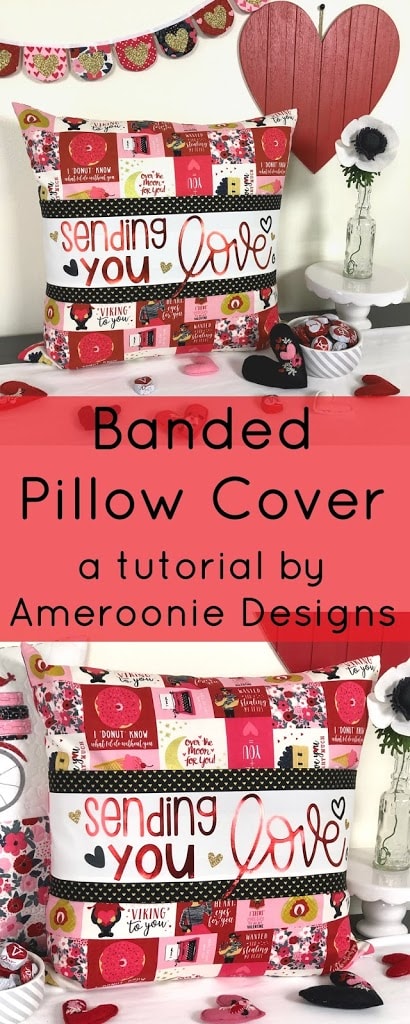
A Banded Pillow Cover is another easy way to pack a big punch and show off your favorite focal fabric.
Pillows are one of my favorite things to sew, and you can find many more tutorials and ideas over on my blog.
About the Maker:

Hello! I’m Amy Chappell, the person behind Ameroonie Designs. I’m a sewing and quilt pattern designer, and I’m proud to say that my work has been featured in several print publications and popular DIY websites.
I am the mom of six kids- which is a big reason I create and sew. I find that I am happiest when I am making things, and taking time to be happy makes me a better mom.
Join me in my exclusive Let’s Sew Friends membership, where you’ll find small, manageable monthly sewing patterns, live classes, and lots of video tutorials!
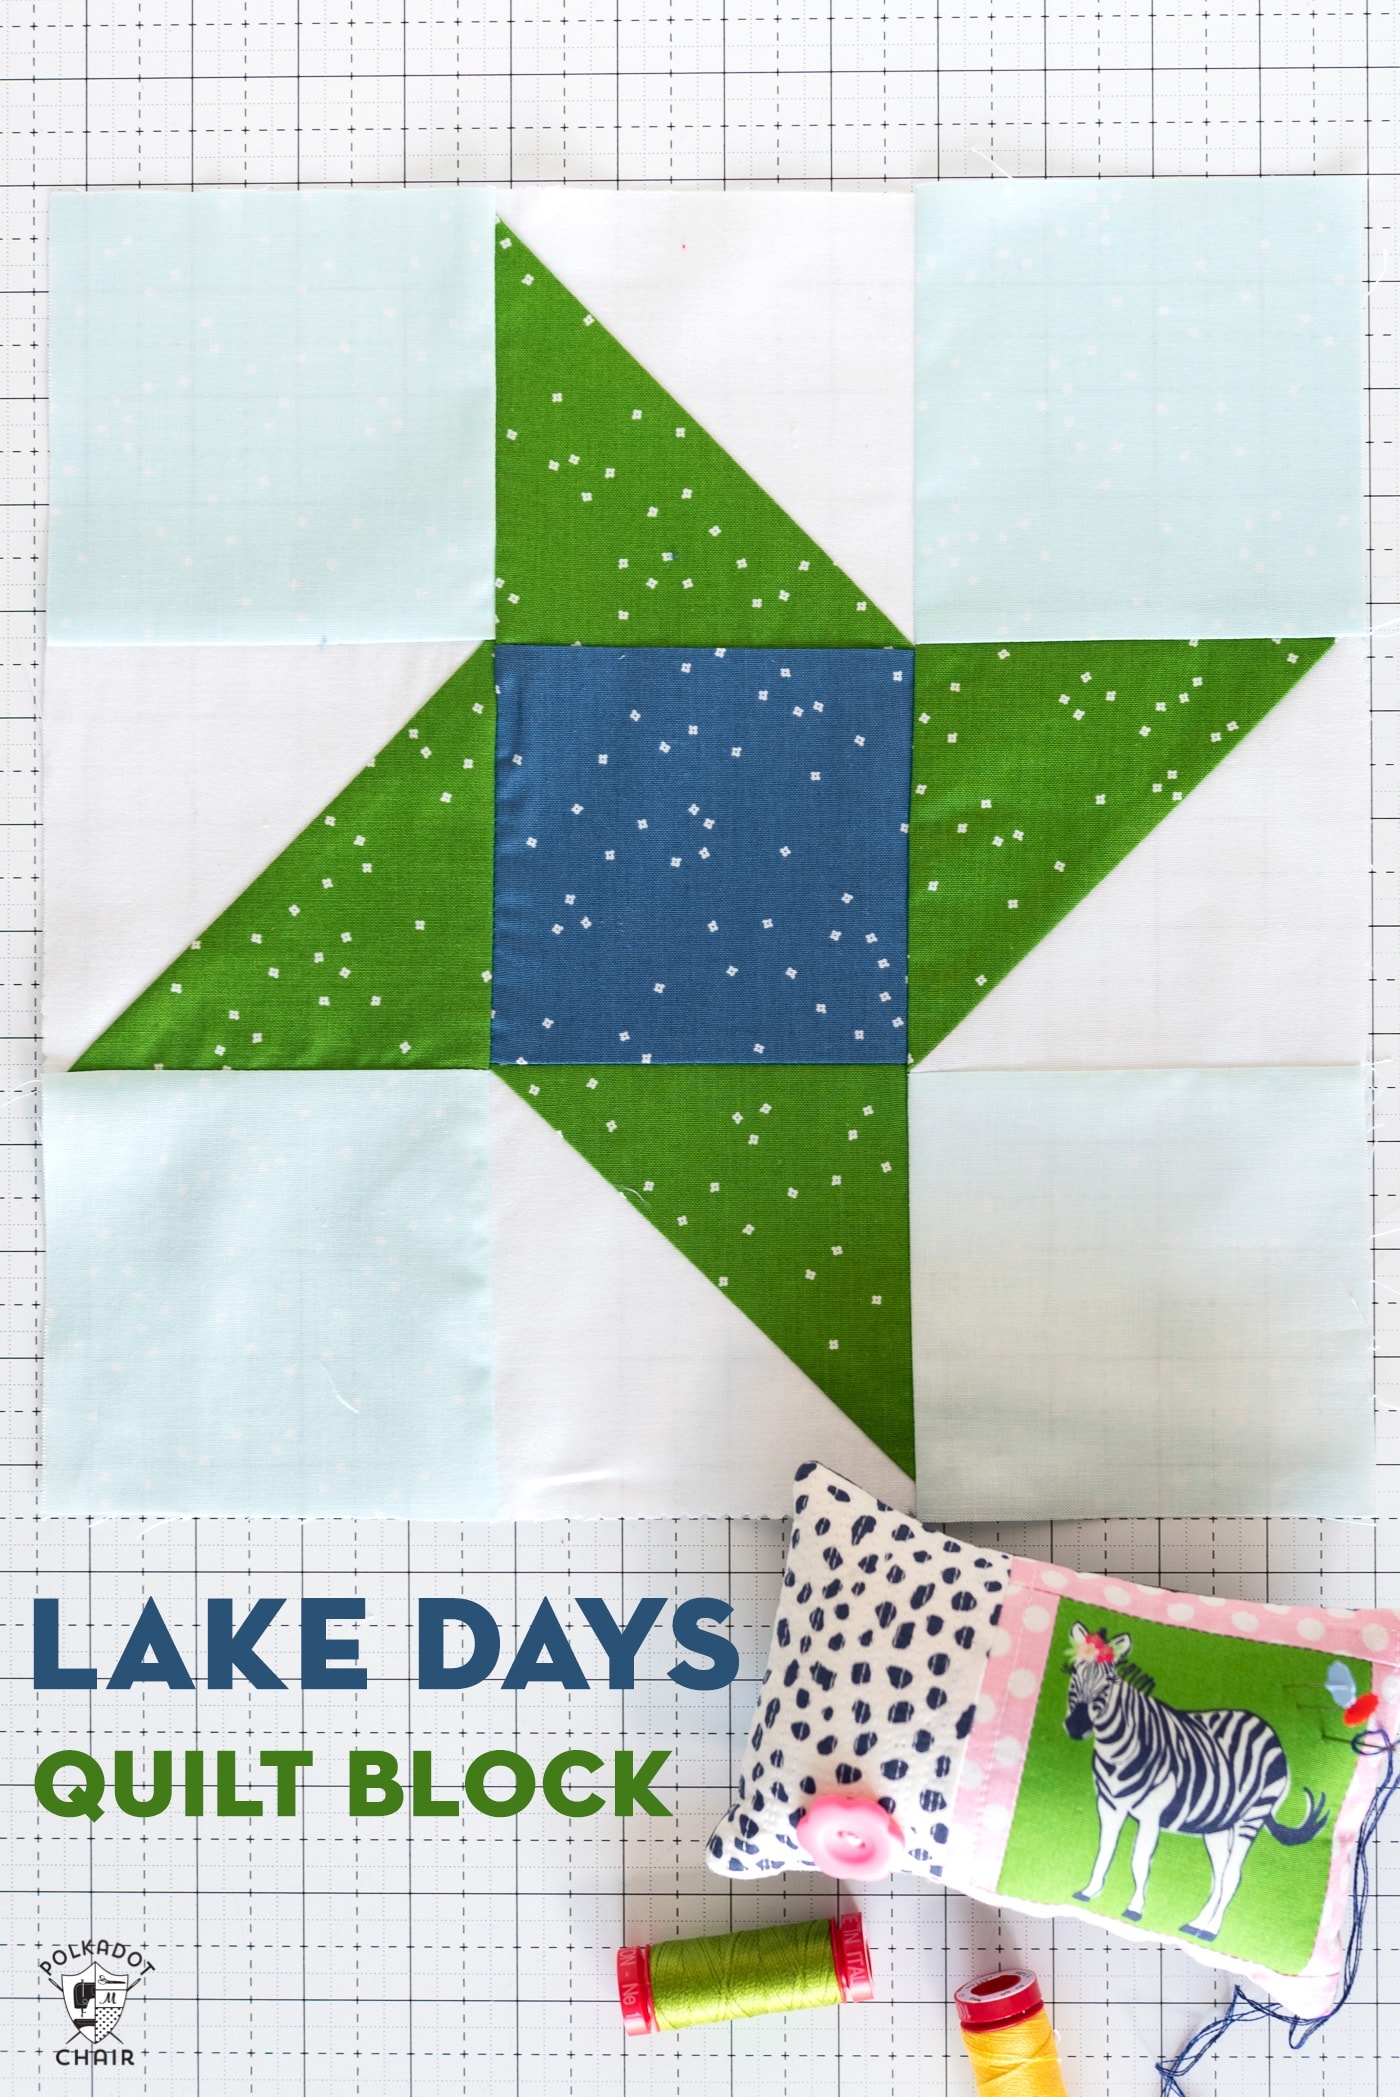
A few Fun Fall Project Ideas you Might Like:
Halloween Haberdashery Quilt Pattern
How to Make a Paper Leaf Pumpkin
Pumpkin Chocolate Chip Cookie Recipe
Frightfully Fun Halloween Quilt Patterns

What size is the finished pillow?
I love the pumpkin pillow. Is there a way to download the instructions?
Thanks for a sweet and simple pumpkin pillow tutorial, Melissa. I’m going to make it at the guild retreat this weekend. I love the mustard bordered one so much.
Hi Melissa,
I have enjoyed your site for several years. Great projects with clear instructions. I just wanted to welcome you to Wyoming. We have lived here 45 years and love it!
What fabric line did you use for the pumpkin patch pillow with the wide yellow border? I just LOVE that pillow!