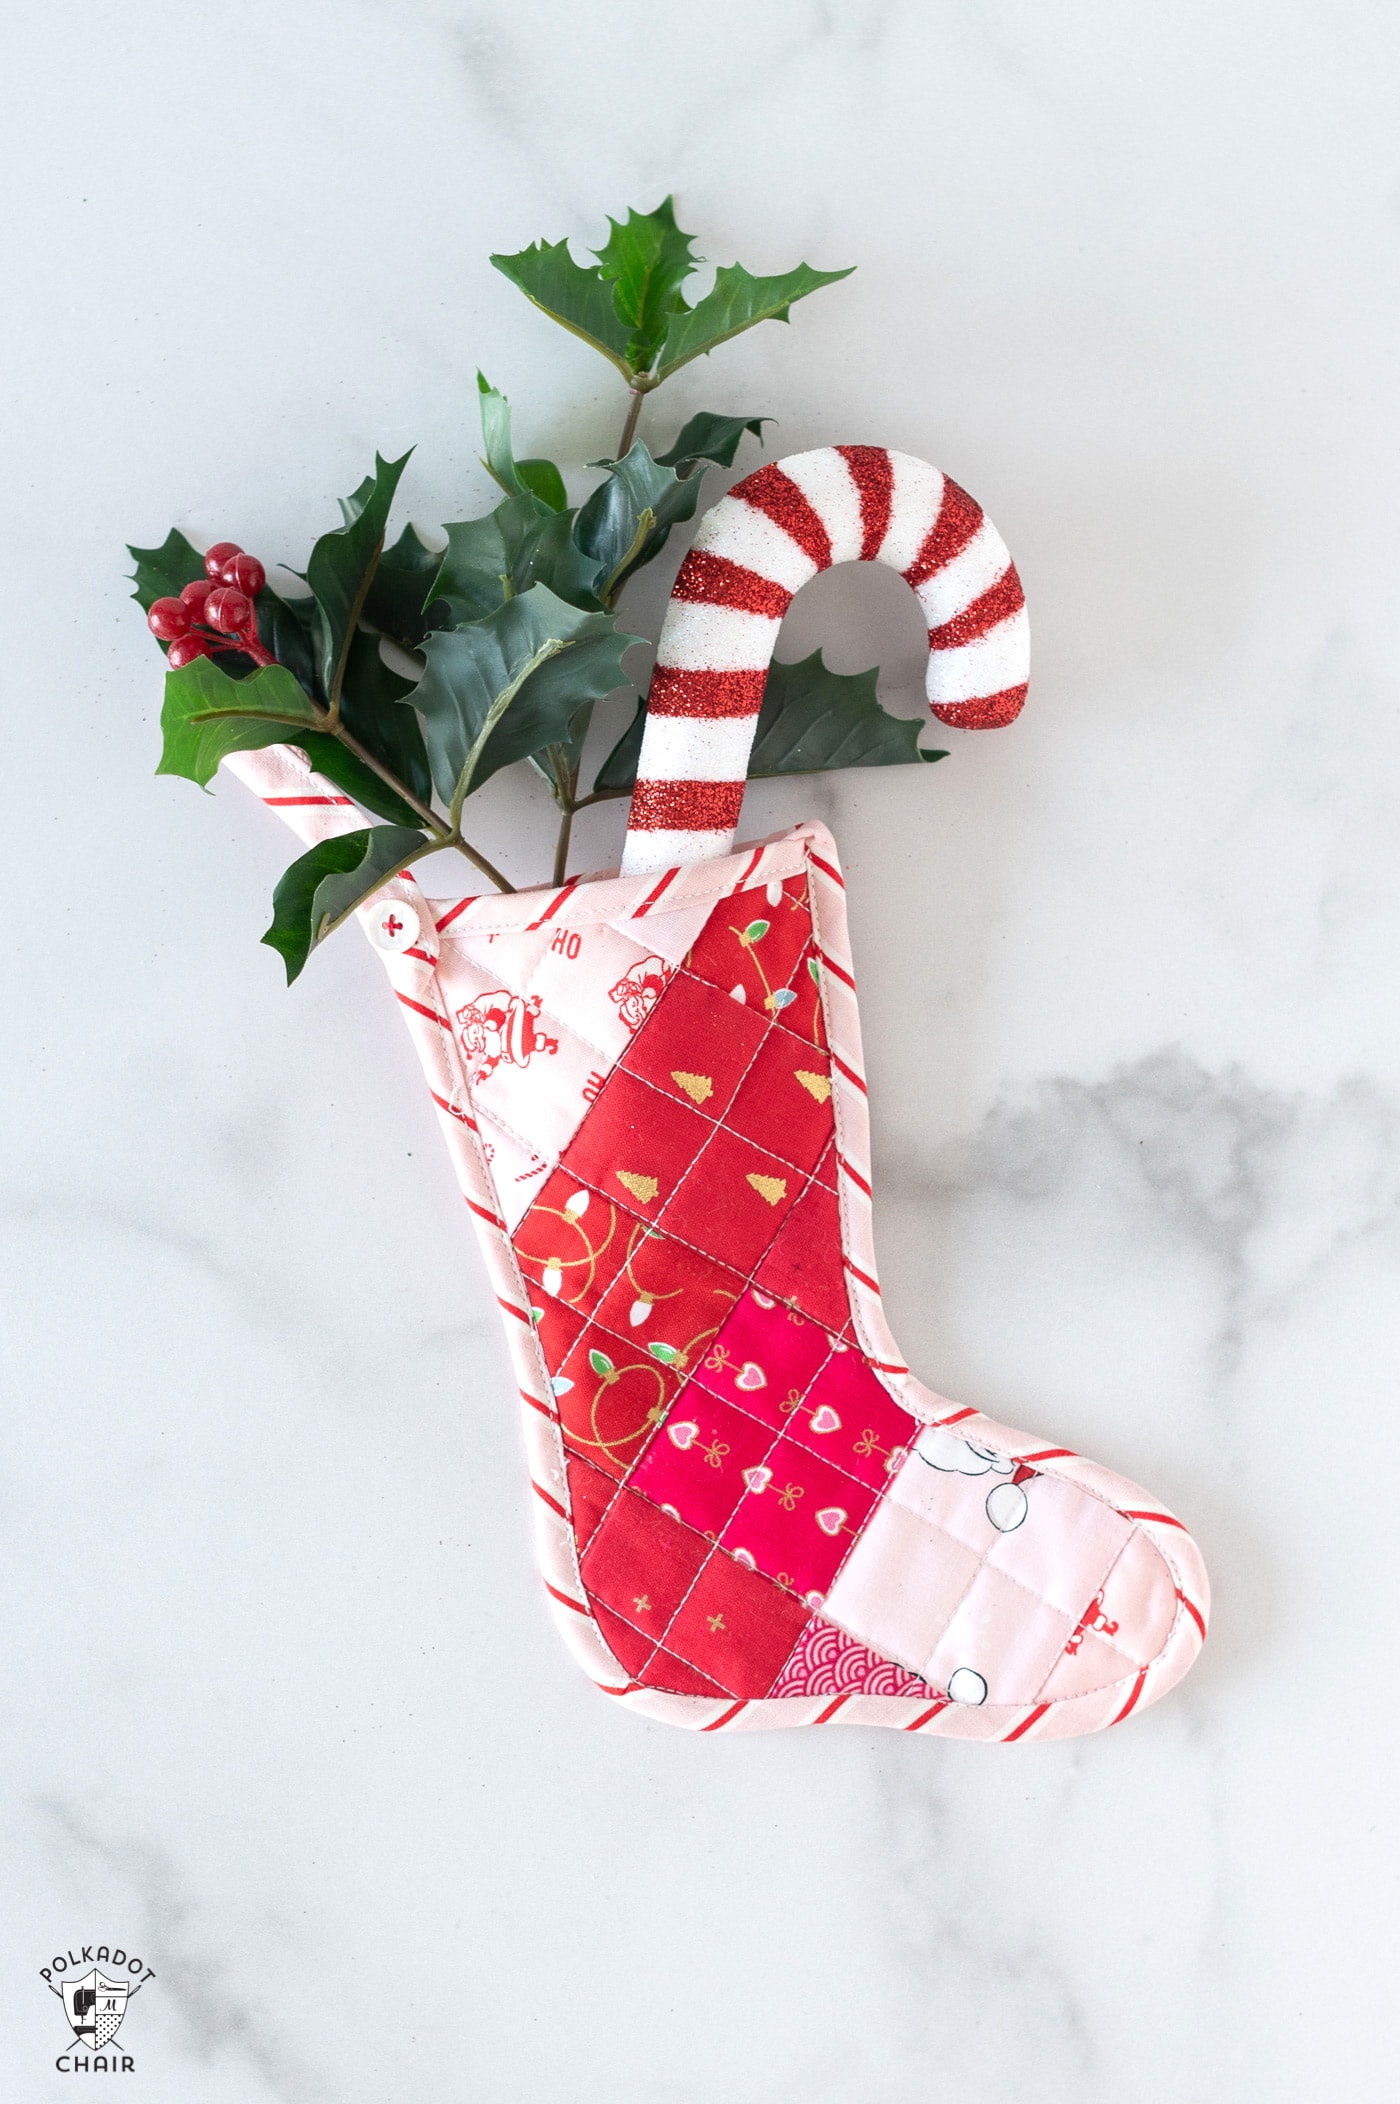
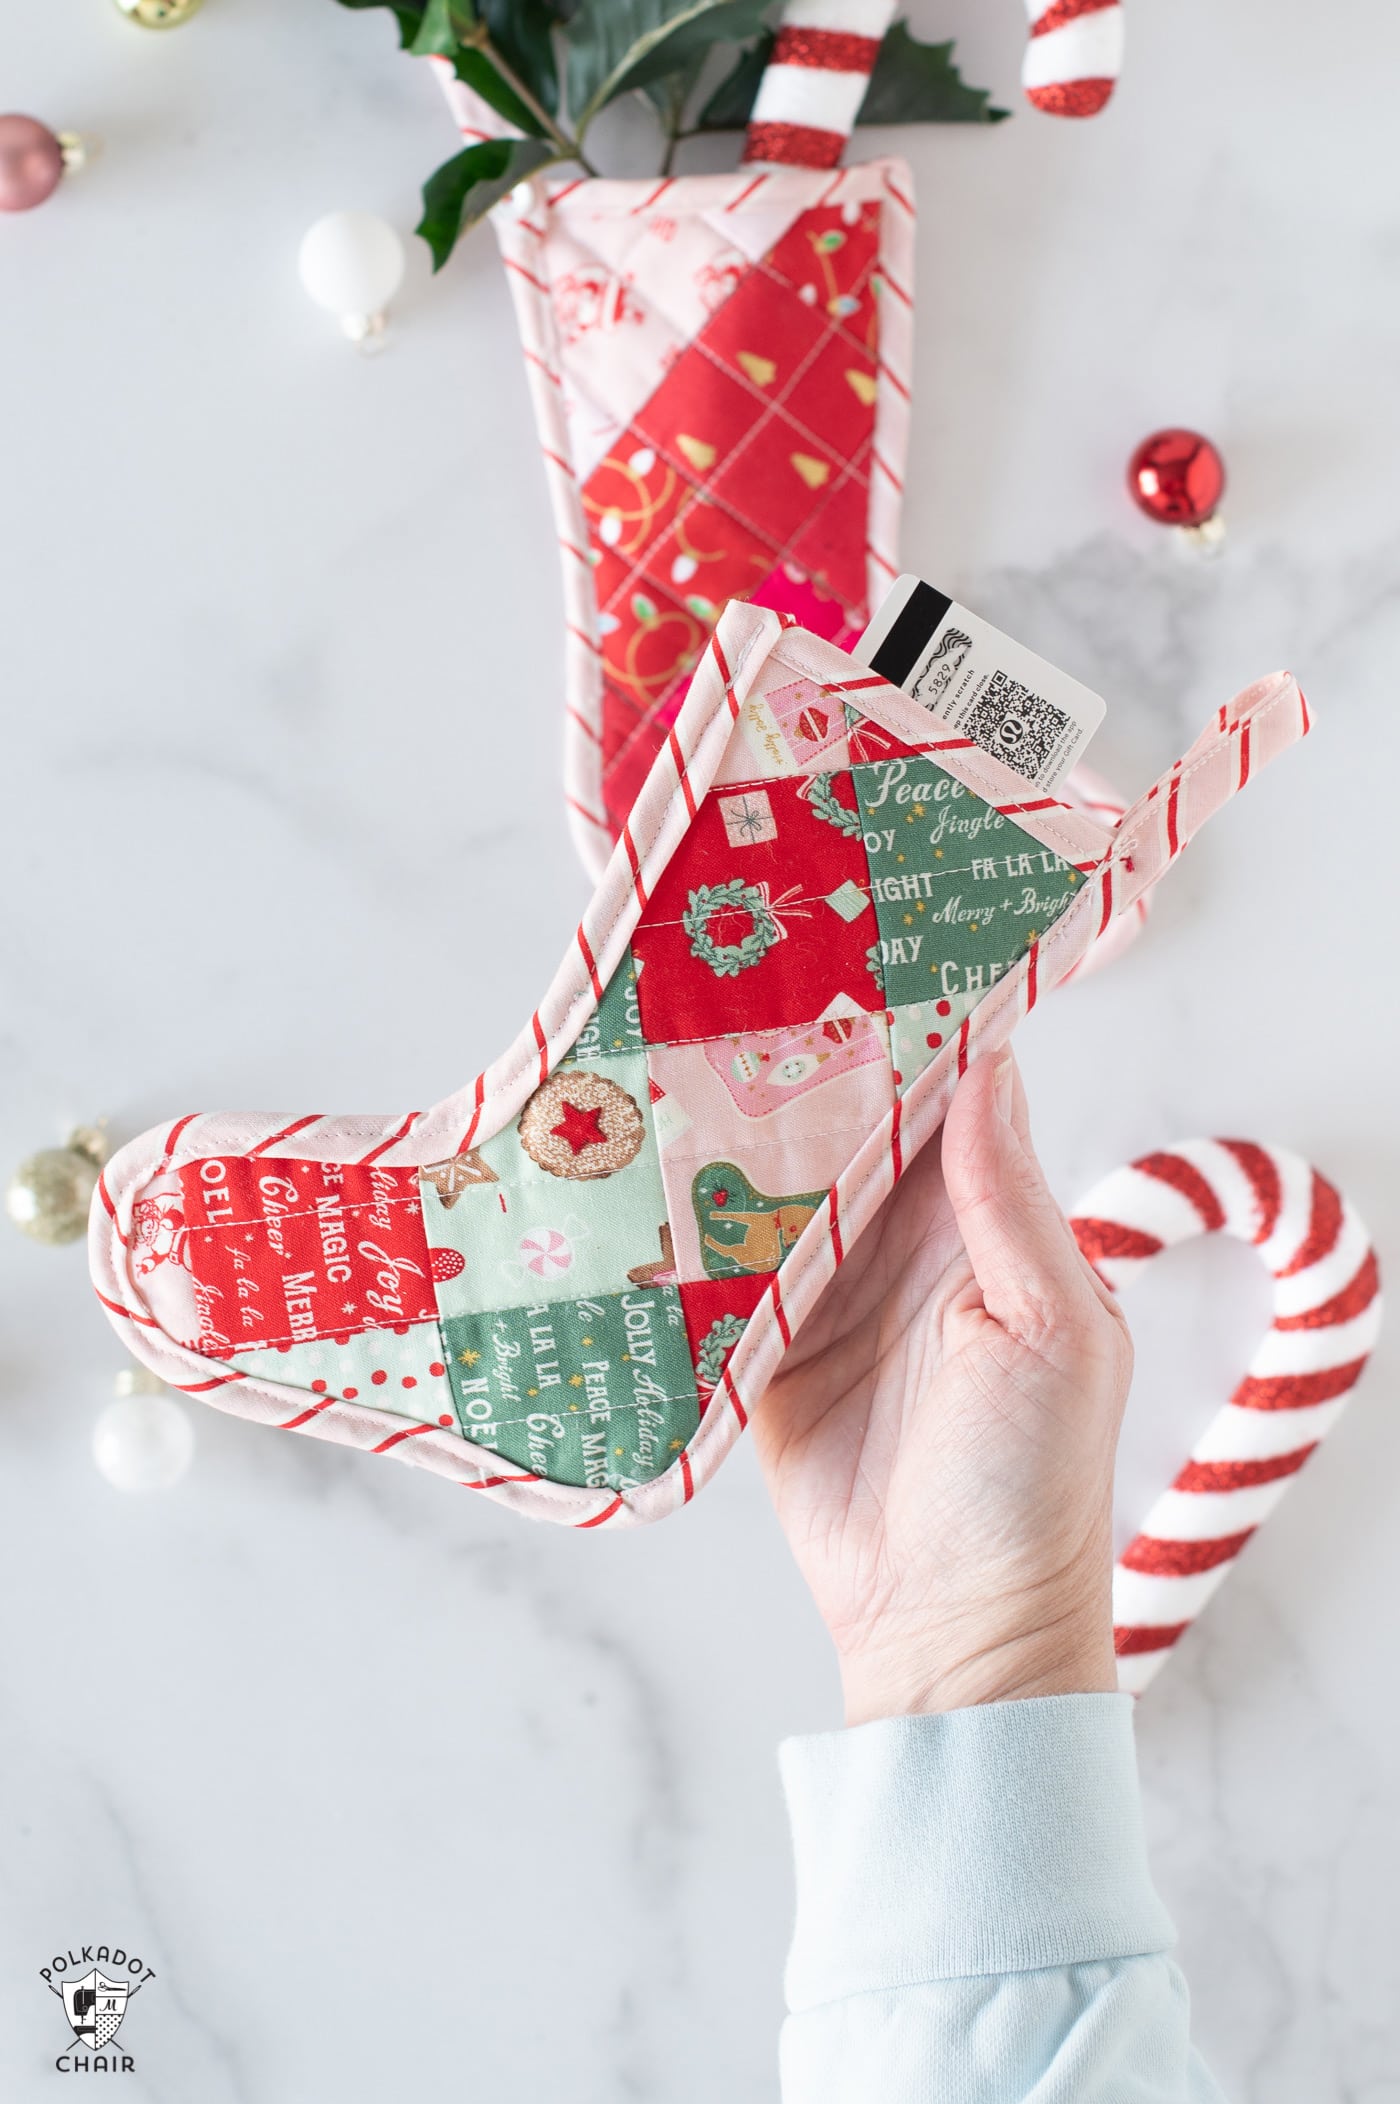
Quilted Mini Christmas Stocking Pattern
I’m excited to share a simple, scrap-friendly, quilted Christmas stocking pattern. These mini Christmas stockings are just the right size to hold a gift card or to hang on your Christmas tree. Learn how to make them with our free sewing pattern.

When I created my first Snowbound Santa hat, I knew I wanted to think of something to make with the leftover scraps.
The Santa Claus hat is a cone shape and is best cut out from a rectangle of fabric. Leaving two large triangles of extra quilted fabric.

It was too much good fabric to throw in the trash, so I upcycled the scraps into mini Christmas stockings.

We have several Christmas stocking tutorials on our site—everything from a simple stocking to a quilted and even a wool stocking tutorial.
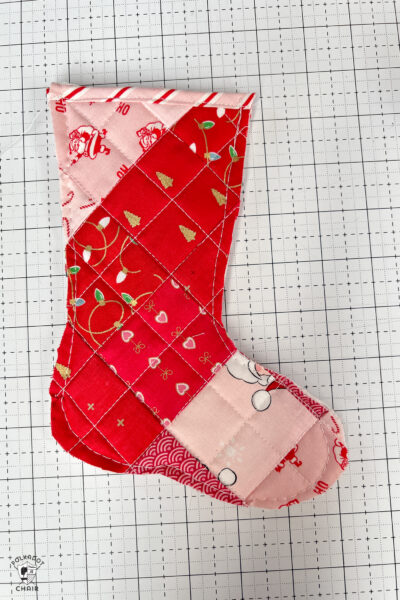
These mini stockings feature a quilted pieced exterior, sewn together with bias binding.
How to Make Bias Binding
If you’ve never run fabric through a bias tape maker before, here’s a quick demo video of the process.

You don’t need to have sewn the Santa hat to make these stockings, I’ve included measurements if you’d like to make your stockings from scratch.
Quilted Stocking Supplies
- Turning Tubes
- Bias Tape Maker 3/4″ or 18mm
- 1 Fat Quarter for Bias Binding (from Holiday Cheer collection by Riley Blake)
- 1 Small Button
- Needle & Thread
- Leftover quilted scraps from another project. You need two pieces at least 7” x 9”
- OR; Two quilted pieces of fabric at least 7” x 9” – you can also use pre-quilted fabric.
If you’re unsure how to make a small quilted piece of fabric, check out our Machine quilting basics tutorial. This crazy quilting technique featured on these Christmas ornaments would be great to create the stockings.
You could also use the quilt-as-you-go method to create the stockings.
If you’d like to make your stockings patchwork, like mine, you will need twenty 2 1/2” squares for each side of the stocking sewn together in a 4 x 5 grid.
How to Get the Pattern Piece
Fill out the form below, and we will email you a copy of the pattern piece.
Instructions

Quilted Mini Stocking Sewing Pattern
Equipment
- Turning Tubes
- Bias Tape Maker 18mm 3/4" size
supplies
- Leftover quilted scraps from another project. You need two pieces at least 7” x 9”
- OR
- Two quilted pieces of fabric at least 7” x 9” – you can also use pre-quilted fabric.
- 1 Fat Quarter for Bias Binding
- 1 Small Button
- Needle & Thread
Instructions
Step One: Quilting
- If you haven’t already create two quilted pieces of fabric at least 7” x 9”.
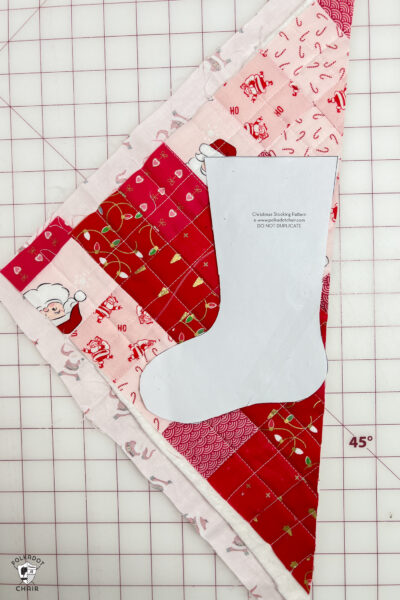
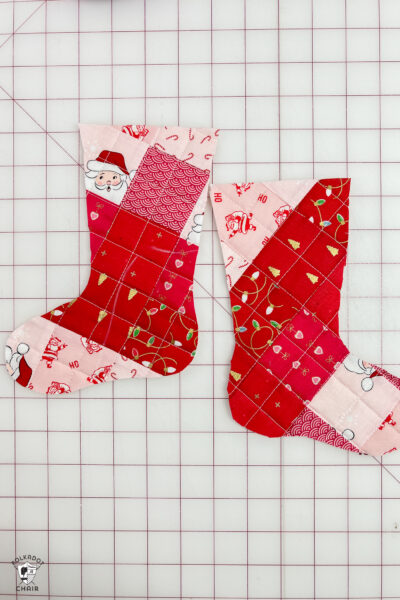
Step Two: Cutting
- Cut out a stocking front and back piece from the quilted fabric. Make sure you flip the pattern piece over when you cut out the second stocking piece.

- The two cut pieces should be mirror images of each other.
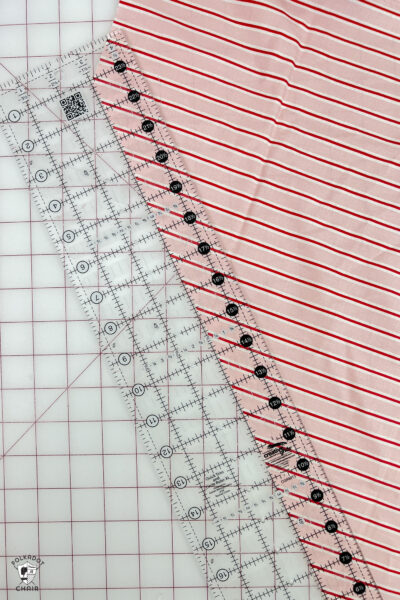
- Cutting on the bias means cutting the fabric at a 45-degree angle to the selvage edge of the fabric. This will allow the fabric to stretch around the curves on the stocking.
- Cut one bias strip From your fat quarter at least 1 1/2” x 10” and another at least 1 1/2” x 28”. You may need to sew two bias strips together for the longer piece.
Step Three: Top
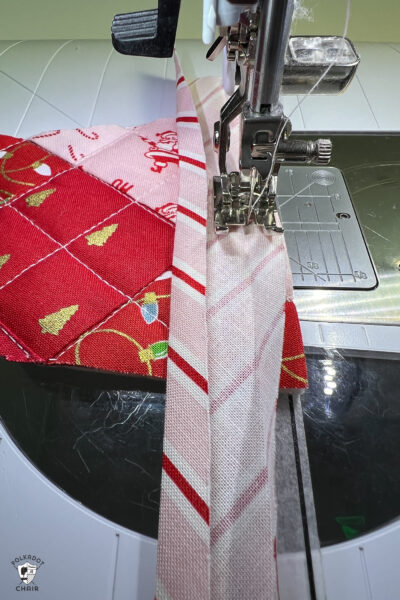
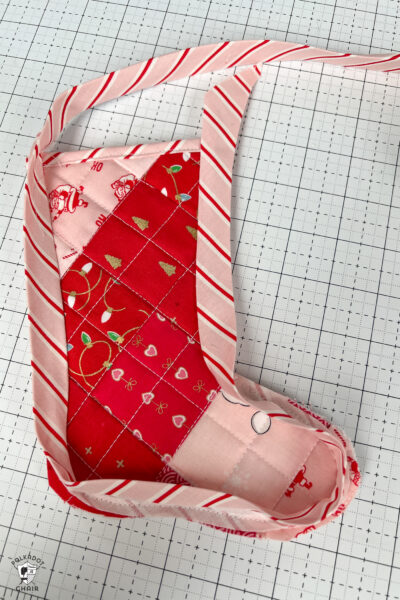
- Run the 1 1/2” x 10” and 1 1/2” x 28” pieces of bias through your bias tape maker. I’ve included a video on this post demonstrating how to do this if you are new to bias tape.
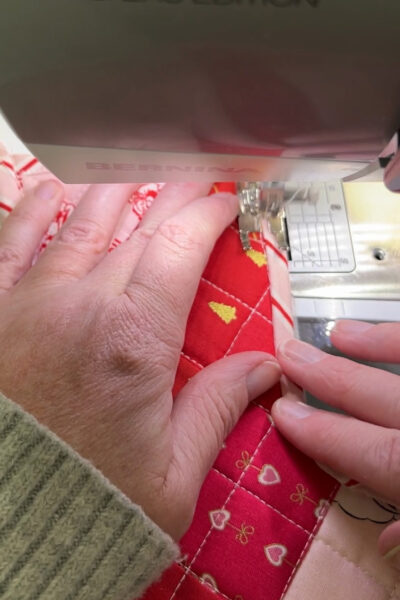
- Unfold the 10” long bias and line up the raw edge of the bias with the top edge of one of the cut stocking pieces. Sew just inside of the first fold in the fabric.
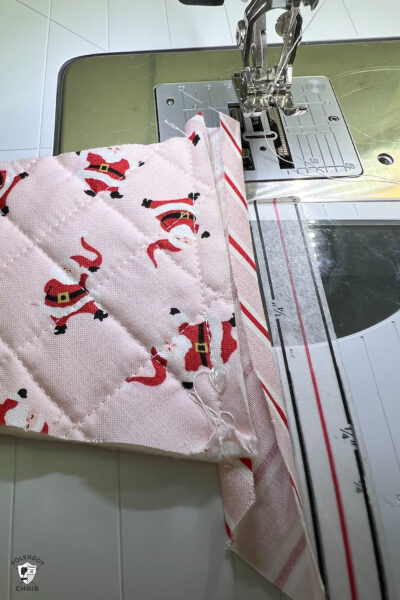
- Refold the bias and bring it to the other side of the stocking piece.
- Secure in place and sew close to the first fold in the bias. I prefer to sew it on the right side of the stocking so I know that the stitching lines look good.
- Repeat with the second cut stocking piece.
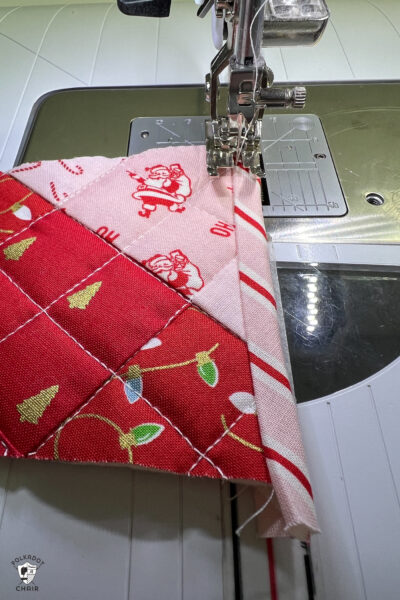
Step Four: Assemble
- Pin the two stocking pieces together, wrong sides (or lining facing. Baste around the outside edge with a 1/4” seam allowance.
- Unfold the longer bias strip and pin it to the outside of the stocking, the raw edge of the fabric lined up with the edge of the stocking. Leave about 1” of bias hanging off the end when you start pinning. The bias fabric piece will be longer than the stocking; do not trim off the excess.
- Use lots of pins for this step!
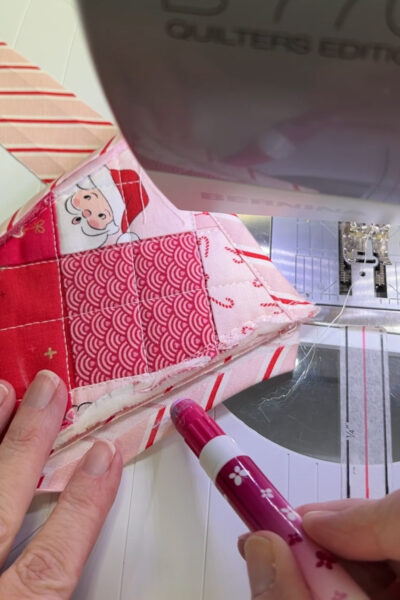
- Sew the bias strip to the stocking with a 1/4” seam allowance.
- Refold the bias fabric strip and bring it around to the other side of the stocking. Secure it in place with binding clips or pins.
- TIP: Use fabric-safe glue to hold the bias tape in place during this step. Apply the glue a little bit at a time, all the way around the stocking.
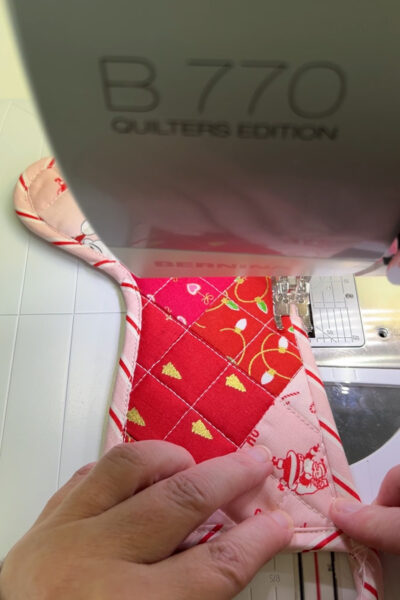
- On the top corner on the "toe" side of the stocking, fold the extra bias tape inside the stocking and pin it so that it gets "caught" as you complete the next step.

- Sew the bias fabric strip in place. Once again I prefer to sew the bias on the “front” of the stocking, so I can see where the stitching lines are.
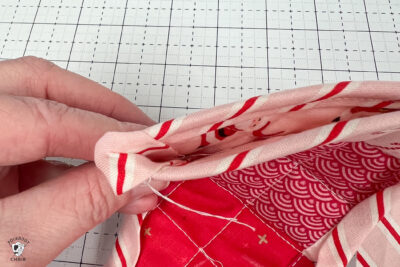
- When you get to the end of the stocking (the other top corner of the stocking) stop sewing.
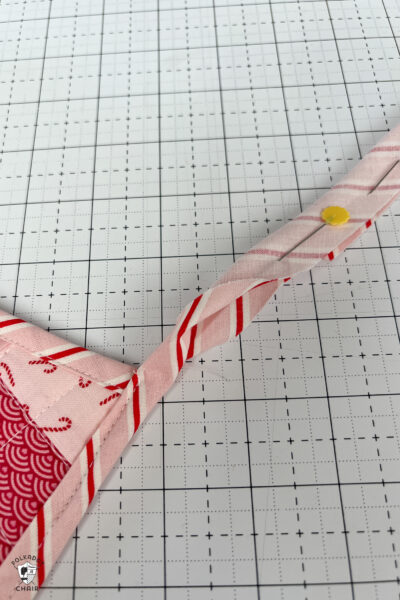
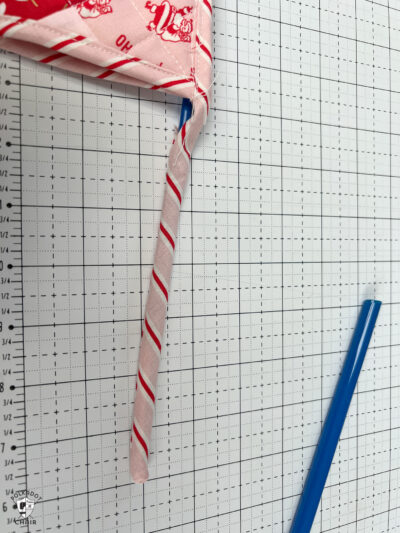
- Fold the remaining bias fabric strip in half, RIGHT sides facing.
- Sew along the top of the bias fabric strip down the side as far as you can. Use a scant 1/4” seam allowance.
- Turn the fabric right side out.
- If you have them, use the turning tubes to assist you.

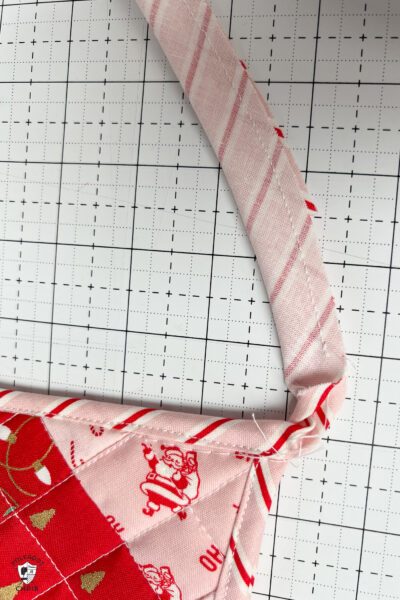
- Press. Top stitch along the edge, and catch any opening left in the fabric as you go.
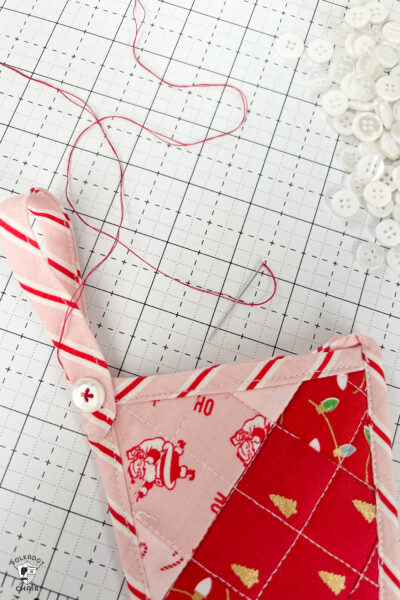
- Pin the end of the bias fabric strip over the top corner of the stocking and hand sew in place with a button (the button is not functional).


Thank you for the Stocking printable. I’ve been looking for a small one!
Yes! I loved the article!