• Skip to primary navigation
  • Skip to main content
  • Skip to primary sidebar

The Polka Dot Chair logo

  • SEWING
    • Free Sewing Patterns
    • Bag Patterns
    • Costumes
    • Apparel
    • Learn to Sew
    • Beginner Friendly
    • Embroidery Projects
    • Tips & Techniques
    • All Sewing
  • QUILTING
    • Quilt Blocks
    • Learn to Quilt
    • Free Patterns
    • Quilt Patterns
    • All Quilting
  • CRAFTS
    • Disney
    • Cricut
    • Printables
    • All Crafts
  • HOLIDAYS
    • Seasonal Projects
    • Valentine’s Day
    • Easter
    • 4th of July
    • Halloween
    • Thanksgiving
    • Christmas
    • All Holidays
  • TUTORIALS
  • ABOUT
    • About Me
    • My Fabric Collections
    • Published Books
    • Press
    • FAQ’s
    • Contact
  • SUBSCRIBE
  • SHOP
menu icon
go to homepage
subscribe
search icon
Homepage link
  • SHOP
  • ALL PROJECTS
  • SEWING
  • QUILTING
  • CRAFTS
  • HOLIDAY PROJECTS
  • ABOUT
    • Published Books
    • My Fabric Collections
    • Facebook
    • Instagram
    • Pinterest
    • YouTube
  • ×

    Home » Sewing

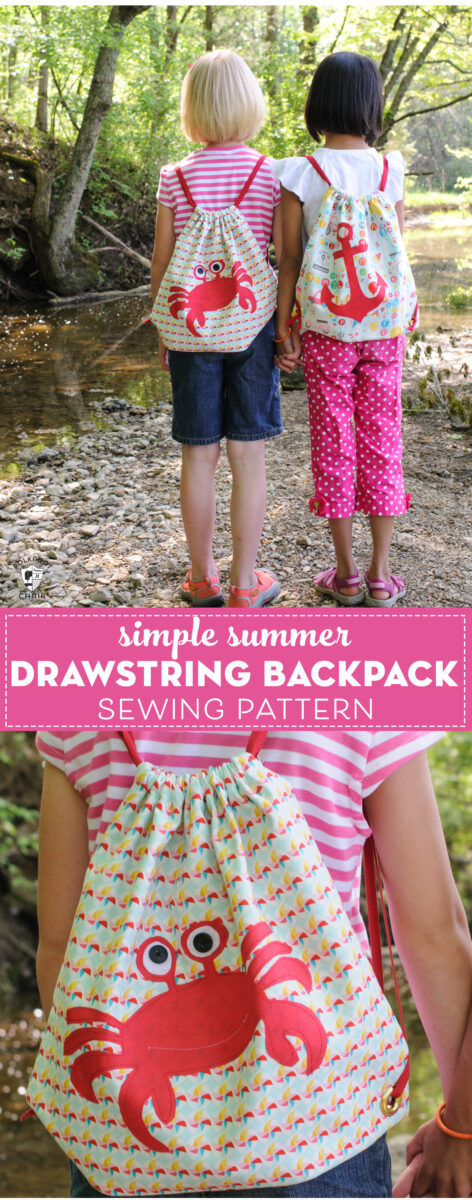
    How to Make a Drawstring Bag or Backpack

    Updated: Feb 15, 2022 by Melissa Mortenson · This post may contain affiliate links · This blog generates income via ads · 6 Comments

    kids drawstring backpack

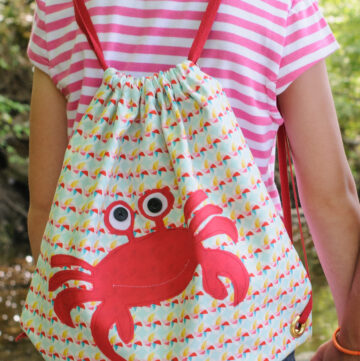
    Use this free sewing tutorial for a Simple Drawstring Backpack to create a lightweight, lined backpack perfect for summer! I’ve even included a free download for the applique shapes featured on the backpack.

    kids drawstring backpack

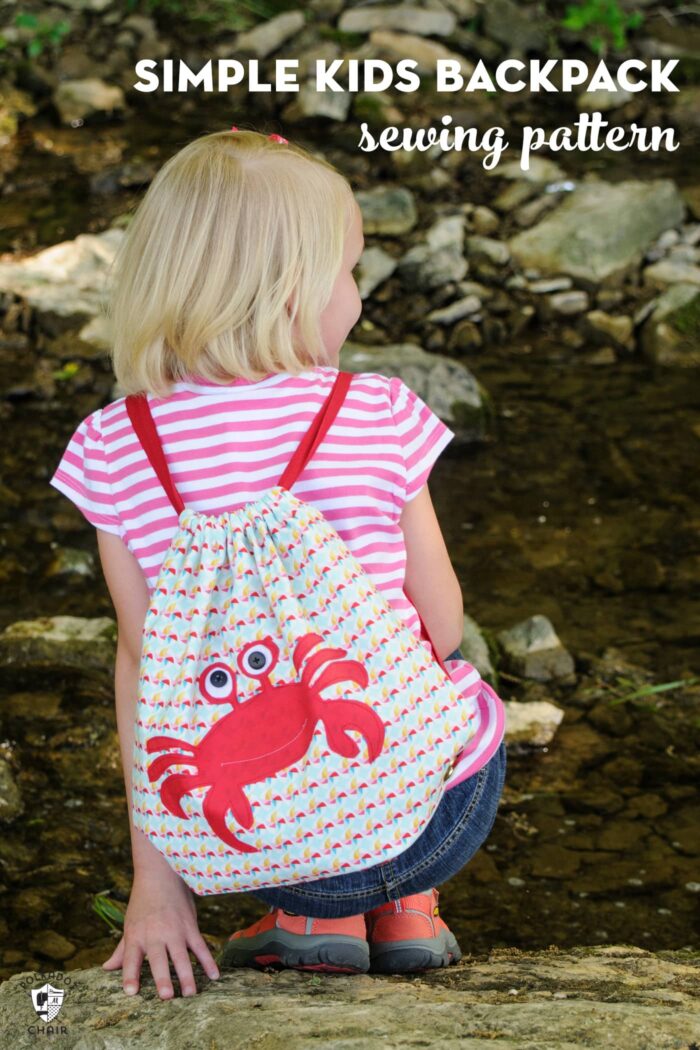
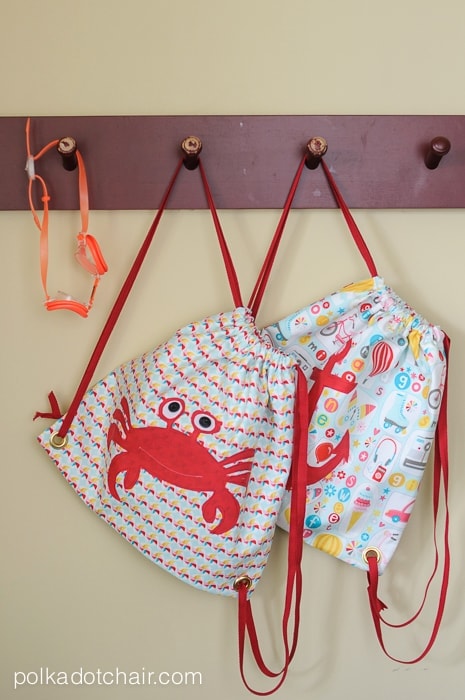
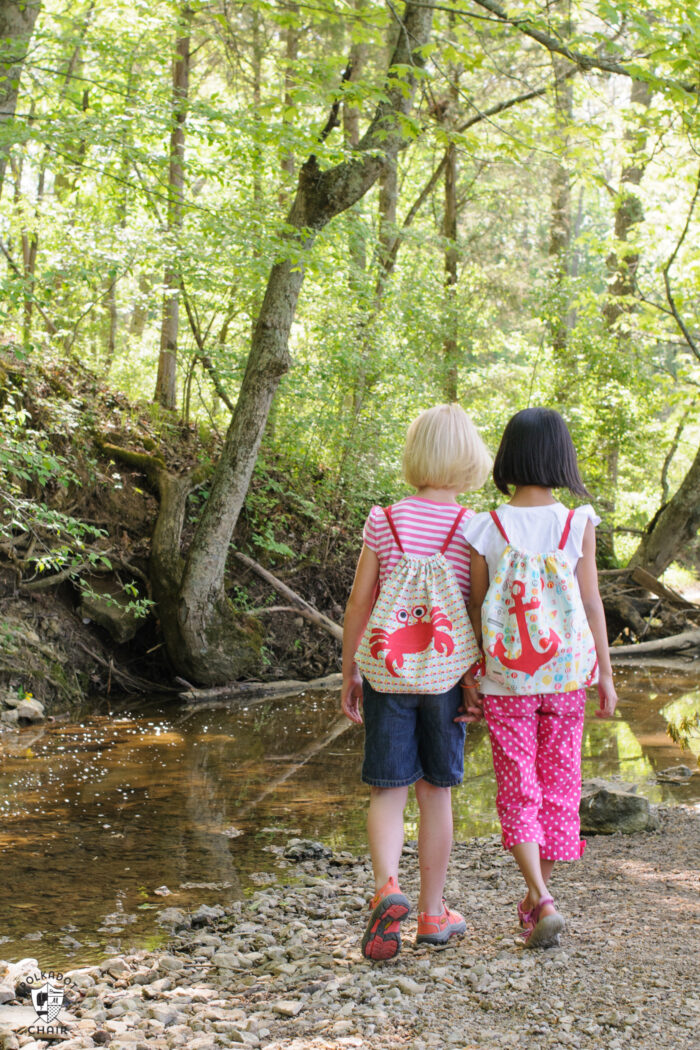
    When I think about summer, one of the things that I always think about are with lazy days out by the pool and afternoons spent exploring.  Recently, I decided to make some super simple drawstring backpacks that would be perfect for kids to tote around their treasures in all summer.

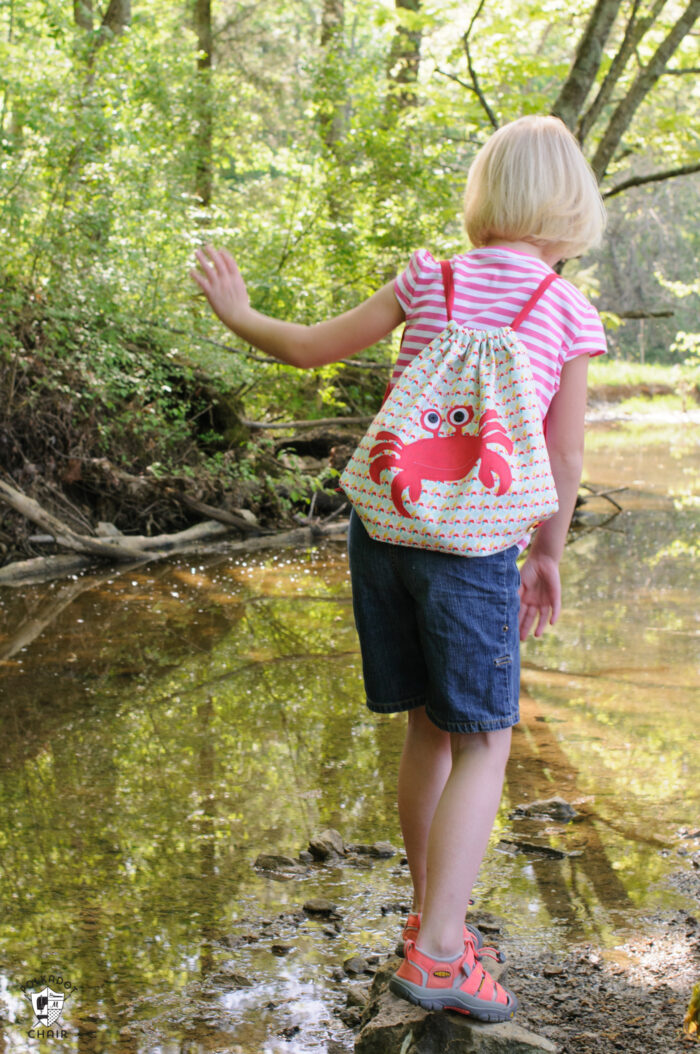
    They could carry something lightweight around whether they are headed to the amusement park or just out for a ride on their bike.

    Table of Contents
    • Features of the Backpack Pattern
    • Simple Drawstring Backpack Sewing Pattern
    • Backpack Supplies
    • Instructions

    Features of the Backpack Pattern

    • Finished size is approximately 13″ x 13″.
    • The backpack is fully lined.
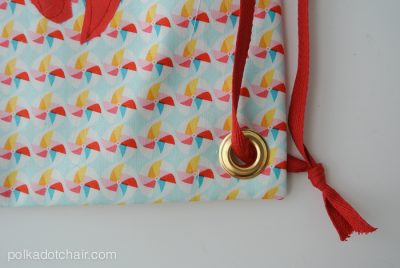
    • We used 1″ grommets for the straps in the bottom corners, you can set these easily using the directions on the package.
    • Use cotton webbing for the straps, it can be purchased in the decorative trim section of the craft store.
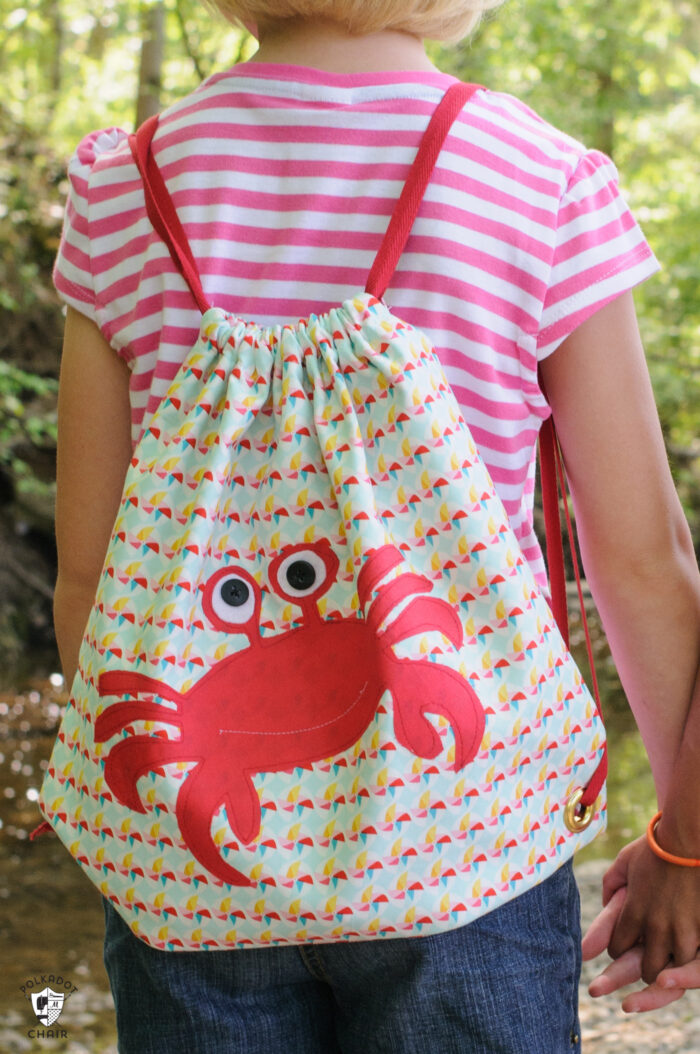
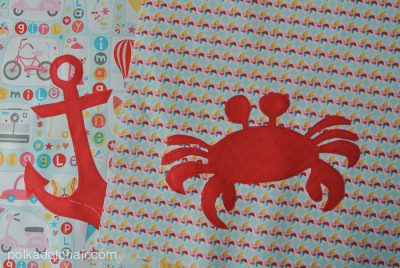
    • The shapes on the bag are created using a technique called Raw Edge Applique. It’s a simple to follow beginner friedly techhnique. If you need more help with this step you can view our “How to Create an Applique” article complete with video instructions.
    • how to make a drawstring bag
    • Kids summer drawstring backpack pattern
    Free Sewing Pattern for a simple summer drawstring backpack for kids. Even includes a free download for the crab and anchor applique shapes on the bag.

    Simple Drawstring Backpack Sewing Pattern

    kids drawstring backpack

    Backpack Supplies

    I’ve included free applique patterns for you. To get them hop on over to my blog’s Sewing Templates Libary. 

    • ½ yard of Fabric for the outside, cut two pieces 15” x 15”
    • ½ yard of Fabric for the lining, cut two pieces 15” x 15”
    • Shape-Flex Interfacing, cut two pieces 15” x 15”
    • 4 yards of string/trim for the backpack straps
    • Fat Quarter of Riley Blake Solids for the applique
    • Heat N Bond Lite
    • Two 1” grommets
    • for the crab, a scrap of white felt and 2 black buttons

    All seam allowances are ½” unless otherwise noted.

    Note: this bag contains strings. It is not recommended for young children as it can pose a choking hazard.

    Instructions

    kids drawstring backpack
    Pin It
    Print
    5 from 1 vote

    Lined Drawstring Backpack Sewing Pattern

    How to sew a simple, lined drawstring backpack with optional applique.
    Prep Time30 mins
    Active Time3 hrs
    Total Time3 hrs 30 mins
    Yield: 1 backpack
    Author: Melissa Mortenson

    Tools

    • Sewing Machine
    • Basic Sewing Tools

    Materials

    • ½ yard of Fabric for the outside cut two pieces 15” x 15”
    • ½ yard of Fabric for the lining cut two pieces 15” x 15”
    • 1 piece Shape-Flex Interfacing cut two pieces 15” x 15”
    • 4 yards of string/trim for the backpack straps
    • 1 Fat Quarter of Riley Blake Solids for the applique
    • 1 piece Heat N Bond Lite
    • 2 1” grommets
    • 1 Scrap of white felt for crab eyes
    • 2 buttons 1" black buttons for crab eyes
    • 1 Applique pattern for crab & anchor download it in the Sewing Library.

    Instructions

    • All seam allowances are ½” unless otherwise noted.

    Step One: How to Create the Appliques

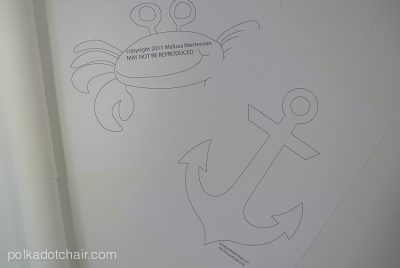
    • Begin by printing out the applique pattern, that can be downloaded here.
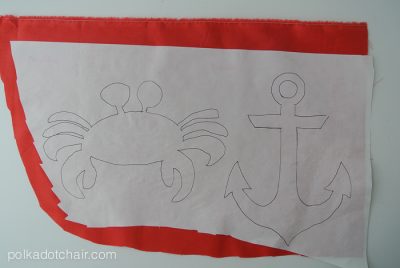
    • Trace the pattern onto a piece of heat n bond lite (Trace on the paper side of the heat n bond) Remember your image will be reversed after appliqued- it doesn’t matter too much with these shapes, but might if you use another shape.
      Simple Summer Backpack Sewing Pattern by Melissa Mortenson of polkadotchair.com
    • Iron onto the wrong side of the applique fabric.
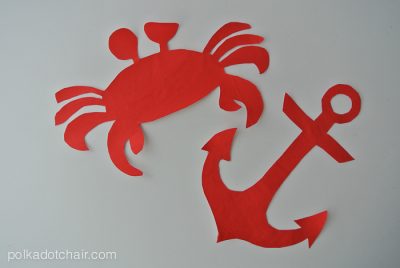
      Simple Summer Backpack Sewing Pattern by Melissa Mortenson of polkadotchair.com
    • Cut out.
      Simple Summer Backpack Sewing Pattern by Melissa Mortenson of polkadotchair.com
    • Peel off the backing and apply to the front backpack piece in the desired location. Apply the shape flex interfacing to the wrong side of the two backpack outside pieces.
    • Stitch around the applique with matching thread. To complete the crab, cut out two pieces of white felt for his eyes and sew two black buttons to the center.
      Simple Summer Backpack Sewing Pattern by Melissa Mortenson of polkadotchair.com

    Step Two: How to Sew the Backpack

    • Sew the backpack side and bottom seams.
    • Sew the 2 backpack outside pieces together, right sides facing, leaving the top seam open. Press the seams open and clip the corners.
    • Repeat for the 2 lining pieces.
    • Slip the lining piece into the backpack outside piece, wrong sides facing.
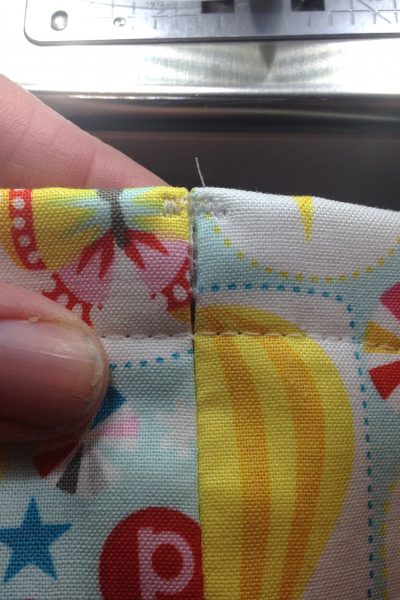
    • Pin so that the top edges are even and the side seams match.
    • Finish the seam at the Top of the Bag.
      Simple Summer Backpack Sewing Pattern by Melissa Mortenson of polkadotchair.com
    • Using a serger (or a zig zag stitch on your machine if you don’t have a serger) serge the backpack outside and backpack lining pieces together.
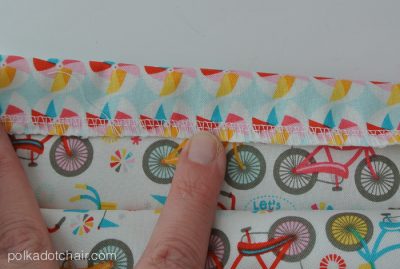
    • Fold the top edge down 1” and pin. You are folding towards the lining. Stitch along the edge (where the serger stitches are) to form a casing.
      Simple Summer Backpack Sewing Pattern by Melissa Mortenson of polkadotchair.com
    • Unpick the seam on the outside of the backpack side seams between the casing stitching line and about ⅛” from the top fold. Reinforce the seam with a bar tack stitch so that it doesn’t unravel any more than this.
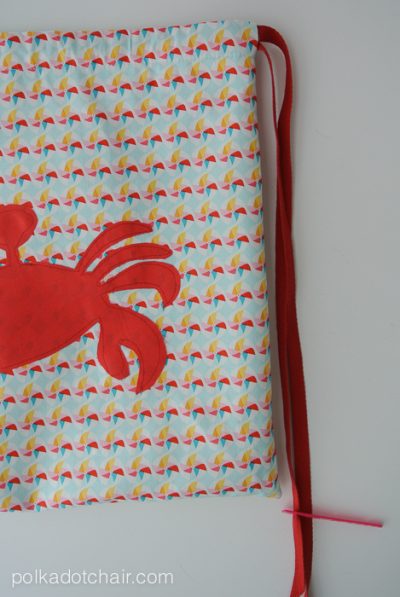
    • Feed the String through the Casing.
      Simple Summer Backpack Sewing Pattern by Melissa Mortenson of polkadotchair.com
    • Cut two yards of string for the backpack and string through one side, starting at the opening in the side seam, all the way around until it comes out the same opening. Pull it down so that it extends a little below the bottom of the backpack.
      Cut both ends the same length about 2” below the backpack bottom corner. To help you feed your string use an elastic shuttle (you can get it at the notions store).
      Simple Summer Backpack Sewing Pattern by Melissa Mortenson of polkadotchair.com
    • Repeat the same process this time starting and stopping on the opposite side seam of the backpack.
    • Set the Eyelets
      Simple Summer Backpack Sewing Pattern by Melissa Mortenson of polkadotchair.com
    • Making sure that your lining is laying flat inside your backpack, set one eyelet in each bottom corner of the backpack through all your layers of fabric (follow the instructions on the package). Loop one string through the eyelet and tie with a slip knot to secure.

    Copyright Notice

    ©www.polkadotchair.com – This is Copyrighted Content. You may NOT copy it, distribute it, sell it or package it with a kit. You may NOT teach a for-fee class using it. All items are for personal use only. No commercial use is allowed.

    Simple Summer Backpack Sewing Pattern by Melissa Mortenson of polkadotchair.com

    Enjoy! Now you’re ready for Summer!

    kids drawstring backpack
    drawstring backpack sewing tutorial

    More Free Bag Sewing Patterns:

    Toddler Backpack Sewing Pattern

    How to Sew a Simple Tote Bag

    Oversized Beach Bag Sewing Pattern

    kids drawstring backpack

    More Projects You'll Love!

    • drawstring laundry bag on white cutting mat
      How to Make a Drawstring Laundry Bag; a Fat Quarter Project
    • Learn how to sew a mini backpack with this cute toddler backpack pattern. Stitched up with Derby Day fabrics from Riley Blake Designs #minibackpack #toddlerbackpack #smallbackpack #backpacksewingpattern
      Free Sewing Tutorial: Toddler Backpack Pattern
    • Summer Sling Bag Sewing Tutorial and Pattern by Ameroonie Designs
      Summer Sling Bag Sewing Tutorial
    • The June Bag; A mini messenger cross body PDF sewing pattern; great travel bag to sew
      The NEW June Bag, Cross Body Bag Sewing Pattern
    « New Sewing & Quilting Patterns Available in Print
    EASY Reading Pillow Pattern »

    • Share
    • Email

    About Author

    Melissa Mortenson

    Melissa Mortenson is a blogger, designer, and content creator. She is the Polka Dot Chair blog founder and has been sharing fresh and creative ideas with readers since 2008. She is the author of “Project Teen, Handmade Gifts your Teen will Actually Love.” Her work and designs have been featured on HuffPost, TODAY, Pioneer Woman, HGTV, BuzzFeed, Better Homes & Gardens, and many other established publications. Her first fabric line, “Derby Style,” debuted in January 2015 through Riley Blake Designs.  Additional fabric collections have followed it in subsequent years. A mom of 3, she considers herself lucky to be living in Kentucky.

    Reader Interactions

    Comments

    1. Tweet says

      February 25, 2018 at 5:31 am

      I love this idea. I might make these for my students. Do you happen to have a printer friendly version of the directions on here that I’m missing? Thanks for sharing such an awesome idea!

      Reply
      • Melissa Mortenson says

        February 26, 2018 at 12:32 pm

        I don’t for this project, but do for a few others on shop.polkadotchair.com

        Reply
    2. Cheryl Evans-Holbrook says

      May 14, 2019 at 12:10 am

      I love these drawstring bags!! Can you share the fabric line you used? Thanks so much.

      Reply
    3. Lisa says

      August 03, 2020 at 11:30 pm

      This looks adorable! I am teaching my daughter to see and can’t wait to try it. Where did you find the backpack straps/trim? I’ve looked online and can’t come up with anything. Thank you!!

      Reply
      • Jo Ann says

        October 08, 2020 at 11:40 pm

        Cotton twill tape

        Reply
    4. Linda says

      June 09, 2022 at 10:37 am

      Love the drawstring-backpacks! Except I can’t get to the appliqués which are so cute. Love your website!

      Reply

    Leave a Reply Cancel reply

    Your email address will not be published. Required fields are marked *

    This site uses Akismet to reduce spam. Learn how your comment data is processed.

    Primary Sidebar

    Hello! It’s nice to meet you.

    I’m Melissa. I like to design things, like fabric, printables, and projects.

    I’m also a Mom and a Maker. I am like most of you, just trying to do my best every day. Some days I succeed, many days I fail.  I find joy in creating, if you do too, then I hope that you find something here bring a little “happy” to your life.  Find out more about me here.

    COPYRIGHT POLICY

    All my images and text are copyrighted. You may NOT use any images from this site in any kind of Video (this includes YouTube). If you would like to feature my work, you may use ONE (1) NON-COLLAGED image and must “follow” link back to my original blog post. You may NOT edit, crop, or change my images in any way without written permission. You MAY NOT print out or copy and distribute any text, images or patterns from this site. All patterns, content, instructions, and templates are for personal use ONLY! Thank you! Violators will be reported.

    Footer

    ↑ back to top

    About

    • Privacy Policy
    • Disclaimers
    • About Melissa

    Newsletter

    • Sign Up! for emails and updates

    Contact

    • Contact
    • FAQ
    • Press
    • Fabric Collections

    Welcome to the Polka Dot Chair! Here you’ll find easy, step-by-step, sewing, quilting, and crafting projects. We design projects for Makers of all skill levels. Beginners are welcome!

    DISCLAIMER:

    While every effort has been made to ensure the accuracy of the content on this website, the information is made available without warranty of any kind. The Polka Dot Chair accepts no responsibility or liability, whether direct or indirect, as to the currency or accuracy of the information, nor any consequence of its uses. This website is not intended to substitute the advice of a professional.

    Copyright © 2020 Polka Dot Chair

    [ Placeholder content for popup link ] WordPress Download Manager - Best Download Management Plugin