Twin Pines Quilted Pillow Pattern
Create a cozy pillow perfect for Fall with our Twin Pines Quilted pillow pattern. This patchwork pillow pattern is the tenth pillow in our free Pillow Pattern of the Month series.
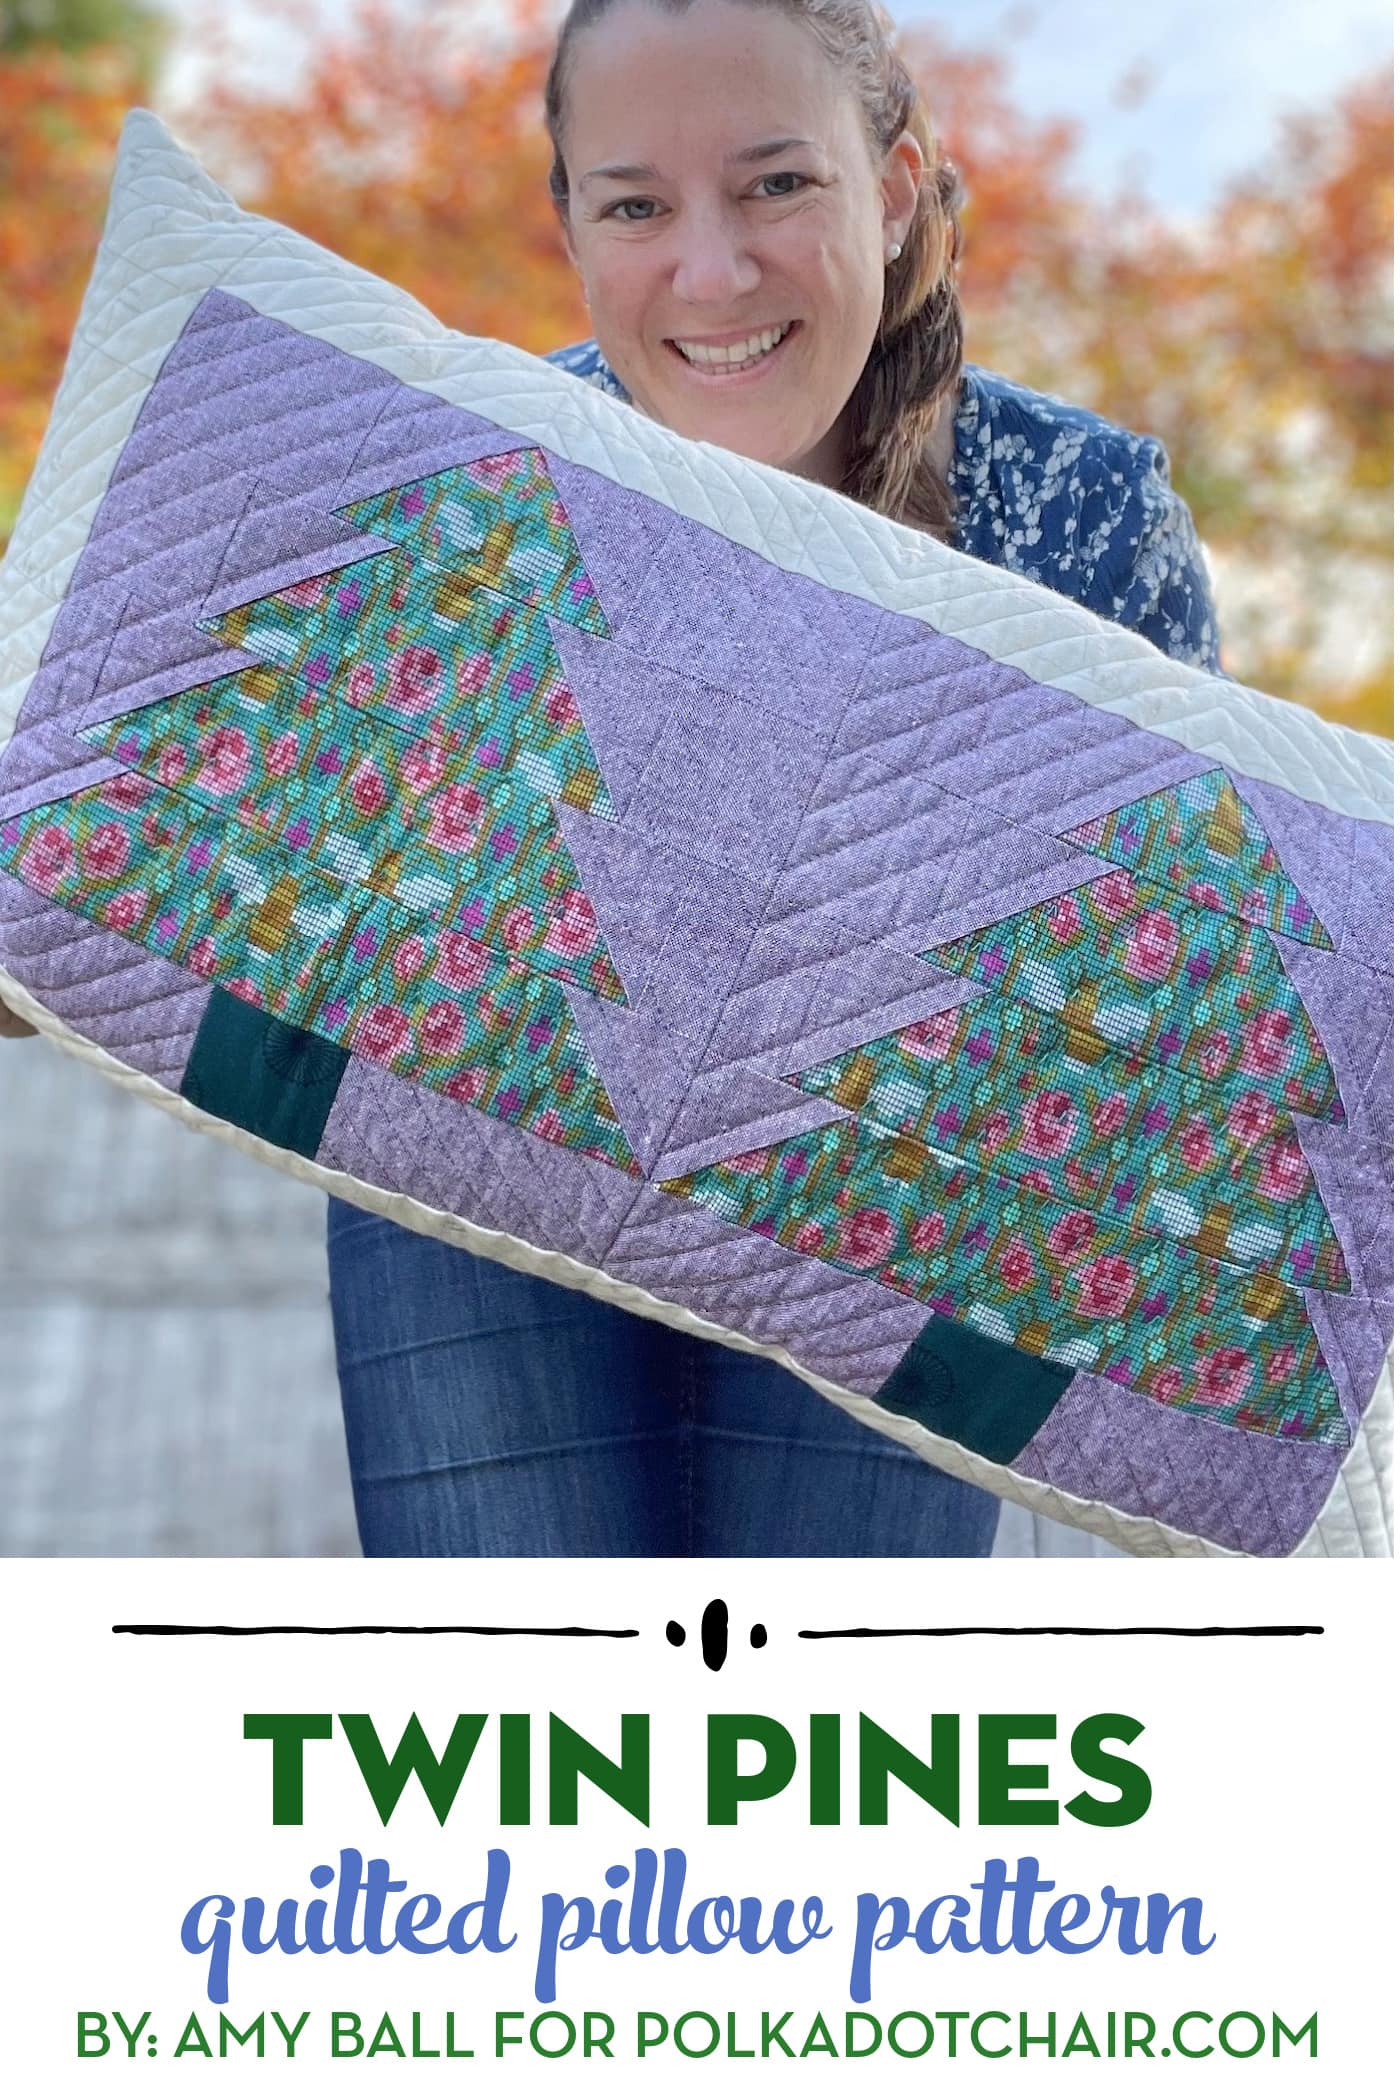
It’s time for our next “Pillow of the Month” pattern! Amy Ball created a pattern for a beautiful patchwork tree pillow this month. She stitched her pillow from cozy, textured fabrics, which are perfect for Fall. This pillow pattern would also be great sewn in Christmas fabrics!

All of the Pillow of the Month Patterns
In case you missed any of them, here are all of the pillow patterns shared this year!
- January: Patchwork Plaid Pillow
- February: Heart Quilted Pillow
- March: SLEEP Pieced Letters Pillow Pattern
- April: Patchwork Beehive Pillow
- May: Queens Jubilee Celebration Pillow Pattern
- June: Moroccan Tiles Pillow
- July: Prism Paw Quilted Pillow Pattern
- August: Strawberry Fields Patchwork Pillow
- September: Improv Patchwork Pillow Pattern
- October: Twin Pines Quilted Pillow Pattern
- November: Peeking Reindeer Patchwork Pillow
- December: Christmas Presents Pillow
About the Pattern
As the season changes to autumn and then into winter, my thoughts change from beaches and picnics to forests and being cozy inside. My Twin Pines pillow is inspired by both of those things. The “forest” inspiration is obvious (two big pine trees) but the “being cozy inside” link may be less obvious.
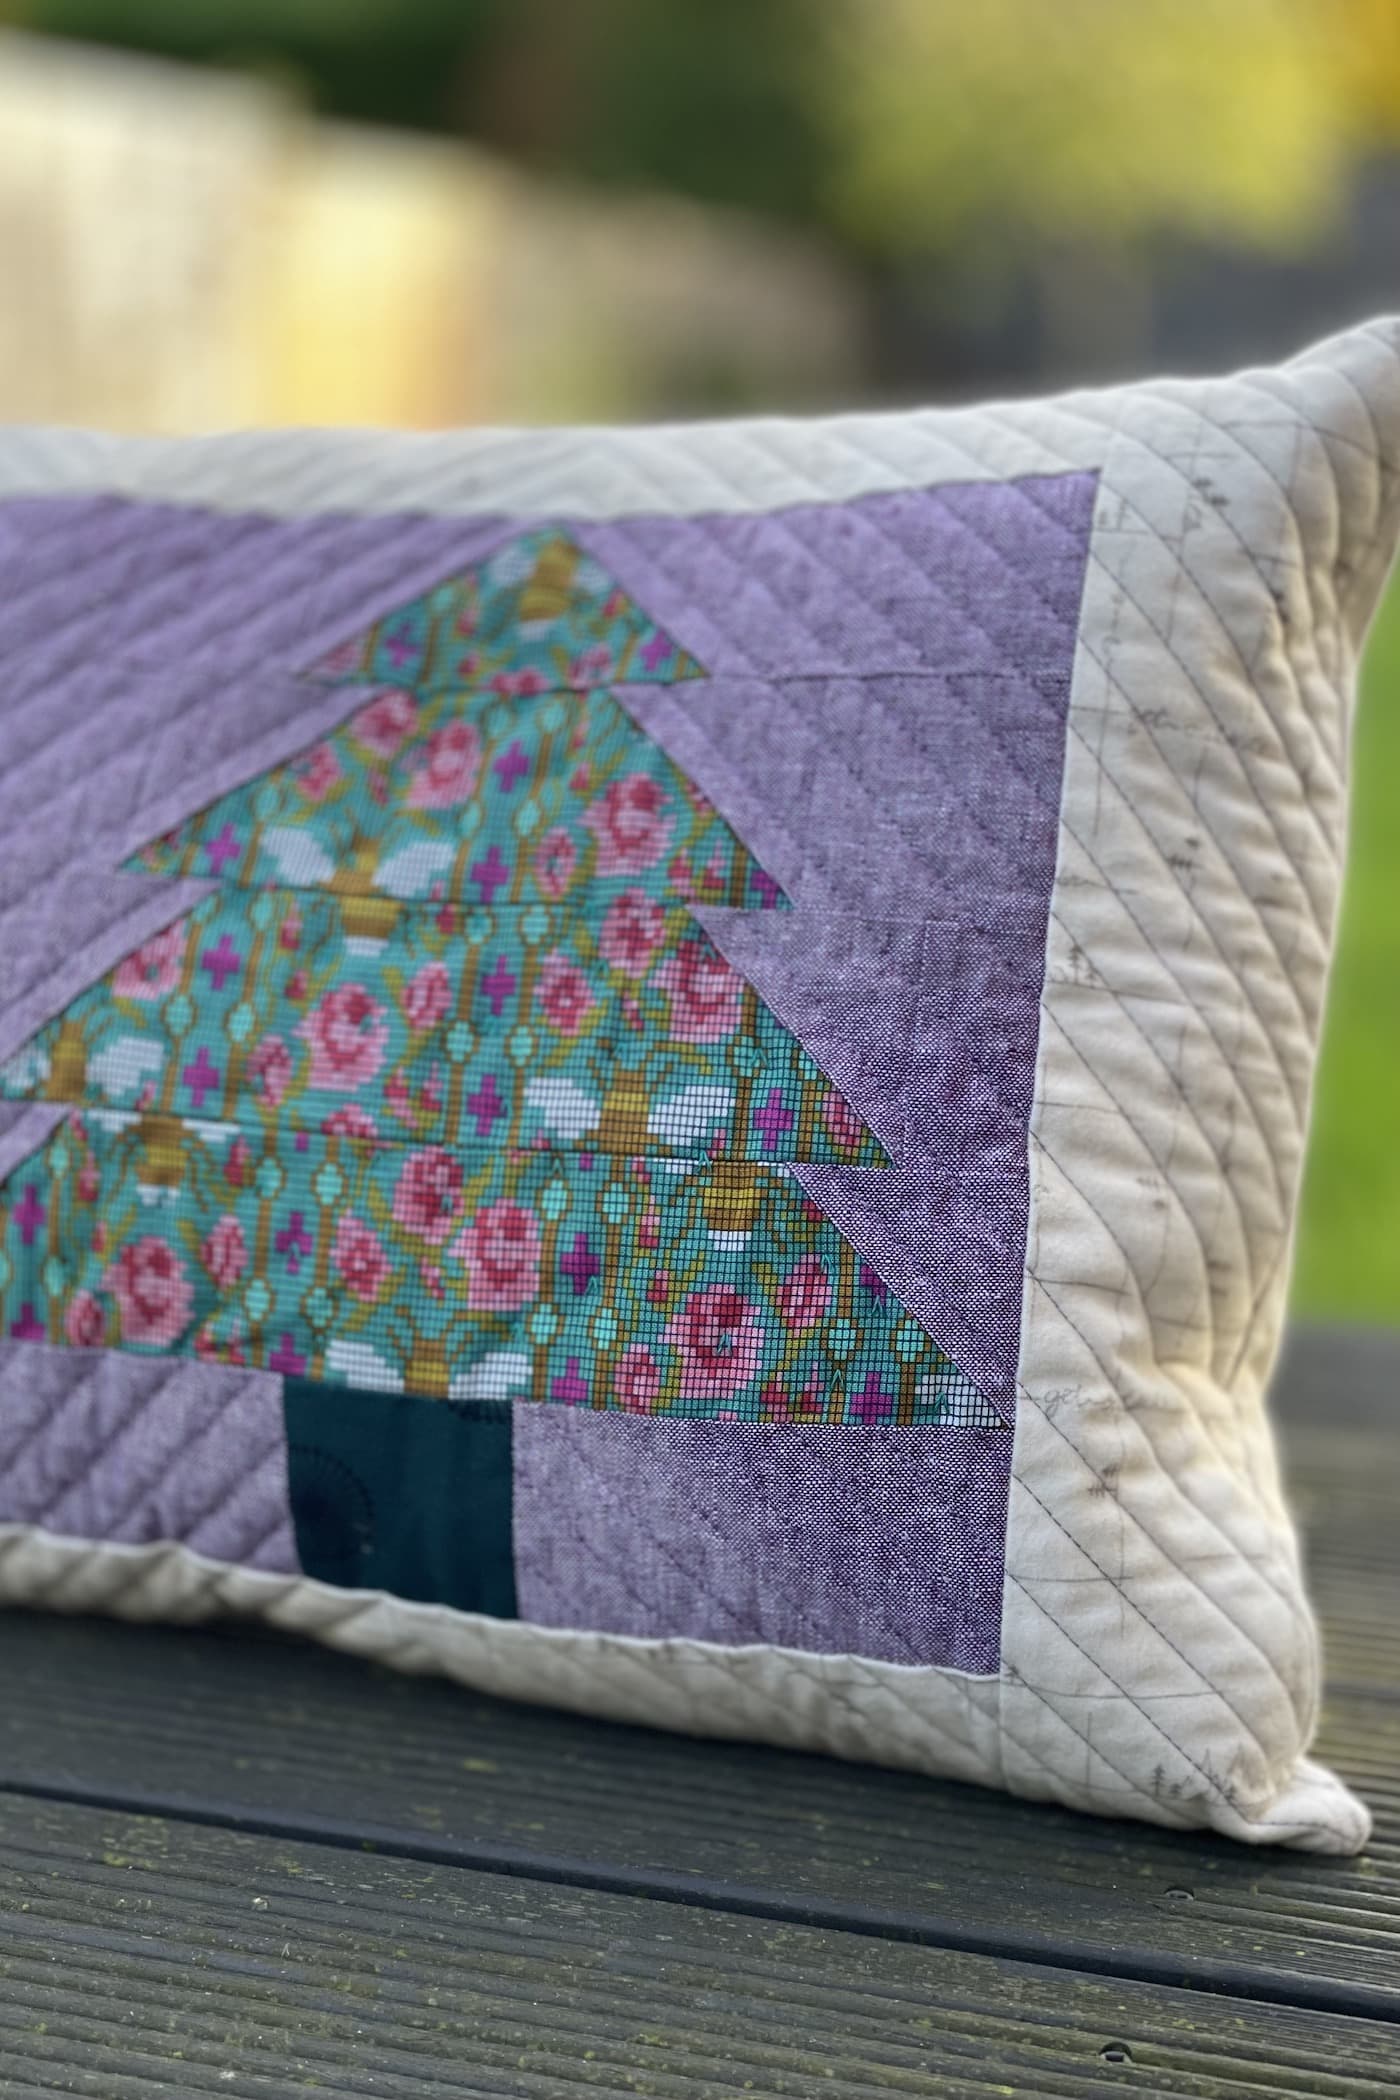
I’ve used cozy, textured fabrics for the background (Essex linen) and borders (flannel) of this pillow, but the pillow design is also a nod to one of my favorite films… and I associate “being cozy inside” with snuggling up watching a good film!
The Inspiration for the Pattern
The early part of the first Back to the Future film takes place in the parking lot of Twin Pines Mall. When Marty first leaves 1985 and goes back to 1955 he crashes into a pair of pine trees and knocks one of them down. Once he returns to the present day, the parking lot now has a Lone Pine Mall sign because one of the “twin” pines was knocked down years before the mall was built!
So if you’re a BTTF fan like me, then this pillow is secretly called Twin Pines Mall pillow, and if you’re not, then it’s simply a lovely autumn-winter forest scene.

Twin Pines Quilted Pillow Pattern
Equipment
- quilting ruler
supplies
Fabrics:
- 1 Fat Quarter Green fabric for trees
- 1 Large Scrap Dark green fabric for tree trunks
- 1 Fat Quarter Purple fabric for background
- 1 fat quarter Cream fabric for borders for non-directional print (you’ll need more for a directional print)
- 1/2 yard Light backing fabric
- 1/2 yard Pillow back fabric
Other:
- 1 piece
Batting 26” x 16”
- 1 Pillow form or Cushion Pad; 24” x 14”
Instructions
Cutting:
- From green “tree” fabric cut:5” x 3” (2), 6½” x 2½” (2), 8½” x 2½” (2), 10½” x 2½” (2).From dark green “trunk” fabric cut: 2½” square (2).From purple “background” fabric cut: 1½” x 2½” (4), 2½” square (16), 3” square (4), 3½” x 2½” (4), 4½” x 2½” (4).From cream “borders” fabric cut:3½” x 14½” (2)20½” x 2½” (2).From pillow back fabric cut: 16½” x 14½” (2).
Preparation:
- Make flying geese as follows:
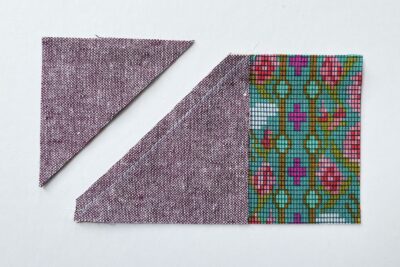
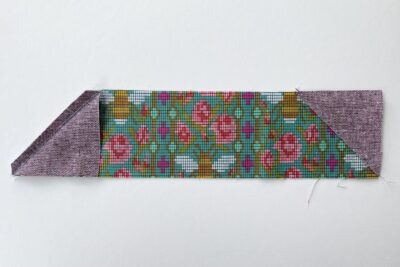
- Take one green 5” x 3” rectangle and two purple 3” squares.
- Draw a diagonal line on the wrong side of both squares then pin one purple square to the left edge of the green rectangle (right sides together) with the drawn line running bottom left to top right.

- Sew just to the outside of the drawn line and trim away the excess fabric leaving a ¼” seam allowance.
- Press the corner into place.
- Now pin the second purple square to the right edge of the green rectangle (right sides together) with the drawn line running top left to bottom right.
- Sew just to the outside of the drawn line and the trim away the excess fabric leaving a ¼” seam allowance. Then press the corner into place.
- Now trim the flying geese unit to 4½” x 2½”. Be careful to trim evenly around all four edges making sure the centre point stays in the centre with a ¼” seam allowance above it, and the diagonal seams run right into the bottom corners.
- Repeat steps 1 to 7 to make one more green/purple flying geese unit.

Construction: Use a ¼” seam allowance unless otherwise stated.
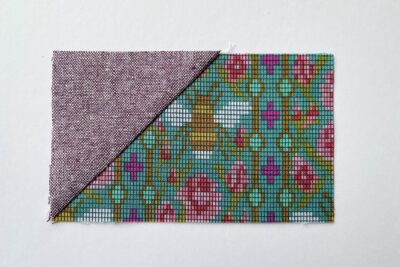
- Take two purple 2½” squares and one green 6½” x 2½” rectangle. Draw a diagonal line on the wrong side of both squares.
- Pin one purple square to the left edge of the green rectangle (right sides together) with the drawn line running bottom left to top right, and pin the second purple square to the right edge of the green rectangle (right sides together) with the drawn line running top left to bottom right.
- Repeat step 10 using the remaining ten purple 2½” squares with the second green 6½” x 2½” rectangle, the two green 8½” x 2½” rectangles, and the two green 10½” x 2½” rectangles.
- On each of these pinned units sew just to the outside of the drawn lines, trim away the excess fabric leaving a ¼” seam allowance, and press the corners into place. Set aside.
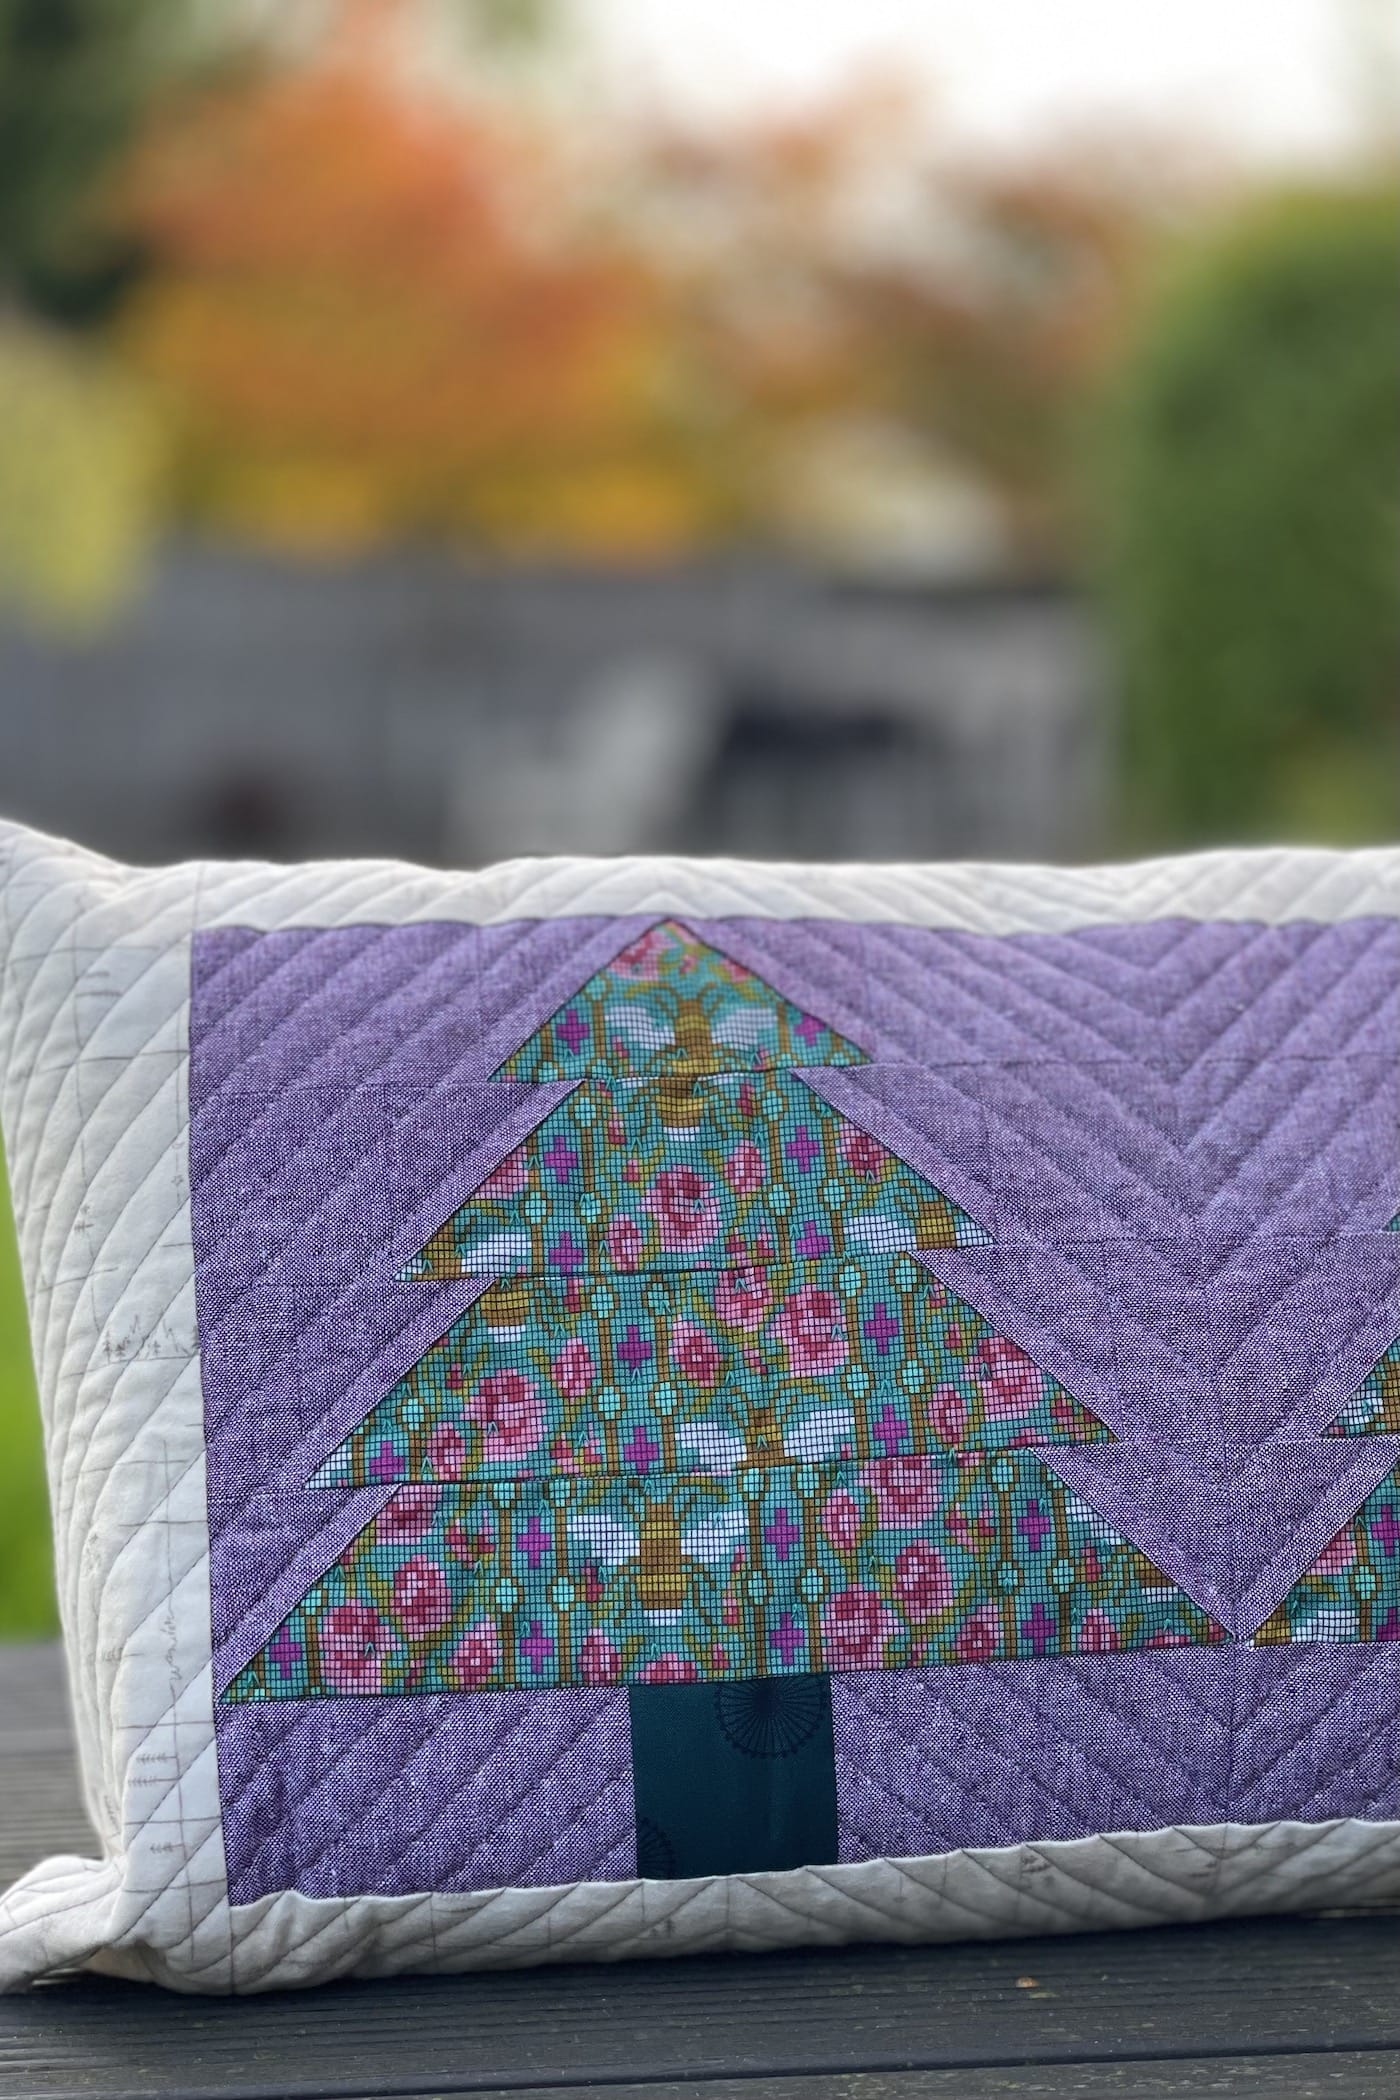
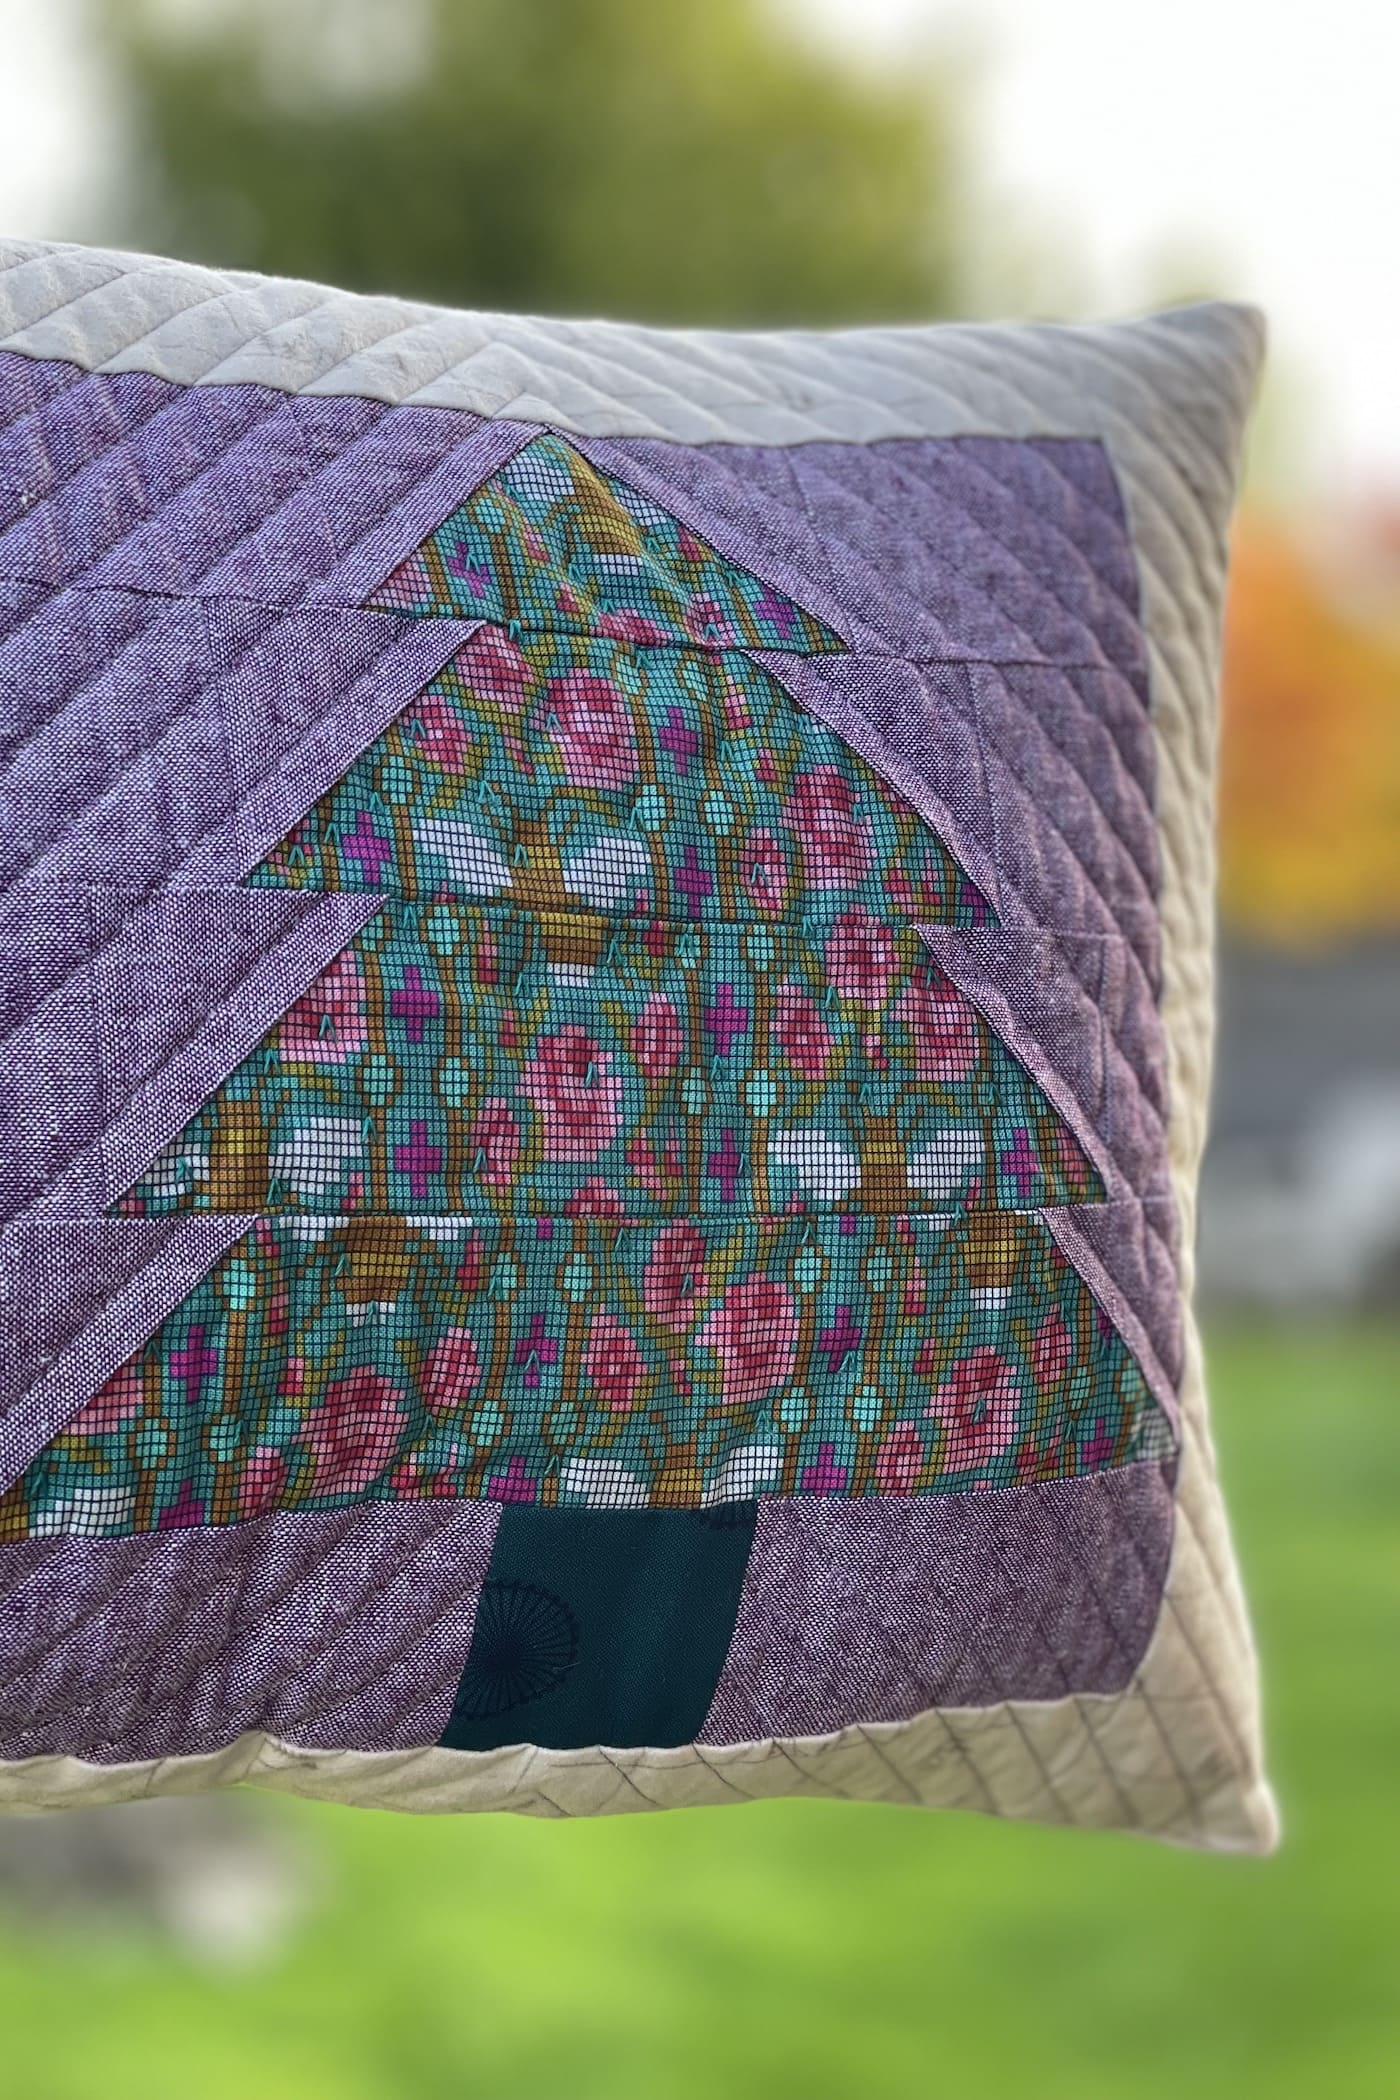
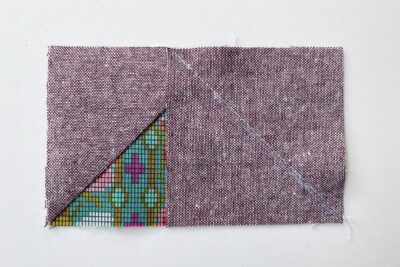
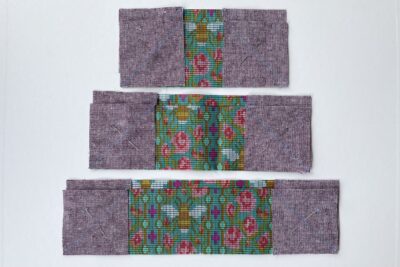
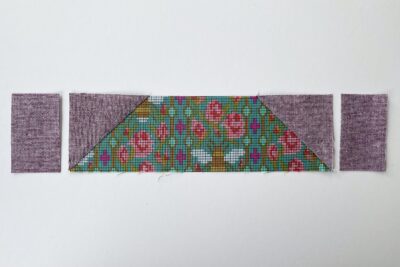
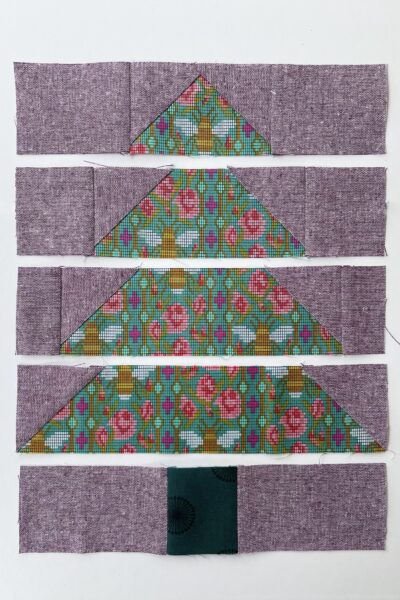
- Take two purple 3½” x 2½” rectangles and one flying geese made earlier. Sew them together in a row with the flying geese in the centre.
- Take two purple 2½” squares and one 6½” x 2½” rectangle unit from steps 9-12. Sew them together in a row with the rectangle unit in the centre.
- Take two purple 1½” x 2½” rectangles and one 8½” x 2½” rectangle unit from steps 9-12. Sew them together in a row with the rectangle unit in the centre.
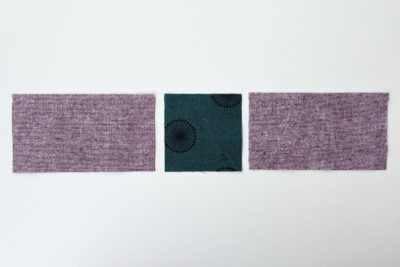
- Take two purple 4½” x 2½” rectangles and one dark green 2½” square. Sew them together in a row with the square in the centre.
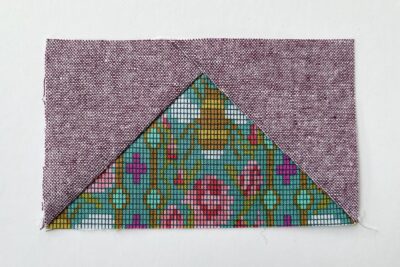
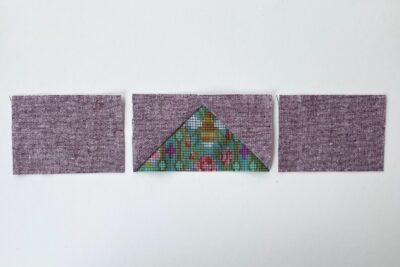
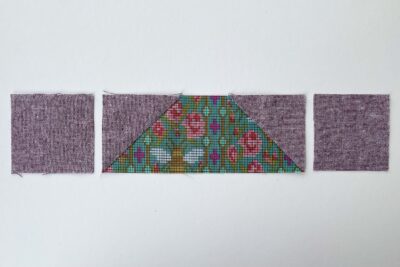
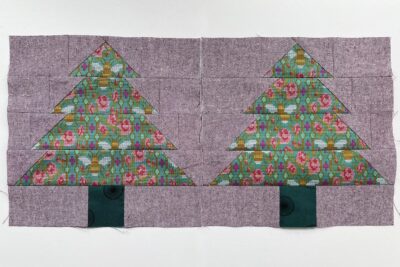
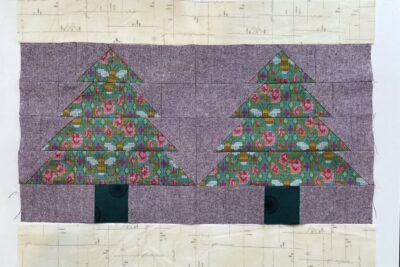
- Arrange the four rows from steps 13-16 plus one 10½” x 2½” rectangle unit from steps 9-12, using the photo as a guide. Sew them together to complete one tree block.

- Repeat steps to make a second tree block. Press both blocks well.
- Now sew the two blocks together, being careful to match up the seams.
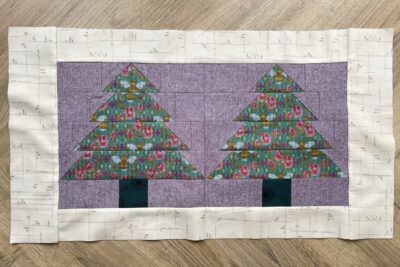
- Take two cream 20½” x 2½” rectangles and sew them to the top and bottom edges of the pillow block.
- Then take two cream 3½” x 14½” rectangles and sew them to the left and right edges of the pillow block to complete the patchwork pillow front. Press well.

Quilting:
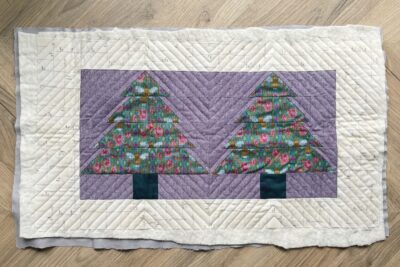
- Now it’s time to make a quilt sandwich. Place your light backing fabric (right side facing down) with your batting on top, then add the patchwork pillow front with the right side facing towards you. Make sure all the layers are smooth and flat then baste the layers together using your preferred method.
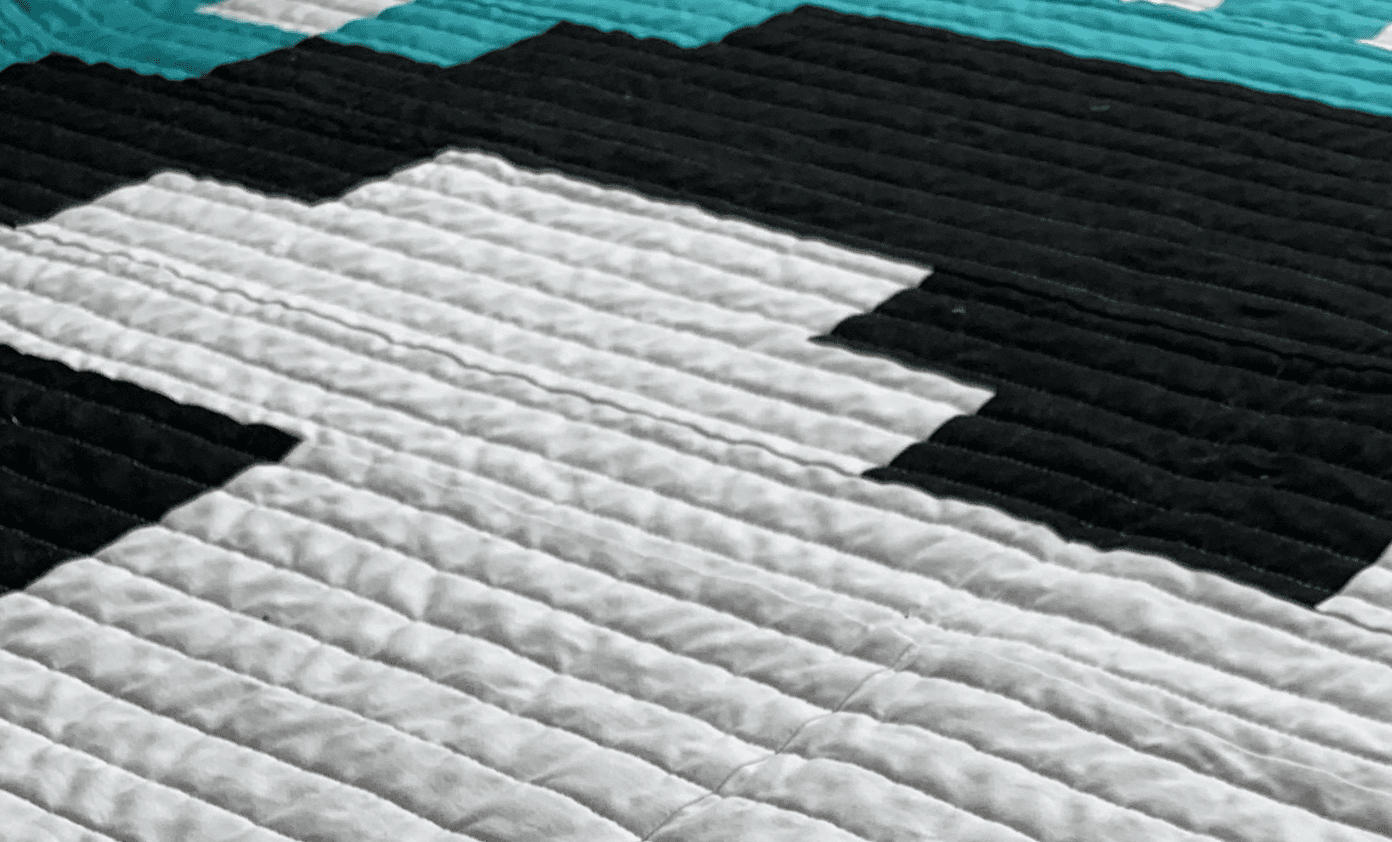
- Quilt as desired. I have used straight line quilting in pale purple, spaced at ½”, echoing the diagonal lines of the two pine trees, and hand quilted, in dark green, upside-down Vs randomly spaced inside the trees to add a “pine tree” texture. Other quilting ideas: vertical straight lines across the whole pillow front or free motion quilting inside and outside the trees using a different motifs in each area.
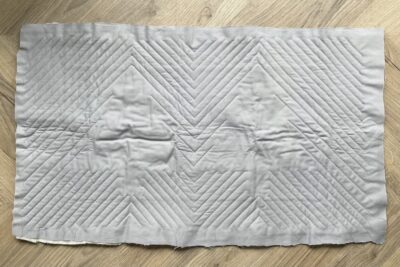
- Once you have finished quilting, trim off the excess backing fabric and batting, and square up your pillow block if required.
Finishing:
- Take one cushion back 16½” x 14½” rectangle and hem one short edge by pressing the raw edge to the wrong side by ¼” then again by another ¼”. Press well and sew. Then repeat for the second cushion back 16½” x 14½” rectangle.
- Pin or clip the cushion back pieces to the quilted block, right sides together, all around the four sides.
- Sew around all four edges using a ¼” seam allowance, securing the start and finish with some back-stitching.
- Trim the corners, turn the pillow cover the right way out, carefully poke out the four corners and then press.
- Stuff with an 24” x 14” pad and enjoy your new Twin Pines pillow!
About the Designer

Amy lives in the north of England with her husband and son. When she’s not sewing and quilting, Amy can usually be found baking or reading. You can find her on Instagram @amyatthegate
Also Designed by Amy
Straight Line Quilting | Not so straightforward…in a good way


The link to the Peeking Reindeer pattern actually directs to the Twin Pines pattern. Please update the link; I’d love to make this pillow for my grandson. Thank you!
I’ve updated it, but you can also use the search box and just type in reindeer. It pops right up.
Pretty pillow and pattern. Those fabrics are so colorful.
This is so adorable! Thanks for sharing it!