How to Make a Tulip Wreath Perfect for Spring
Create a fun spring Tulip wreath perfect for Spring with our free Tulip Wreath Tutorial.

Before I finish blogging about my trip to the Netherlands, I thought I’d pop in here quickly with a bit of Spring “How to make a Tulip Wreath” Project.
Sadly I had to settle for fake tulips as real ones would not last more than a day, but it made for a quick and fun project.
This wreath is quite simple to make; all you need to do is glue some silk tulips to a grapevine wreath form. I added a bit of burlap ribbon to my wreath, but you can use any ribbon that you like if burlap is not your style!
Can this Wreath be Used Outdoors?
I have a covered porch, and my wreath has always been fine outdoors. However, if you do not have a covered porch, I would not recommend placing this wreath outside.
How to Make a Tulip Wreath
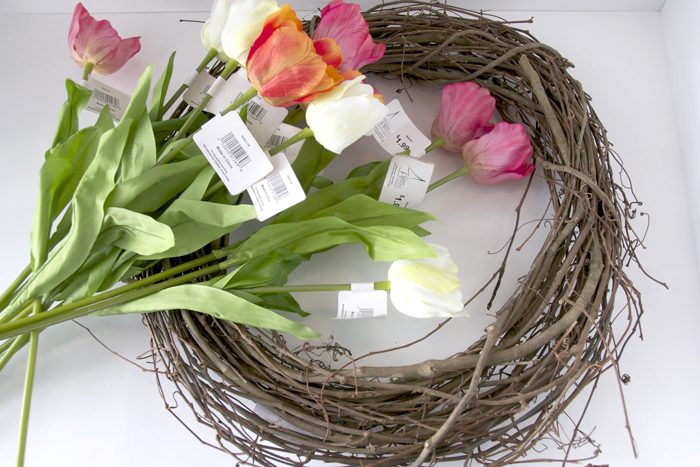
Supplies
- Grapevine Wreath
- Approx 20 tulip stems- I found mine 1/2 off at a local craft store (Dee’s for those of you local) watch for sales they get marked down frequently.
- Wire cutters
- Burlap ribbon in 2 widths (3″ and 1″)
- Floral wire
- Hot glue
How to Make a Wreath Bow out of Burlap Ribbon
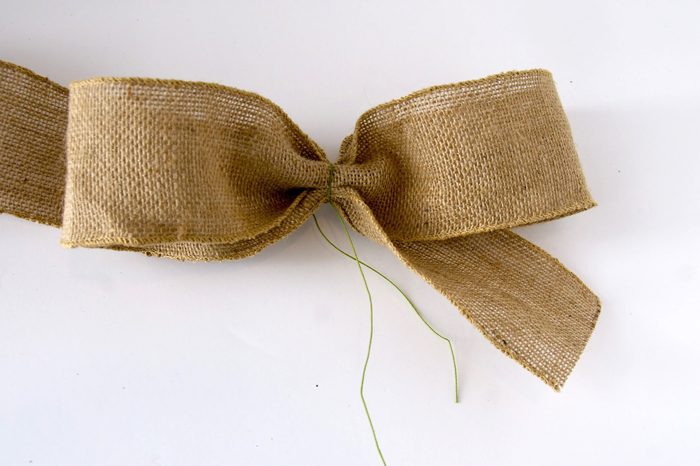
I think it’s easiest to begin by making the bow, attaching it, and arranging the flowers around it.
To make the bow, fold the ribbon over itself twice. You are then using floral wire pinch the middle to shape it. Repeat this step so that you have a ribbon with four loops.
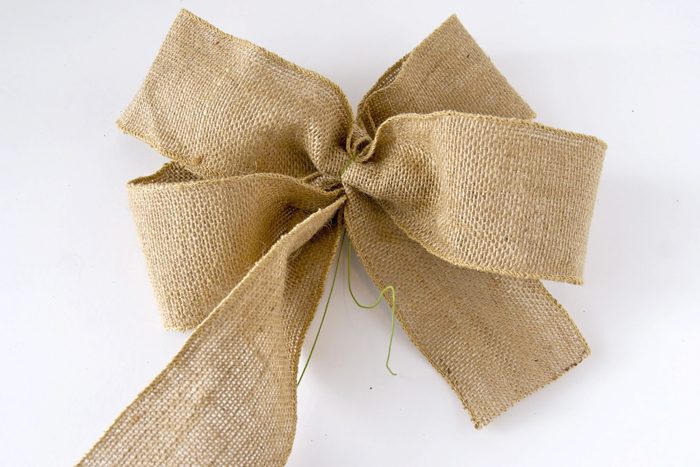
Do the same thing for the 1″ wide ribbon. Attach the smaller bow to the top of the larger bow.
Place the completed bow onto the wreath using floral wire. Don’t glue it down yet.
How to add Tulips to the Grapevine Wreath

Using wire cutters, cut a few tulips stems down. Ju t cut a few at a time, place them on the wreath, then cut a few more. I ut mine all to varying lengths.

Attach a few of the tulips to the grapevine wreath using hot glue. Begin by clustering them around the bow. Tuc them under the bow and glue in place. Leave the leaves on a few of the tulip stems.
Move around the wreath gluing on tulips as you go.

After you’ve placed about eight tulips, start putting tulips on the other side of the bow and working in the opposite direction. Place bout eight more tulips.
Finishing
With your remaining tulips, fill in the gaps in the wreath. Hot glue all of the tulips down again when you have the wreath looking like you want (the stems will be poking into the grapevine wreath and should glue down easily).

To complete the wreath, take some of your 1″ wide burlap ribbons and loosely wrap them around the wreath, tucking the ends into the bow.


Hi Melissa
I absolutely adore your tulip wreath, simply elegant and stunning. What a fantastic DIY idea and so beautifully shown 🙂
Thank you so much for sharing, can’t wait to give it a go! Hope you don’t mind me linking to this post for awesome DIY’s to try this spring. x
I love your tutorial! I also made one on my own blog and I featured your tutorial on my site. http://gallantlady.blogspot.com/2015/01/diy-spring-wreath.html#more
So glad you like it! thanks for sharing!
I am totally in love with that wreath. Loving it!
Your wreath is sooo pretty! I have been looking for something for my front door and this is it. I am off to the craft store to make my own. Thanks for sharing.
Good luck!! I’m so glad you can use the tutorial !
What a beautiful spring wreath. Well done!
That is stunning! I love the colors and tulips are my fave!! Would love for you to stop by and link up to the Pomp Party!
http://jill-createcraftlove.blogspot.com/2012/04/pomp-party-15.html
Jill @ Create.Craft.Love.
I made mine today! Not as beautiful as yours but I am quite proud of it. I could not find the burlap after weeks of searching so settled for another type of wired ribbon. Thank You for the inspiration!
I’ve featured this post on my Misc. Finds Monday:
http://collettaskitchensink.blogspot.com/2012/04/misc-finds-monday-41612.html
Colletta
What a gorgeous wreath…I think it would be perfect for my front door! Thank you for sharing!
Project Housewife
http://projecthousewifebyrachael.blogspot.com
That is gorgeous! And so simple. I love it.
This is so eye-catching! The simplicity is stunning! Also, thank you for taking the time to do this precise, thorough tutorial! I’ll be out looking for some tulips first thing tomorrow. : )
I love the wreath. I actually have a question about the adorable lens cap cozy you made last month….where did you get the hooks to attach them to the camera strap? I can’t seem to find them anywhere.
so pretty! I have been on the hunt for the perfect spring wreath, but the ones I like are over $35! I might just need to may one myself.
Beautiful. I’m featuring this at somedaycrafts.blogspot.com
So very pretty. You’ve made it look so easy I may just have to try it!
Very beautiful! I would make one but I’m trying not to cover my No Soliciting sign. What I really need to make is a beautiful No Soliciting sign!