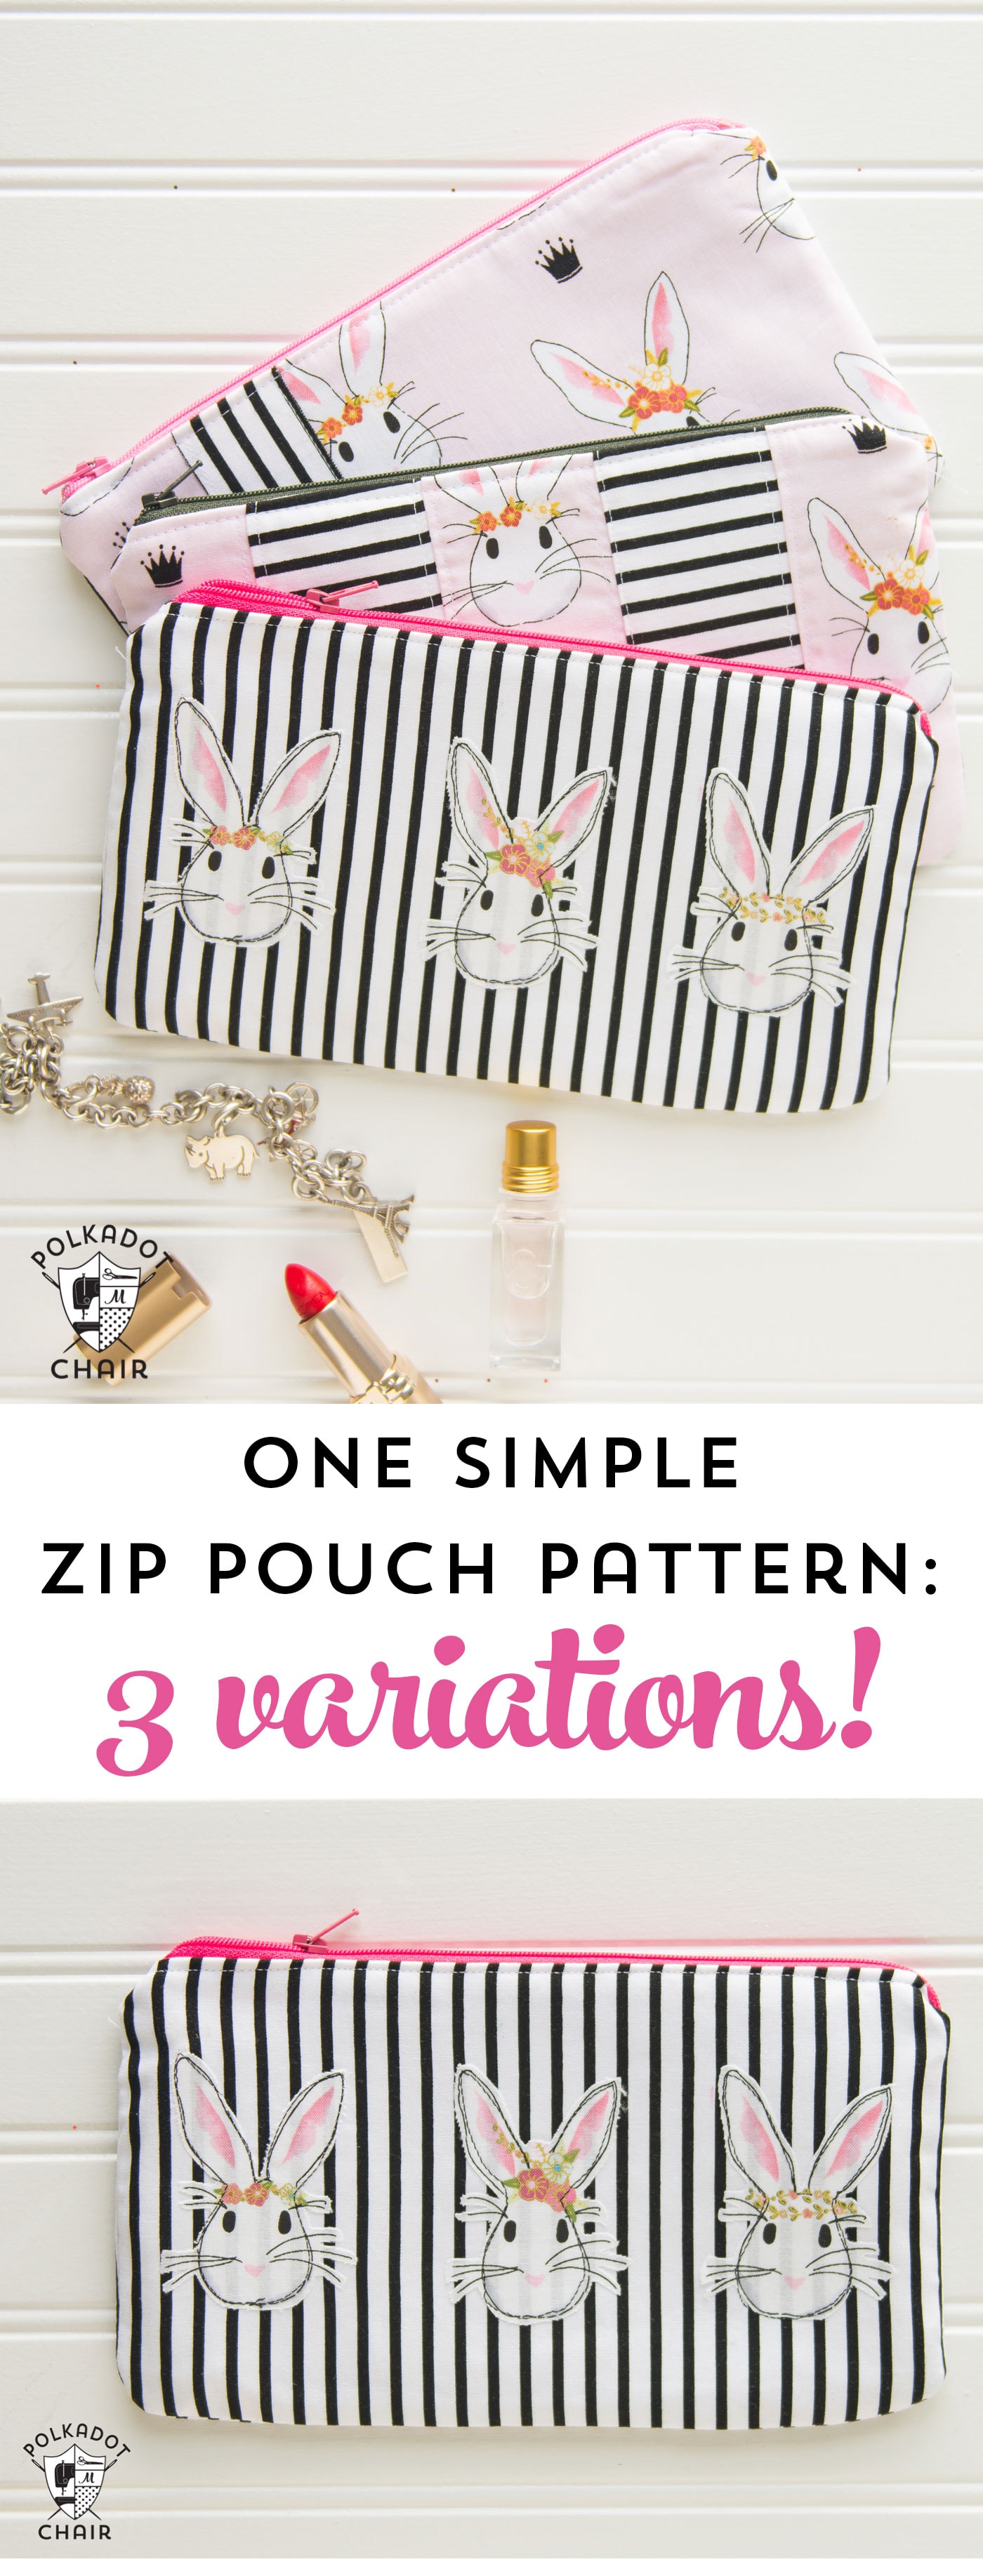
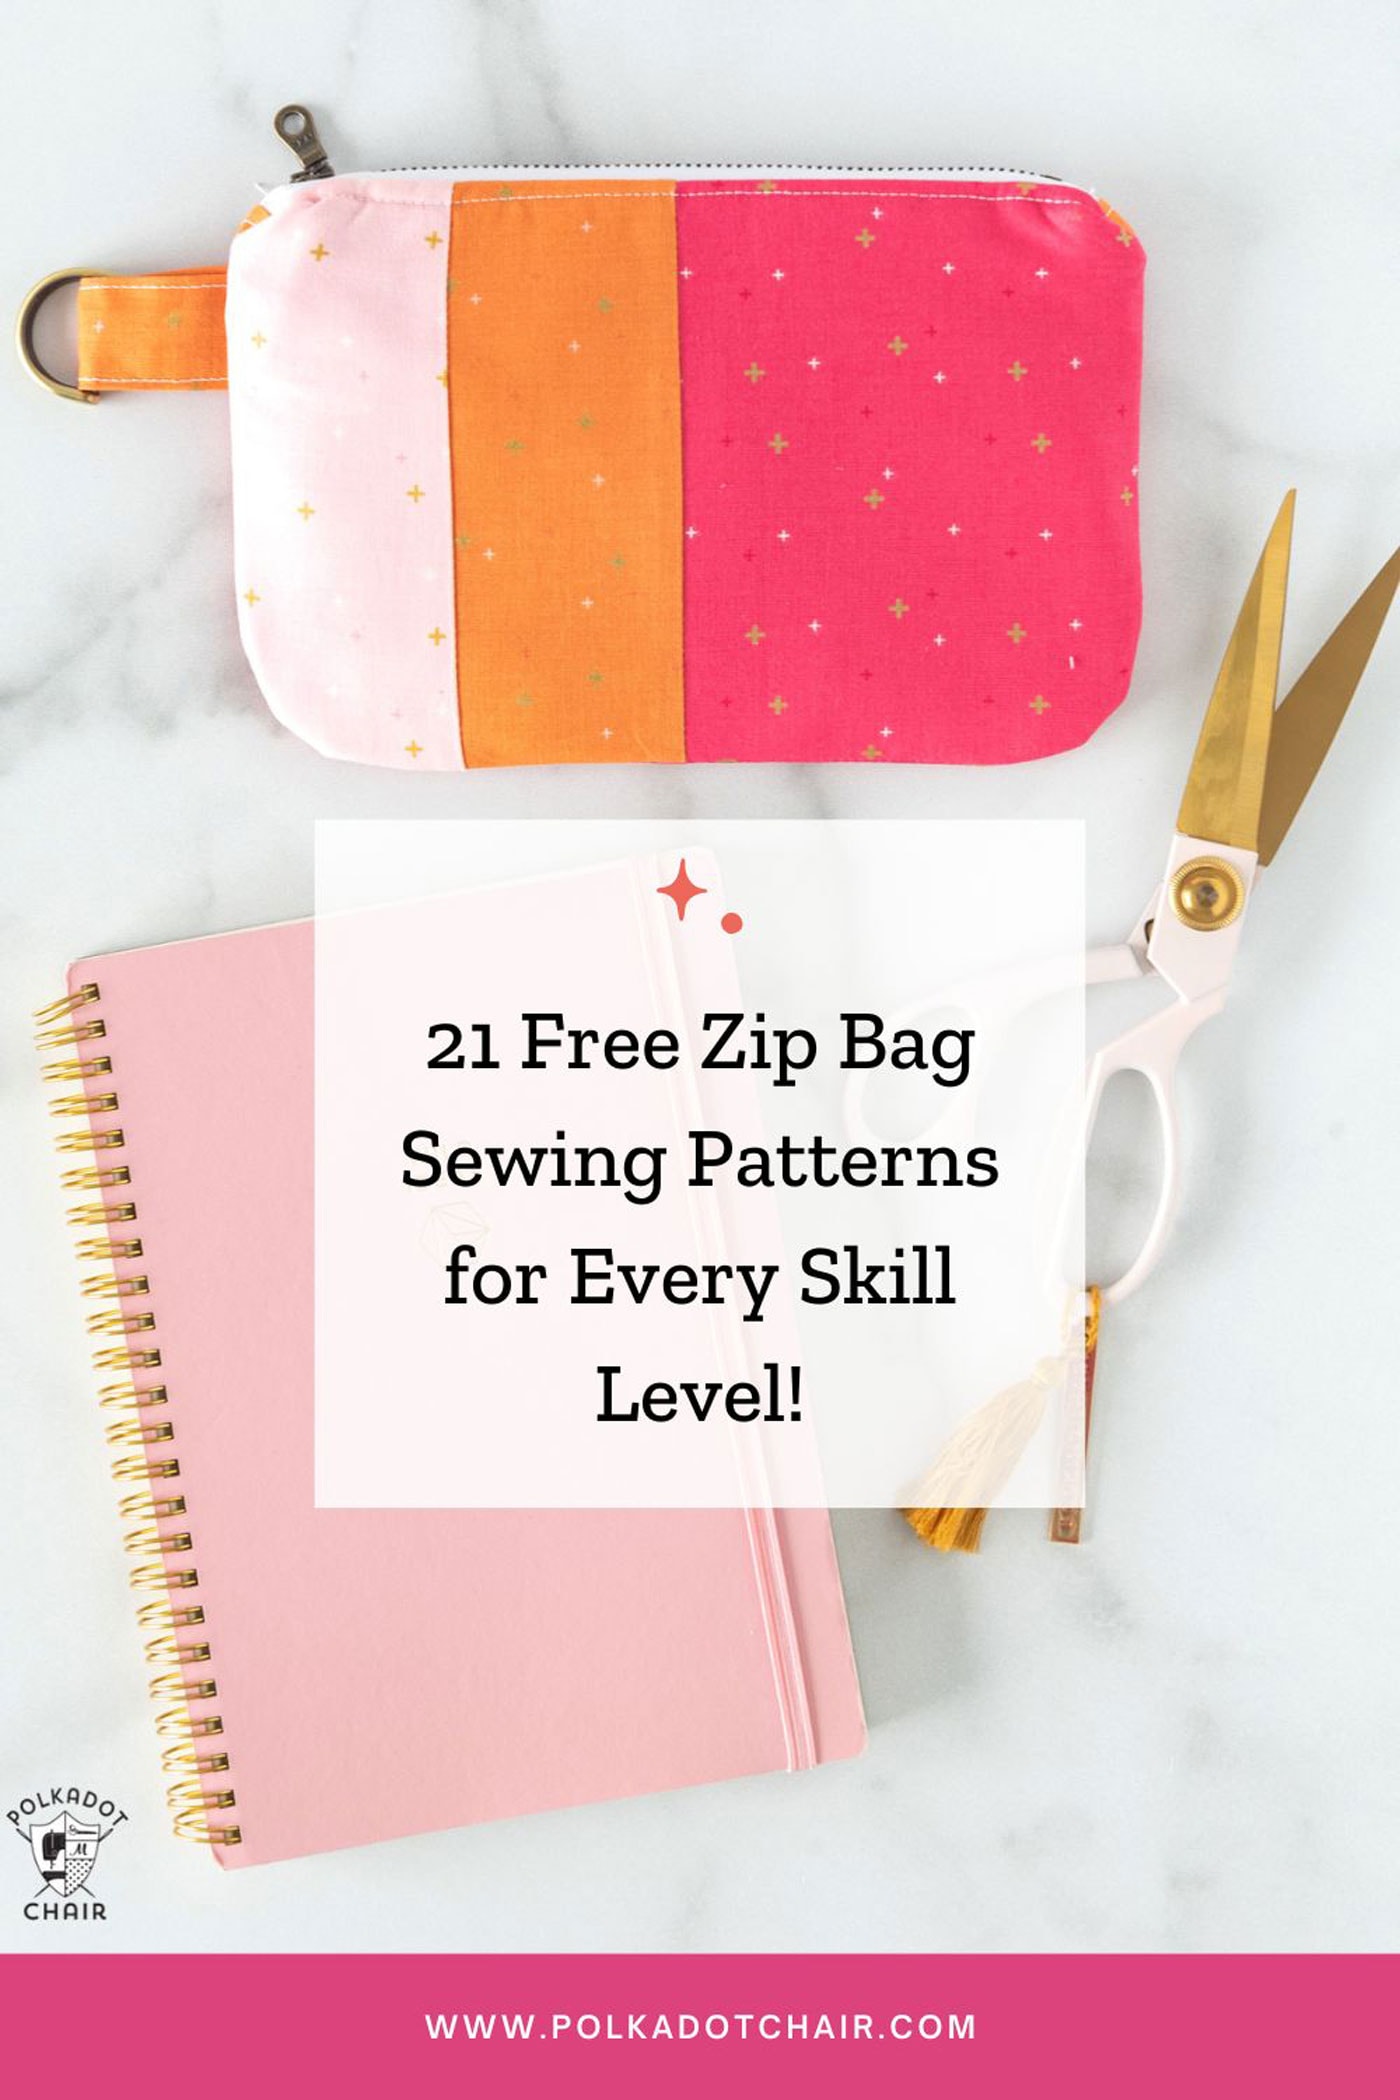
One Simple Zip Pouch Sewing Pattern 3 Ways
Today, I’m going to show you how to take a Simple Zip Pouch Sewing Pattern and make minor modifications to create three distinct zippered pouches. If you like this project, then you may also like this Curved Top Zip Pouch Sewing Pattern.
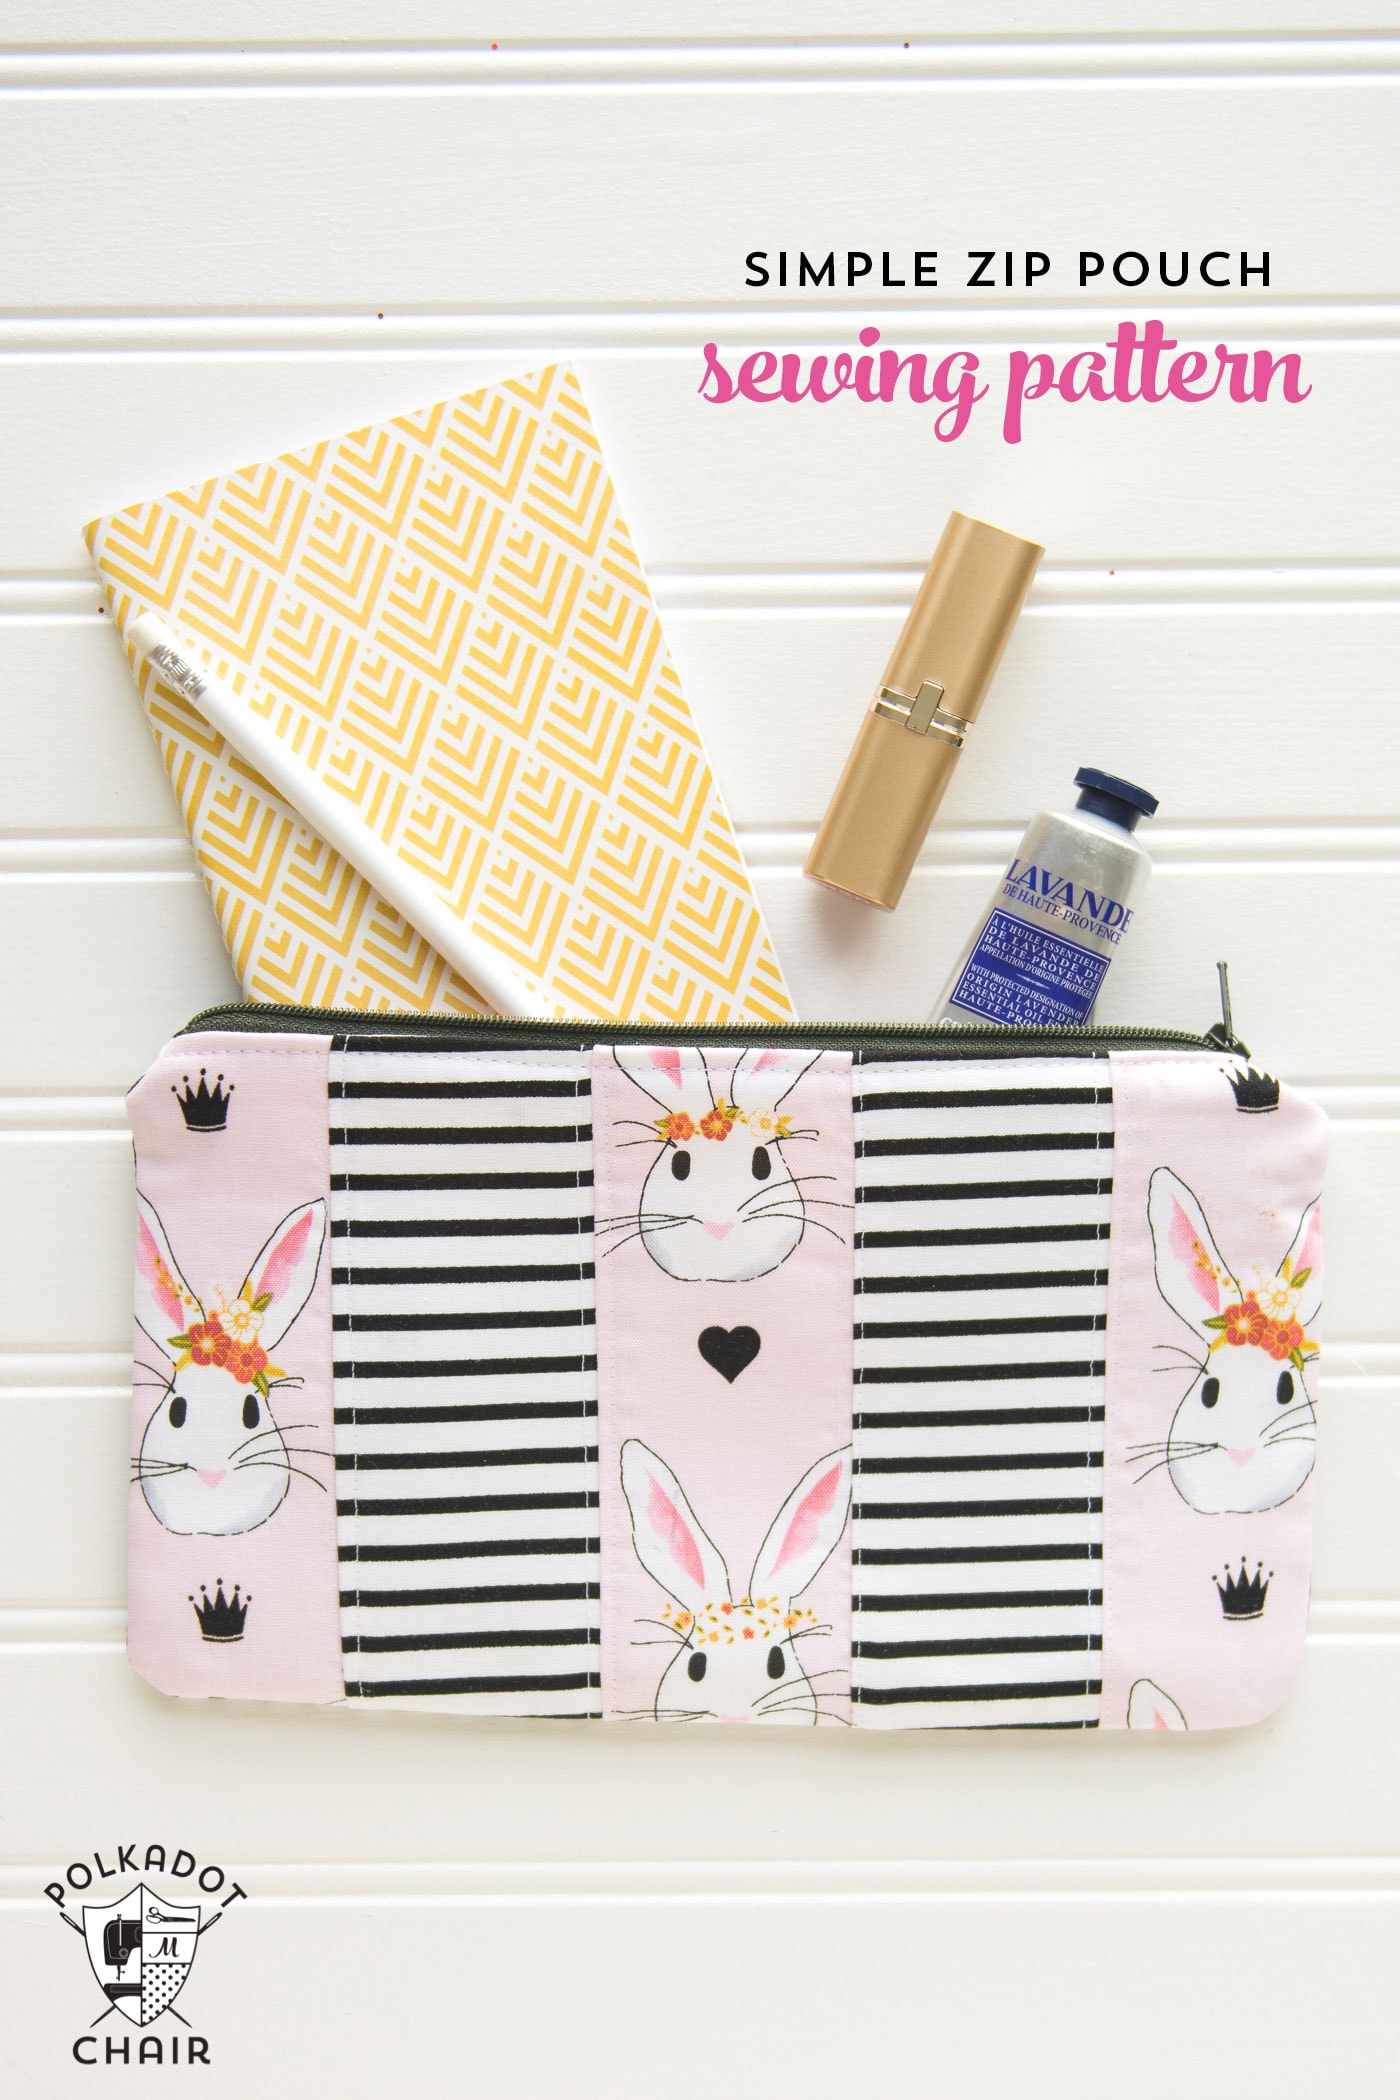
The pouches I’m showing you today are sewn from my most recent fabric line, Wonderland, by Riley Blake. If you’ve been reading this blog for a while, you know I adore making zip pouches. I make them all the time.
Sometimes I tell myself I should try something else, but it doesn’t last long. These little zip pouches are fun to sew and very useful. They make great gifts for both adults and kids!
Today, we will start with a straightforward pattern and make minor adjustments to give you 3 different looks.
One Simple Zip Pouch Sewing Pattern 3 Ways
supplies
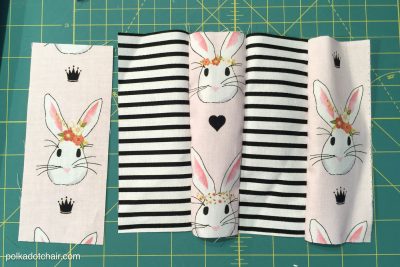
- 1-3 Fat Quarters Fabric for Outside in various prints
- 1 Fat Quarter Fabric for Lining
- 1 9″ zipper
- Heat N Bond Lite
- Fusible Fleece
- Lightweight Fusible Interfacing.
Instructions
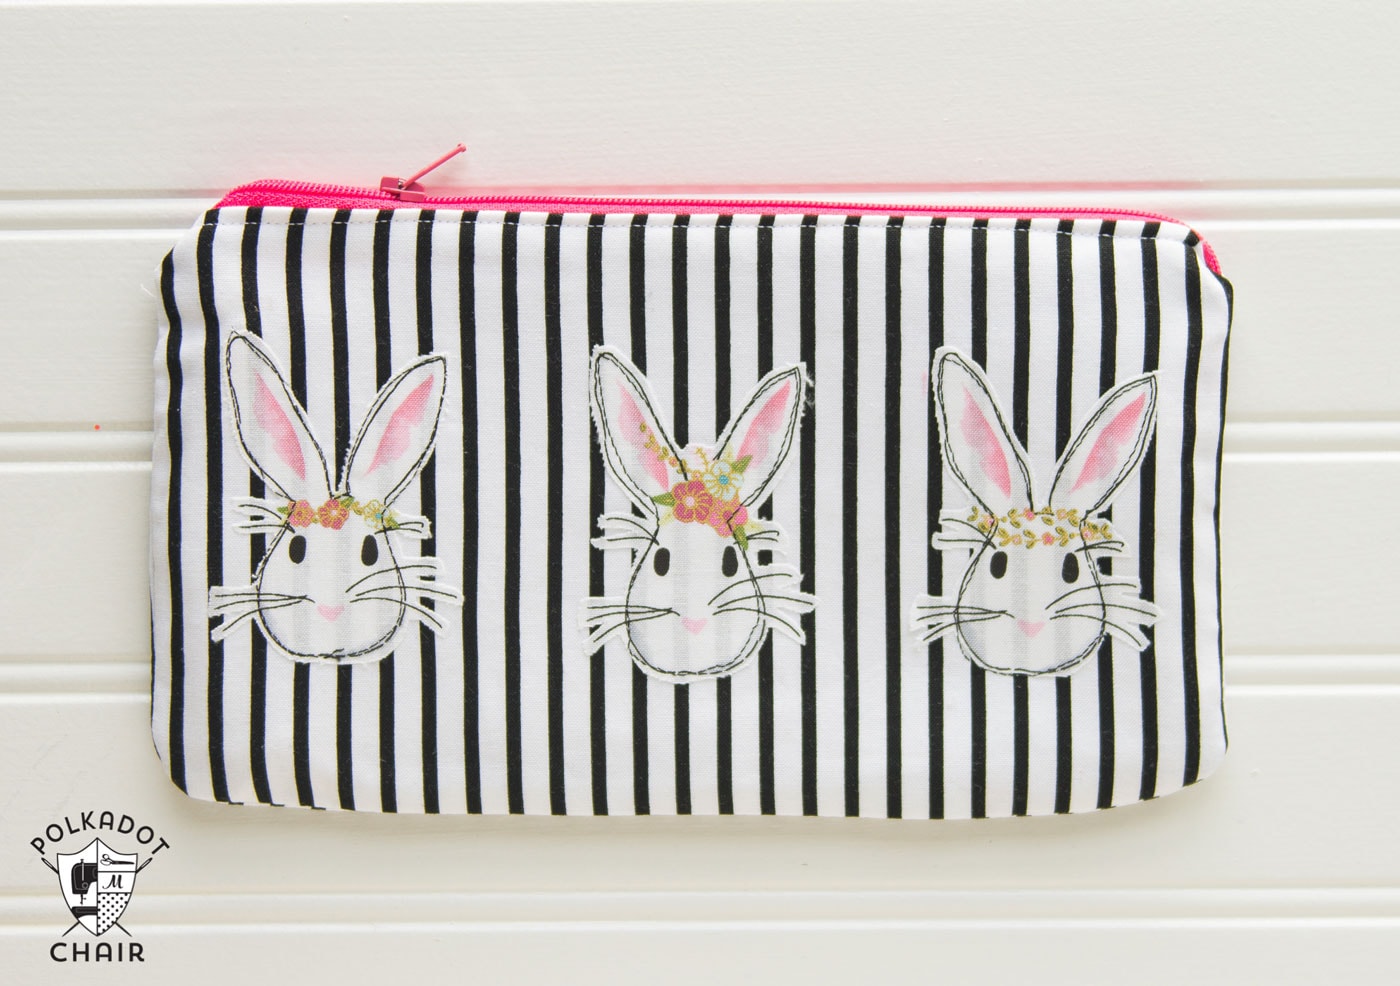
Simple Applique Pouch Instructions:
- Cut 2 pieces 6″ x 10″ from lining fabric, pouch outside fabric, fusible fleece, and lightweight interfacing.

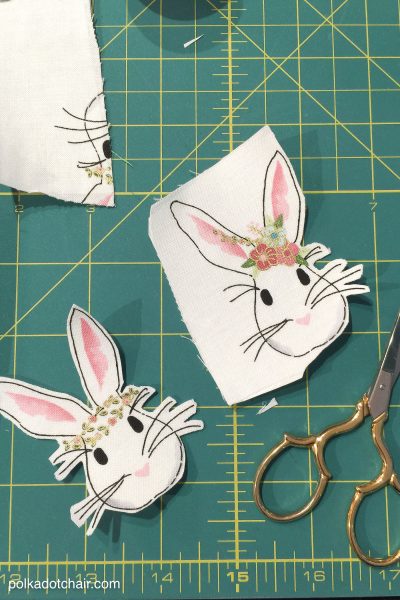
- Roughly cut out three bunnies (or another image if you’re using a different fabric line). Iron the Heat n Bond Lite to the wrong side of the bunny fabric, then cut out the bunnies more precisely.
- Next, peel off the backing from the interfacing and arrange the bunnies on the front of your 6×10 piece of pouch outside fabric. Press in place.
- Apply lightweight interfacing to the wrong side of both pouches’ outside pieces.
- Put the black thread in your machine and stitch around the edge of each bunny along the outline already on the fabric.
- Skip to the POUCH construction step at the end of this post.


Simple Striped Zip Pouch Instructions:
- Cut 3 pieces each 2 1/2″ x 6″ from fabric A
- Cut 2 pieces each 2 1/2″ x 6″ from fabric B
- Cut 1 piece 6″ x 10″ from pouch outside fabric
- Cut 2 pieces 6″ x 10″ from pouch lining
- Cut 2 pieces 6″ x 10″ from Fusible Fleece AND Lightweight interfacing
- Stitch Fabric A to Fabric B using 1/4″ seam allowances. Press seams. Trim to 6″ x 10″.
- Apply lightweight interfacing to the wrong side of the sewn pouch outside piece and the cut pouch outside piece.
- Top stitch along the seams between Fabric A and Fabric B
- Skip to POUCH CONSTRUCTION STEP
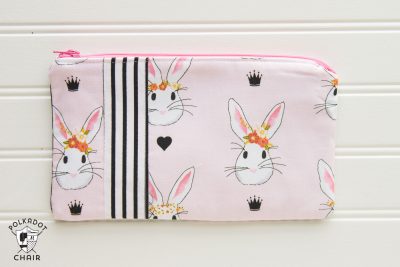
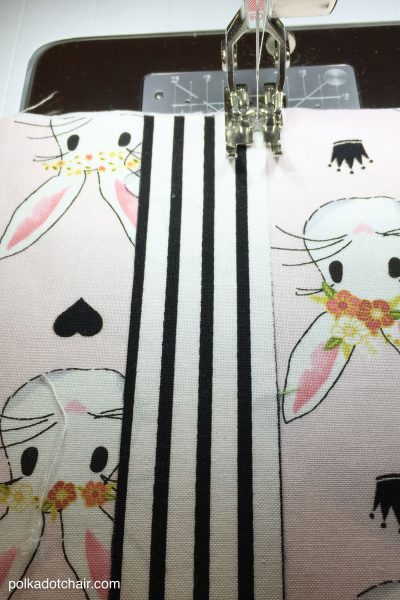
Zip Pouch with Accent Stripe Construction Steps:
- Cut TWO 6″ x 10″ pieces each from Pouch Outside Fabric; Pouch Lining Fabric; Lightweight Interfacing; Fusible Fleece
- Cut one 1 1/2″ x 6″ piece from a contrast fabric
- Cut one 1 1/2″ x 6″ piece from Heat N Bond Lite
- Press the Heat N Bond Lite onto the wrong side of the 1 1/2″ wide accent piece. Remove the paper backing and press the pouch’s outside piece into a location you like.
- Apply lightweight interfacing to the wrong side of the pouch outside pieces.
- Topstitch along the two edges of the pouch accent piece.
- Skip to POUCH CONSTRUCTION STEP
Zip Pouch Sewing Pattern Construction Steps:
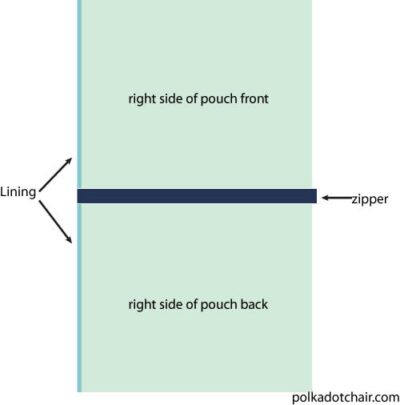
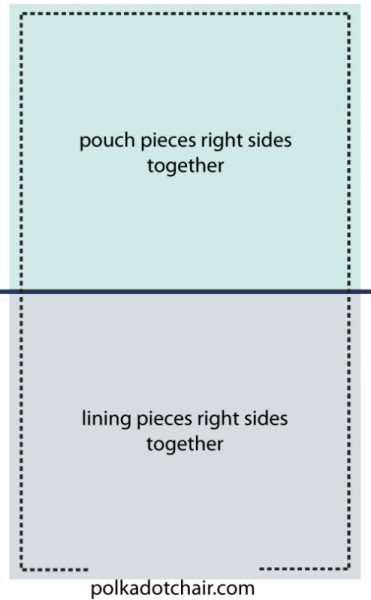
- Pin the right side of the zipper to the right side of the pouch front piece. Pin the wrong side of the zipper to the right side of one of the lining pieces. Stitch using a zipper foot. Repeat for the other side of the zipper. Cut off any part of the zipper that is longer than the pouch.

- Press the pouch pieces away from the zipper and topstitch along both sides of the zipper (this will keep the lining from getting caught in the zipper).

- Unzip the zipper. Pin the pouch lining right sides together, and the pouch front and back pieces are right sides together. Pin the zipper towards the lining pieces.
- Stitch around the perimeter of the pouch, leaving a 3″ opening at the bottom to turn it right side out.
- Clip the corners and turn right side out. Stitch the opening in the lining closed.
- That’s it!!

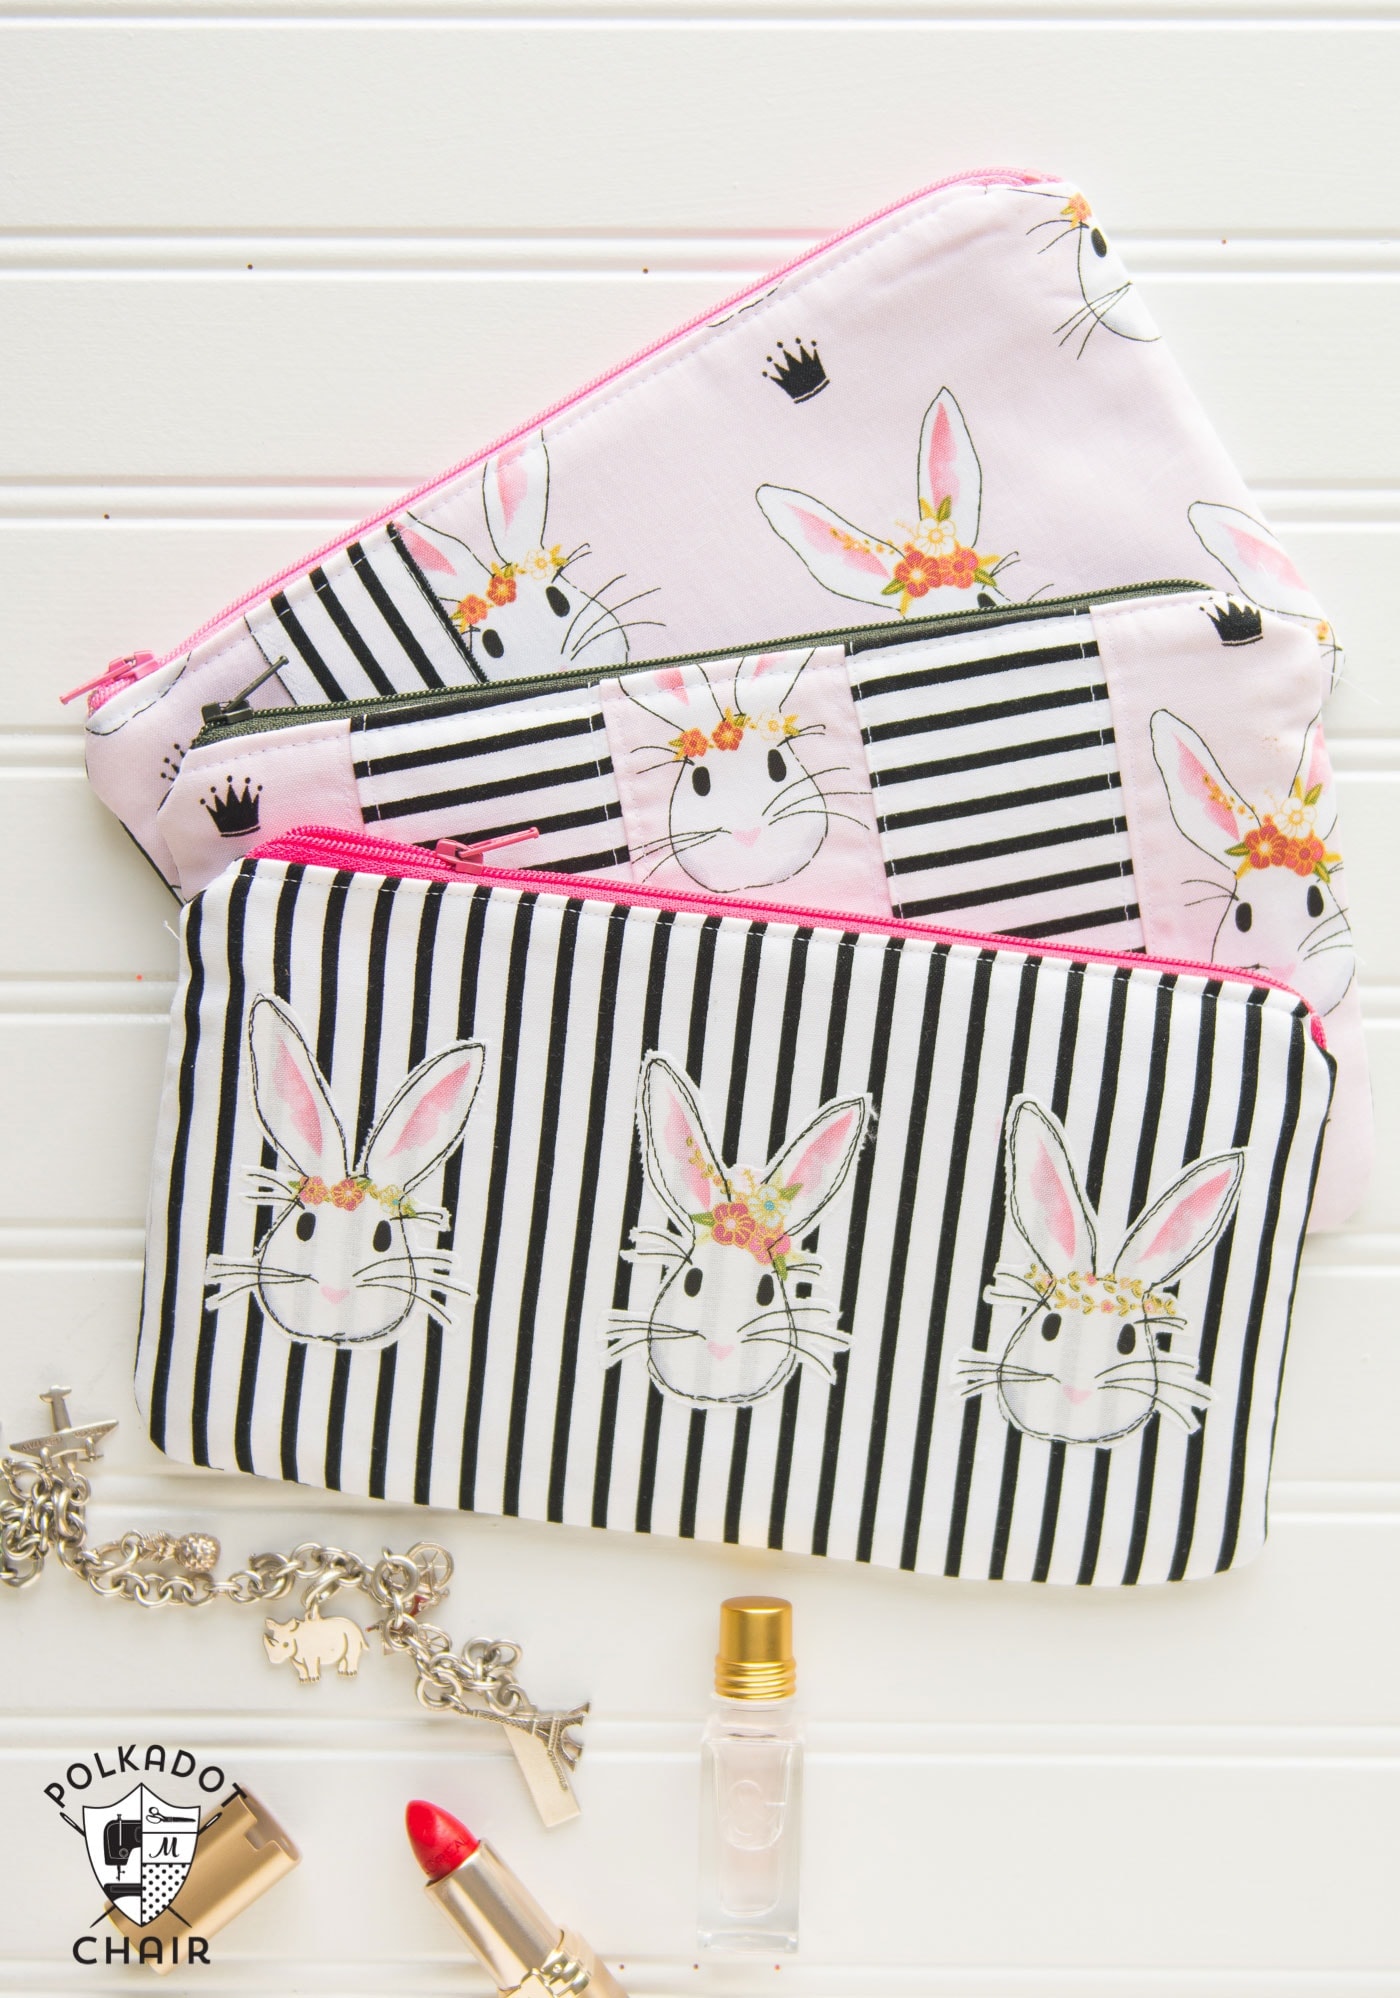
Look at all the fun ways you can change up the look of your pouches!!
You May Also Like:
These are adorable! I must have missed it, but when do you apply the fusible batting, and to the lining or to the outside fabrics? Thanks so much!
I also did not see instructions for applying the fusible fleece or the interfacing to the main fabric or the lining fabric. Please advise. These bags are adorable! Thanks.
Don’t you need to turn under the fabric so raw edge doesn’t show befor sewing in zipper?
No, You stitch the zipper to the fabric right sides together. It turns itself.
I think I’m missing a part. How do I attach the fusable fleece? The instructions jump from making the front piece to attaching the zipper to a back peice we never worked on. Thanks in advance.
It gets ironed onto the lining in the prep steps.
For those who come behind me: The fusible fleece directions don’t seem to show up here but they are on her other pouch post: https://www.polkadotchair.com/fat-quarter-zip-pouch-sewing-pattern/