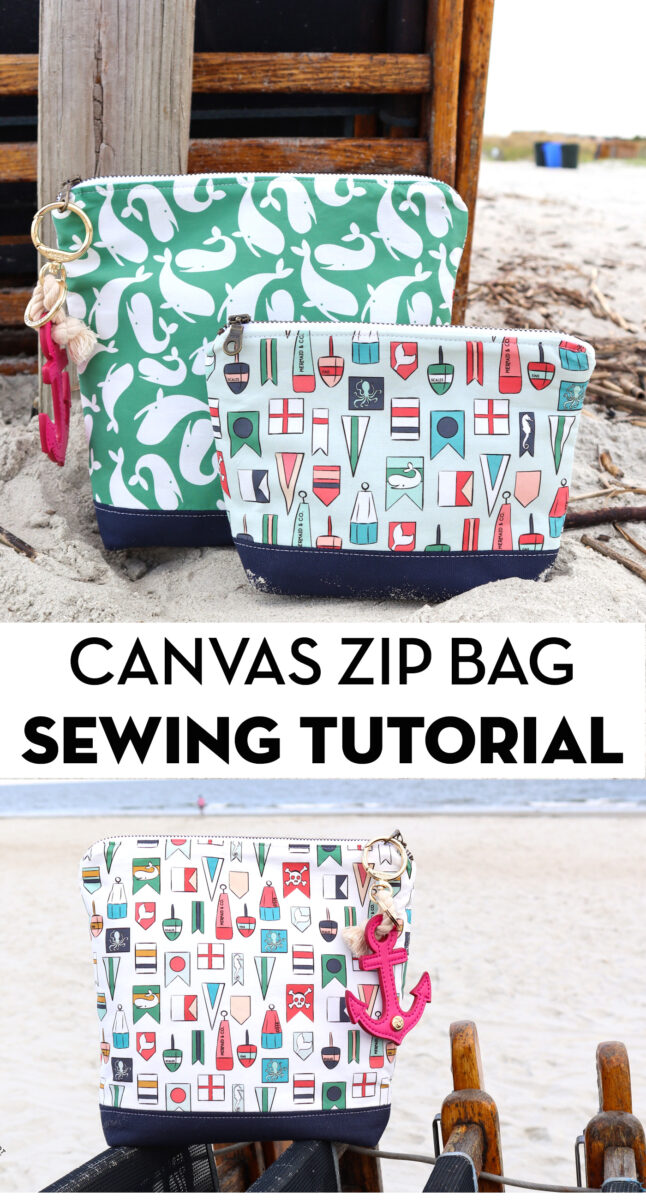
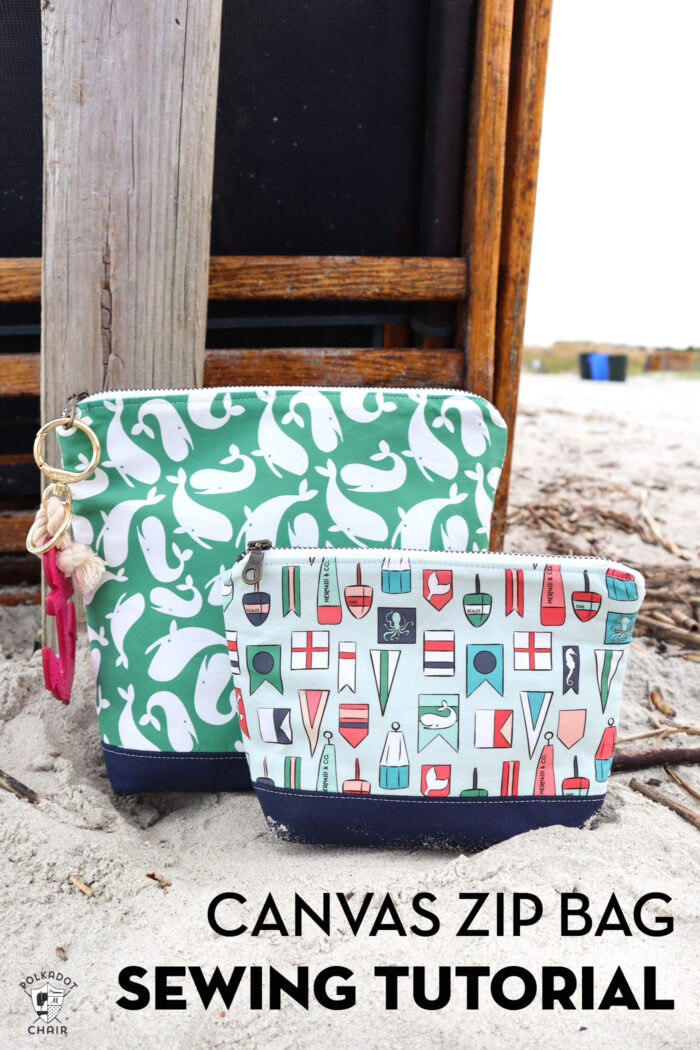
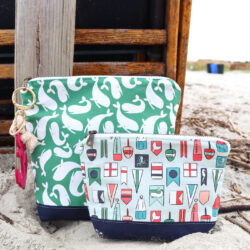
Canvas & Fabric Lined Zip Bag Pattern
Create a set of cute and useful zip bags using our free instructions. These bags feature canvas bases and flat bottoms, which make them sturdy and useful. This bag is simple to sew and is the perfect weekend sewing project!
If you’ve followed me here for a while then you know that I LOVE to make zip bags. They are so easy to make once you know the “trick”. You can seriously make one in an hour once you get the hang of it.
Zippered Bag Pattern Options
I love that there are so many ways to change a simple zip bag pattern to customize it. If you’ve never made a zip pouch (or make-up bag) before, I recommend starting with this simple pattern. There’s even a step-by-step video for the bag on my Instagram profile. Just look for the “Bag Sew Along” highlight.
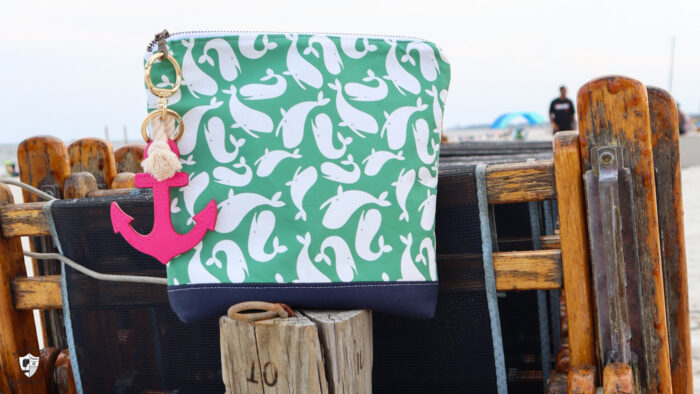
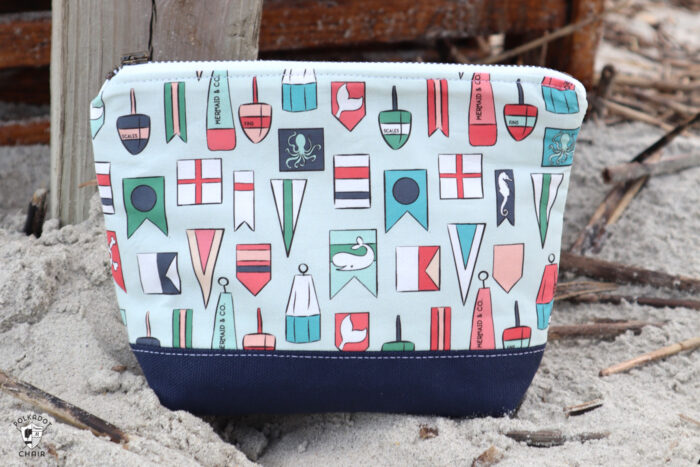
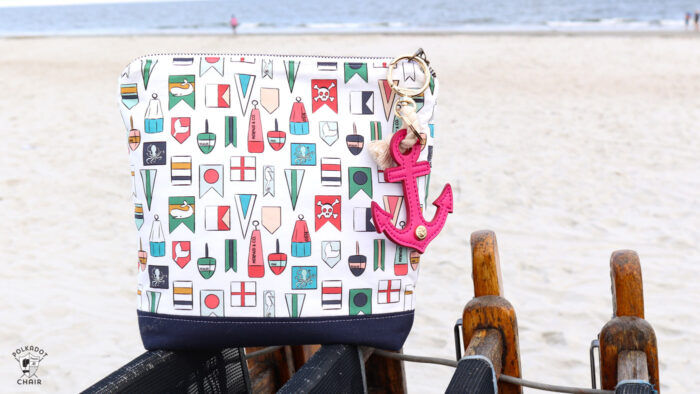
The zip bags featured in today’s tutorial feature a flat bottom and a canvas base. The canvas base gives them a nice shape and makes them a bit more sturdy. (If you’d like to carry heavier items).
You can sew these bags out of laminate fabrics as well, which would make them “wipeable.” If you’d like to do that, just read through the changes you’ll need to make when sewing with laminates and follow the directions below.
The bag pattern is in two sizes. Both sizes have the exact same directions. You just start with different pattern pieces.
About the Fabric
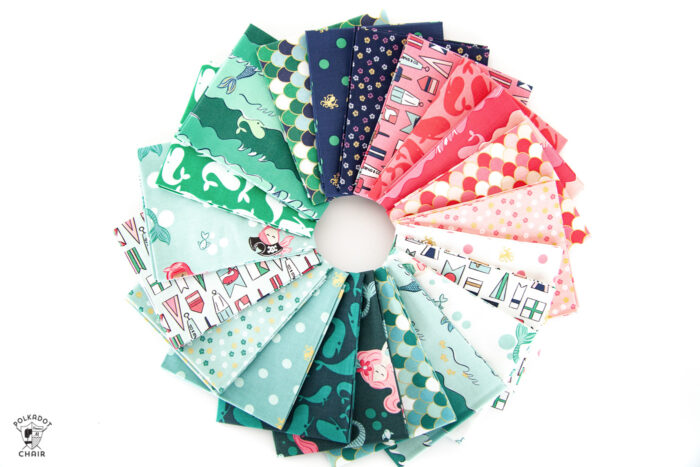
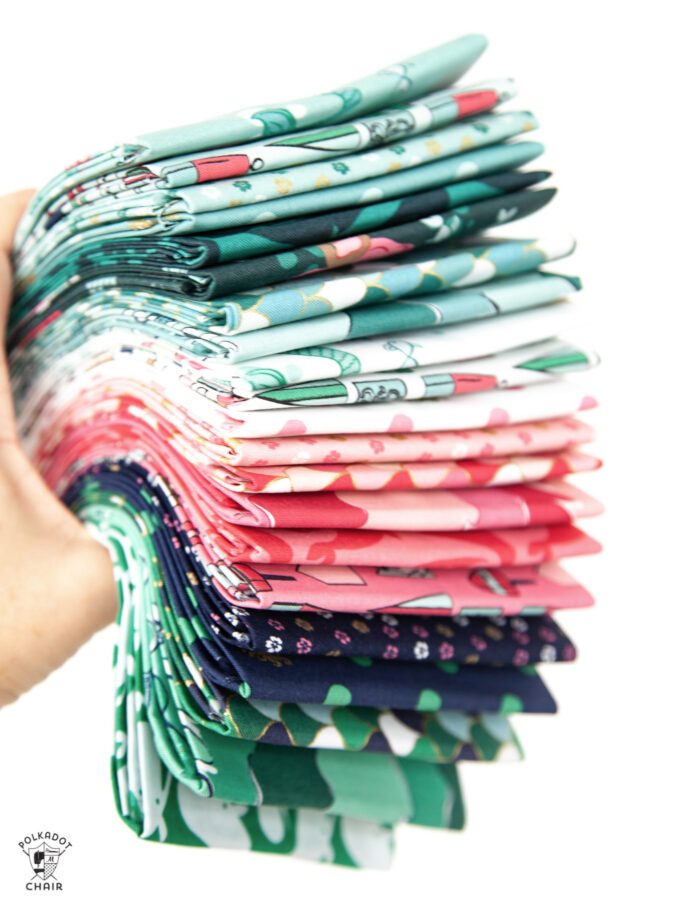
The fabric on these bags is from my new fabric collection with Riley Blake Designs, Ahoy! Mermaids.
The bags are sewn using 100% quilting cotton. Quilting cottons are wonderful to use for bags because they have a high thread fount. They also have a “sizing” applied to them during the manufacturing process which gives the colors a bright pop and the fabric a nice sheen.
The base of the bag is sewn from canvas. I just used Navy blue canvas that I purchased by the yard at my local fabric store. If you think the canvas is too stiff to work with you can prewash it. Otherwise, I do not prewash any of my fabrics before I sew.
I sew on a BERNINA sewing machine and have not ever had any problems sewing canvas on my home machine.
Fabric and Canvas Zip Bag Sewing Pattern
Equipment
supplies
- 1 Fat Quarter Fabric For Bag Outside
- 1 Fat Quarter Fabric For Bag Lining
- 1 Zipper 7" zipper for the Small bag. 9" zipper for thr Large Bag
- 1/2 yard 20" Wide Fusible Fleece or another lightweight interfacing
- 1 piece Canvas at least 12" x 12"
Instructions
Cutting Directions
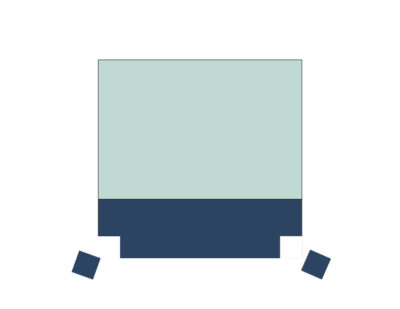
- For Large Pouch Cut:From Fabric:2 pieces 10" wide x 8" tall for outside2 pieces 10" wide by 10" tall for liningFrom Canvas:2 pieces 10" x 3"From Fusible Fleece:2 pieces 10" x 10"
- For Small Pouch Cut:From Fabric:2 pieces 5" tall by 8" wide for outside2 pieces 8" tall by 8" wide for liningFrom Canvas:2 pieces 3" x 8"From Fusible Fleece:2 pieces 8" x 8"
Step One: Prep
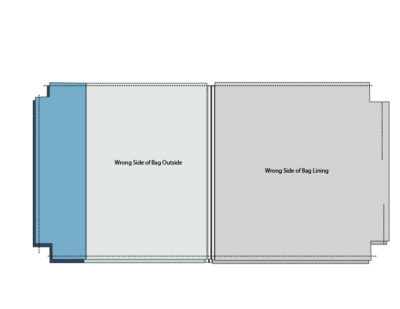
- Apply the Fusible Fleece interfacing to the wrong side of the bag outside and bag lining pieces.
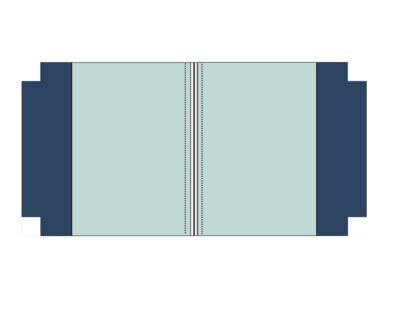
- Sew the canvas piece to the bottom of both of the bag outside pieces. Press seam open and topstitch on both sides of the seam.

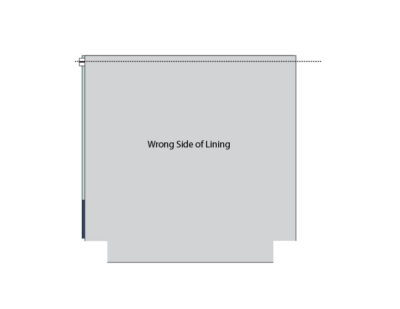
- Using a quilt ruler, draw a 1" x 1" square in the bottom corners of the canvas. Cut out.
- Using the same technique, cut a 1" x 1" square out of the bottom of the two lining pieces.

Step Two: Zipper
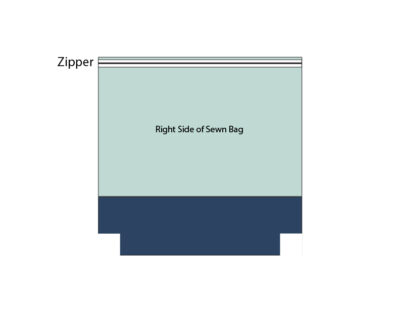
- Pin the right side of the zipper to the right side of the bag outside piece (if your bag has a front and a back, start with the front piece).
- Place the bag lining piece on top of this piece so that the wrong side of the zipper is facing the right side of the lining.
- Using a zipper foot on your sewing machine, stitch. Your seam allowance should be between 1/4" – 3/8" depending on the width of your zipper. Make sure you don't sitch too close to the zipper or you will not be able to unzip the bag.
- Repeat with the other bag outside and lining piece on the other side of the zipper.
- Press the fabric away from the zipper (be careful, metal zippers get very hot when ironed). Top stitch down both sides of the zipper.
Step 3: Assembly
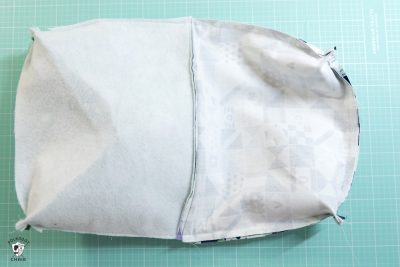
- Unzip the zipper.
- Bring the two bag outside pieces together, right sides facing. Pin. When you pin make sure the teeth of the zipper are folded twoards the lining.
- Pin the linig as well.
- Stitch around the perimeter with a 1/2" seam allowance. Make sure that you do NOT sew over the metal zipper. Leave a 2" opening in the bottom of the lining fabric. Do not sew inside the squares.
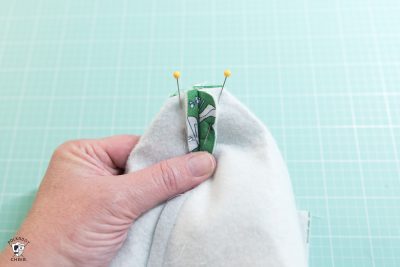
- Pinch the squares so that the seams are on top of each other. Sew with a 1/2" seam allowance. Repeat for all 4 squares.

- Turn the bag right side out though the opening you left in the lining.
- Press well and either hand stitch or machine stitch the opening in the lining closed.
Notes
You May Also Like
The “Seas” the Day Quilt Pattern (a nautical quilt pattern)
How to Make a Weekender Travel Bag