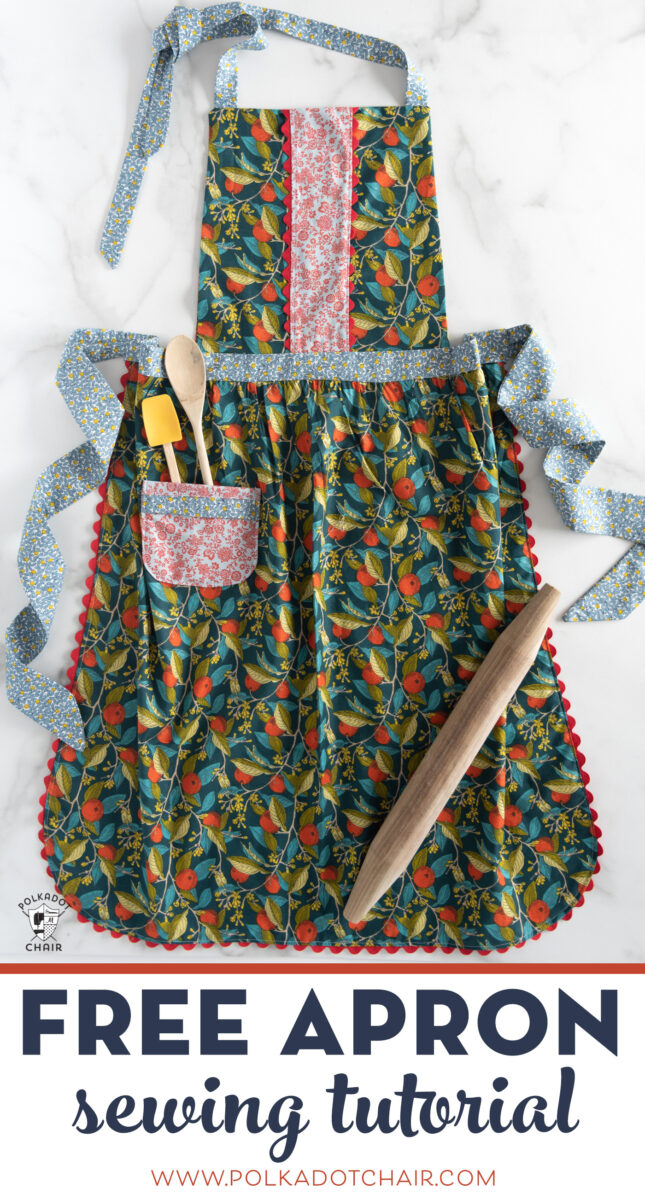
Learn How to Make an Apron with this Free Sewing Pattern
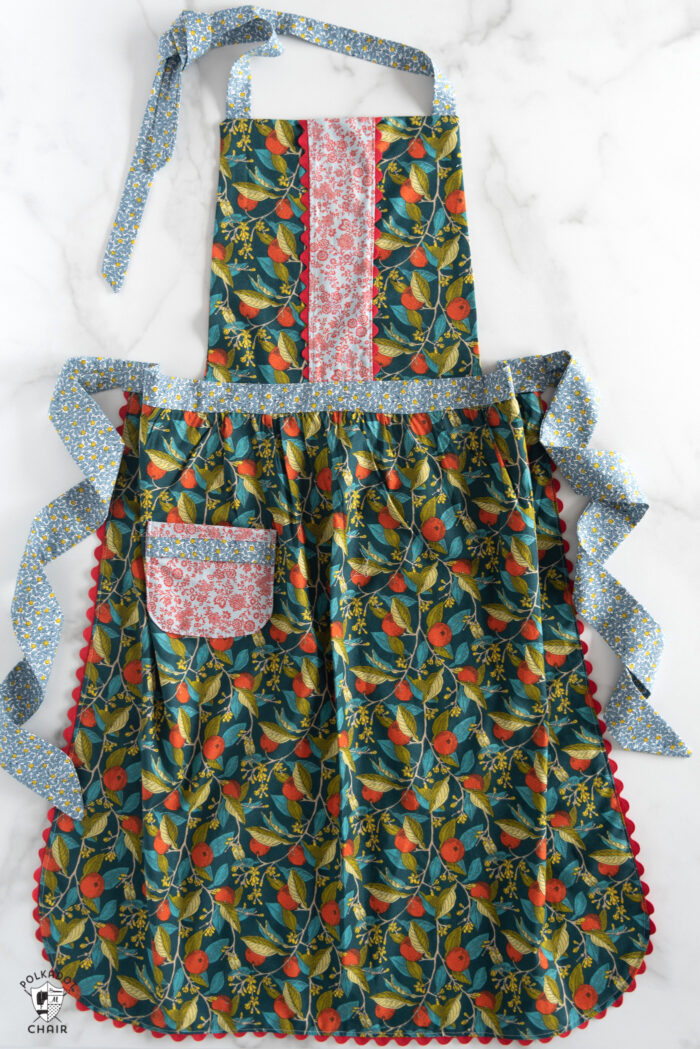
Learn how to make an apron with this free sewing pattern! This adorable apron tutorial is sized to fit most adults and would make a wonderful gift for your favorite cook!
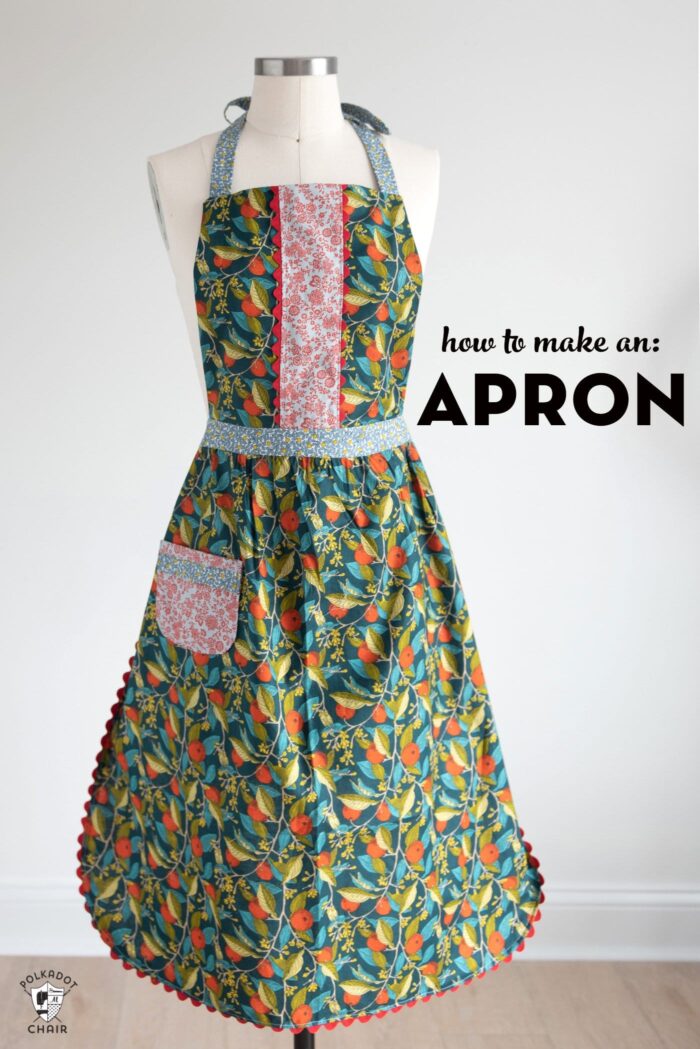
A couple of years ago, I created an apron sewing pattern sized just for kids. Since then, I’ve received several requests for a similar apron pattern but for adults. Today I’m happy to share with you how to make an apron, and a cute apron pattern sized just for grown-ups!
Apron Pattern Sizing
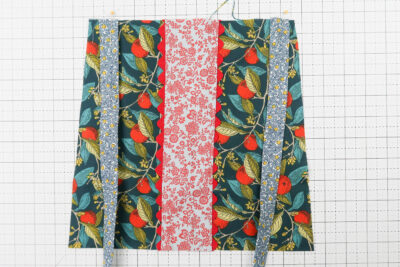
This apron is a bit of a “one size fits most” pattern. I am tall (5′ 9″) and about a size 8-10. I’ve got pretty broad shoulders, and this apron fits me very well. The mannequin in the photo above is a size 6. So you can see that this apron will fit “most” adults.
Summer House Fabrics:
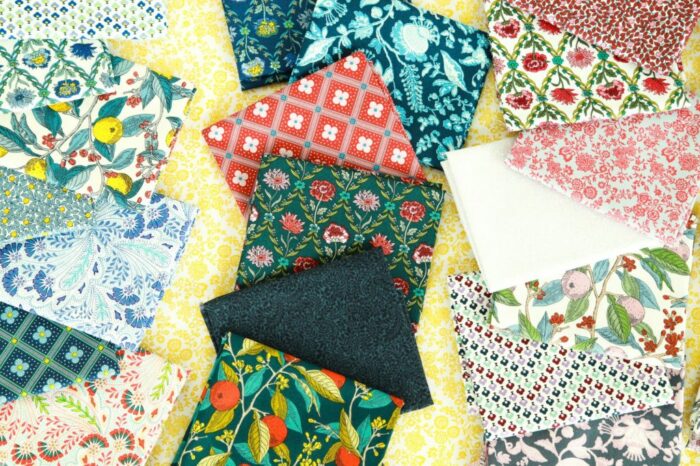
This apron is made from the Summer House line of fabrics from Liberty of London. These fabrics are from their quilting cotton line, which is being distributed in the US by Riley Blake Designs.
I’m a GIANT fan of Liberty of London fabrics. When I heard that Riley Blake was distributing them, I got so excited because this means the fabrics are more available and affordable for customers in the USA.

Make it a Gift!
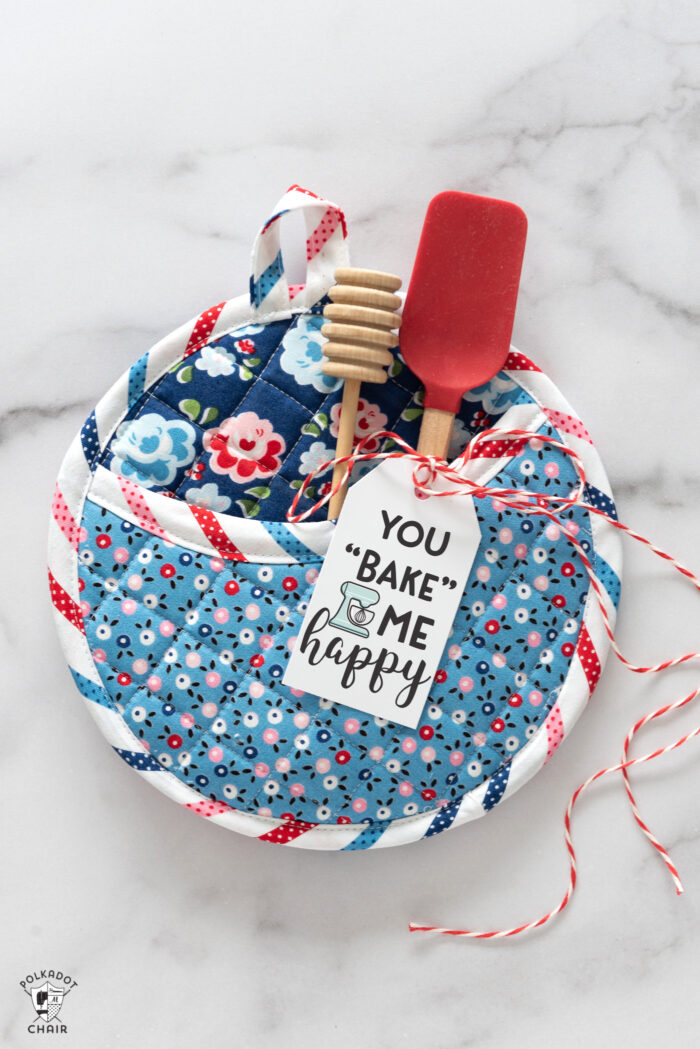
If you’d like to make this apron as a gift, may I suggest that you also create a matching hot pad? You can find a cute pot holder sewing pattern on my site HERE. You can even download a matching tag!
How to Make an Apron; a Free Sewing Pattern:
Supplies to Make an Apron
- Fabric is Summer House by Liberty of London
- Apron Fabric: 1 1/4 Yards Fabric
- Apron Ties: 1/2 Yard
- Pocket and Accent Fabric: 1/4 Yard
- Jumbo Ric Rack: 3 Yards

Women’s Apron Sewing Pattern
Equipment
supplies
- 1 1/4 Yards Apron Fabric
- 1/2 yard Apron Ties Fabric
- 1/4 yard Pocket and Accent Fabric
- 3 Yards Jumbo Ric Rac
Instructions
Cutting Directions:
- From Apron Fabric: 1 piece 25″ x 27″ for Apron Skirt 2 pieces 11″ x 12″ for Apron Top
- From Apron Placket Fabric: 1 piece 3″ x 12″
- From Apron Tie Fabric: 2 pieces 4 ½″ x 26″ 2 pieces 2 ½″ x 24″
- From Waistband Fabric: 2 pieces 2 ¼″ x 20″
- From Pocket Fabric: 2 pieces 5 ½″ x 5 ½″ 2 pieces 1 ½″ x 5 ½″
Prep
- Before You Begin, create 2 pattern pieces
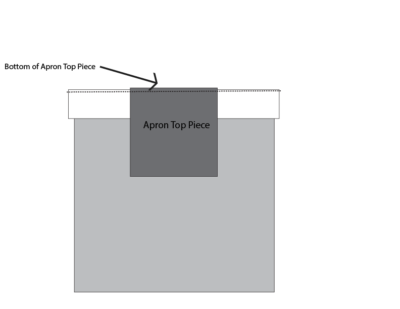
- On one of your apron top pieces, measure in 1″ from the top edge. The piece of fabric should be laid out so that it is 12″ tall and 11″ wide. Draw a line from the 1″ mark to the bottom corner and cut off the excess fabric.

- Repeat for the other side of the apron top piece and the other apron top piece.
- Using a plate or CD round the bottom two corners of the apron skirt piece. The skirt piece is 27″ wide by 25″ tall.
- Repeat this time rounding the two bottom corners of the 5 ½″ x 5 ½″ pocket pieces.

Apply Ric Rack
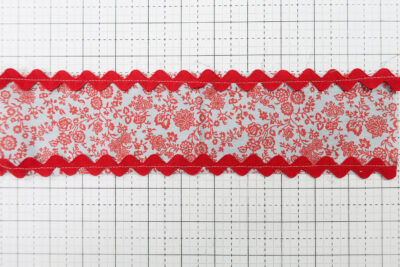
- Stitch 1 piece of rick rack to each of the long sides of your apron top placket piece (the 3″ x 12″ piece of fabric). You will sew the ric rack to the right side of the fabric, stitching down the center of the fabric.

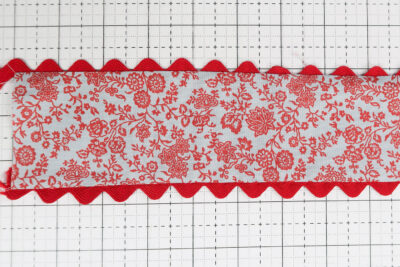
- Fold the Ric Rack to the wrong side of the fabric and press.
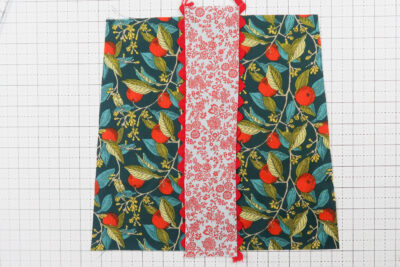
- Pin to the center front of one of your apron top pieces.
Sew the Apron Top
- Topstitch along both sides of the ric rack to secure the placket to the apron top piece.
Apply Ric Rack to Skirt
- Serge or zig-zag the sides and bottom of your apron skirt piece. Apply ric rack to the edge of the skirt piece using the same method that is shown in step 1.
Create Shoulder / Neck Straps
- Fold your shoulder strap pieces in half lengthwise with right sides facing. On one end draw a line across the strap at a 45-degree angle. Stitch the apron strap piece with a ¼″ seam allowance along the long side. When you get to the end, pivot your stitch and stitch a 45-degree angle. Turn the strap right side out and press. Repeat for 2nd strap.
Create Waist Ties
- Repeat the above step using the two waistband strap pieces.
Add Straps to Top
- Pin one apron strap to the top corner of the apron top piece. The raw edge of the strap will be flush with the raw edge of the apron top. The strap will be ½″ in from the edge of the apron top piece. Repeat with 2nd apron strap. Baste in place.
Assemble Apron Top
- Pin the two apron top pieces together (the piece that you stitched the placket to, and the 2nd piece you cut out). Stitch using a ½″ seam allowance around the sides and top of the apron top piece. take care not to catch the apron straps as you sew. Turn right side out and press.
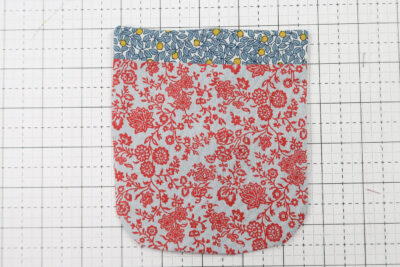
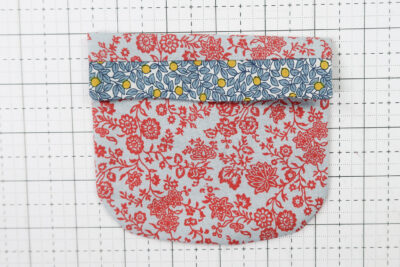
Create the Pocket
- Stitch the 1″ x 5 ½″ piece of fabric to the top of one of your 5 ½″ x 5 ½″ pieces of fabric. Repeat for the other 5 ½″ x 5 ½″ piece. Place the two sewn pieces right sides together and stitch with a ¼″ seam allowance leaving a 3″ opening in the bottom of the pocket piece. Clip seams, and turn the pocket right side out through the hole. Press turning the opening under as you go.
Pocket Construction
- Fold the sewn pocket piece down about 1 ½″ and press. Place the pocket where you would like it on the apron and stitch in place taking care to backstitch at the top and bottom of the pocket.
Attach Skirt to Waistband
- Run two rows of gathering stitches along the top edge of the apron skirt piece. Pull up on the strings and pin to the waistband piece so that there is ½″ of waistband hanging over the edge of the gathered skirt piece. Stitch the skirt to the waistband with a ½″ seam allowance.
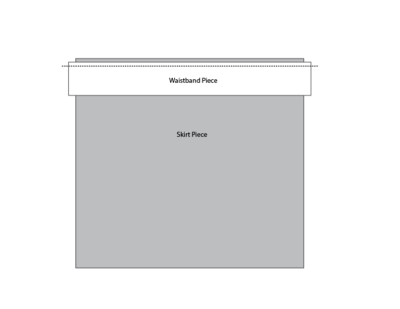
Attach Top to Waistband
- Pin the apron top piece to the other side of the waistband piece, matching centers. The bottom of the apron top piece will be pinned to the top of the waistband piece, right sides facing. Stitch the apron top to the waistband with a ½″ seam allowance.
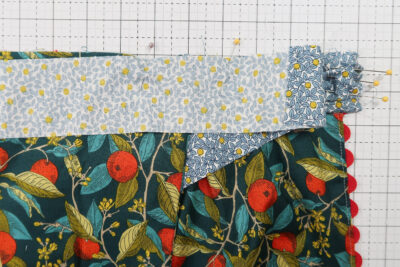
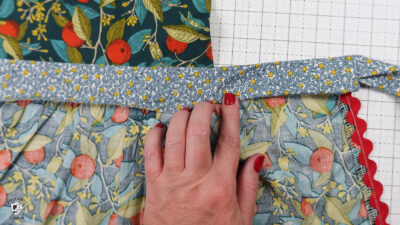
Attach ties
- Pin one of the sewn waistband straps to the edge of the waistband piece. You will want to “pleat” the sewn straps so that they fit inside of the waistband with ½″ left on each side of the strap. Baste in place. Repeat with the other strap.

Attach the waistband lining
- Pin the 2nd waistband piece (your waistband lining piece) to the sewn waistband piece along the top edge of the waistband right sides facing, pinning around to the sides of the waistband but not the bottom of the waistband.
Finishing
- Stitch the waistband lining with a ½″ seam allowance beginning at one side and all the way around to the other side. Again, do not stitch the bottom.

- Turn the waistband lining to the back of the apron and press. Fold under the raw edge of the waistband lining and hand stitch in place to finish the apron.
You May Also Like:


Love this apron. However, I am not tech savy. Where is the pattern template lol?
Super cute pattern. I found the top to be too small. (It doesn’t cover enough of the chest width wise) I’d probably add an inch or two more to the width of the base rectangle. Other than that, it’s super cute!
This is such a nice little apron, I’ve used it multiple times. Thank you for sharing
The waistband really got me too. After reading for the new sewers I think I figured it out.
I AM an experienced sewer.
Love love love that you have a print option! I was looking for something just like this but get so frustrated using a web page. I’ll be trying this out for a bridal shower gift. Thank you!
So glad you like it! We have to had ads to make up for the cost of running the site that way, but I know people need to print instructions to keep in front of them as the work.
I am an experienced sewist but found this pattern a little challenging when it came to the waistband. After reading the comments it made more sense. Now that it’s finished, I really appreciate your waistband design, it just gives it a really finished look both front and back. I’ll be making more of these as gifts. I’ve been following you for a few years now and always learn something new. Thank you for posting this free pattern!
Hi. I’m super excited to make this apron!!! I’m still a beginner, and I am really stuck on the pocket. I sewed the 1 1/2x 5 1/2 piece to the top of each pocket piece. However, once I sewed both pieces together, and turned right side out, I found I couldn’t fold the pocket the way the picture shows. I must be missing something or must have not understood the directions. I have already tried once, and it didn’t turn out. Do you have any suggestions? or clarifications? If there is a video, I am happy to watch it. Thanks in advance.
The pocket just gets folded over, much like you would fold down the top sheet on your bed. The fold is just decorative, you can leave it unfolded – the fold doesn’t have any function to it or change the way the pocket works.
Thank you!!! 🙂
Hi Melissa,
I love this apron pattern! I’m very confused on step 14 though. I’m unsure how to orient the waistband lining onto the apron. It appears that the lining is pinned right side facing the right side of the waistband on the front of the apron, but that is not possible, because you would not be able to fold the lining onto the backside because the apron top is in the way.
When you unfold it the apron top “pops” up. You only sew the top seam of the waistband, the bottom of the waistband is hand sewn.
Hi Melissa! This has been fun to make but now I’m on step 11 and super confused! I have gathered the material and understand the 1/2″ of waistband hanging over the edge of the skirt BUT which side of the apron should I be sewing the first piece of the waistband to? Is it the wrong side of the apron to right side of the waistband, or is it the front side of the apron to the right side of the waistband? I’ve stared at it for what seems like forever and just don’t know! 🙂 Thanks so much!
Fabric is right sides facing. So right side of the bottom of the waistband to the right side of the gathered fabric.
Hi Melissa, I love this apron! I am new to sewing and stuck on Pt. 11 at the instruction to “Pull up on the strings and pin to the waistband piece so that there is 1/2″ of waistband hanging over the edge of the gathered skirt piece.” I’ve successfully gathered the skirt but am not clear if the 1/2″ of extra waistband fabric is supposed to “hang over” lengthwise all along the top of the gathered skirt piece or on either end to the sides of the skirt piece.
Thank you in advance for the clarification!
It should hang over on each end. So that when you sew the next piece on you can use a 1/2″ seam allowance and not catch the skirt in the seam allowance.
Hello Melissa,
I am a new seamstress attempting to make your adorably cute apron. I need a little extra info. Which cuts are supposed to be for the shoulder straps? I can’t find the dimensions- other than what is labeled as Apron ties. I’m guessing it’s the 2 1/2” x 24” pieces??
Yes, those are the shoulder straps
I enjoy many of your projects. I save my favorites (copy and paste) and pull them out when needed. Unfortunately, you have changed the way the pictures are on your site. I can no longer save the pictures with the pattern. This makes them much less useful.
You can print them by using the print friendly button at the bottom. Unfortunately, my site was being copied by very dishonest people. It is my business and full-time job. I have the right to protect it.