DIY Graduation Cap Decorating Ideas using Cricut Iron-On
It’s almost Graduation season again! If you’re looking for a fun way to celebrate the Graduation of someone you love, then you may like today’s craft project. I’m sharing with you lots of fun Graduation Cap decoration ideas and how to decorate a graduation cap with a Cricut machine.
I am thrilled to be working with Cricut as a Brand Ambassador on this project. This is sponsored content.
I’m not quite sure how it happened, but all 3 of my kids graduated from something this year—1 from college and 2 from High School. I obviously expected the twins to graduate the same year, but when I realized my oldest would also be graduating college simultaneously, I had to giggle.
This April, May & June will be crazy busy for us with all of the graduation celebrations (3 kids graduating, and none of them from the same school or during the same month… way to stretch things out, LOL!). Let the celebrations begin!

DIY Graduation Cap Decoration Ideas
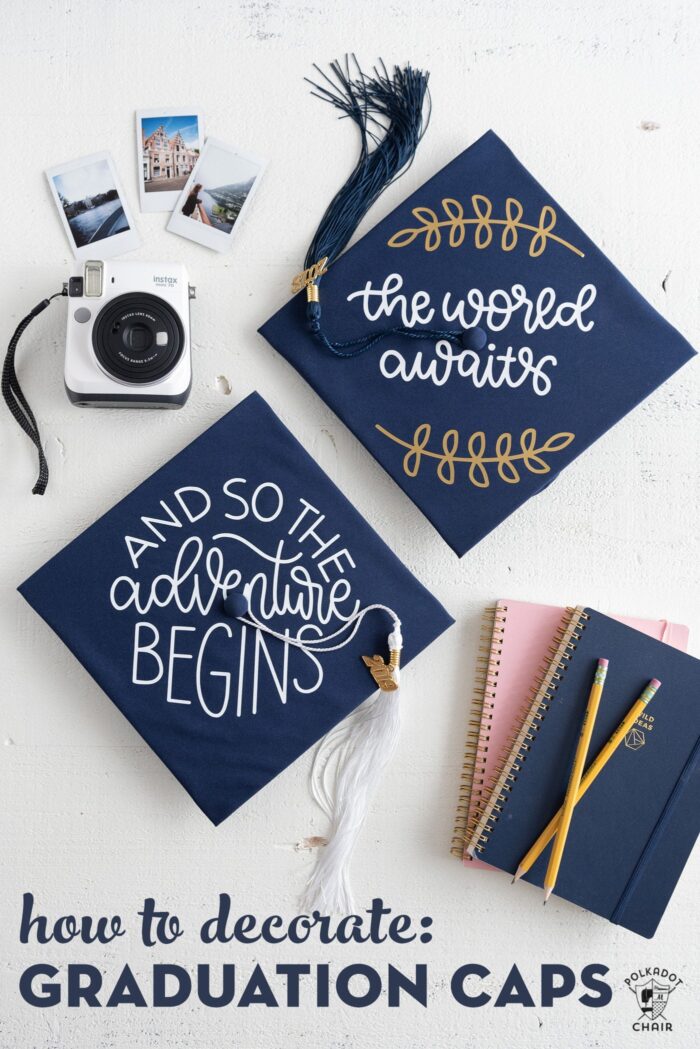
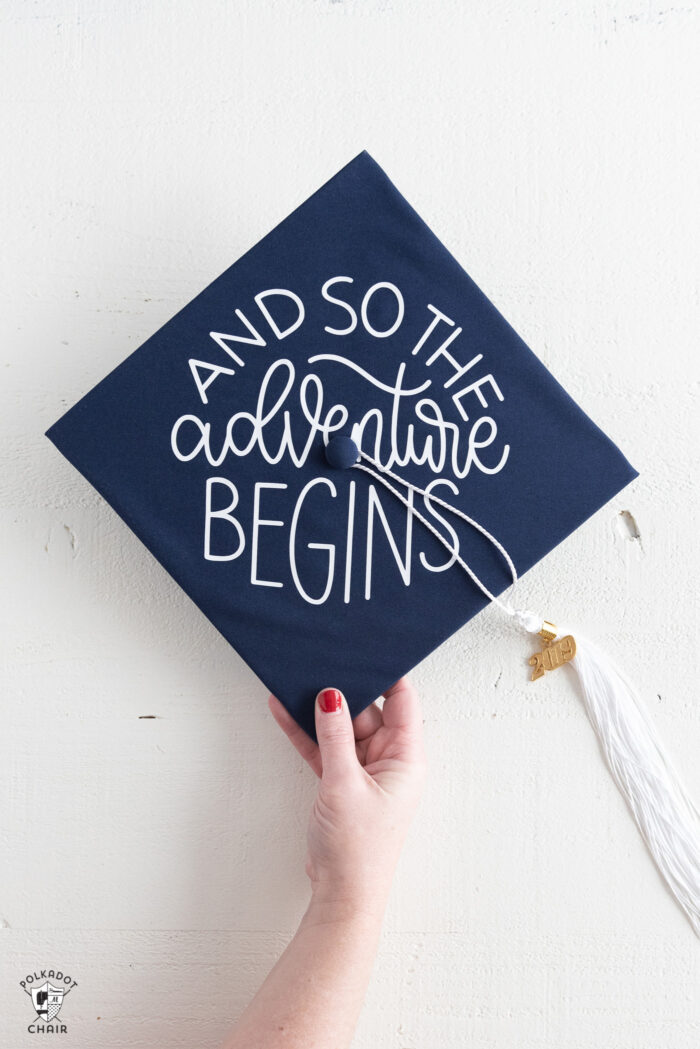
I’ve noticed a trend lately of decorating graduation caps. I know that this is not allowed at some schools, but I still think the idea is genius! I’ve seen all kinds of graduation cap decorations ranging from inspirational to funny. I think that it is a great way to celebrate what is a pretty amazing accomplishment.
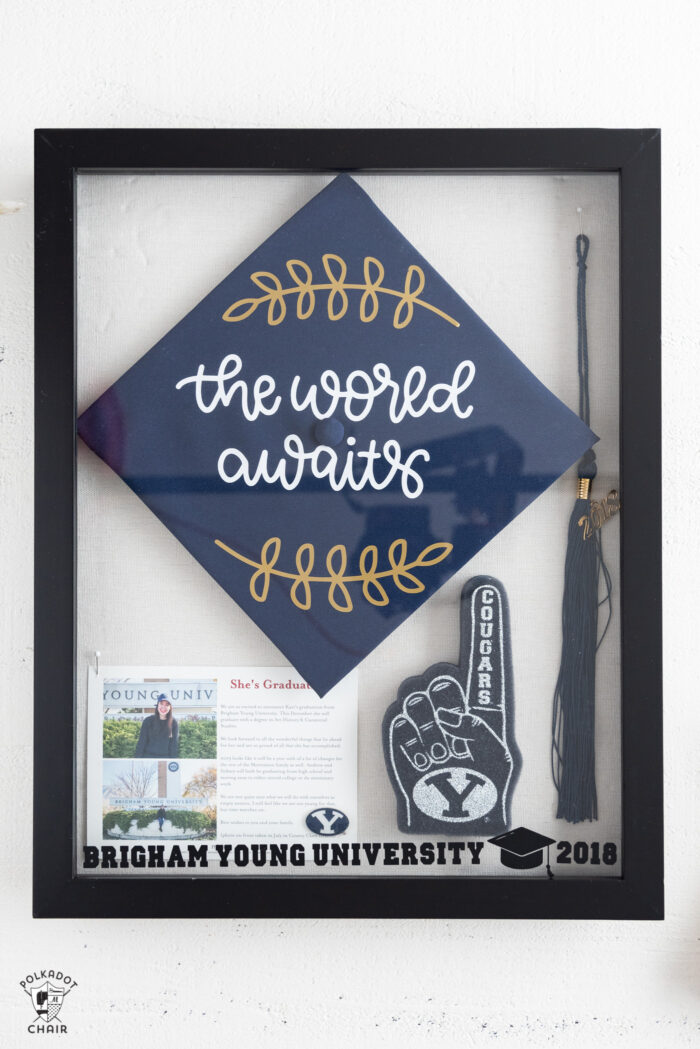
I’m not sure if my kids can wear a decorated grad cap, but I thought that it would be fun to decorate some for them as a keepsake. I will take the decorated caps and use them in Graduation shadow boxes.
Should I Buy an Extra Graduation Cap to Decorate?
Since I didn’t want to alter the graduation caps they would be getting at school, I ordered an extra set of caps online. My plan is to replace the tassel with their actual graduation tassel in the shadow box after they graduate. I’m also going to add a few photos of the commencement ceremony.
For those of you with eagle eyes looking at the shadow box and wondering why it’s not complete. My oldest graduated in December from BYU. They don’t do commencement in December, so she will walk in April, but her graduation year was still last year. So we don’t have an official graduation tassel or photo of her to use in the box yet.

To decorate my Graduation Caps and matching shadow box, I used my Cricut Machine. In the Cricut Design space, I found loads of fun images perfect for graduation caps. All of the images shown in this post are Cricut SVG files, not mine.
What Materials Should I Use to Decorate Graduation Caps?
For the Graduation Caps, I used Cricut Iron-On Vinyl, and I used regular vinyl on the shadow box. Here’s how I did it.

Supplies
Supplies are linked:
- Cricut Maker 3 (you can get great deals on machine bundles on Cricut.com)
- Roll Holder for Maker 3
- Cricut EasyPress (I like the large size the best): Make sure you get the EasyPress mat as well.
- Cricut Weeding Tools: (I use the small hook tool ALL the time, making weeding vinyl so much easier).
- Cricut BrightPad: A cordless, flat, bright lightbox. I use it to weed Cricut vinyl and use it all the time to trace applique shapes for sewing & quilting.
- Cricut Iron On Vinyl
- Cricut Permanent Vinyl
If you want to make the same Graduation Cap that I did, I’ve shared my Design Space file HERE.

How to Decorate a Graduation Cap
Equipment
- Iron On Protective Sheet
supplies
- 1 roll Cricut Every Day Iron On Can also use Foil Iron On
- 1 Graduation Cap
Instructions
STEP ONE: DESIGN THE CAP
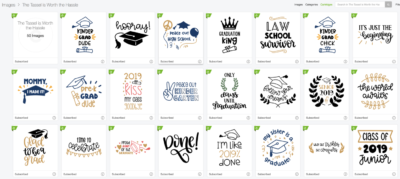
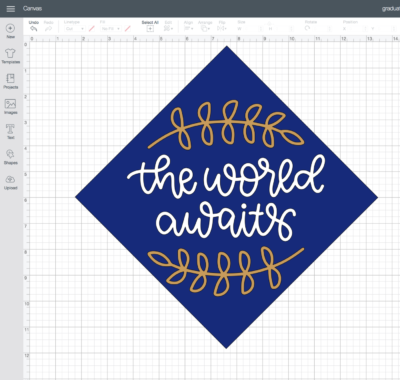
- The first thing you need to do is design the cap. If you look in Cricut Design Space there is a collection called “The Tassel is worth the hassle”. There are lots of fun graduation phrases in that collection. You can also type keywords like “adventure”, “Goals”, “I Did it” into the search box and you should be able to find something you like.Next, measure your graduation cap.Open Cricut Design Space and draw a square the same size as your graduation cap, rotate it 45 degrees.Insert the image you want to apply to the cap. Size it so that it’s the same size as the cap (remember there is a non-removable button on the top of the cap so plan accordingly).

- After you’ve got your image the size you want, delete or hide the square graduation cap (it was only in there for size reference).

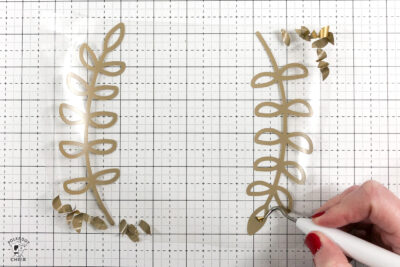
STEP TWO: CUT OUT THE IMAGE FOR THE CAP
- Send the image to the machine, and cut it out from Iron-On Vinyl

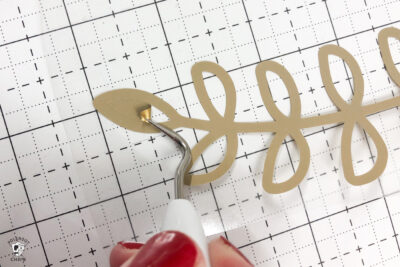
- Weed the vinyl until only your image remains.
- If you are using two different colors of vinyl, you’ll need to cut out the 2nd color as well.
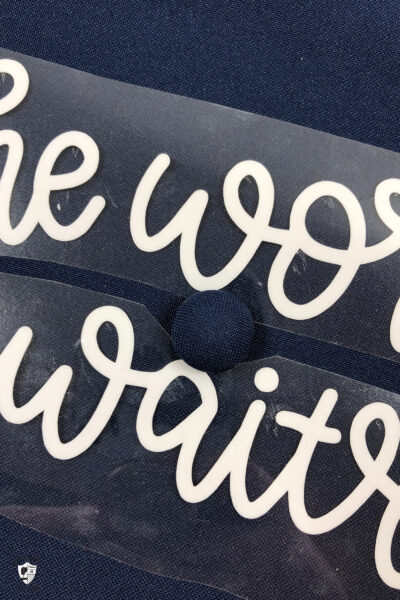
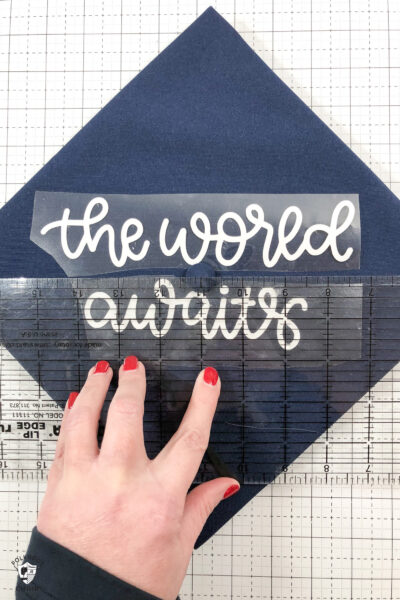
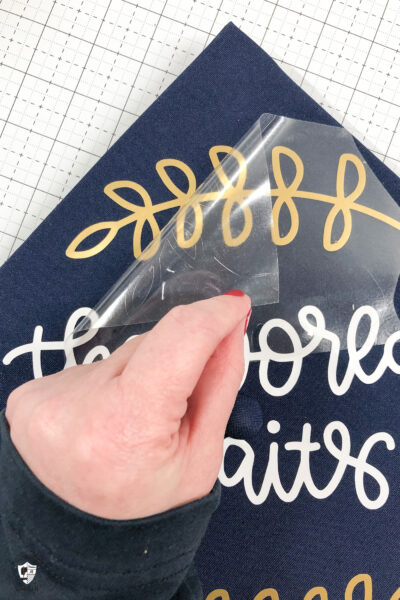
- Place your image on your graduation cap to see if it fits the way you want it. You may have to cut parts of it apart to get it to fit around the button.

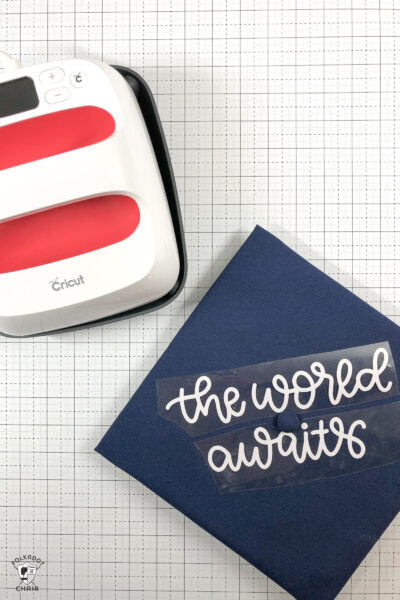
- When you’ve got it where you want it, you’re ready to set it with the EasyPress.
Top Tips
- Since you’re working at an angle that you might not be used to, it’s a bit harder to get the words straight across the cap. Remember the cap is worn as a diamond, not a square. Use a large ruler to help you place your image in the correct spot. Just place the ruler on the cap from the outside corner to outside corner and you should be able to check the placement of your image easily. Also, make sure you know which end is the front of the cap!
STEP THREE: HOW TO SET THE IMAGE WITH THE CRICUT EASYPRESS
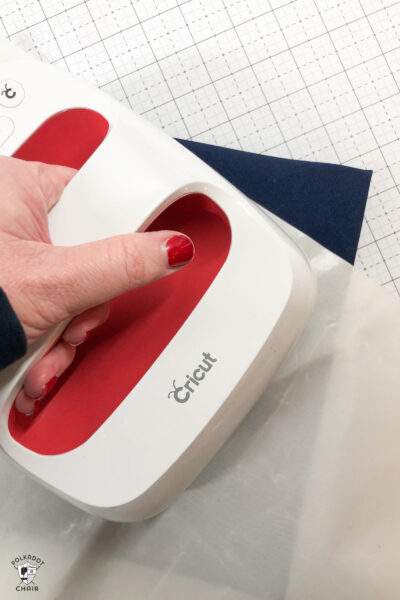
- Set your EasyPress to 305 degrees and 30 seconds. Since your cap is polyester you’ll also need a pressing sheet to protect the fabric.
- Place the pressing sheet on top of the iron-on then the EasyPress on top of that and hit the button and wait for the timer. When you’re done, move it to another section of the cap and keep moving until you’ve adhered the entire iron on.
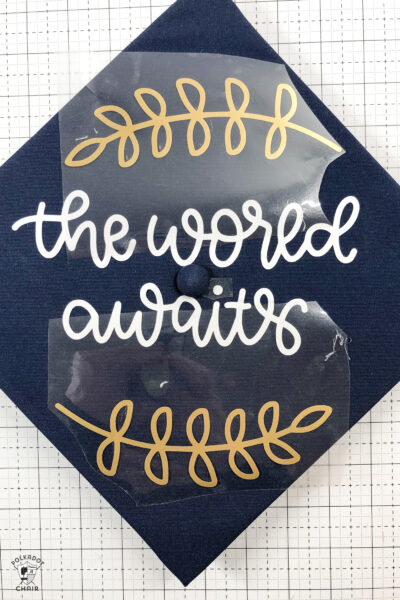
- If you’re using a 2nd color, apply it now, again making sure to use the pressing sheet to protect both the fabric and the iron-on you’ve already attached.
- Then just peel off the plastic backing.
How To Make a Graduation Shadow Box
In Cricut Design Space, spell out the phrase you’d like on top of the glass of the shadow box. Measure it so that it will fit on the glass. I used the Cricut Varsity font.
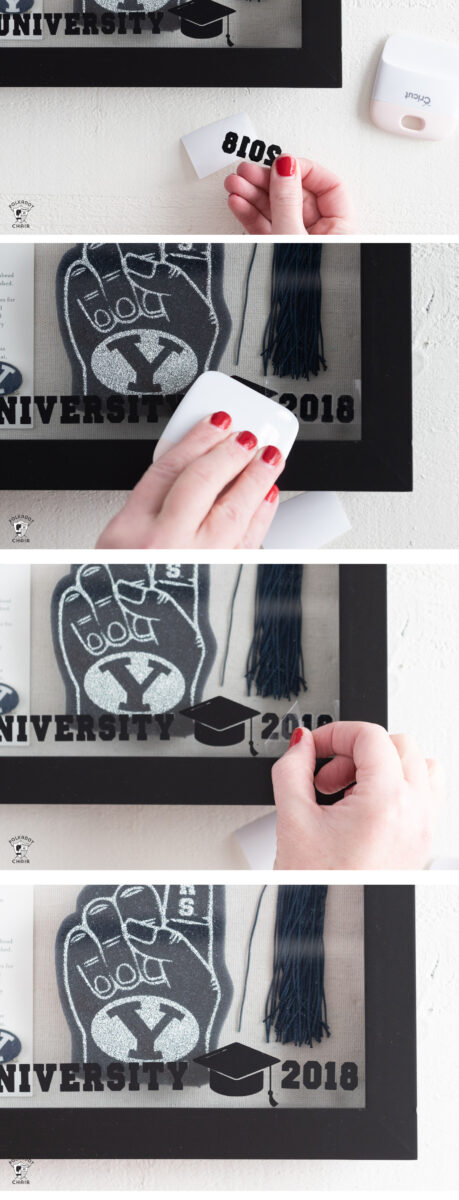
Cut out the image from Vinyl. Peel away the excess. Apply a bit of transfer tape to the top of the image. Then peel off. Place the image/transfer tape on the glass and use the Cricut tool to adhere.
The last thing you need to do is peel away the transfer tape.
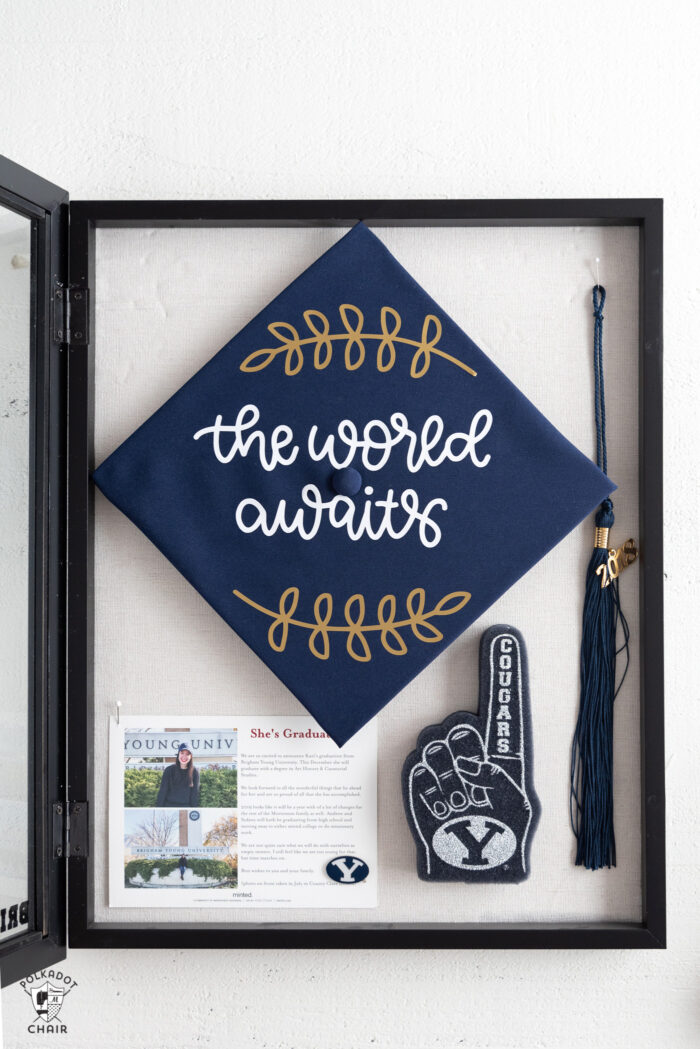
For the last step, arrange the items you want in the shadow box.
That’s it! There are so many fun possibilities when it comes to decorating graduation caps! You can even design your own lettering if you’d like.
More fun Cricut DIY Projects:
How to Make a Canvas Banner for a Dorm Room
Answers to your FAQ’s about the Cricut Rotary Blade
How to Make a Fabric Scallop Banner or Pennant
Make a Personalized Wood Sign using your Cricut Machine

This is a sponsored conversation written by me on behalf of Cricut. The opinions and text are all mine.
Hi. What font did you use for the – and so the adventure begins- grad cap? Thanks.
Hi, It’s not a font. It’s a hand lettered design that you can find in Cricut Design space
Thank you for your ideas on how to personalize a graduation cap. I can see how doing something like this adds a special touch to the occasion. Unfortunately, I am not that crafty. I will have to see what services are out there that I can find to do something like this for my daughter’s graduation cap and sash.
what was the size of cap board
It depends on which cap you buy
I love your post! Thanks for sharing! I was wondering what shadow box did you use and where did you find?
I have a Brother Scan & Cut-do you know if the files are compatible? I will also need to check the Brother site as I’m new to this technology that my husband bought me last summer. 🙂 I think this is such a cute way to display and my daughter did decorate and wear her cap on graduation day.
I’m sorry I don’t know about the Brother machine. I’ve never seen one. The files in this post are ones owned by Cricut so I’m guessing there is not a way to export them out of their software
Thanks Melissa. I will check the Brother website as they may have something similar. 🙂