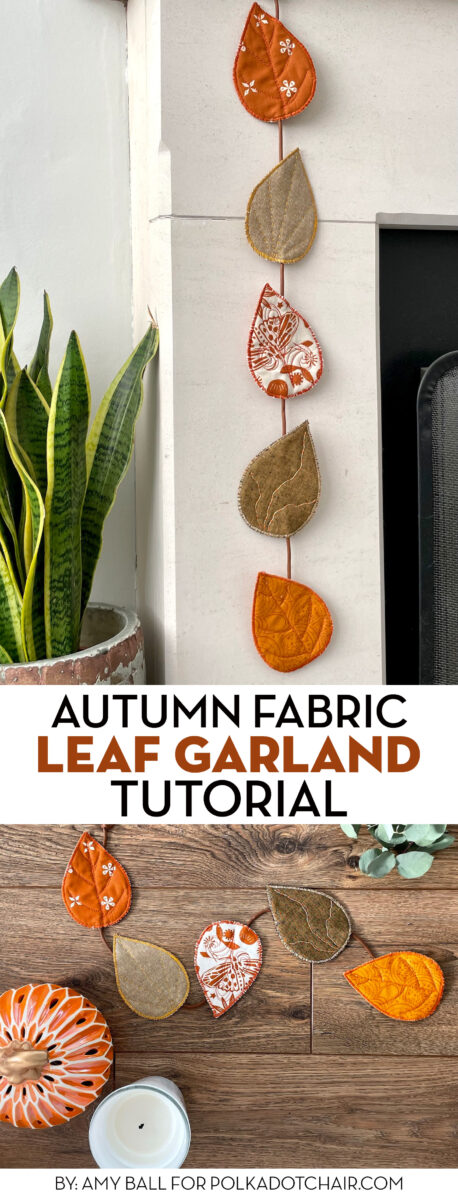
Fabric Autumn Leaf Garland Sewing Tutorial
Add a touch of texture and pattern to your Fall and Autumn decor with this simple leaf garland. Learn how to make one with our free Fabric Leaf Sewing Pattern. This project is a great one to make with fabric scraps that you may have leftover from another Autumn sewing project.
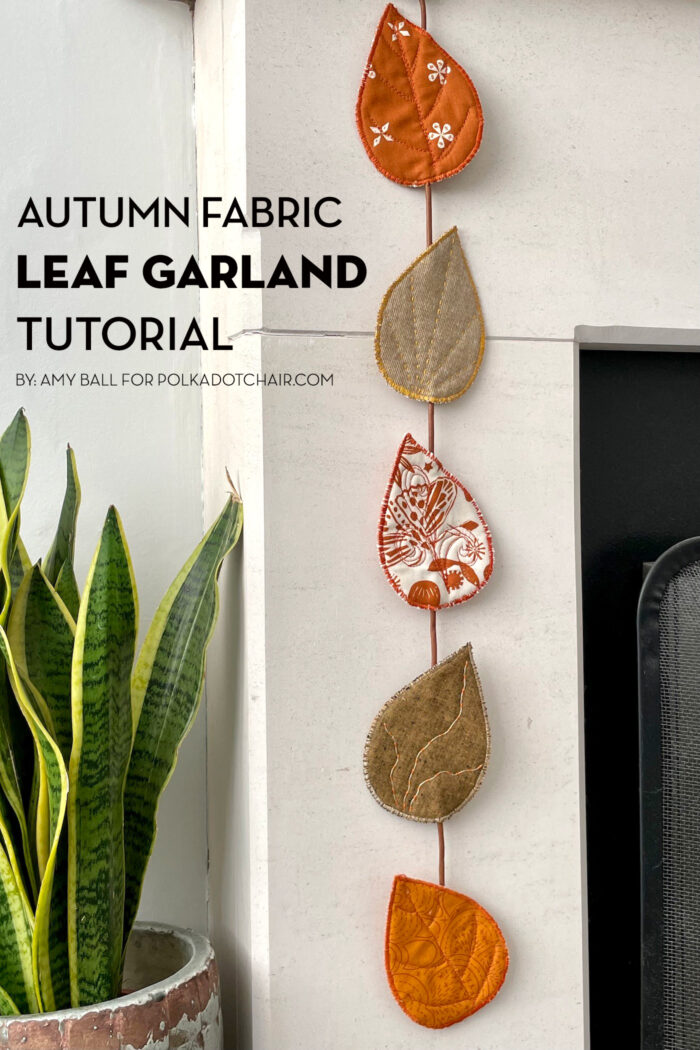
As the season changes, I love adding some handmade Autumnal and Fall decor around the house. This little vertical garland is a great way to use up some fabric scraps and try out a few different decorative stitch techniques.
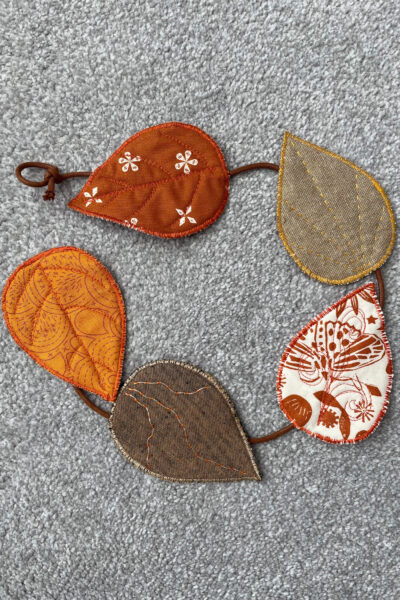
The design is really adaptable; if you want the garland to be longer you can simply make extra leaves and use a longer ribbon, or add a knot at each end of the ribbon to change it into leaf bunting.
Autumn Leaf Garland
supplies
- 1 Fat Eighth Main Fabric
or selection of large scraps
- 1 piece Fusible fleece/batting; 17½” x 4¾”
- 1 yard
Ribbon or Leather String
- 1 Leaf Shape
Instructions
Cutting:
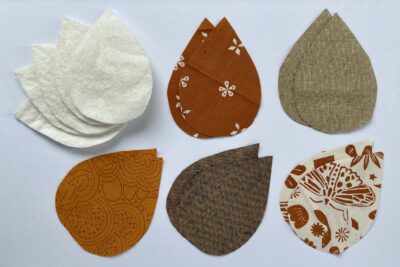
- From Main Fabric (or scraps) cut:10 pieces, 3½” x 4¾” From fusible fleece/batting cut:5 pieces, 3½” x 4¾”
Construction:
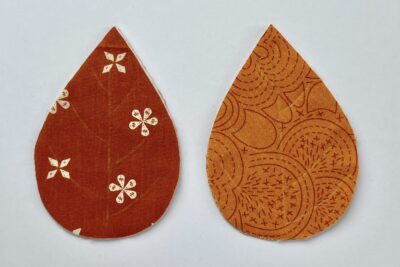
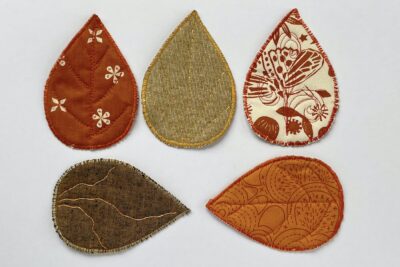
- Using a leaf template, cut out 10 fabric leaves and 5 batting leaves.

- Baste the three layers (fabric leaf, batting then another fabric leaf) together to create five basted leaves.
- Trim around the edges if they look a little uneven but don’t worry about small amounts as these will be hidden by the edge stitching later.
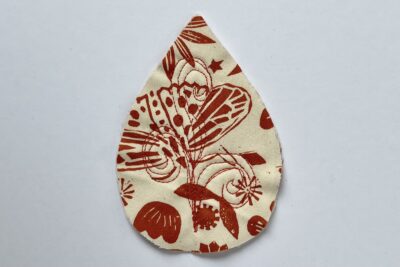
- Now it’s time to add decorative stitching to the five leaves. Be sure to leave a ¼” seam allowance around the edge of the leaves. You can decorate the leaves in any way you like but here are four suggestions:
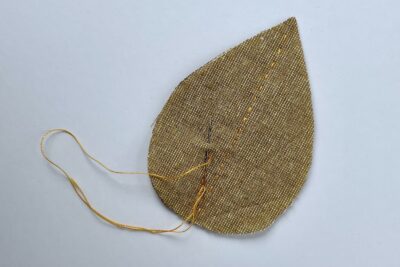
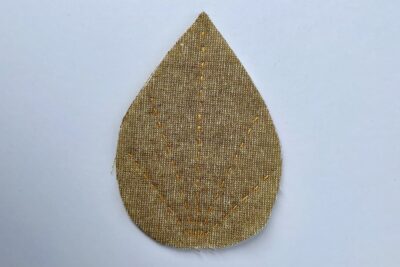
- ONE- Hand Quilting: Mark five lines radiating from the centre point on the bottom edge of a leaf, then hand quilt along each line.
- TWO- Laced Running Stitch:
- From the centre point on the bottom edge of a leaf sew three wavy lines of running stitch, then with a contrasting thread colour start next to your first stitch on one of the lines and weave the thread back and forth through the running stitches.
- Repeat this for all three running stitch lines.
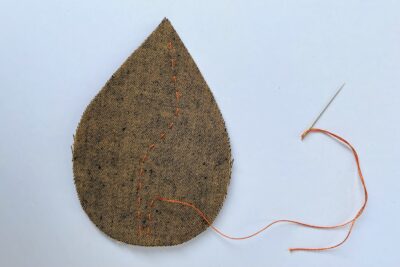
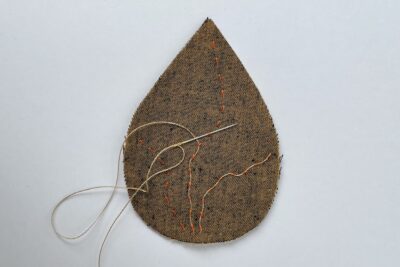
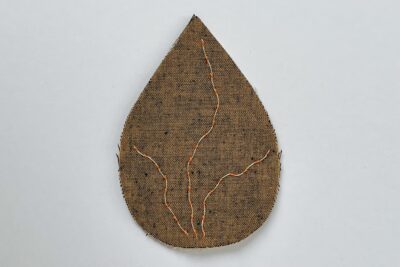
- THREE- Freehand machine drawing: Start by marking leaf veins as a guide then “draw” over them with your sewing machine. I used the same machine set-up as I would use for free motion quilting.
- Start at the bottom edge of the leaf and sew the central line up to the top then on the way back down create the diagonal short veins on either side of the central one sewing back and forth over the initial lines of stitching. Don’t try to match all the lines perfectly, you want it to look sketchy.
- FOUR- Free motion quilting: – choose your favourite motif and use this to decorate one of the leaves. I have used a smokey swirl.
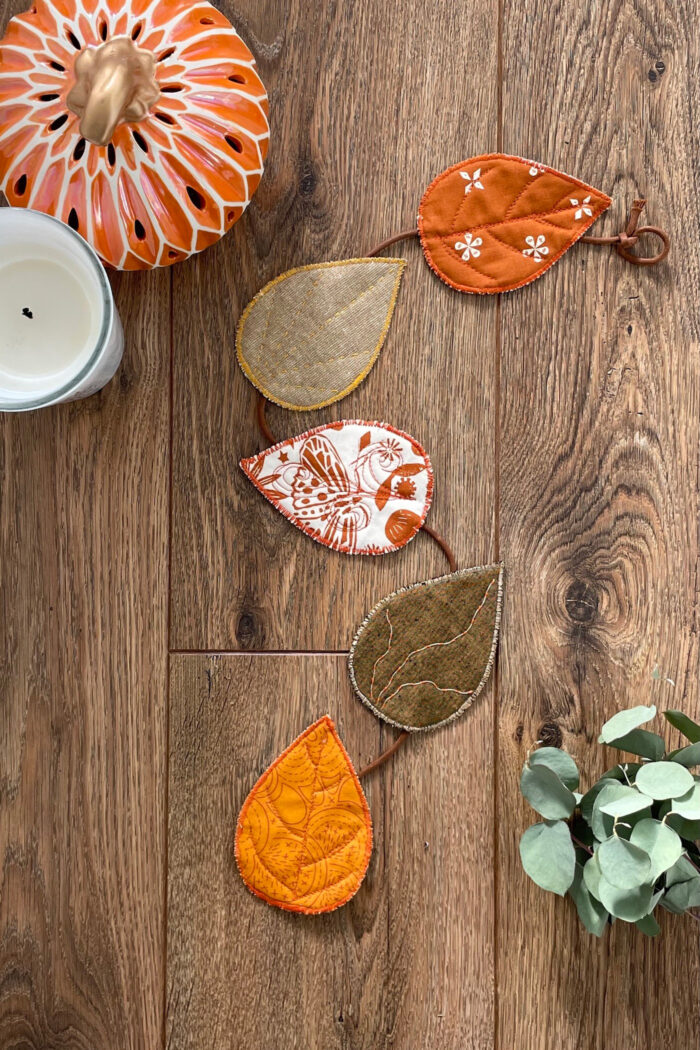
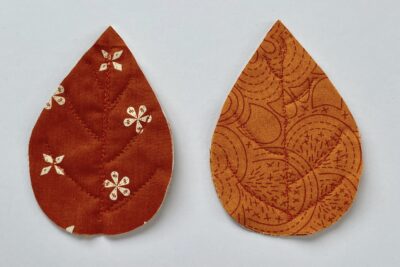
- Once all the leaves have been decorated, sew a tight zigzag stitch around the raw edges of each leaf to bind the layers together. Test your zigzag stitch first to get the size you want (don’t make it too small) and when sewing around each leaf, make sure the righthand needle position of the zigzag falls just off the leaf. Don't worry if your stitching doesn’t look perfect all the way round, this design works well with a rustic look.
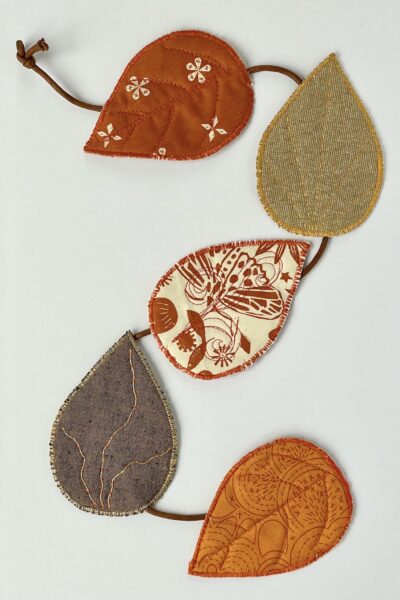
- Cut 30” from your length of ribbon.
- Pin the leaves in place along the ribbon, the wrong side of each leaf onto the right side of the ribbon.I have put them at a slight angle (and alternated the angle for each leaf) and left a 1½” gap between each leaf. Make sure there is some spare ribbon above the top-most leaf. Check the placement before sewing in place and adjust as required.

- Hand sew the leaves in place.
- Tie a knot at the top of the ribbon to hang up your garland.

About the Designer

Amy lives in the north of England with her husband and son. When she’s not sewing and quilting, Amy can usually be found baking or reading. You can find her on Instagram @amyatthegate
More Fantastic Projects by Amy Ball
Lights On | How to improve your sewing machine lighting
Guide to (near) Perfect Patchwork
You May Also Like:

this there a left template?