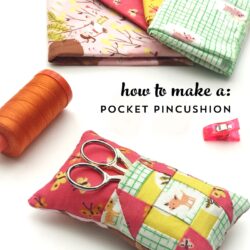
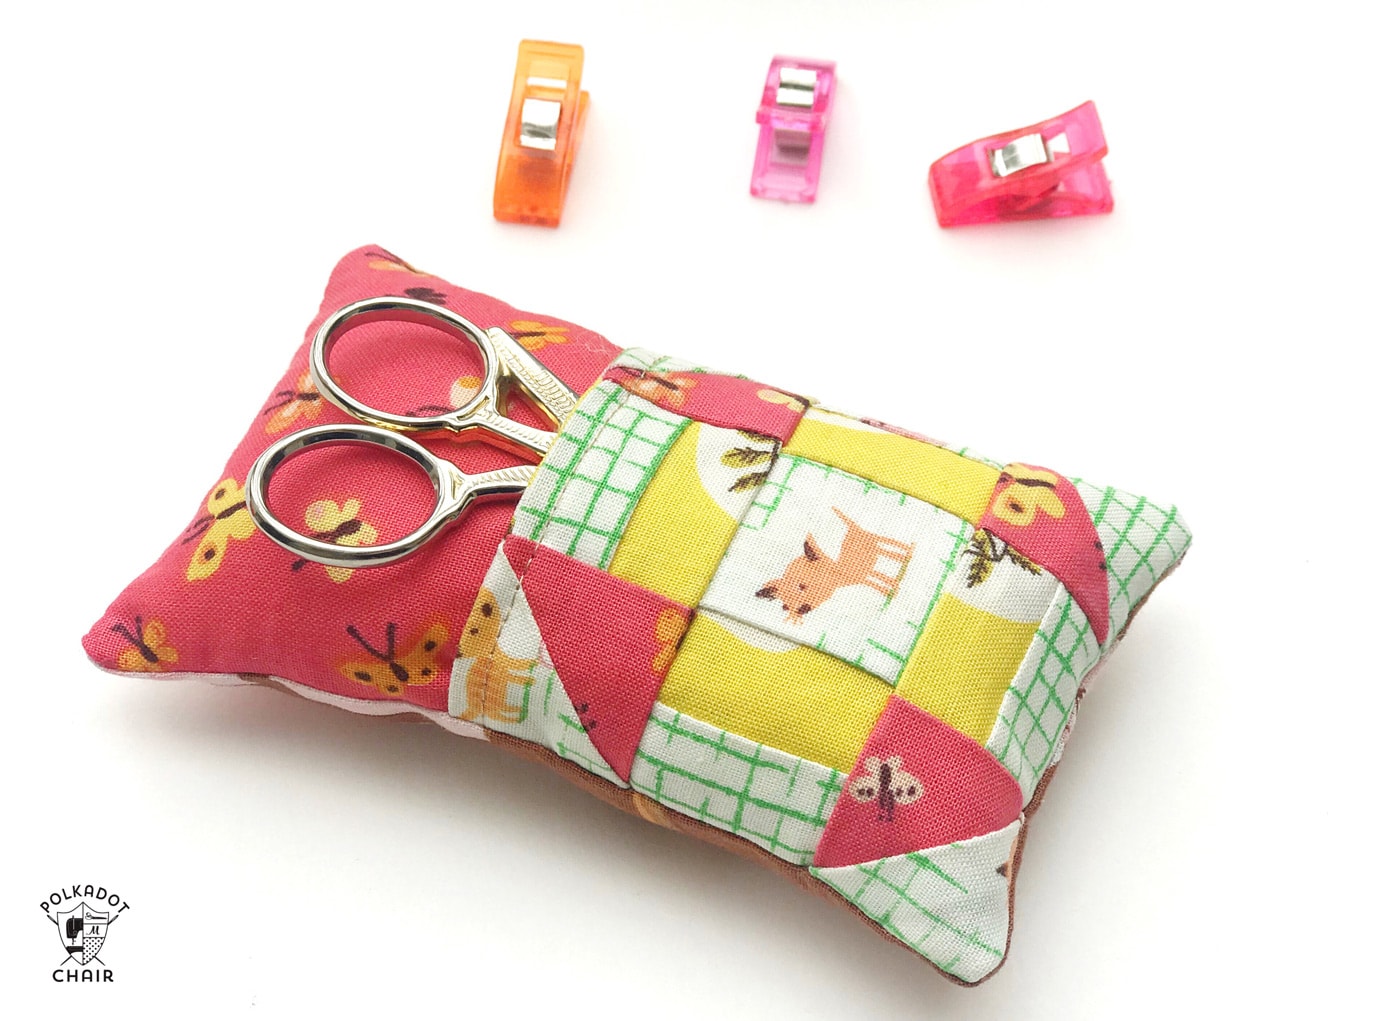
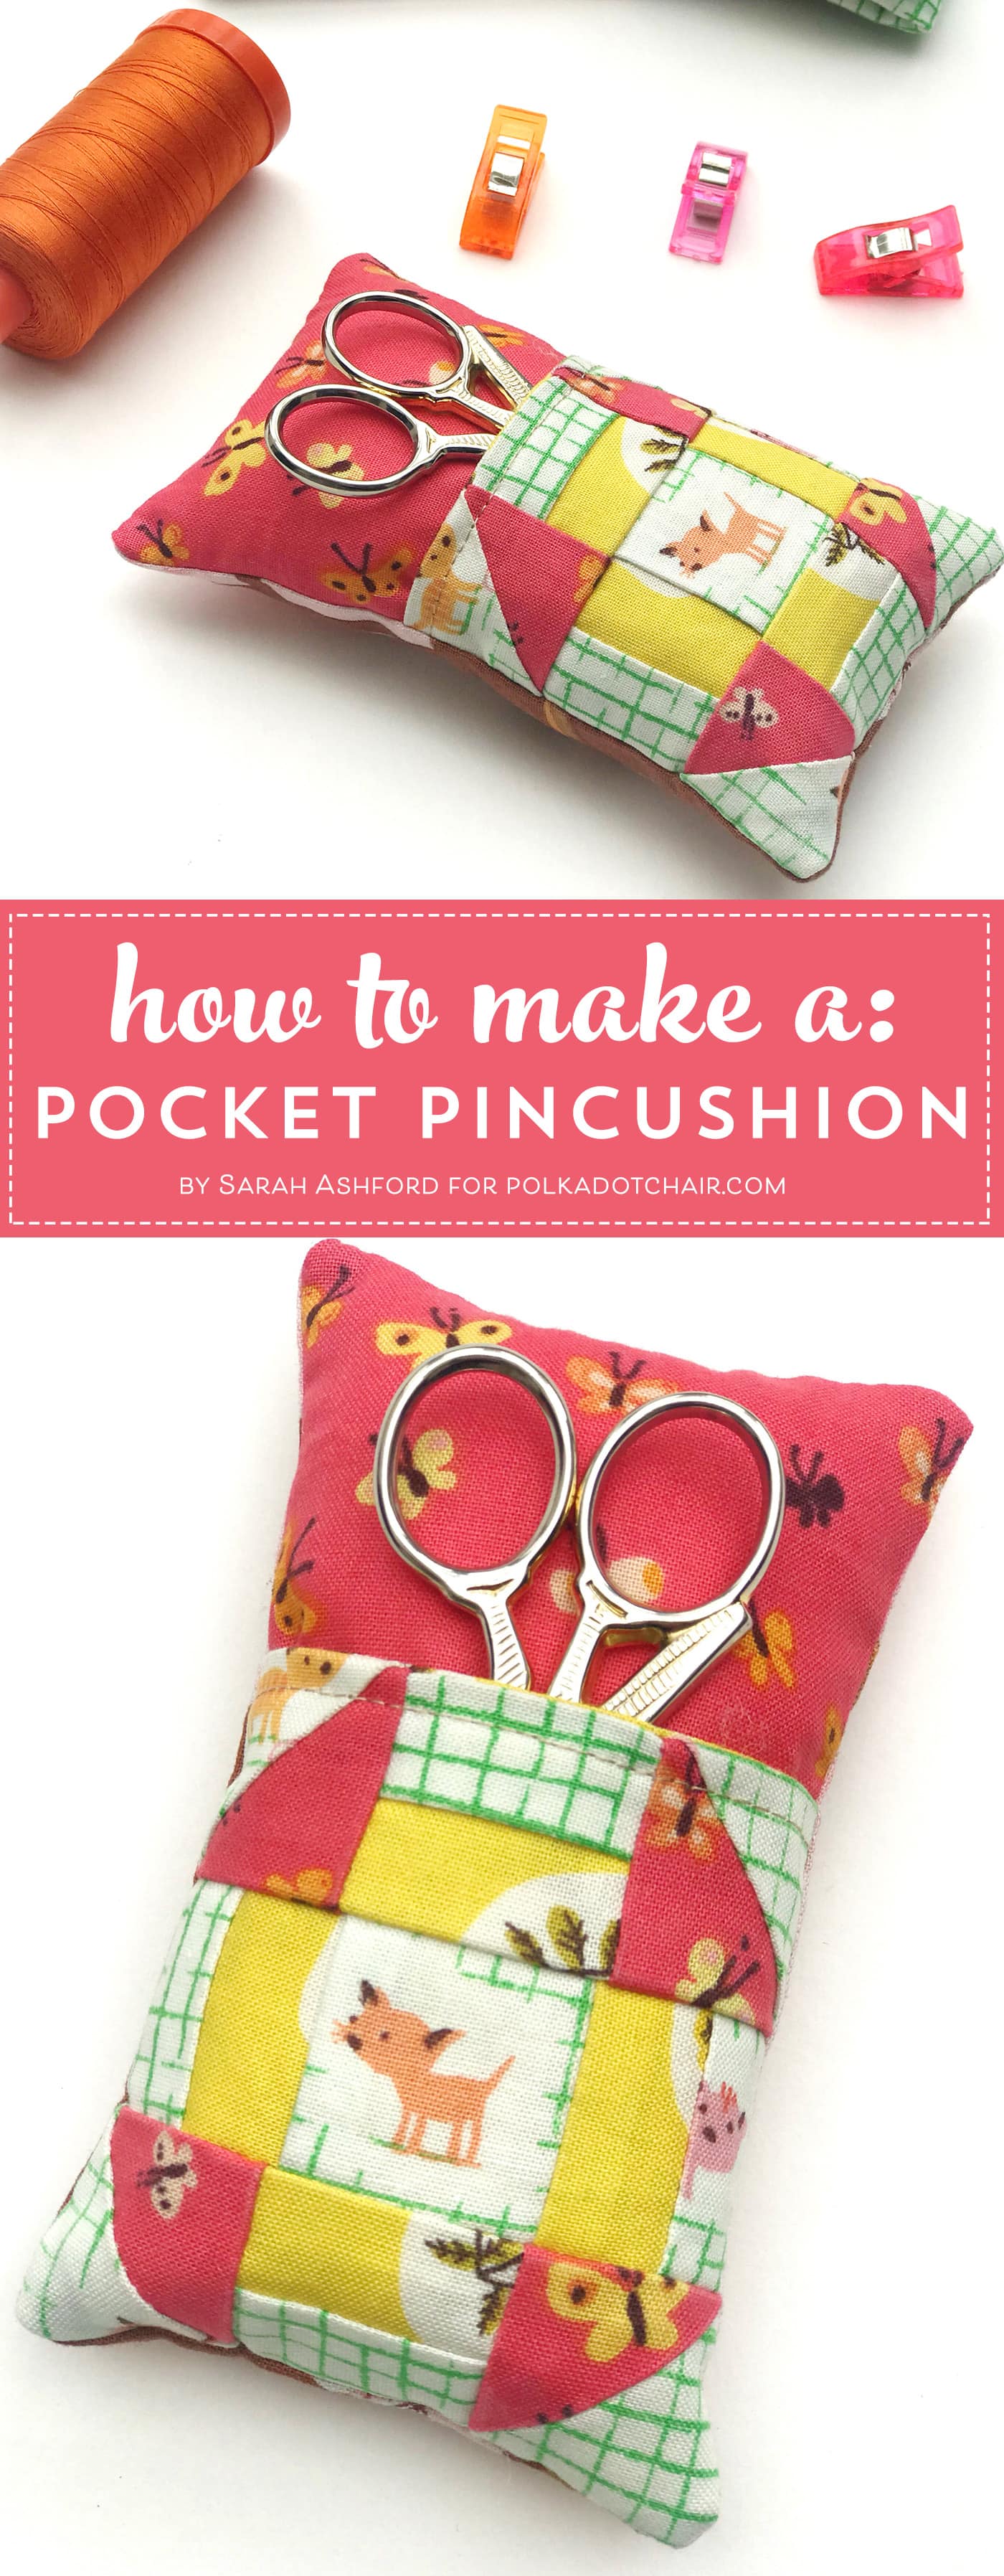
How to Make a Pincushion with a Pocket
Learn how to make a pincushion with a pocket to hold your sewing scissors, binding clips, needles, or other items with our free sewing pattern.
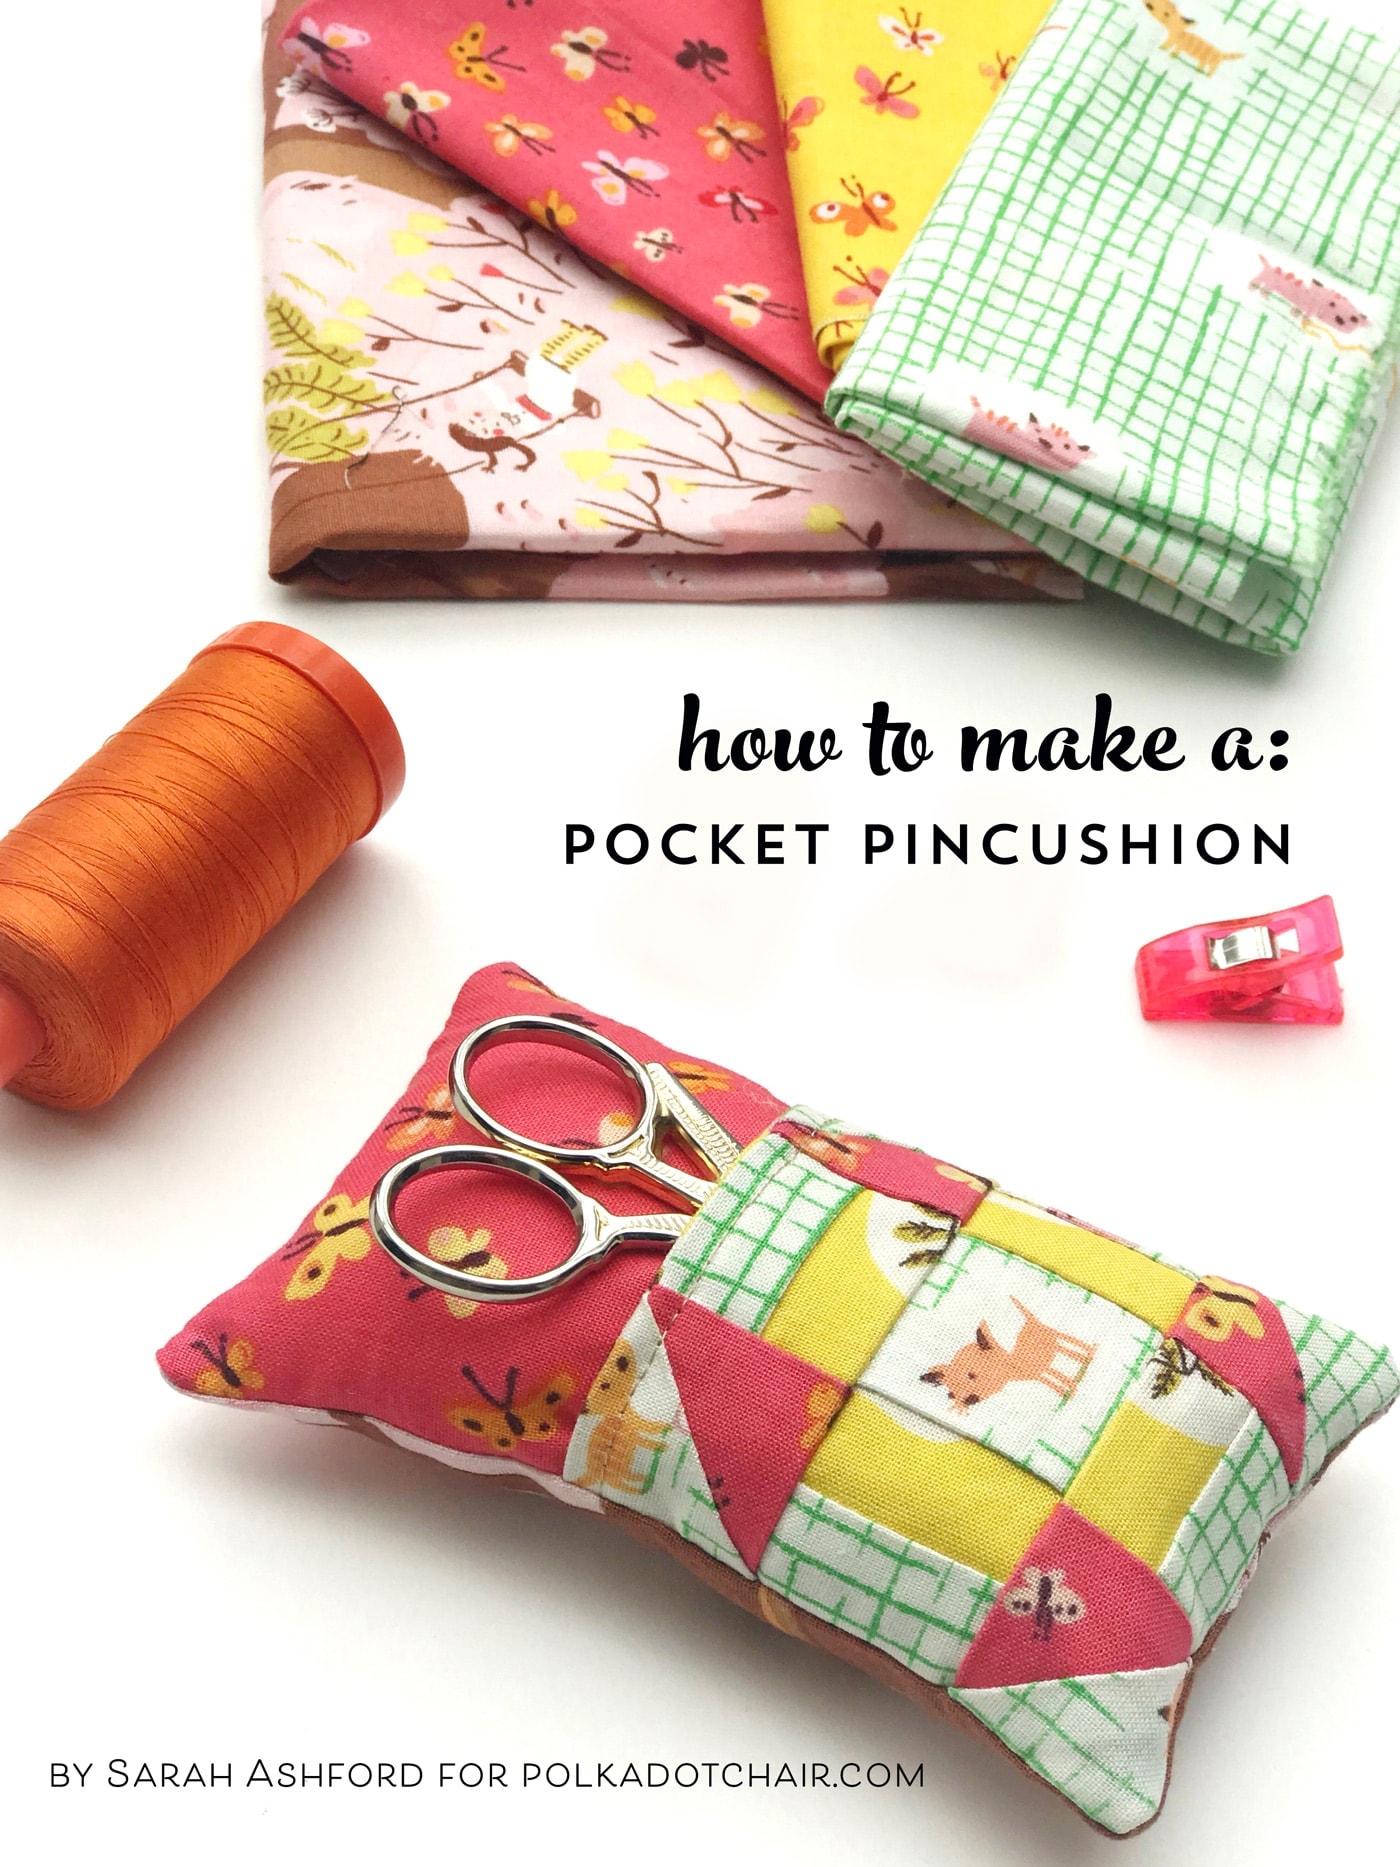
Just last week, I was getting ready to hand-stitch a project, and I could not find my small scissors anywhere! If I had a pincushion with a pocket like the one that Sarah Ashford created for today’s tutorial, I would not have had that problem.
I love that this project is so useful, and it gives you the fun opportunity to stitch up a mini churn dash quilt block as well (I’m enamored with all things mini lately). Keep reading to get this cute free pincushion pattern. It also makes a great gift for your favorite seamstress or quilter!
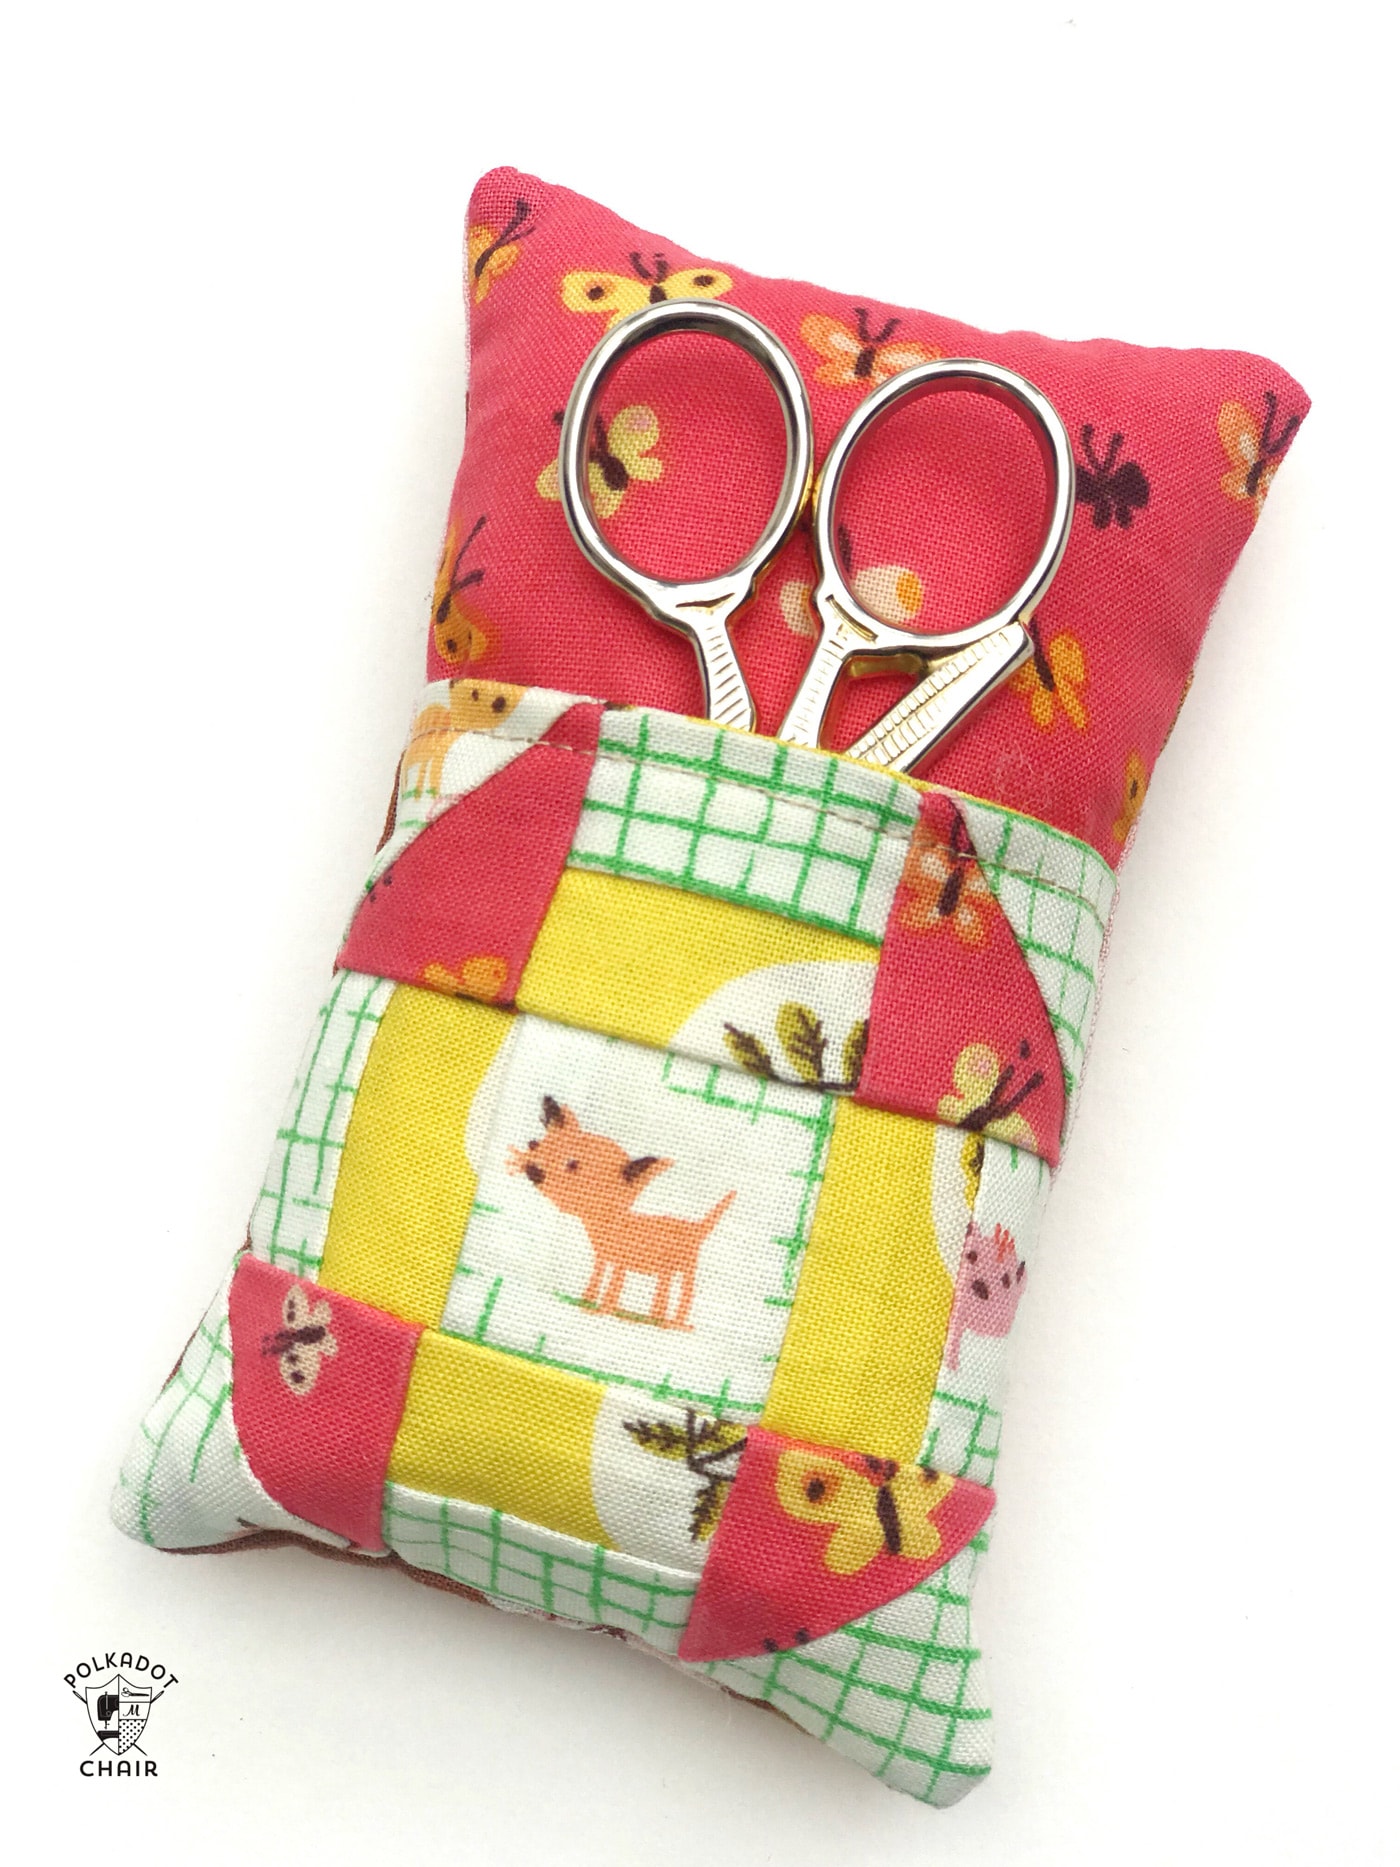
Churn Dash Pocket Pin Cushion Tutorial
I don’t know about you, but I’m always dropping pins, losing pins, and hunting for the right type of pin just when I’m at a critical moment in a project. And as for embroidery scissors for snipping those loose threads, I can never find them when I need them!
So it gave me the idea to make a pincushion that also keeps my scissors safe too, so I can always find them! I decided to create a pincushion with a pocket.
I’ve worked on a lot of projects recently that have been really modern in design. I’ve done lots of foundation paper piecing, some improv piecing, and used lots of solids. So I wanted to go back to the roots of quilting and use a traditional method and a traditional quilt block.
What is a Churn Dash Quilt Block?
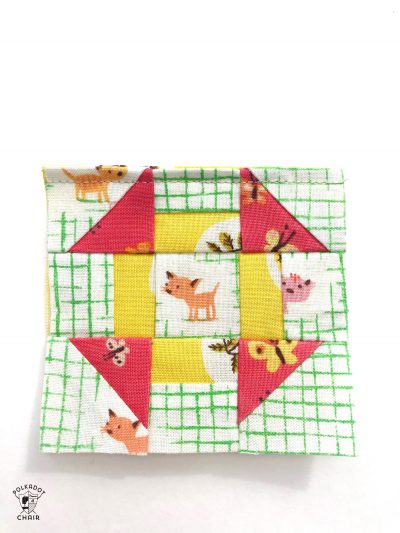
One that I love but I’ve not used for some time is the Churn Dash Block. This is a very old 9-patch block and one that girls first learned in the 1800s because of the simplicity of its rectangles, triangles, and squares.
It gets its name because the perimeter resembles the butter churn, and the square center resembles the stick – also known as the dash. So there you go, a little bit of history before you embark on this cute project!
Traditionally Churn Dash blocks are made up of 2 highly contrasting fabrics. Well, I’m abandoning tradition for this bit and throwing in as many adorable Heather Ross Tiger Lily fabrics as I can find, but you can use any fabrics you choose.
You might want to consider some contrast, but why not add in 3 or even 4 different colors? See if it works, and if it doesn’t, try a different combination! Since the pieces needed for the project are small, it’s perfect to make from fabric scraps from your stash.
What is the Best Filling for a Pincushion?
I would not say that there is a “best” filling for a pincushion; rather, several choices, all with pros and cons.
Poly-fill batting is easy to source and generally inexpensive. It will give your pincushion a nice shape when finished.
TIP: The pincushion will require more stuffing than you think it will. Keep adding stuffing until the pincushion is very firm.
Fine Steel Wool can be used for pincushion filling; the steel wool will help to keep your pins and needles sharp. It can, however, be hard to work with. I would not recommend using only steel wool but rather combining it with polyester or other stuffing.
You can also use a combination of rice or walnut shells with polyester batting. The walnut shells (or rice) will give your pincushion more weight. The weight will help keep the pincushion from moving as you insert your pins.
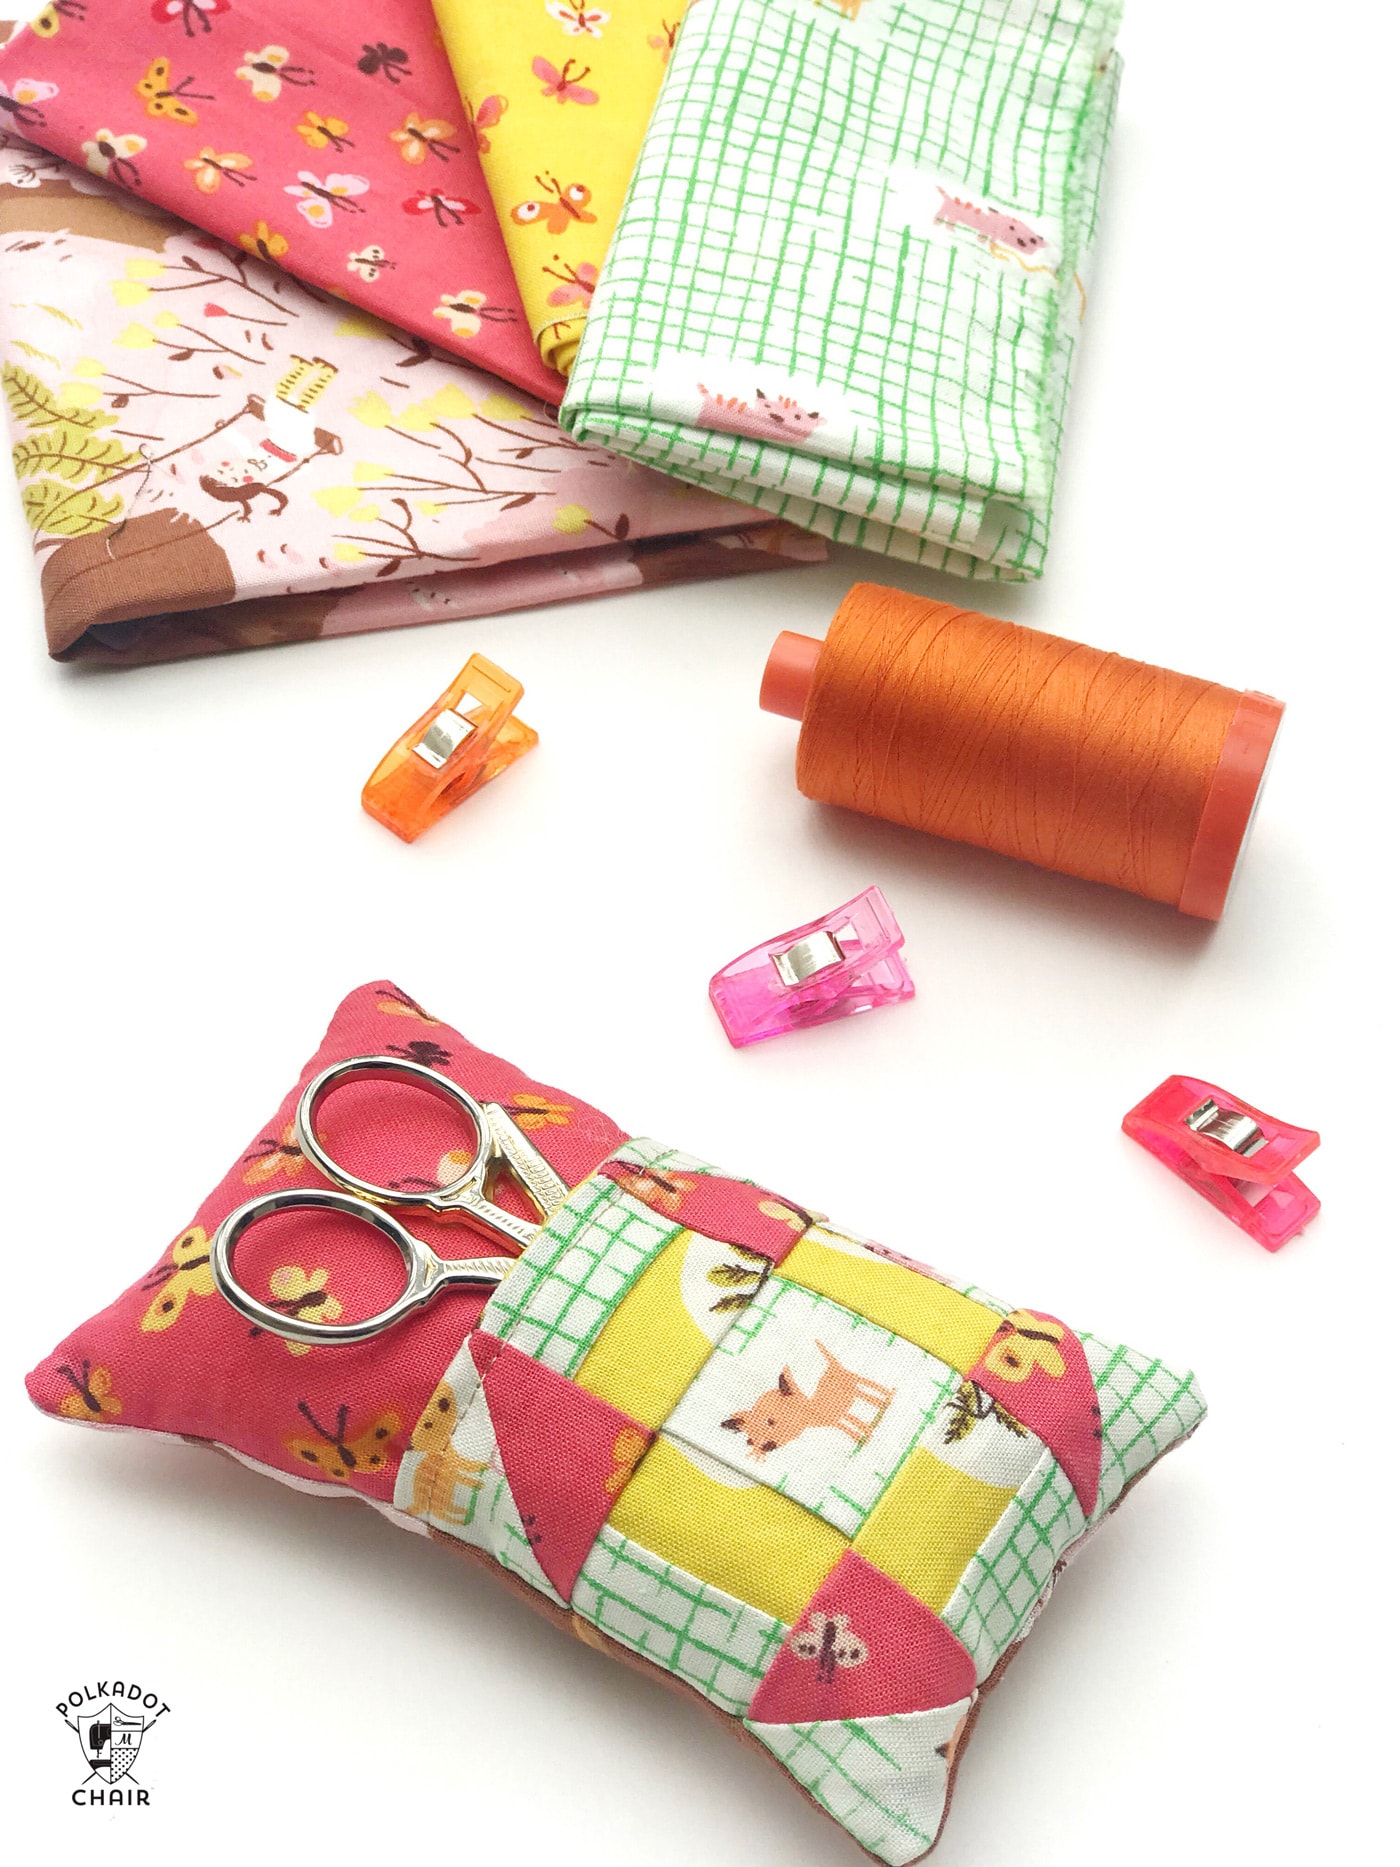
Supplies for Pincushion Pattern
Stuffing – polyester fiberfill (the kind normally used for toys)
Sewing Machine
Basic Sewing tools
Quilt Ruler
Binding Clips
Several large pieces of fabric, I use 100% quilting cotton fabric.
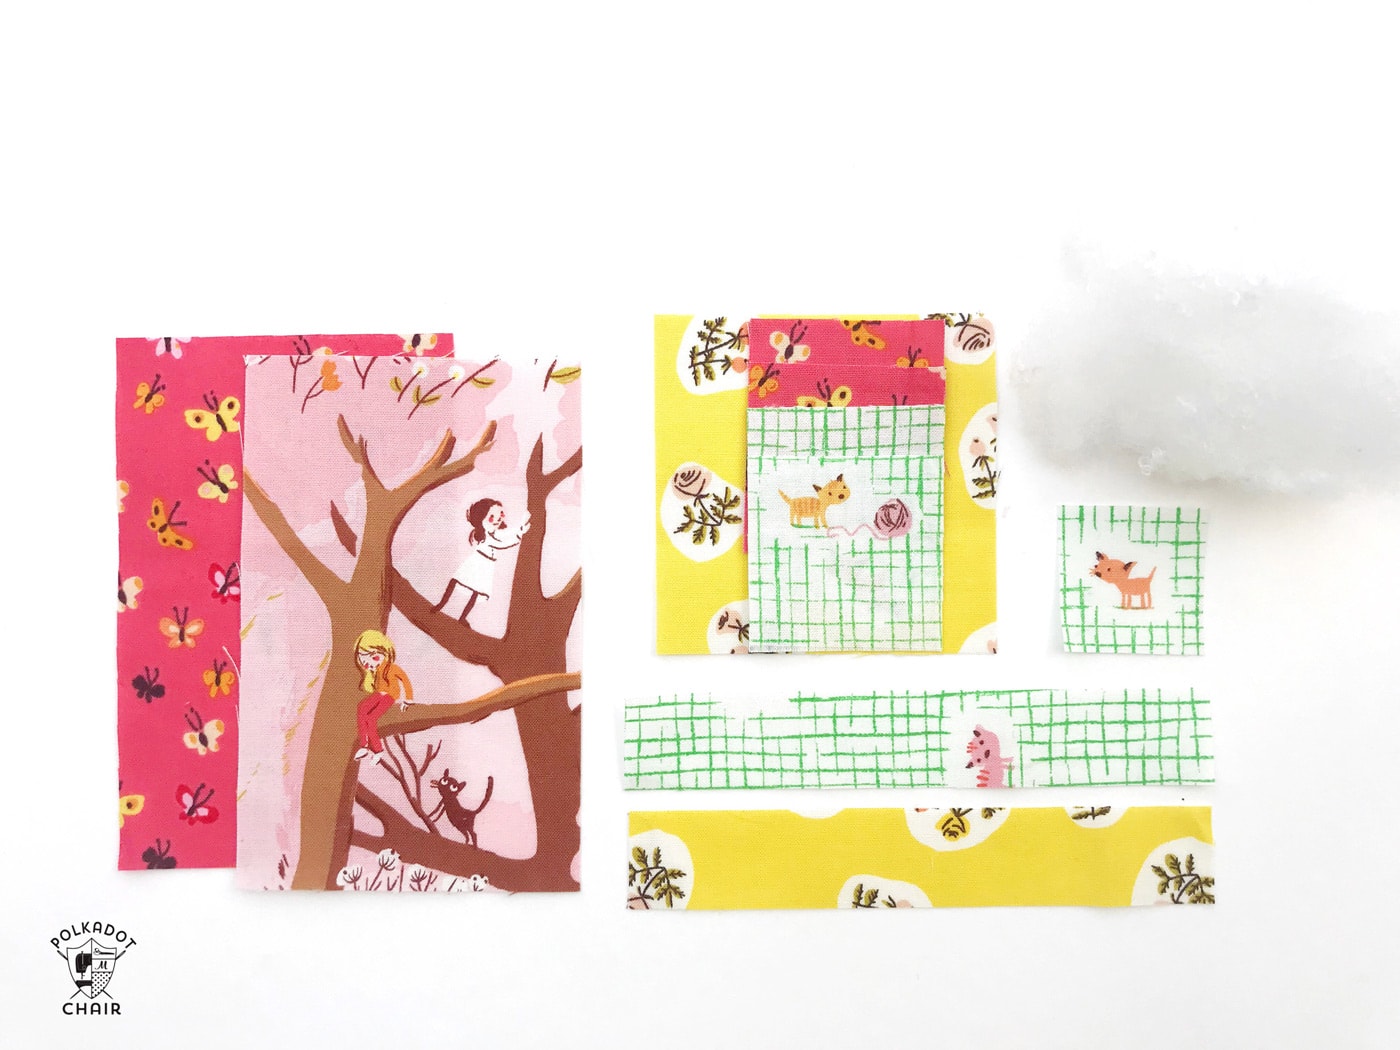
Cutting Directions:
Center square 1 1/2”
2 x colored squares 2” for the triangles (slightly larger to allow for trimming)
2 x background color squares 2” for the triangles (slightly larger to allow for trimming)
6” x 1” colored strip
6 x 1” background color strip
For the Pocket:
1 x 3 1/2” square (pocket lining)
For the Cushion:
2 x 5 1/2” x 3 1/2” (front and back of cushion)
Instructions to Make the Pincushion with a Pocket
Churn Dash Pocket Pincushion Pattern
supplies
- 4-5 large pieces Fabric I use 100% quilting cotton fabric.
- 1 package Polyester Fiber-Fill can also use wool batting, or a combination of steel wool and batting.
Instructions
Cutting Directions:
- For the Quilt Block:Center square 1 1/2”2 x colored squares 2” for the triangles (slightly larger to allow for trimming)2 x background color squares 2” for the triangles (slightly larger to allow for trimming)6” x 1” colored strip6 x 1” background color strip

- For the Pocket:1 x 3 1/2” square (pocket lining)
- For the Cushion:2 x 5 1/2” x 3 1/2” (front and back of cushion)
- All seam allowances are 1/4″ unless otherwise noted.

Step One: Make the Mini Churn Dash Quilt Block
- We are going to start off by making a 3” (finished) Churn Dash block.
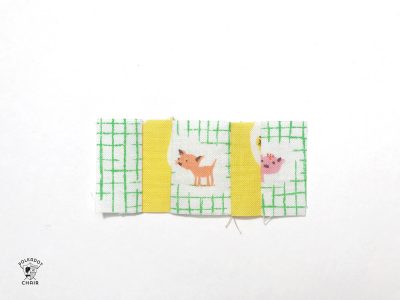
- Take the colored strip and stitch the right sides together with the background color strip. Press open and sub-cut into four 1 1/2” inch strips.
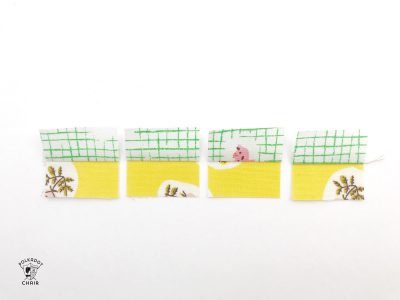
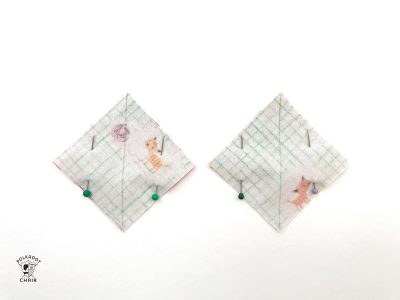
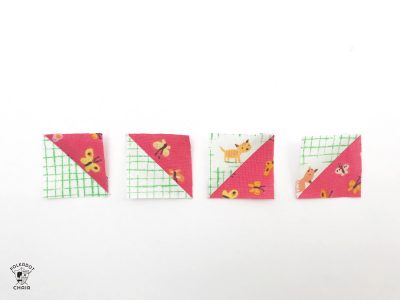
- Next, create the half square triangles (HSTs) by taking 1 colored 2” square and placing it right sides together with a background 2” square. Draw a line down the center and pin near the edge of the square on either side. Repeat with the other pair.
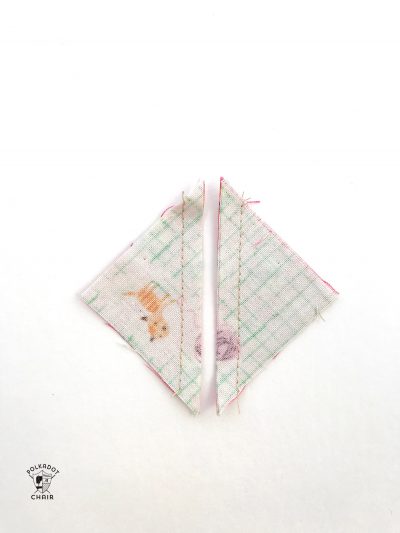
- Using a 1/4” foot, stitch down either side of the drawn line. Using a rotary cutter, cut down the drawn line creating two HSTs.

- Open out, press to the dark side, and trim the ears. Trim to 1 1/2”. Repeat with the other pair of squares to create 4 HSTs in total.
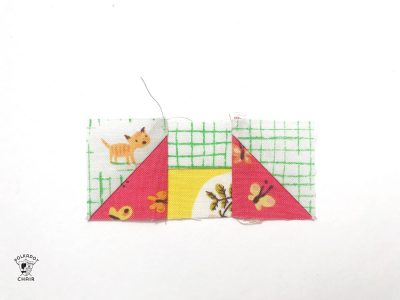
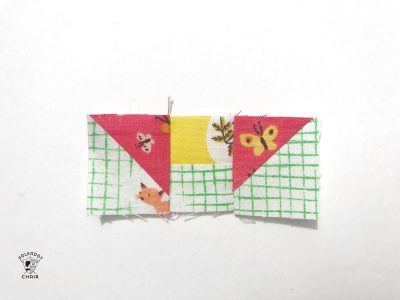
- You now have all the components of the block ready to stitch together.
- Starting with the top row, take the square made of two rectangles and stitch an HST to either side, checking the orientation of the block.
- Take the center square and stitch a square made of 2 rectangles to either side, checking that the background fabric is on the outside of each square vertically.
- Take the final square made of 2 rectangles and stitch a HST to either side, checking the orientation of the block.
- Stitch all the rows together to complete the Churn Dash block.
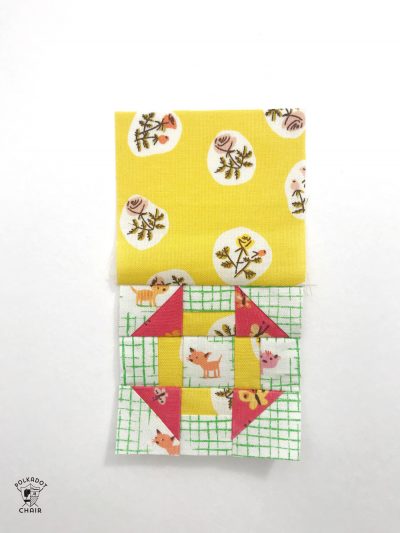
Step Two: Make the Pocket for the Pincushion
- Take the pocket lining piece and place the right sides together with the Churn Dash block. Stitch across the top to join the two blocks together. Open out and press.
- Fold the lining fabric so that it is the wrong sides together. Press in place and top stitch 1/8” from the top.
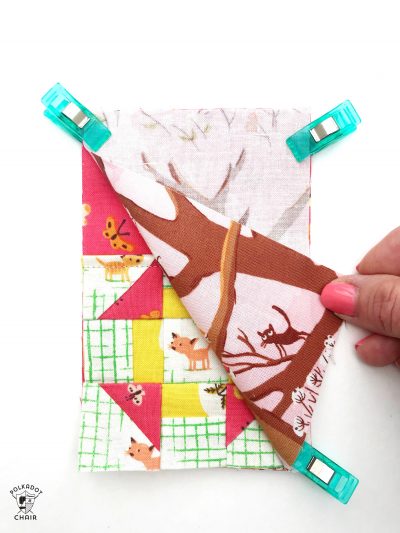
Step Three: Construct the Pincushion
- Now to construct the pincushion. Lay the pieces down in the following order:
- Top cushion fabric right side up, pocket lined up with the bottom, right side down, back of cushion right side down. Use basting clips to pin in place, leaving a gap for turning.
- Add basting pins all around the outside, leaving a gap at the top for turning. Stitch all around the edge using a 1/4” seam and reinforcing beginning and end.
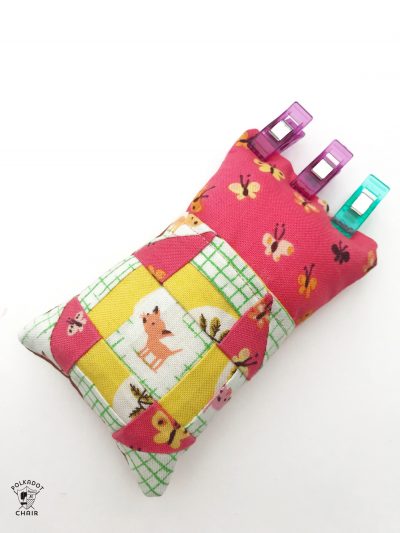
- Clip the corners and turn them out. Stuff with toy stuffing.
- Use basting clips to hold the opening closed, and use a small slip stitch to close the gap.
- Add your scissors and pins, and you are finished! Now you’ve no excuse ever to lose your scissors or pins again!
About the Maker:

Sarah Ashford is a British Quilter and embroiderer and founder of the GreatBritishQuilter challenge on Instagram. Sarah regularly contributes projects to magazines and loves to spread the joy of quilting everywhere she goes. Follow her on Instagram at @sarahashfordstudio and be sure to check out her beautiful sewing room decals in her etsy shop www.etsy.com/shop/
Other projects you may like:
- Padded iPad Case Sewing Tutorial
- Bedside Kid Tote Tutorial
- How to make a Dresden Quilt Block
- Quilting Basics for Beginners
- Mason Jar Pincushion Tutorial
I have made a couple of these I use mine all the time and my daughter loves hers they are so handy when I do my binding hand sewing great next to my sewing machine
Thank you a great project well written tutorial
Patty
Cute project…I made one for my daughter who took up embroidery recently. Thank you…clear easy instructions and it turned out perfectly.
I’m new to the churn dash block, and am confused on the triangles. I followed the directions and had squares look exactly like the 4 unsewn triangular squares that lay side by side. Then in the next picture, it shows the 2 HST sewn to the 2 rectangular piece. The HST has a seam allowance that does not show in the previous picture. It looks like the two pieces I sewed together to create the HST should actually been a square and rectangle to create the seam allowance. Please help me understand…this is an extremely cute project that I am certain I am missing something.
The whole project uses a 1/4″ seam allowance. So when the block is all sewn together it will line up as all of the other pieces will have a 1/4″ seam allowance as well.
If you stuff your pincushions with steel wool, the pins will stay sharp.
Thank you for this project. Have made 2 this afternoon. I added a flap of brushed cotton on the back, fastened with vintage press-studs to trap my orts when I”m out stitching at work.
Thanks a million. Question? What does HST’s stand for. Thanks a lot
Half Square Triangle
Thank you for the neat churn dash pocket pincushion tutorial! What is your recommended size of sissors for this little project? Happy Holidays!
This looks like a bed for Polly Pockets. (I have daughters who used to love them. For anyone who hasn’t seen Polly Pockets, they are tiny dolls.)
“pocket lined up with the bottom, right side down……………….should be right side up as shown in the illustration? Love the mini block, which would make a mini pincushion on its own. Thank you.
WOW! I love this project, fabulous.