How to Make a Half Square Triangle String Quilt Block – December Block of the Month
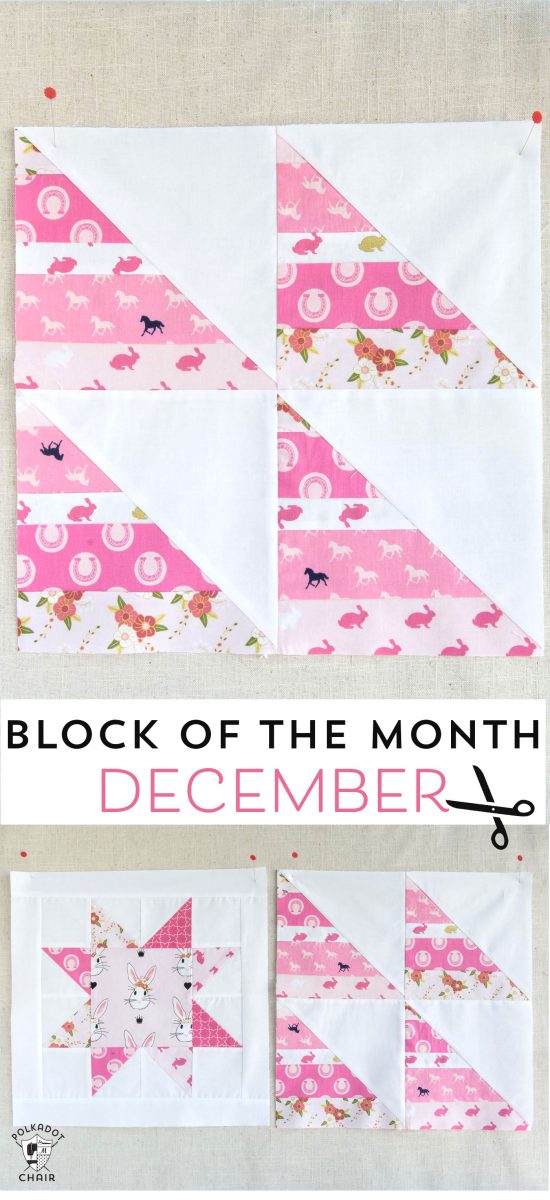
I hope you’re ready to play along with the Block of the Month series here on the Polka Dot Chair! This month, we are continuing the series with a free pattern 15-inch String Half Square Triangle Quilt Block.
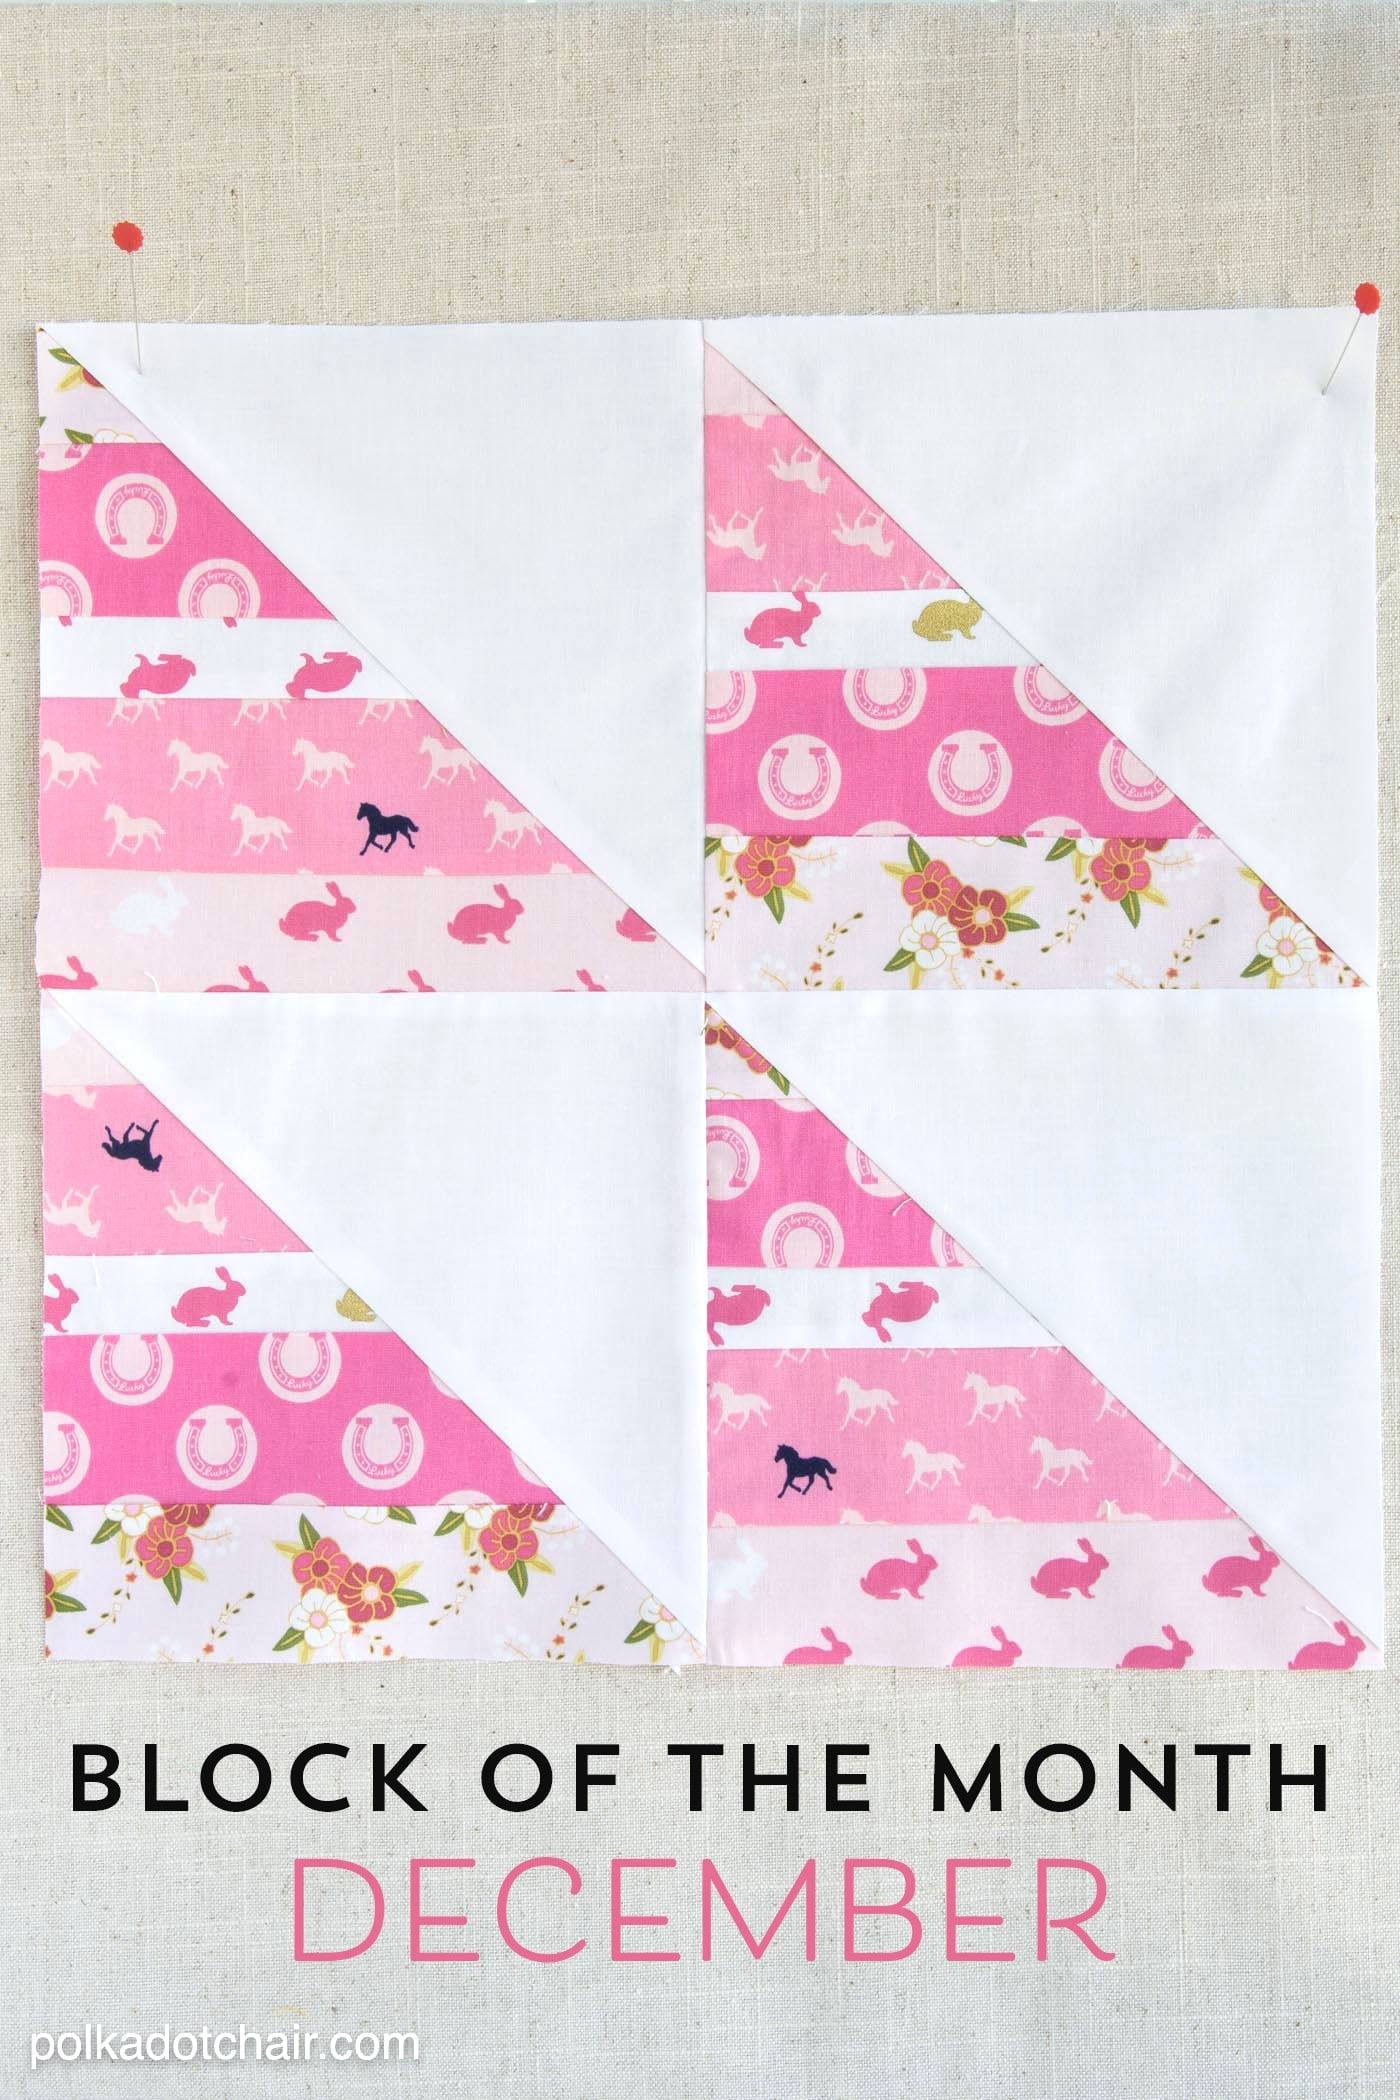
This is block #4 of 12. It builds on the basic HST blocks that we learned to make in October and adds an extra dimension by piecing them from a strip pieced block.
Hi There!! Did you guys have a nice Christmas?? Are you ready to jump back into creating now that the Holidays are over?
Maybe you set a goal for yourself in 2016 to learn to quilt or to complete a specific project. I’ve set a few goals for myself that I’ll be sharing with you in the next few weeks. But before we jump into all of the New Year’s Resolutions stuff, let’s mark that December Quilt Block of the Month, this String Half Square Triangle Quilt Block, off of our “to do” list, shall we?
If you missed it be sure to check out this post offering tips and trick to picking out fabric for a quilt. You can find an index to all the posts in this quilt block series to date by clicking here.
UPDATE: You can now purchase a PDF with ALL of the block instructions for each month in one place!! Click here to PURCHASE
About the Quilt Block
This month’s block is a variation of the Half-Square Triangle (HST) blocks that we learned to make in October.
The variation is that it is partially made with a string (or stripe) block. The block is also set 4 up, and I like that it will make the finished quilt look like it’s made up of smaller blocks as well as larger finished blocks.
How to Make a Half-Square Triangle String Quilt Block:
You’ll need to Cut:
- 4 Strips each 2 1/2″ 19″
- 1 Strip 1 1/2″ x 19″
- 2 Squares Background Fabric 8 1/2″ x 8 1/2″
Step One: Create the Strip Block
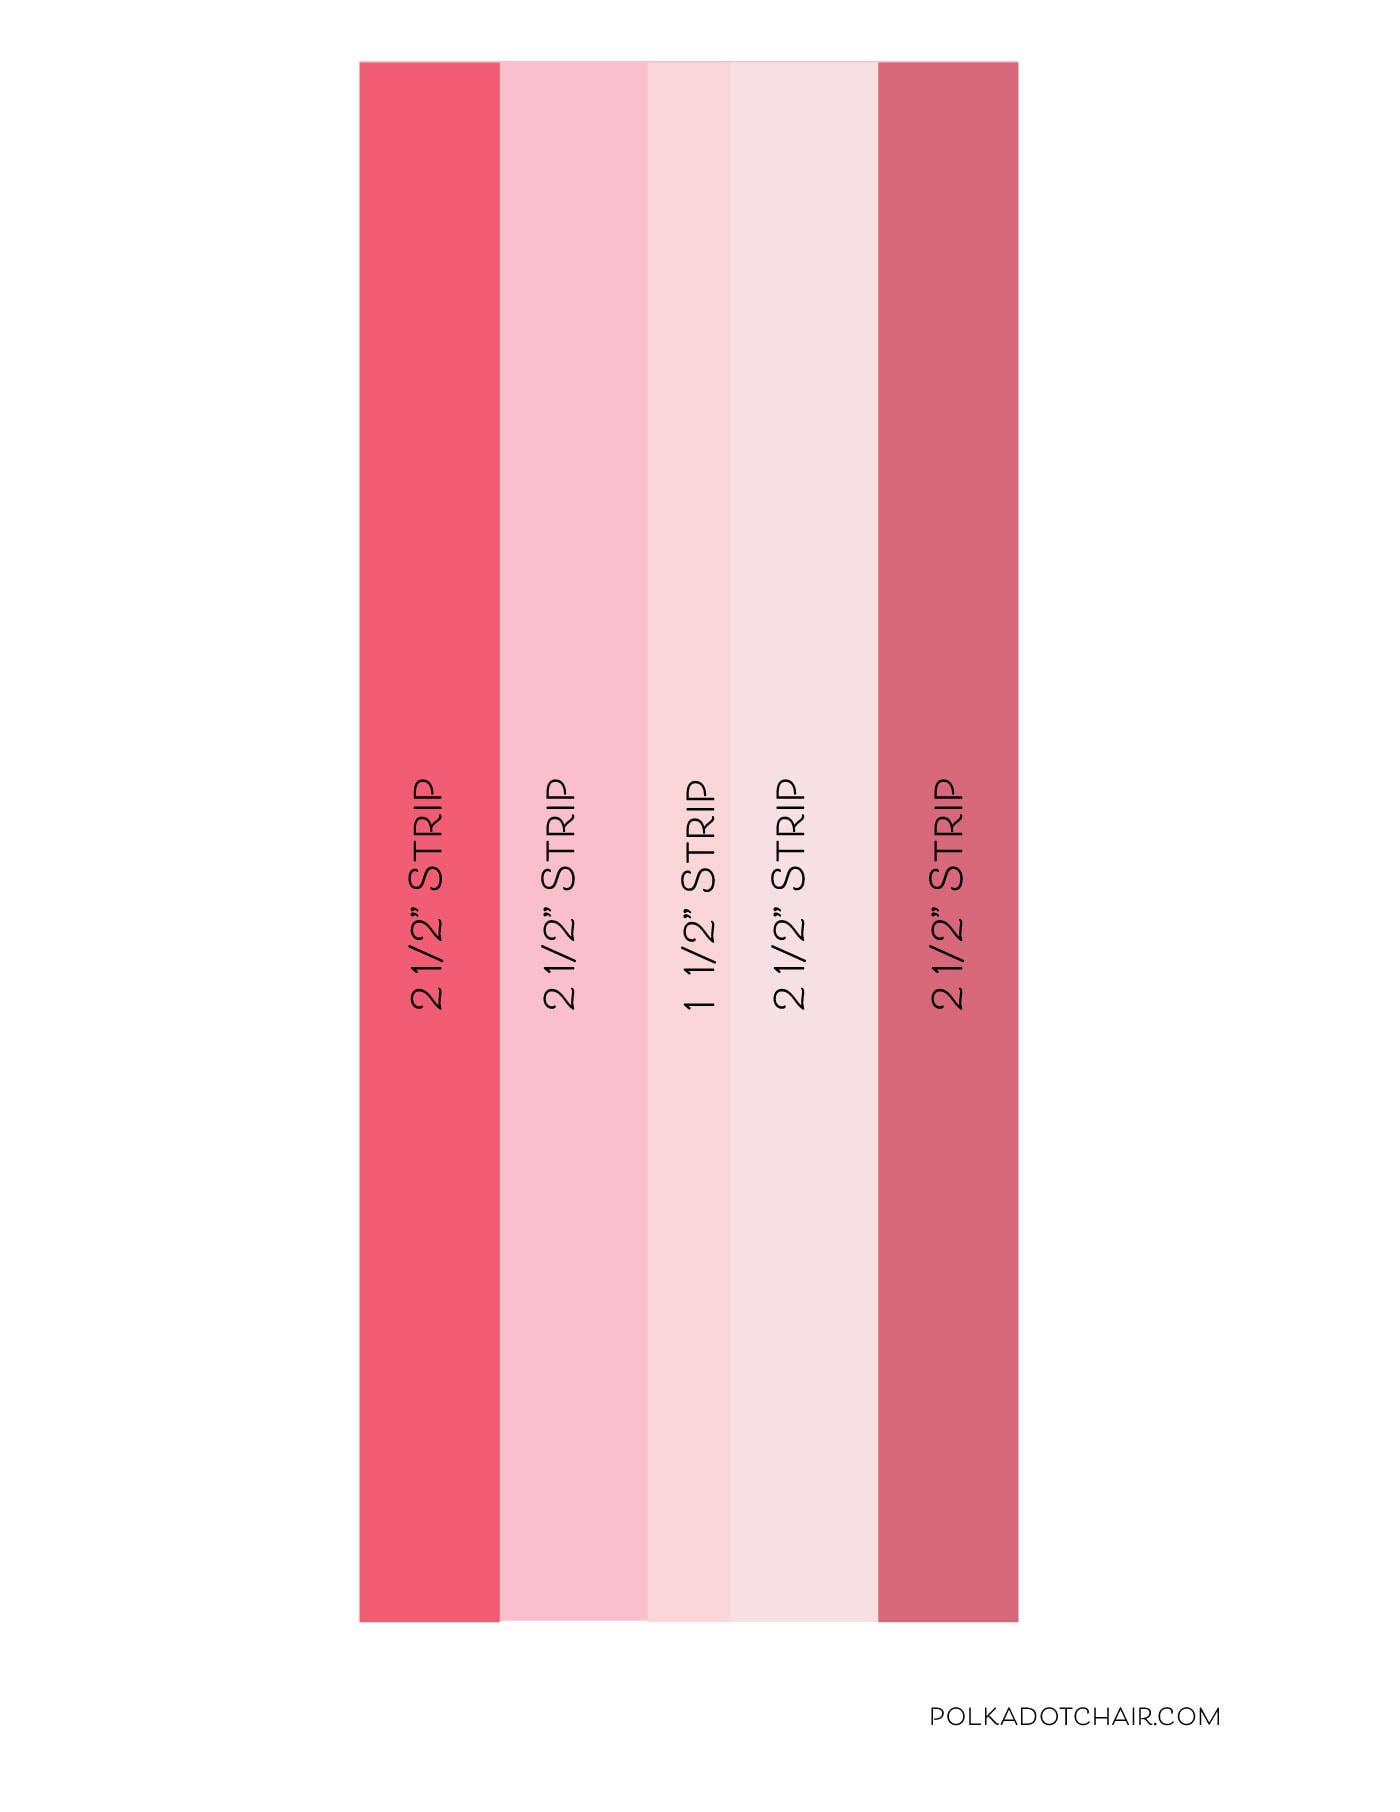
Stitch your 19″ long strips with the 1 1/2″ wide strip in the center. Ensure that your seams are precisely 1/4″, and be careful not to distort your seams when you press the strips. Move your iron up and down, not side to side.
Trim this block into two pieces, each 8 1/2″ x 8 1/2″ (the finished width will be close to 9 1/2″, so you will need to cut 1/2″ off each side of the unit; this measurement is intentionally larger to allow you to have “wiggle” room even out your fabric before the next steps).
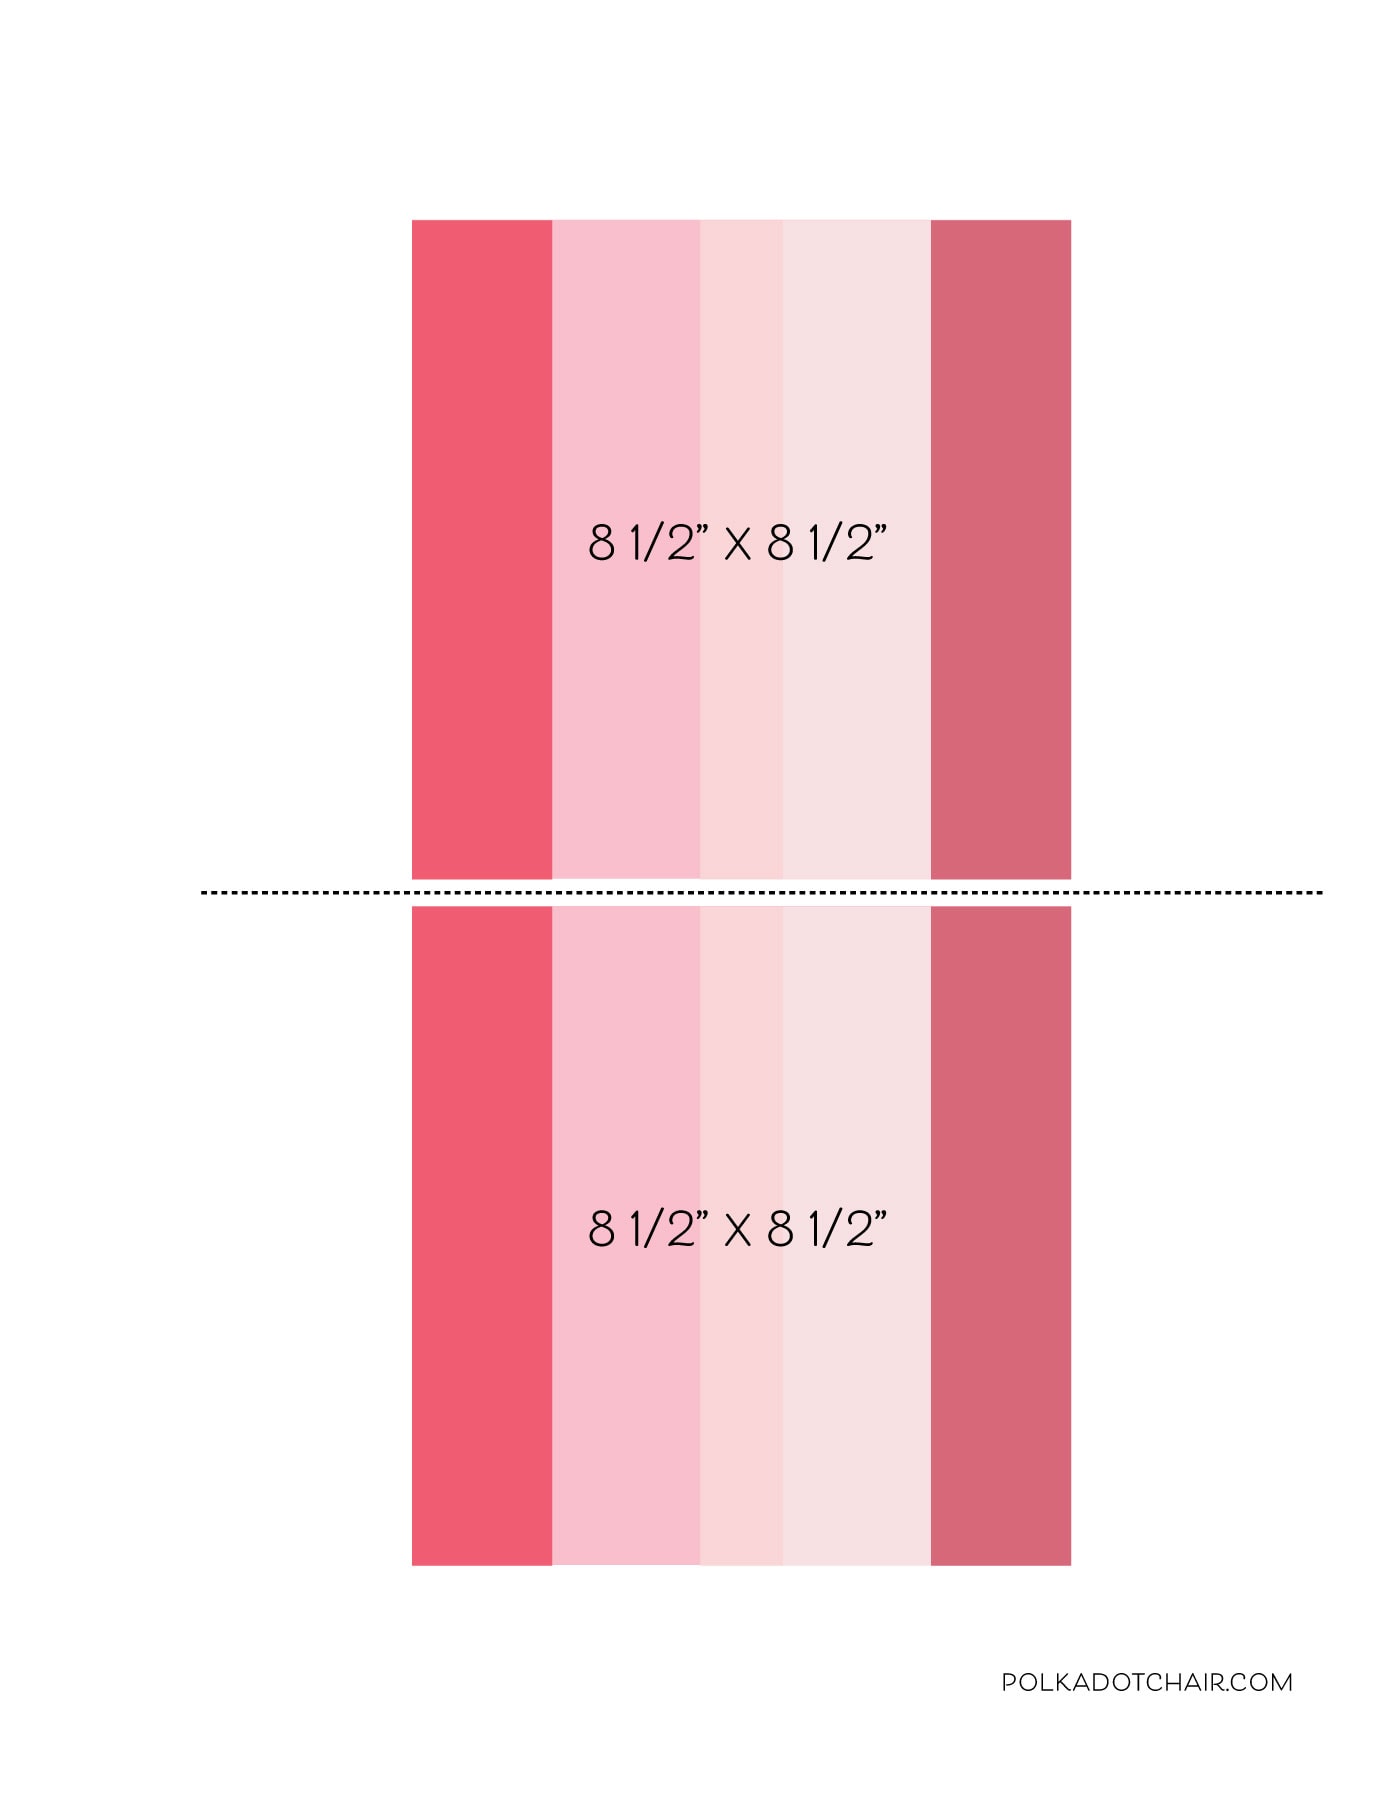
Step Two: Construct the Half Square Triangles
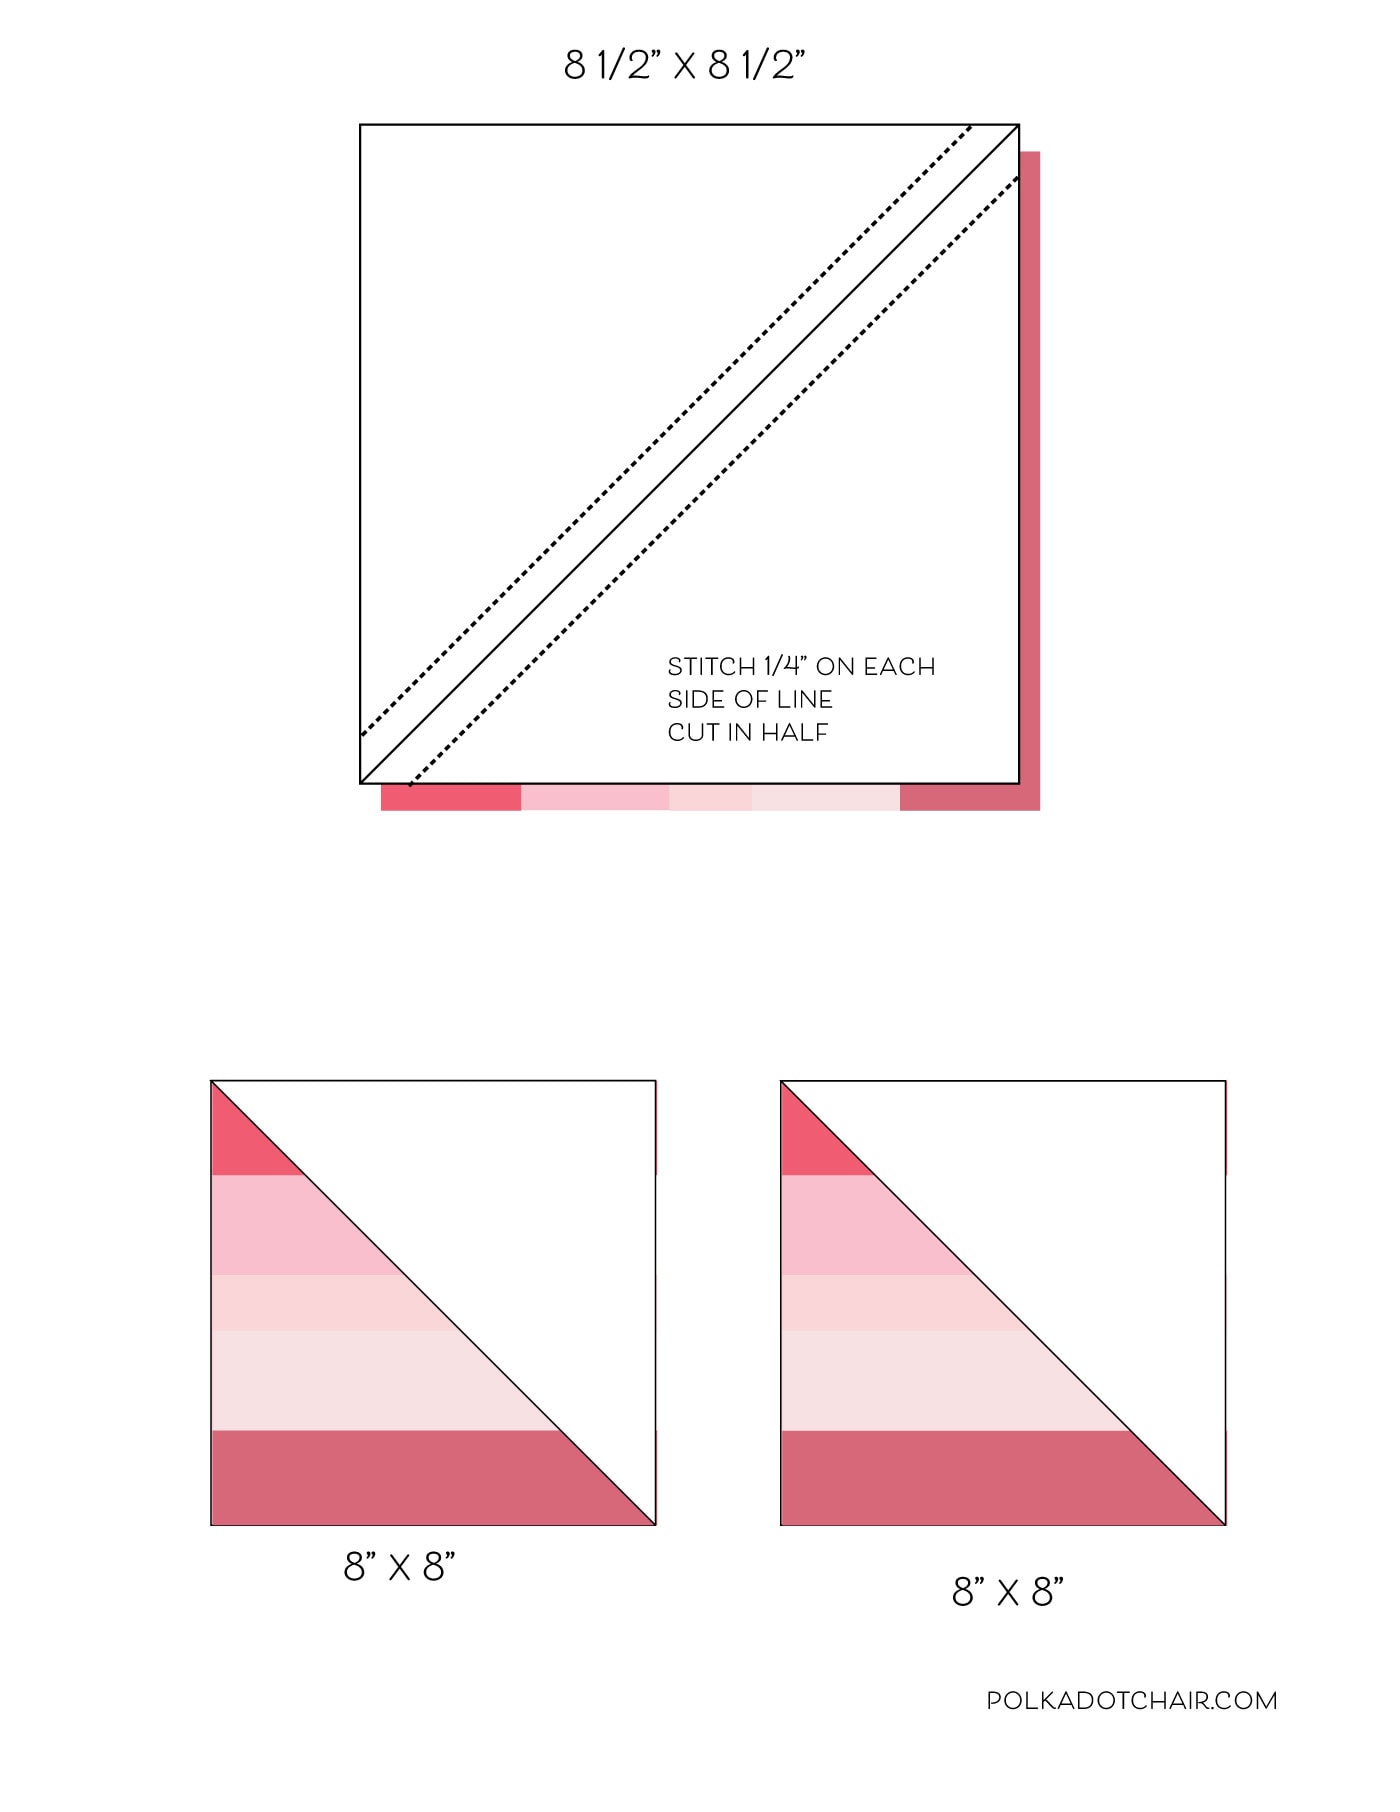
Next, draw a diagonal line on the wrong side of your two 8 1/2″ x 8 1/2″ background fabric pieces.
Place the trimmed strip piece right side together with the background fabric piece and stitch 1/4″ on each side of the line you drew.
Cut apart along the line you drew. You will now have 2 Half Square Triangle Blocks (HST’s, if you need more help understanding how to make a HST refer to this post)
Repeat for the second set of squares. Make sure that the diagonal line faces the same direction as it did with the first set of squares.
Trim each HST block to 8″ x 8″
Step Three: Assemble the Quilt Block
Stitch the four blocks together as shown. Sew two blocks in row 1 along the side seams and press. Then, stitch the two blocks in row 2 along the side seams and press. Then, stitch the two rows together.
Trim block to 15 1/2″ x 15 1/2″
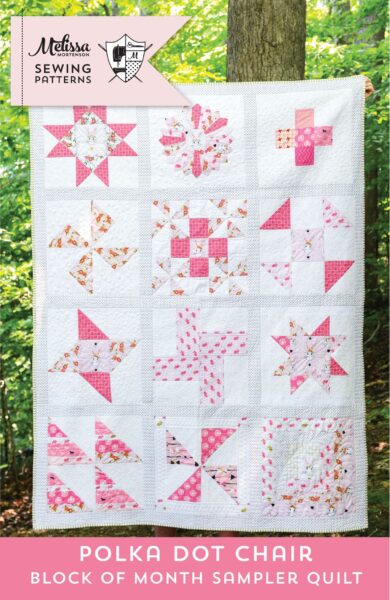
Other Blocks in the Block of the Month Series
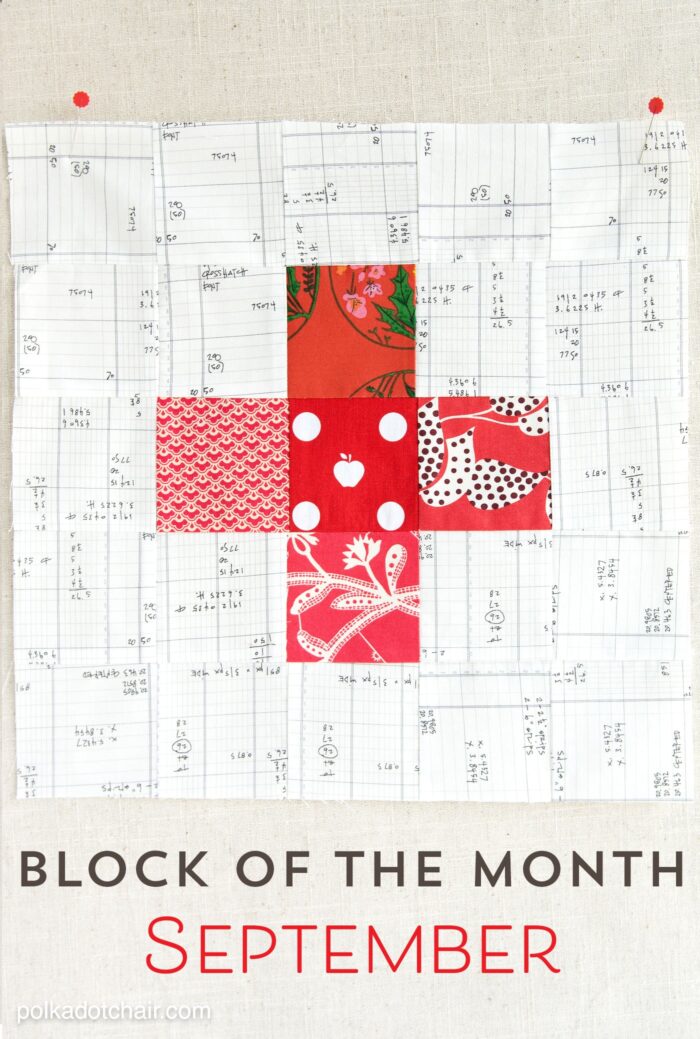
- Plus Quilt Block Pattern
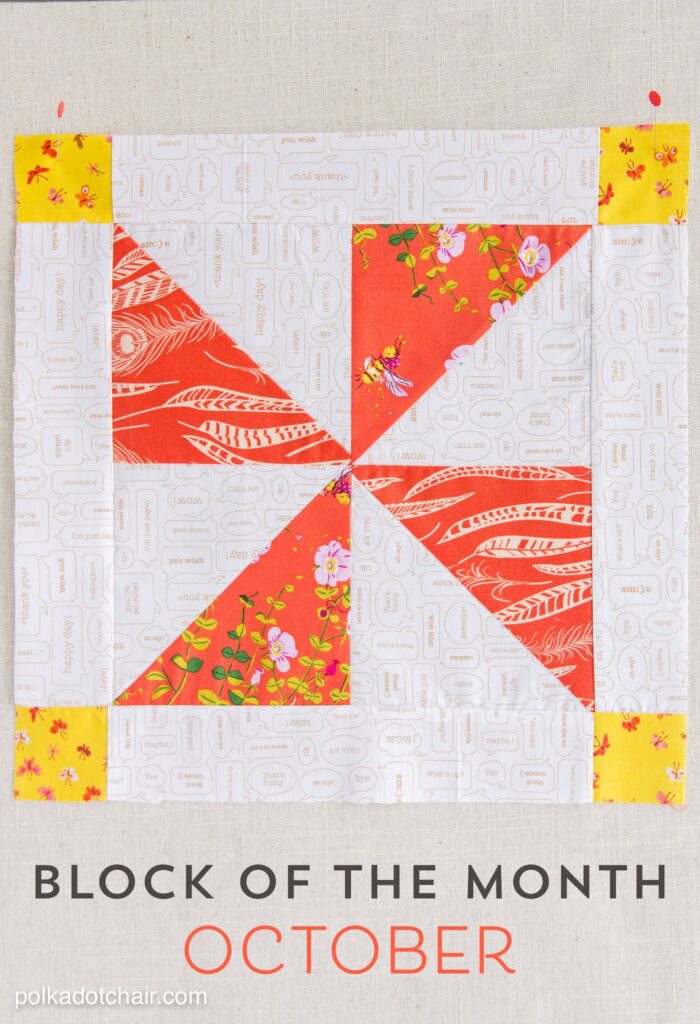
- Pinwheel Quilt Block Pattern
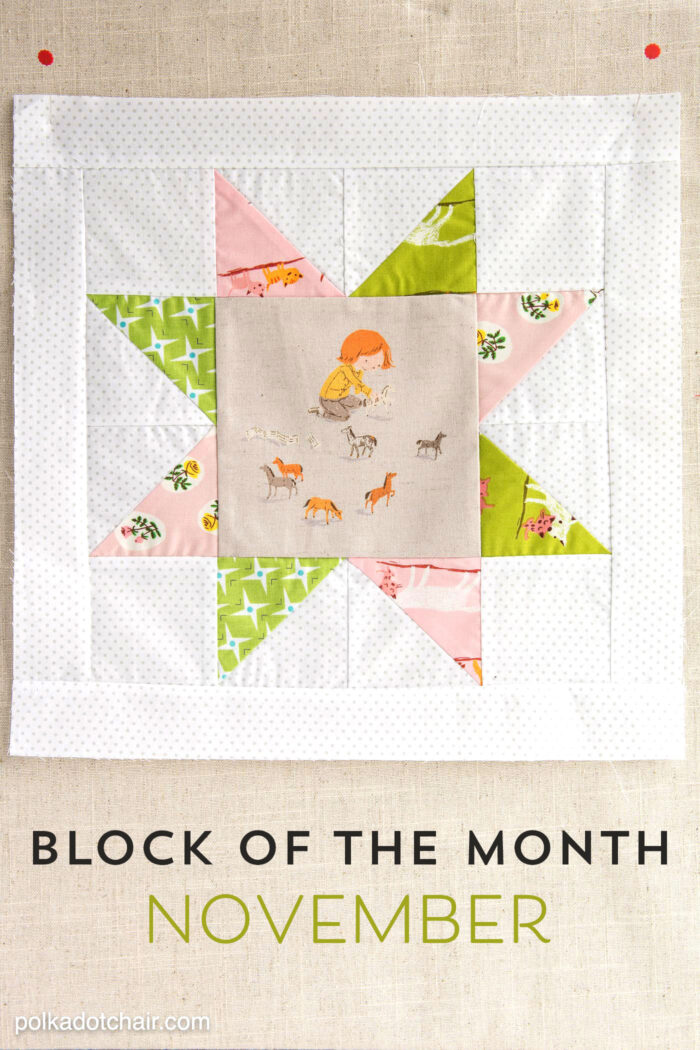
- Sawtooth Star Quilt Block Pattern
- Half Square Triangle String Block Pattern
- Turnstile Quilt Block Pattern
- Shoofly Quilt Block Pattern
- Keystone Quilt Block Pattern
- Log Cabin Quilt Block Pattern
- Friendship Star Quilt Block Pattern
- Grandma’s Favorite Quilt Block Pattern
- Ohio Star Quilt Block Pattern
- Dresden Quilt Block Pattern


Just want to say your article is as astounding. The clearness to your publish is simply
excellent and i could assume you are a professional in this subject.
Fine with your permission allow me to grasp your feed to keep
updated with coming near near post. Thanks a million and please carry on the gratifying work.