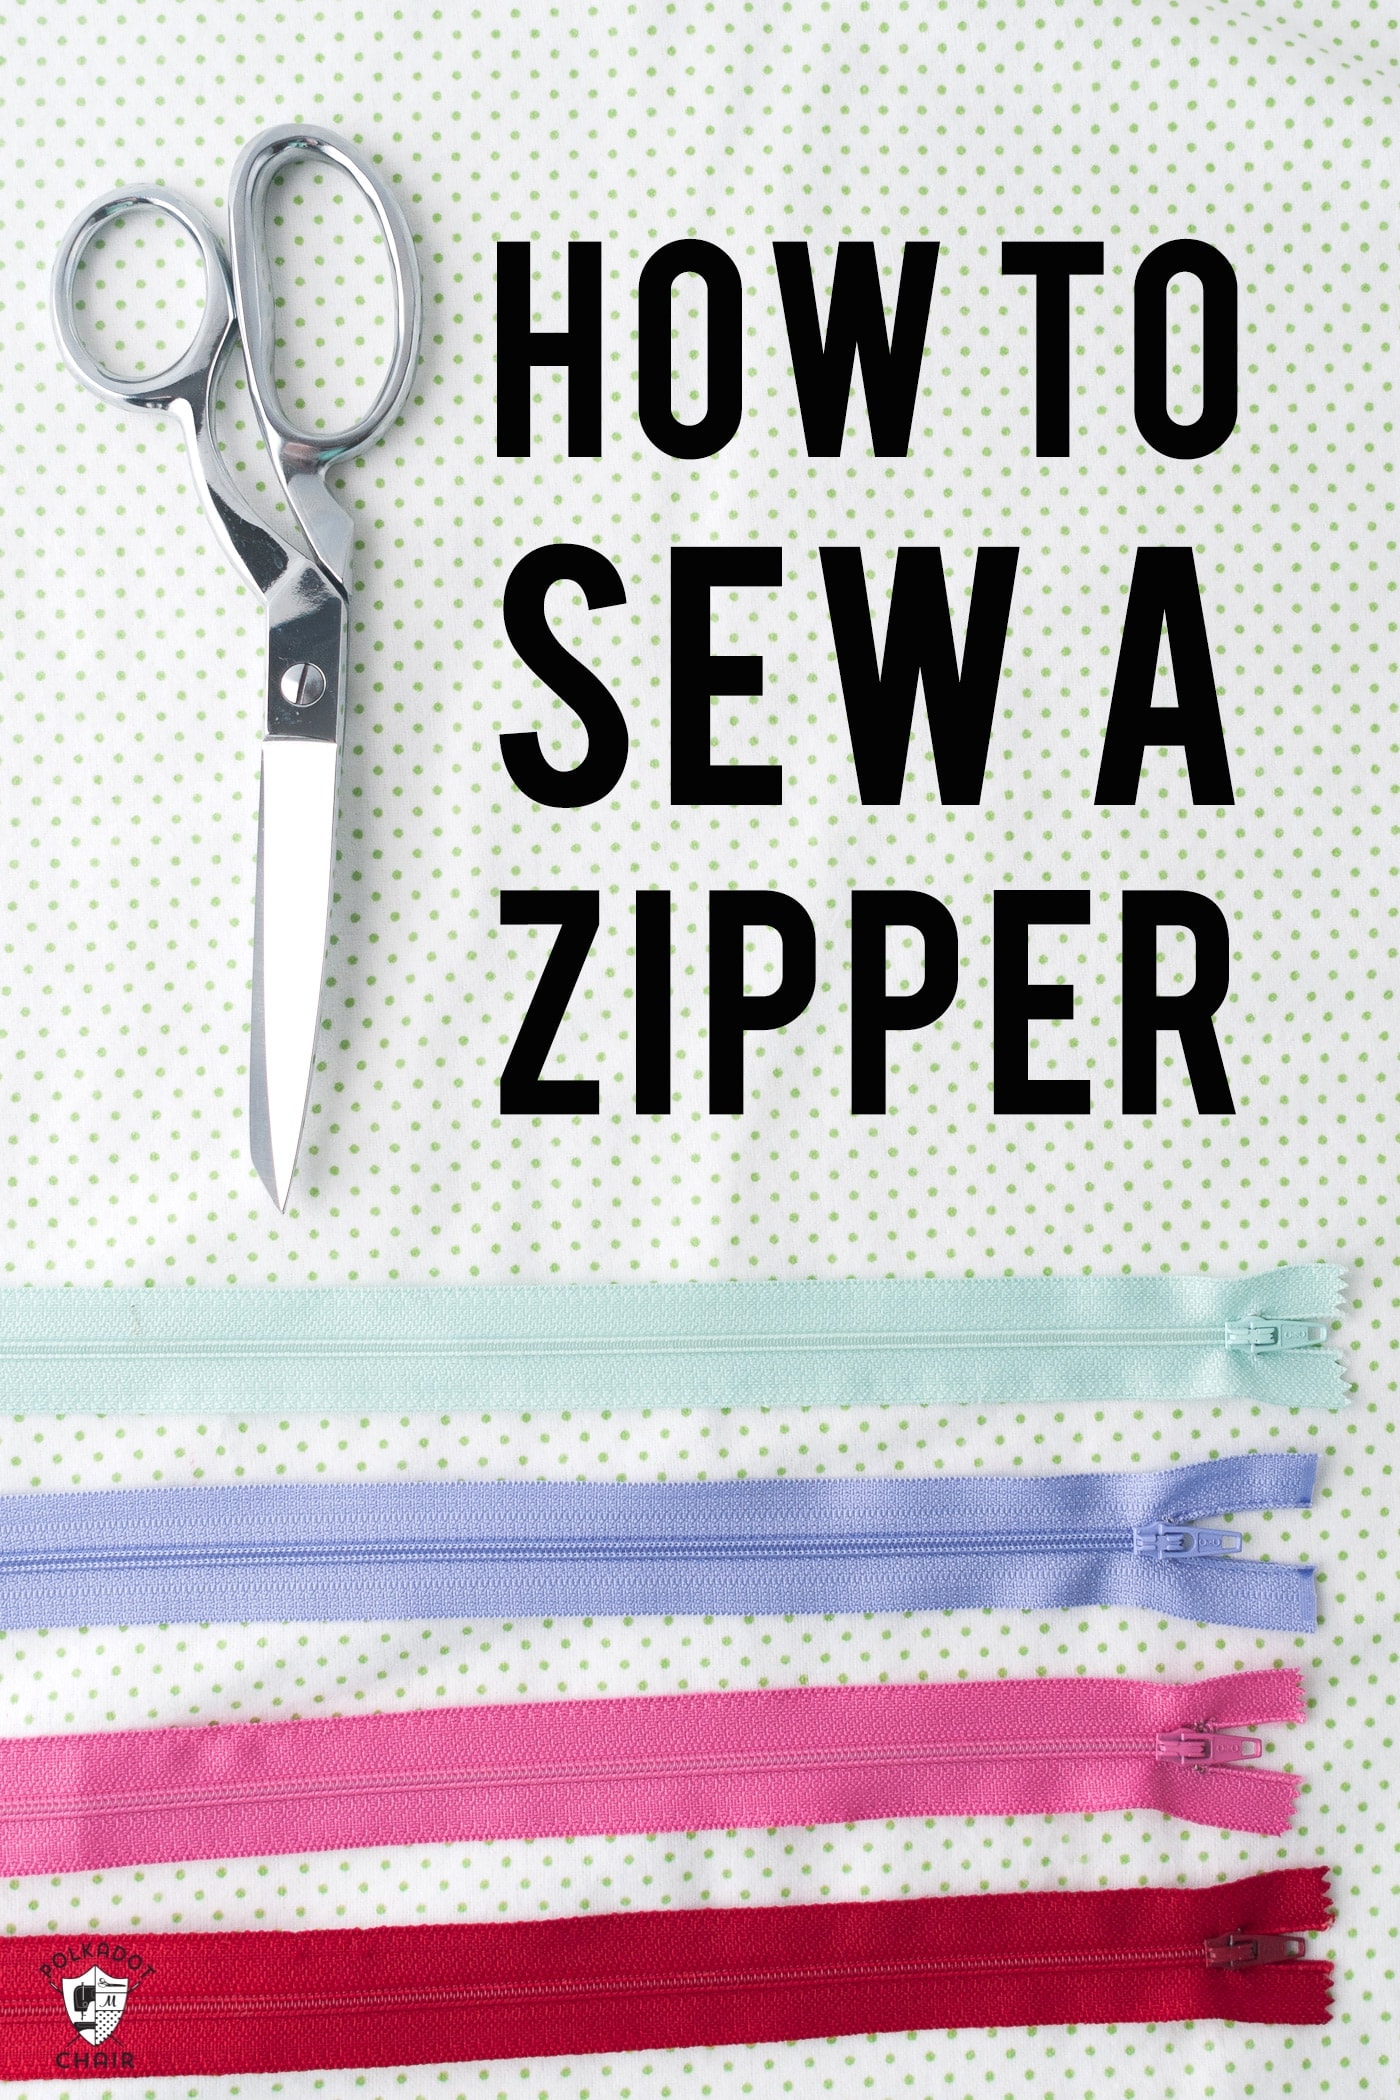
Sewing Lesson: How to Sew a Zipper the Easy Way
I’ll have you sewing a zipper in no time flat! Welcome to Sewing School! Today we will learn how to conquer your fear of zippers with this simple and easy zipper sewing technique. Learn how to sew a zipper into a skirt or other apparel item.
Polka Dot Chair Sewing Lessons Series
The lesson today is part of my “Sewing Lessons” series. A series of posts designed to help beginners learn how to sew. Projects break it down. So just pick a project you’d like to try. I think the best way to learn how to sew is just to DO IT! Tackle a project!!
Sewing a zipper may seem like a daunting task, and it’s not uncommon for someone to have a “fear” of zippers I will try to demystify the process a bit for you. A zipper is just a piece of fabric placed between two other pieces of fabric. If you just think of it that way, instead of some crazy contraption, I think you’ll understand the process better.
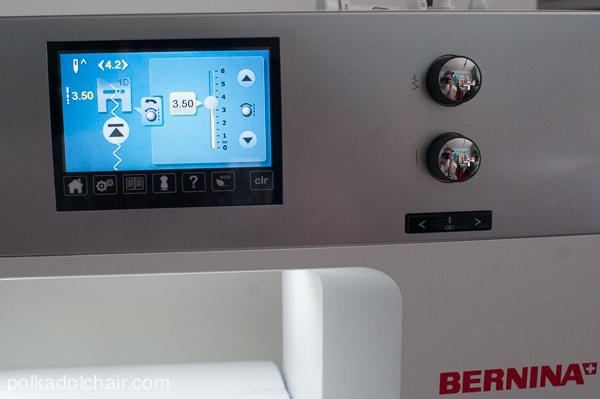
Just a note, all of the instructions today will be based on using a Bernina 710 machine, but you can use ANY brand sewing machine and follow the SAME directions. I will say things like, “adjust your stitch length to 6” if you don’t have the same sewing machine as me, you’ll just need to know how to adjust your stitch length. If you’re not sure, pull out your user manual.
This zipper sewing technique is one that I picked up in a class at my local sewing shop. They have a masters class and this was featured as one of their mastery techniques. They have graciously agreed to let me share the technique with you here today.
This technique might be a bit different than one that you have learned in the past, I think this one so much EASIER than how I learned to put in a zipper originally. In my opinion, it’s a much better way to insert a zipper especially if you are just beginning to sew.
How to Sew a Zipper into a Skirt
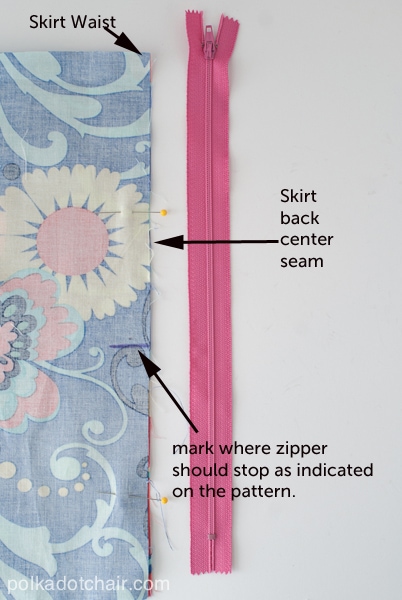
- For teaching purposes, for the tutorial today, I’m going to show you how to sew into a zipper on a skirt.
- I picked crazy colors so that they would show up for illustration purposes. This is not a real skirt. I know that nothing matches 🙂
How to Sew a Zipper into a Zip Pouch, Pillow, or Another Item
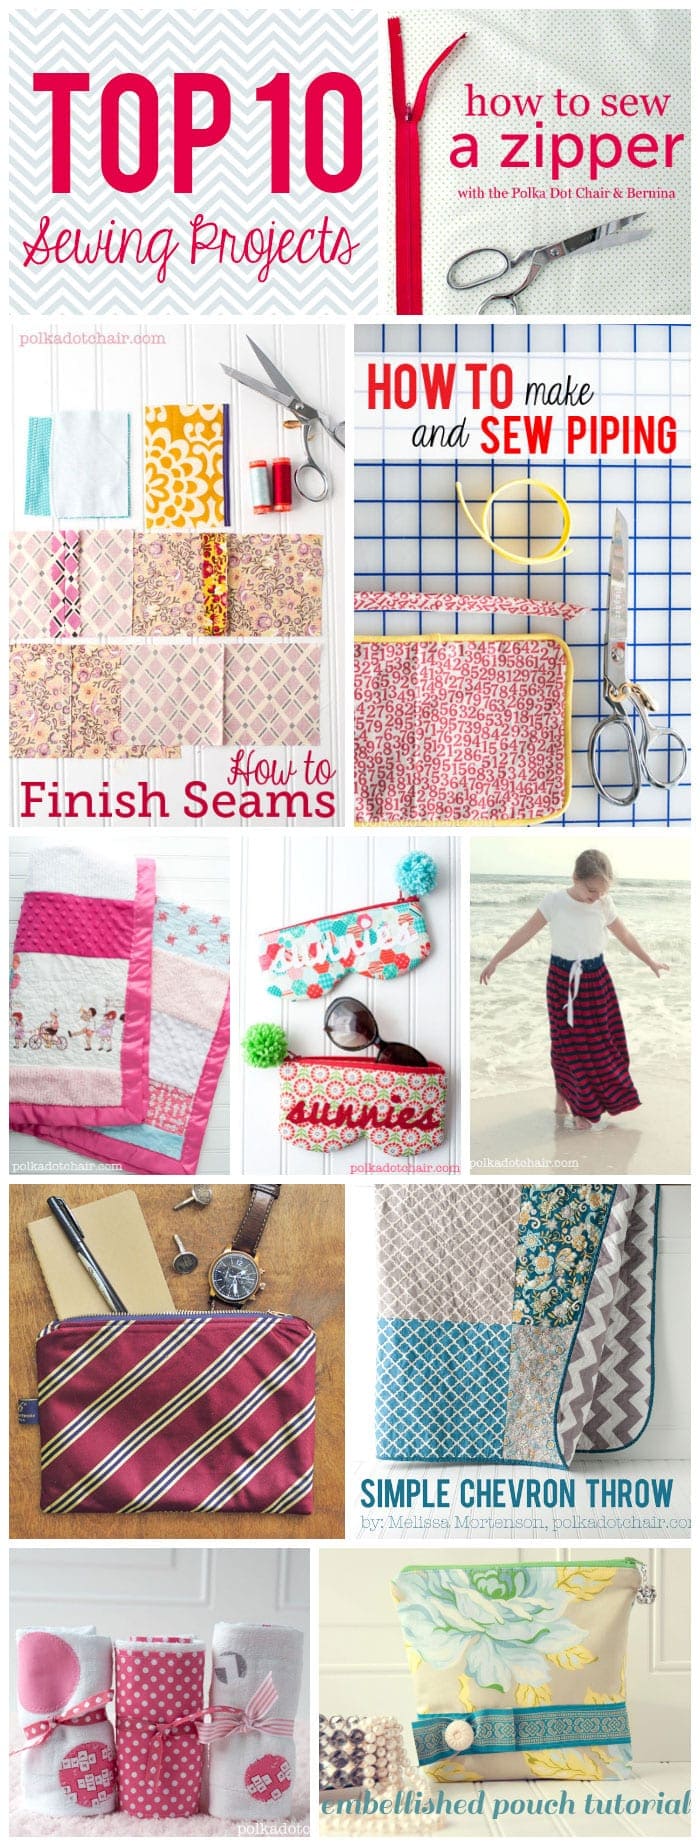
If you’re looking for instructions for how to sew a zipper into another item, check out the other Sewing Lesson tutorials on our site.
- How to sew a zipper pouch with a Polyester Zipper
- How to Sew an Invisible Zipper into a Pillow
- How to Sew an Exposed zipper into any size Pillow
- Zip Pouch tutorial using a Metal Zipper
TIP! STOP being scared of zippers! Your fear is going to hold you back more than anything. Try it; if you fail, so threehat. You can unpick it and do it again. You’re only going to learn this by DOING.
What Kind of Zipper Should I Use?
There are 3 main types of zippers on the market today (there are others, but to simpfily things, we will talk about three).
- Polyester / Nylon Zippers
- Metal Zippers
- Invisible Zippers
Most clothing and garment items are made with either polyester or invisible zippers. Metal zippers are usually used for items like bags and upholstery.
Basic Parts of a Zipper
A zipper is made up of a few essential parts.
- The Zipper Teeth: The metal or nylon parts of a zipper that “lock” together.
- The Zipper Pull: the part that you use to pull the zipper up and down.
- Zipper Stopper: At the top and end of the zipper, there is a stopper that keeps the zipper pull from coming off of the zipper teeth.
- Zipper Tape: The ribbon or “fabric” the zipper teeth attach to. This is the portion of the zipper that you sew the fabric.
Supplies Needed for Sewing Zippers
- Sewing Machine
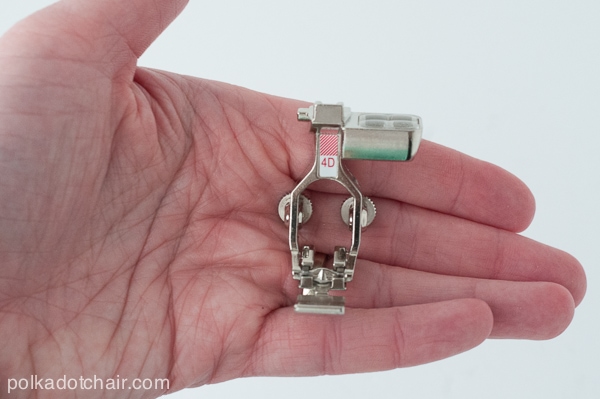
- Standard Presser Foot
- Zipper Foot for Sewing Machine (this is machine-specific, you’ll need to check your sewing machine manual to see which one to buy, most machines come with a zipper foot).
- Thread
- Scotch Tape
- Pins
- Basic Sewing Supplies
Step One: Prep
Start with a zipper that is at least 2” larger than the one called for in your pattern. It can be even bigger than that but go for at least 2” longer.
From your pattern, mark where the zipper should stop. (You can see it in the photo above, it’s the purple mark). On the pattern piece, there should be a mark noting where the zipper stops.
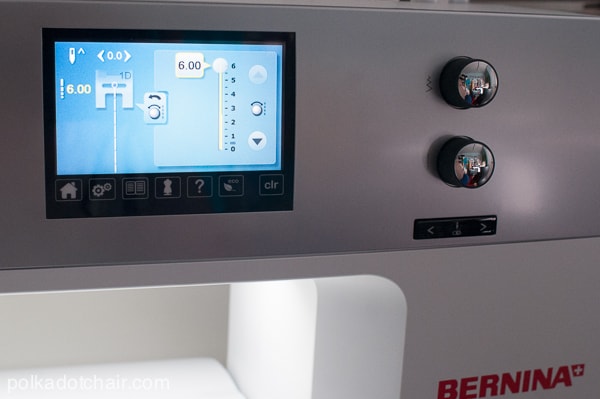
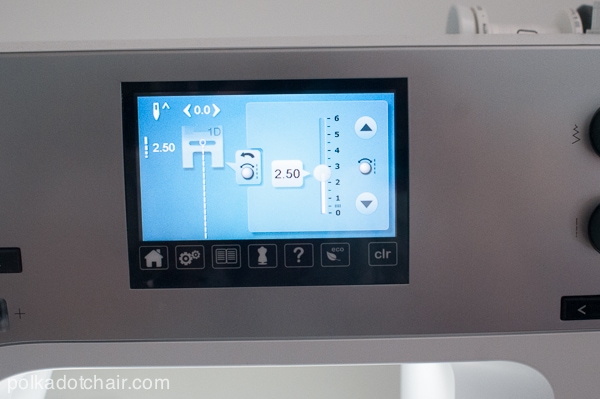
On your sewing machine adjust your stitch length to 6 (or as high as it will go, it might only go to 5). On the 710 it’s super easy, just turn the bottom dial and watch the stitch length get longer, stop when you get to 6. This is commonly referred to as a basting stitch.
Step Two: Sewing
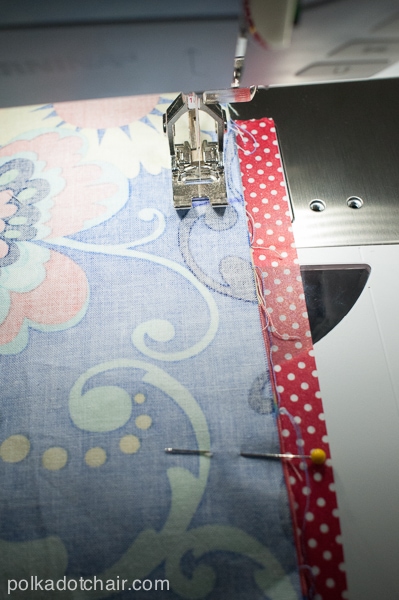
Here’s a trick, see that red tape? That’s washi tape. I use it to mark my seam allowances when I’m sewing. For this zipper sewing technique, we want to use a 1/2” seam allowance. (that’s 1/2″ from the needle to the edge of the fabric).
Note: you will use your standard machine foot for this step.
With the right sides of the fabric facing, begin sewing at the top of your skirt, you are basting the seam. When you get to the purple mark where the zipper should stop, change your stitch length back to 2.5.
Don’t take your fabric out of the machine, or cut your thread.
Finish sewing the remainder of the seam with a 2.5 stitch length and a 1/2” seam allowance. Stop when you get to the bottom of the skirt.
Step Three: Mark the Zipper
Press the seam open.
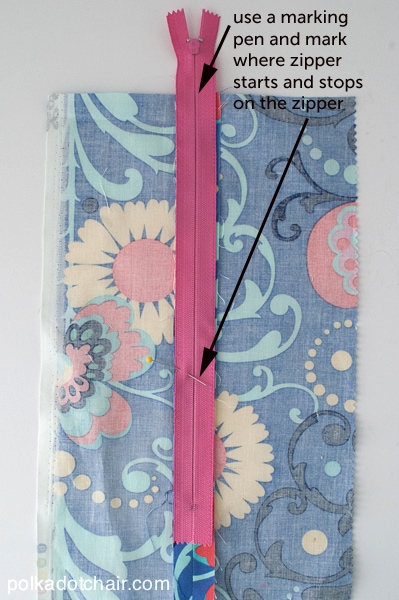
Place your zipper on the pressed seam, right side down. The zipper teeth will be laying right on top of the seam. The top of the zipper is at least 1” above the fabric.
On the zipper, mark the top of the fabric on the zipper and the place where the zipper should stop.
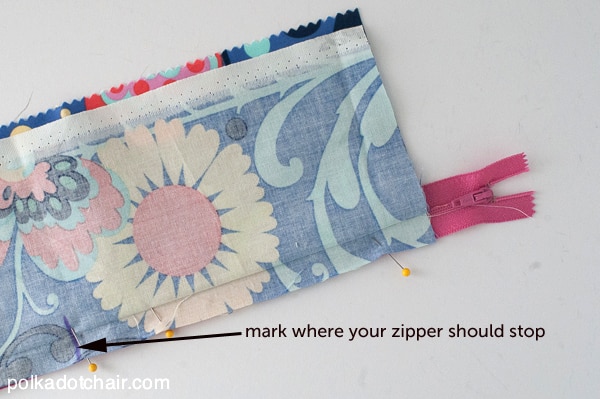
Fold your fabric, so that the right sides are facing.
With the right side of the zipper facing the seam, pin one side of the zipper to the edge of the fabric. Your zipper is 1/2” wide on each side, and your seam allowance is 1/2”; it should match up.
Step Four: Sew the Zipper
Set your sewing machine for a wide zig-zag stitch. On the 710 I set my stitch width to 4.2 and my length to 3.5.
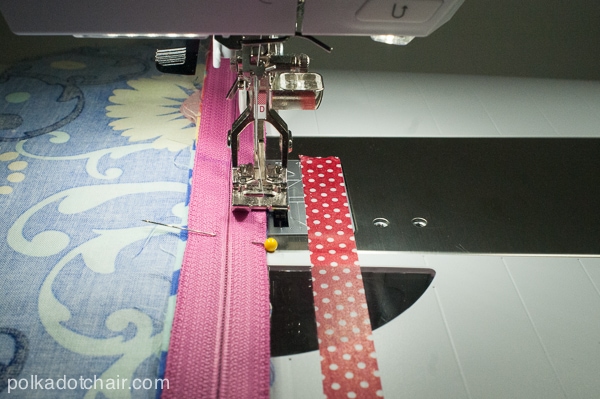
Sew the zipper to the fabric with the zig-zag stitch. Your stitch will go over the edge. Stop when you get to the mark you made for the zipper stop.
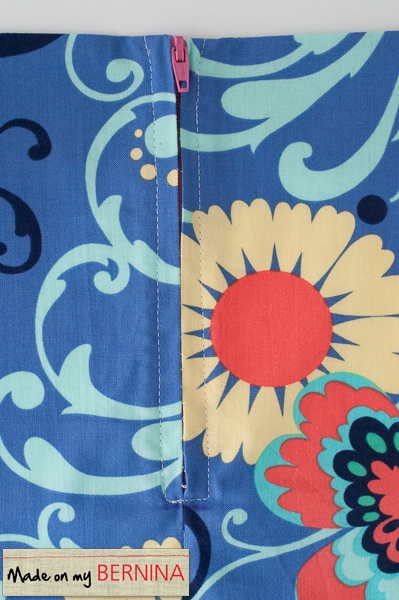
It will look like this when you are done. Do the same thing for the other side.
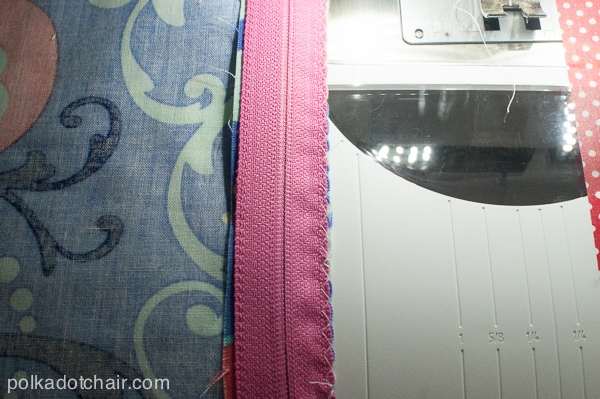
Note: You are only sewing through one layer of fabric.
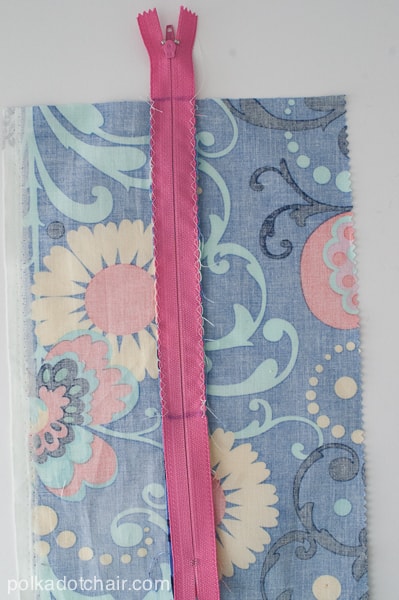
Here’s what it will look like. The edge of the zipper is sewn to the raw edge of the fabric. You can see the marks I made for the zipper start and stop points.
Step Four: Using the Zipper Foot
Put the zipper foot on your machine. Most all machines come with one. Check your manual if you’re not sure which one it is.
Check on your machine if you need to move your needle over. You don’t want the needle to hit your foot. Most sewing machines have a spot where you can adjust the right and left position of the needle.
On a BERNINA sewing machine, I move my needle 4 clicks to the left.
Step Six: Top Stitching
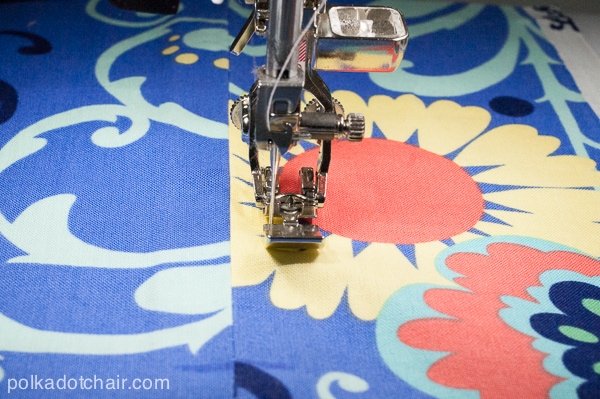
Change your sewing machine back to a straight stitch. Starting at the top, sew 3/8” from the seam. I eyeball this, you just want a straight line all the way down, and for it to be the same on both sides.
You can use your zipper foot as a width measurement if you like. Make sure you backstitch at the beginning of your seam.

When you get to the point that your zipper should stop, put your needle down and pivot. Sew over the zipper (yes, you can do that with a polyester zipper, but NOT a metal zipper) and stop on the other side of the seam. Do one backstitch.
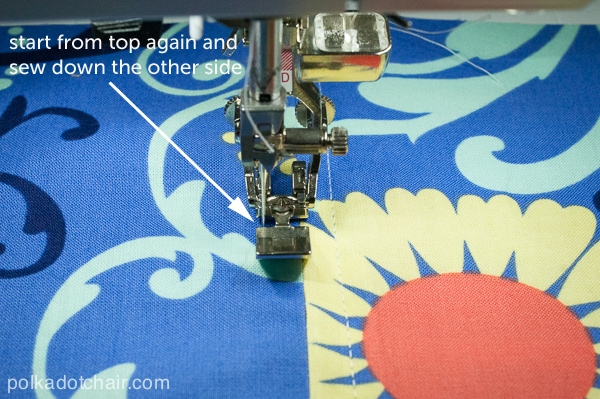
Do NOT pivot and go back up the zipper, your fabric will bunch up. Start again at the top of the zipper on the other side, and sew down until you get to the stopping point. Backstitch and cut your threads.
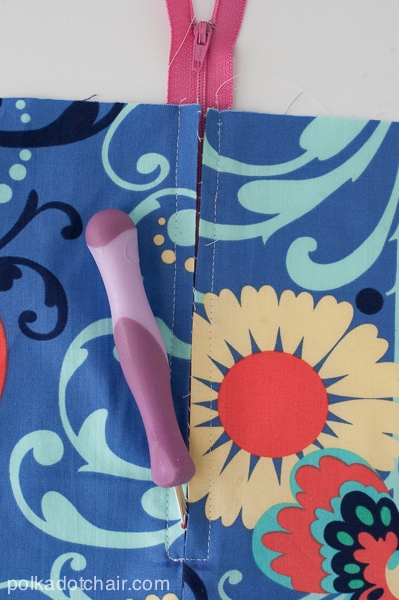
Using a seam ripper, unpick the basting stitches.
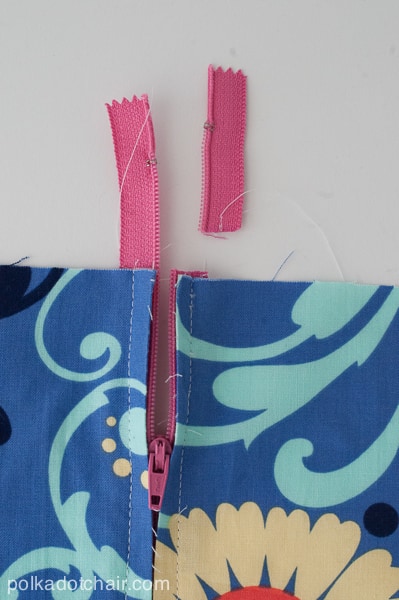
Move the zipper pull down so that it’s at least 2” below the skirt top. Now just cut off the zipper ends.
Do not move the zipper up to the top again, as the zipper pull has nowhere to stop since we cut off the zipper stopper.
Finishing Steps
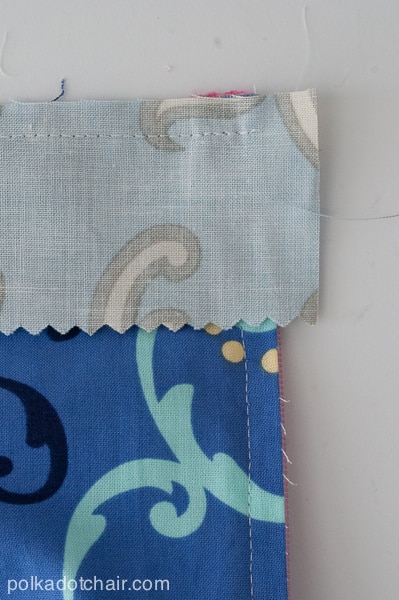
Sew your skirt facing to the skirt; ensure that the facing is at least 1/2” longer than the skirt (usually, a facing is interfaced, but I skipped that part). Stop sewing at the edge of the zipper.
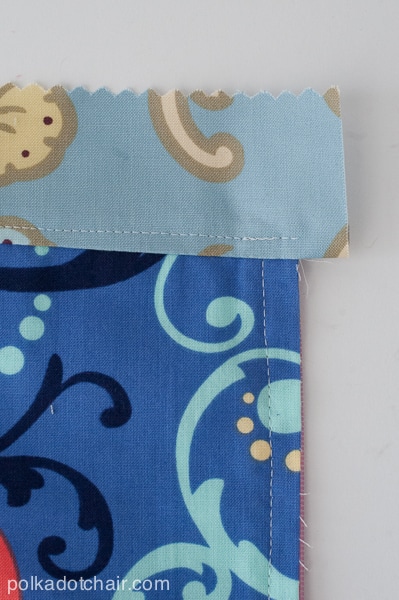
Press this seam up. Sew a “stitch in the ditch” 1/4” up from the seam. This will keep your waistband from rolling up.

Press under the extra facing fabric.
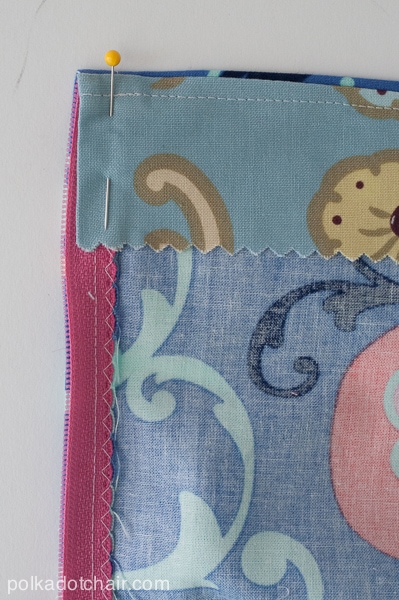
Turn it down and press. Handstitch the facing to the zipper to secure (and so your facing doesn’t get stuck in your zipper)
You’re done! Feel free to leave questions in the comment box, I’ll be sure to get them.


I have sewn a lot of zippers successfully on my Bernina 880. The main reasons for my success is two-fold. I use Wonder Tape (by Collins (a double sided, repositionable, and wash away tape) to hold the zipper. It’s better than pins, which can distort the zipper and fabric. I also use longer zippers than necessary so that I don’t have to move the zipper pull as I sew the seam.It only a few cents more for the longer zipper.
Carol S (Copper Buttons)
Thanks so much for the tips!
This is awesome!
This is interesting, I never knew you can cut the top off to make it fit neatly. I’ve always struggled to get the top edges to match evenly, and I would eventually get it right, but this is easier.
Thank you so much……
Do you cut off the bottom of the zipper or leave all that extra? Sewing across the zipper won’t break your needle if you hit it? Looks easy but I do have these 2 questions!!
Hi,
Yes you just cut off the zipper below the seam. I’ve not had a problem with needles when I sew accross a zipper.
Thank you. This is my first attempt to sew a zipper. I made a search in Pinterest and this was the first result. I have to tell you that this was a great tutorial, for a begginer like myself. Definitely, I’ll be looking for more of your tutorials. Thanks again!
Yeah!
Thank you. This is so much easier to keep everything lined up and the pull out of the way. I always had a little curve around the pull.
Great tutorial, Melissa! No matter how many times I’ve put in a zipper, I always learn something new from other sewists out there! This is awesome!
Thanks,
When I learned this technique I went “oh” I didn’t know there was another way to put in a zipper! Funny how you can sew for so long and still find new things to learn!