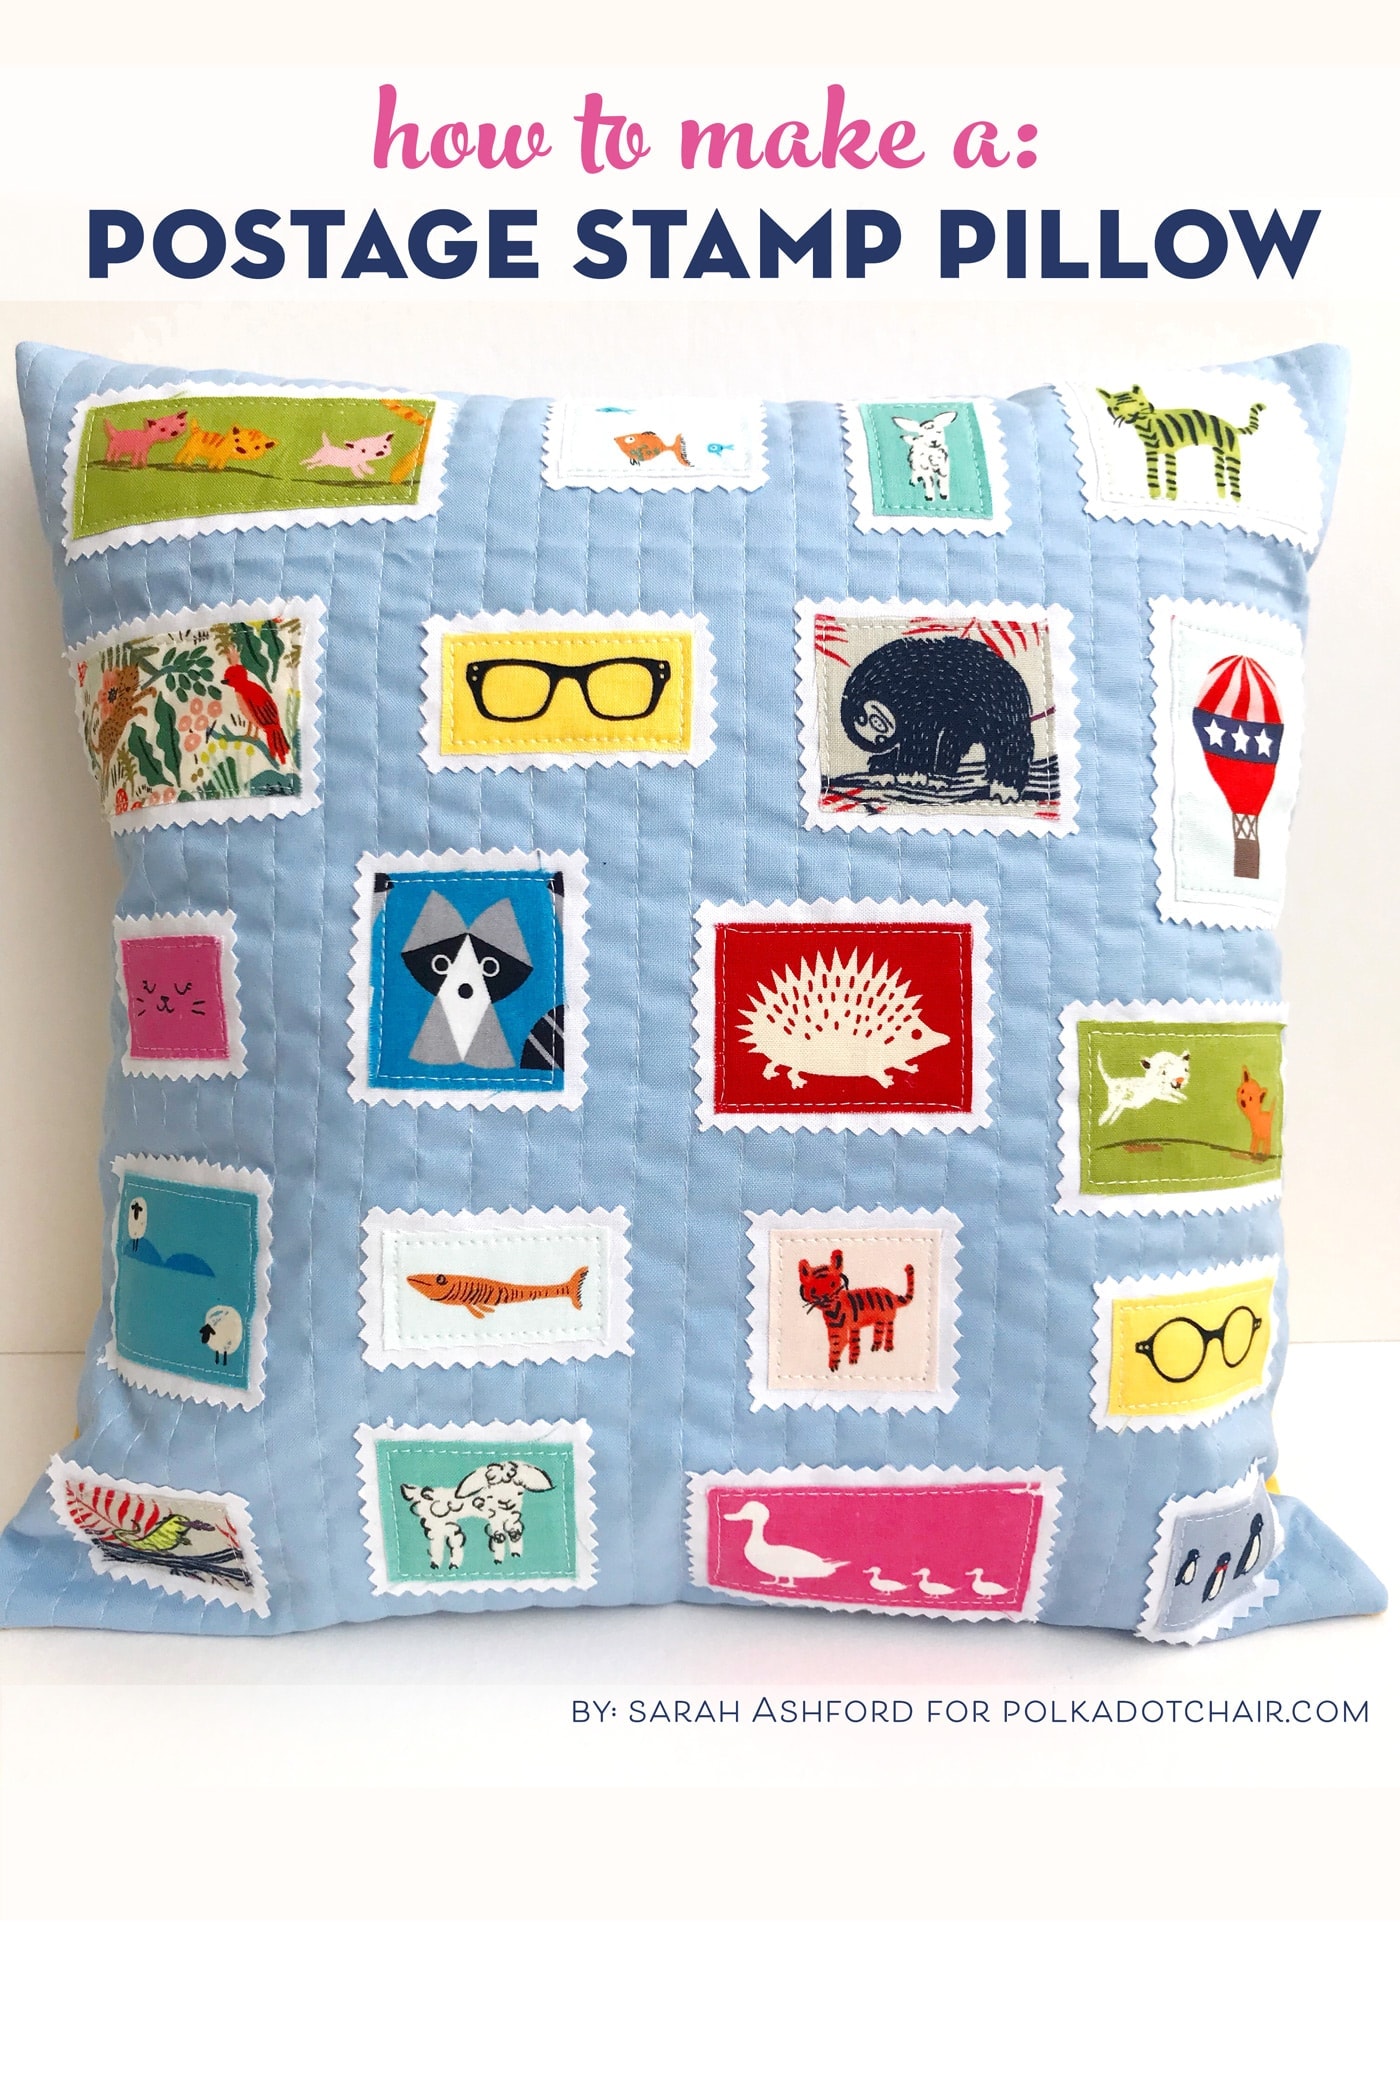
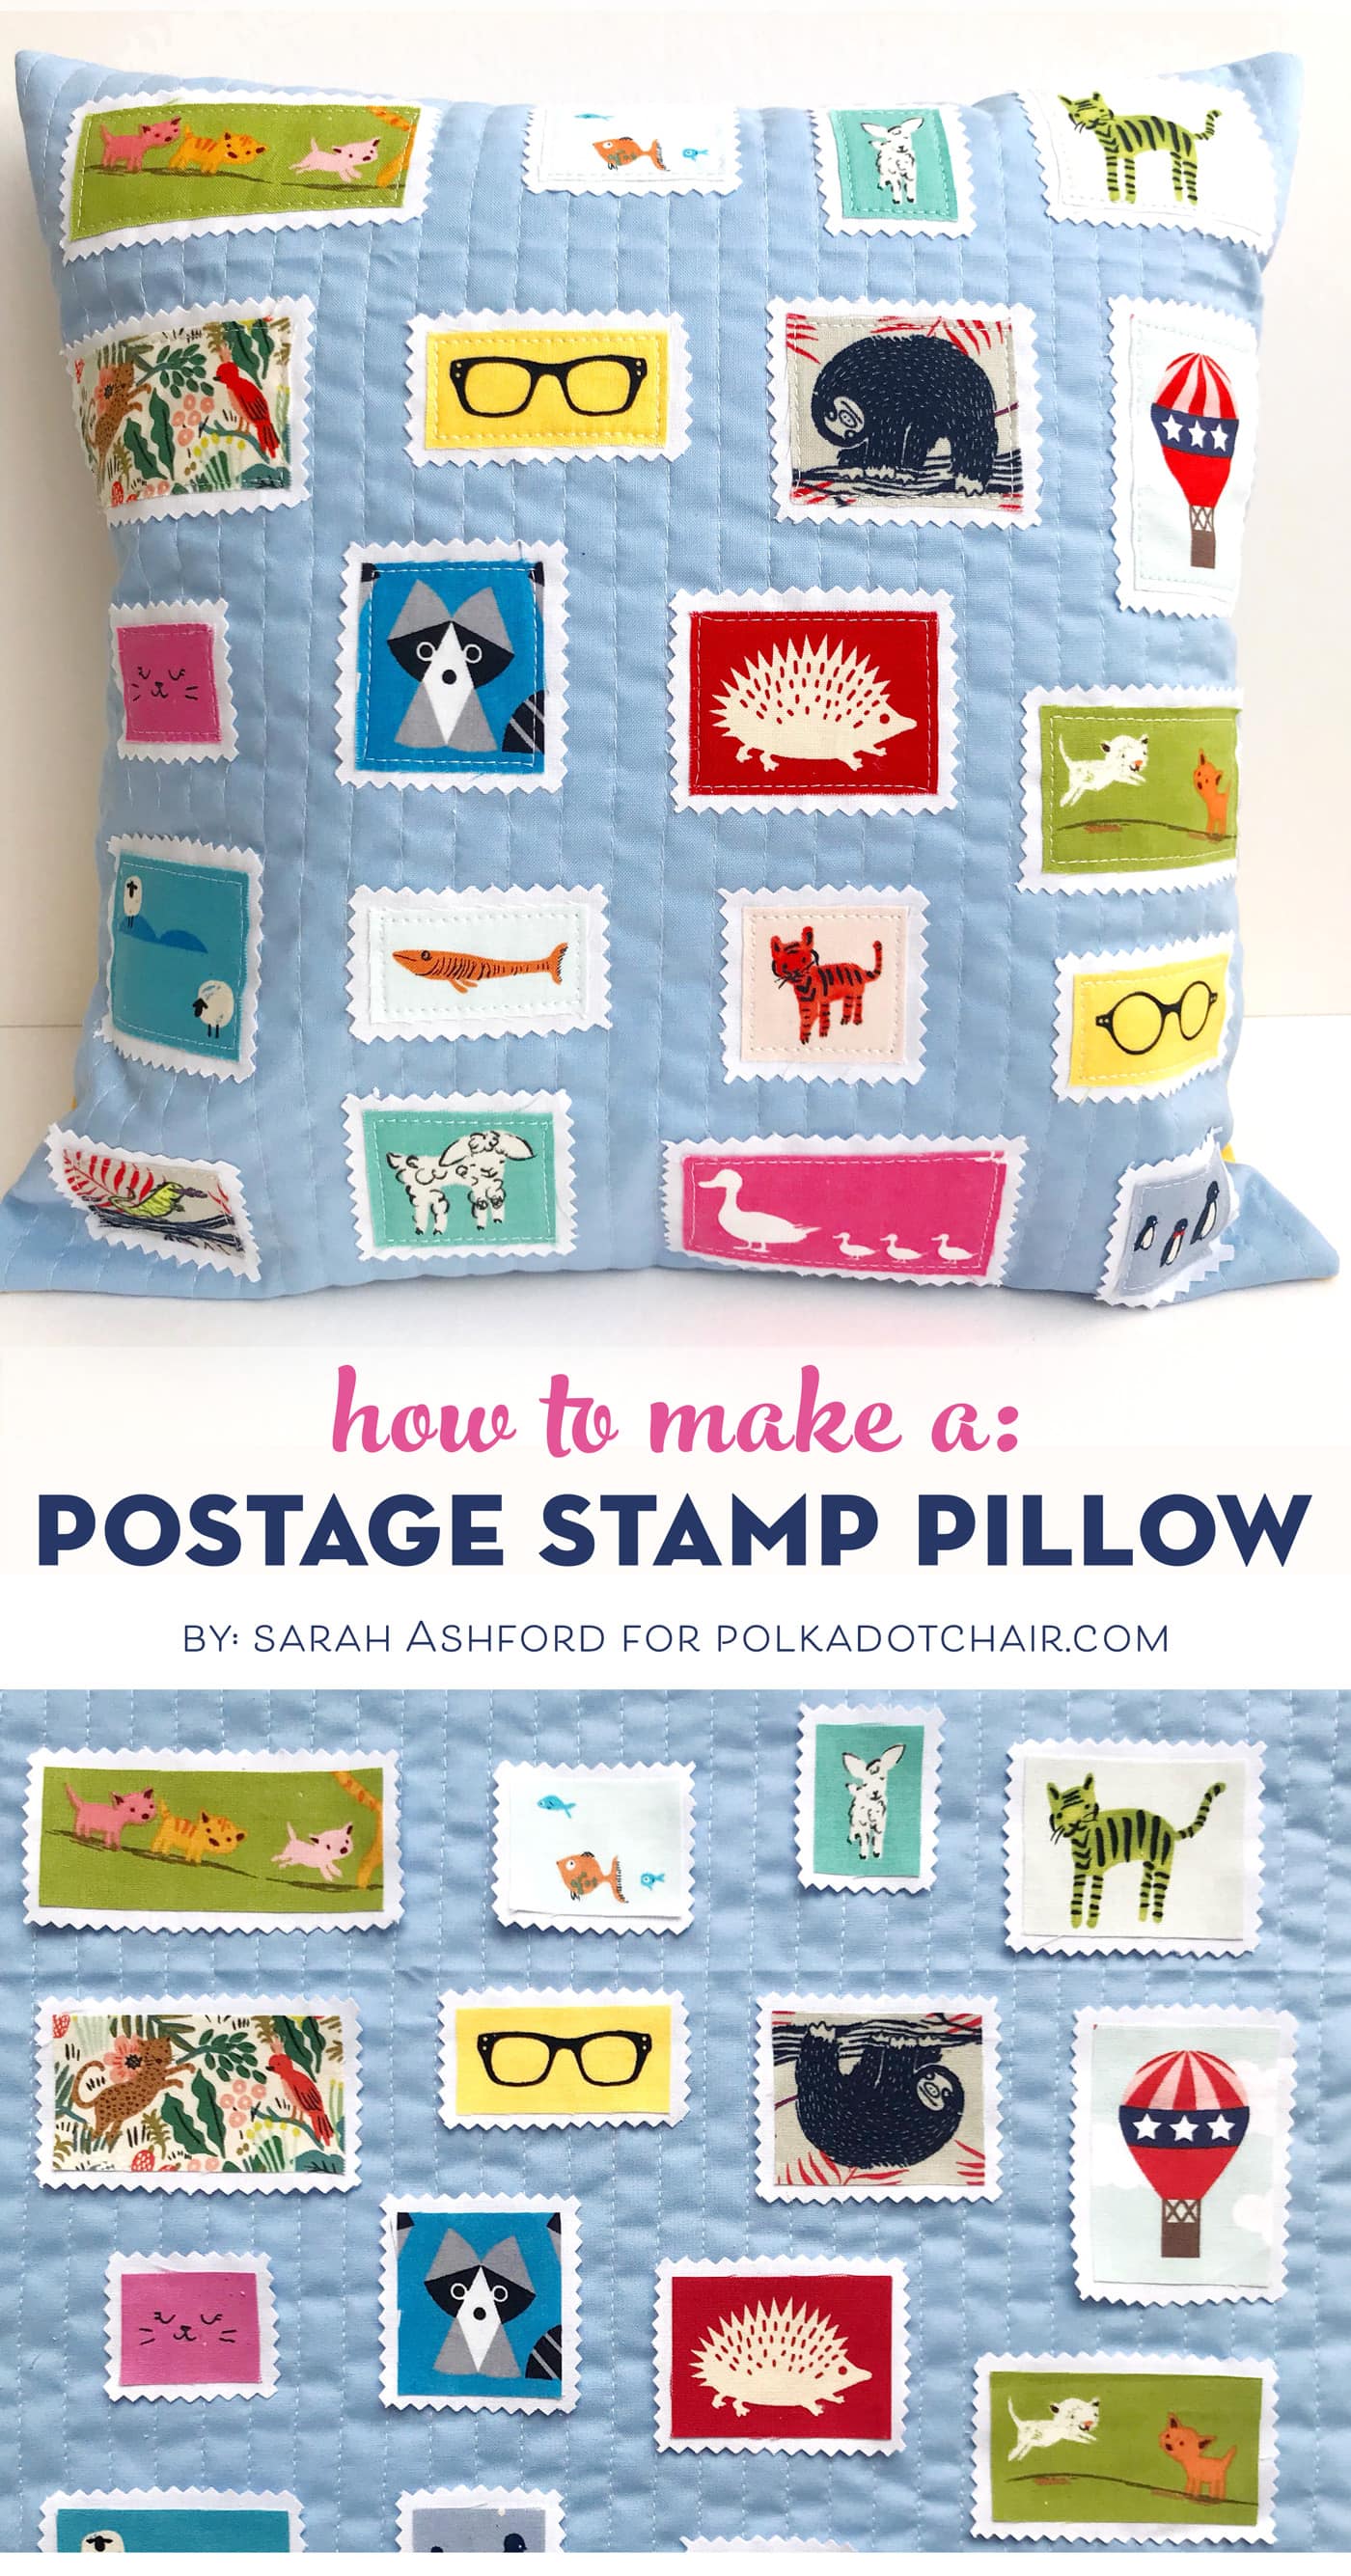
Scrap Busting Postage Stamp Quilted Pillow Tutorial
Sarah Ashford created this adorable postage-stamp quilted pillow tutorial. I’m so excited that she decided to share it with you guys today! It’s the perfect project to use up some of those fabric scraps you’ve been hoarding!
You may have seen my rainbow bunting tutorial (link) a few weeks ago, which featured a whole host of delightful little animals. Well, it got me thinking that some of those fabrics were perfect for fussy cutting, giving me an idea.
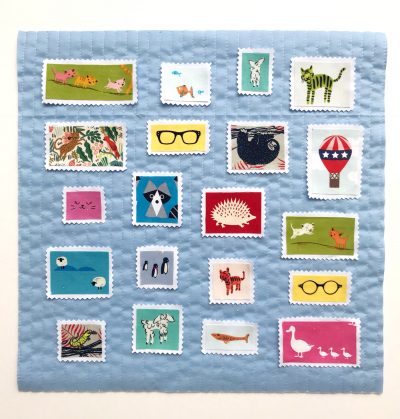
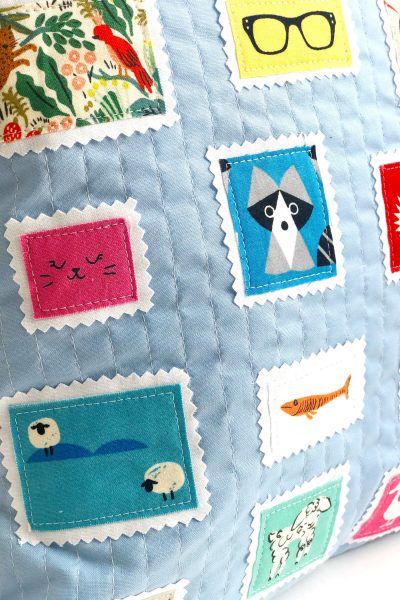
I just love those projects with little fussy-cut postage stamps on them—they are just the cutest! So I decided to fussy-cut some of my rainbow fabrics, and I delved into my stash to see what other cute creatures I could find to add to the gang. The result is this gorgeous postage stamp cushion!
There’s no better way to show off your favorite novelty print animals than with a bit of fussy cutting. So why don’t you rummage through your stash to see who is lurking, waiting to be the center of attention on your very own postage-stamp cushion?
Scrap Busting Postage Stamp Quilted Pillow Tutorial
Equipment
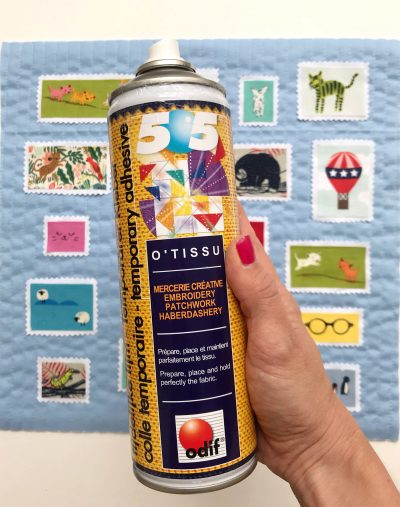
- Spray Baste
- Hera Marker
supplies
- 15-20 pieces Selection of animal prints for fussy cutting
- 1 Pillow Form 14” square
- 1 piece Batting 17” square
- 1 piece Front Fabric 15” square
- 1 piece Cushion back top blue panel 15” x 11”
- 1 piece Cushion back bottom yellow panel 15” x 9”
- 1 Fat Eighth White fabric for stamp background
Instructions
Step One: Make the Fabric Postage Stamps
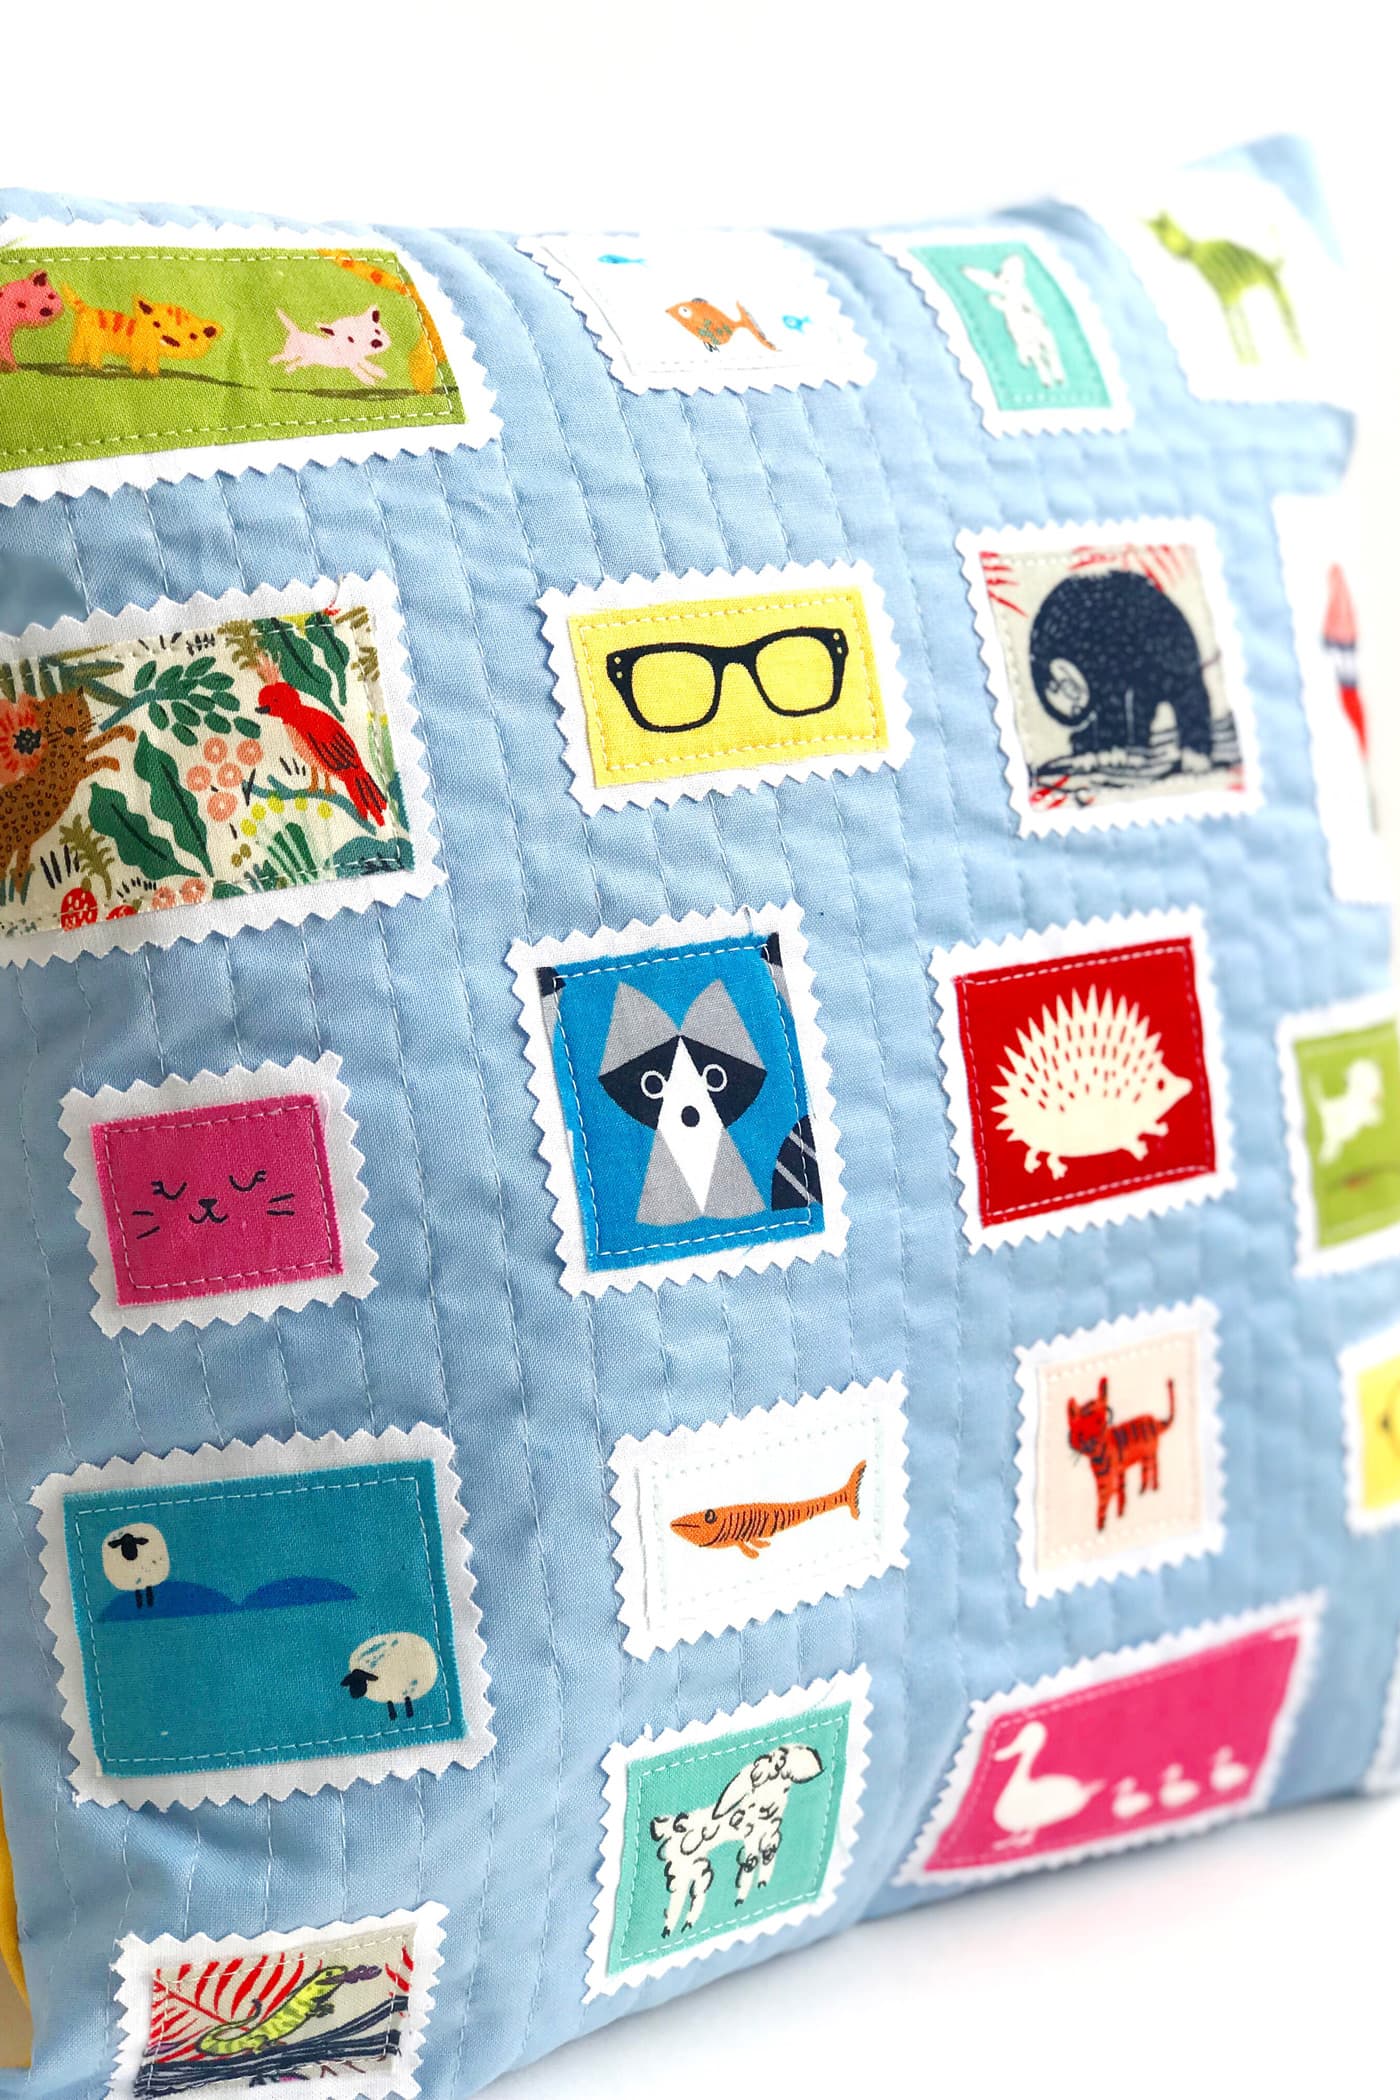
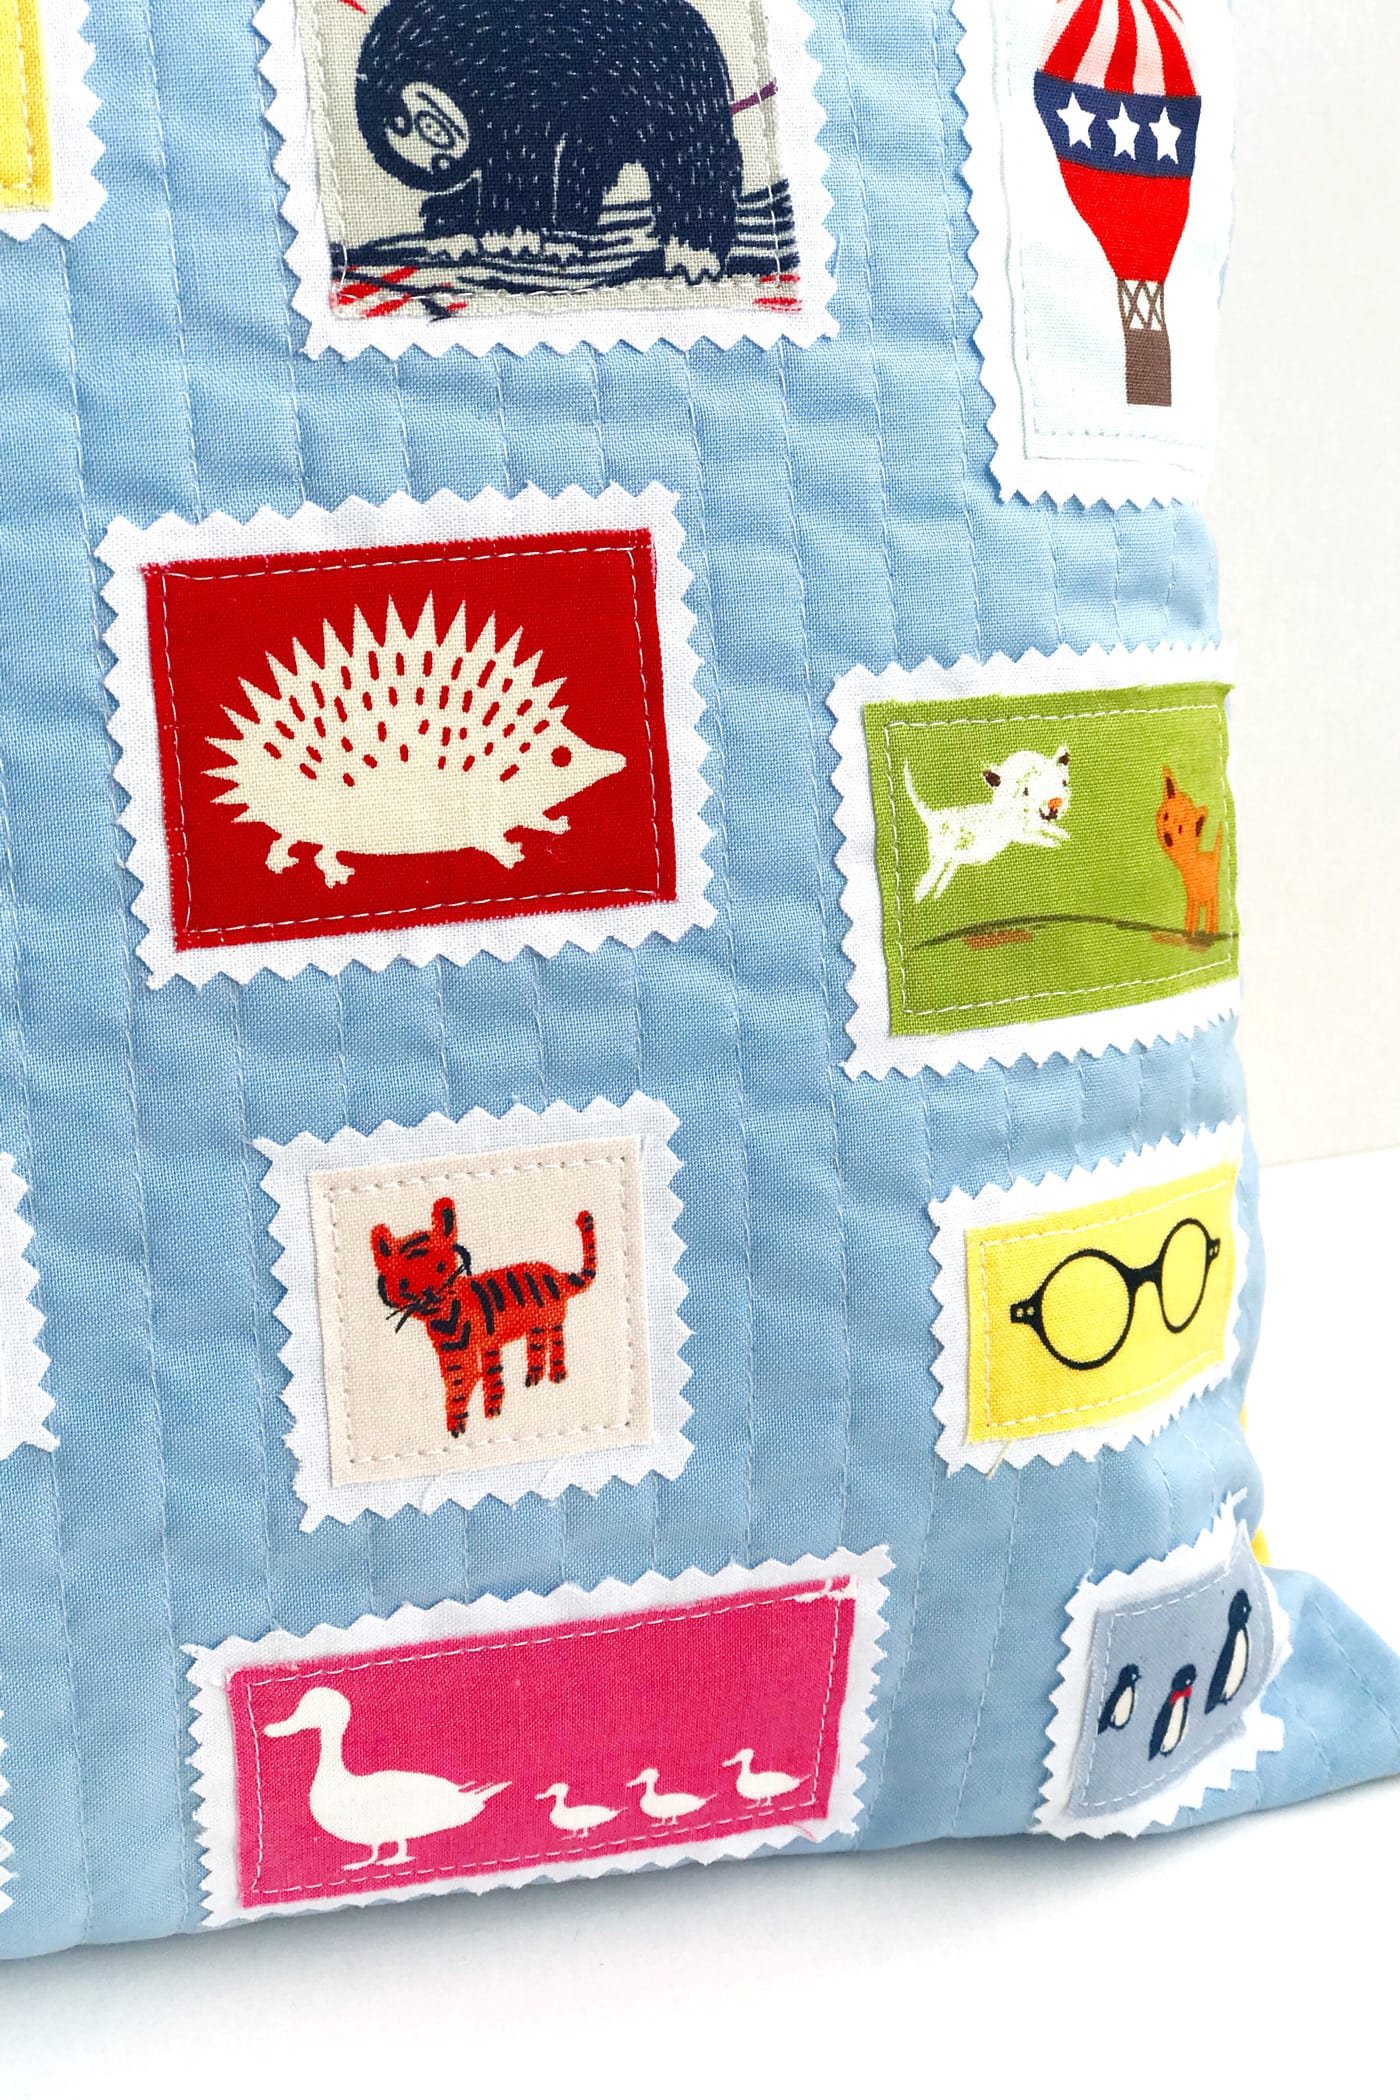
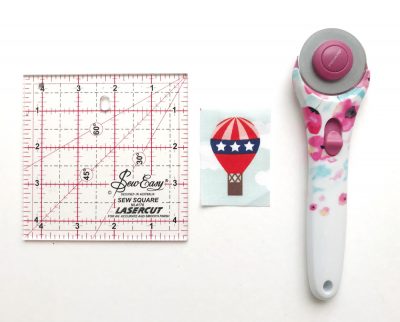
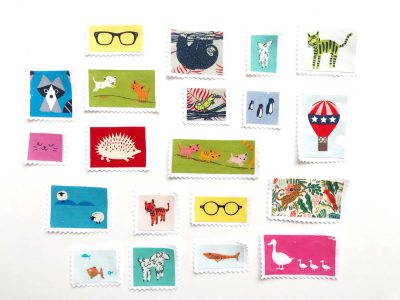
- First, you need to make the stamps. Take your fabrics for fussy cutting and trim into a square or rectangle, depending on the shape of each motif. Use a rotary cutter and ruler for this to ensure straight lines and 90-degree angles. How many you need will depend on the size of each motif. Make lots so you can play around with the layout and choose your favorites. You can always add one to the back of the cushion or gift any spares to a friend!

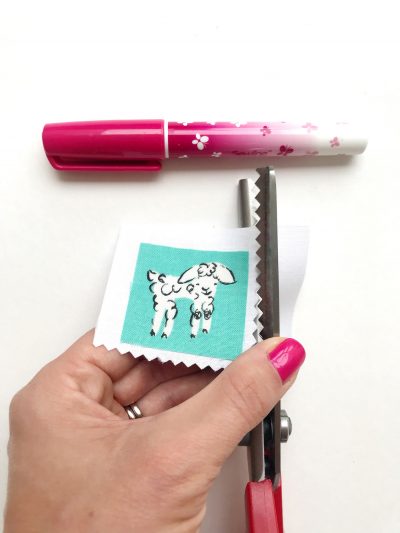
- Once all your motifs are cut out, take one at a time and use a glue pen to stick the motif onto a larger piece of white fabric. Use pinking shears to cut out close to the edge. Don’t worry, these stamps will be stitched together later on! The glue is just to hold things in place for now.

- Repeat for all of the motifs and set aside.

Step Two: Quilt the Pillow
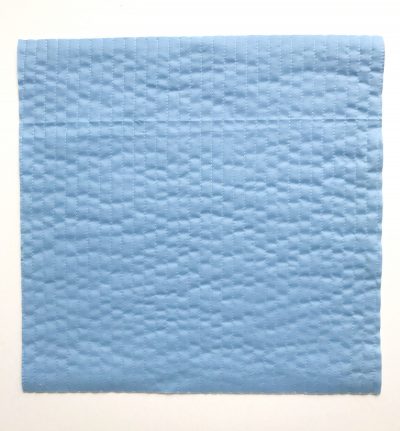
- Use spray baste to adhere your background solid fabric to the batting. Use a hera marker and a ruler to draw a straight line down the center. Quilt down this line, and then use this line as a guide to quilt either side of the line at approximately 1/2” intervals. Trim the batting to the size of the background fabric.

Step Three: Layout the Fabric Postage Stamps
- Now for the auditions! Play around with the layout of your stamps on the background fabric, balancing size, color, and motif type. Don’t place them too close to the edge, as you’ll be using a 1/2” seam allowance all around when you stitch the front panel to the back panels later on. Once you are happy with the layout, take a photo—just in case!

- Once you are happy with the layout, take the spray baste and spray it onto the back of each stamp in a well-ventilated area, pressing it into position. After all the stamps are in place, iron the cushion front to further activate the adhesive. This will ensure that no stamps move when you come to the next step.

Step Four: Applique the Fabric Stamps
- The next step is to appliqué the stamps. Carefully stitch a few millimeters in from the edge of each motif all the way around the edge of each stamp.
- Stitch all the stamps, pull the threads to the back, and tie them off.

Step Five: Sew the Pillow Back
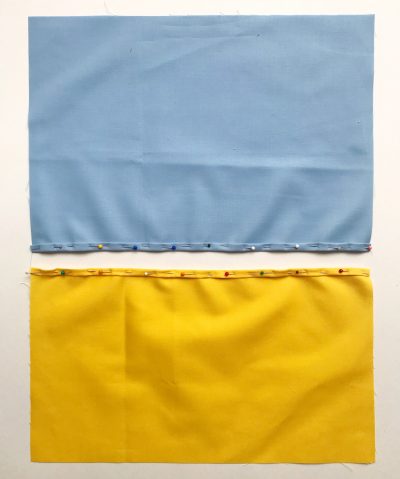
- Next is the envelope back. Take the top blue panel, fold it 1/4” and then 1/4” again, and pin it in place to create the hem. Repeat for the bottom yellow panel.

- Stitch along the hemline to secure it in place.
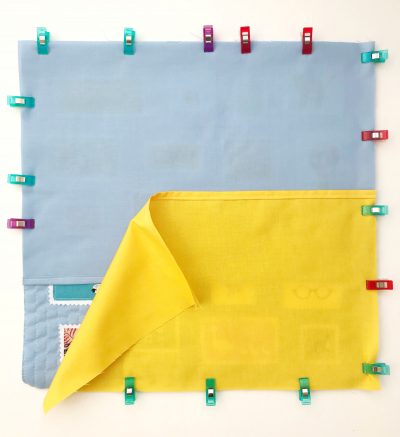
- Now, to construct the cushion, lay the front of the cushion face up and the top blue panel right side down, with the hem in the middle. Lay the bottom yellow panel across the bottom, again with the hem in the middle. Use binding clips to hold in place.

Finishing:
- Stitch all the way around with a 1/2” seam.

- Clip the corners and turn right side out. Insert your cushion pad, and you're done!


About the Maker:

Sarah Ashford is a British Quilter, embroiderer, and founder of the GreatBritishQuilter challenge on Instagram. Sarah regularly contributes projects to magazines and loves to spread the joy of quilting everywhere she goes. Follow her on Instagram at @sarahashfordstudio, and be sure to check out her beautiful sewing room decals in her Etsy shop www.etsy.com/shop/sarahashfordstudio
More Sewing and Quilting Projects:
How to Make “No Math” Polaroid Quilt Blocks
DIY Horse Applique Pillow Pattern
Cute and Simple Kids Library Bag Pattern
Great tutorial. Thank you. I look forward to some fussy cut fun with all my silly novelty fabrics.
This technique could make a quick I Spy quilt as well. Thank you!
Your project is completely adorable! My daughter collects stamps and would LOVE a pillow like this. Thank you for sharing your process.
Thank you so much for sharing this tutorial with us. I have seen many stamps on instagram and never really knew what I could do with them. Your cushion tutorial is the perfect answer! Thank you again!
This is a really cute project! I think I will use felt for the white postage borders so I don’t have to worry about fraying!
I was thinking about the fraying also. Should it be backed by heat n bond or something else similar?
Do you not worry about the edges of the Stamps fraying?
Hi thank you so much for the cushion with the postage stamps I will definitely give it a go a really good idea I will make one each for my granddaughters they will love it.Looking at the different pictures.
I love these cushions… 🙂 thanks for sharing… Perhaps one day I will get to try making them… so many things to do … so little … 🙂 You are motivating me towards spending more time learning to sew… thank you … 🙂
Have a fabulous day… Is it o.k. to share your projects? I have two websites and a facebook page… let me know… 🙂