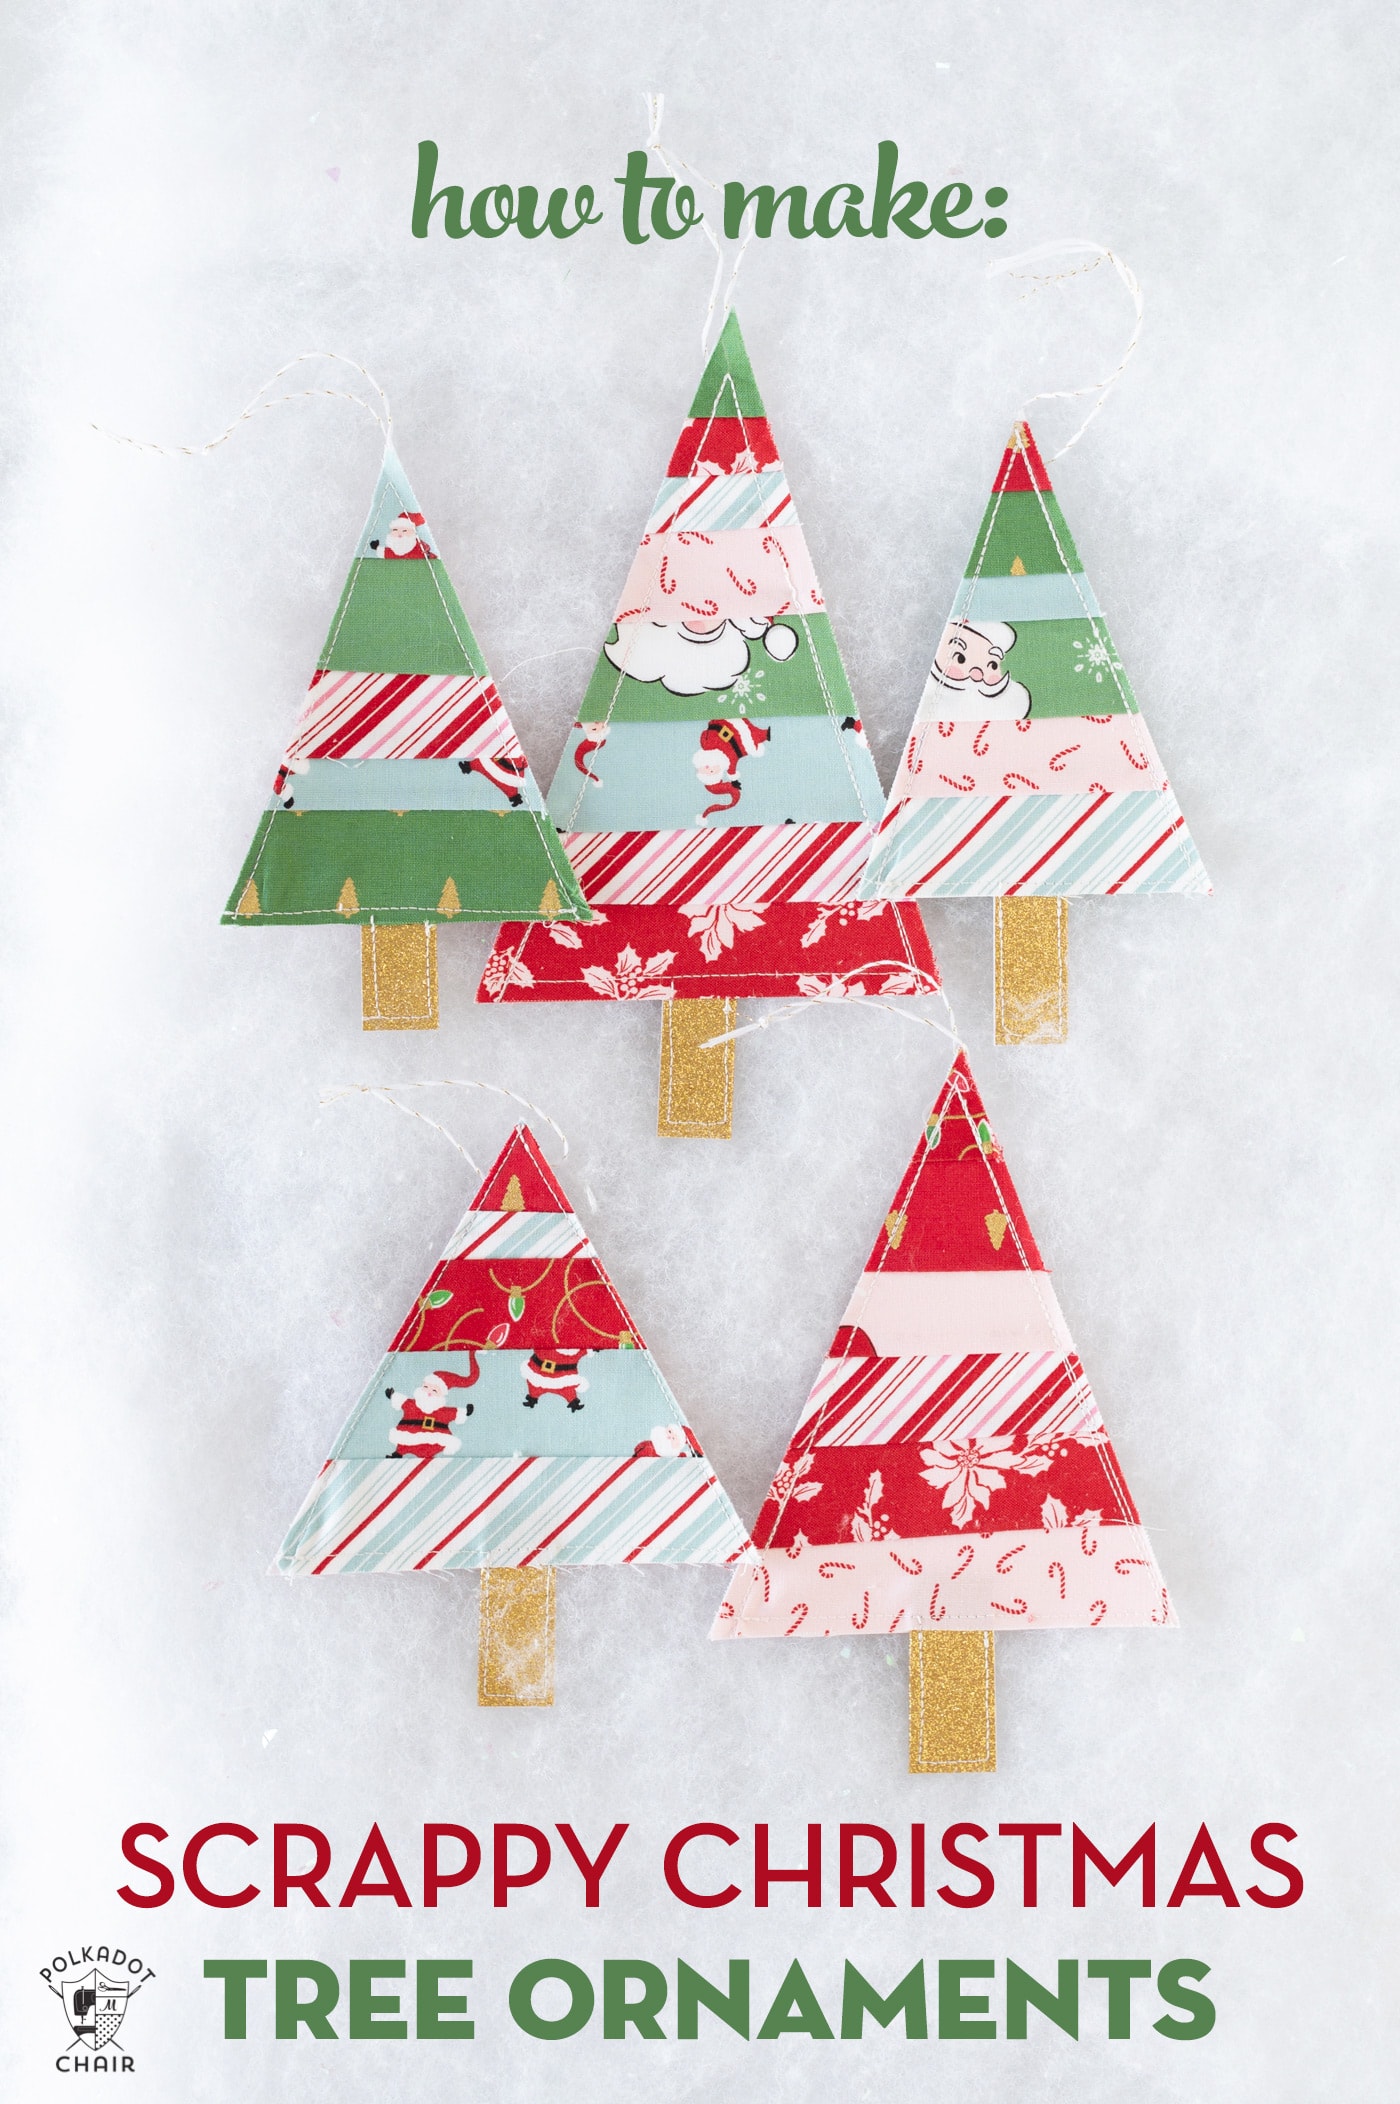
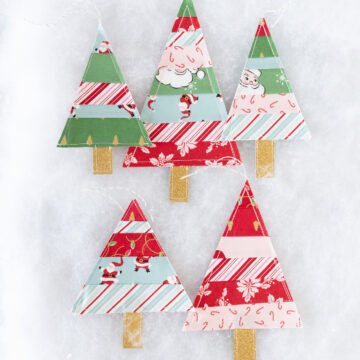
Scrappy Improv Christmas Tree Ornaments
Don’t throw out the scraps from your favorite Christmas fabrics; turn them into Christmas ornaments instead! These scrappy improv Christmas Tree ornaments use cardstock as a base, so they don’t need to be quilted. They are a fun way to turn that scrap bin fabric into something beautiful!
I’m always looking for ways to use up the fabrics in my scrap bin. My dear friend is excellent and turns scraps into beautiful quilts and inspires me to use my fabric scraps more often.
I had a few pieces left over from a Santa Claus Lane 5″ pre-cut stack of fabric and thought I could make a set of ornaments.
About the Ornaments
These ornaments are not quilted but use a method similar to quilt as you go. I use cardstock instead of quilt batting. This makes the ornaments a bit more sturdy, so you could also use them to create a Christmas pennant or banner.
They would also be beautiful tied to a wrapped Christmas gift. You can write on the cardstock if you leave the fabric off the back.
Improv Construction Techniques
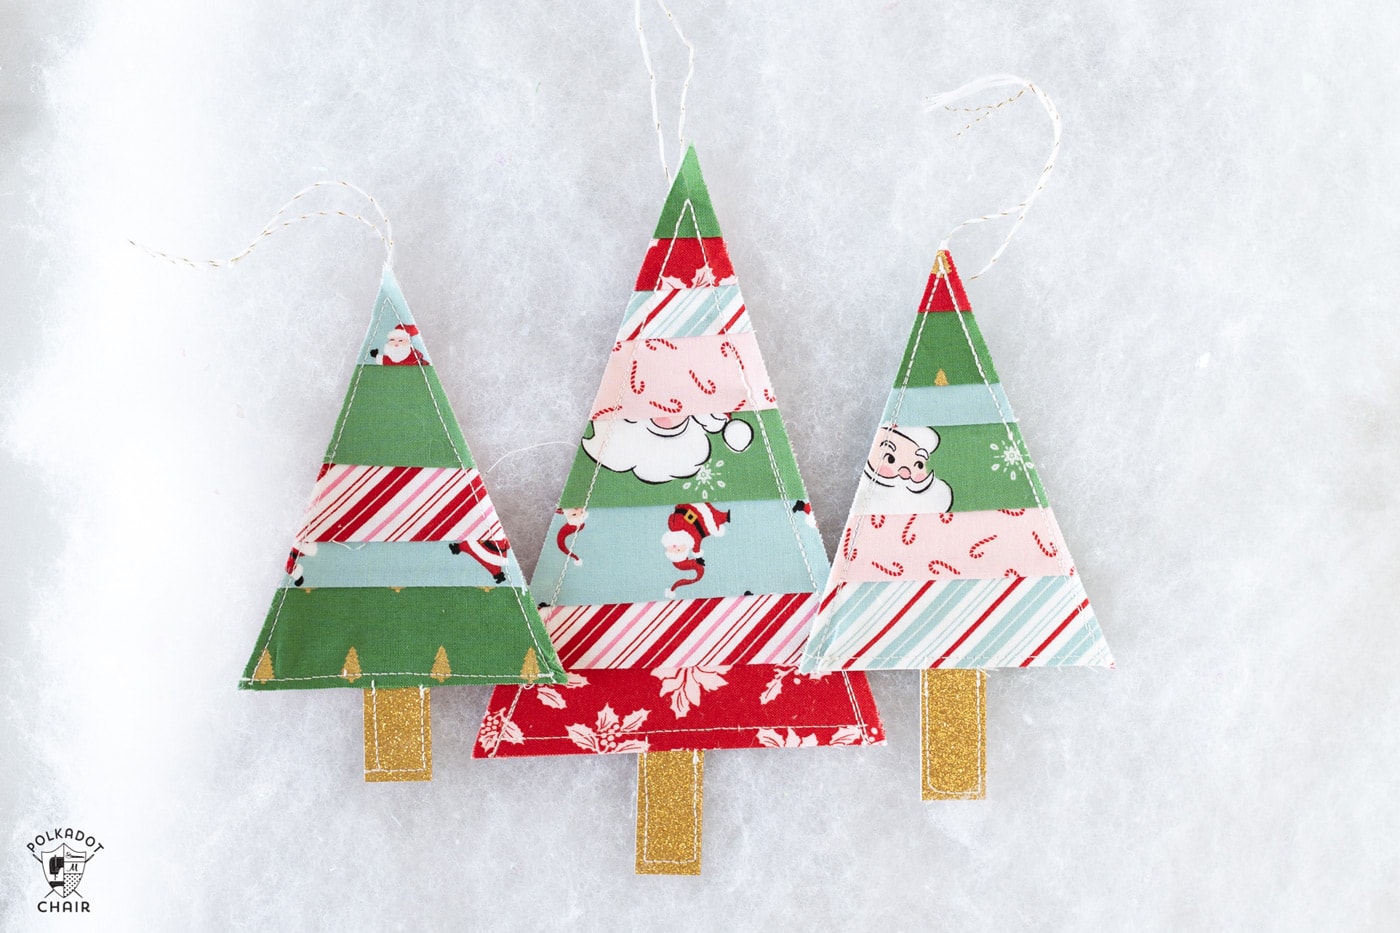
The ornaments are very scrappy and constructed improvisationally – I know that not having “exact” measurements bothers some of you a bit, but these are just ornaments! They are just for fun and a great project to practice your improv technique.
Video Instructions
I’ve created a short video to walk you through the steps to create the video. You can watch it below (it has also been added to our YouTube channel).
Scrappy Improv Christmas Tree Ornaments
Equipment
supplies
- 10-20 Scraps Christmas fabrics at least 5" wide I used leftovers from a 5" pre cut charm pack
- 2-3 pieces Cardstock
- 1 piece Fabric At least as big as the finished ornaments
- 1 spool Twine or Heavy Duty String
- 1 piece Glitter Cardstock
Instructions
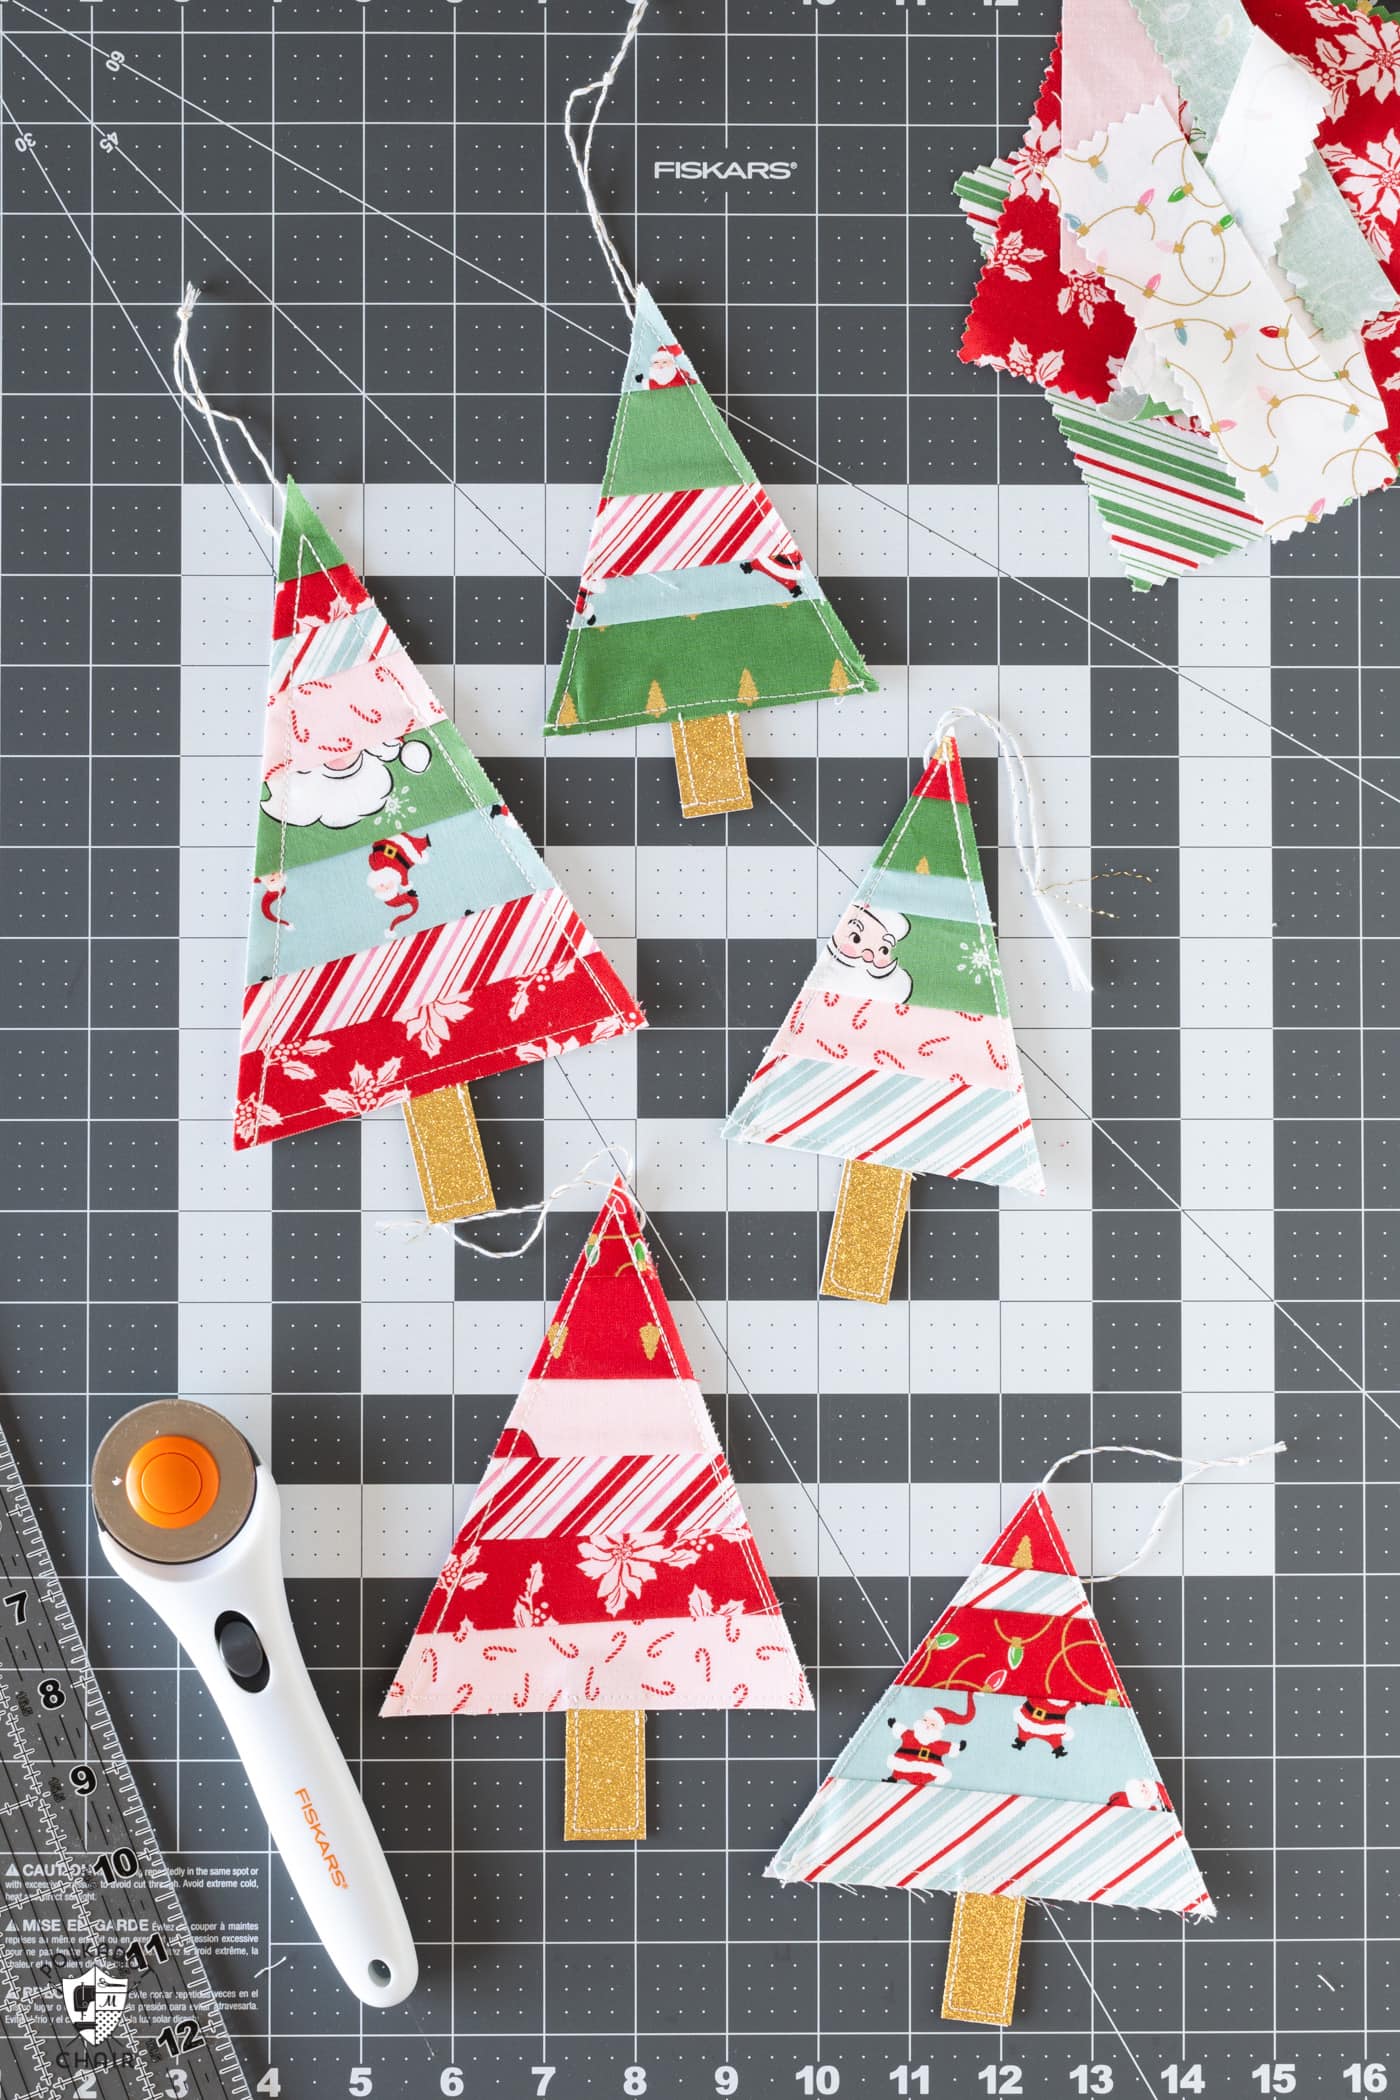
Cutting
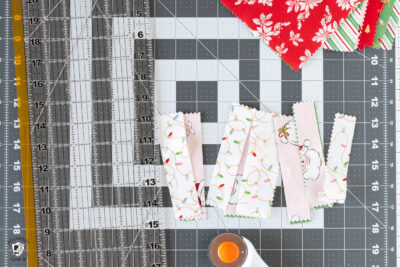
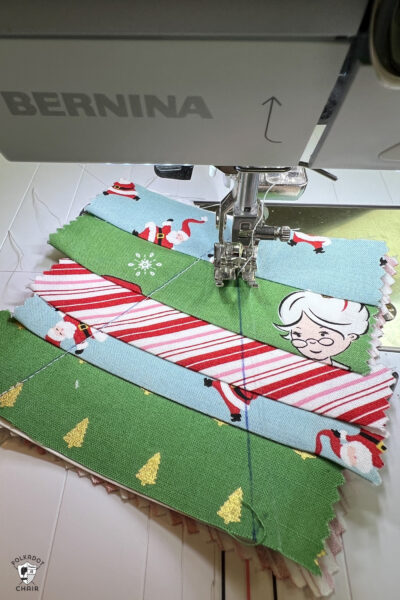
- From cardstock cut one rectangle; it can be any size, I started with 5" x 7" and 3" x 5" pieces. Cut your fabric into strips of varying widths between 3/4" and 1 1/2". The cuts do not have to be straight. Make sure the strips are at least as long as the cardstock is wide.

Sewing
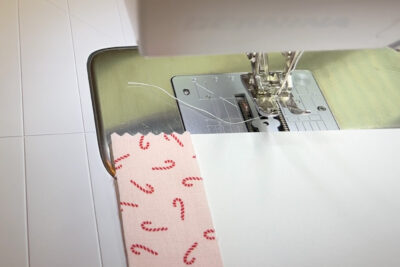
- Begin by sewing the strips to the cardstock. Place two pieces of fabric right sides facing at the edge of the cardstock.
- Sew the fabric with a 1/4" seam allowance.
- Flip the fabric up and press.
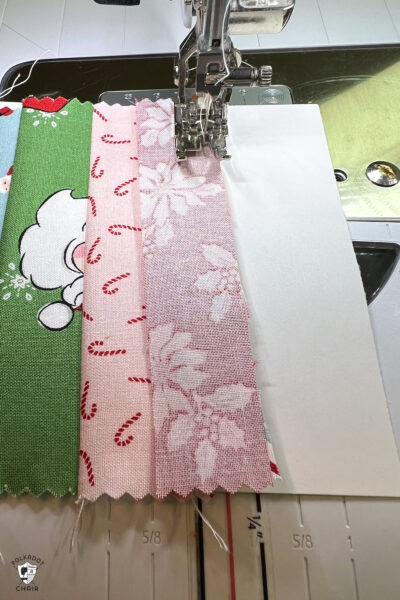
- Place another piece of fabric on top of the cardstock, right sides facing and sew.

- Repeat this process until the cardstock is covered.

Make the Tree Shape
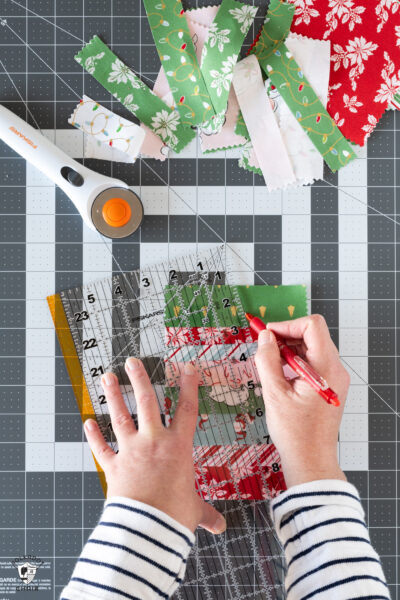
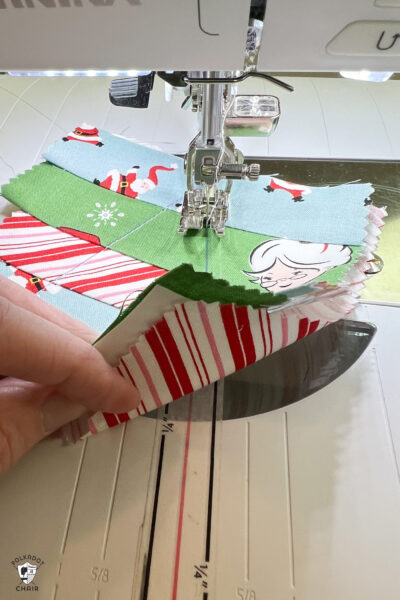
- Using a quilt ruler, draw a triangle on the sewn fabric piece. You can make it as tall or wide as you'd like. Make sure that you leave 1/4" on the outside of the line for cutting. To draw my lines I usually mark the center of the piece then measure down to the two outer corners.
- Cut a piece of fabric the same size as your cardstock, and place it on the back of the cardstock wrong sides facing. You can use a bit of glue or clips to hold it in place.
Sew
- Sew the piece along the line you drew down the two long sides. Don't sew across the base yet.
- I like to sew two stitching lines, giving it more texture. If you forgot to add the fabric piece to the back you can do it in this step as well.
Trim
- Using your ruler, trim the piece 1/8"-1/4" on the outside of the line you stitched.

Create the Trunk
- Cut a piece of glitter cardtsock to 1 1/2" x 1 1/2"
- Fold it in half.
- Slip it into the ornament at the base and hold it in place with a clip.
- Sew across the base, catching the trunk as you go.
- For consistency, sew around the base of the trunk as well.
Finishing
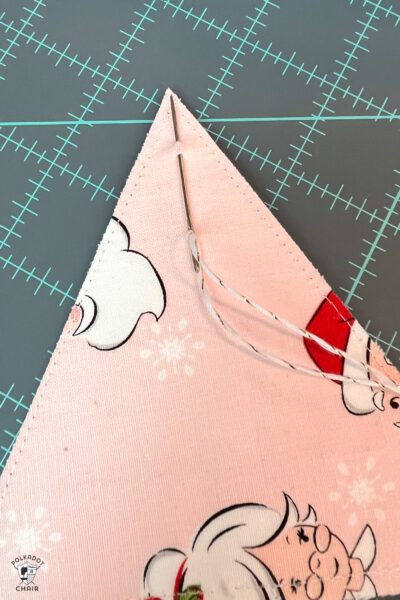
- Using a needle with a large eye, sew a piece of heavy thread or twine to the back of the ornament and tie in a loop to use to hang the ornament.


Hi,
I just unsubscribed then re- subscribed. I am not an experienced seamstress, and I thought your email was way beyond me. But, then I came across your Christmas Ornament from scraps, and I’m thinking I might be able to make it? So I I’m signing up again! I’m sorry about the mix-up!
Are you kidding me! The best idea! I have other tutorials for Christmas trees, but this wins it hands down!!! Thank you!
So cute Melissa, and easy! Great for a Christmas banner, or, without the fabric on the back, it’d be a great tag for a present, writing your note on the cardstock back.