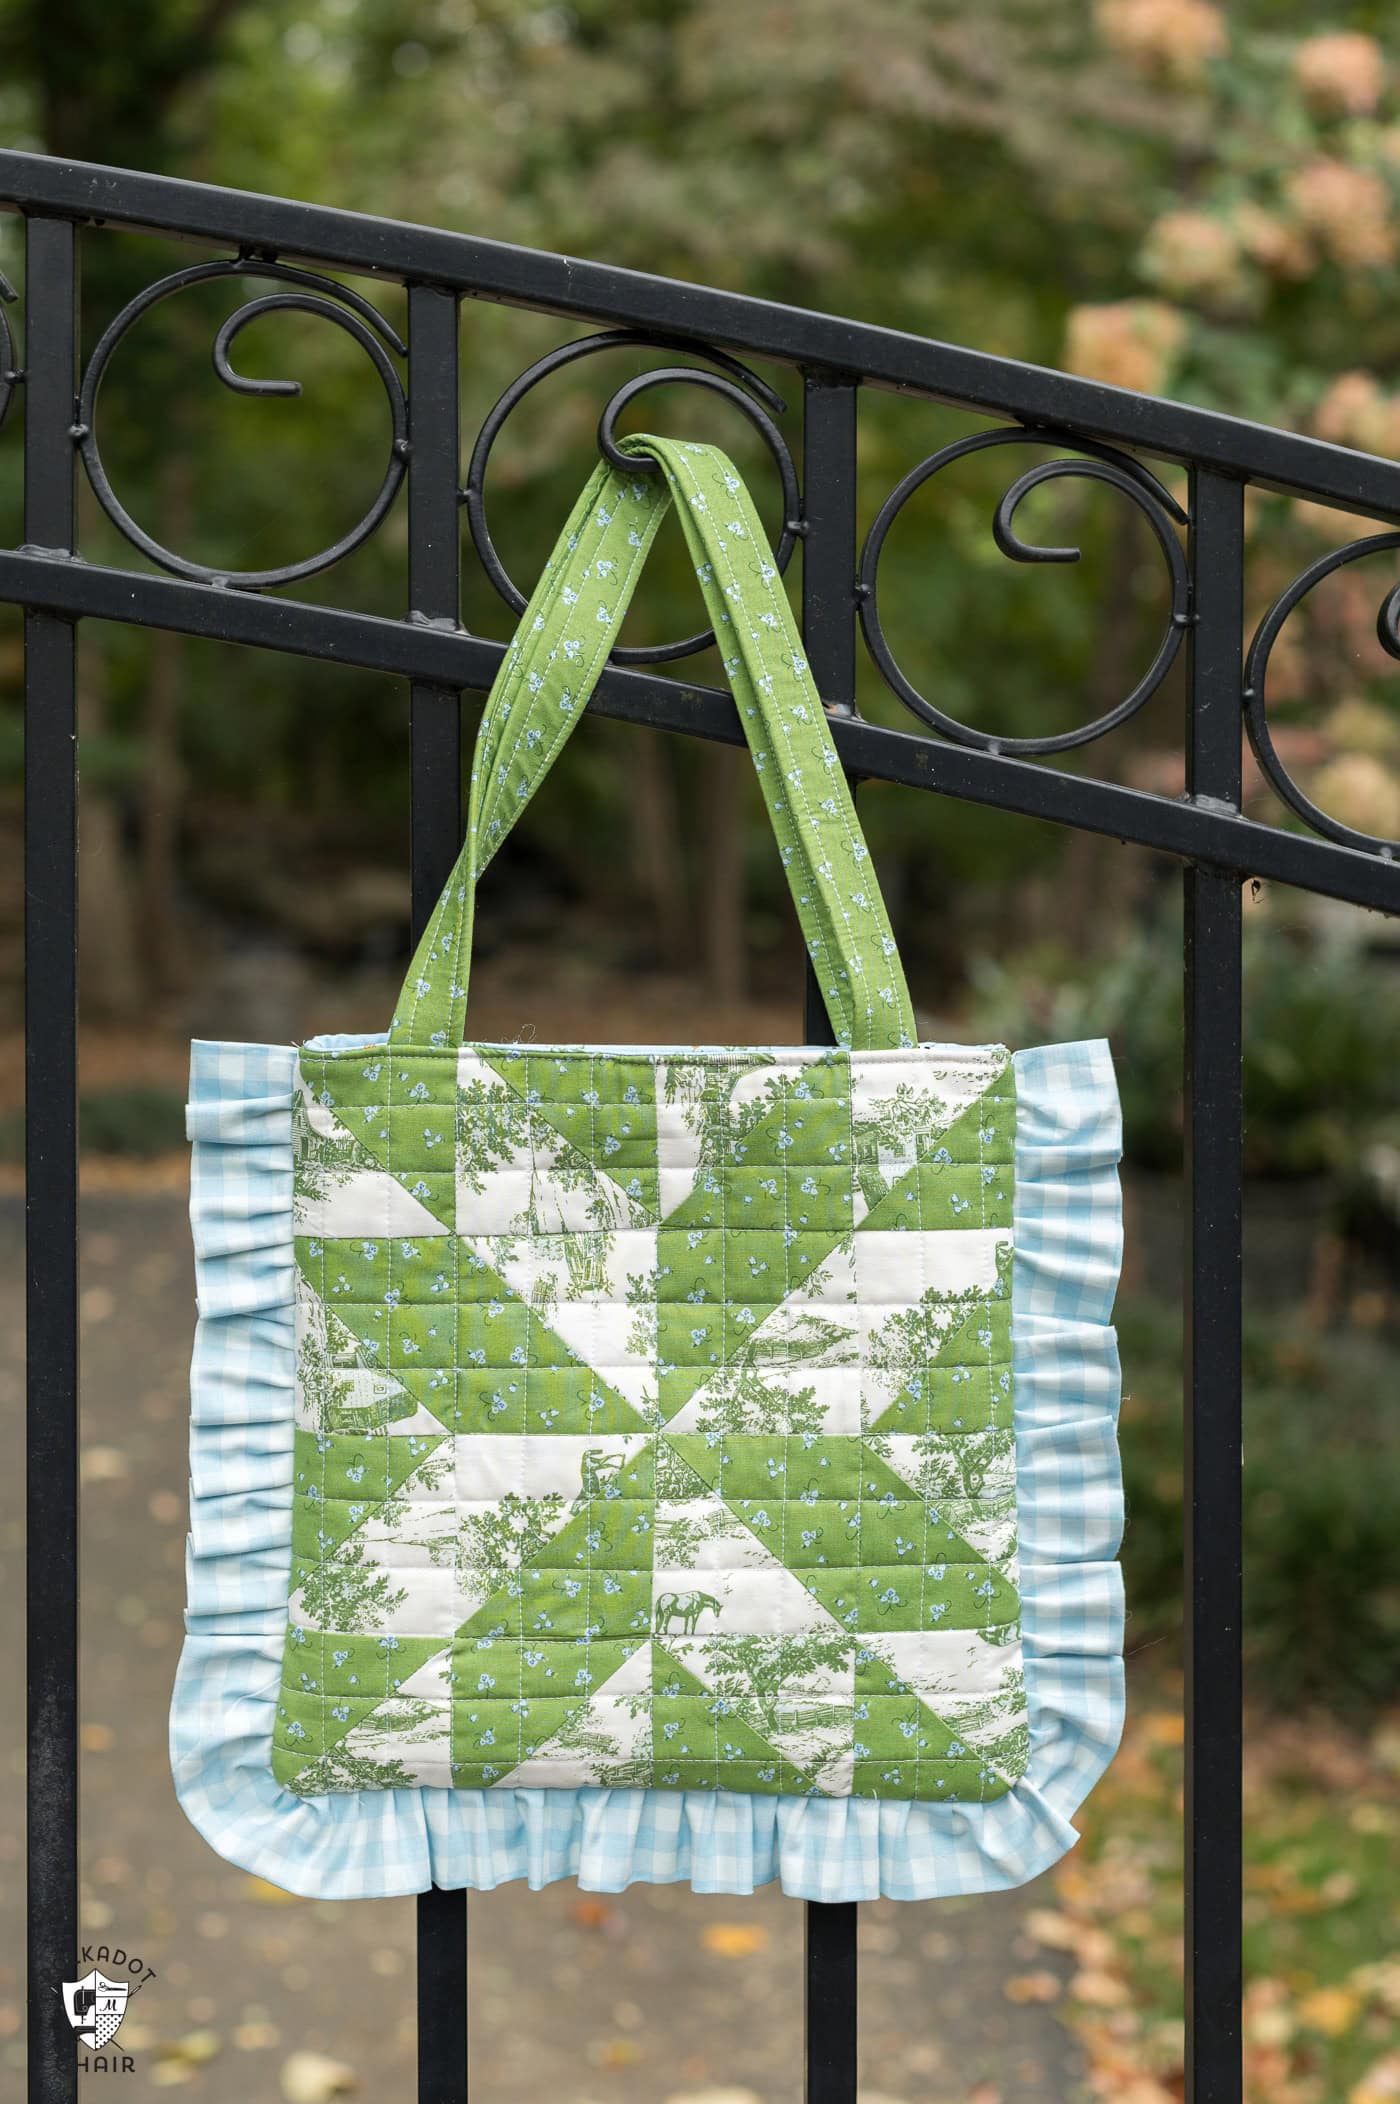
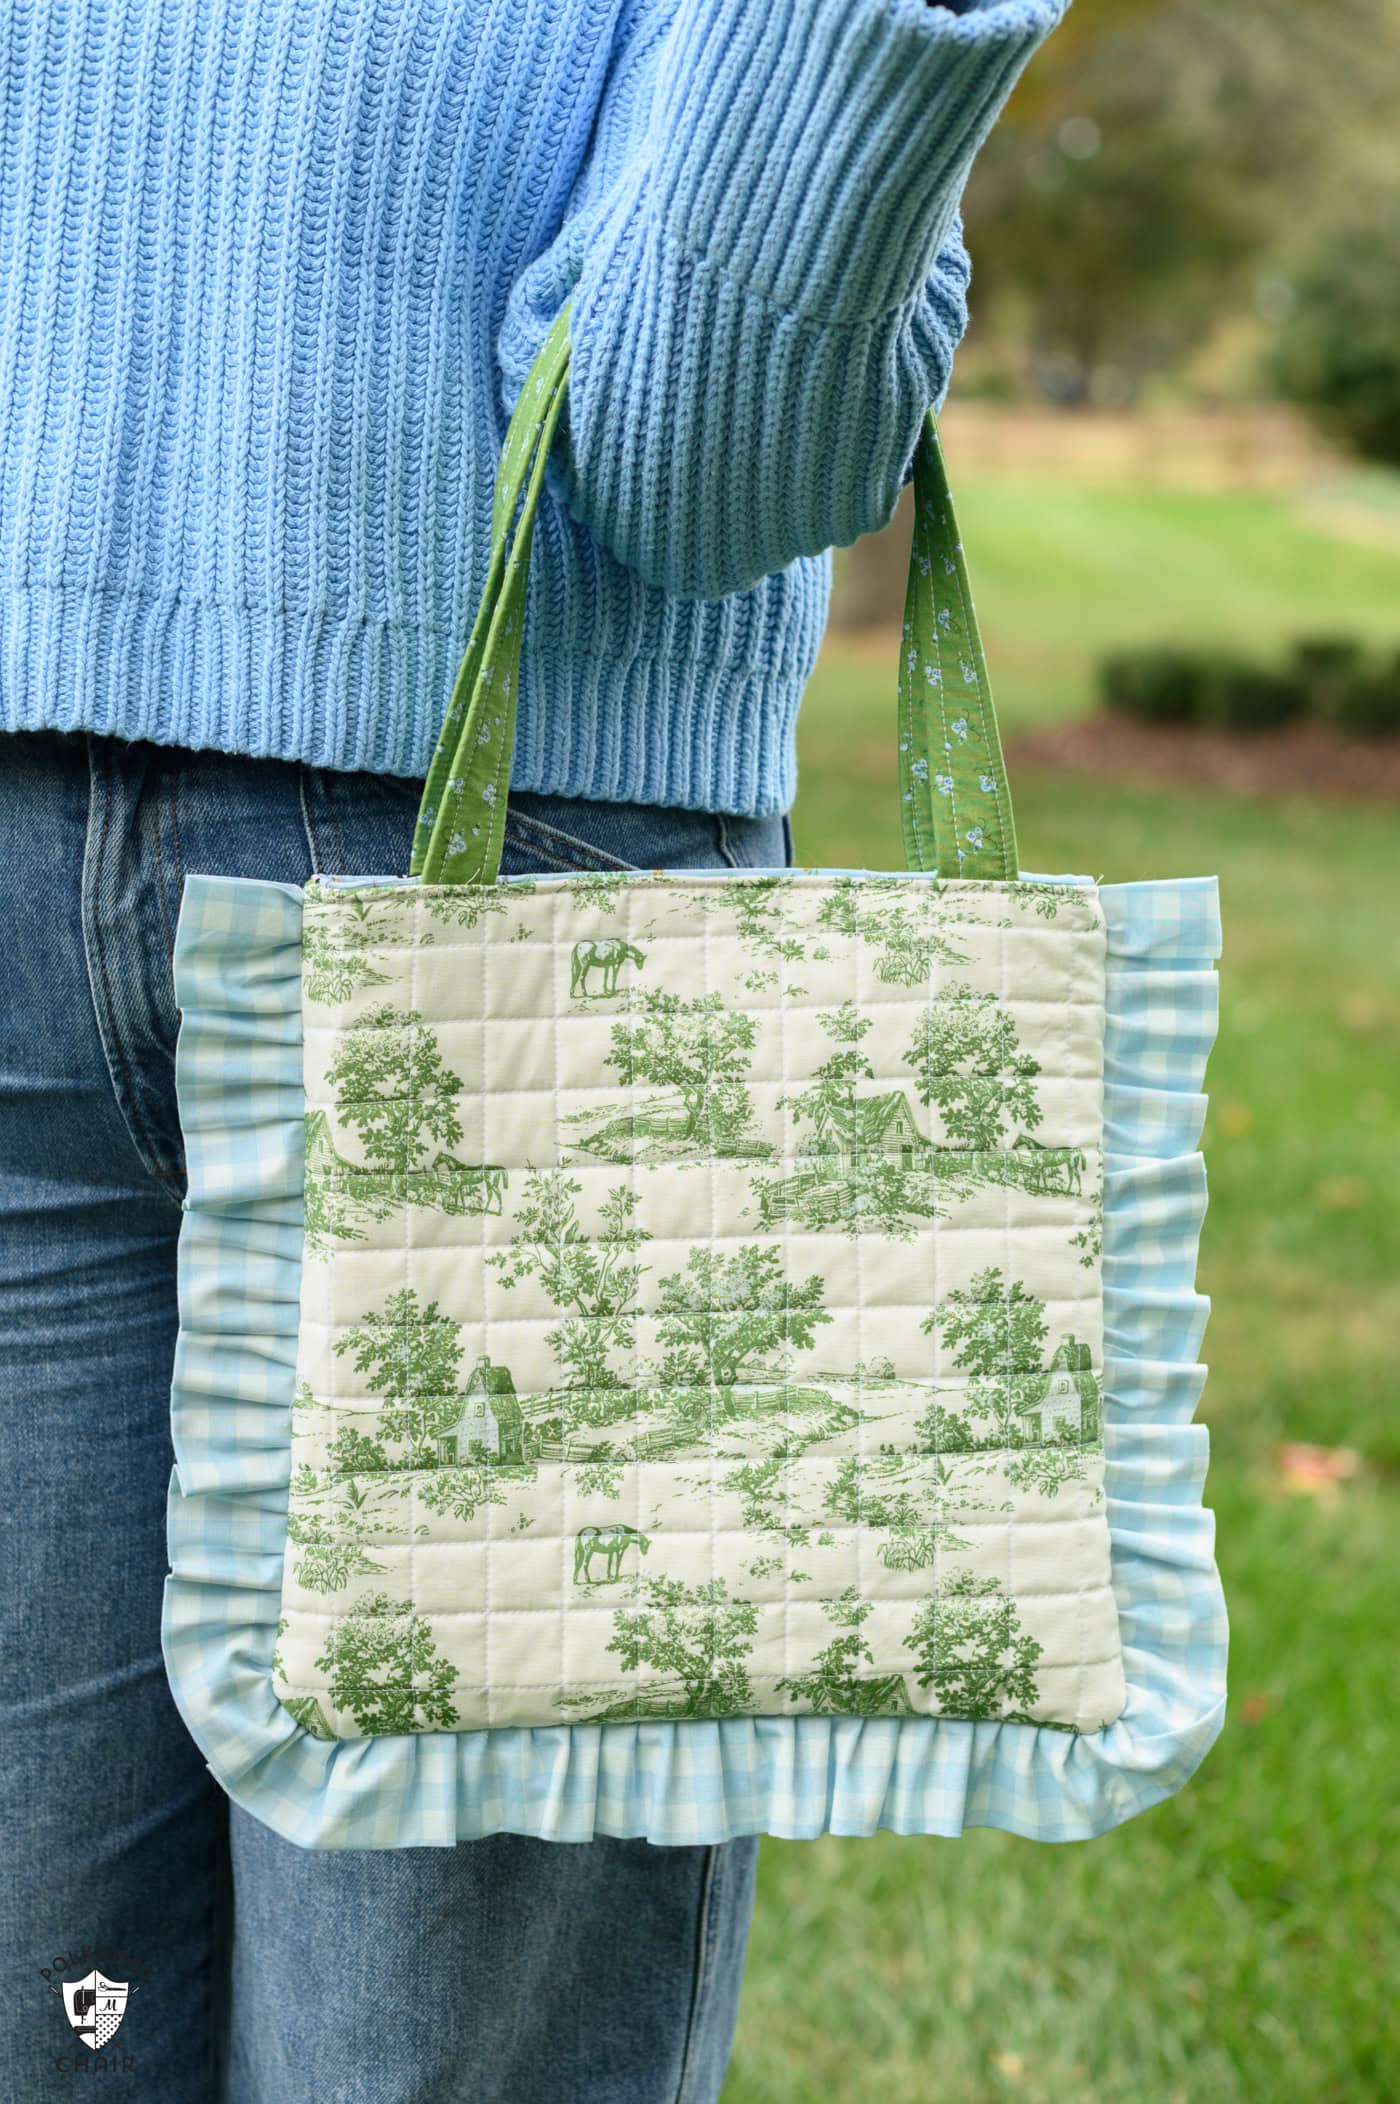
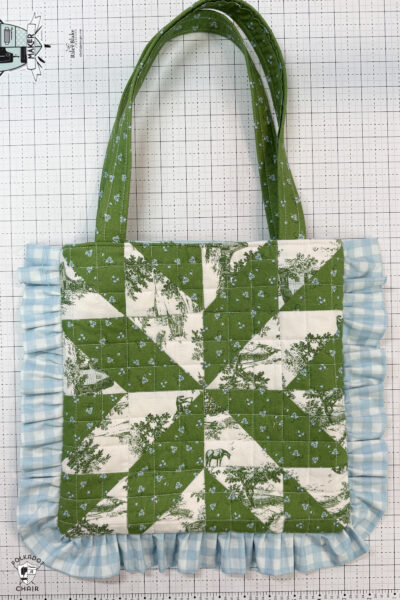
Turn an Extra Quilt Block into the Cutest Quilted Tote Bag with Ruffle
Today I’m sharing an easy step-by-step tutorial for making a quilted tote bag with a ruffle border using a 12-inch quilt block. This project is a great way to use up leftover blocks from previous quilts, test blocks, or even orphan blocks from your stash.
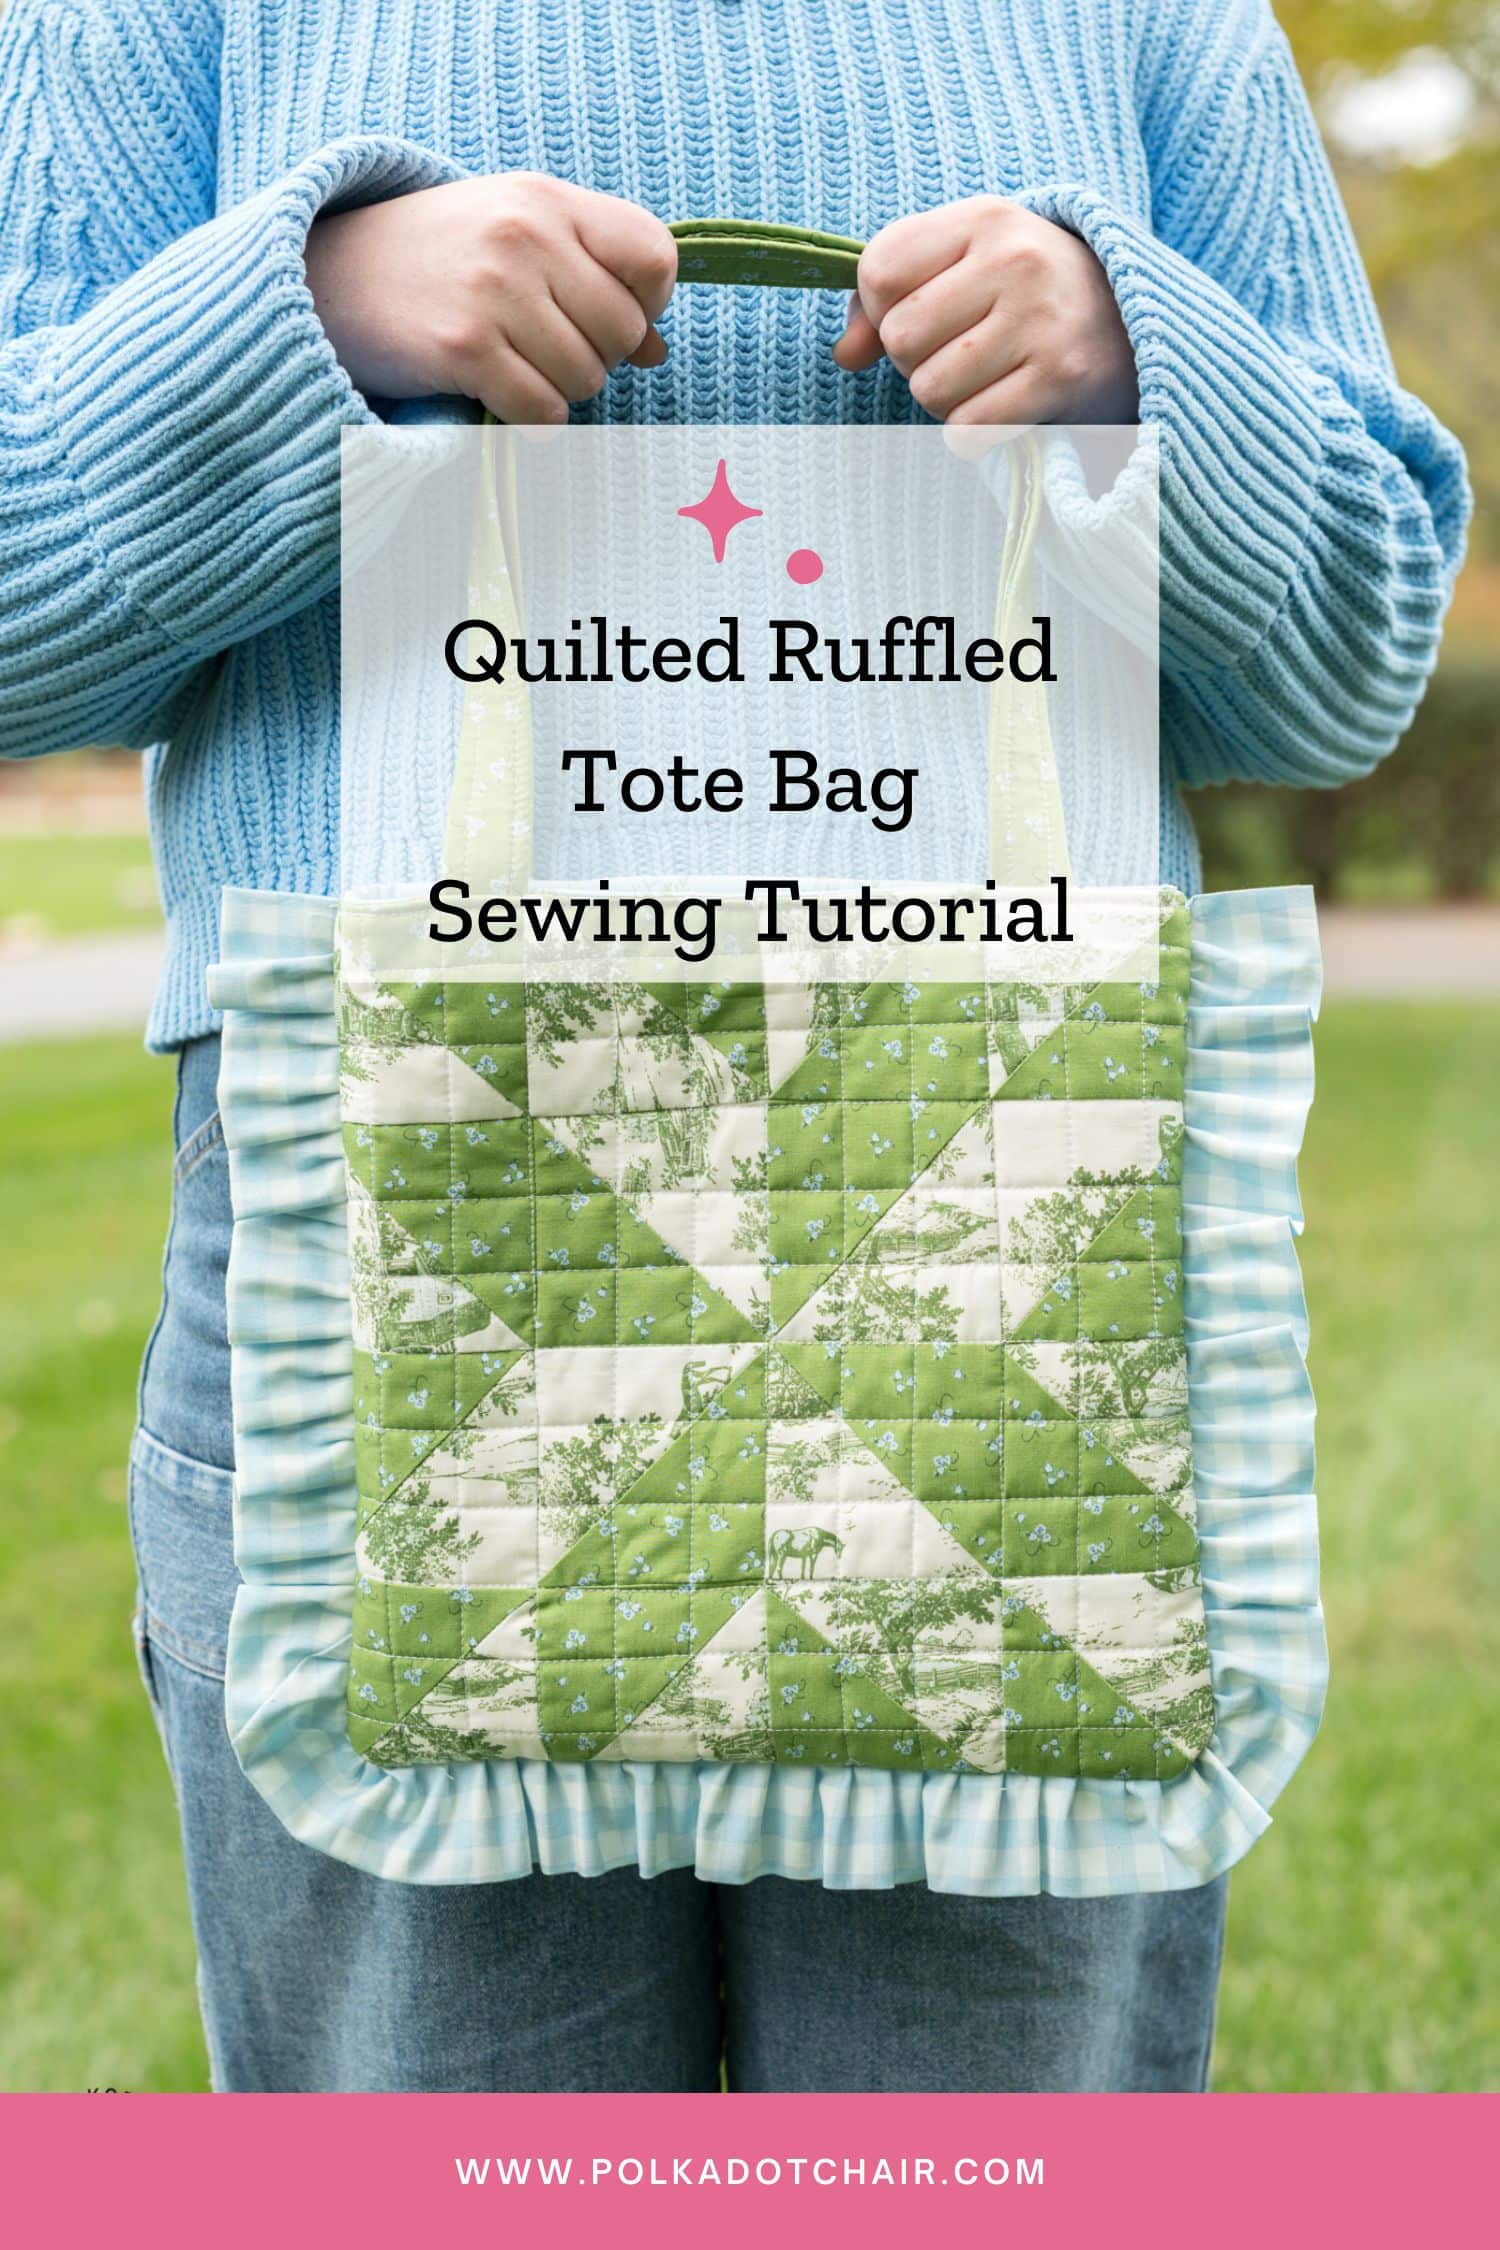
In this tote bag tutorial, you’ll learn how to complete simple quilting, assemble a lined tote, and finish it off with a cute ruffled edge. It’s a quick sewing project that’s perfect for scrap lovers and quilters who enjoy turning leftover quilt blocks into something useful.
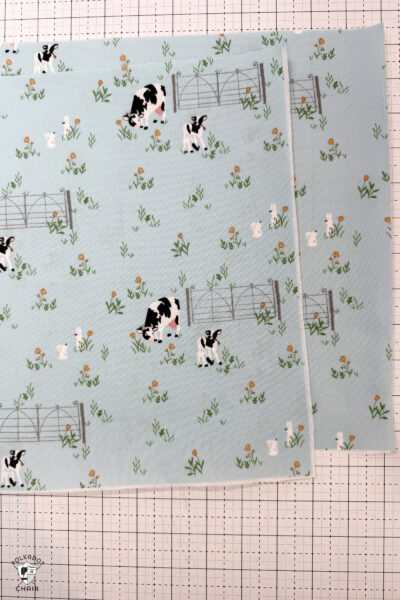
Last summer, my Bluegrass Charm fabric collection was released, and I was so excited to get my hands on it and sew something. However, work deadlines got in the way, and most of my “want to make projects” got pushed down the priority list.
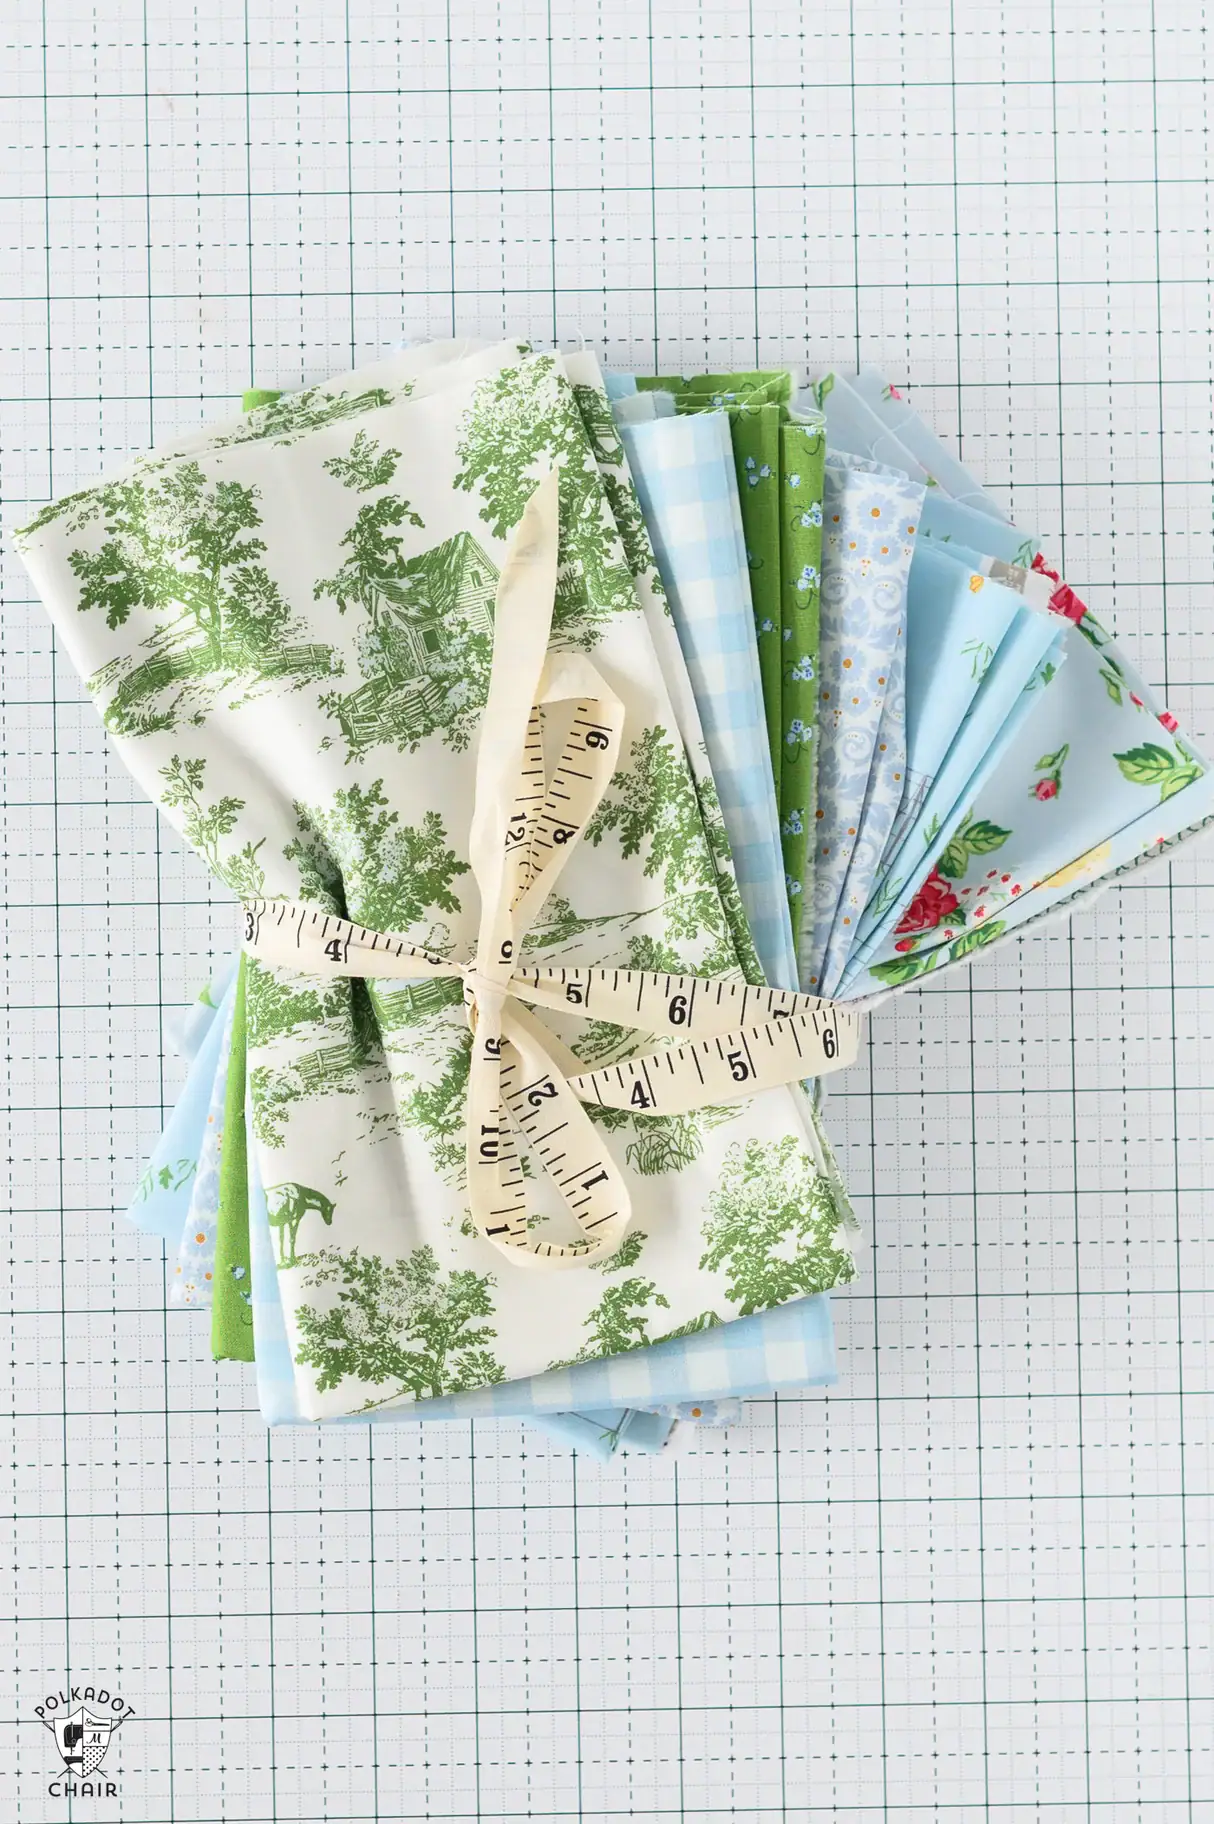
You can purchase the fabric used on this tote bag in a special bundle in our shop.
This month, I decided it was time to just MAKE the time to stitch up a project I’ve had in mind for the bag for a long time: a cute quilted ruffled tote bag!
I don’t know if you’ve noticed, but ruffles are trending right now! Which is so funny to me because they were trending when I was in my 20s. It’s fun to see how everything truly comes back around again!
I’ve made a ruffled pillow and a ruffled zip pouch, and now it’s time to make a ruffled tote bag!
How to Make the Ruffles
The ruffles on my tote bag were created with a BERNINA Ruffler foot (foot #86). Note: I’ve tried the BERNINA Gathering Foot and don’t like it as much as the Ruffler Foot. If you don’t have a ruffler foot, that’s ok, I’ll show you how to make one using a standard machine foot. But if you think you’ll be making many ruffles, a special foot might be worth the investment.
Options for the Bag Front
You can make the front and back of this bag from either a sewn quilt block or a solid piece of fabric. I used the Annie’s Choice Quilt block tutorial posted recently, but feel free to use any 12″ quilt block that you want (it’s a great project for a leftover quilt block)
If you just want a quilted tote bag that is not made from a quilt block, you can do that as well! Swap out the quilt block in the instructions below for a Fat Quarter of fabric cut to 12 1/2″ x 12 1/2″.
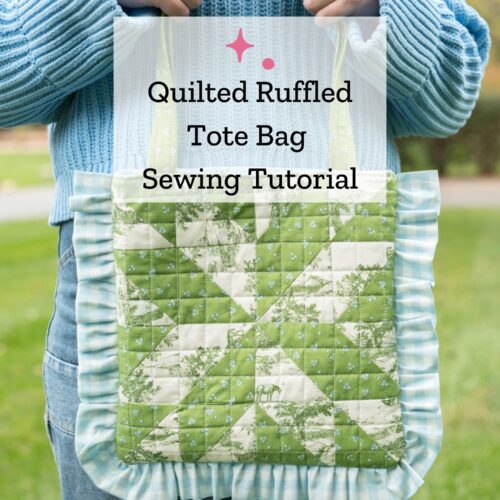
Quilted Tote Bag with Ruffle Detail Sewing Tutorial
Equipment
supplies
- 1 Fat Quarter Fabric for Back of Tote Bag
- 1 Completed 12" quilt block or 1 Fat Quarter if you don't want to make your tote from a quilt block
- 1 Fat Quarter Fabric for Handles
- 1/4 Yard Fabric For Ruffle
- 1/2 Yard Fabric For Lining
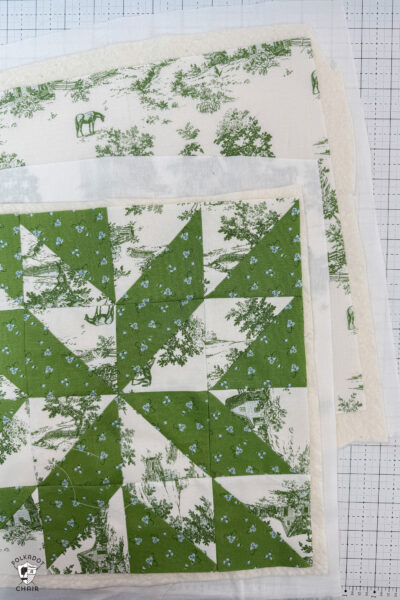
- 1/2 Yard Backing Fabric – White Does not show on the finished project used as backing when quilting the bag front and back pieces.
- 1 Package Shape Flex Interfacing
- 2 Pieces Quilt Batting at least 14" x 14"
- 2 Yards 1" Wide Cotton Webbing for handles
Instructions
Cutting Instructions
- From Back of Bag Fabric: 1 piece 12 1/2" x 12 1/2"From Quilt Backing Fabric: 2 pieces 13" x 13"From Strap Fabric: 2 pieces 3" x 22"From Ruffle Fabric: 2 pieces 4" x 38" (sew together along the short sides to have one piece 4" x 37")From Bag Lining Fabric: 2 pieces 12" x 12"From Shape Flex: 2 pieces 12" x 12"
How to Make the Ruffle:
If using the Ruffler Foot;
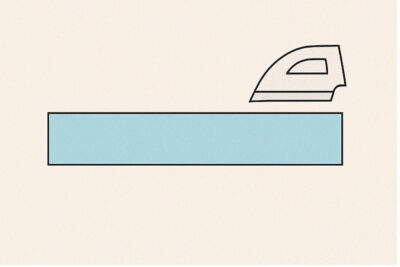
- Fold the 4” x 74” strip in half lengthwise, with the wrong sides together, and press along the fold to create a crisp edge.
- Set the Ruffler foot at 6. Fold under the end of the piece 1/2” inward so you have a clean edge. Sew using the Ruffler foot.


If using Standard Foot:
- Fold the 4” x 74” strip in half lengthwise, with the wrong sides together, and press along the fold to create a crisp edge.
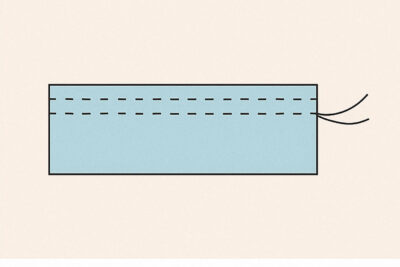
- Next, set your sewing machine to a long stitch length and sew two rows of basting stitches along the raw edges, about ⅛” and ¼” from the edge.
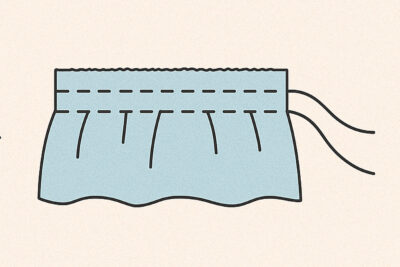
- Gently pull on the bobbin threads to gather the fabric until the ruffle matches the length of your tote bag panel.
- Evenly adjust the gathers, then secure the threads by tying a knot at each end. You can now baste or pin the ruffle in place before attaching it to your bag.
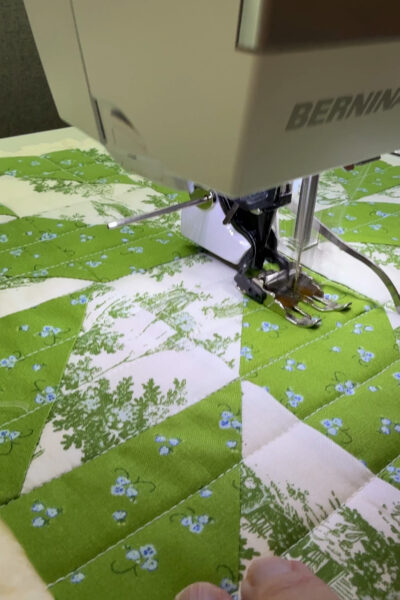
How to Quilt The Bag:
- Mark the center of the 12 1/2” x 12 1/2” piece of fabric or quilt block in both directions.
- Layer the 13” x 13” piece of backing fabric with the batting and quilt block (or solid piece of fabric).

- On a sewing machine with a walking foot attached, sew one of the lines. Sew another line 1” away from the first line. Keep sewing lines 1” apart until you get to the edge of the fabric.
- Rotate the piece 90 ° and sew 1” lines using the same method, working in the other direction on the bag.
- After both the bag front and back pieces are quilted, trim all layers even.
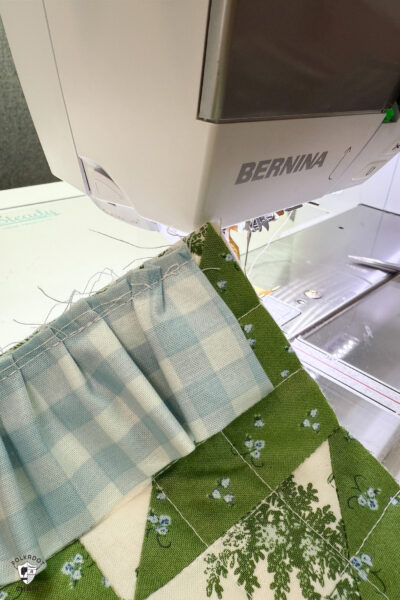
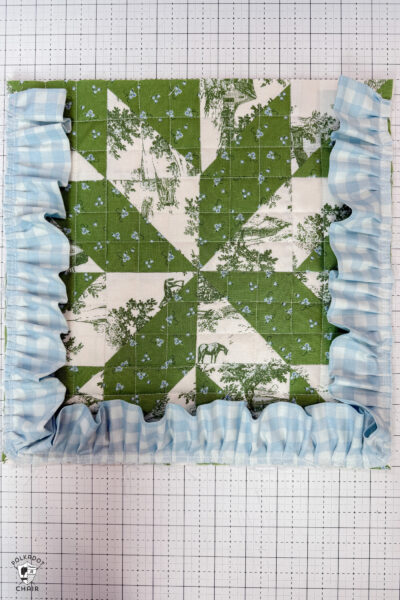
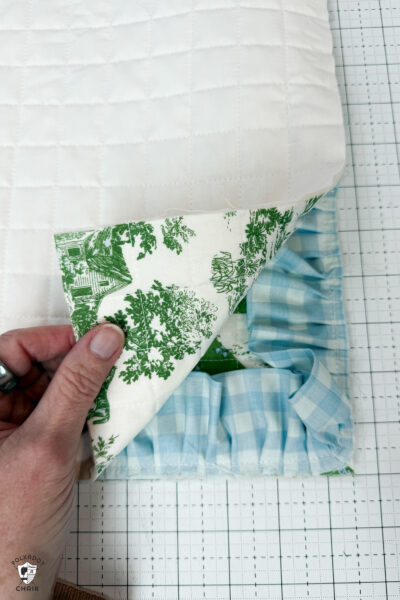
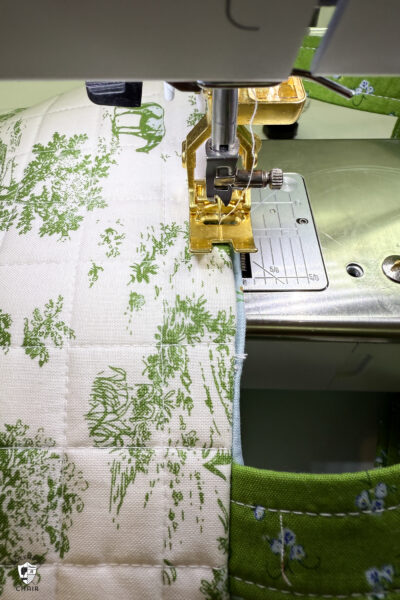
Attach the Ruffle:
- Pin the start of the finished end of the ruffle 1/2” down from the top of the front of the bag on one side. Keep pinning all the way around until you get to the other side of the bag. Trim the ruffle even with the top of the bag.
- Unpick the ruffle and fold the raw edges under, and pin so that the finished top of the ruffle is 1/2” from the top of the bag.
- Sew the ruffle place with 1/4” seam allowance.
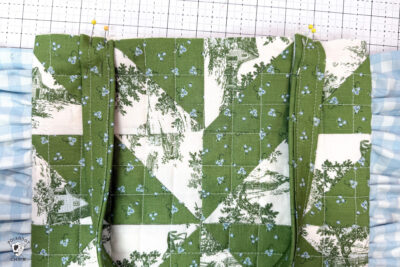
- Sew the bag front and back pieces together with a 3/8” seam allowance. Make sure you backstitch at the start and end of your seam.
- Turn the bag right side out.
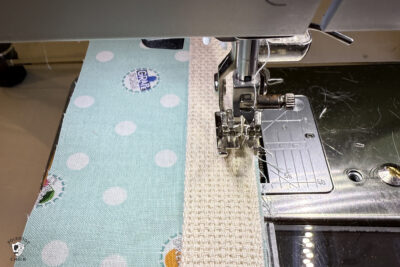
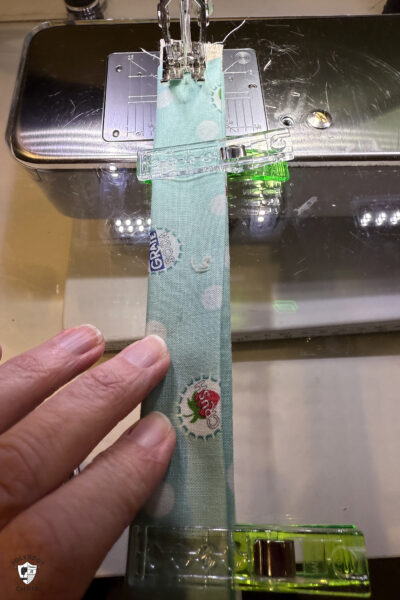
How to Cover Canvas Straps
- Cut two pieces of 1” webbing 22 long.
- Sew the webbing to the strap fabric piece with a 1/4” seam allowance.
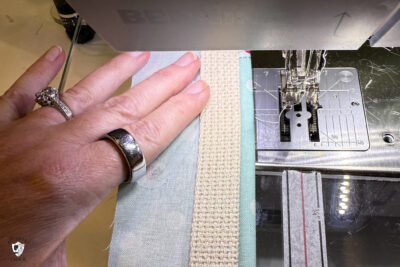
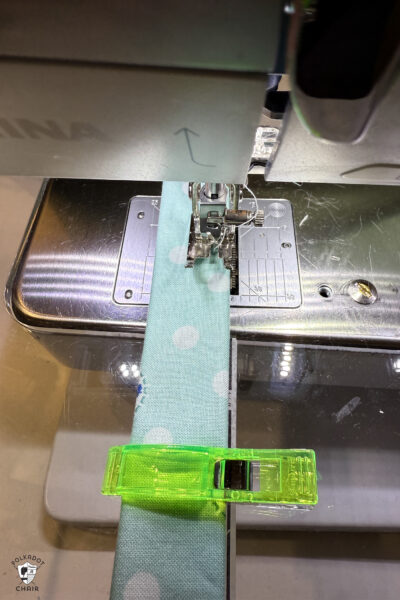
- Bring the fabric around to the other side of the strap
- and turn the fabric under 1/4” on the raw edge.
- Pull the folded edge of the strap and secure it with binding clips and glue.
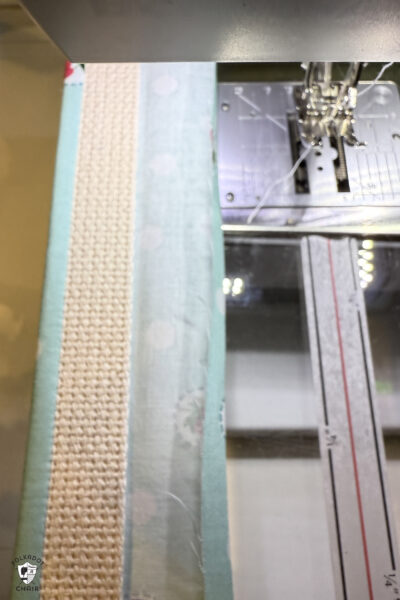
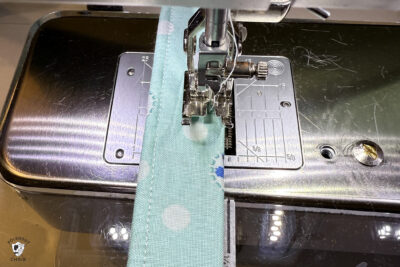
- Topstitch the strap so that you catch the folded edge as you sew.
- Top stitch on the other side of the strap as well.
- Pin the straps to the front and back of the bag 3" in from the outside edge. Stitch in place.
Lining:
- Apply the Shape Flex interfacing to the wrong side of the two 12” x 12” bag lining pieces.
- Sew the two lining pieces together right sides facing.
Finishing:
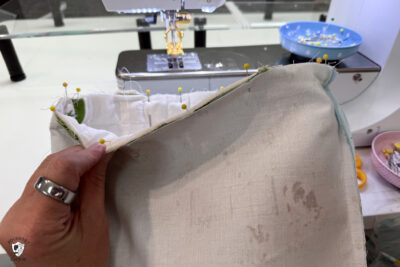
- Slip the completed bag outside piece into the sewn bag lining piece. Match the side seams and pin all the way around the top of the bag.
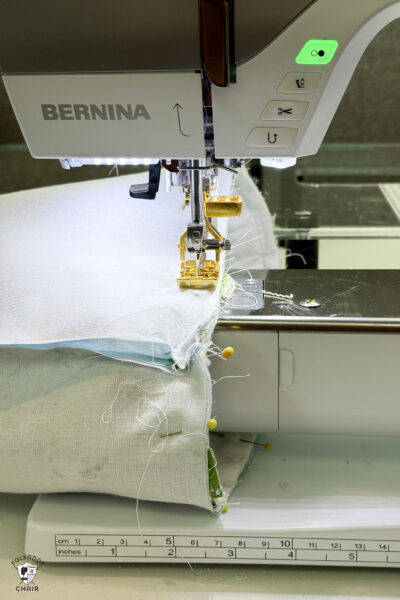
- Sew with a 3/8” seam allowance, leaving a 4” opening on the back of the bag to turn it right side out.
- Turn the bag right side out through the opening. Press the top seam of the bag well (you may need to use steam), turn under the raw edge of the opening, and pin in place.
- Top-stitch around the top of the bag, making sure to catch the opening as you sew.
- Enjoy your bag!
You May Also Like:
- How to Make a Beaded Bag Charm (one of these would be so cute attached to this tote bag)
- The Bows & Monograms Quilt Pattern
- How to Make 8 Half-Square Triangles at Once

Such a cute bag. I love that there are printable directions.