How to Make a Beaded Bag Charm; Trendy, Easy & Perfect for Gifting!
Bag charms have become a trendy way to personalize your purses and tote bags. There are so many cute charms on the market, but what better way to express your individual style than making your own bag charm? Want to make yours extra special? Try creating your own polymer clay beads and charms; check out our tutorial to learn how!
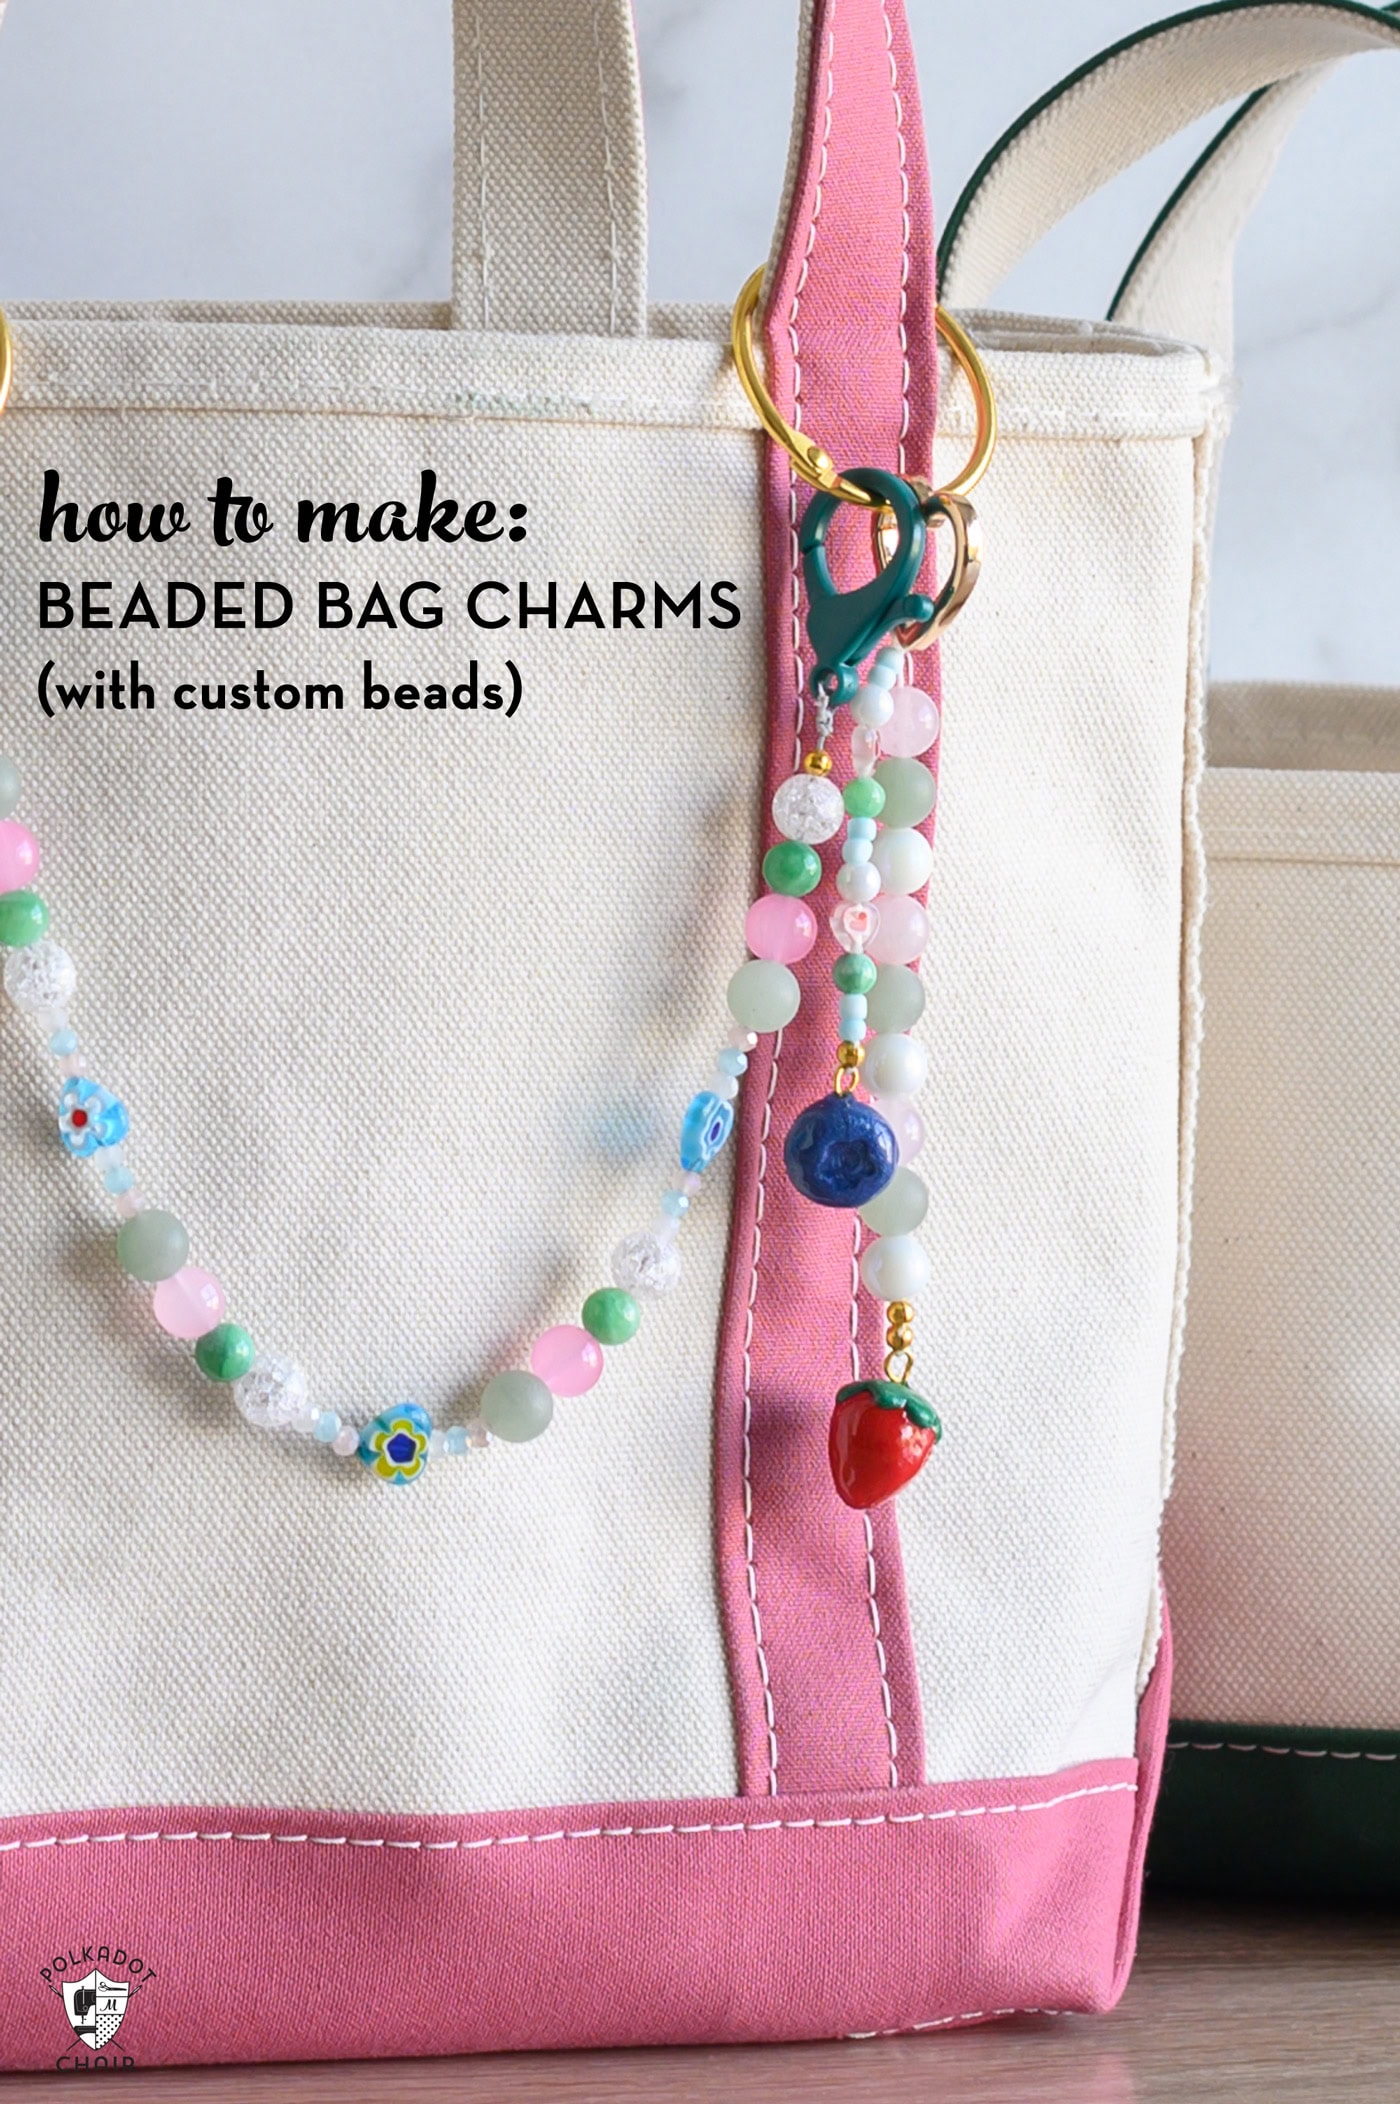
Bag charms have become a trendy way to personalize your purses and totes (we love attaching them to our boat and tote bags). There are so many cute charms on the market, but some are very expensive.
Making your own bag charms not only can save you money but can also be very fun! If you are looking for a fun group activity to do with family or friends during the holidays, this might be perfect!
Note: as with all of the craft projects on our site, this is for adult use only and should be kept out of reach of children and pets. Always supervise crafting activities and use caution when handling sharp objects.
How to Make a Beaded Bag Charm: Trendy, Easy & Perfect for Gifting!
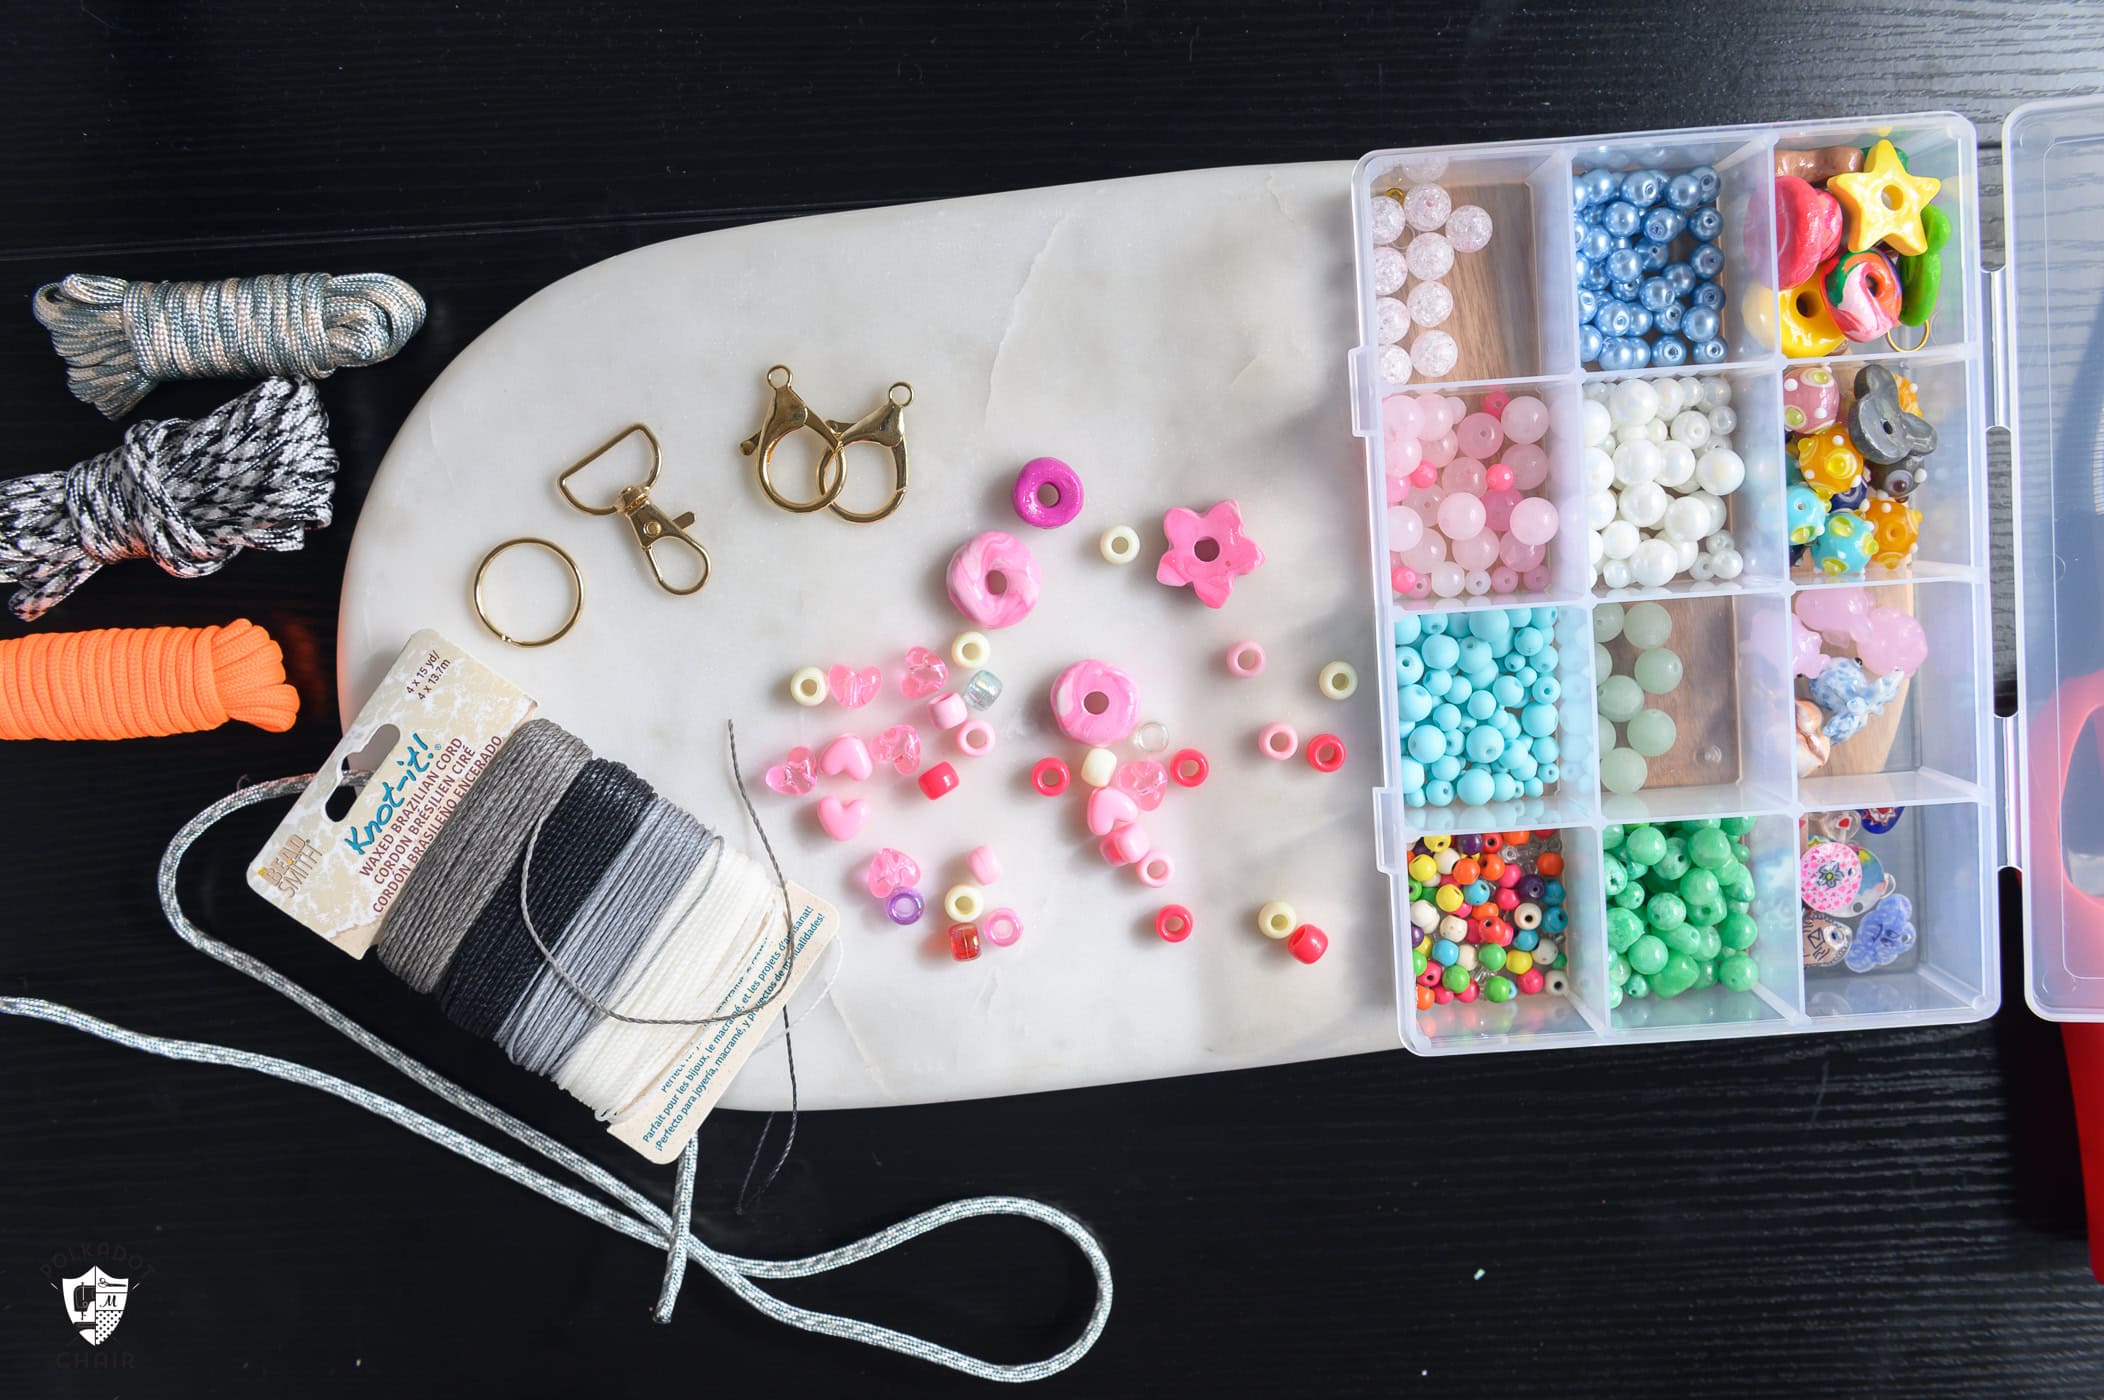
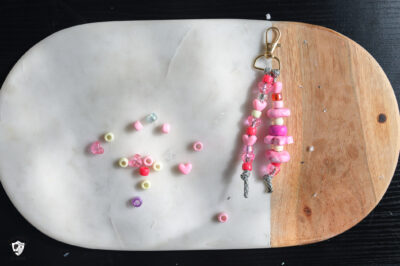
supplies
- Paracord make sure it is small enough in diameter to string beads
- Waxed cord
- Key ring/clip/giant lobster clasp
- Pony beads
- Novelty beads/charms
- Polymer clay custom beads you can make these using our tutorial
Instructions
Step 1: Cord Types
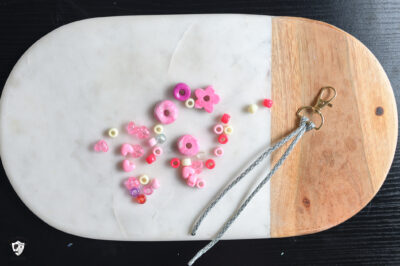
- To start, select your preferred cord and key ring. The two main ways I like to tie the cord are to loop the cord around the key ring/giant lobster clasp, creating a two-strand bag charm.

- Or simply tie the cord around the key ring to create a single-strand bag charm. Once you have determined the desired length for your bag charm, cut the cord to that length.
- If you are using paracord, add an extra inch to the end to ensure an easy tie-off. You will also need to burn the cut edges of the paracord to prevent fraying.

Step 2: Design
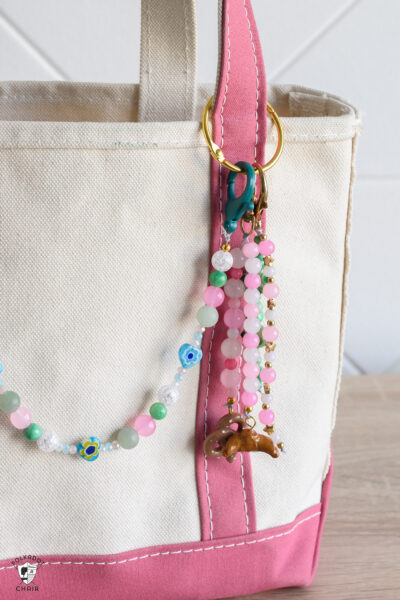
- Figure out your beads and design. If you made special charms and beads out of polymer clay, grab those along with your pony beads or other novelty beads. Figure out the color scheme and order for your beads. String them onto the chord and tie off the end.
- If you are using the waxed cord instead of the paracord, I like to tie off the end with a charm hanging from it. This way, the end of your bag charm looks finished and has a little extra personality.
- Another great option to finish off your bag charm: instead of tying it off, you can attach the other end to a giant lobster clasp, giving you more options for hooking it onto your bag.

Step 3: Add Additional Strands
- After completing step two, you’ll have an adorable bag charm. To really take your charm to the next level, though, you can add on extra strands or a singular charm on a jump ring attached to the key ring, which is another excellent way to use those polymer clay charms you made previously.

Step 4: How to Attach to Your Bag
- Now it’s time to attach your charm to your bag. Some bags have rings or zipper pulls that are great for attaching the bag charms. However, if your bag straps are too thick to clip a bag charm to, you can add a 1.5-inch binder clip around the strap to secure the bag charms.
- You can add just the one charm you just made, or make more to create a fun layered charm look. Feel free to mix it with other key chains and bag charms you have collected as well. That is what is so fun about this project: it’s endlessly customizable.

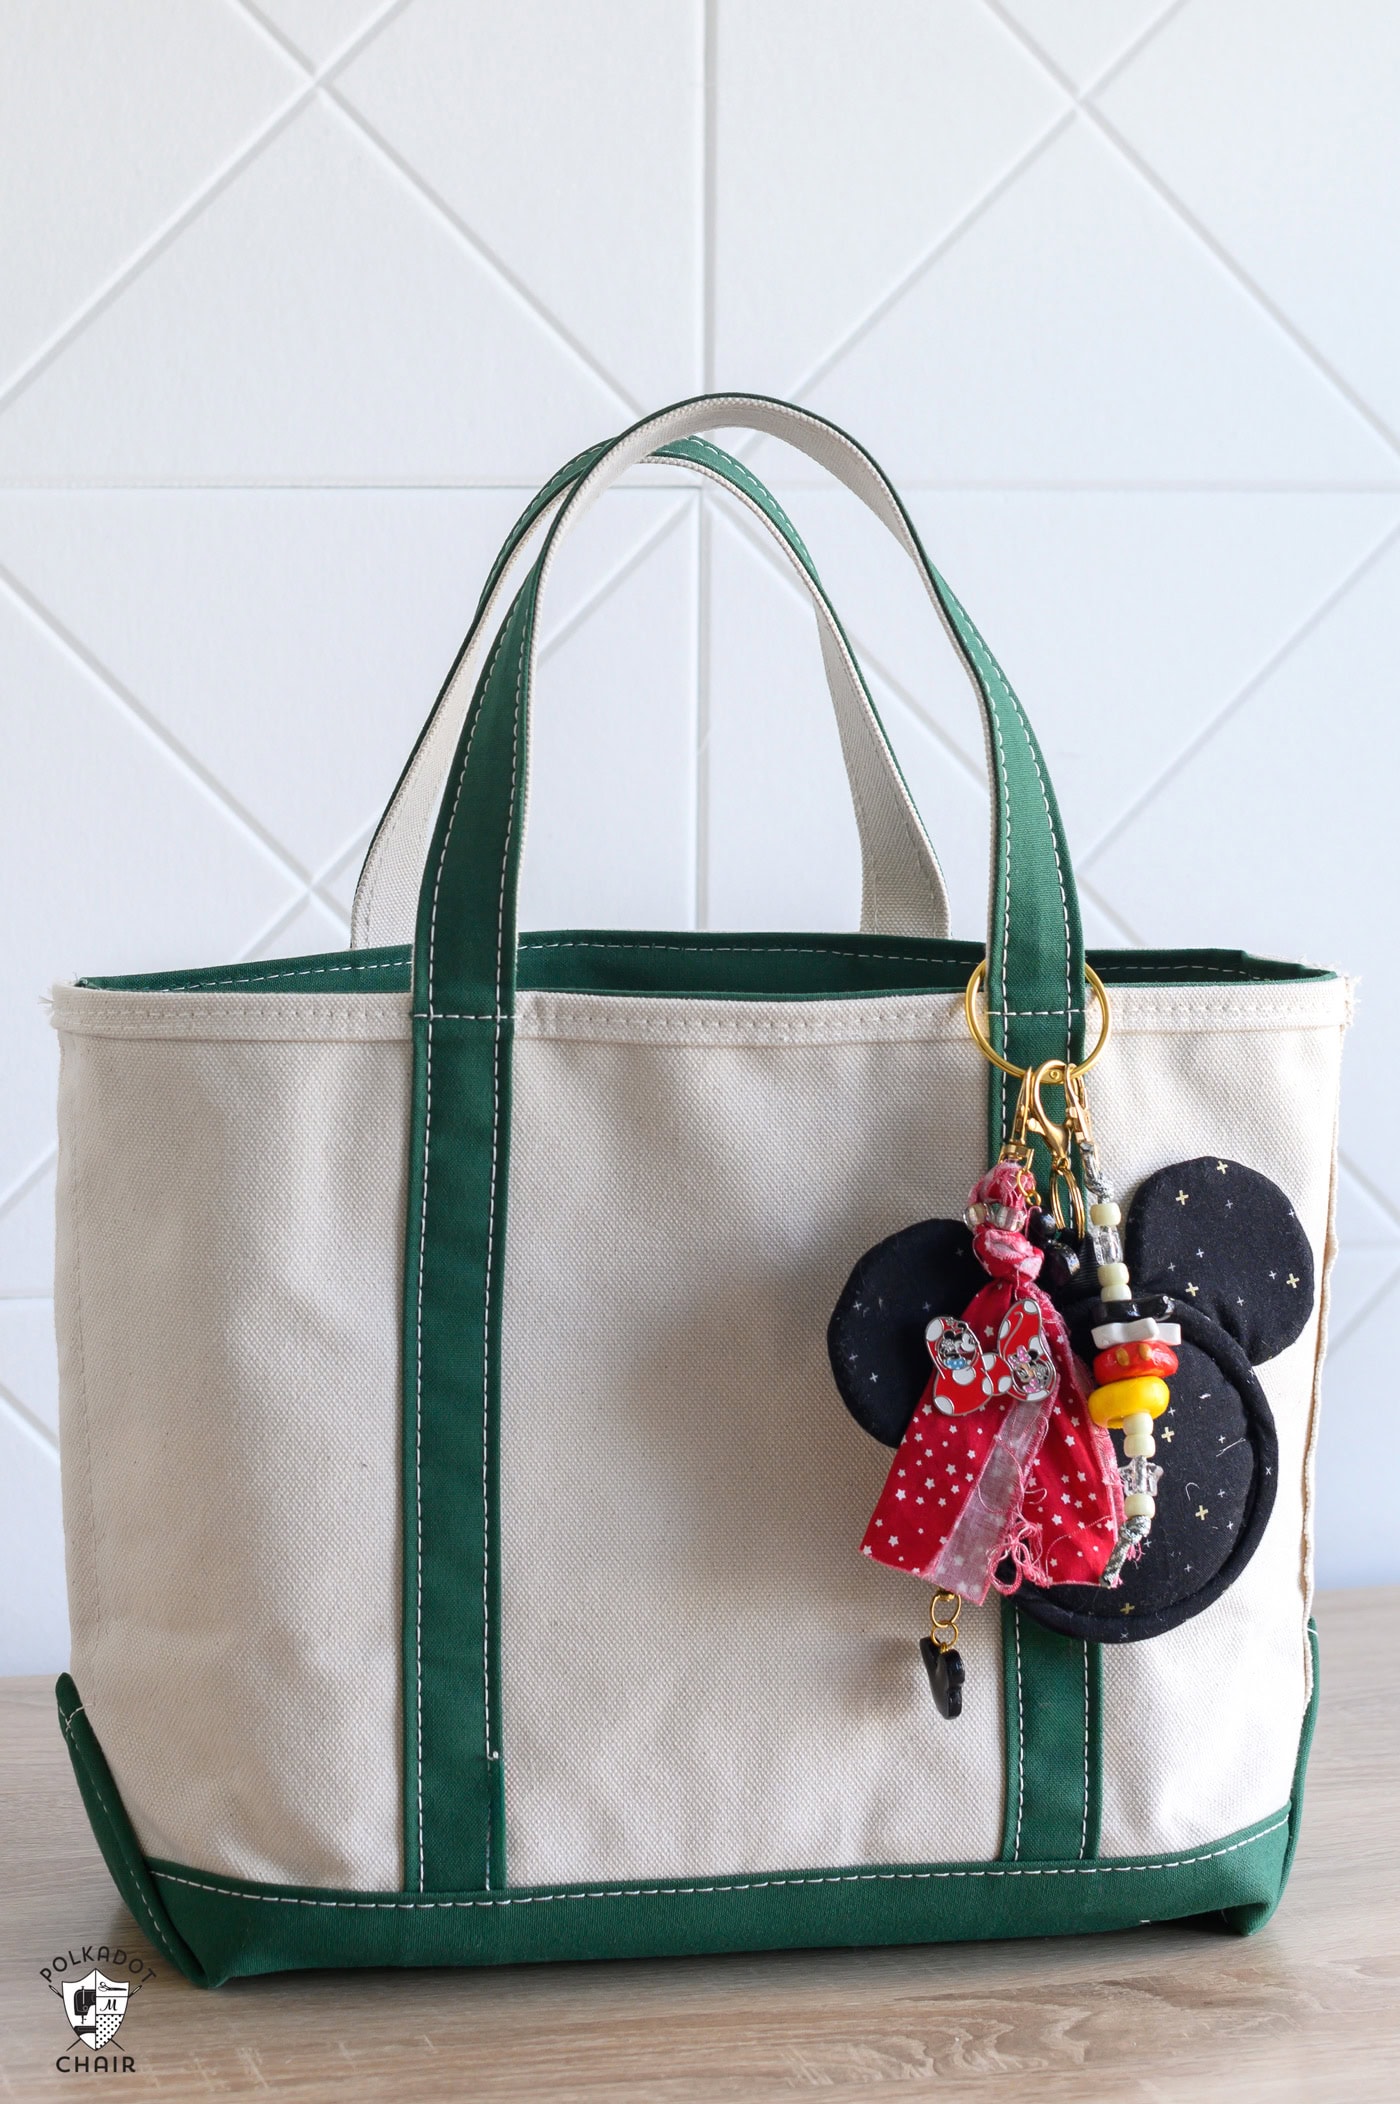
- Pair a few of the beaded bag charms with our cute Mickey and Minnie zippered bag charm as a fun way to decorate your tote bag even more!
This is the inspiration I have been looking for! I have lots of beads, beautiful fabric to make pouches and bags and polymer clay to make my own beads. I have a new mission!
These beads are so pretty 💜. Hmmm, I wonder if we could make quilted charms?
We’re working on it!