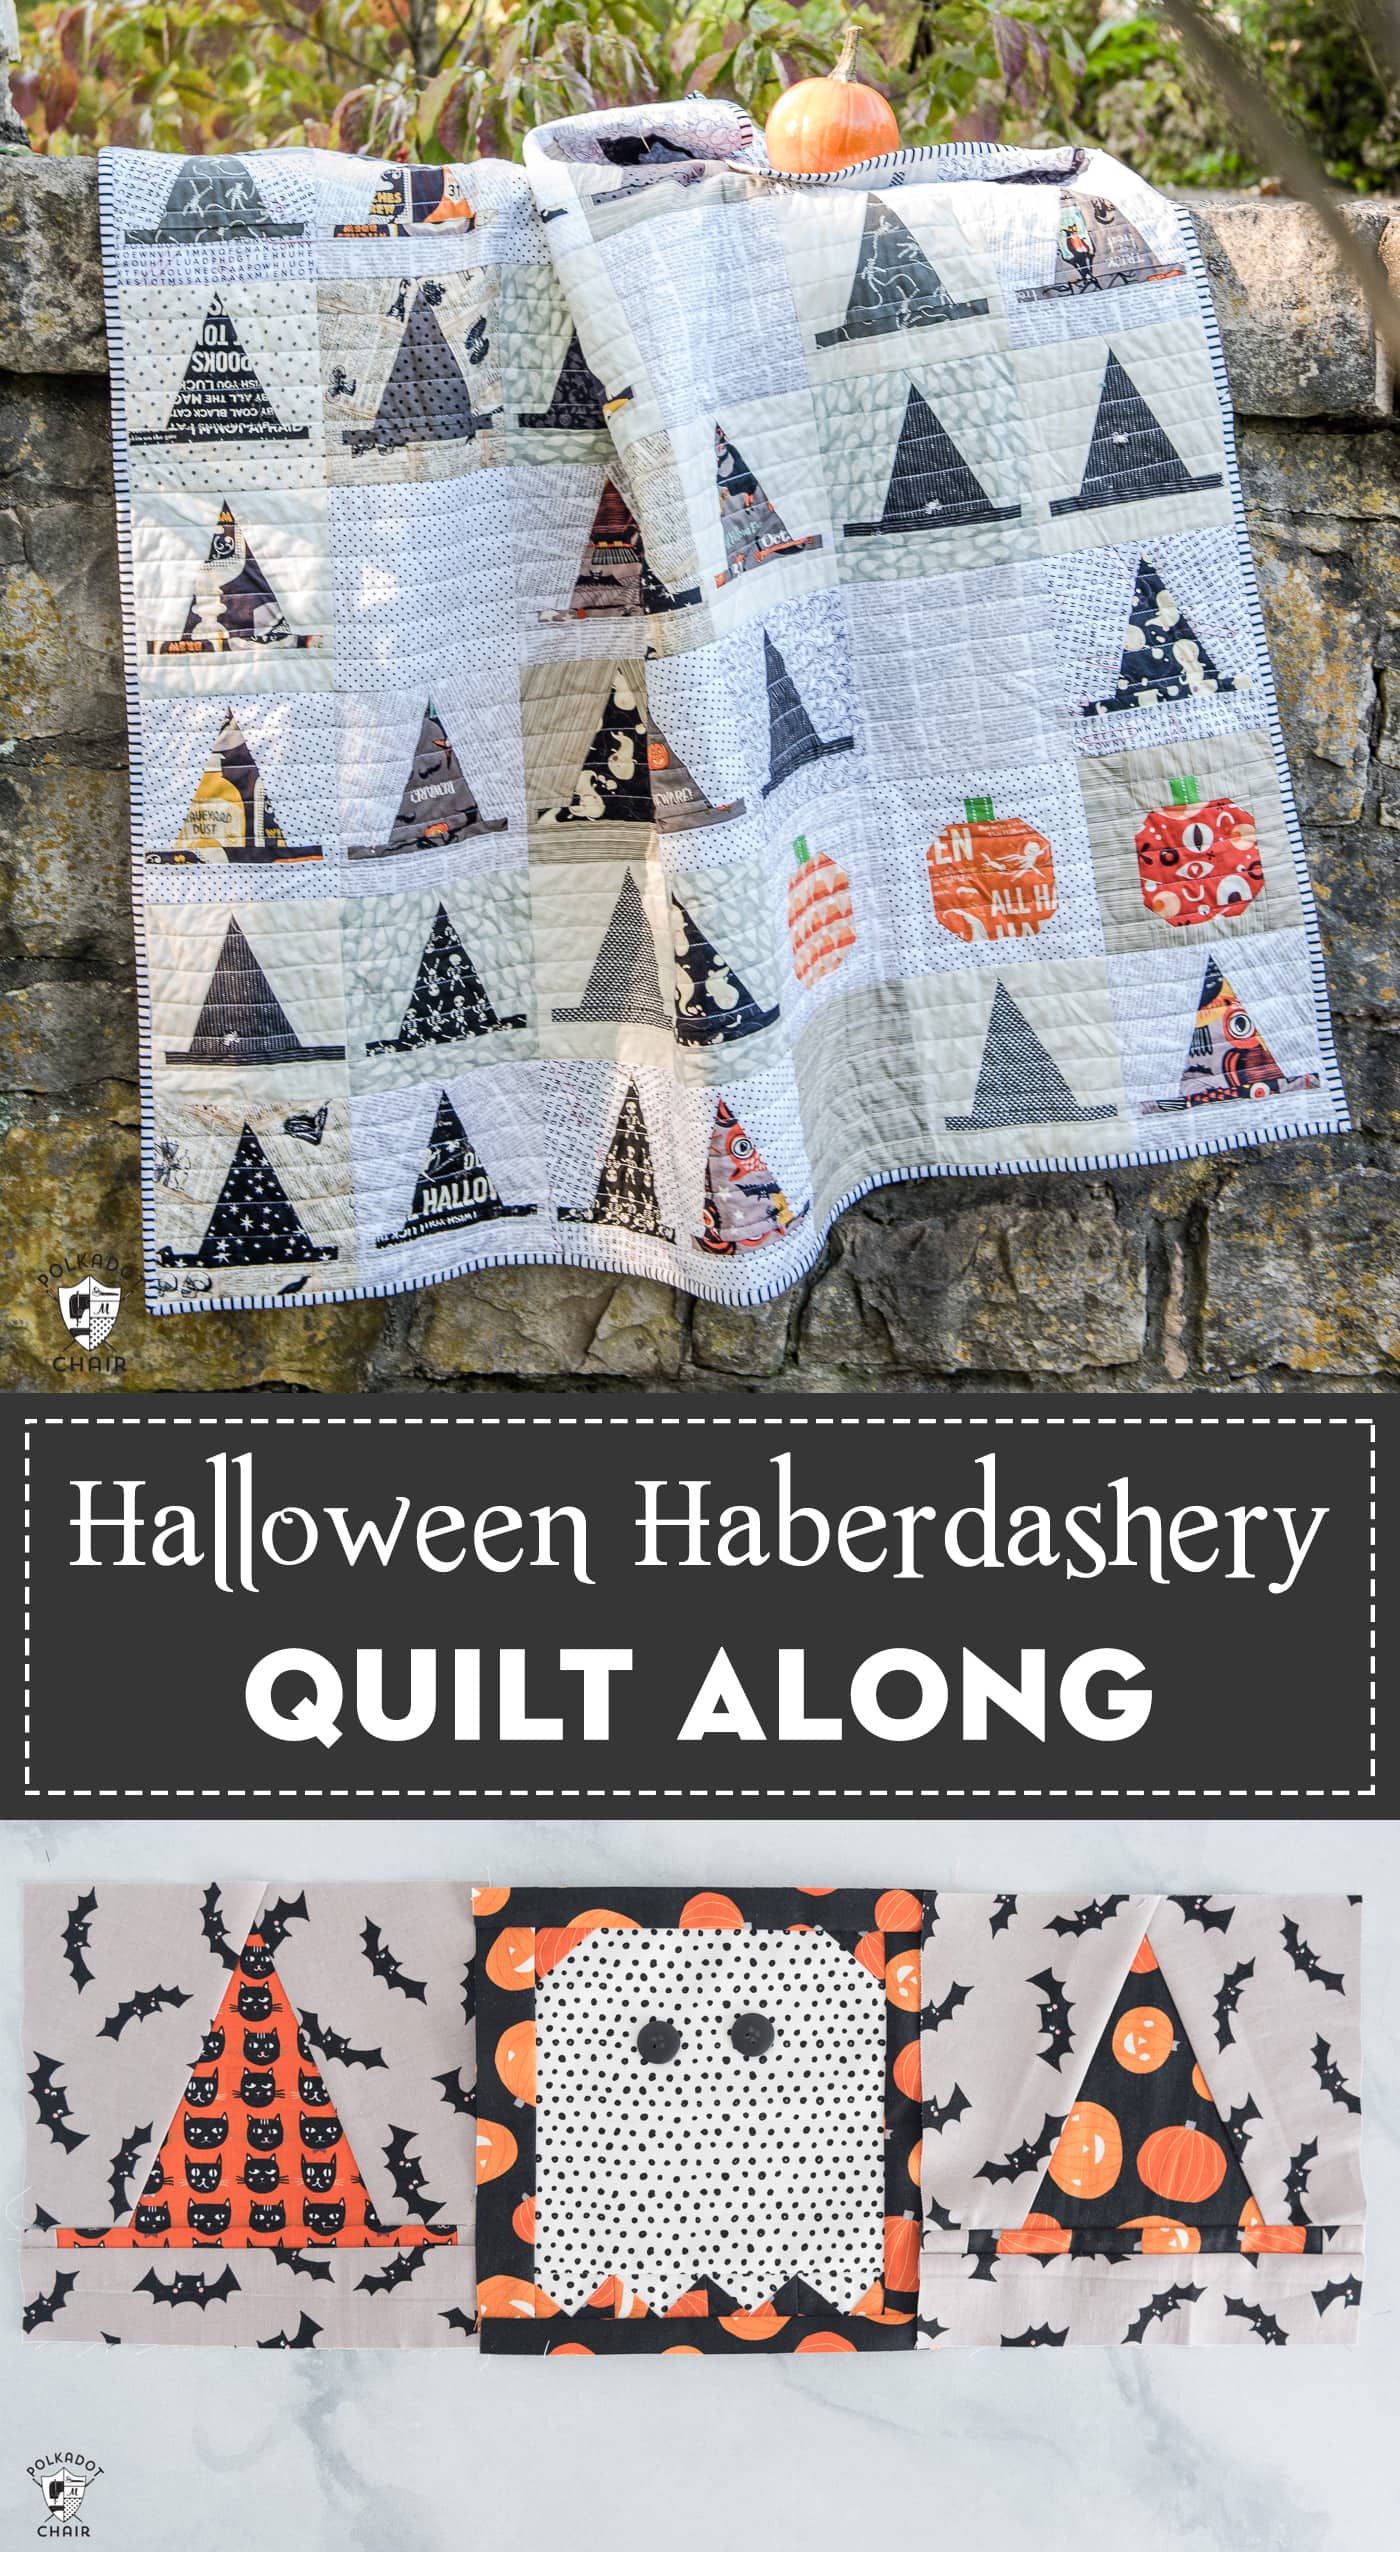
The Halloween Haberdashery Quilt Along
Who wants to make a fun Halloween Quilt?!? If you’re looking for a new Halloween quilting project, I invite you to participate in our Halloween Haberdashery Quilt Along. You’ll make this fun Witch’s Hat quilt and improve your quilting skills at the same time! Please keep reading for more information about joining our quilt along.
Today, I’m excited to share something I’ve been working on for the last few months. It’s a Quilt Along for my Halloween Haberdashery Quilt!
The quilt pattern was released several years ago, a few days before Halloween. Which is not great timing, I know. But when you get an idea, you get an idea, and the idea for this quilt didn’t come until the beginning of October that year.
UPDATE: The official quilt along is now over, but you can still find the videos for this quilt on our YouTube channel.
The next year, the quilt started to build steam, and I loved stalking Instagram for all of your Halloween quilt creations. Thank you so much to everyone who tagged me in your Instagram photos!
Now that it’s after Labor Day, it’s acceptable to start putting out Halloween decorations (in my humble opinion). I’ve been known to go a little bit crazy around Halloween. My kids always tease me about it, but I love the holiday!
Let’s chat a little bit about the quilt.
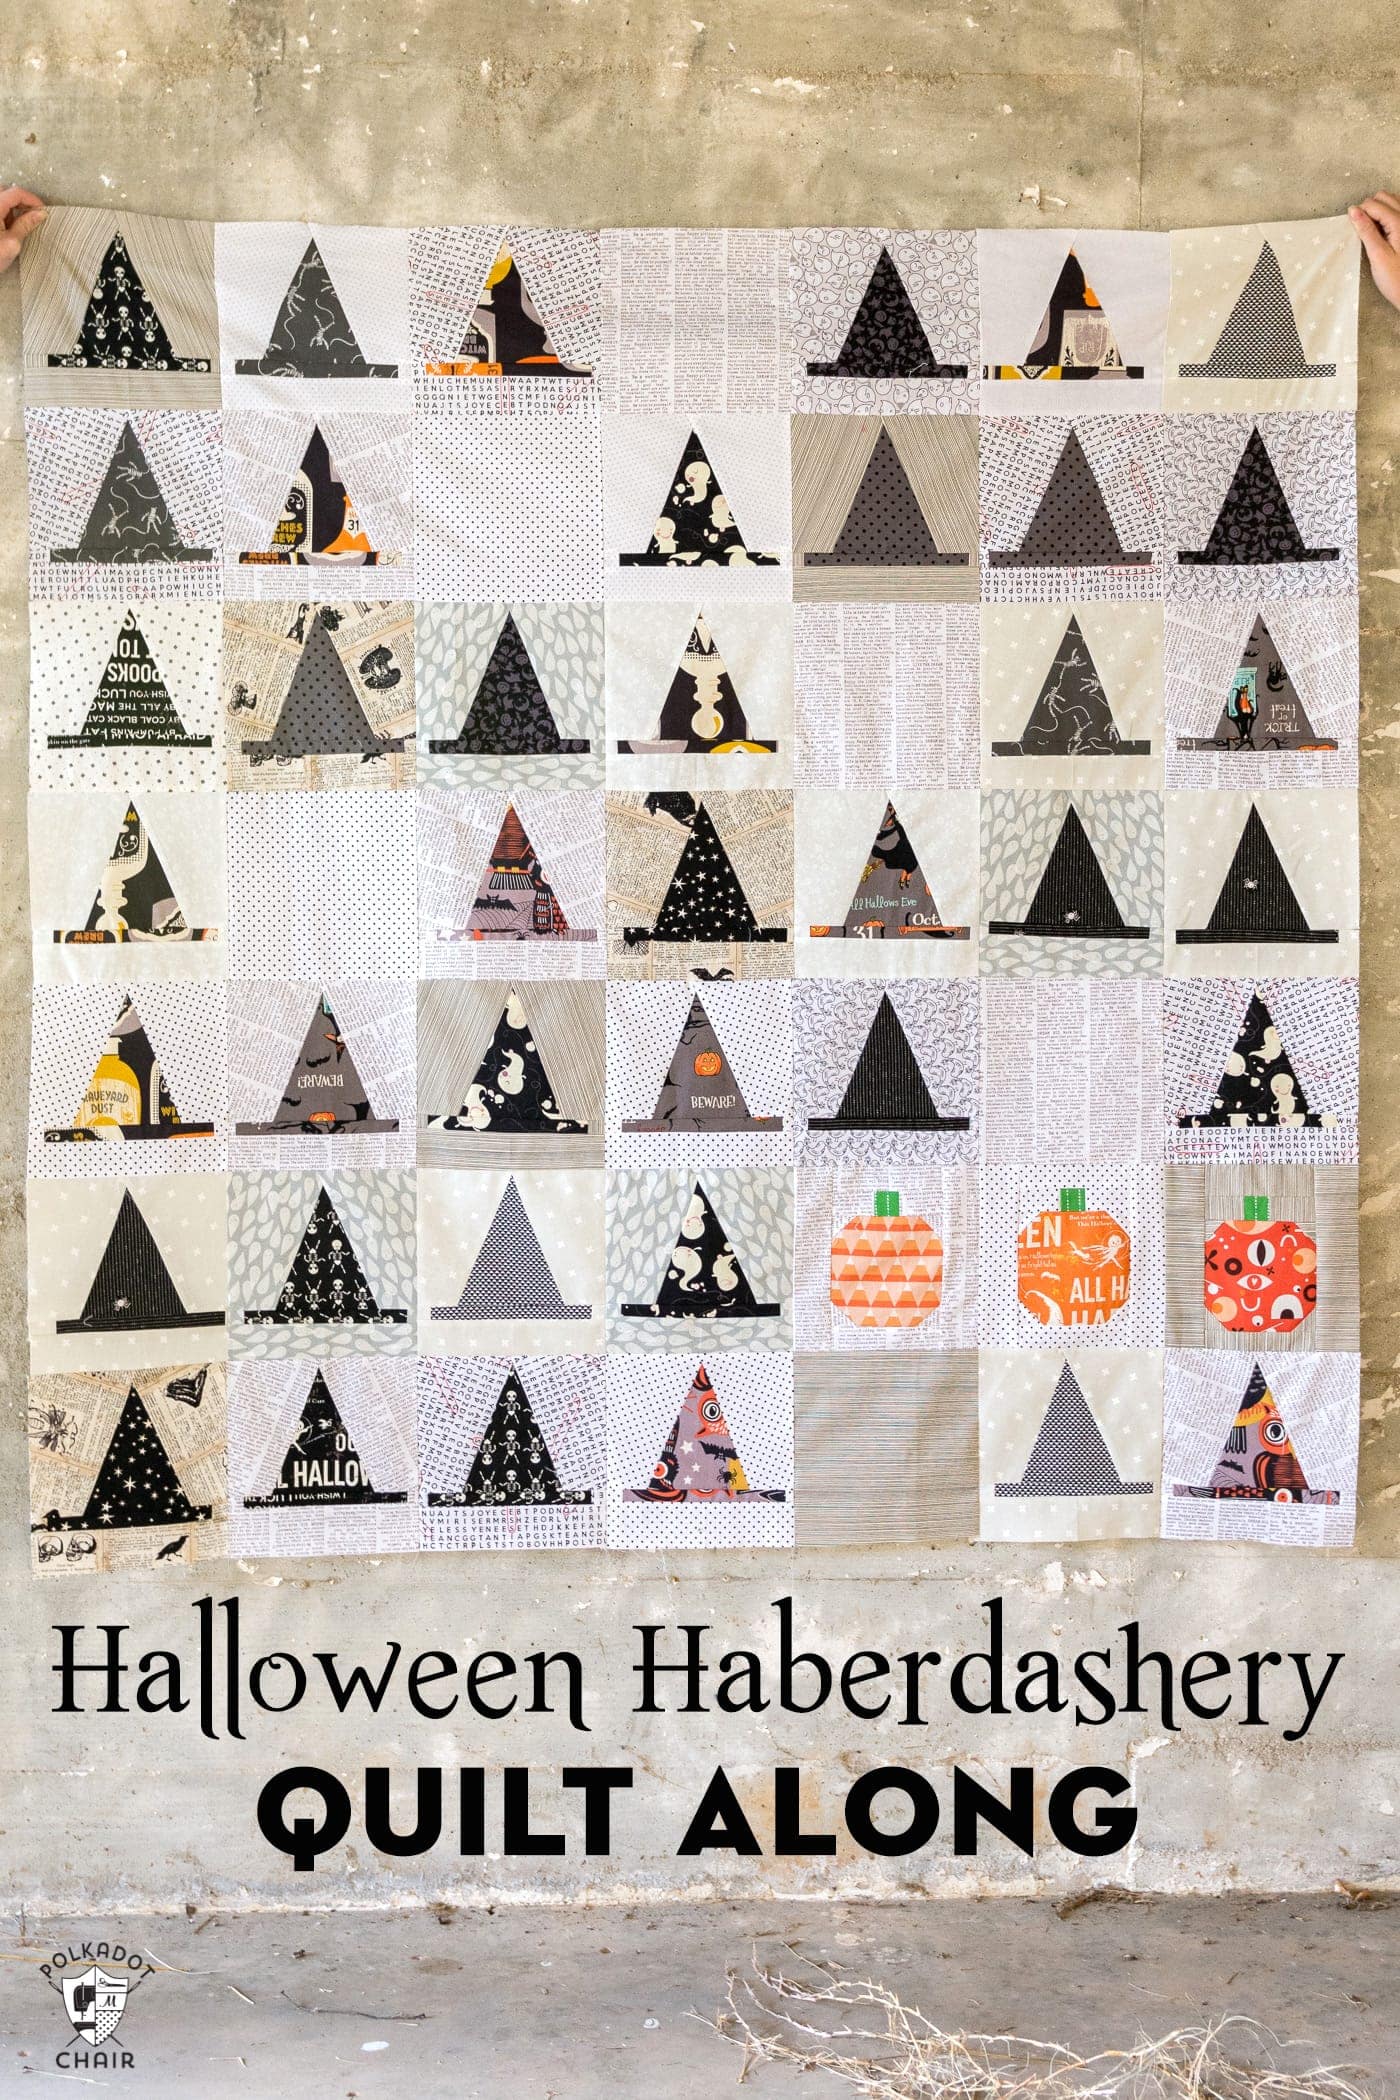
About the Halloween Haberdashery Quilt, aka the Witch’s Hat Quilt
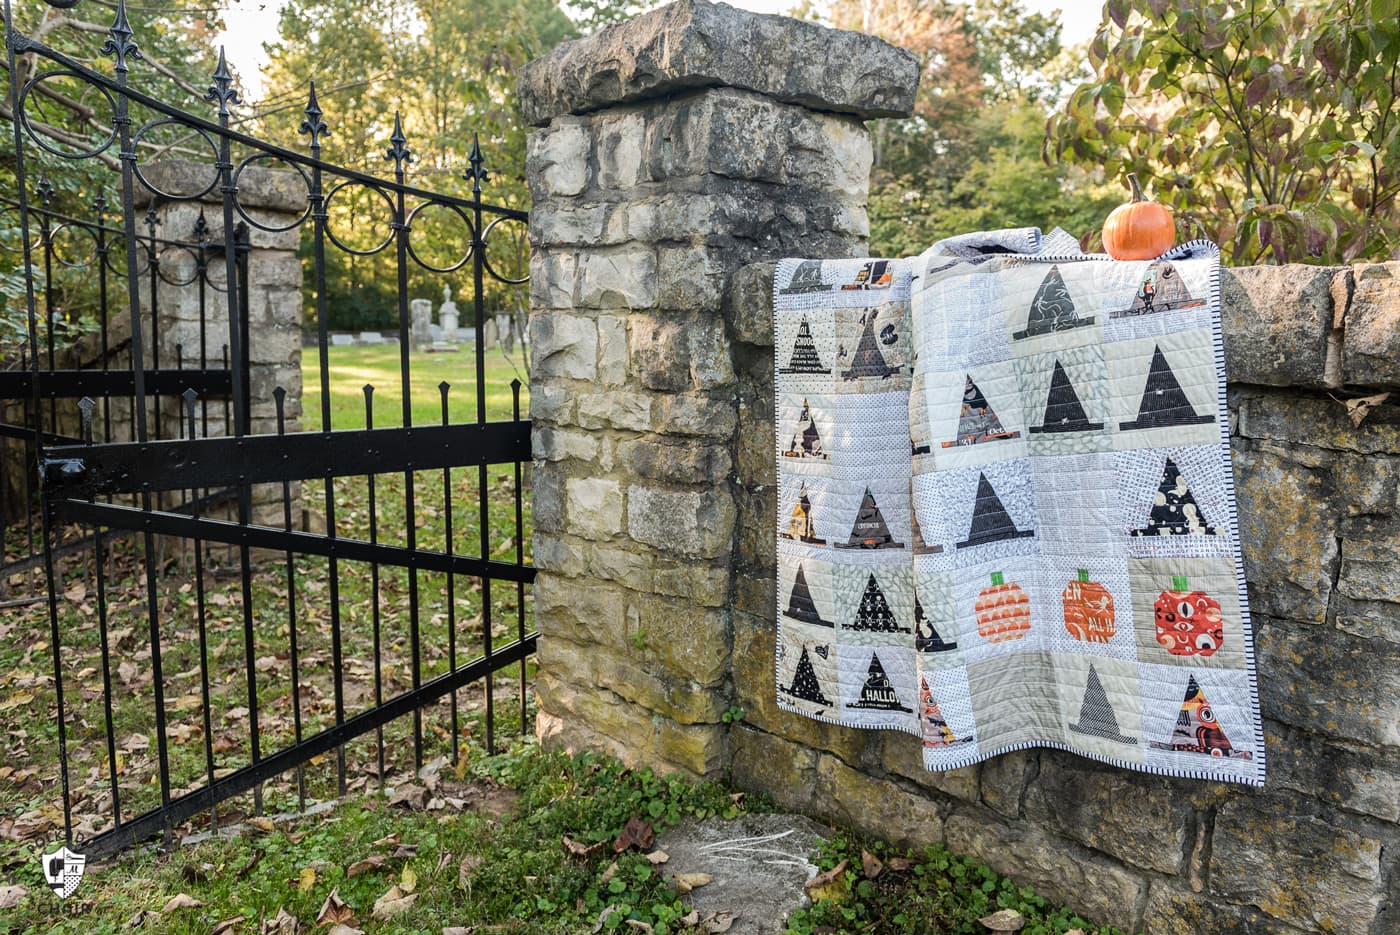
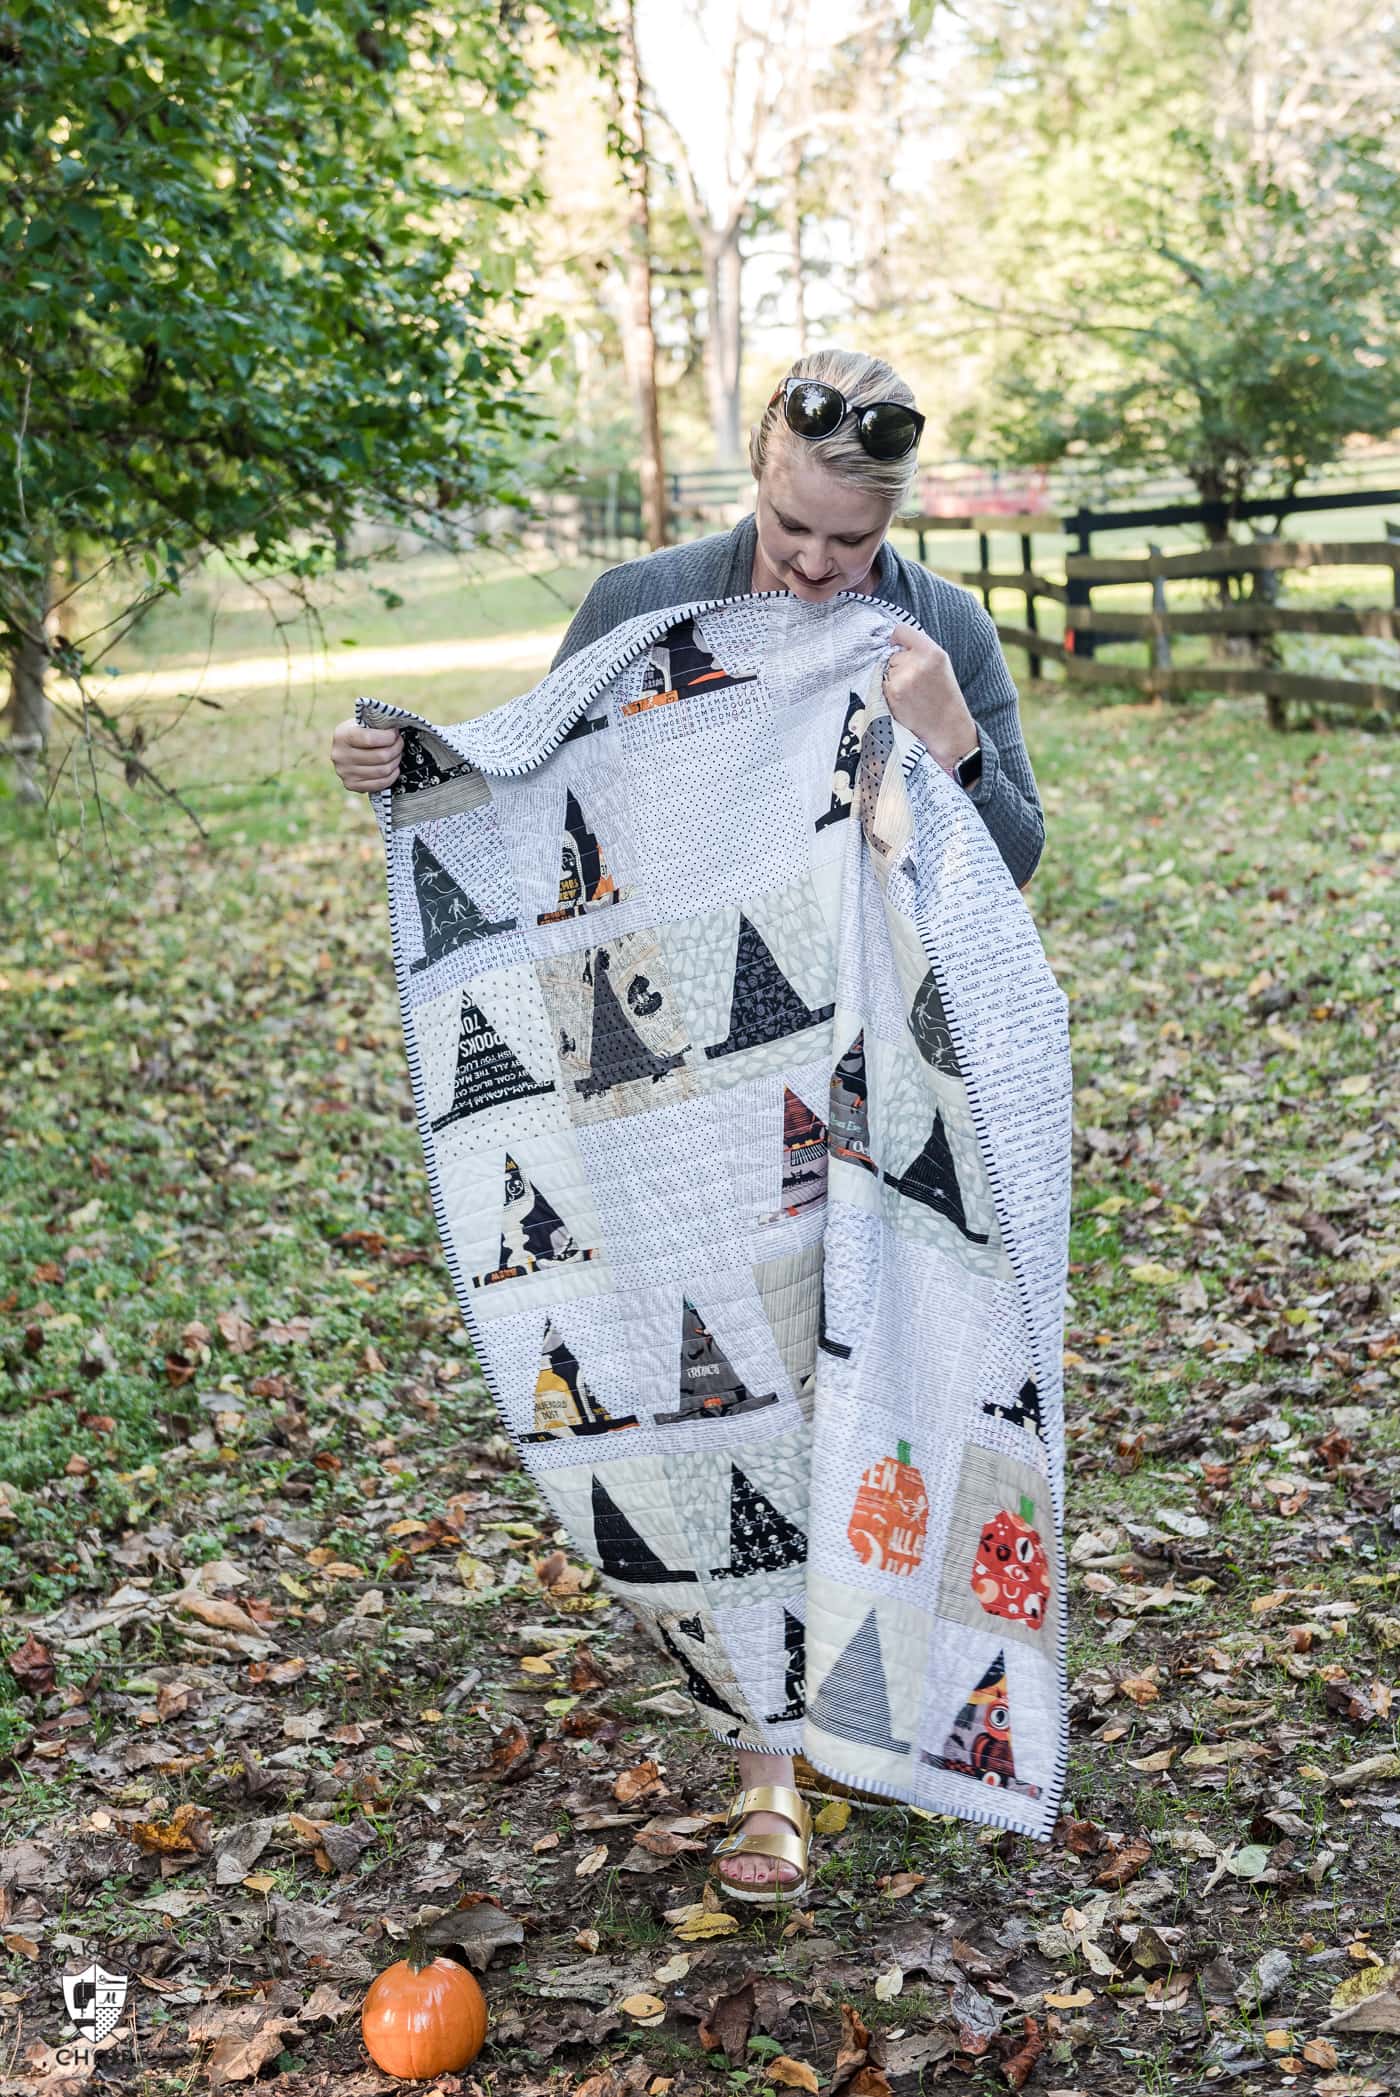
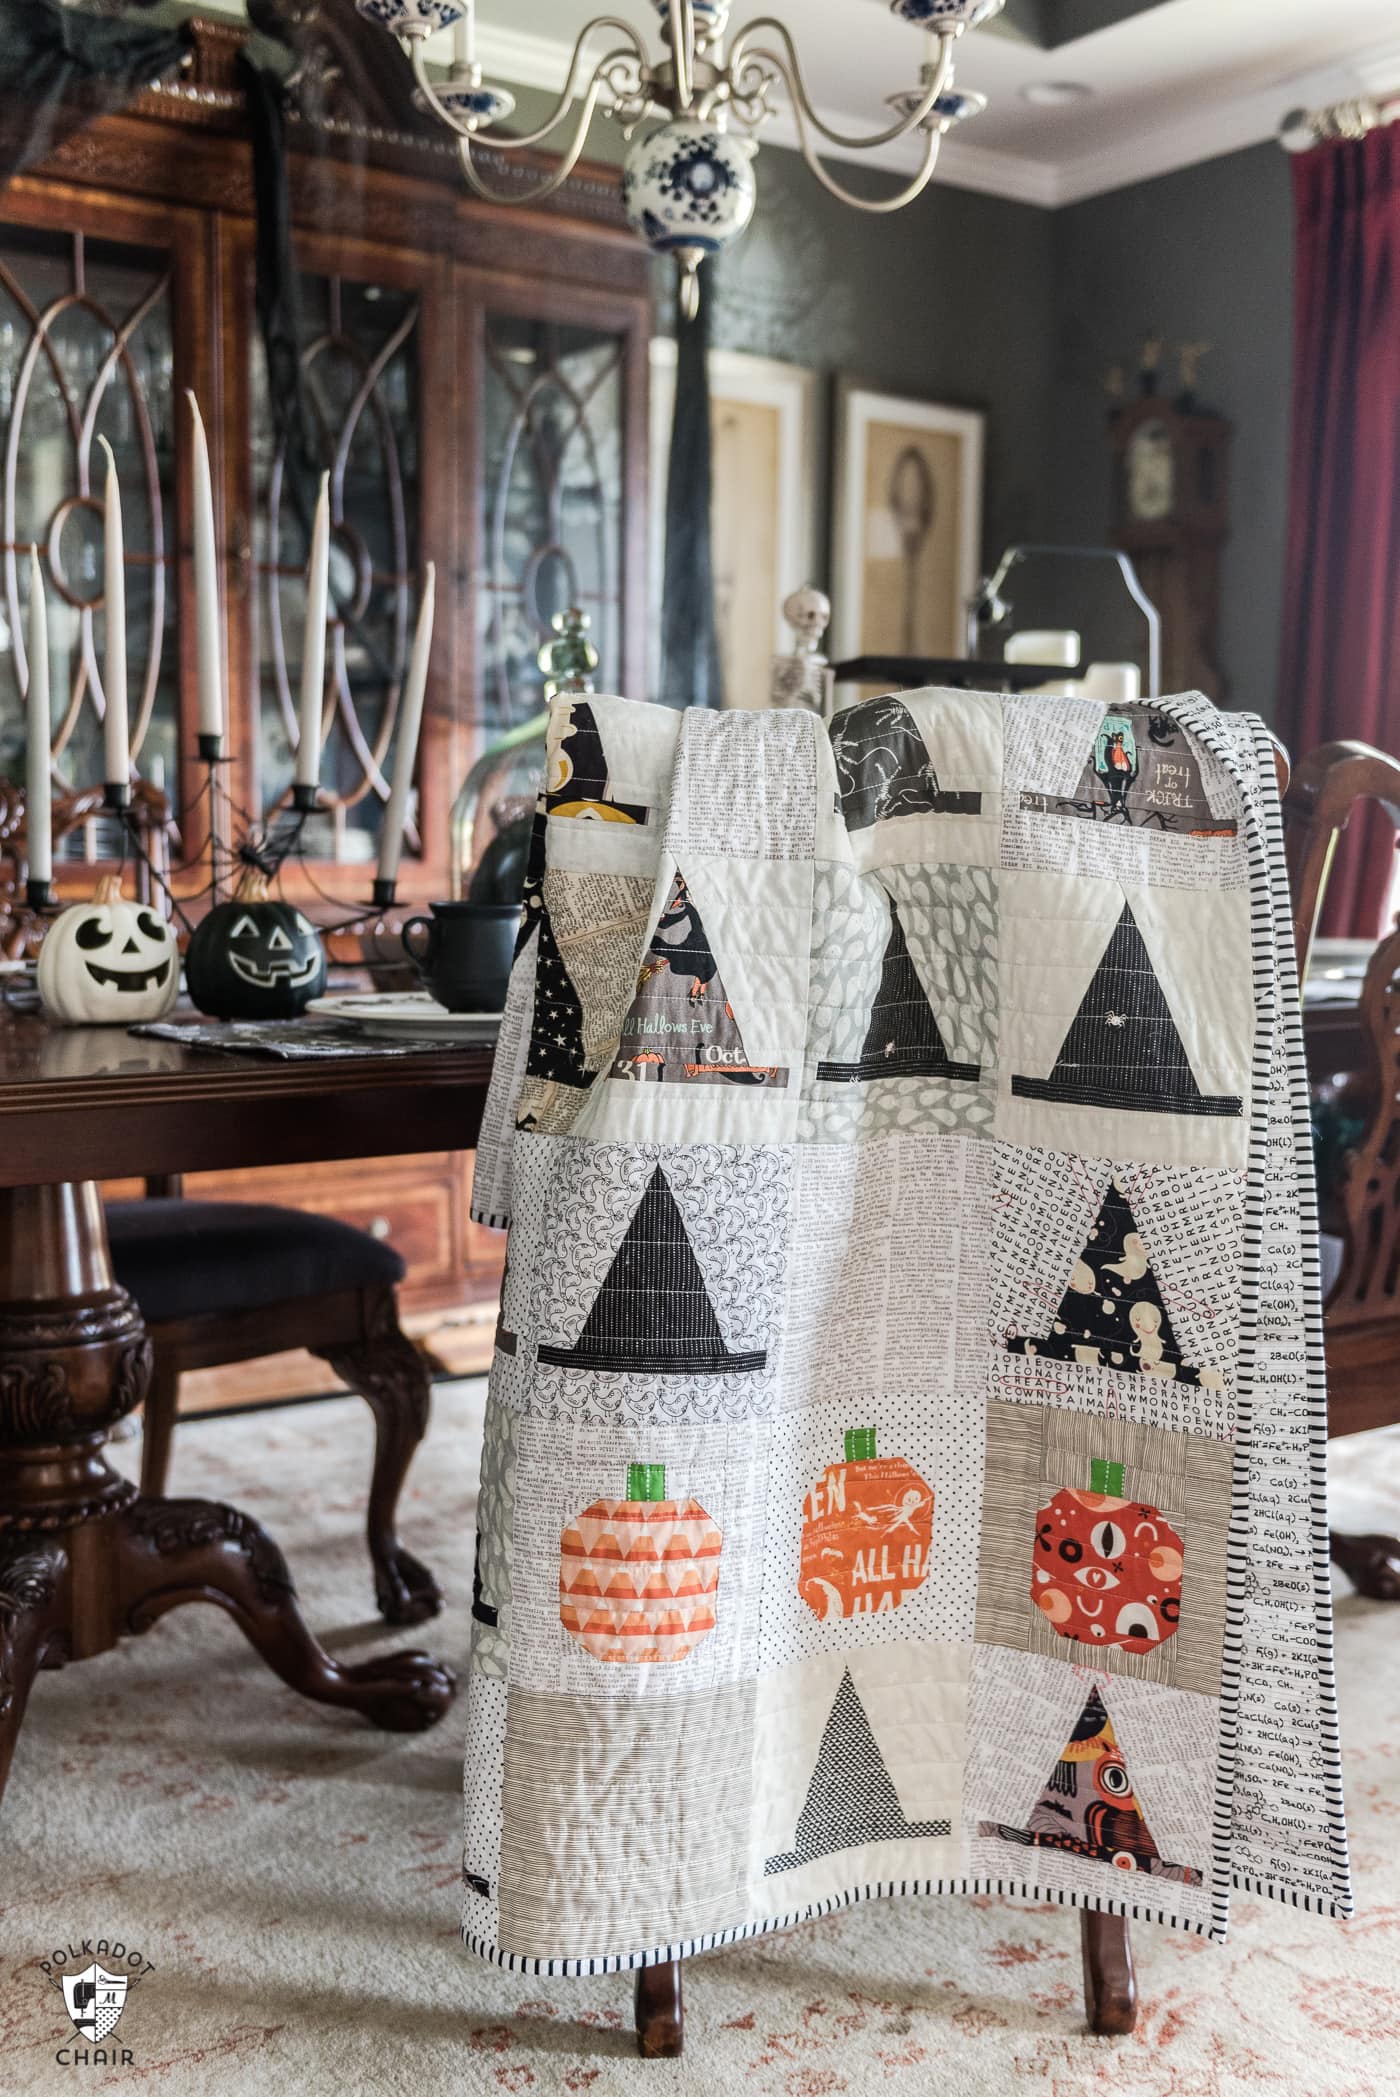
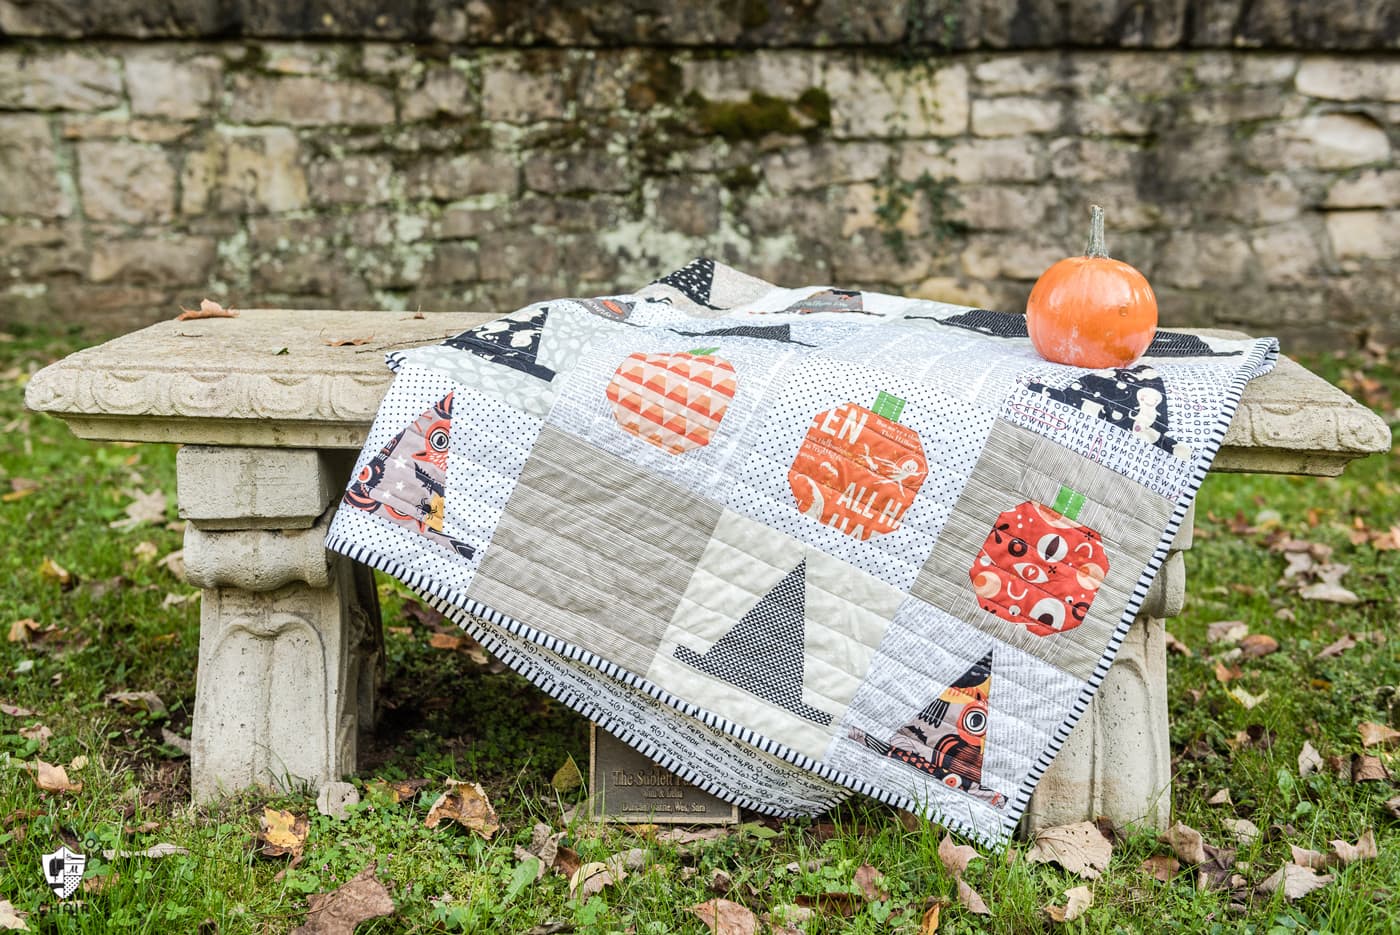
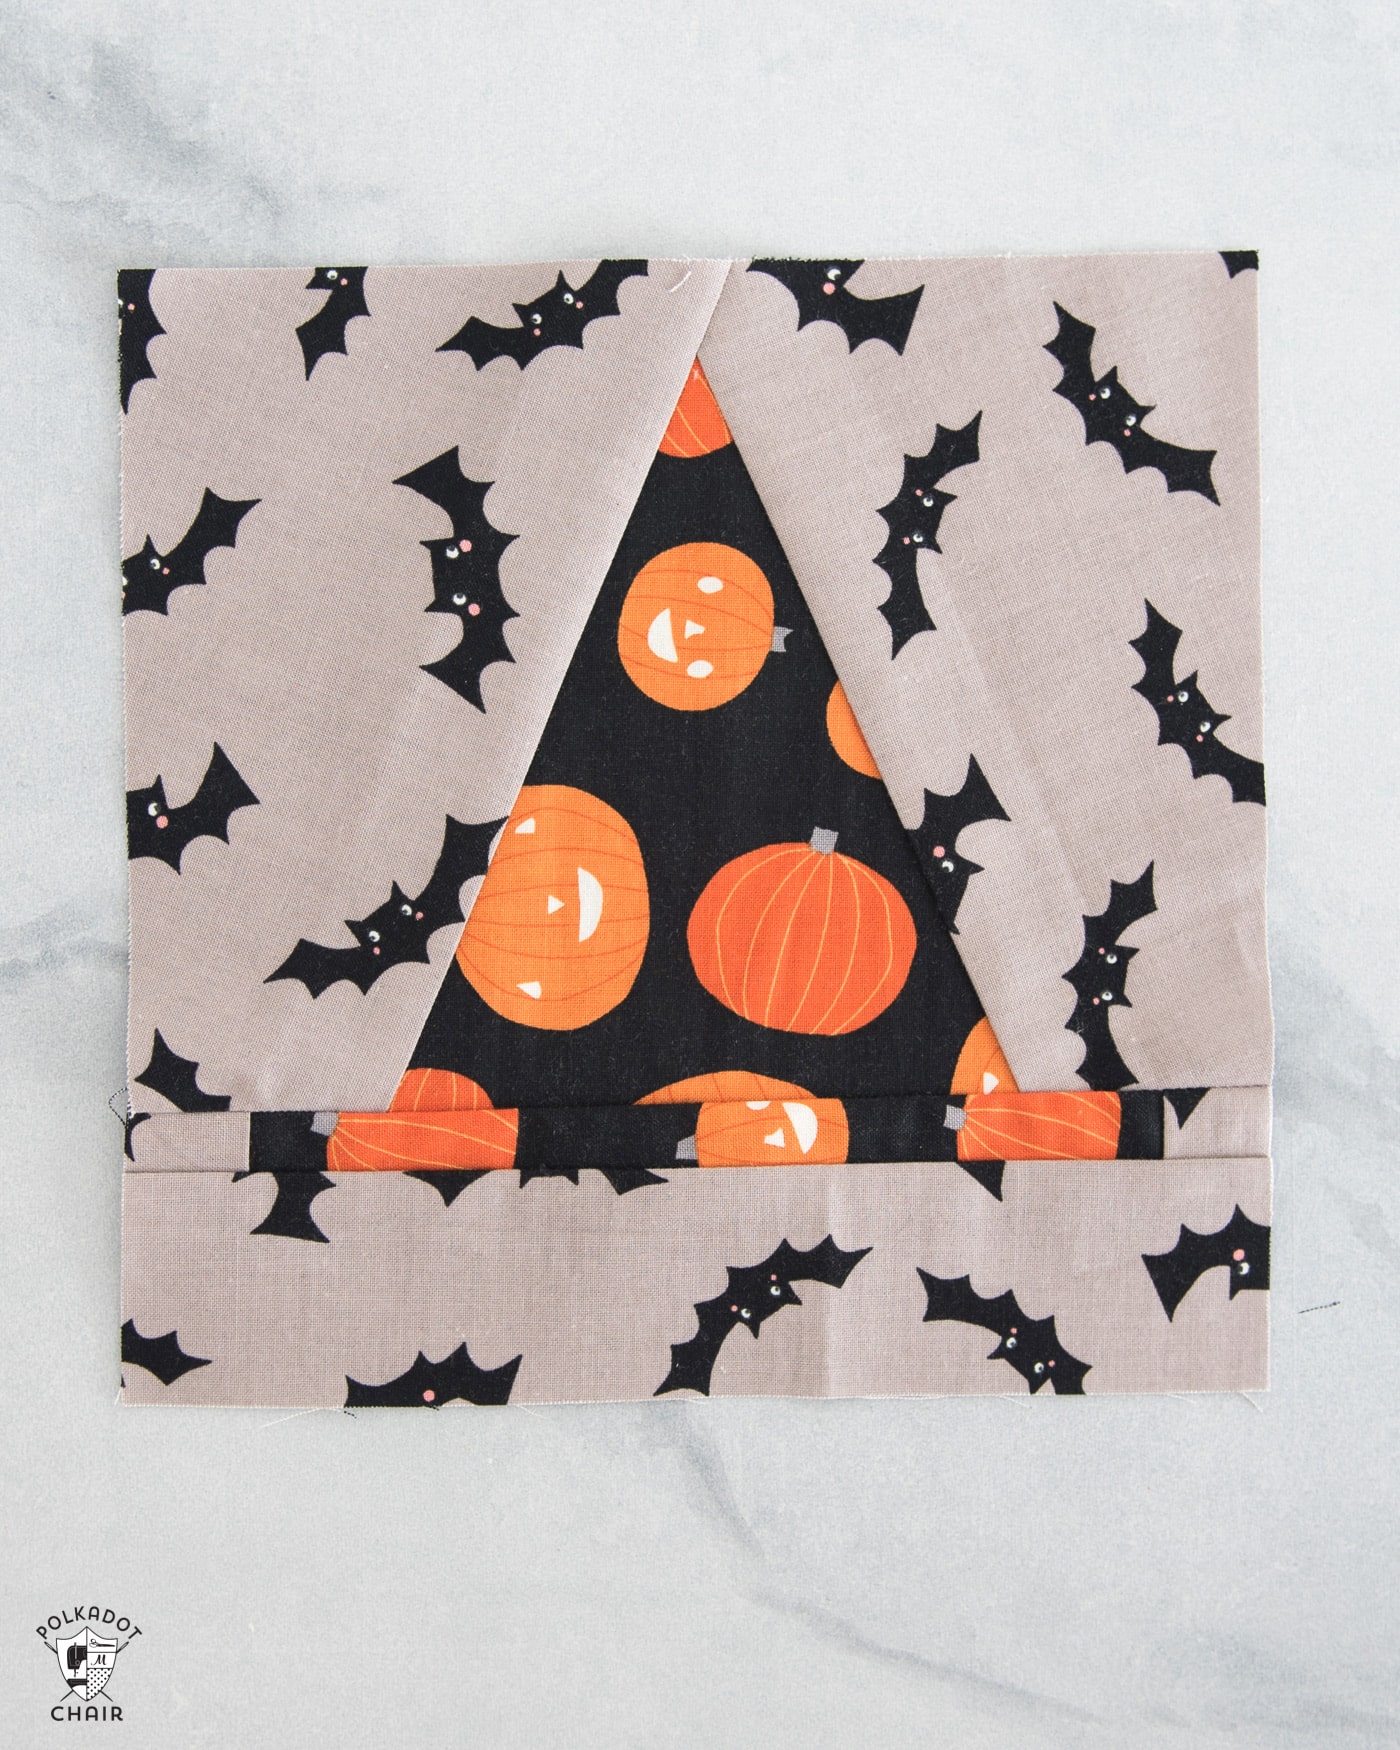
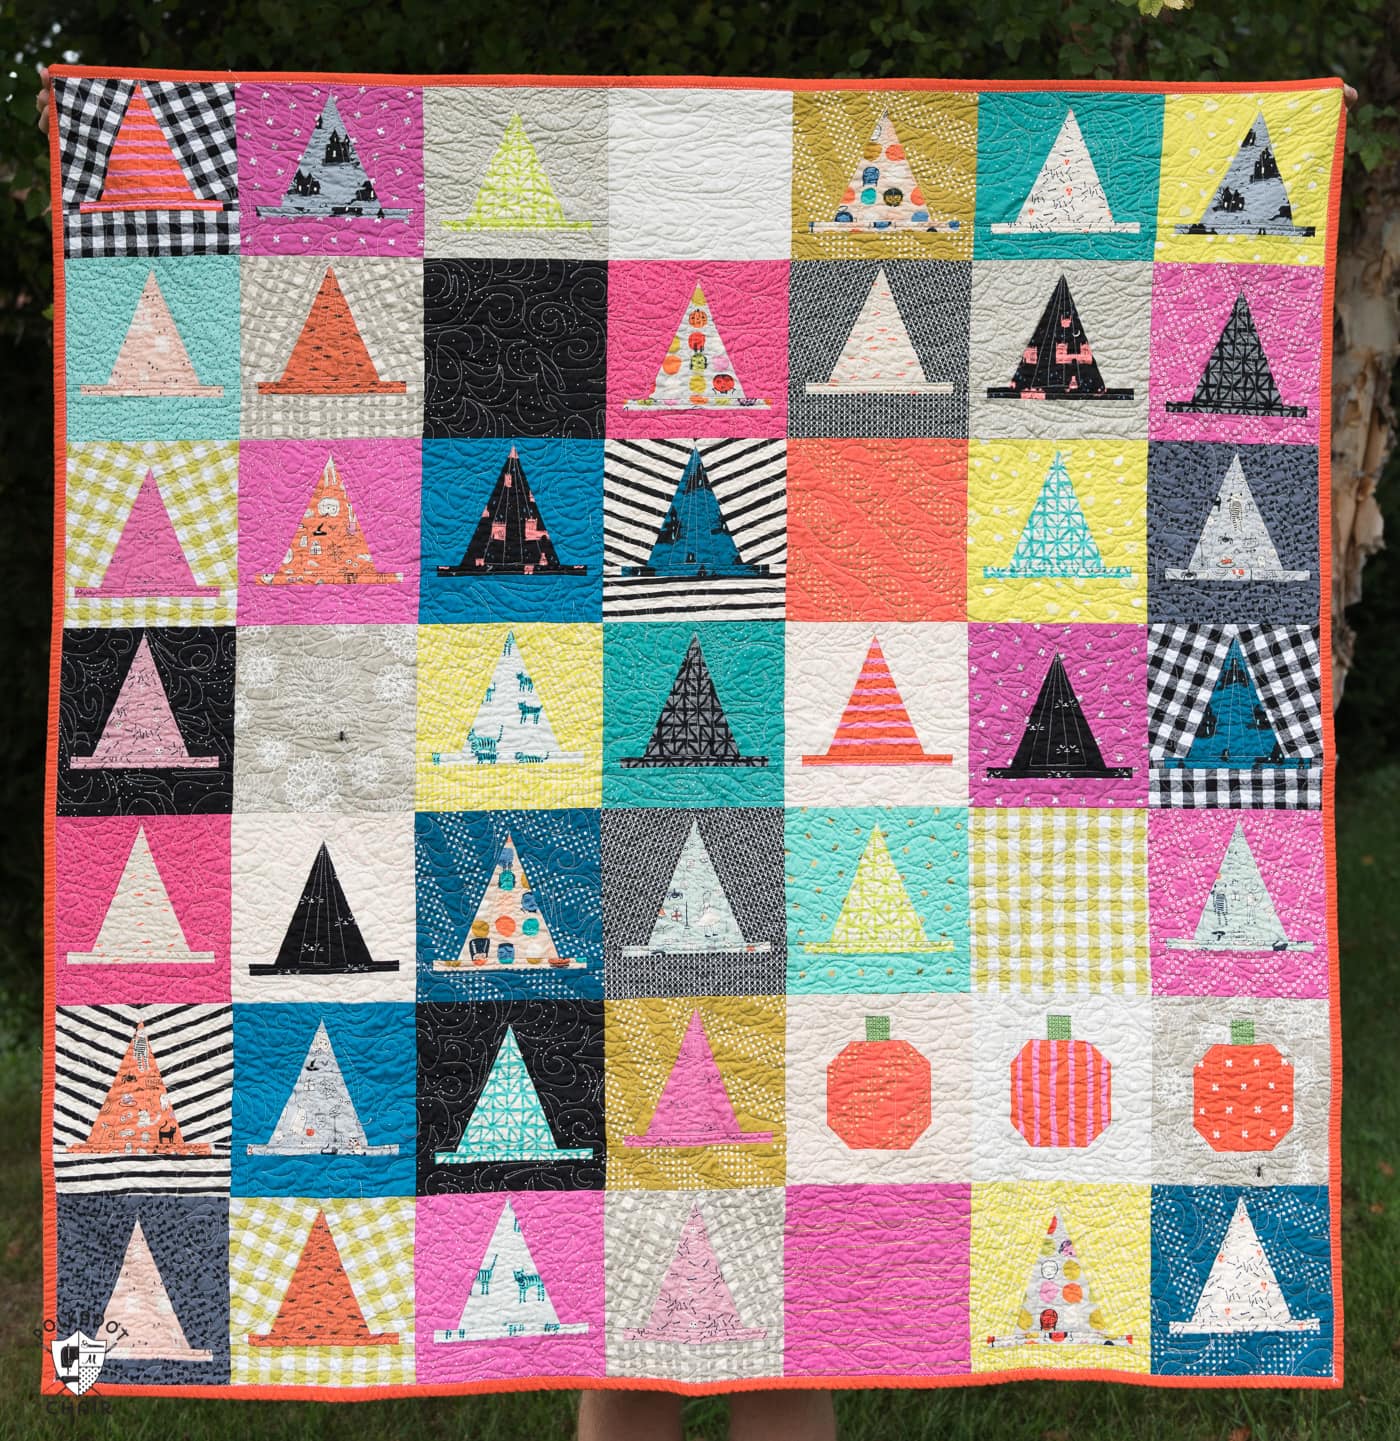
The Halloween Haberdashery quilt measures approximately 53″ x 53″ when finished and combines a witch hat, pumpkin, and “blank” blocks. The blocks are all traditionally pieced (although we now have an FPP version available too).
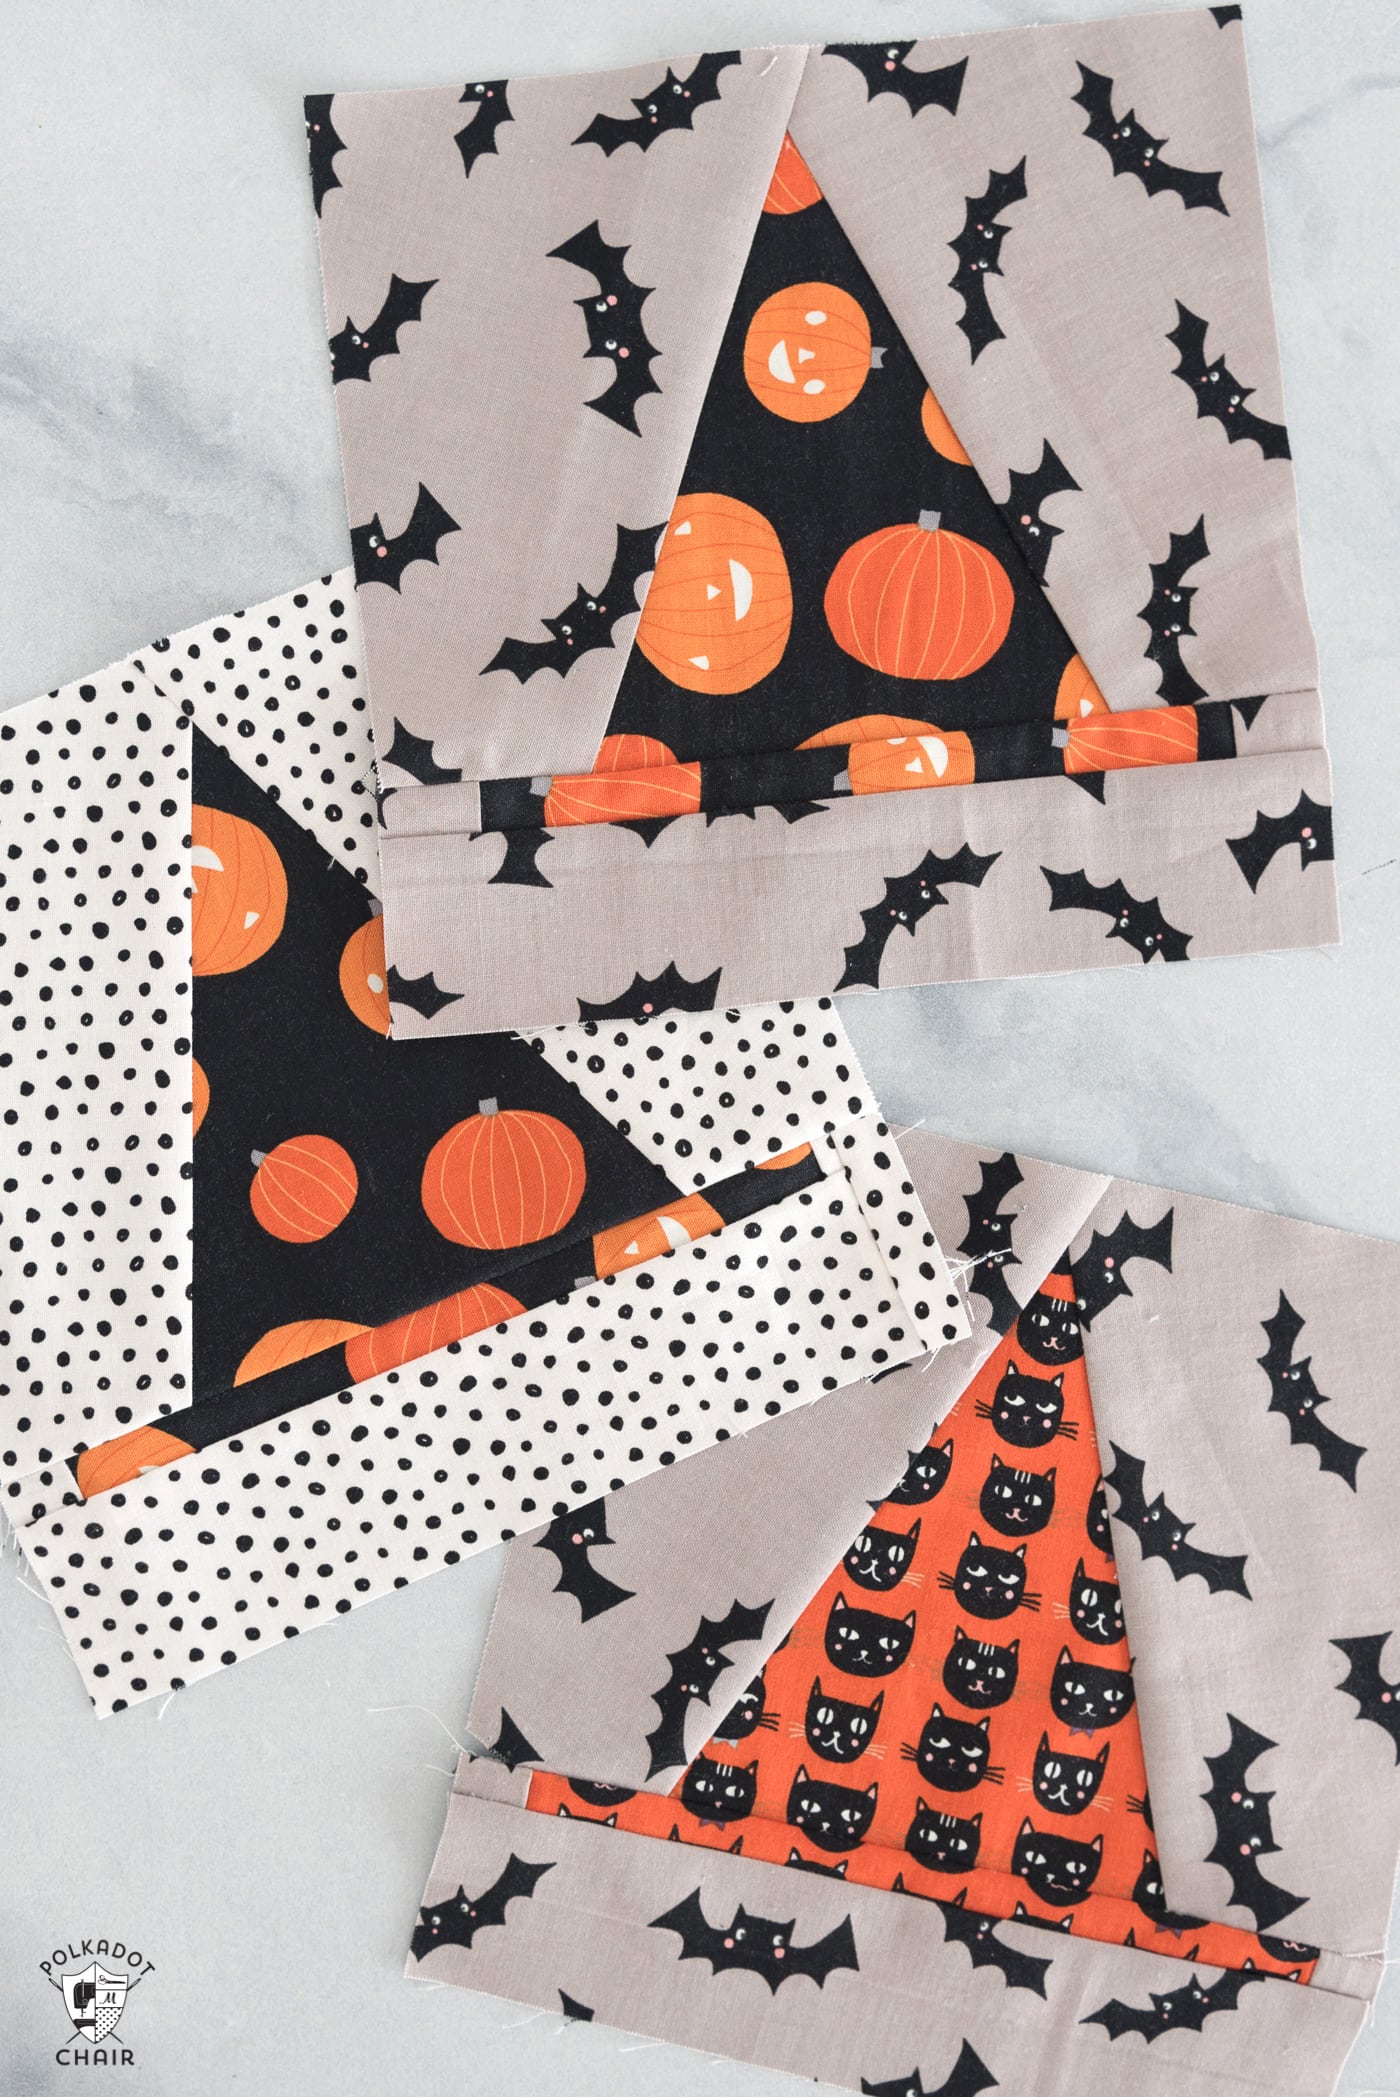
The witch hat blocks are made up of a pretty big piece of fabric and are an enjoyable way to show off all of those novelty Halloween fabrics you’ve been hoarding.
What if I Don’t Want to Make an Entire Quilt?
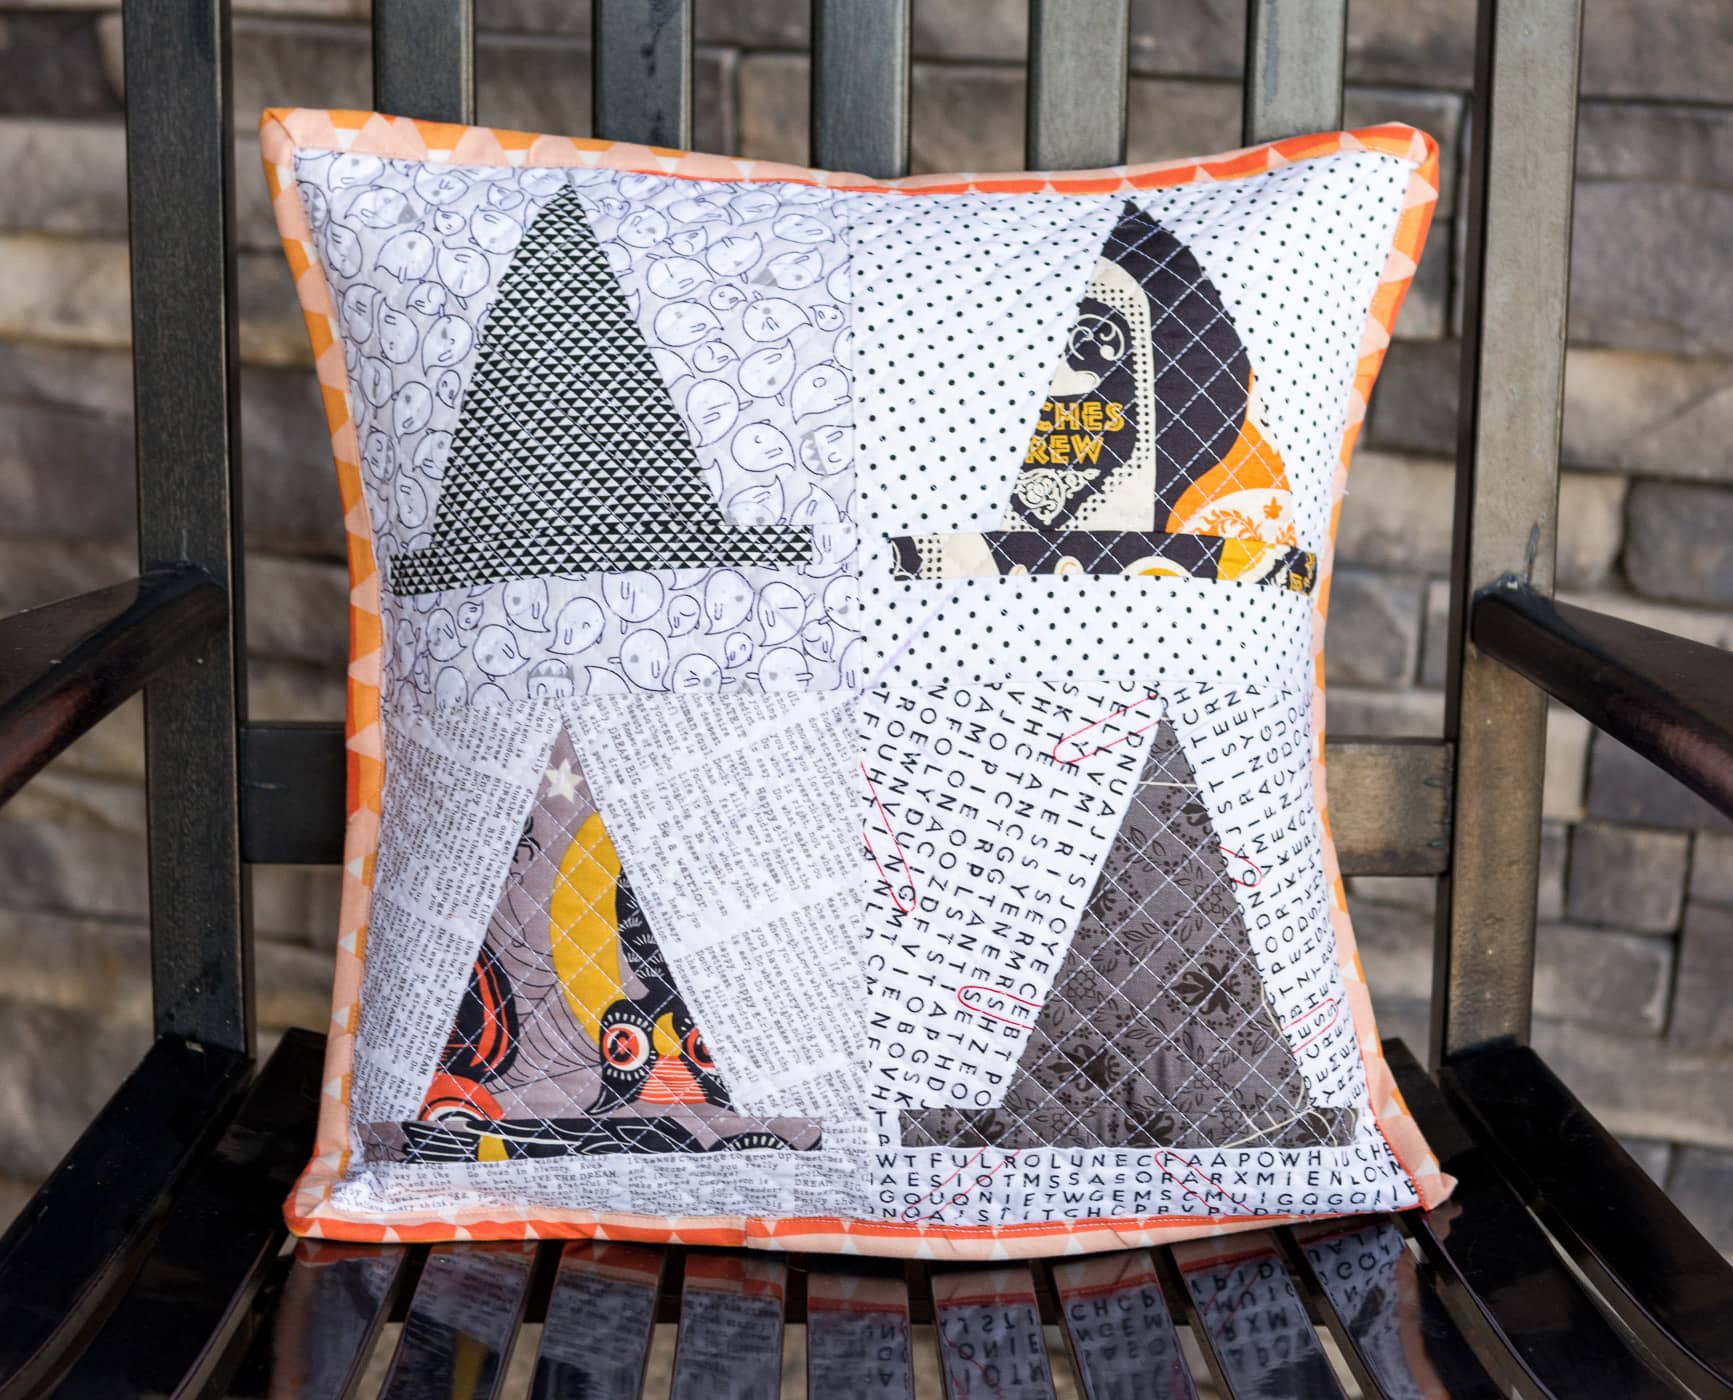
If you’re not interested in making the entire quilt, you can make fewer blocks and turn them into a pillow, table runner, or table topper. We will discuss other block options in another post.
What is the Difficulty Level of the Pattern?
This quilt is not a beginner quilt, but it’s not advanced either. If you’re good with keeping seam allowances at 1/4″ and are careful with pressing an advanced beginner could tackle it easily.
The pattern has step-by-step photos, so it’s a good one to tackle if you want to move beyond just “squares” when it comes to quilting. I will say that the Foundation Paper Piecing (FPP) pattern version of the block is a beginner FPP pattern. So if you’re new to that, you’ll be fine.
How to Join the Quilt Along
All of the quilt-along steps and tips will be posted on the blog. There is nothing to “sign up” for. You can also subscribe to my newsletter (link at the very top) to receive weekly emails about new projects!
Also, follow me on Instagram, as I’ll be doing quite a few InstaStories as we go, giving you a bit more of the ‘behind-the-scenes of the quilt along.
Also, if you participate, tag me @polkadotchair and use the hashtag #HalloweenHaberdashery so everyone can see your creations. (Also, if you share on Instagram and have a private account, your hashtag won’t show up in the search)
Supplies Required
So, let’s chat about what you’ll need to make your quilt!
- Quilt Pattern (linked below)
- Fabric (detailed fabric yardage below)
- Template Plastic for the Hats
How to Get the Pattern
You will need the pattern. You can buy it in my shop. There is a PDF version and a Paper version.
The digital PDF version will be sent to you as soon as you complete your purchase. If you are outside of the US you need to use Etsy due to international tax issues. (you can find it on Etsy here).
Digital Version:
Print Version:
Many shops also stock the pattern, so check your local quilt shop. Many of them also have kits available.
Fabric Requirements
This quilt is meant to be scrappy. Here are the MINIMUM fabric requirements. I recommend you use more fabric prints than recommended. But you need to know how much to buy:
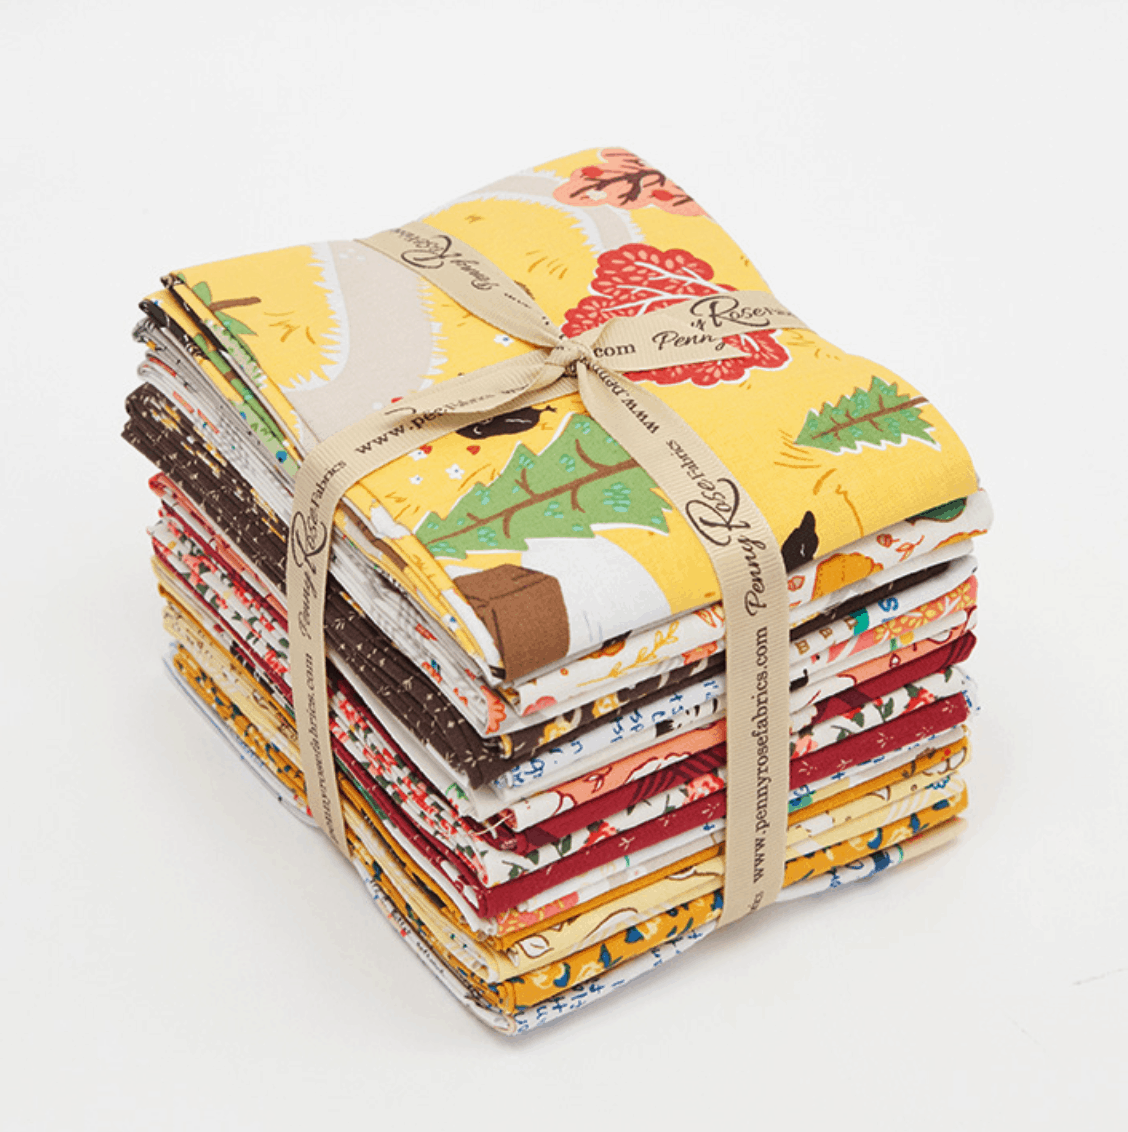
- 6 Fat Quarters for the Witches Hat (you can get seven witches hat block pieces from one fat quarter)
- 20 Fat Quarters for the Background of the Witch Hat, Pumpkin Blocks
- 2 Fat Quarters for the “Blank” blocks- these measure 8″ x 8″
- 1-3 Fat Quarters for the Pumpkins
- Scraps of Green fabric for Pumpkin Stems
- Binding: 1/2 yard
- Backing: 3 1/2″ Yards
- Notions: Template Plastic or 5″ x 6″ Isosceles Triangle Quilt Ruler or Die Cut
Schedule
Ok, let’s talk schedule. If you’re participating, the only thing you need to do is to start gathering fabric. We won’t start cutting until next Friday, and you’ll have 3 weeks after that to make your blocks. So plenty of time if you don’t have all your fabrics by the 14th.
September 21st: Block Piecing Tips
October 5th: Ghost Block Free Tutorial
October 12th: Finishing & Other Options for using the Blocks
This will leave you enough time to quilt your quilt before Halloween. You can work ahead if you’d like more time to complete the quilting section. I quilted straight lines on my home machine, which took only an afternoon.
Each week, I’ll pop in and offer you information and tips for completing that step of the quilt. As you can see, I’ve also got a few fun “extras” planned!
How to Add Ghost Quilt Blocks to Your Quilt
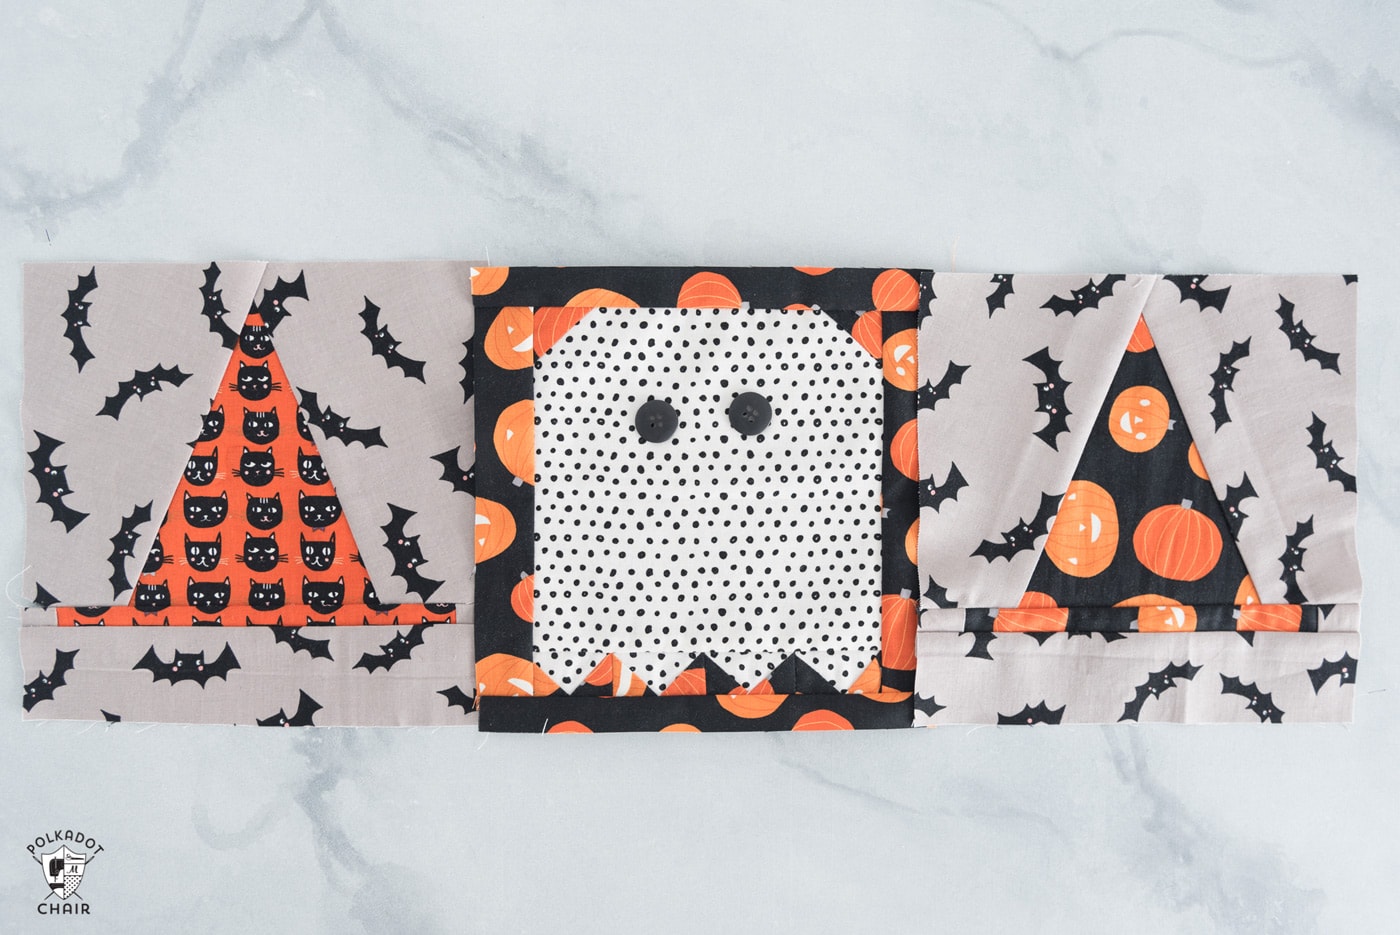
This year, I’m so excited to offer you another Halloween “icon” for the quilt. You can tell I’m a child of the ’80s because Pac-Man inspires this Ghost Quilt Block!
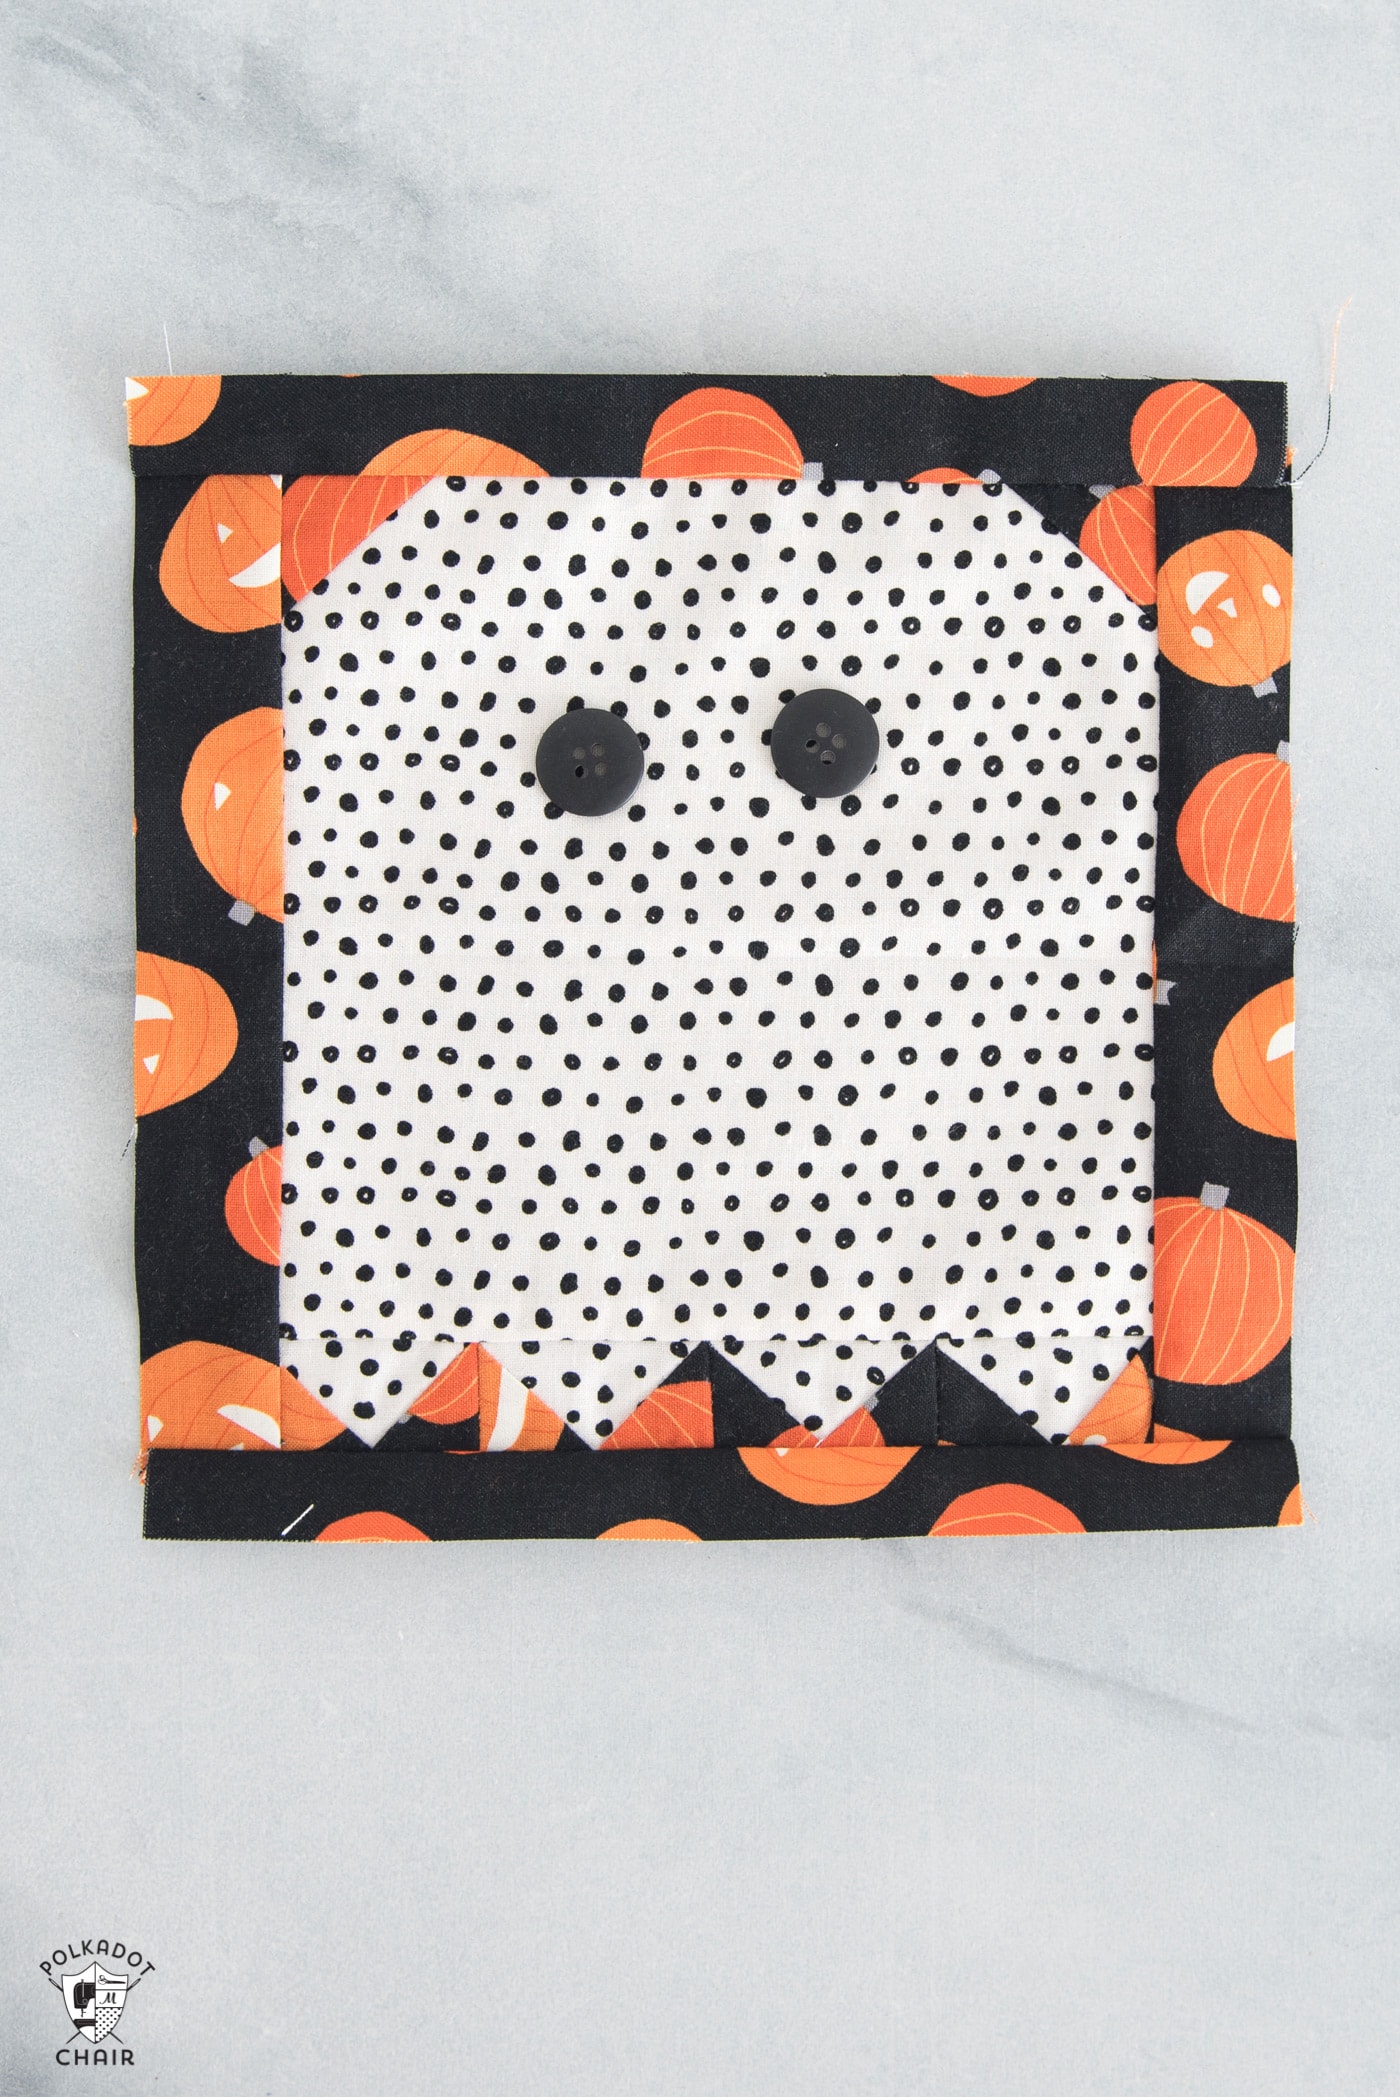
I stitched up this block last week and was so happy with how it turned out. I need a version with a bow for “miss Pac Man” *wink*. The block is simple to piece; the bottom triangles are a bit fussy but doable.
Instead of over-complicating the block to make pieced eyes, the eyes are buttons you can easily sew on at the end. If you intend to wash your quilt, just buy apparel buttons since they can be put through the washing machine. (Some decorative buttons don’t hold up well when washed).
How to Pick Fabric for Your Quilt
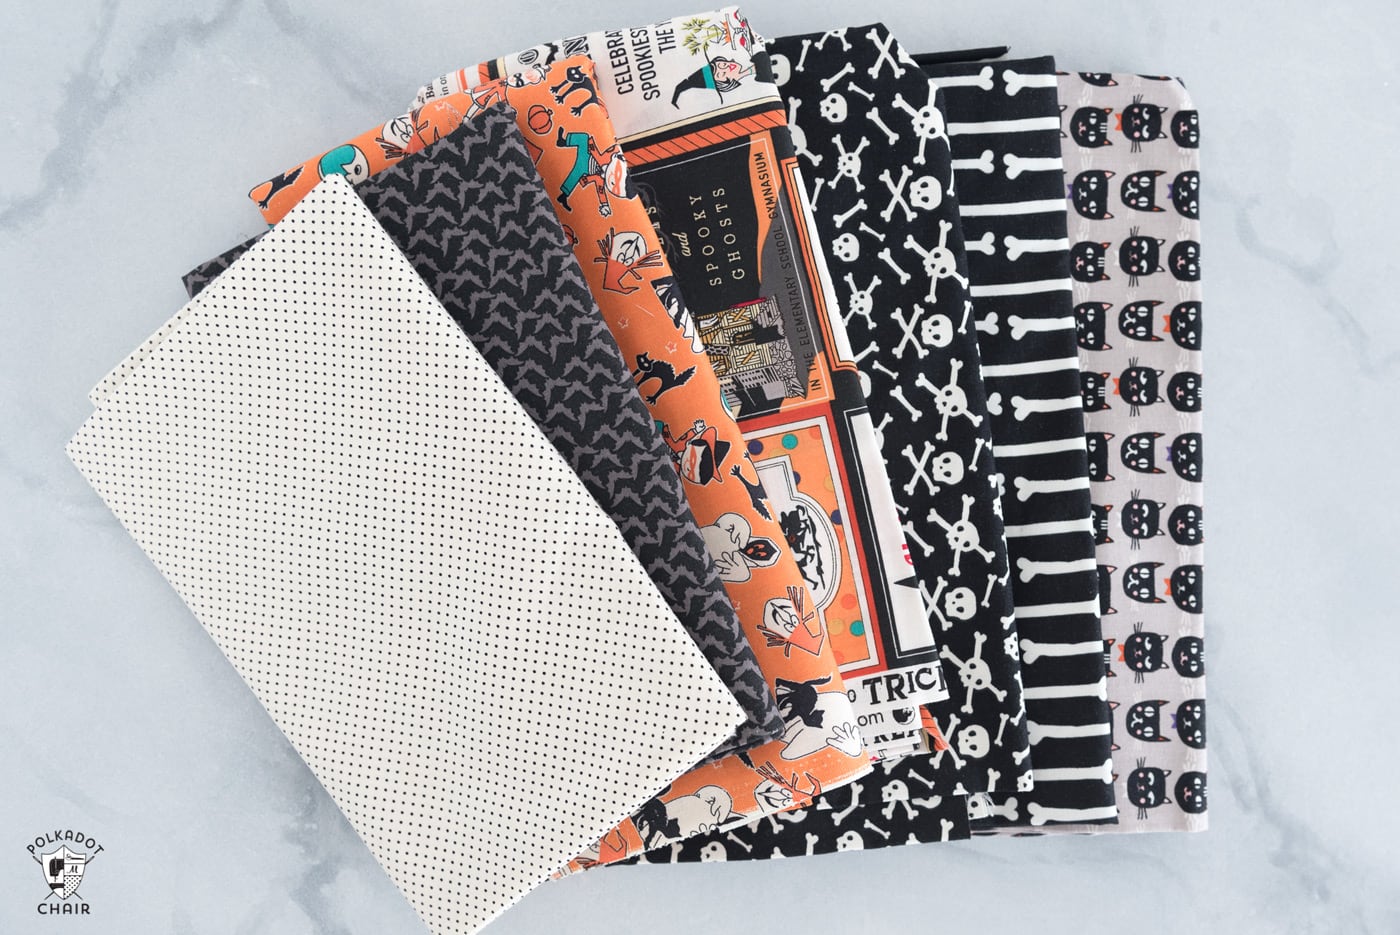
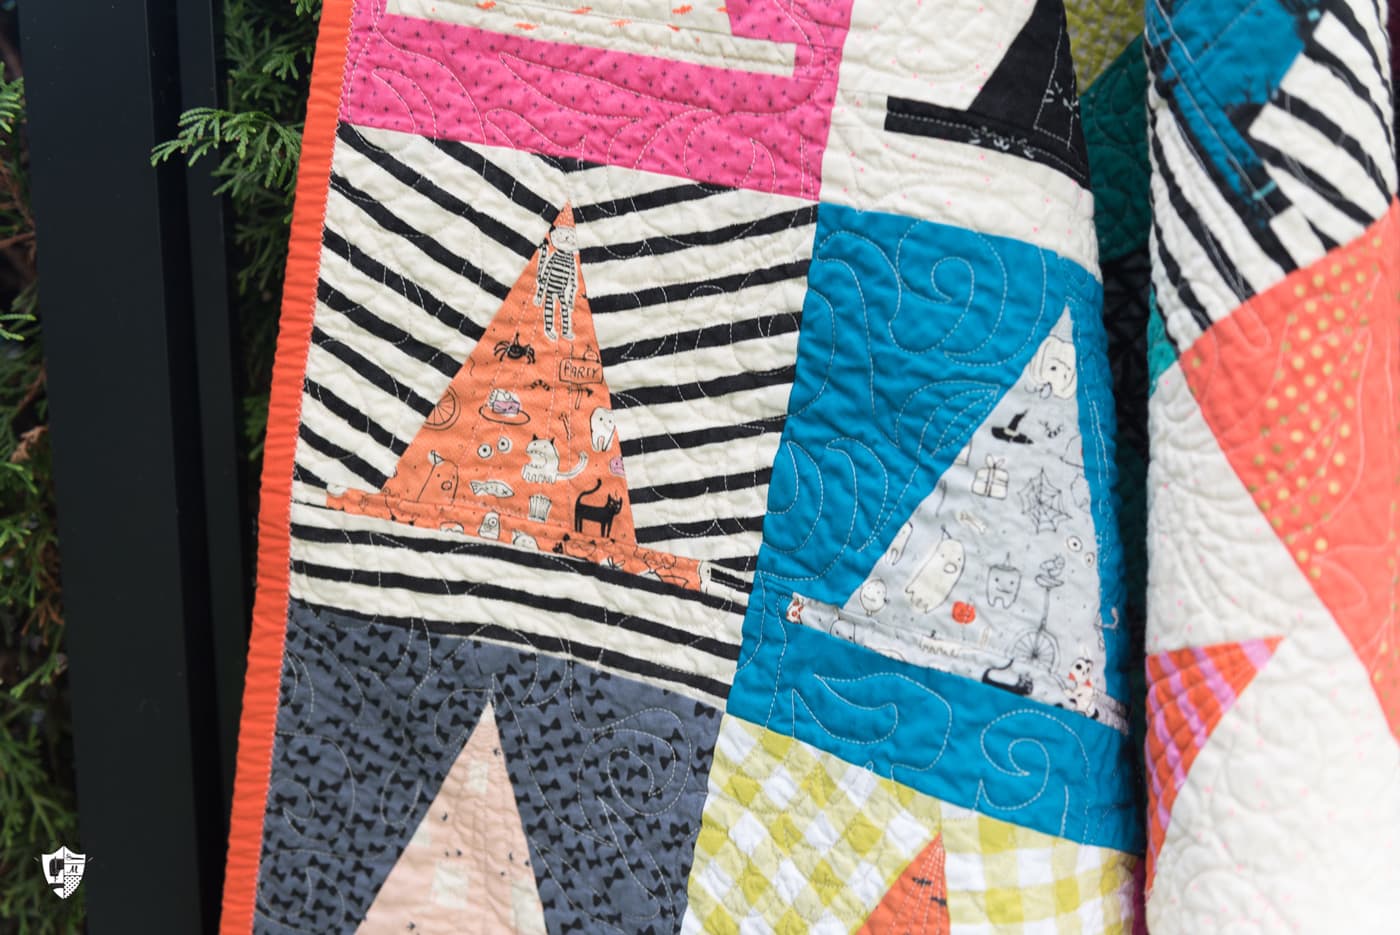
There are a few different ways to pick out fabric for this quilt. The first one is to do like I did and make all backgrounds from varying low-volume prints and the Witch’s Hats from brighter prints. I actually stuck to mostly blacks.
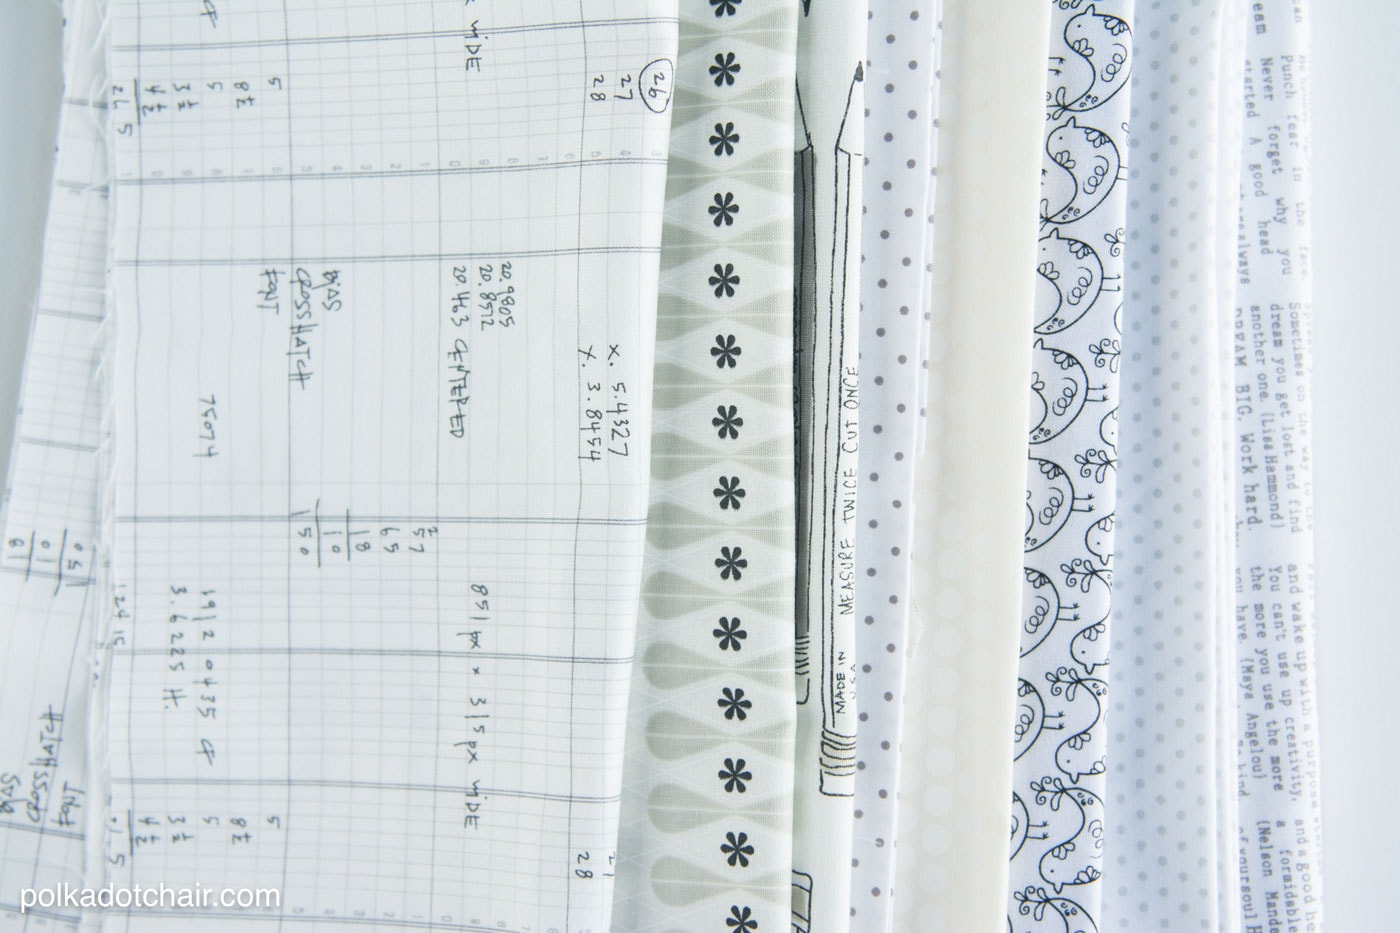
Above, you’ll see a sampling of some low-volume fabrics. These fabrics “read” as white or solid from far away. They don’t carry much visual weight, but the pattern gives them a bit of texture.
You can also make this quilt with an all-solid background. A nice gray would be so cute!
The other option is to make it completely scrappy and choose all different fabrics for your block and backgrounds.
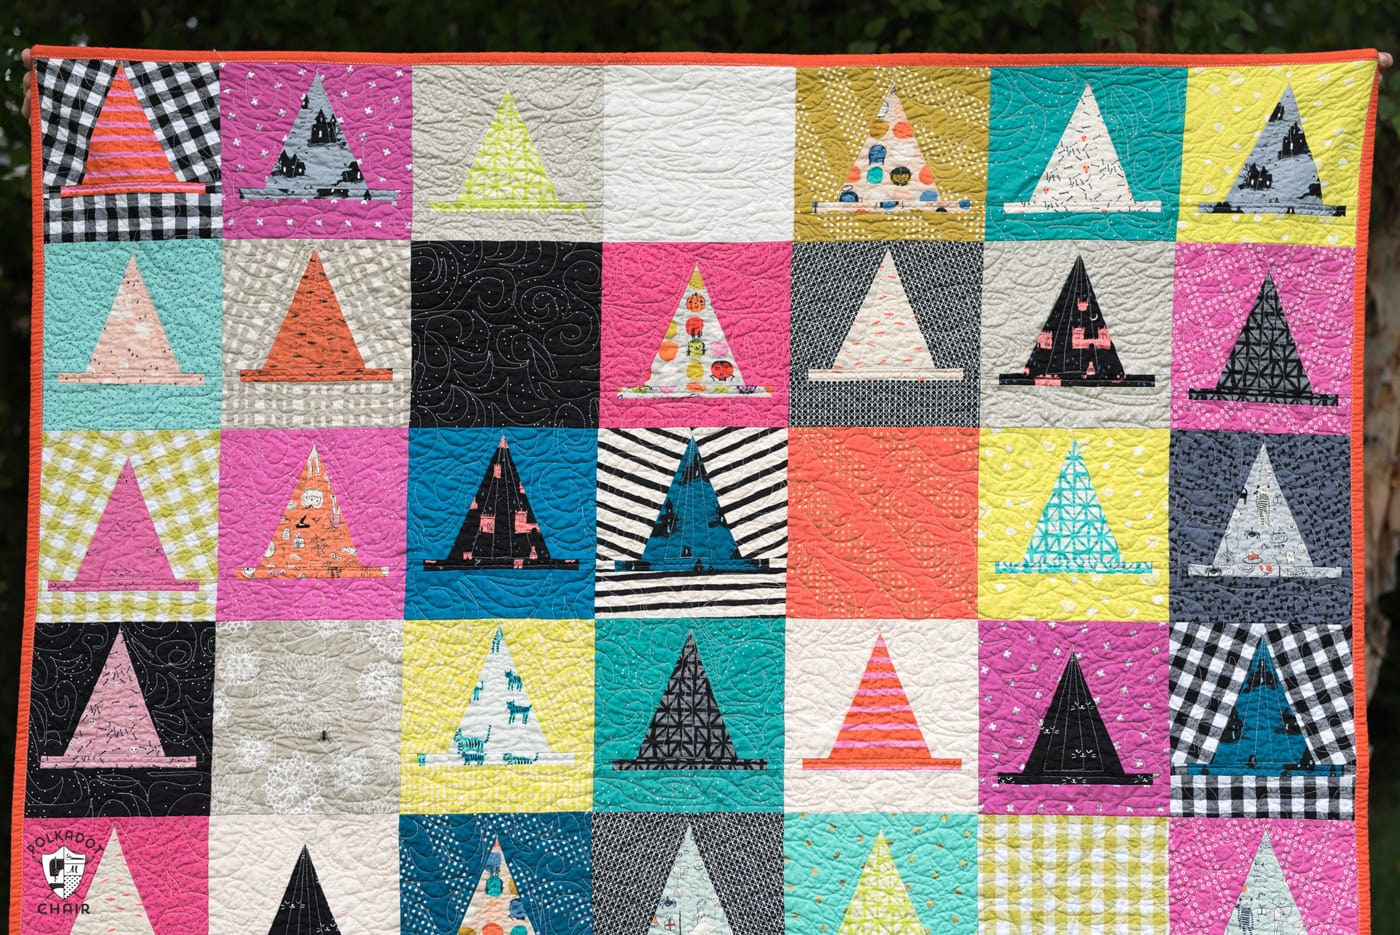
Quilt by Erin Harris of House on Hill Road
If you go this way, my advice is to make sure that your Witch Hat and Background fabric have a lot of contrast. They need to be colors that stand out from each other, or one needs to be dark and the other light. Otherwise, you’ll lose your witch hats in the blocks.
Calico Crow by Riley Blake Designs/Penny Rose – not a Halloween line, but a Fall one that would be adorable in this pattern.
Since this quilt uses so many fat quarters, it’s perfect for a fat quarter pack! There are so many cute ones offered for Halloween that you should have no problem picking one.
The nice thing about going that route is that the designer has already picked colors, prints, and scales of prints that go well together. So a bit of the guesswork is done for you.
The fabrics in my photos and blocks are almost all from the Cats, Bats & Jacks line by Riley Blake Designs. The fabrics in my actual quilt are a hodgepodge of 5 years of collecting Halloween fabrics. There’s a bit of everything in there!
Foundation Paper Pieced Witch Hat Quilt Block
Just this year, we are offering an expansion pack for the pattern that includes a Foundation Paper Pieced block! If you already bought your pattern, no worries, because this is an expansion pack. It does not include the actual quilt pattern.
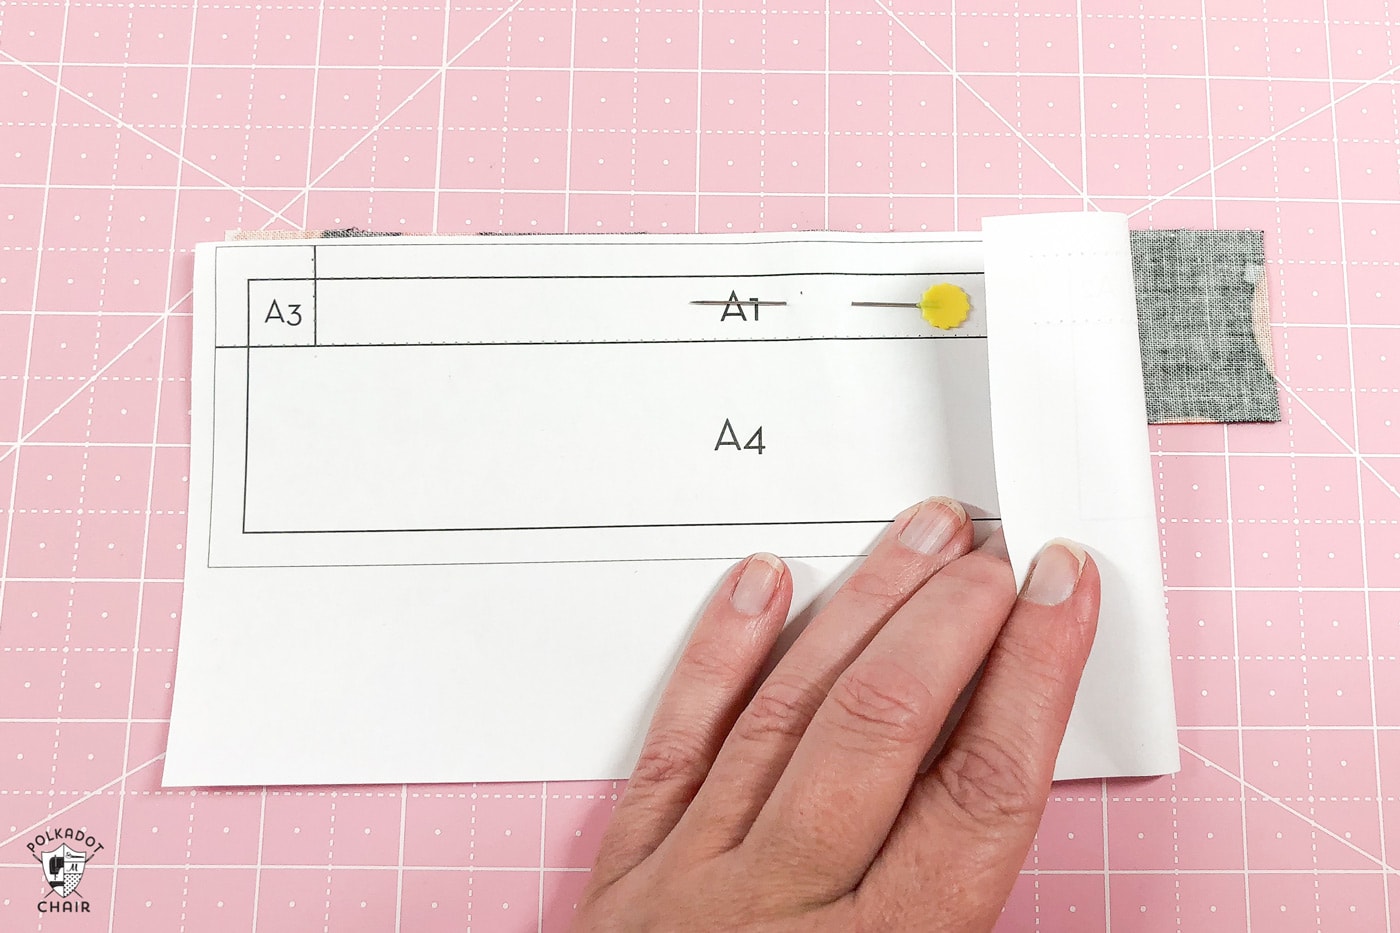
It does include the FPP pattern along with step-by-step photos of creating the block using FPP. If you want to make the FPP version of the quilt, you’ll need to buy both the FPP and the Quilt Patterns.
You can find it in the shop as a PDF Digital Download.
More Quilt Inspiration and Options
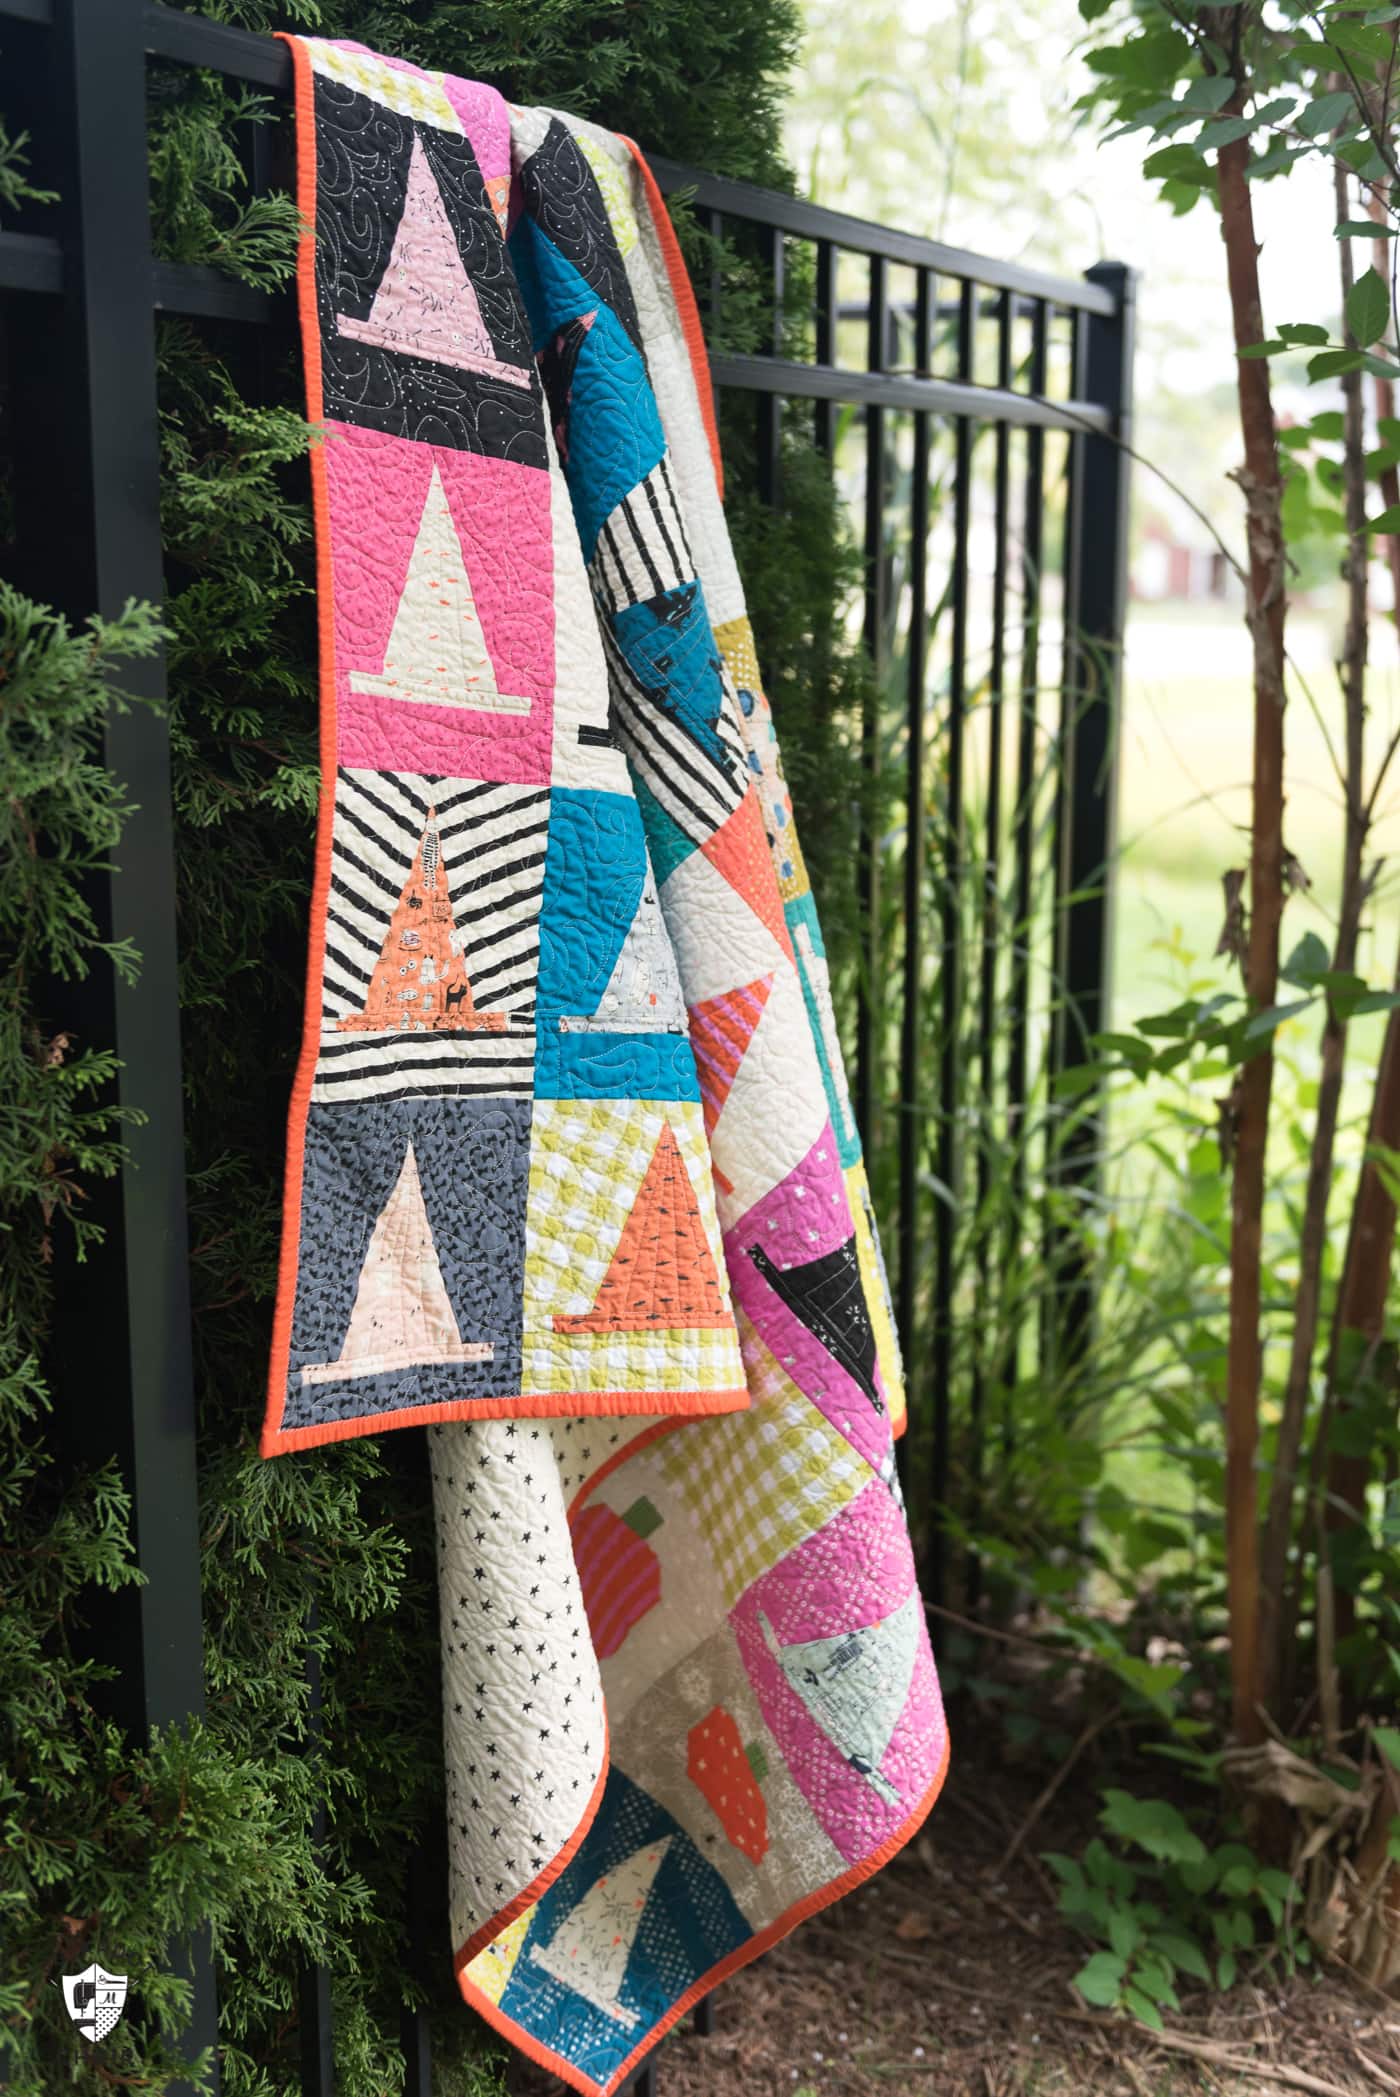
I shared a photo of it above, but my friend Erin of House on Hill Road made a version of this quilt I love last year. Instead of going for the traditional black, white and orange Halloween color scheme she made hers bright!
Her witch hats are all different colors (besides black), and she used various colors and prints for the background. There are so many ways to do this, and I can not wait to see what you guys come up with for your quilts!
If you look at the #HalloweenHaberdashery quilt hashtag on Instagram, you can see even more of the finished quilts. If you have any questions, leave them in the comments section, and I’ll get to them as quickly as I can!
Other Quilting Projects You May Like:
Tips & Tricks for Picking Fabric for a Quilt
Scrappy Strips Baby Quilt Pattern
i’m planning to make this quilt as a group project and just purchased the pdf pattern. can you tell me how much fabric is needed for each hat block, so i can give each person in the group a list of needed supplies to bring to our gathering?
Hi
There are cutting instructions on the pattern for each block. You should be able to figure it out from that. Also, each person in the group should buy their own pattern.
I purchased PDF pattern in 9/19. Love the hats! Any way I can get the ghost instructions? Thanks!
They are on the blog. Just use the search box to find it.
I’m so excited! finished my last hat block yesterday! Plan to make my pumpkin blocks within the next couple of days. I wanted to share a picture of them all laid out, but I don’t know how. Sorry
This is a fun project! I wanted to share some tips I used to make it go quickly..
When you attach the first side of a hat to the rectangle background piece, fold the hat in half at the bottom and finger press the center mark. Then fold the top point down to that exact bottom mark and finger press the middle sides.
Then fold the rectangle in half lenthwise to find the middle and finger press those sides. It’s now easy and quick to align your hat piece on top of the background exactly in the middle without measuring or guessing. All of your hats will end up being perfectly aligned in the middle in both sides.
I did this technique when I sewed the three brim pieces together, too. After I sewed on the small background pieces, I pressed ithe strip and folded it in half, aligning the stitch lines, not the ends., and finger pressed the center mark. Fold the background piece and attach the brim at the marks to center it to the background piece and stitch. Very quick and easy way to place your pieces “in the middle”.
Be sure you follow Melissa’s instruction on starting your hat, with the point up when you sew on the first side, then when you sew the other side on, you will start at the bottom. That makes all of your background tops angle to the left when finish. I had to rip stitches when I started with the hat upside down then sewed the next side starting at the point. My background seam pointed to the right.
Thank you so much for your FABULOUS tips!!! I’m so glad you’re enjoying the project!!!
Purchasing patterns right now. So excited- been collecting halloween fabrics for a long time…wootwoot!!
I purchased the pattern recently and have started to make blocks. I’ve made two, but it seems to me that the pieces that make up the brim are a little off in sizes. I’m keeping the brim the correct length, but end up needing to trim some off each of the end background pieces. Please let me know if I’m doing something wrong. Thanks!
The blocks are designed like that so yes, it’s correct. I think it’s easier to make the blocks a bit bigger than you need then to trim them down rather than find out you are short when it’s too late. Especially when dealing with small pieces like the ones on the sides of the brim.
Thanks, Melissa! That makes a lot of sense.
Love this !!! The black and white, is lovely, the colors are bright and fun…
I purchased the pattern last year and started my quilt. I have 25 hats done. I have to stop now because we are heading to Europe tomorrow. But I want to say that I am a beginner. You’re Pattern is so easy to follow and fun to make! I look forward to catching up when I return. Have fun and THANK YOU!