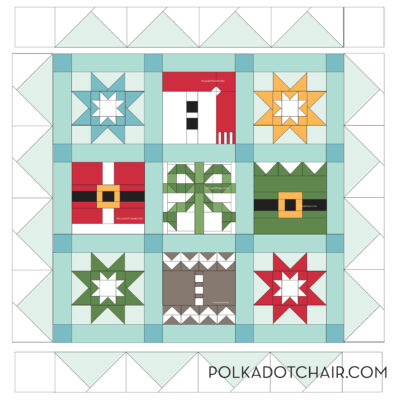
How to Finish Your Christmas Quilt; Festive Friends Quilt Along
I’m happy to share the finishing instructions for our Christmas Sampler quilt! These block setting instructions would also be great for any quilt made using 12″ quilt blocks!
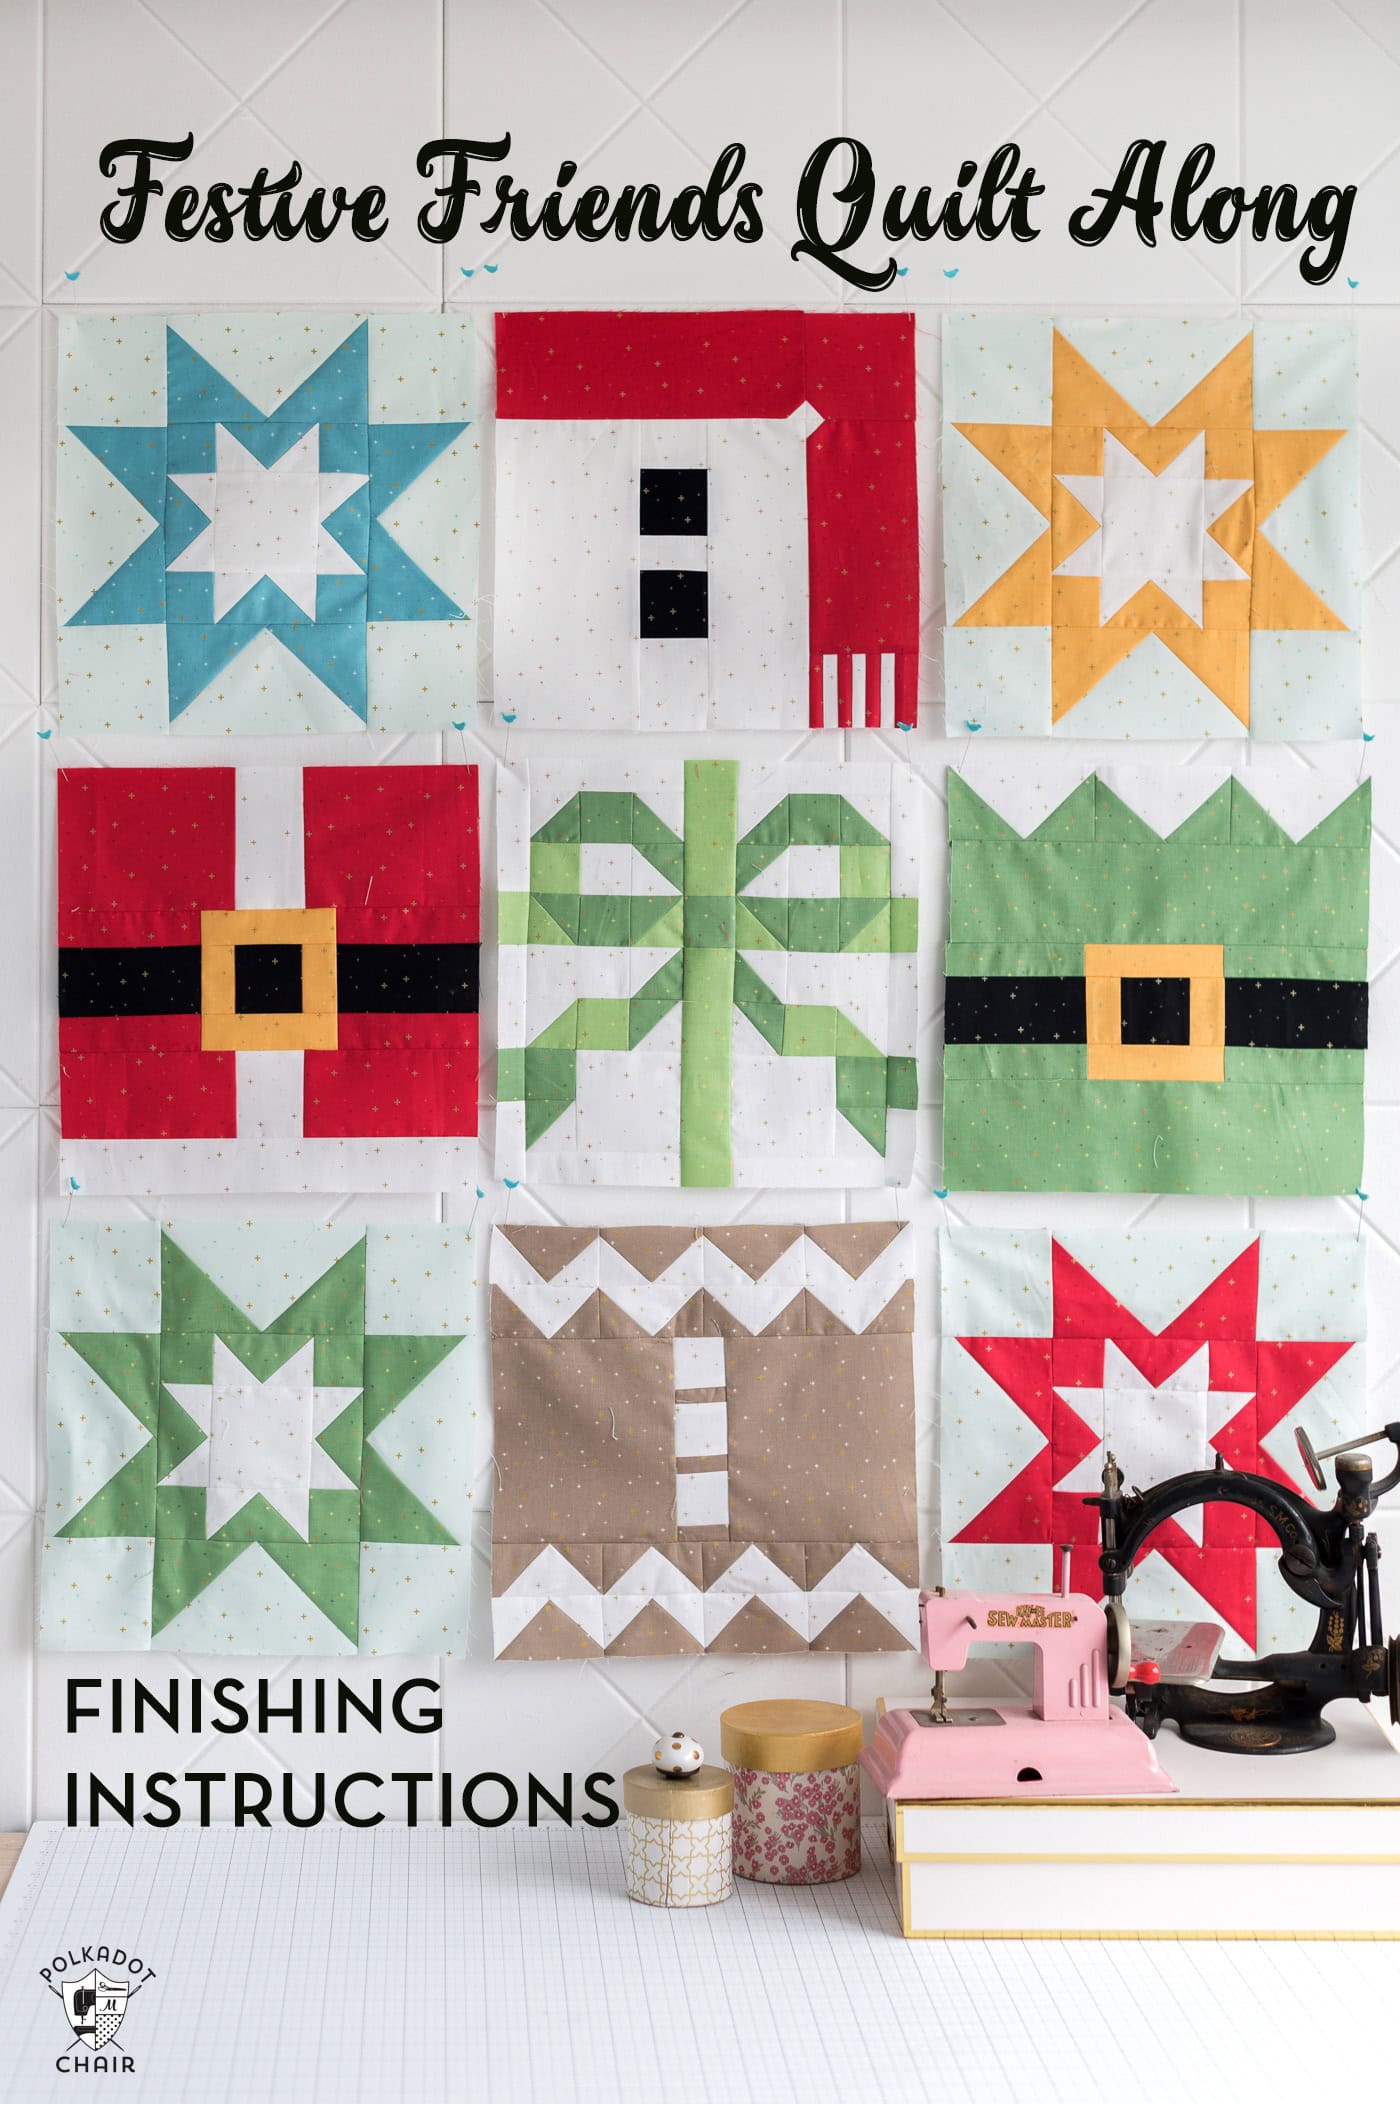
Hi Friends! We’ve reached the end of our Festive Friends Quilt Along! I hope that you’ve enjoyed it. I’ve had a lot of fun sewing along with you and look forward to hosting the quilt along next year with a whole new set of friend quilt blocks!
I hoped to share a photo of my finished quilt with you today, but the flu has taken me down this week. I’m starting to feel better and hope to be able to share my quilt with you next week! I didn’t get any sewing time this week, as I was mostly lying in bed, LOL!
The block setting instructions for this quilt are a bit unique, and I think it’s a clever way to finish a sampler quilt.
As I mentioned, you could use these setting instructions to create other sampler quilts using 12″ quilt blocks (we have a bunch of free patterns in our archives). I plan to leave this blog post up on the site after the quilt along is over since it’s such a versatile quilt block layout.
Join our 2025 Christmas Block of the Month!
If you enjoyed this quilt along, you may love our Patreon Group! My 2025 Quilt Block of the Month program is hosted there, and we are making a Christmas Quilt! Get a PDF Pattern and a video tutorial each month! Join today before the price increases in January
What is the Quilt Along?
The Festive Friends Quilt Along is a free quilting event hosted on the Polka Dot Chair. During the month of December, create a fun Christmas quilt with our free Christmas quilt block patterns. Between December 1st and 20th, visit our site to print one of the adorable Christmas quilt blocks (blocks will be posted throughout the month; full schedule below). But don’t delay because, like Cinderella, the patterns will disappear at midnight on December 31st 2024. Now that the quilt along is over the patterns have been moved to our shop. Watch for a NEW QUILT ALONG December 2025!
Where to Find the Pattern
You can read the directions on this blog post (we’ve included a print button at the bottom, or you can purchase a PDF in our shop).
Pattern Correction
UPDATE: There has been a correction to the pattern. The flying geese on the outside borders should be 5 1/2″ x 11″ FINISHED (6″ x 11 1/2″ before finishing). I’ve updated the directions with the proper cutting dimensions.
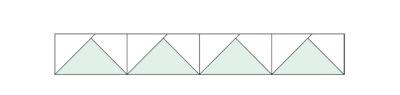
If you have already sewn your flying geese, you can trim them down from 6 1/2″ x 12 1/2″ to 6″ x 11 1/2″; you do not need to recut your fabric. Trim the fabric from the center out and only trim excess fabric from the bottom. The red line in the illustration represents where to cut to trim down the pieces.
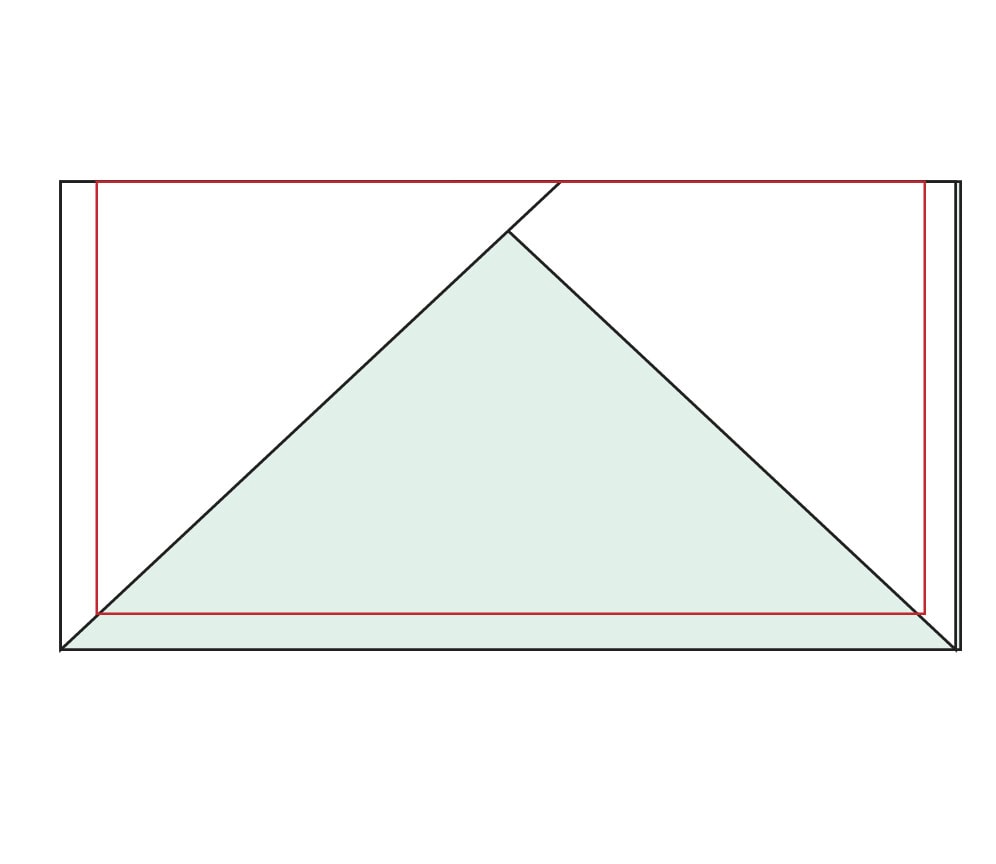
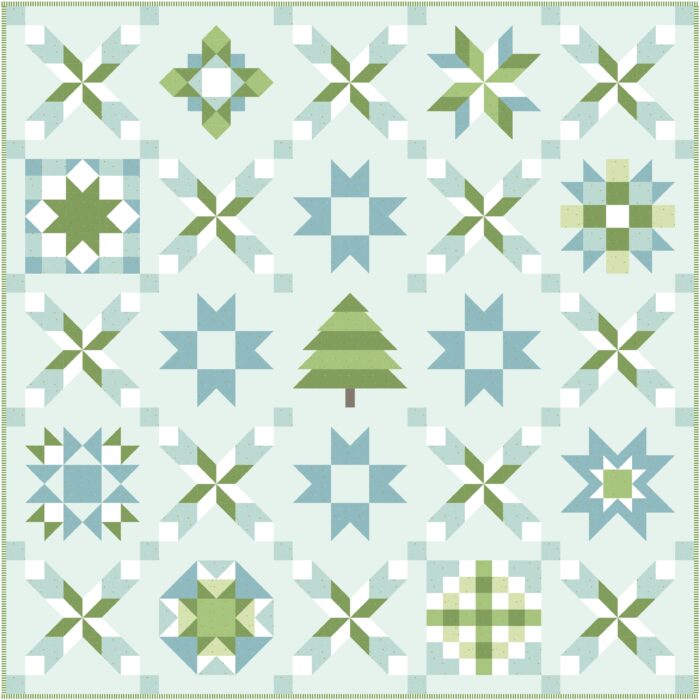
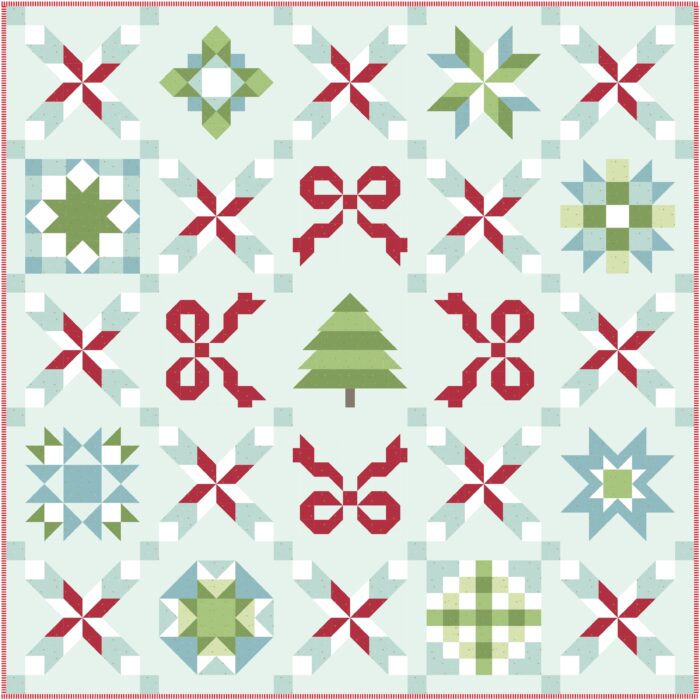
Sampler Quilt Block Setting Layout Pattern; Corrected
Equipment
supplies
- 1 Yard Bleached Denim Sparkler; Used for Background
- 1/2 Yard Bear Lake Sparkler; Used for Cornerstones
- 1 1/2 Yards White Fabric Sparkler; Used for borders and blocks
- 1/2 Yard Red Fabric Sparkler
- 1/4 Yard Black Fabric Sparkler
- 1/4 Yard Daisy Fabric Sparkler
- 1/4 Yard Riley Green Fabric Sparkler
- 1/2 Yard Clover Fabric Sparkler
- 1/2 Yard Pebble Fabric Sparkler or a color that reminds you of gingerbread
- 1 Yard Songbird Fabric Sparkler; Used for Sashing
- 1/2 Yard Fabric for Binding
These are the fabric requirements for the ENTIRE quilt
Instructions
Fabric Key & Cutting
- Fabric Key for Pattern:Fabric A: WhiteFabric B: Clover (darker green)Fabric C: BlackFabric D: Daisy (dark yellow)Fabric E: Bleached Denim (pale minty blue)Fabric F: Pebble Fabric G: RedFabric H: Songbird (minty blue)Fabric I: Riley Green (lighter green)Fabric J: Bear Lake (dark blue/green)Cut for Outside Border:From Fabric E (Bleached Denim):16 pieces 6” x 11 1/2”From Fabric A (White):36 pieces 6” x 6”Cut for Sashing:From Fabric H (Songbird):24 pieces 2 1/2” x 12 1/2”Cut for Cornerstones:From Fabric J (Bear Lake):16 pieces 2 1/2” x 2 1/2”
Step One: Construct Flying Geese for Outside Border
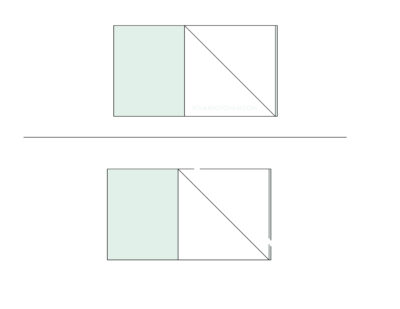
- Draw a diagonal line on the wrong side of two of the 6” x 6” pieces of Fabric A.

- As shown in the diagram, layer one of the squares on top of one of the 6” x 11 1/2” pieces of Fabric E.
- Sew along the drawn line. Trim 1/4” on the outside of the sewn line.
- Flip the fabric up and press.
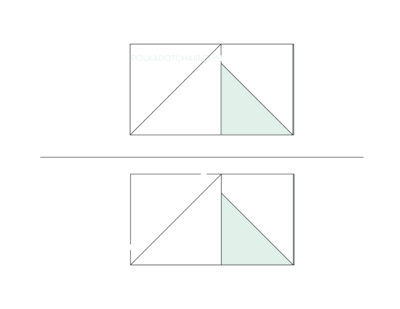
- As shown in the diagram, layer the other 6” x 6” Fabric A piece on top of the sewn piece.
- Sew along the drawn line. Trim 1/4” on the outside of the sewn line.
- Flip the fabric up and press.
- Repeat fifteen more times so that you have sixteen total sewn units.
Step Two: Blocks and Sashing
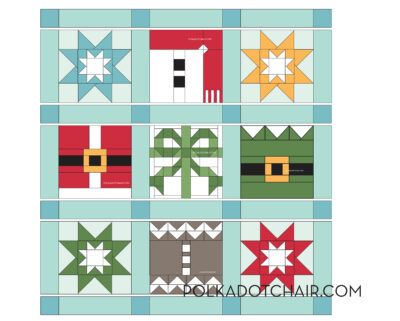
- Sew the following pieces together in order to construct Row 1.
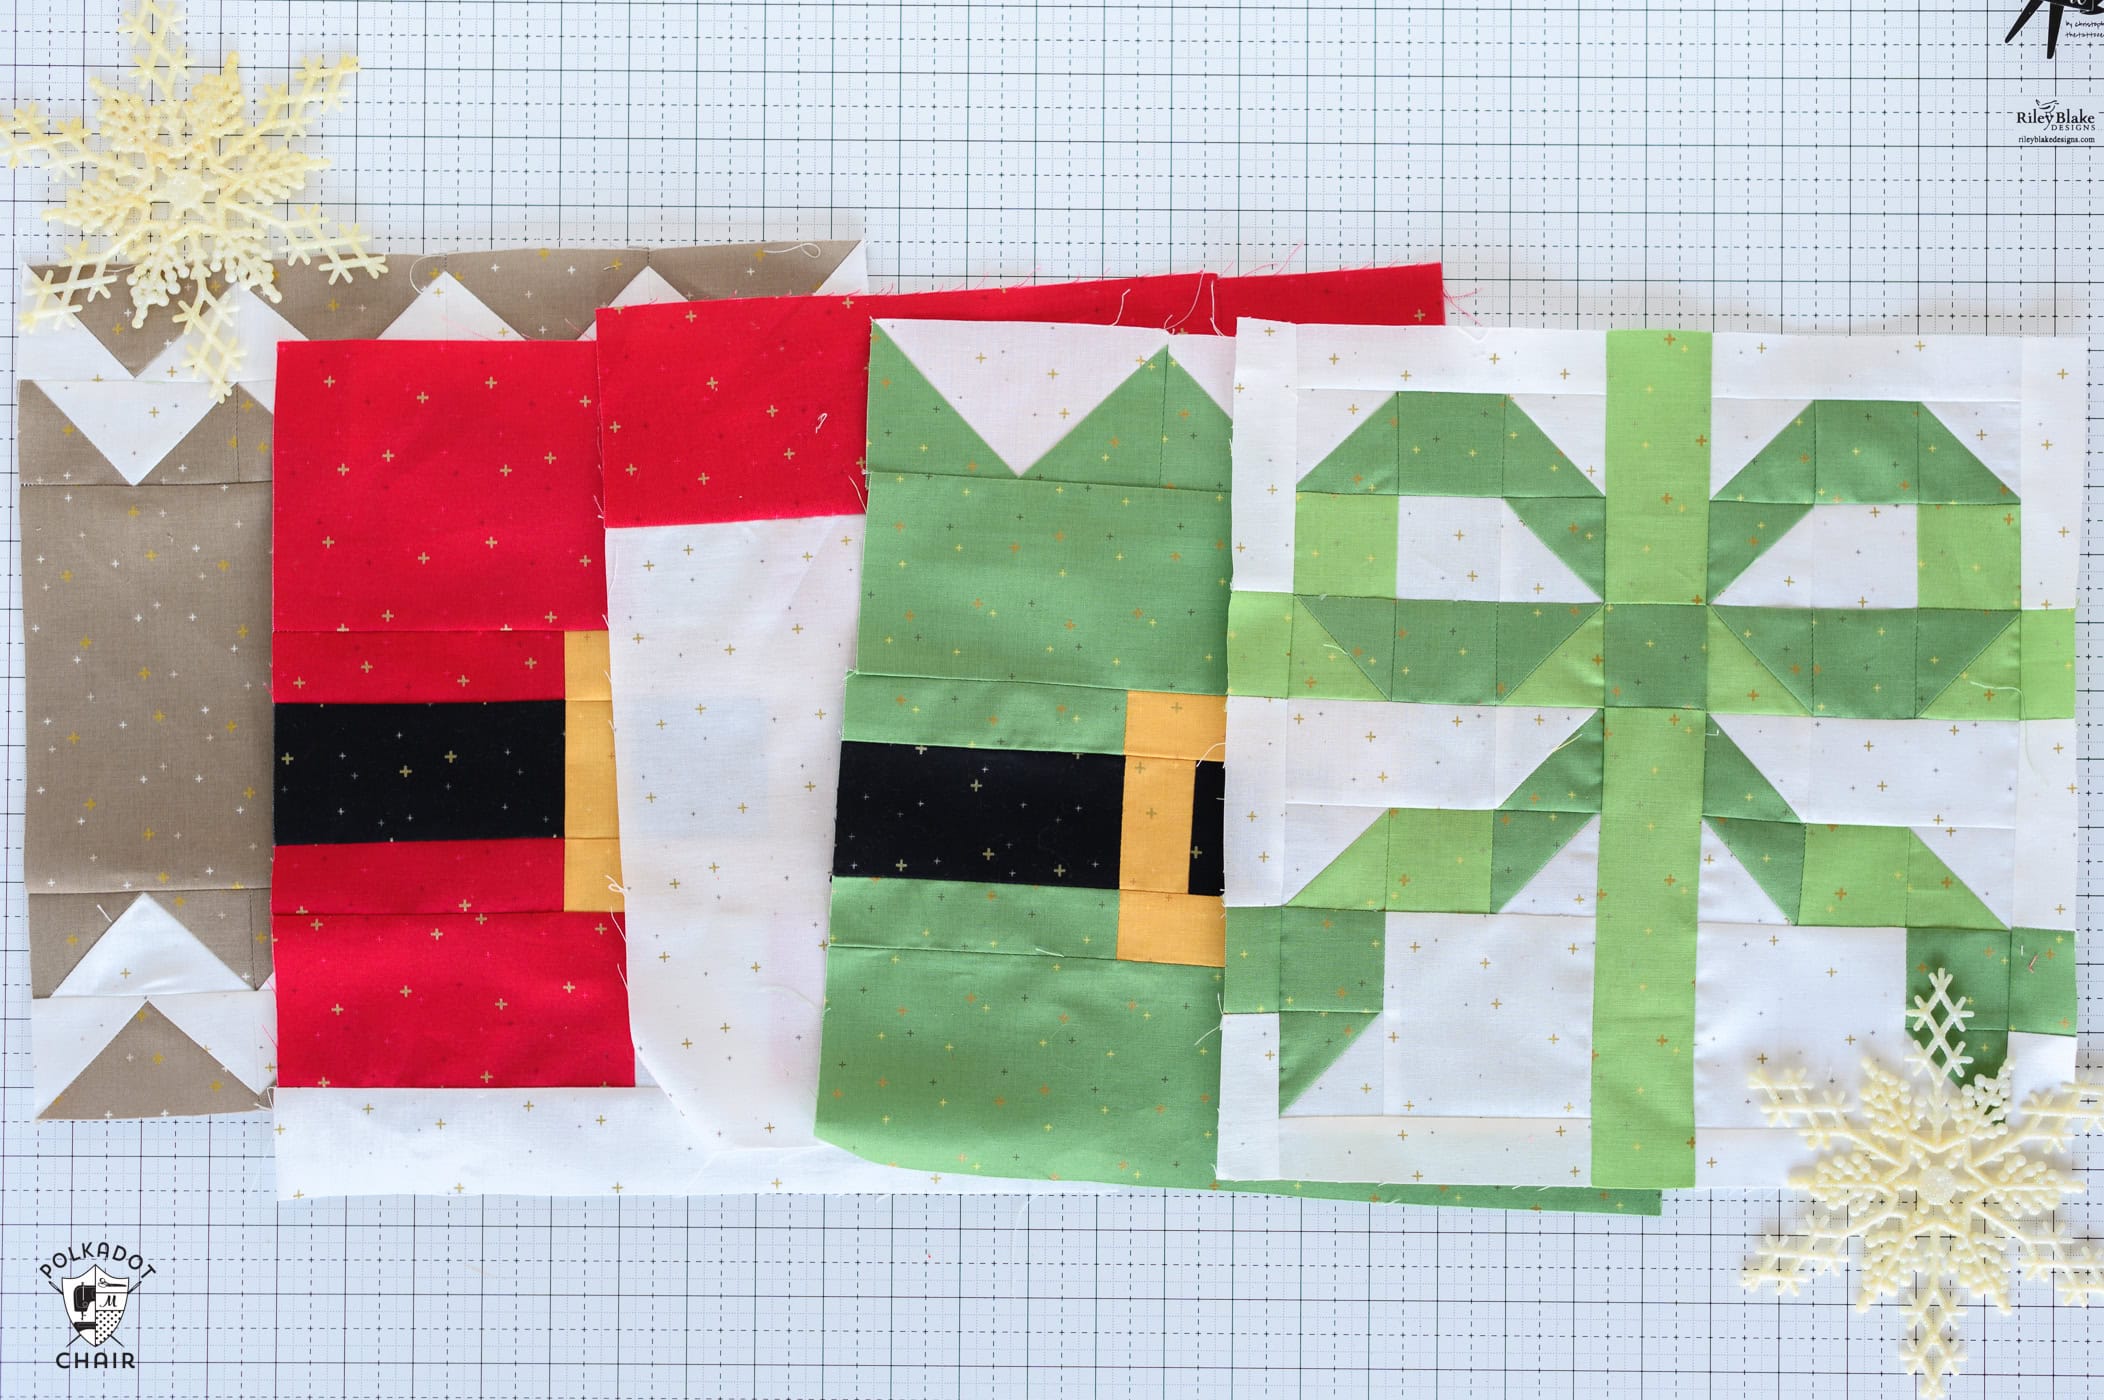
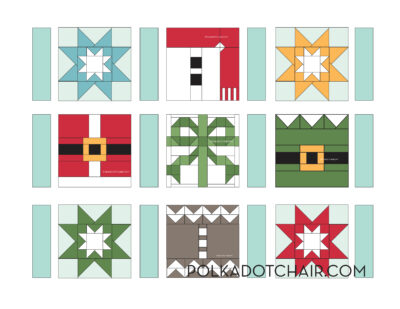
- 2 1/2” x 12 1/2” Fabric H PieceStar Block (made with Fabric J)2 1/2” x 12 1/2” Fabric H PieceSnowman Block2 1/2” x 12 1/2” Fabric H PieceStar Block (made with Fabric D)2 1/2” x 12 1/2” Fabric H Piece
- Sew the following pieces together in order to construct Row 2.
- 2 1/2” x 12 1/2” Fabric H PieceSanta Block2 1/2” x 12 1/2” Fabric H PieceBow Block2 1/2” x 12 1/2” Fabric H PieceElf Block2 1/2” x 12 1/2” Fabric H Piece
- Sew the following pieces together in order to construct Row 3.
- 2 1/2” x 12 1/2” Fabric H PieceStar Block (made with Fabric B)2 1/2” x 12 1/2” Fabric H PieceGingerbread Man Block2 1/2” x 12 1/2” Fabric H PieceStar Block (made with Fabric G)2 1/2” x 12 1/2” Fabric H Piece
Step Three: Cornerstones
- Sew the following pieces together in order along the 2 1/2” sides.
- 2 1/2” x 2 1/2” Fabric J2 1/2” x 12 1/2” Fabric H Piece2 1/2” x 2 1/2” Fabric J2 1/2” x 12 1/2” Fabric H Piece2 1/2” x 2 1/2” Fabric J2 1/2” x 12 1/2” Fabric H Piece2 1/2” x 2 1/2” Fabric J

- Repeat three more times so that you have four total units.

Step Four: Center Quilt Assembly
- Sew the following pieces together in order.
- Sashing/Cornerstone Strip Created in Step ThreeRow 1Sashing/Cornerstone Strip Created in Step ThreeRow 2Sashing/Cornerstone Strip Created in Step ThreeRow 3Sashing/Cornerstone Strip Created in Step Three

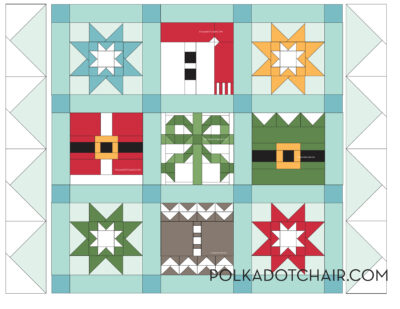
Step Five: Outside Border Assembly
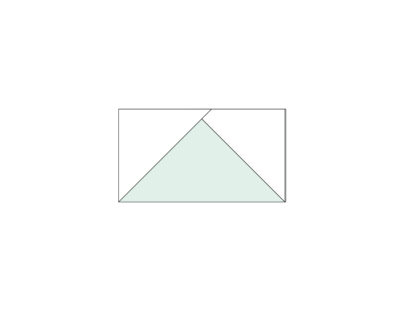
- Sew four of the flying geese units created in Step One together as shown.

- Repeat three more times so that you have four total units.
- Sew one of these units to each side of the Center Quilt created in Step Four.
- Sew one 6 1/2” x 6 1/2” piece of Fabric A to both sides of the two remaining units.
- Sew these units to the top and the bottom of the quilt to complete your quilt top.

Additional Blocks and Information
- November 29: Intro & Fabric Requirements
- December 2: Block 1 Elf
- December 4: Block 2 Snowman
- December 6: Block 3 Santa Claus
- December 11: Block 4 Gingerbread Man
- December 13: Block 5 Christmas Bow
- December 18: Corner Blocks Stars
- December 20: Finishing Instructions
- (If you don’t see the most recent block linked, please refresh your browser; you may be loading an older list version).

I have the borders all made and they are 3″ too long. Anybody else having problems with the measurements of the borders that have the four flying geese in them ?
What an adorable quilt! Thank you so much for doing this. I did not find your quilt-along until a few days ago; Sherri McConnell linked to your bow block in her Saturday Seven email and I’m so glad she did! I’ve saved all of the instructions and hope to make this quilt one day. I’ll subscribe to your newsletter as soon as I finish this comment so I don’t miss any more of your great content! I hope you had a very merry Christmas!! 🙂 PS THANK YOU for naming your blocks!! I usually have to rename everything I save, but yours popped up perfectly!