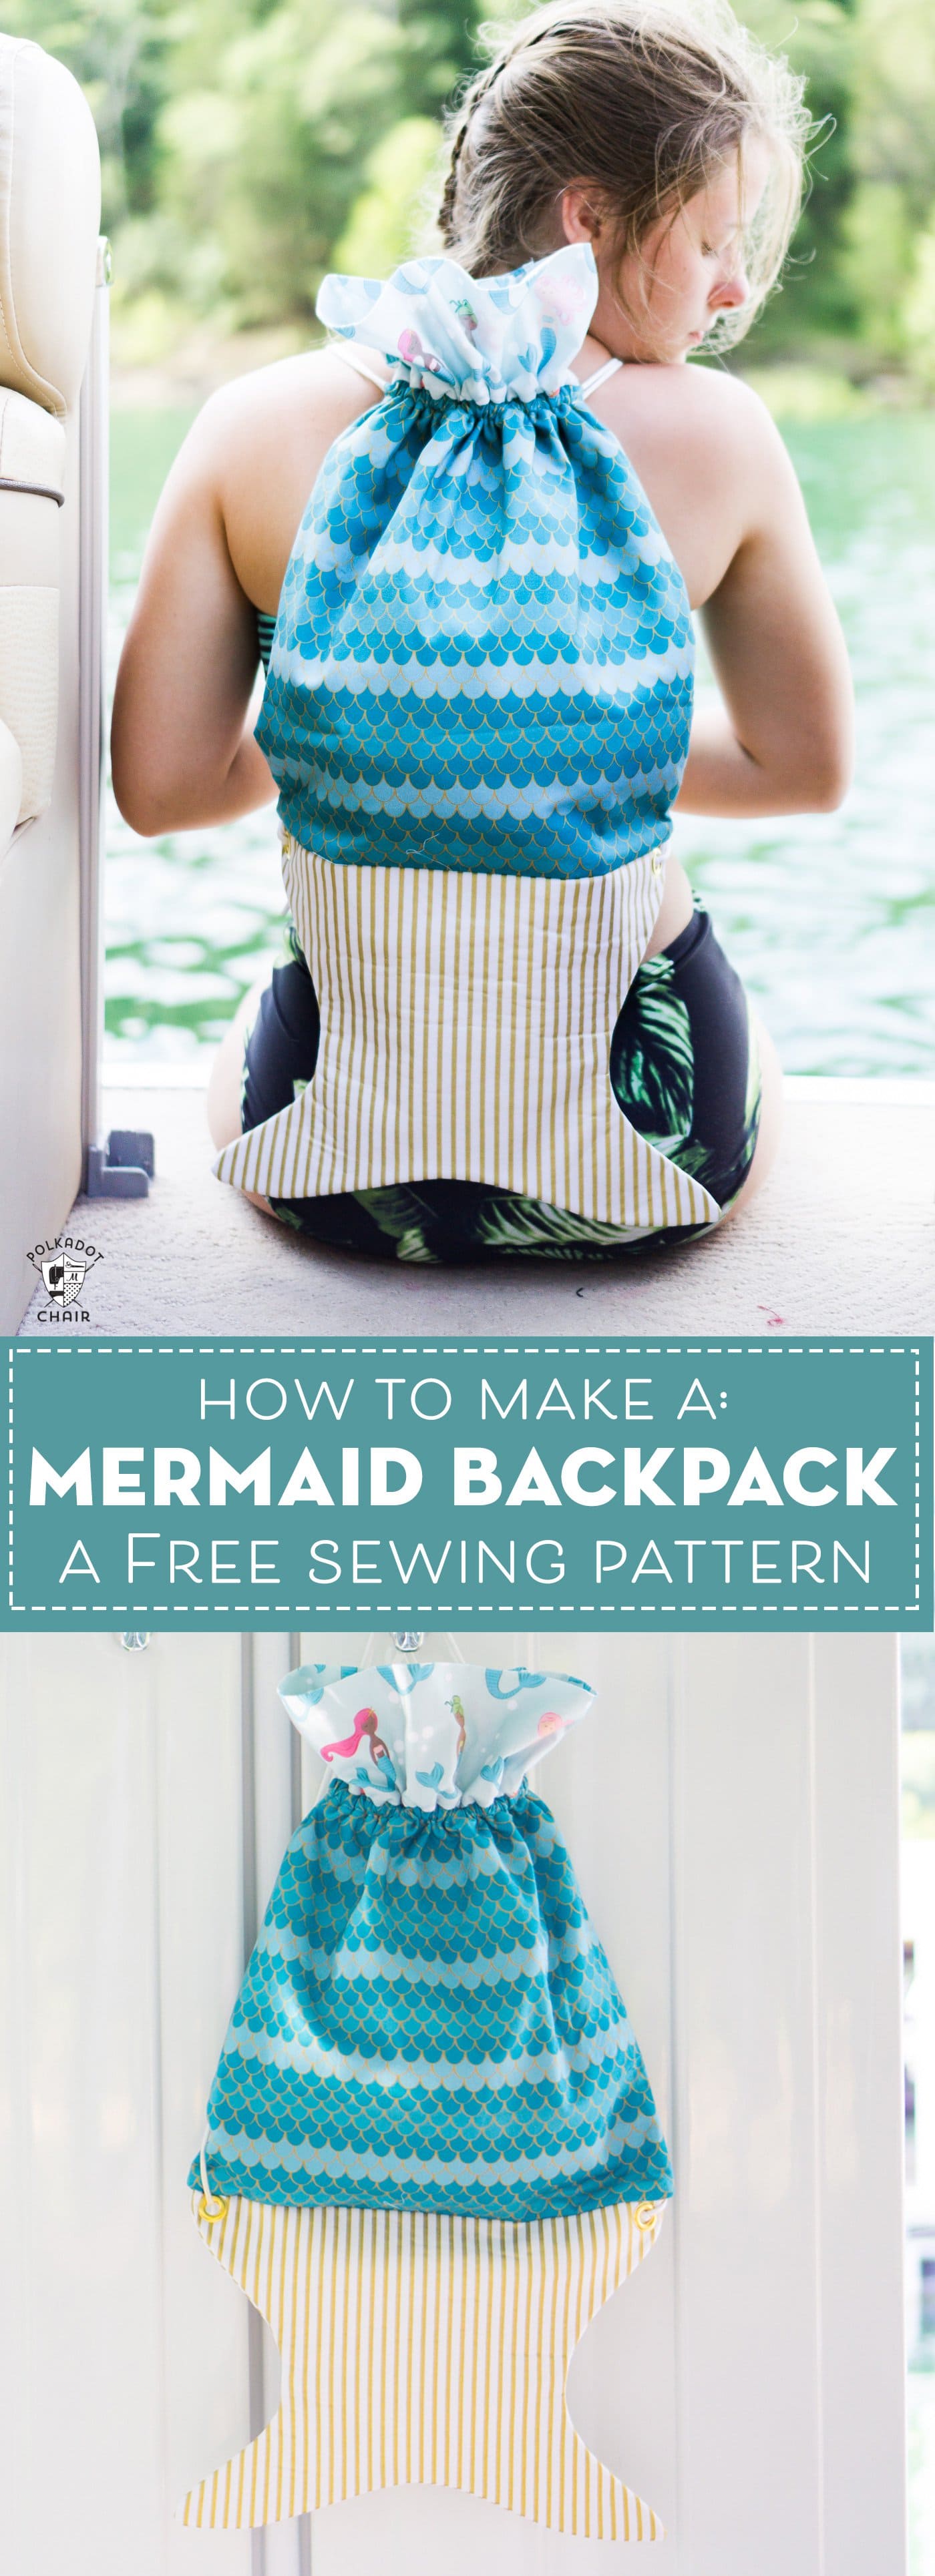
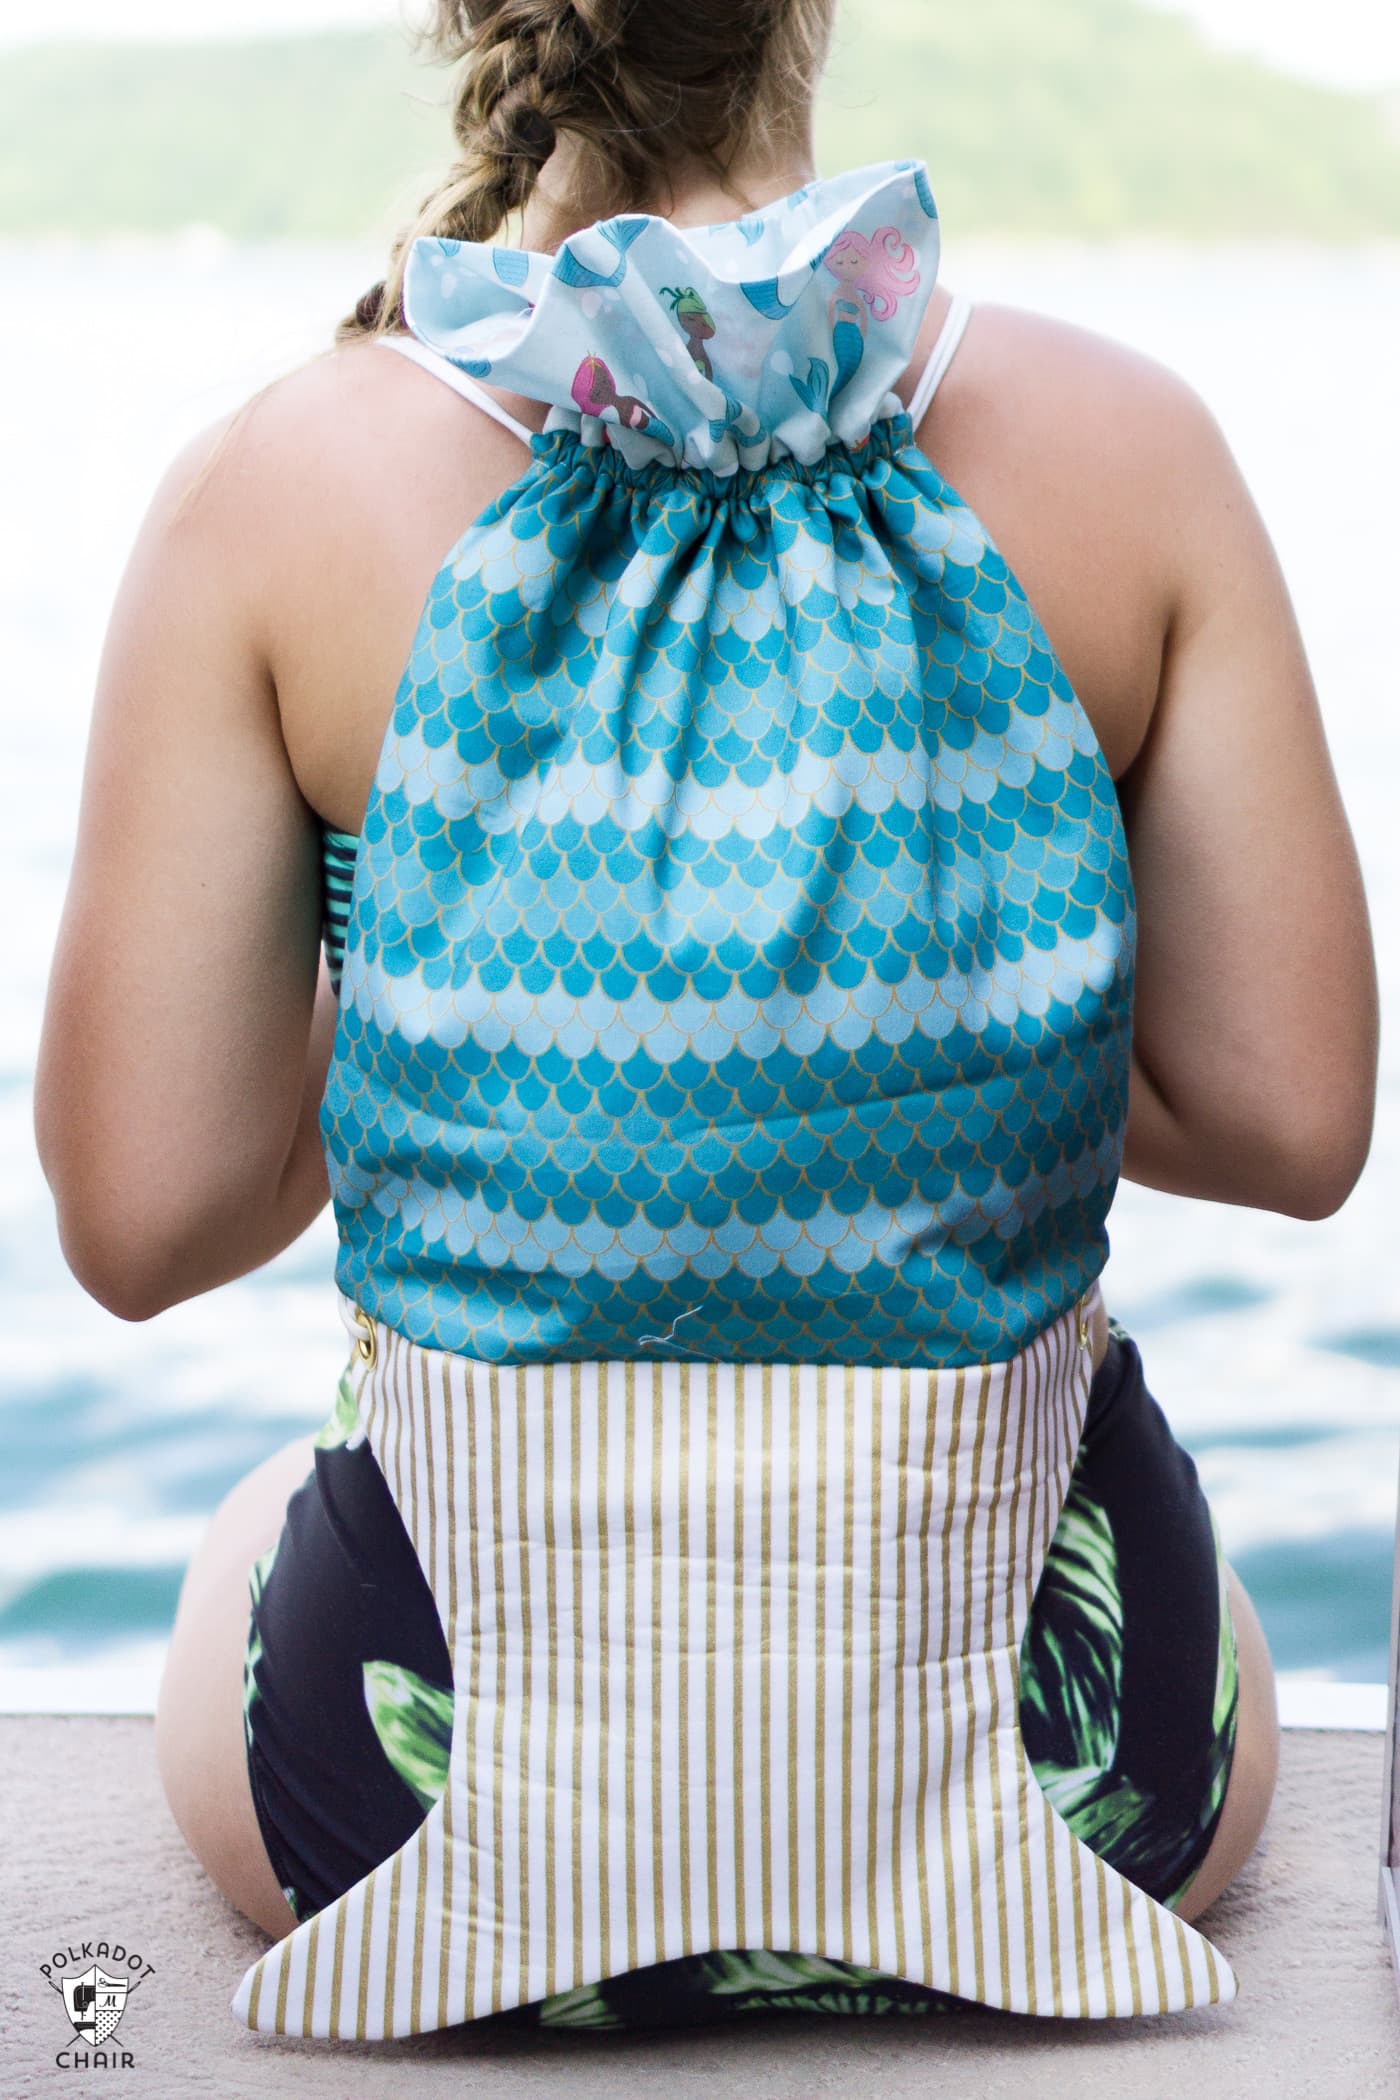
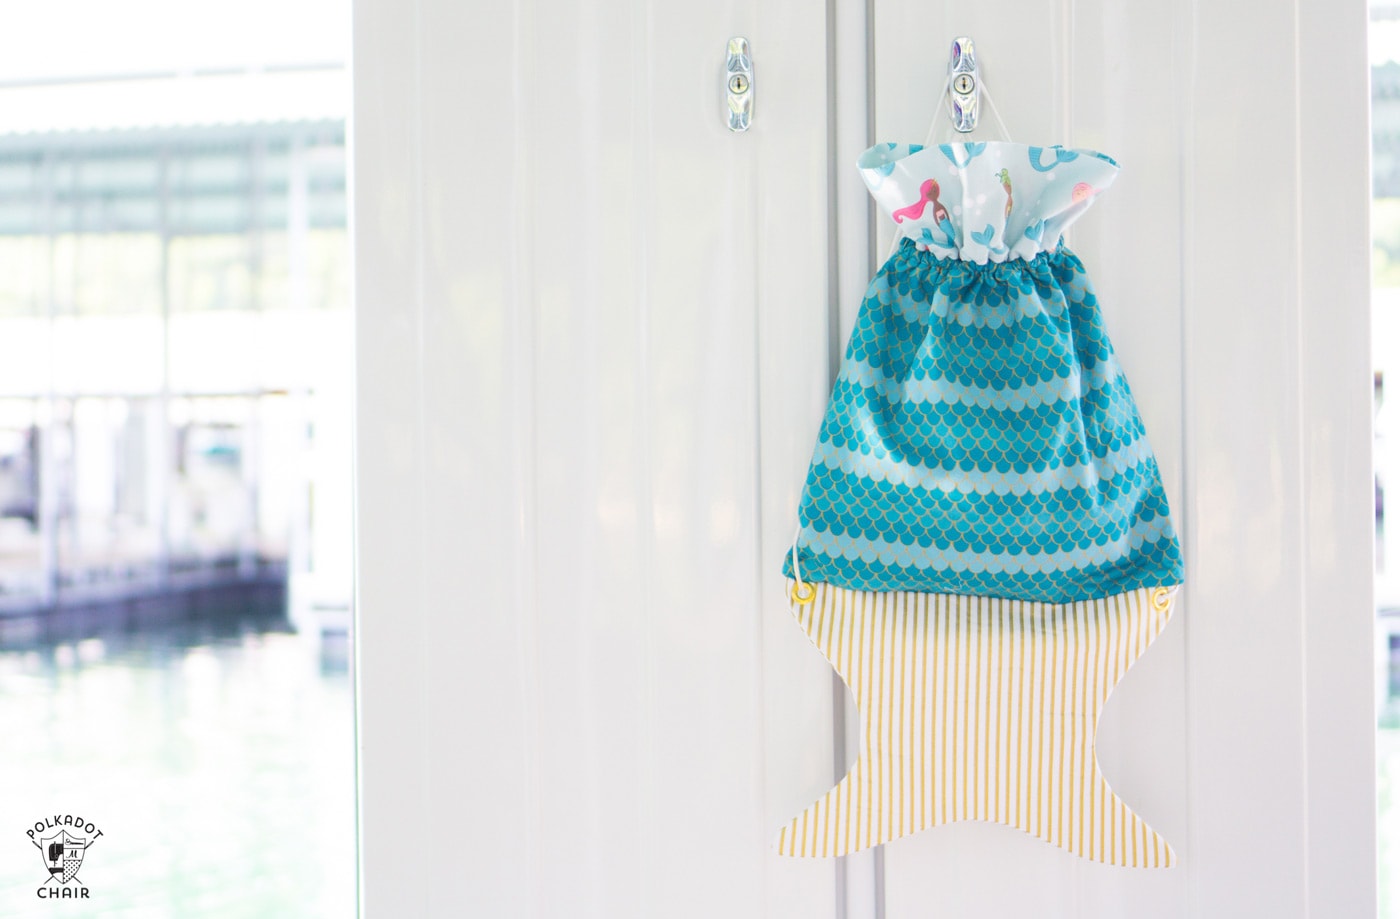
How to Make a Mermaid Backpack
Do you know a wannabe Mermaid? If so, stitch them up with this fun Mermaid Tail Backpack to carry around on all their mermaid adventures! It’s pretty simple to sew; keep reading to see how to make one!
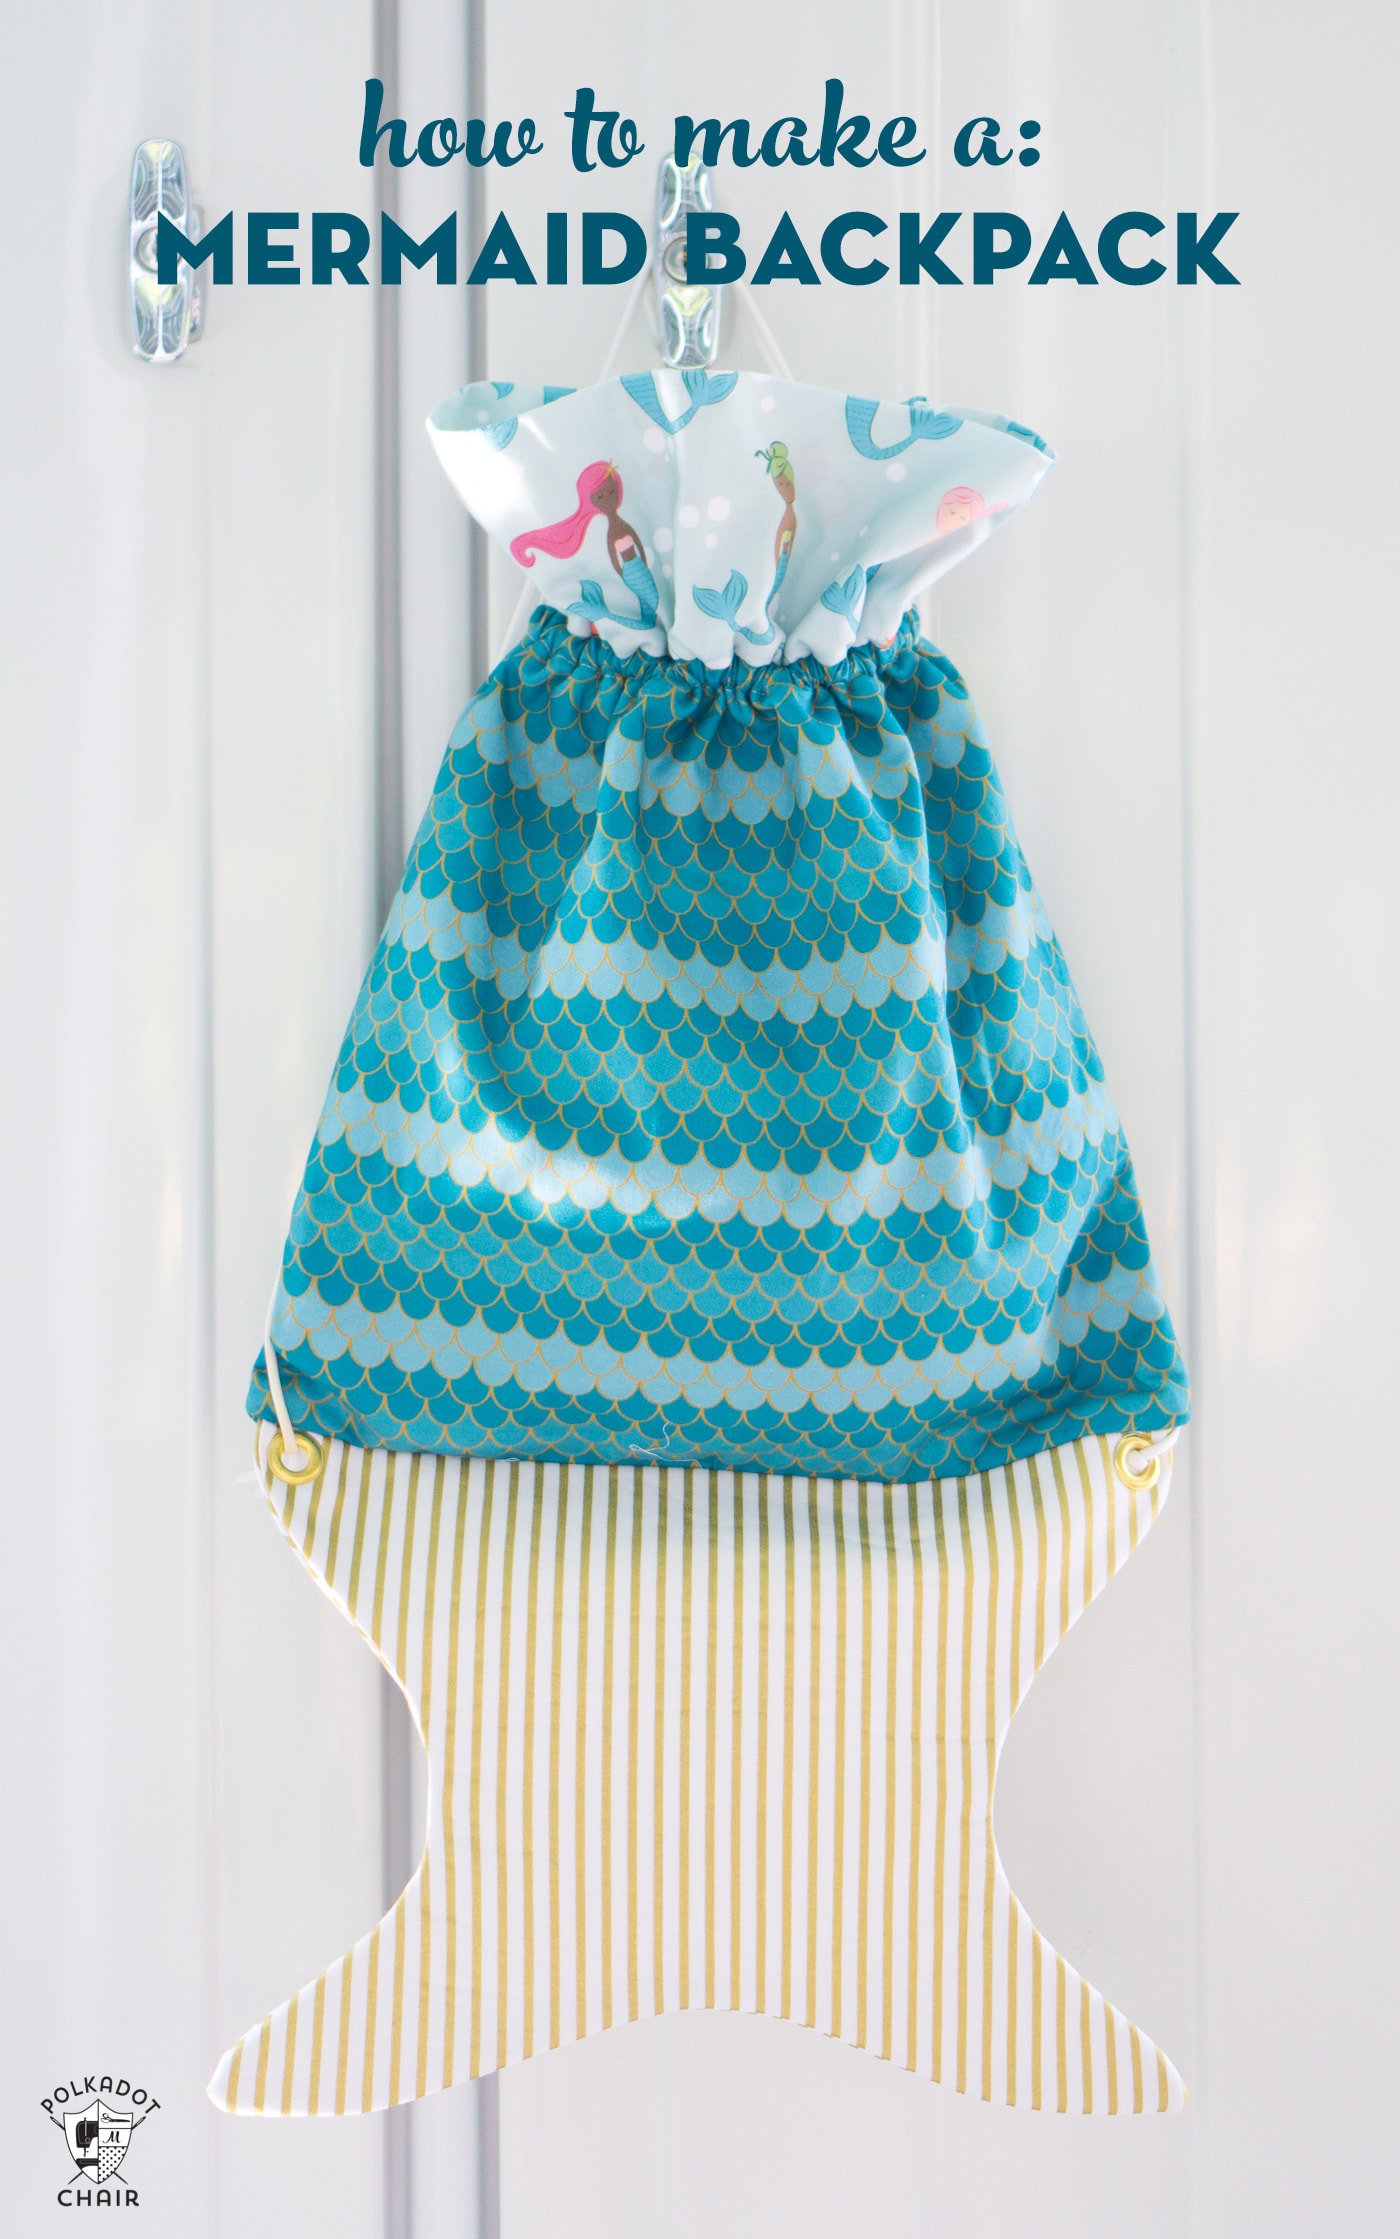
Last year, while I was getting ready to show my Let’s Be Mermaids fabric line at Quilt Market, a good friend stopped by the house to see how I was doing.
While there, she spotted the mermaid fabric on my sewing table and had a great idea to create a backpack resembling a mermaid tail. She has two young girls and always seems to know what is “cool” when making stuff for them.
I gave her some of my fabric, and she generously stitched up this backpack for my booth at Quilt Market. Now that the fabric is available, I thought I’d share a sewing pattern so you can make a mermaid backpack of your own!
Mermaid Backpack Sewing Pattern Details
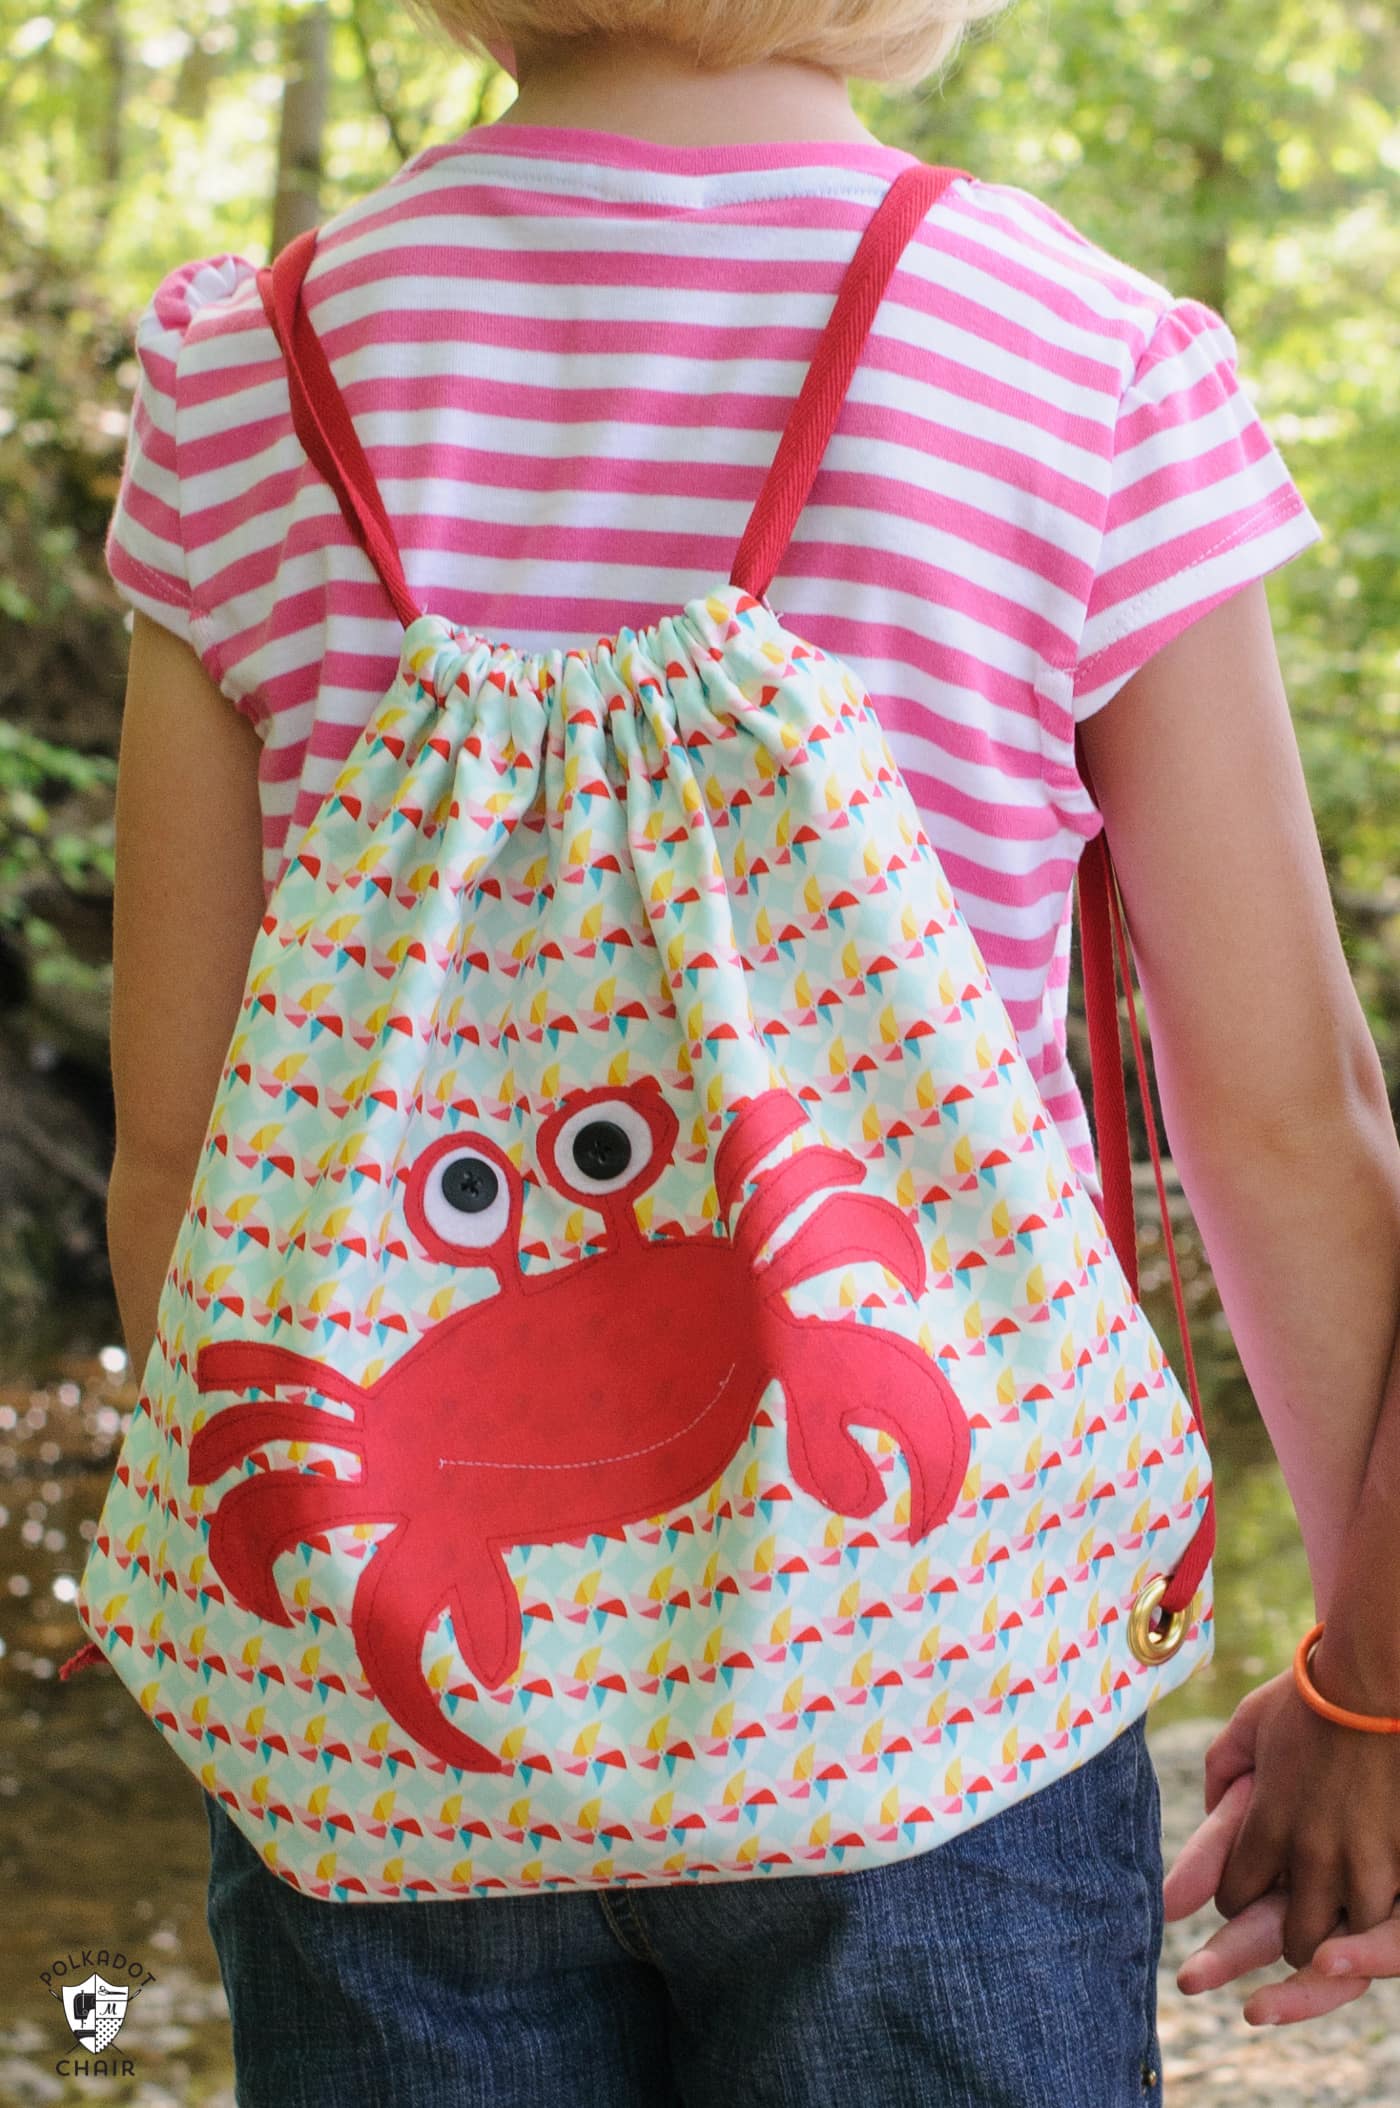
This backpack is the same pattern as my Simple Summer Drawstring Backpack I created a few years ago.
The only additions are a mermaid tail fin and a cuff at the top of the bag. I’ll walk you through sewing the bag step by step, including the directions to make the simple drawstring backpack.
(Since the pattern is the same, I’ve reused a few photos from the original tutorial in the directions below. So don’t be confused if you see a different fabric.)
These would be so cute to take to the pool during the summer. They would also be great as Swim Team backpacks! This pattern is beginner-friendly.
How to Get the Pattern Piece
You will need our pattern piece to complete your project. Fill out this form, and we will email you a copy.
You will still need to read/print the directions on this page to complete your project.
Mermaid Backpack Sewing pattern
Equipment
- Mermaid Tail Pattern Piece Fill out the form on this page and we will email it to you
supplies
- 1/2 Yard Fabric Bag Front I used scales print from Let’s Be Mermaids
- 1/2 Yard Fabric Bag Lining 1 used seahorse print from Let’s Be Mermaids
- 3/8 Yard Fabric Bag Band 1 used Main Print from Let’s Be Mermaids
- 1/2 Yard Fabric Mermaid Tail Gold Stripe Metallic by Riley Blake Designs
- 1 1/2 Yards Shape Flex Interfacing or a piece at least 15×45
- 1/2 yard Decor Bond Interfacing
- 2 1″ Grommets
- 4 Yards String or 1/4″ ribbon for straps
Instructions
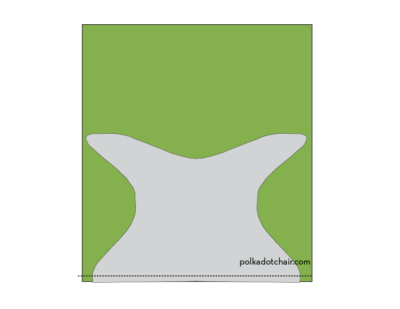
Create the Mermaid Tail Pattern Piece:
- Print out the Mermaid Tail pattern piece. Trace it onto a piece of interfacing or tissue paper, on the fold as noted in the pattern. Cut it out, this will be your pattern piece.
- Tape the two pattern pieces together so they look like this. This is NOT the pattern piece, it is not to scale. You need to download the PDF of the piece using the link above.
Cutting Directions:
- From Bag Fabric:2 pieces 15″ x 15″
- From Bag Lining Fabric:2 pieces 15″ x 15″
- From Bag Band Fabric:2 pieces 10″ x 15″
- From Mermaid Tail Fabric:2 pieces from Pattern Piece
- From Shape Flex Interfacing:2 pieces 15″ x 15″2 pieces from Pattern Piece
- From Decor Bond Interfacing:2 pieces from Pattern Piece
- All seam allowances are 1/2″ unless otherwise noted. Note: this project contains strings which may pose a choking hazard for young children. It is not recommended for small children for that reason.
Sew the Mermaid Tail:
- Iron the Shape Flex interfacing onto the wrong side of both of the mermaid tail fabric pieces. Iron the Decor Bond interfacing on top of the Shape Flex interfacing.
- Pin the two pieces mermaid tail pieces together, right sides facing. Stitch around 3 sides, leaving the top open.
- Clip the seams and curves, turn right side out and press.
Sew the Backpack:
- Iron the Shape Flex interfacing onto the wrong side of the two bag pieces.

- Pin the sewn mermaid tail to the right side of one of your bag pieces. The long edge of the tail will be flush with the bottom of the bag piece.
- Baste in place.
- Pin the 2nd bag piece to the bag piece with the mermaid tail basted to it, right sides facing. Stitch around all 3 sides.
- Press the seams open and turn right side out.
- Pin the two bag lining pieces together, right sides facing. Stitch around 3 sides. Press the seams open.
- Press the bag and bag lining pieces well.

Create the Casing for the Drawstring:
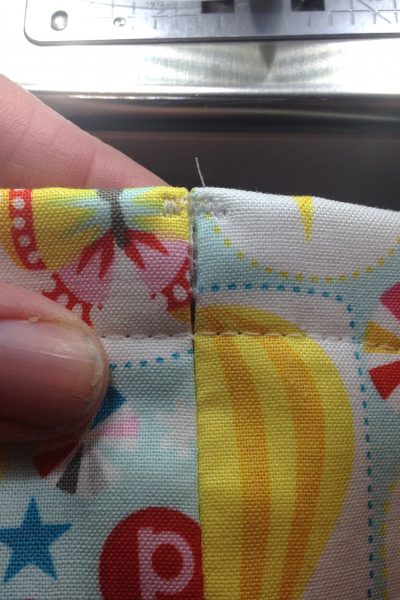
- Slip the bag lining into the bag, so that the side seams are lined up and the top edges are even. The wrong sides of the fabric will be facing. Using a zig zag stitch on your machine, or using a serger. Stitch along the raw edge of the top of the bag. You are finishing off the seam so it doesn’t have a fray.
- Fold the top of the bag down 3/4″ towards the inside of the bag and press. Stitch a casing in the top of the bag by stitching along the serged/zig zagged edge the bag.

- Gently unpick the two side seams of the bag on the outside of the bag from the folded edge of the bag to the sewn line of the casing.

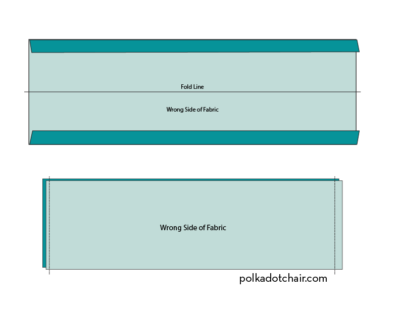
Create the Bag Band Piece:
- On both of the bag band pieces, fold under the two long edges 1/4″ and press well. Then fold the piece in half, with the wrong sides facing.
- Unfold the pieces and stitch the two pieces to each other right sides facing along the two short sides. Press the seams open.
- Refold the fabric (wrong sides facing) and press. You will now have a circular piece of fabric that is folded in half along the long ends with the two raw edges of the fabric folded under 1/4″.
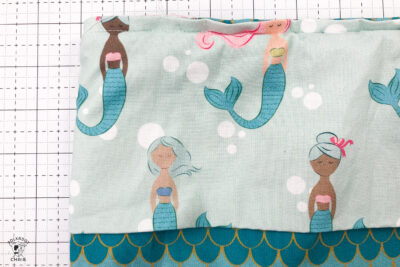
- Slip the bag band over the top of the sewn bag outside piece so that the center fold of the bag band is facing down and the other folded ends are flush with the top of the bag piece.

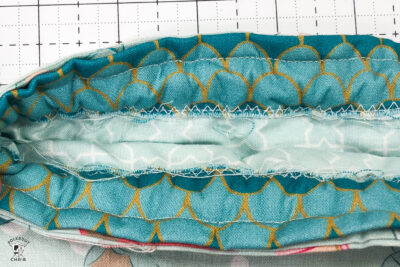
- Stitch the bag band to the bag, along the top edge with a 1/4″ seam allowance.
- (view of the inside of the bag with the bag band sewn on)

Add the Strings:
- Cut two yards of string for the backpack and string through one side, starting at the opening in the side seam, all the way around until it comes out the same opening.
- Pull it down so that it extends a little below the bottom of the backpack. Cut both ends the same length about 2” below the backpack bottom corner. To help you feed your string use an elastic shuttle or a large safety pin (you can get it at the notions store).
- Repeat the same process this, time starting and stopping on the opposite side seam of the backpack.
- Set one eyelet in each top corner of the mermaid tail through all your layers of fabric (follow the instructions on the package). Loop one string through the eyelet and tie with a slip knot to secure.

If you liked this tutorial, you may also like these Free Bag Patterns:
The Best Bag-Making Tips & Tricks
Oversized Beach Bag Sewing Pattern