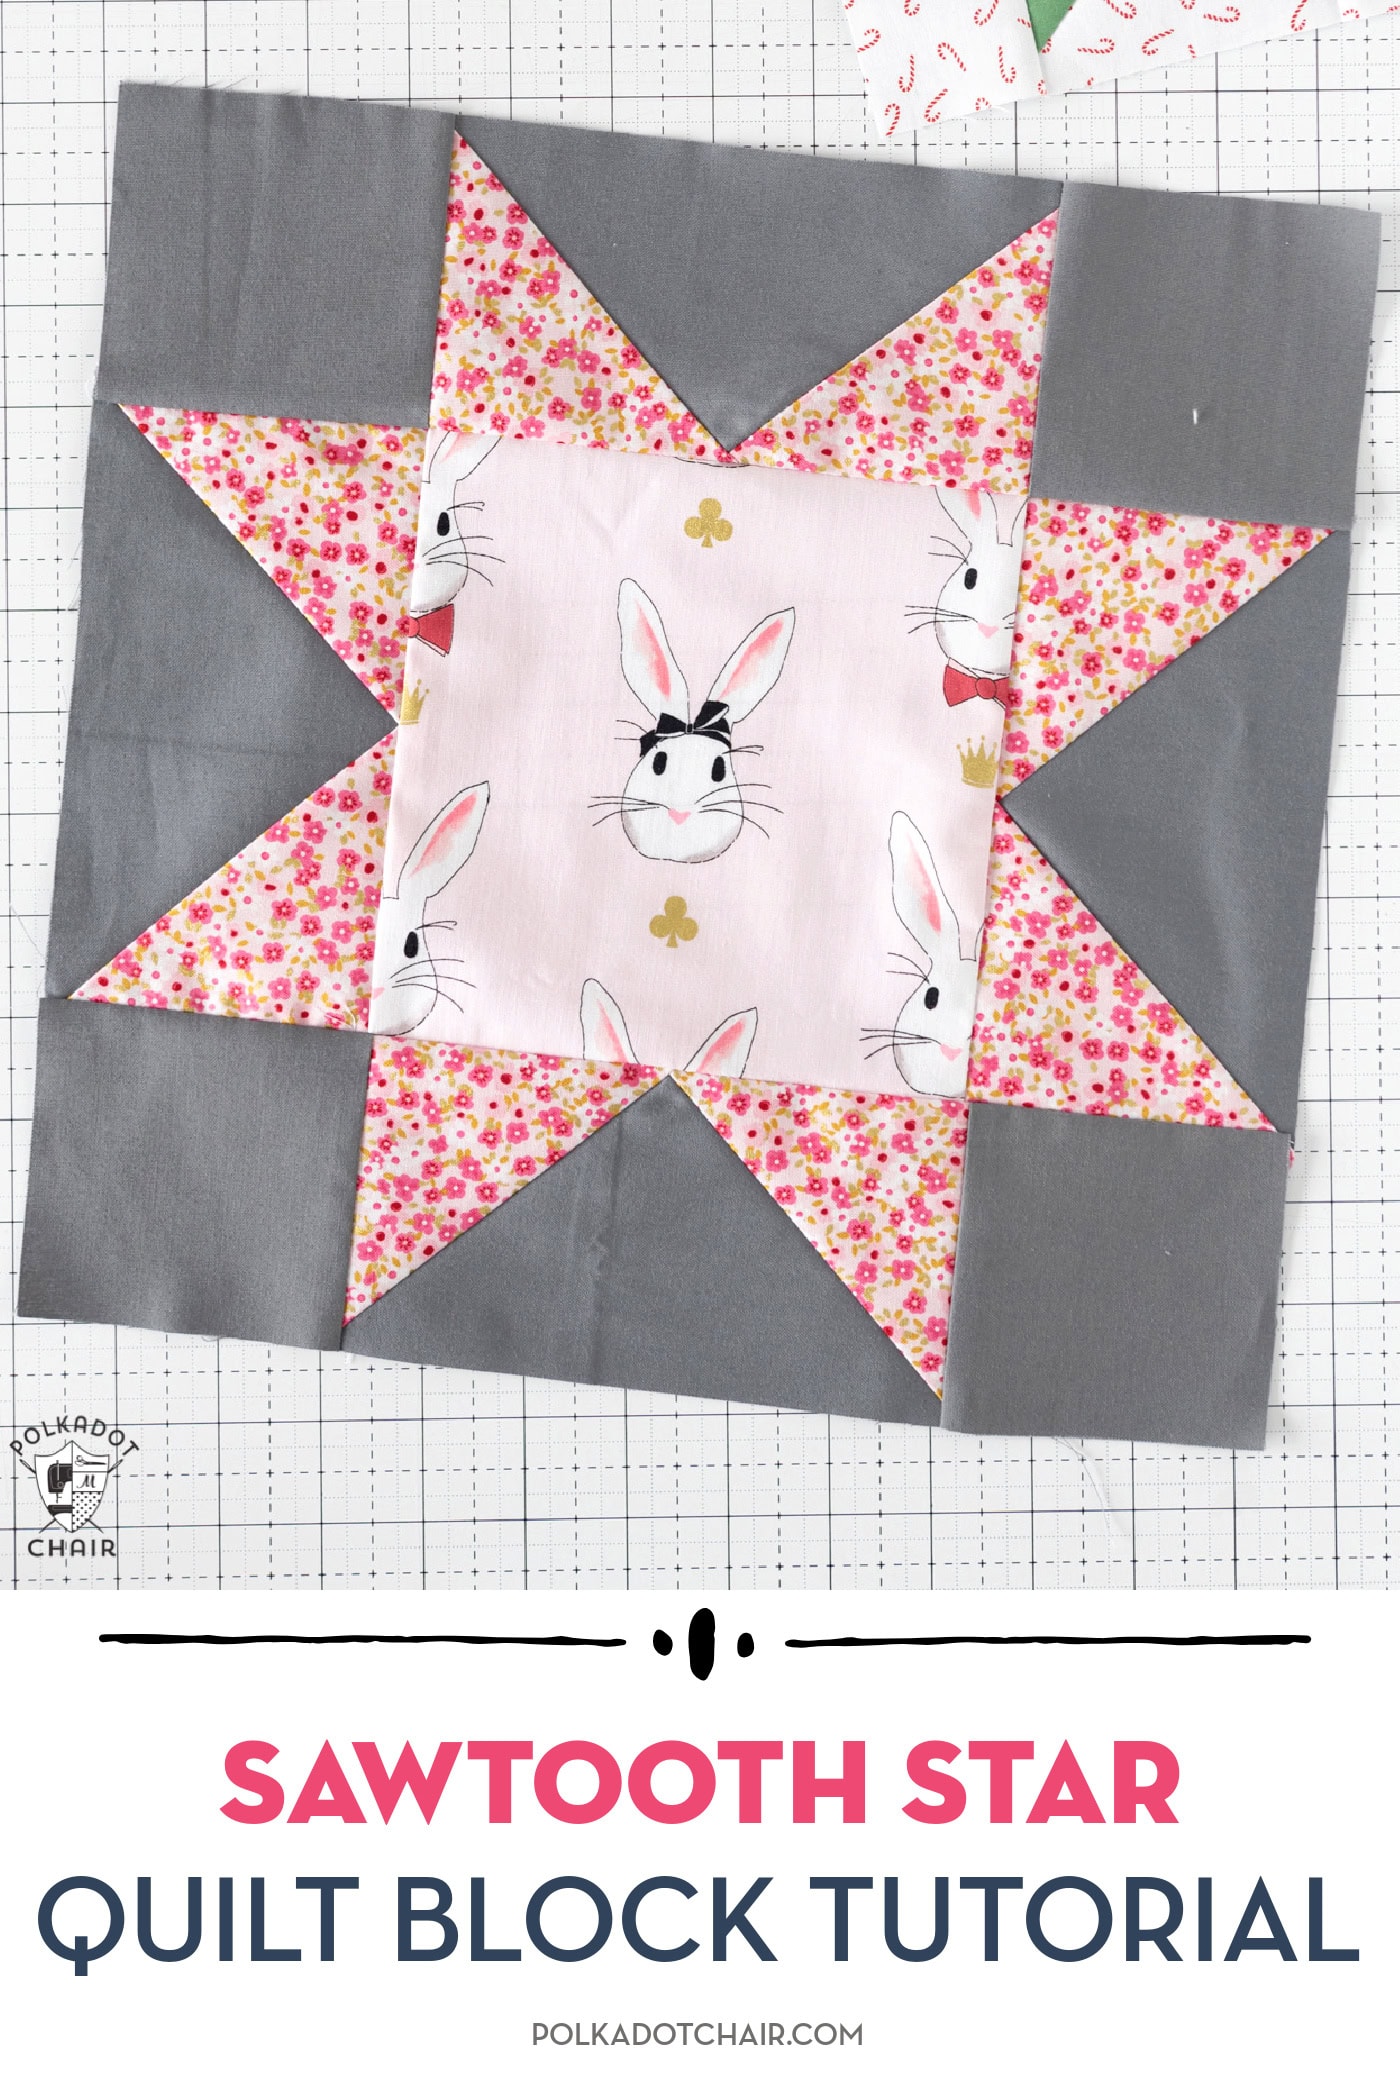
How to Make a Sawtooth Star Quilt Block
Learn how to sew a twelve-inch Sawtooth Star quilt block with our free quilt block pattern.
The Sawtooth Star quilt block is a timeless and versatile design that has been popular in quilting for generations.
It’s both beginner-friendly and easily adaptable, making it a favorite for quilts of all styles, from traditional to modern. The Sawtooth Star features a central square surrounded by four star points and corner squares, forming an 8-pointed star.
The Sawtooth Star dates back to early American quilting and was used in many traditional quilt patterns.
(This post has been updated from a previous version, and a free, printable pattern for the block has been added).
Construction Methods
There are a few ways to create a Sawtooth Star block. Each of the variations deals with how the star points are constructed.
They can be made:
- Using Eight Half Square Triangle Units
- Four Flying Geese Units
- In addition, the Flying Geese units can be constructed using the traditional or no-waste Flying Geese methods.
Today’s pattern features the traditional Flying Geese method. I prefer this method because it reduces the seams in the block (as compared to the half-square triangle method.
The no-waste flying geese method requires the units to be trimmed and squared up before constructing the block, so I prefer the traditional method, which requires less trimming.
If you’d like to make another size Sawtooth Star block, Amy has a chart covering construction in various sizes.
Block Details
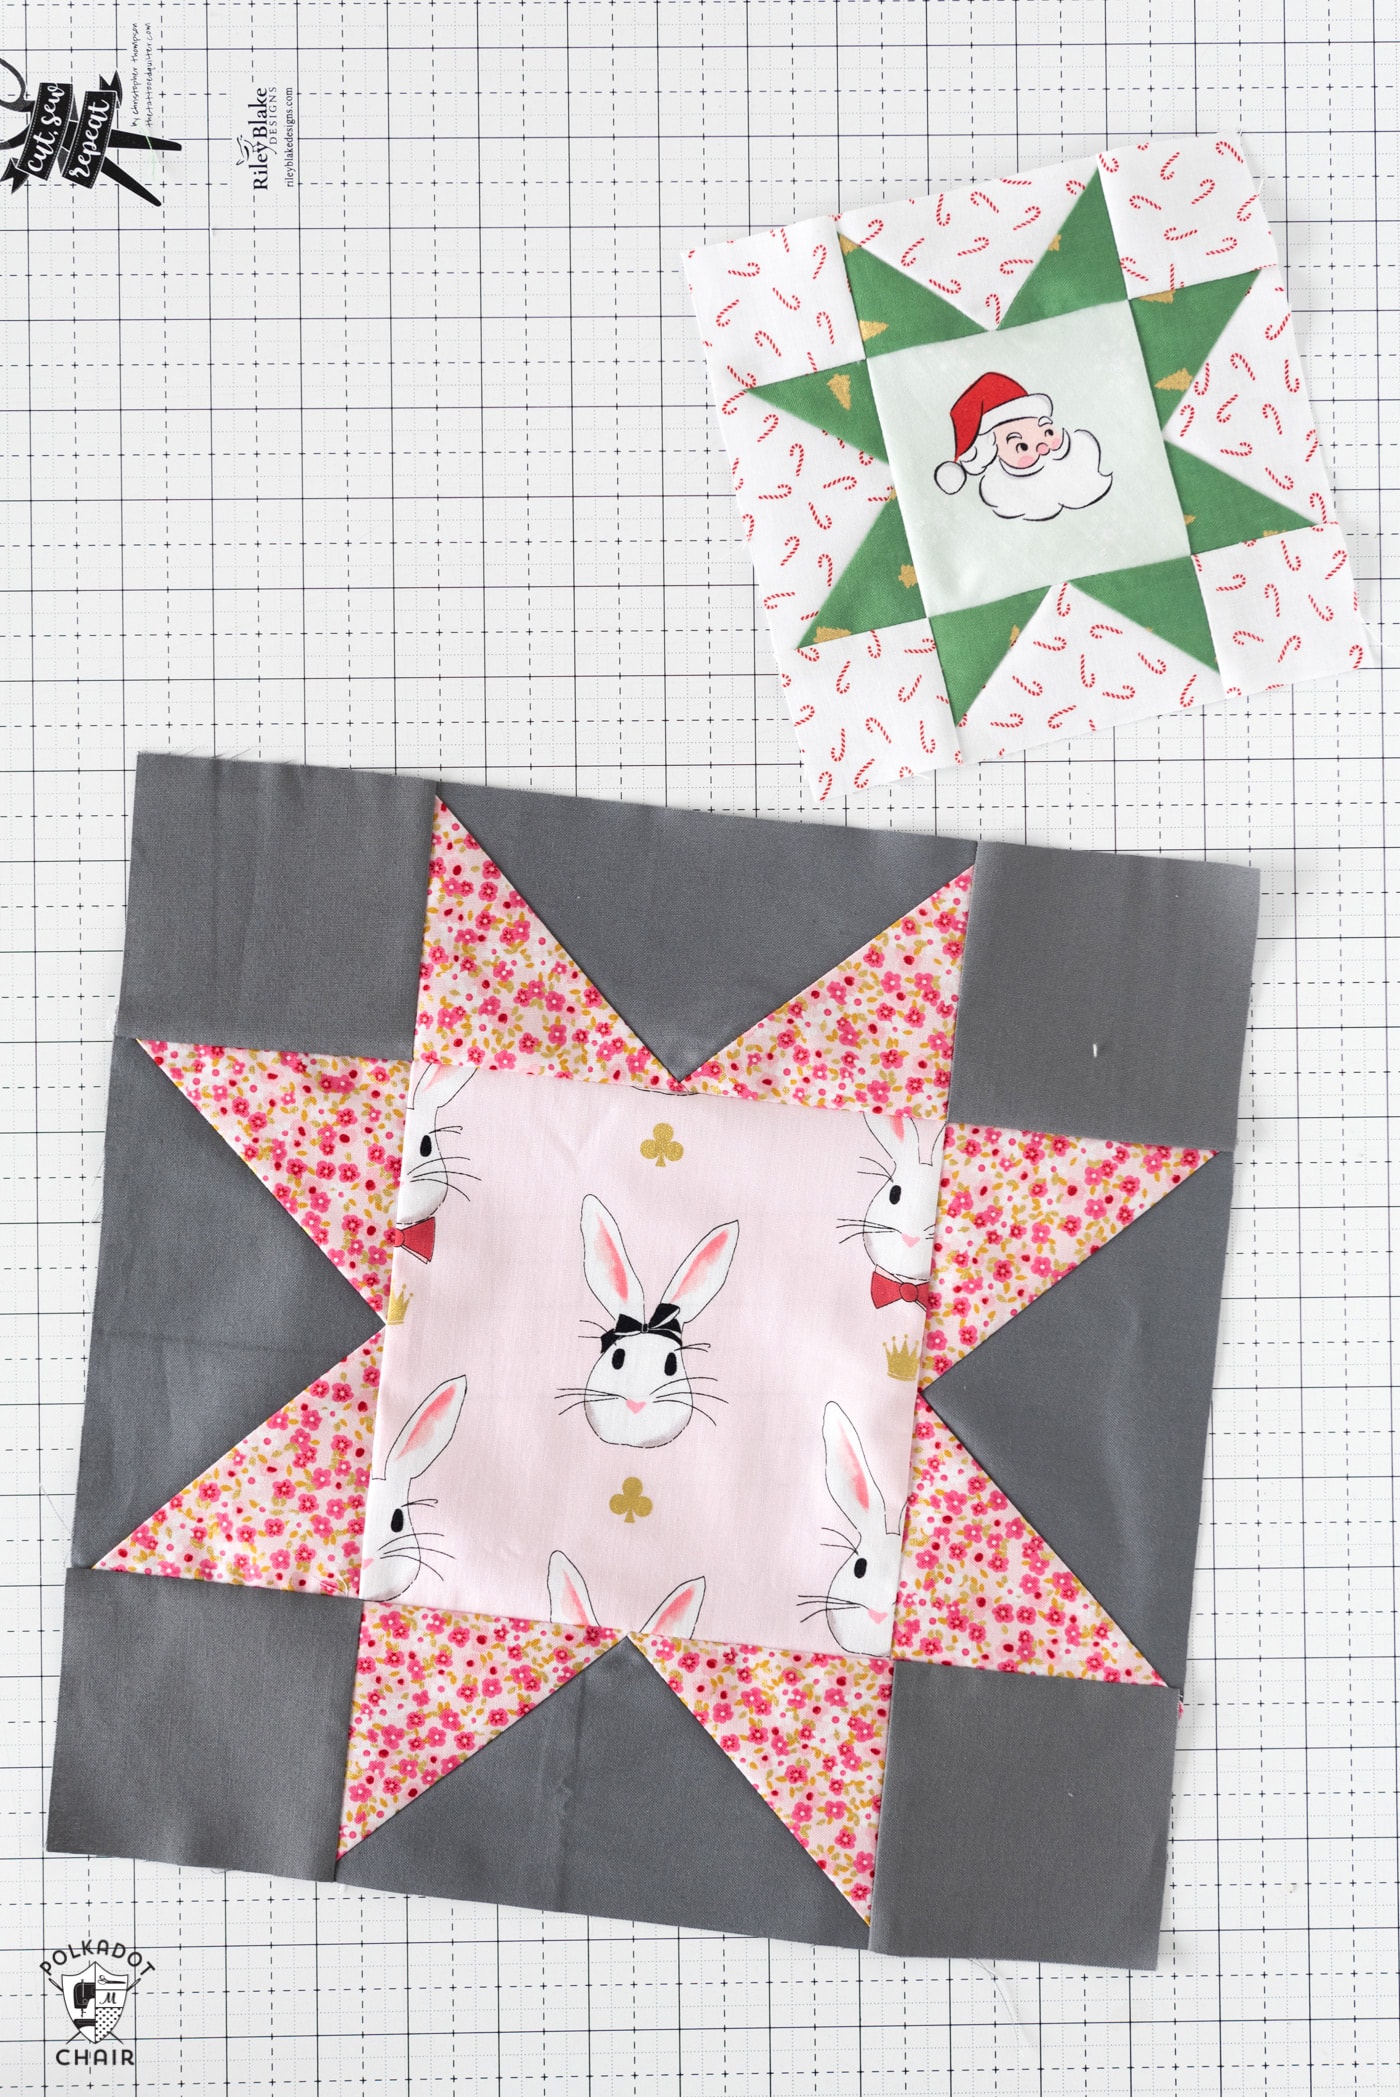
I used fabrics from my scrap bin for this block. I know they are no longer available to purchase, but I feel it is too wasteful not to sew with the fabric I already have just because you can not buy it. There are always SO many cute fabrics for sale; you should be able to find something that you love!
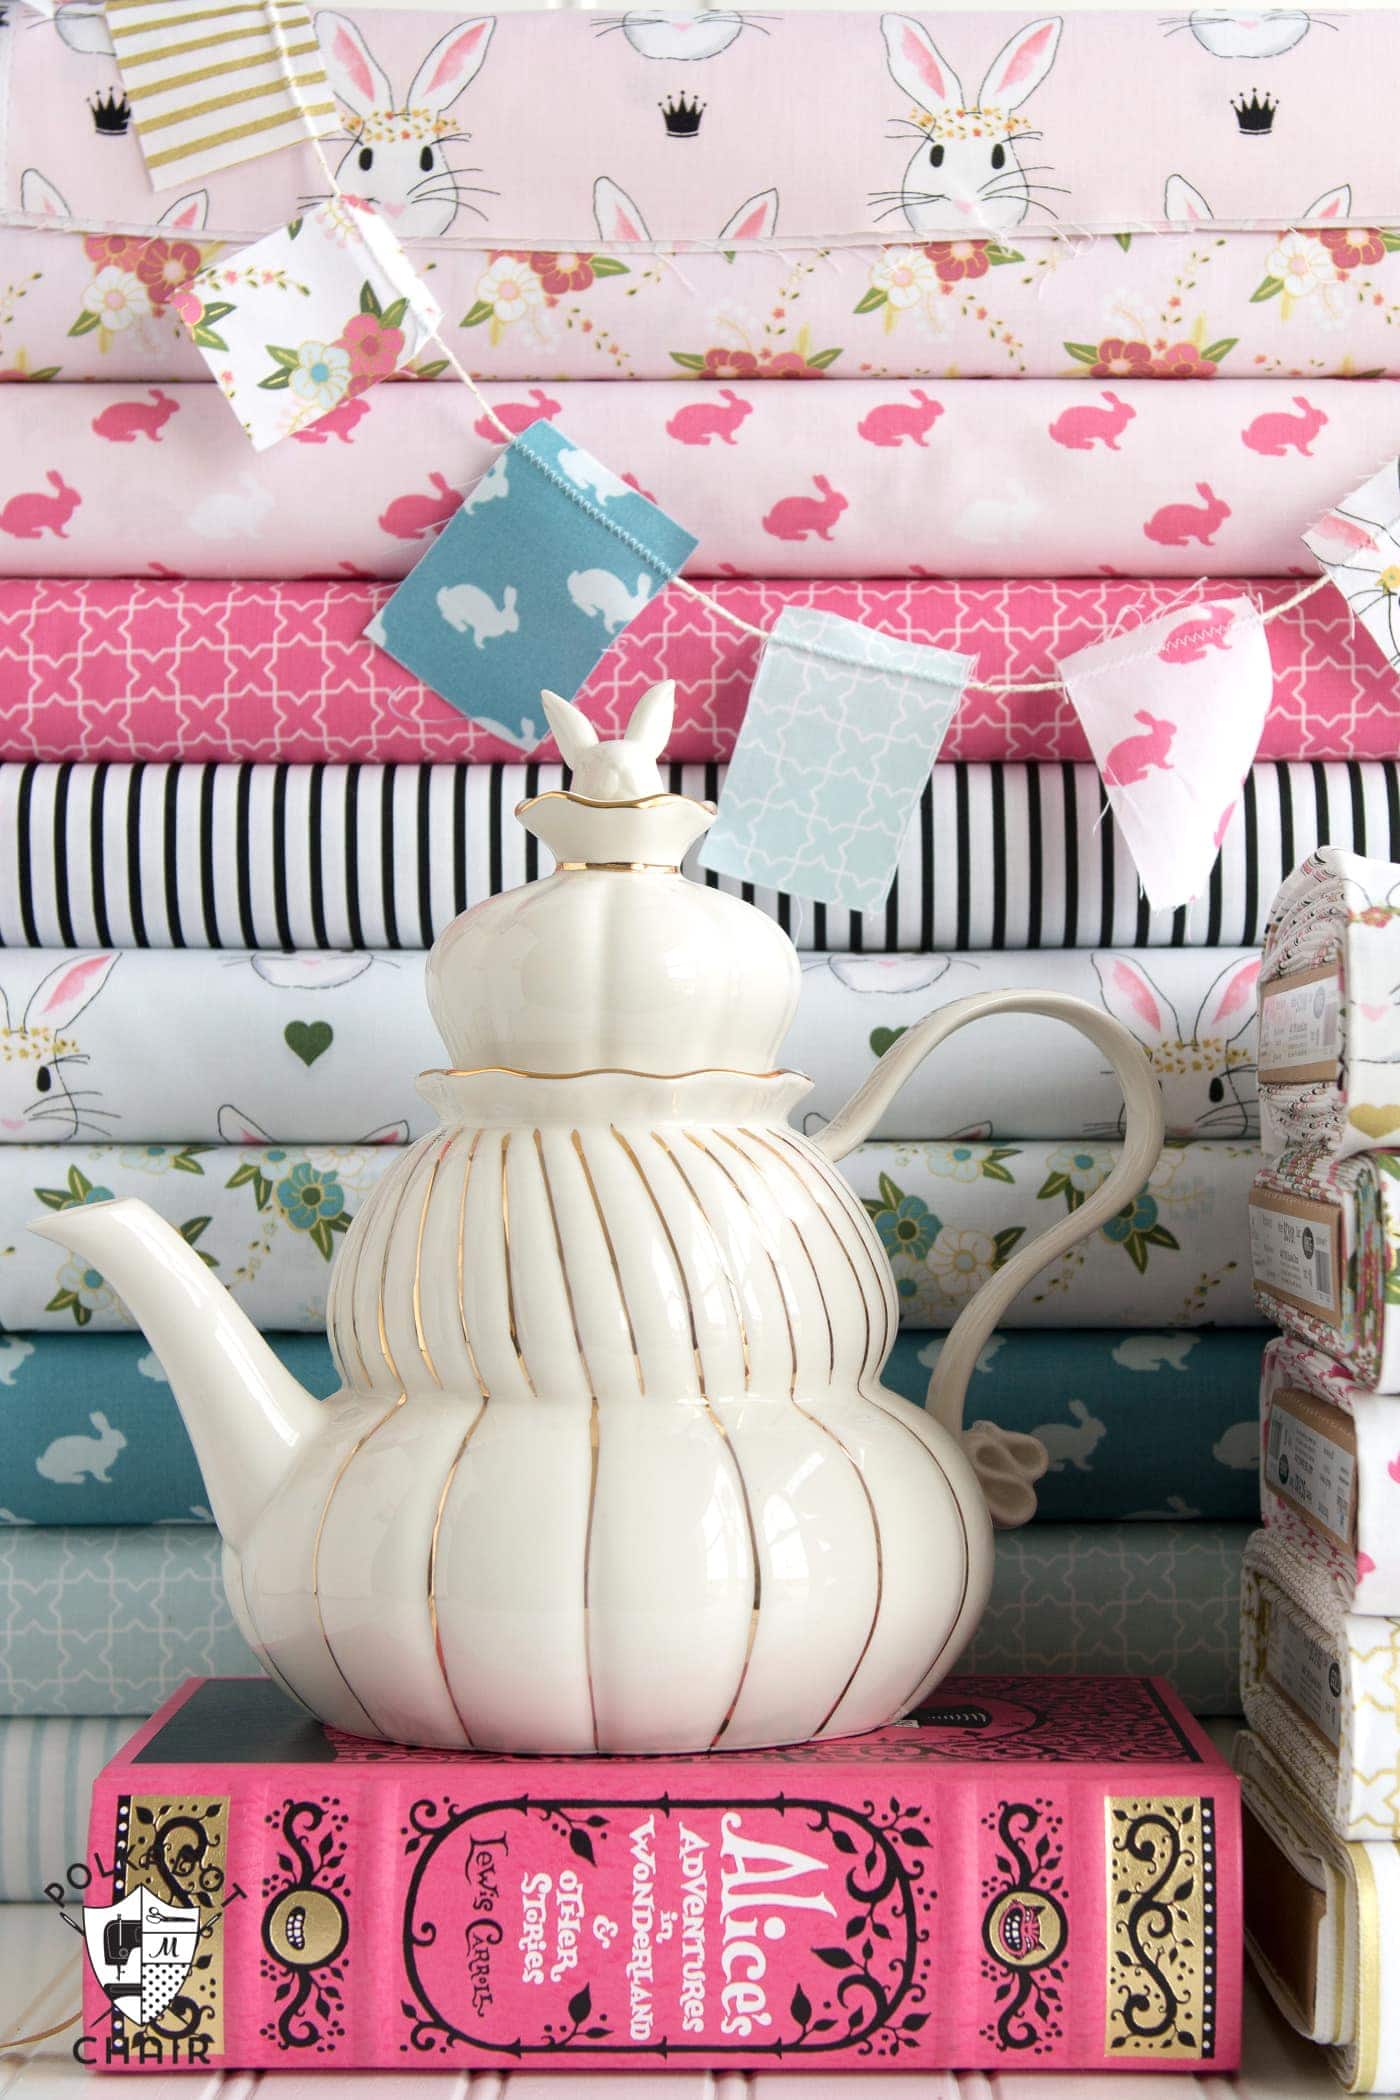
The gray fabric is Iron Confetti Cotton Solid by Riley Blake Designs. The center bunny fabric is from my Wonderland collection, and the small floral print is from my Fox Farm collection.
Twelve Inch Sawtooth Star Quilt Block Pattern
Equipment
supplies
- 1 Fat Quarter Fabric For Block Center
- 1 Fat Quarter Fabric For Star Points
- 1 Fat Quarter Fabric For Background
Supplies are listed in commonly sold units of fabric. You will not need an entire Fat Quarter for each portion of the block. This project is great for left over pieces from a 10" precut stack or for using fabrics from your scrap bin.
Instructions
Cutting:
- From Center Fabric (Pink): Fabric A1 piece 6 1/2” x 6 1/2”
- From Background Fabric (Gray): Fabric B4 pieces 3 1/2” x 6 1/2”4 pieces 3 1/2” x 3 1/2”
- From Star Points Fabric: (Pink): Fabric C8 pieces 3 1/2” x 3 1/2”
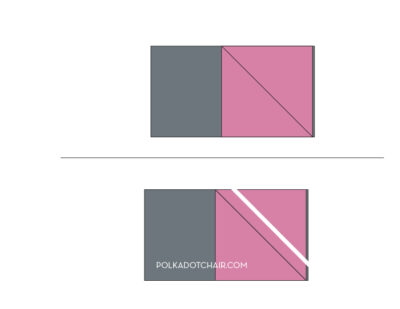
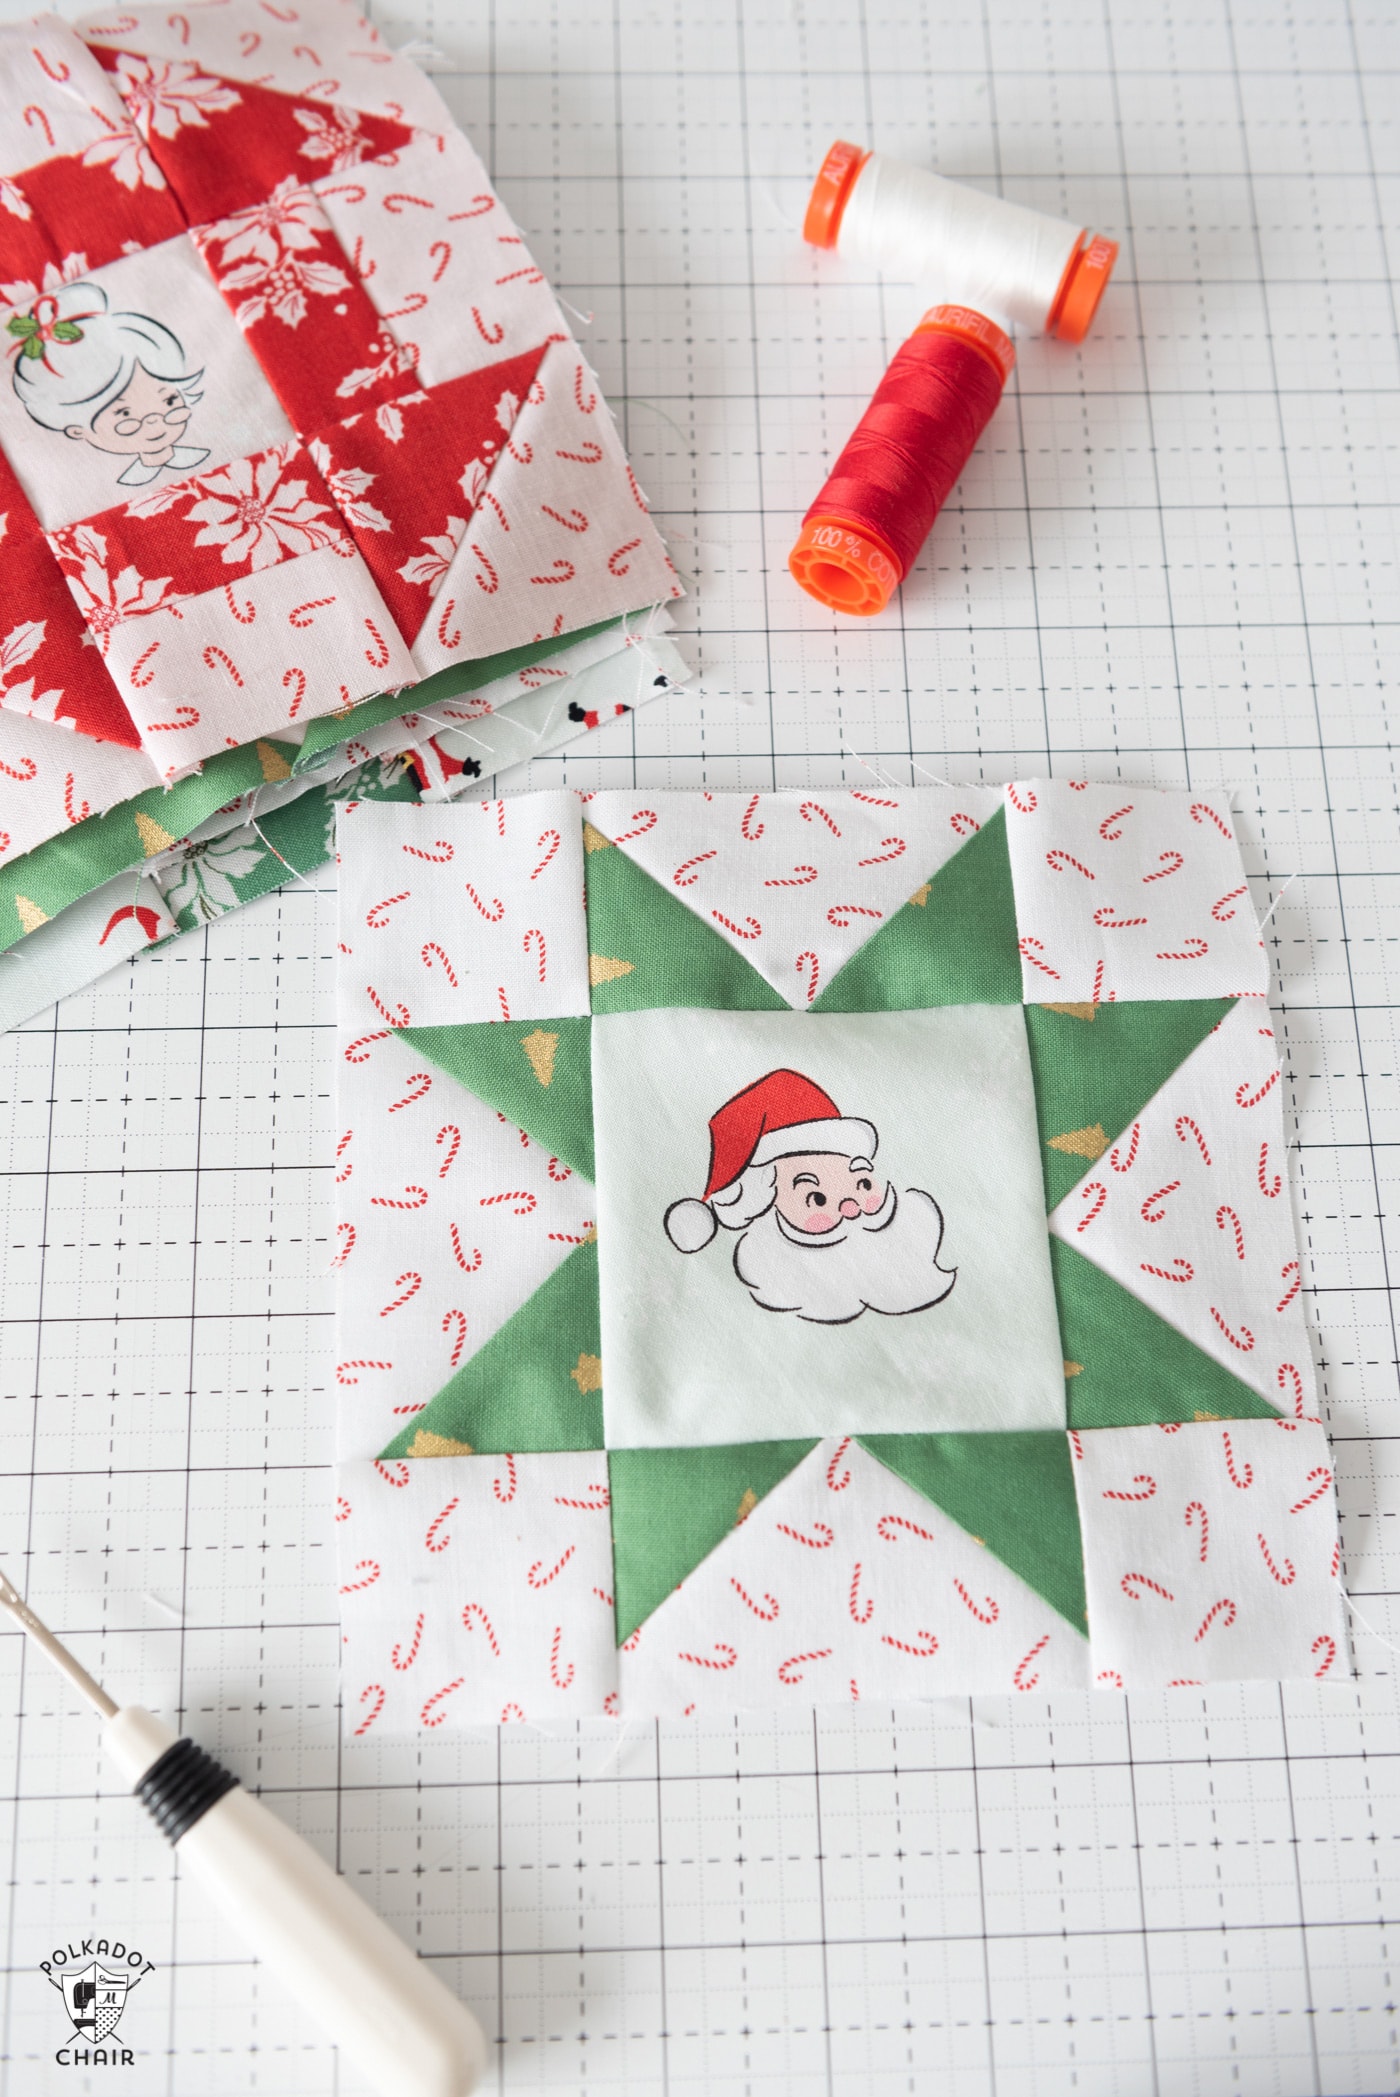
Step One: Construct Flying Geese Units for Star Points
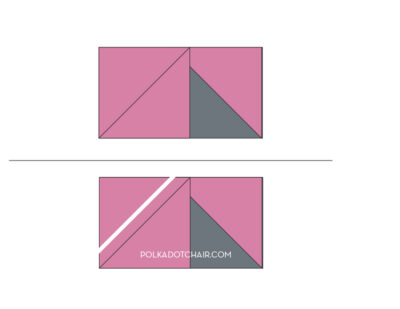
- Draw a diagonal line on the wrong side of your 3 1/2” x 3 1/2” Fabric C pieces.
- Place one 3 1/2” x 3 1/2” piece of Fabric c on top of one of the 3 1/2” x 6 1/2” pieces of Fabric B as shown in the diagram.

- Sew along the drawn line.
- Trim 1/4” on the outside of the sewn line. Flip the fabric up and press.
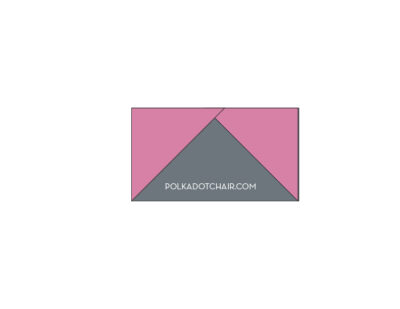
- Repeat with another 3 1/2” x 3 1/2” piece of Fabric C on the other side of the unit.
- Repeat three more times so that you have four sewn units.
Step Two: Assemble Block
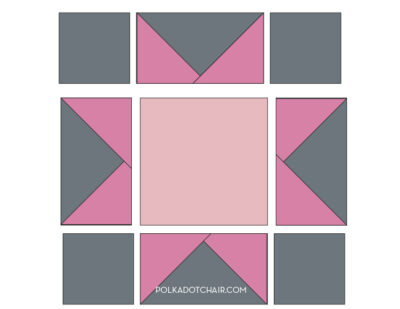
- Sew the following pieces together in order, as shown in the diagram.
- Row 1;: 3 1/2” x 3 1/2” Fabric B, Unit from Step One, 3 1/2” x 3 1/2” Fabric B
- Row 2 Step One Unit; 6 1/2” x 6 1/2” Center Square; Step One Unit
- Row 3: 3 1/2” x 3 1/2” Fabric B, Unit from Step One, 3 1/2” x 3 1/2” Fabric B
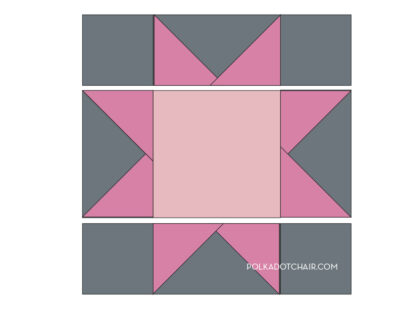
- Press the seams of Rows 1 and 3 away from the center. Press the seams of Row 2 towards the center. Sew rows together as shown.
- Trim and square up to 12 1/2” x 12 1/2”
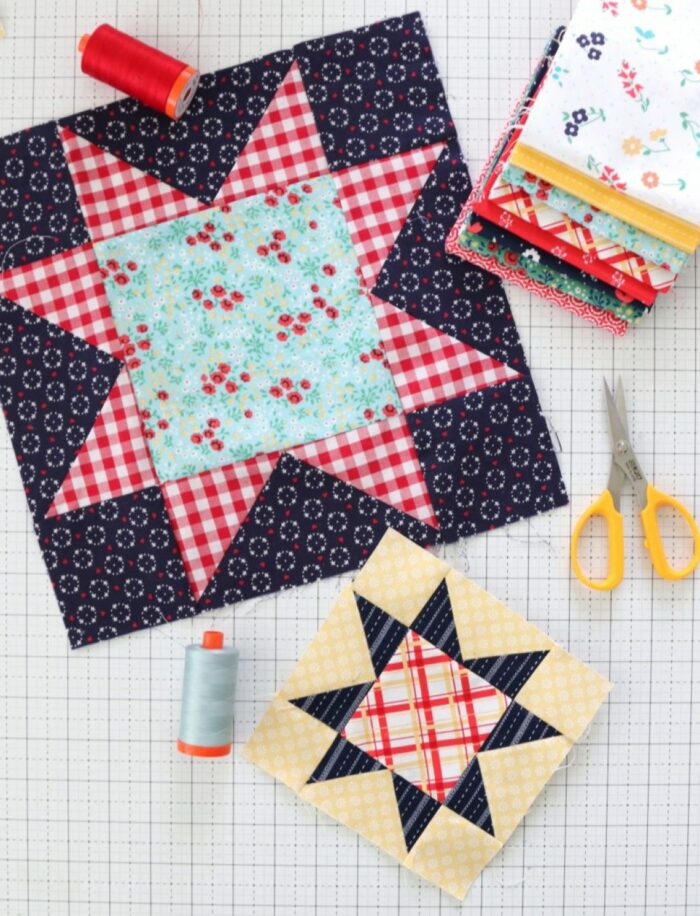
What Can I Make with a Sawtooth Star Quilt Block?
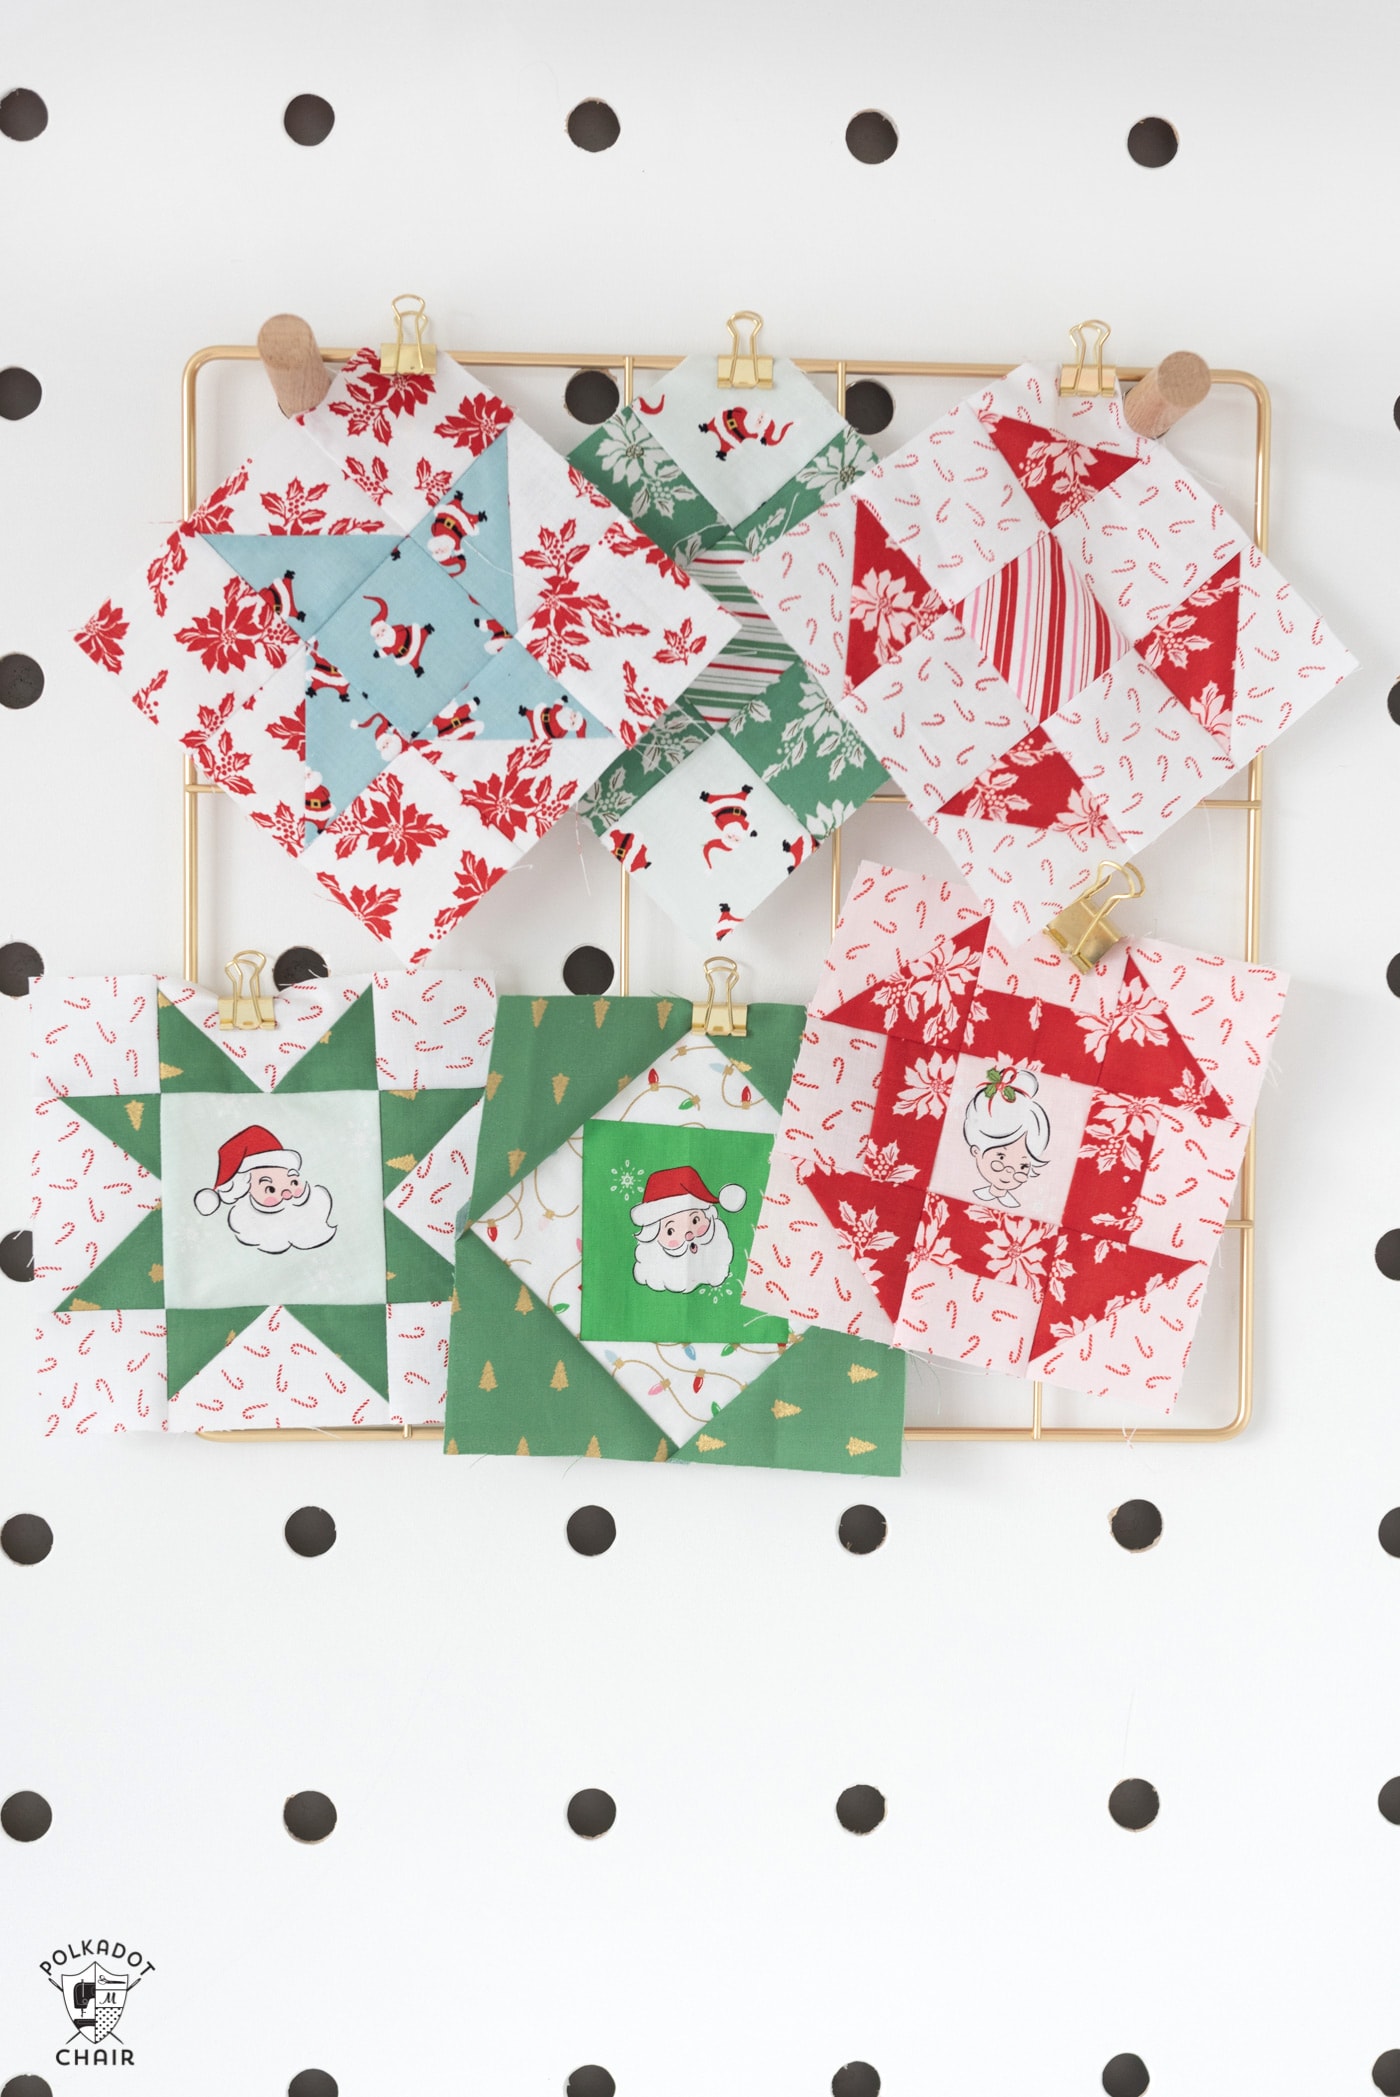
If you’re new here, I’m slowly working on making a sampler quilt with each block, a monochromatic color scheme, and gray background fabrics.
I have yet to decide on a final layout or number of blocks, but I will share both with you when I’m done.
In the meantime, if you’re looking for ideas for leftover quilt blocks (or single blocks), I have a complete list of Orphan (or Leftover) Quilt Block Projects.

More Twelve Inch Quilt Block Patterns
- Churn Dash Quilt Block
- Log Cabin Quilt Block
- Friendship Star Quilt Block
- Economy Block
- Shoo-Fly Quilt Block
- Bear Paw Quilt Block
- Maple Leaf Quilt Block
- Maple Star Quilt Block
- Nine Patch Quilt Block
- Turnstile Quilt Block
- Sawtooth Star Quilt Block
- Bow Tie Quilt Block
- Ohio Star Quilt Block
- Pinwheel Star Quilt Block
- Basket Quilt Block
- Heart Quilt Block
- Rail Fence Quilt Block
- Annie’s Choice Quilt Block
- Butterfly Cross Quilt Block
After I’ve finished sharing the patterns for the 12″ blocks, I’ll share additional patterns for 9″ and 6″ blocks. Here are some of the 6″ blocks I’ve created so far; don’t worry, all of the patterns for these blocks will be released this year on our site.

I’m going to Hopefully take June 6 – 14 off for Vacation to get away from the mad hose at work ( Lowe’s ) I have a line out the door just for returns and internet pickup ( this starts at 6am in the morning ).
Thank you
Nancy