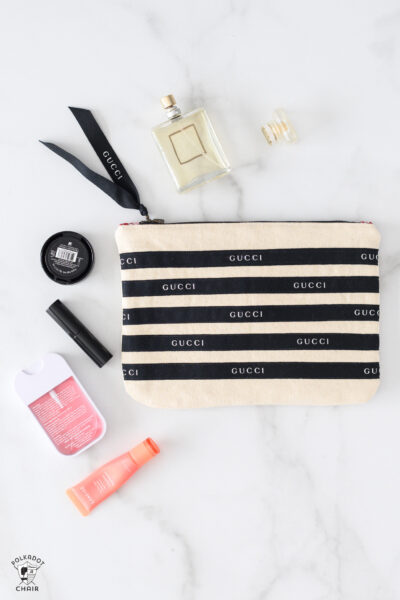
How to Upcycle Designer Ribbon into a Beautiful Zip Pouch; a Sewing Pattern
Upcycle ribbon saved from a special gift into a beautiful zip bag with our free designer ribbon zip bag sewing pattern.
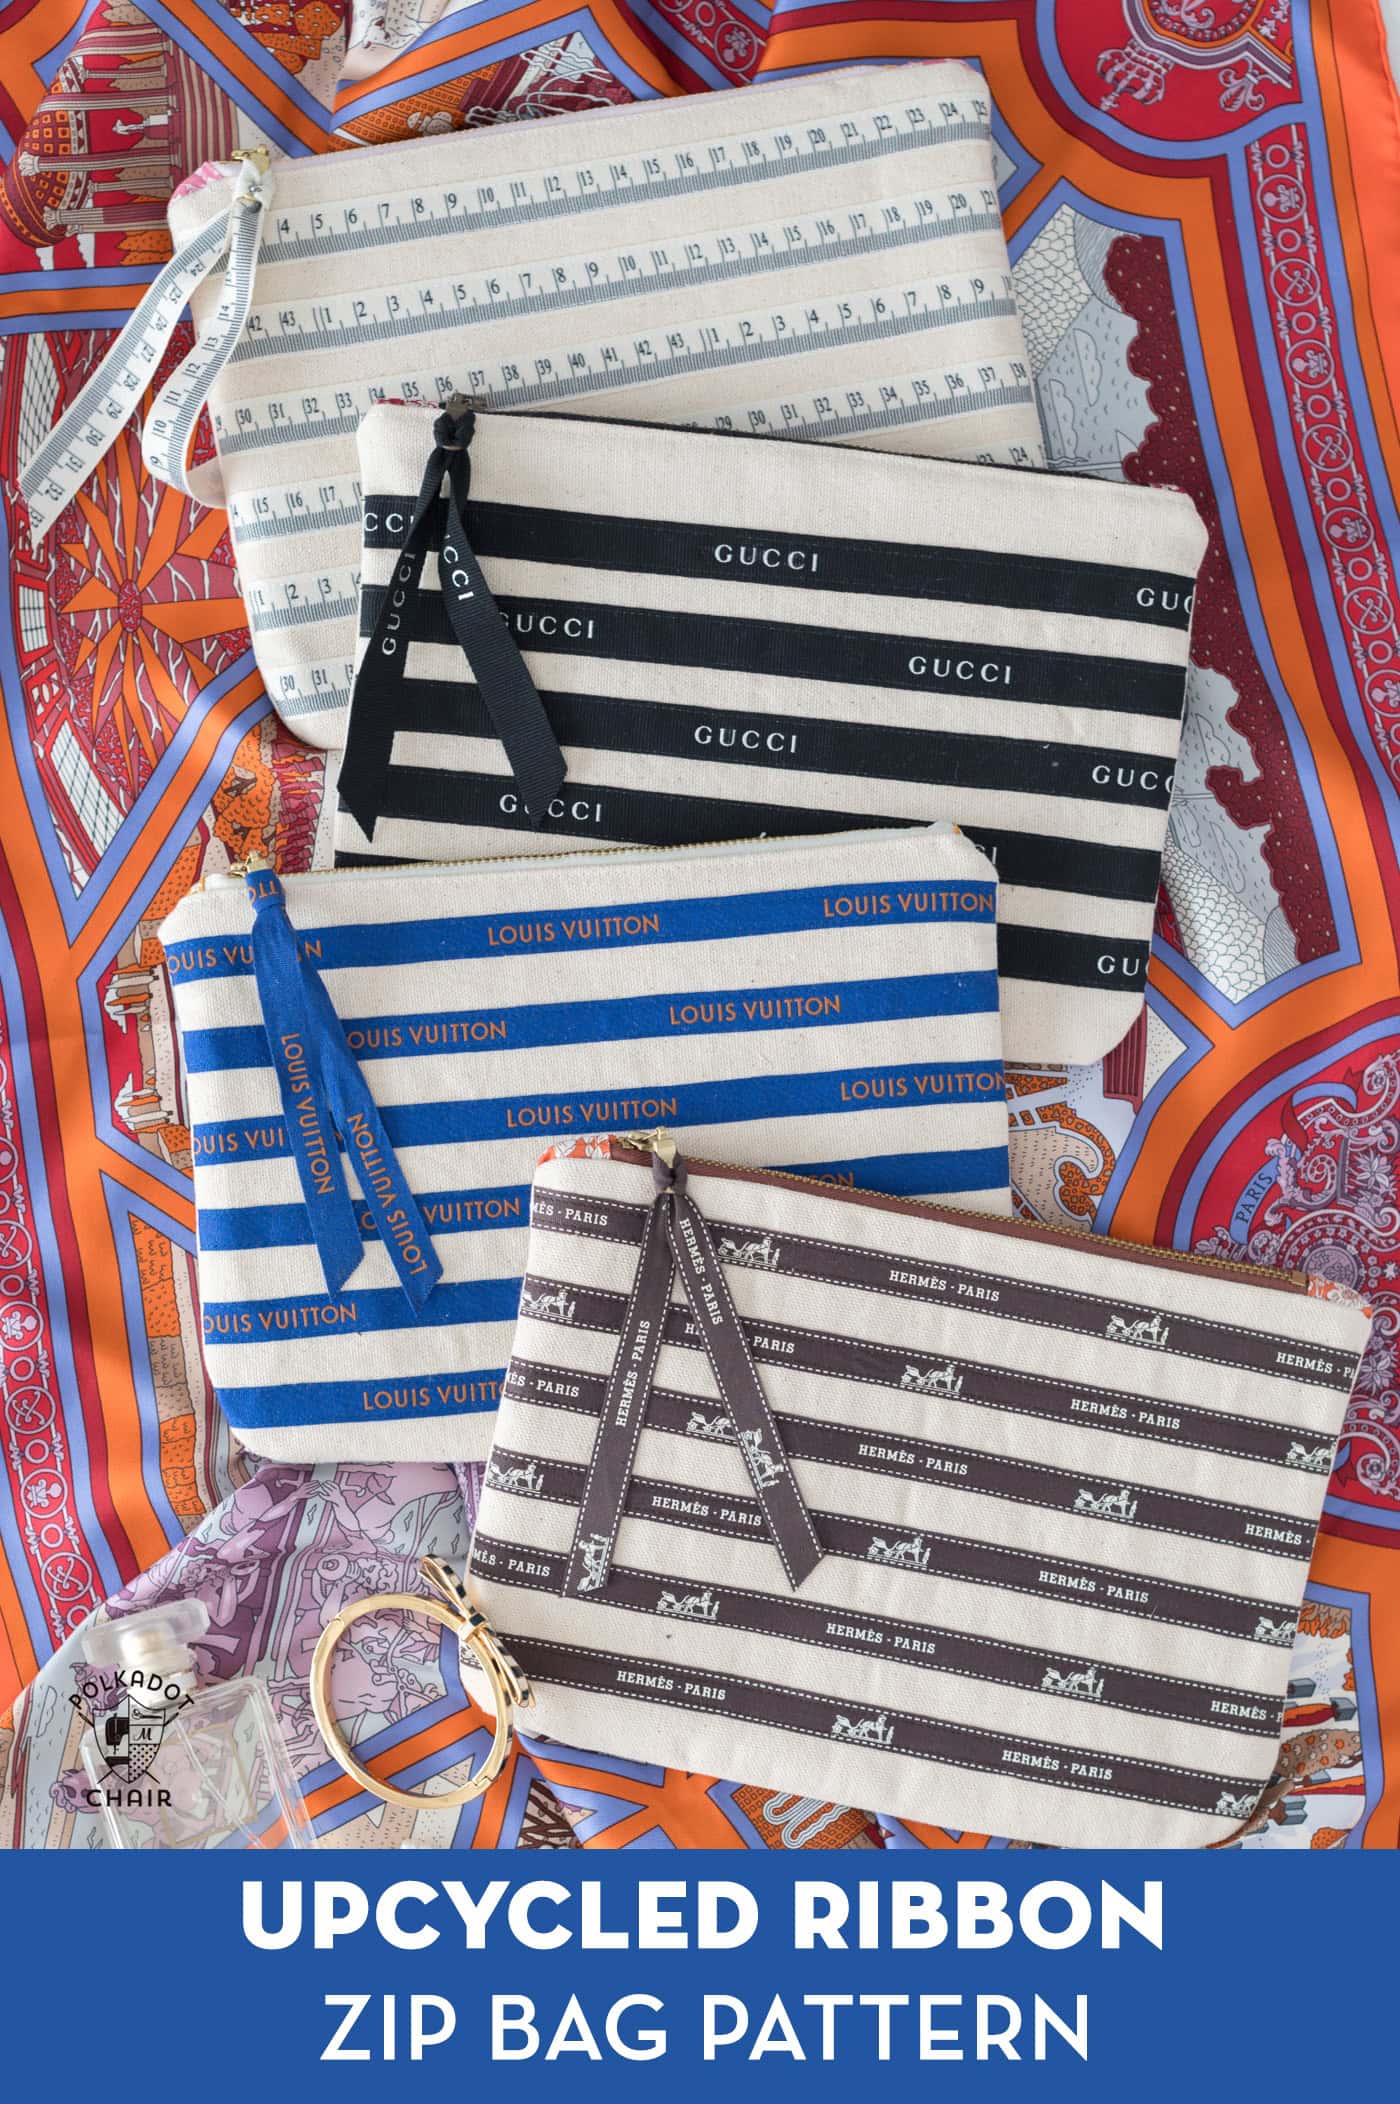
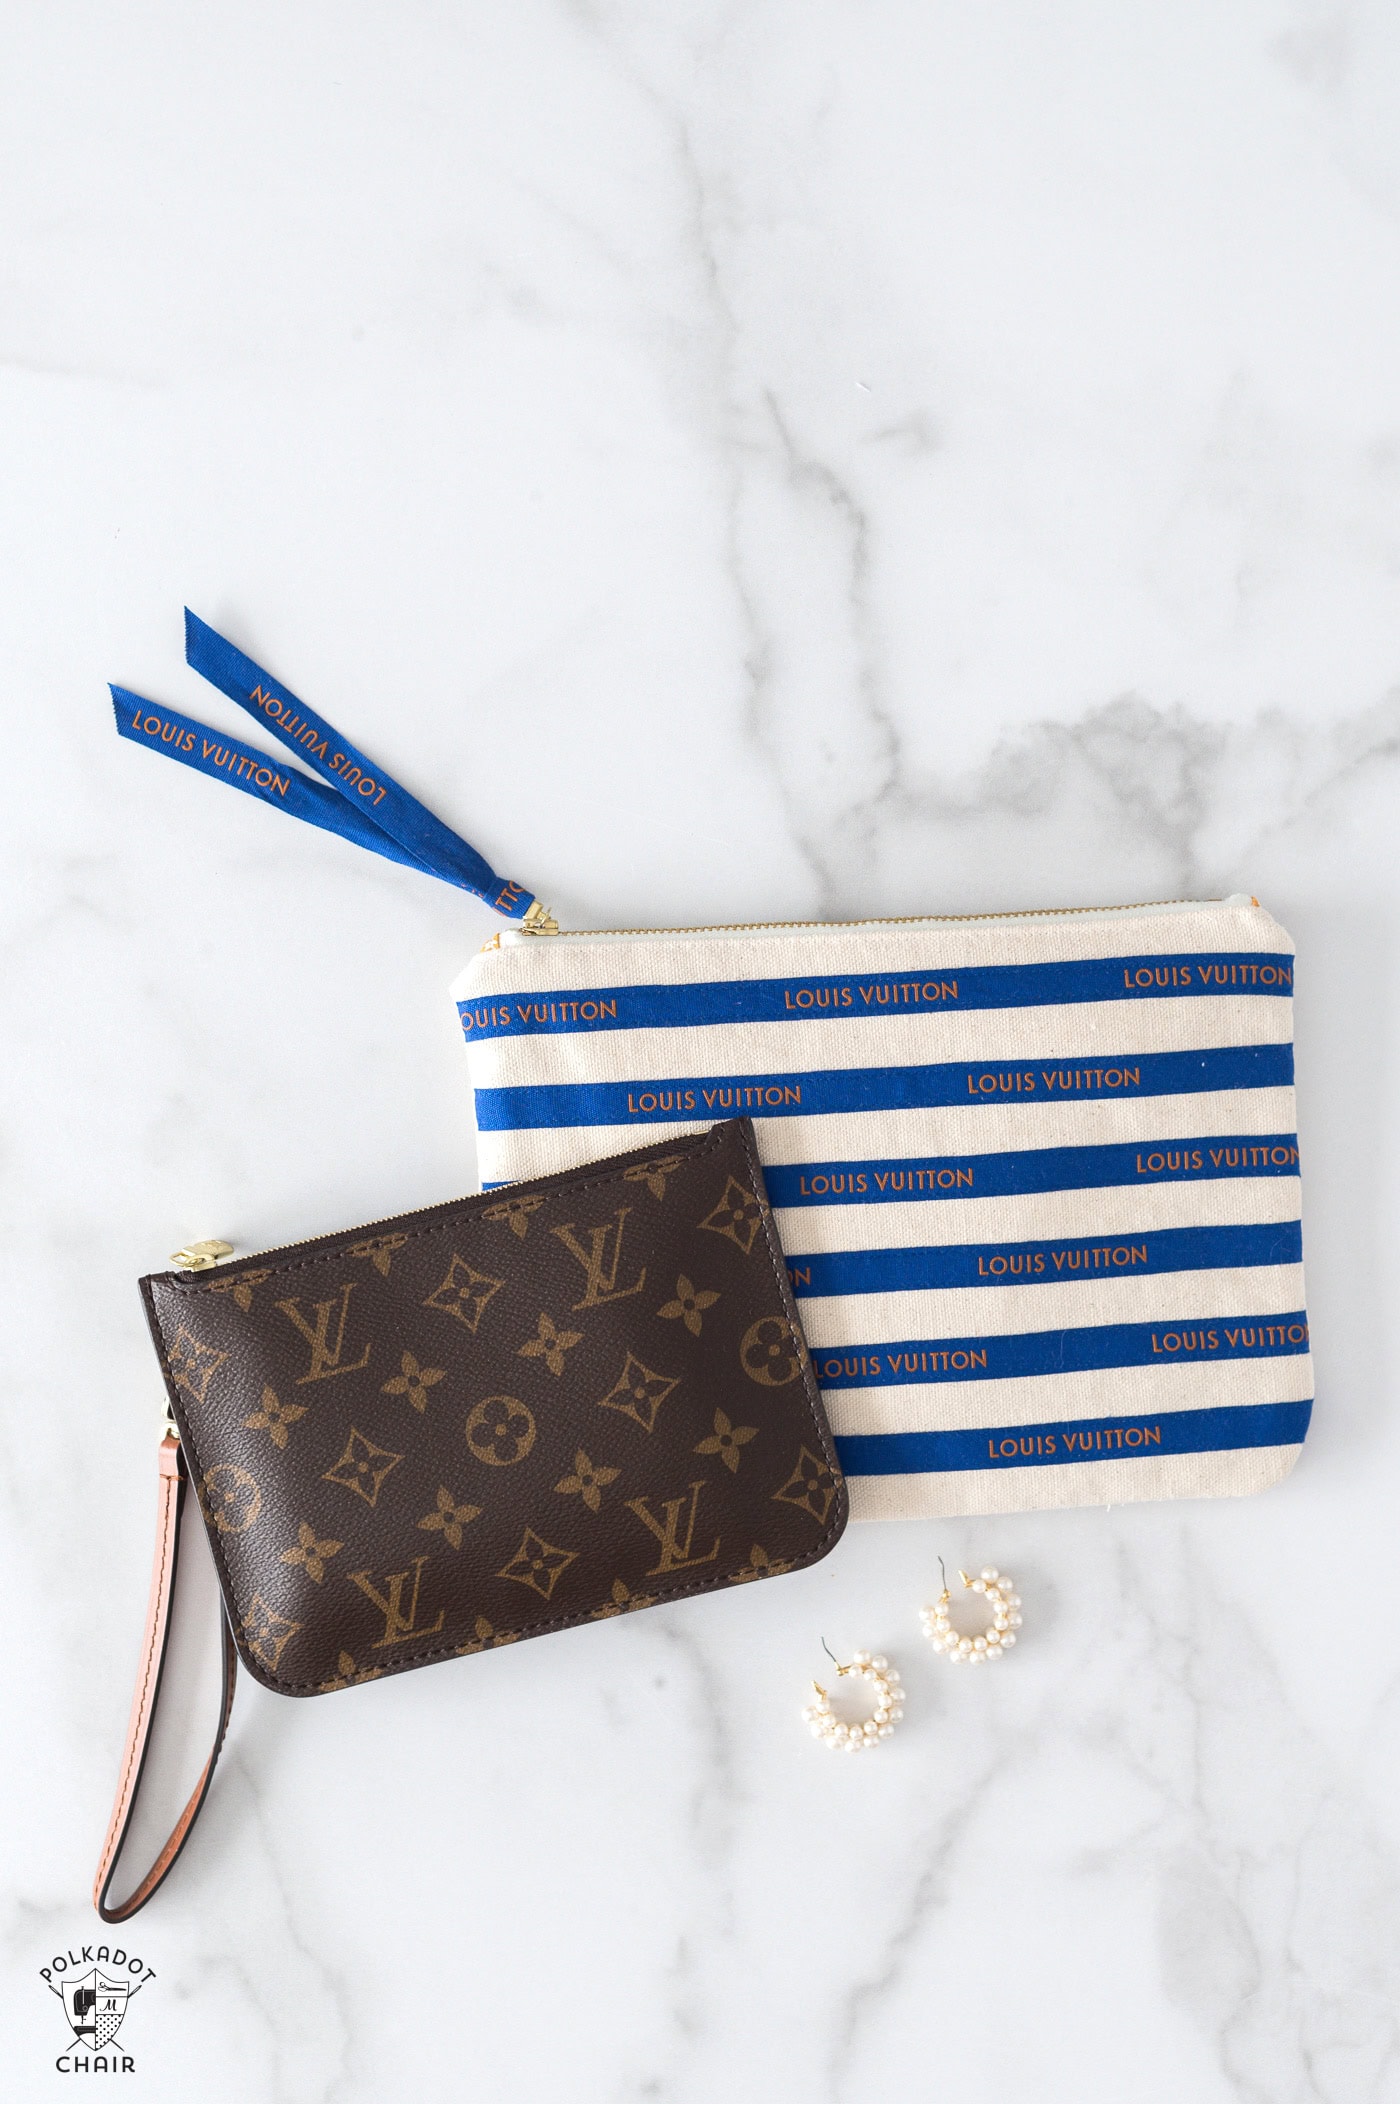
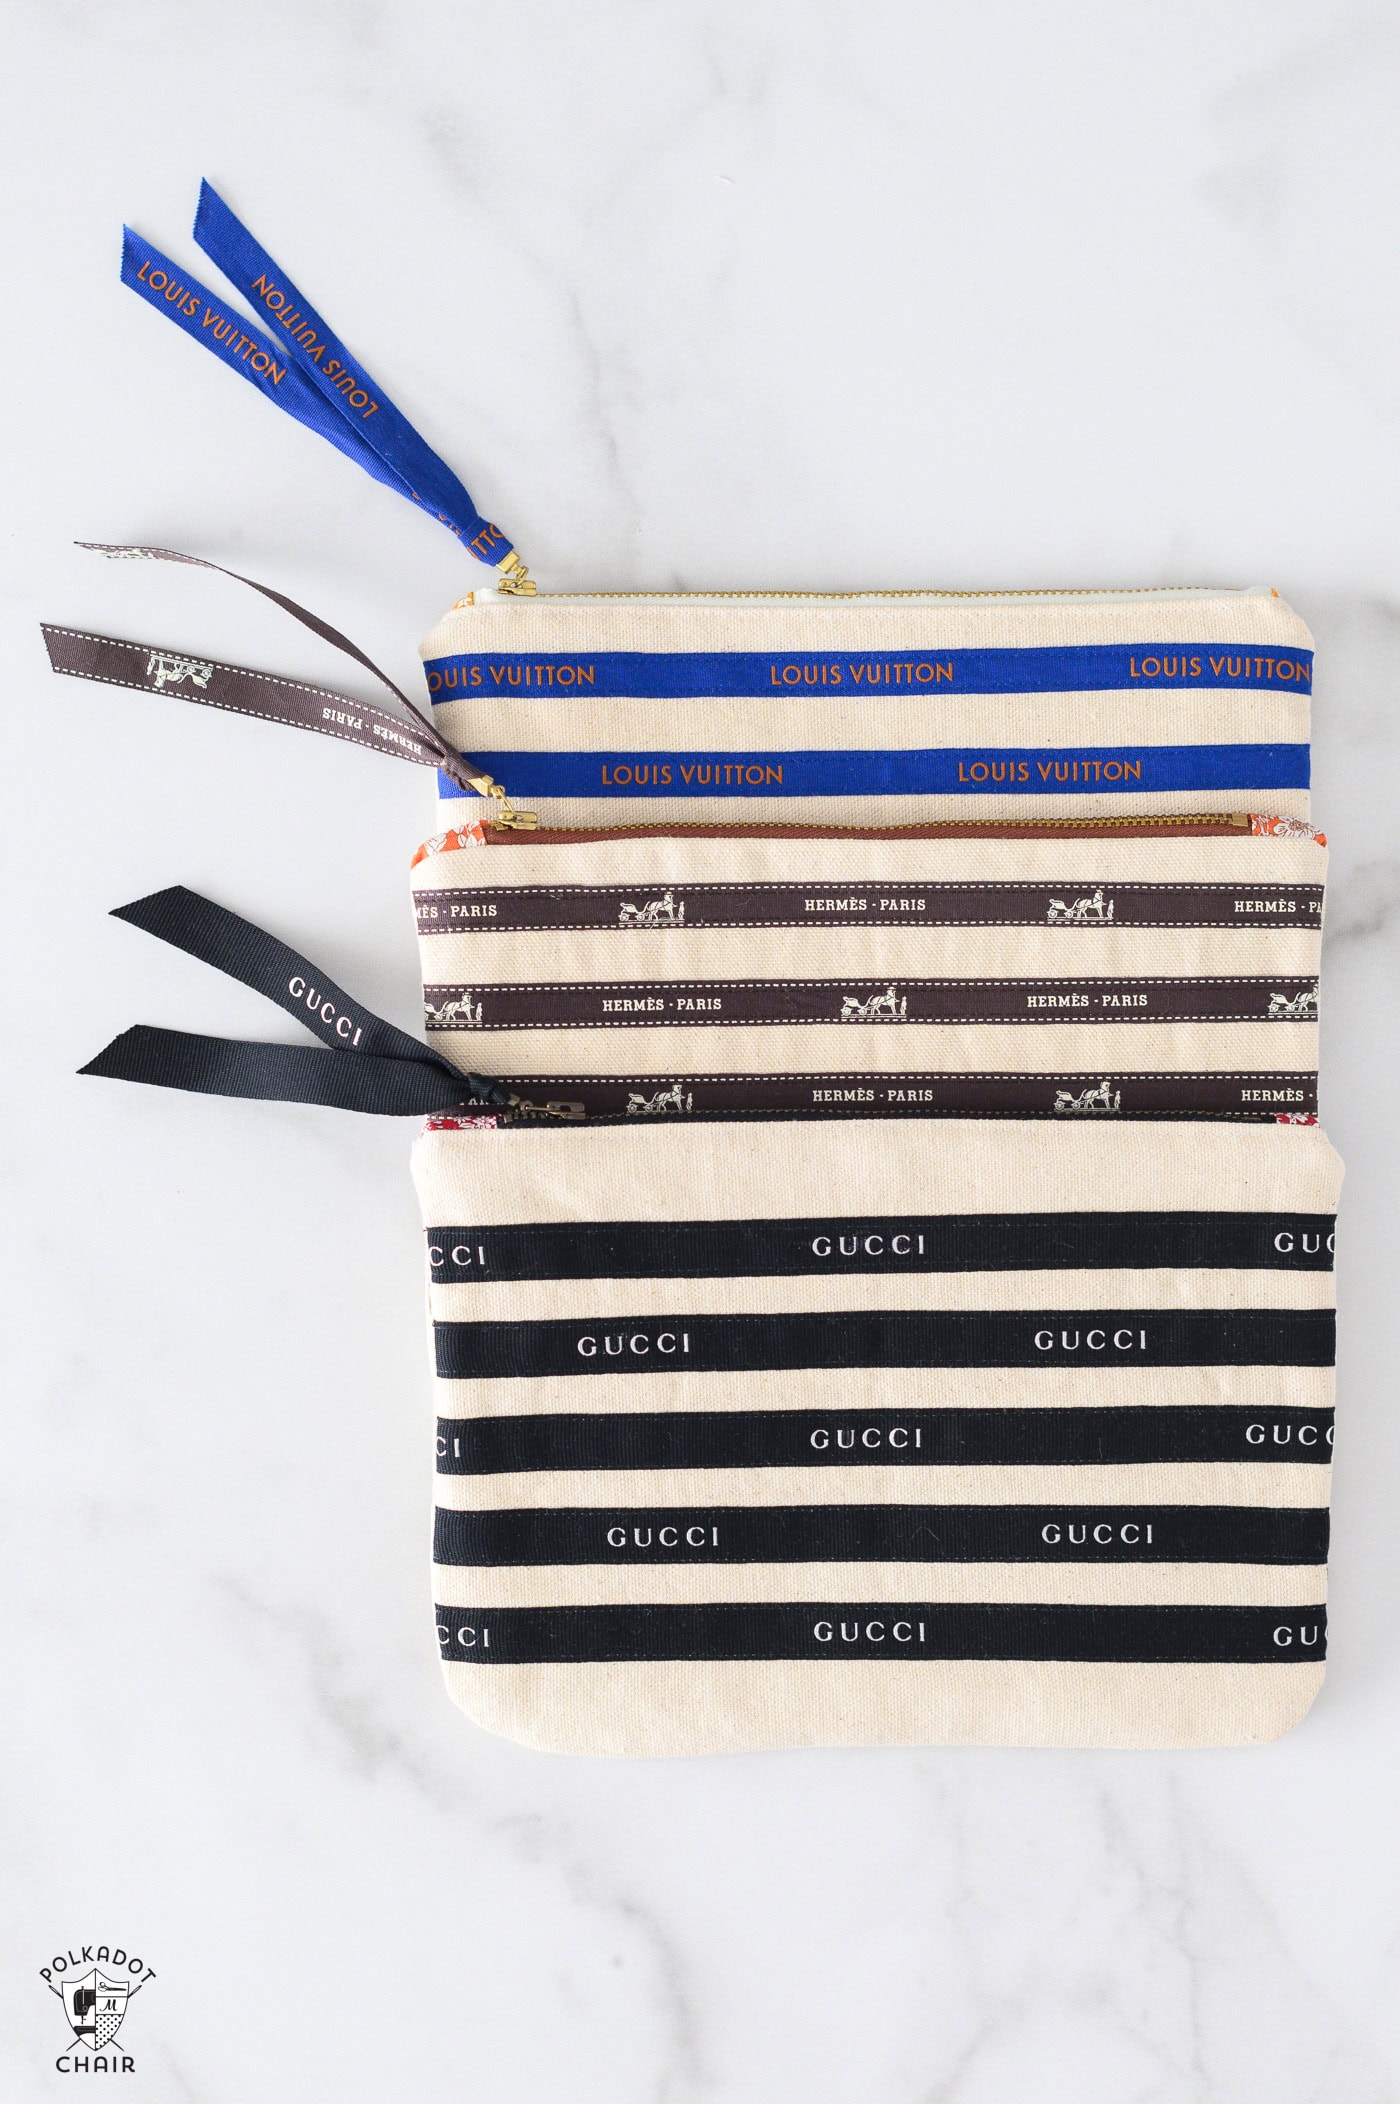
Have you ever received a gift wrapped in a beautiful or unique ribbon that you loved so much that you didn’t want to throw it away but didn’t know what to do with it?
Why not turn the saved ribbon into a useful and beautiful zippered pouch?
This project is a great way to use the ribbon you’ve saved from a special gift or occasion (how cute would this be with ribbon saved from a wedding?).
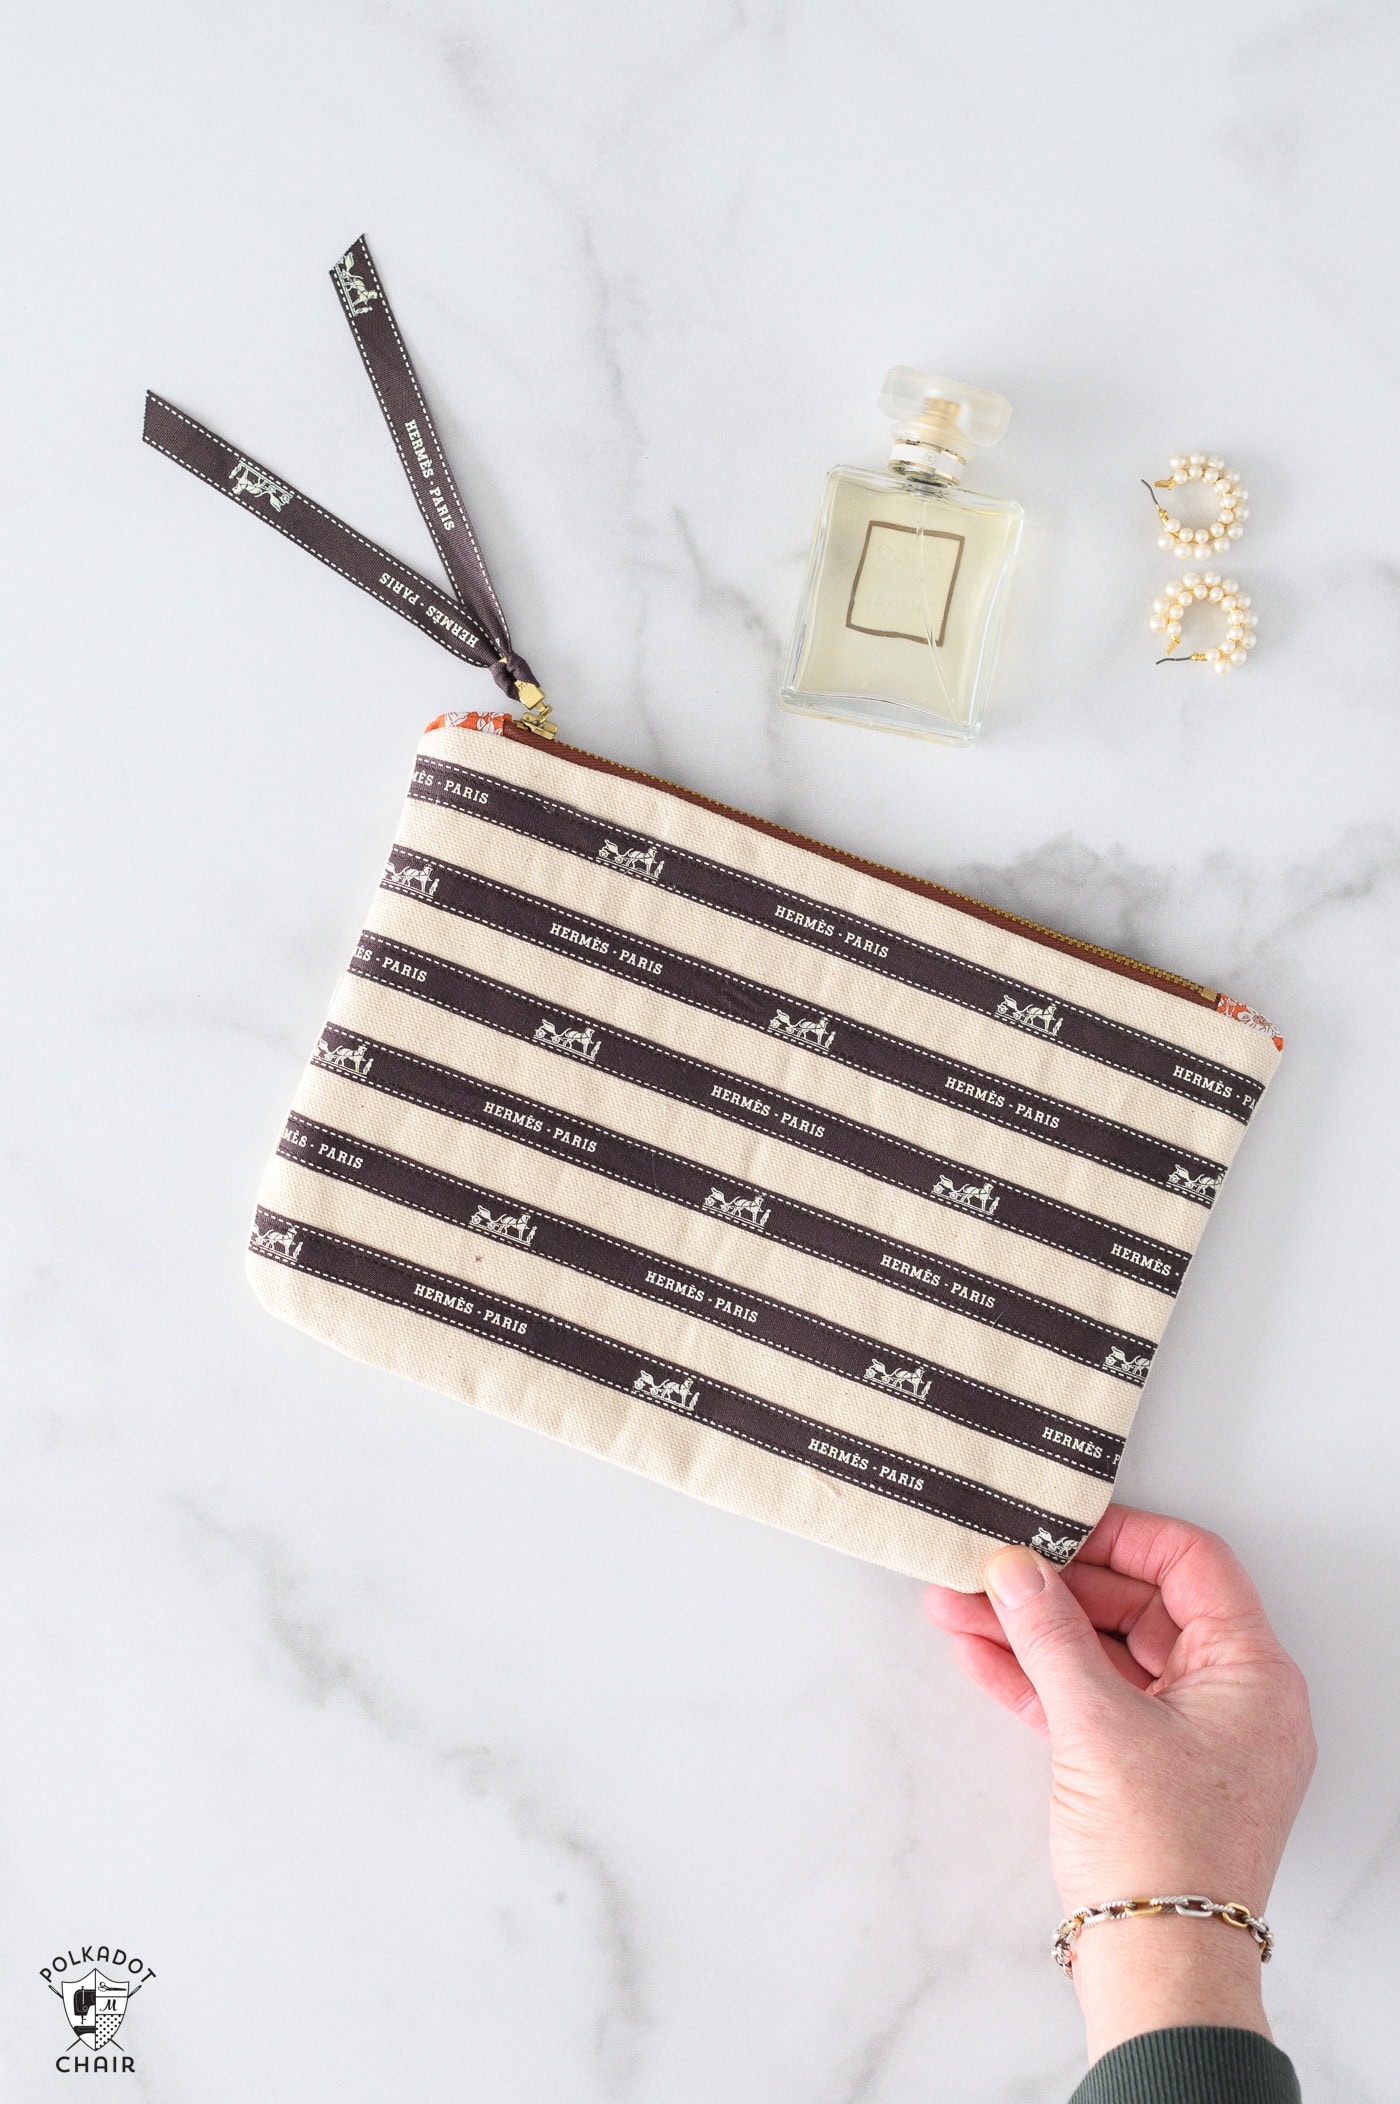
I admit that I love a “bougee” gift (as my kids call them): a beautiful bottle of perfume, a nice pair of earrings, or maybe even a special scarf. Over the years, as I received these unique gifts, I always saved the ribbon that came with them.
Recently, I got the idea to upcycle this ribbon into a practical zippered bag.
If “boujee” gifts aren’t your thing, do not worry! This project is equally as creative, using ANY ribbon that catches your eye.
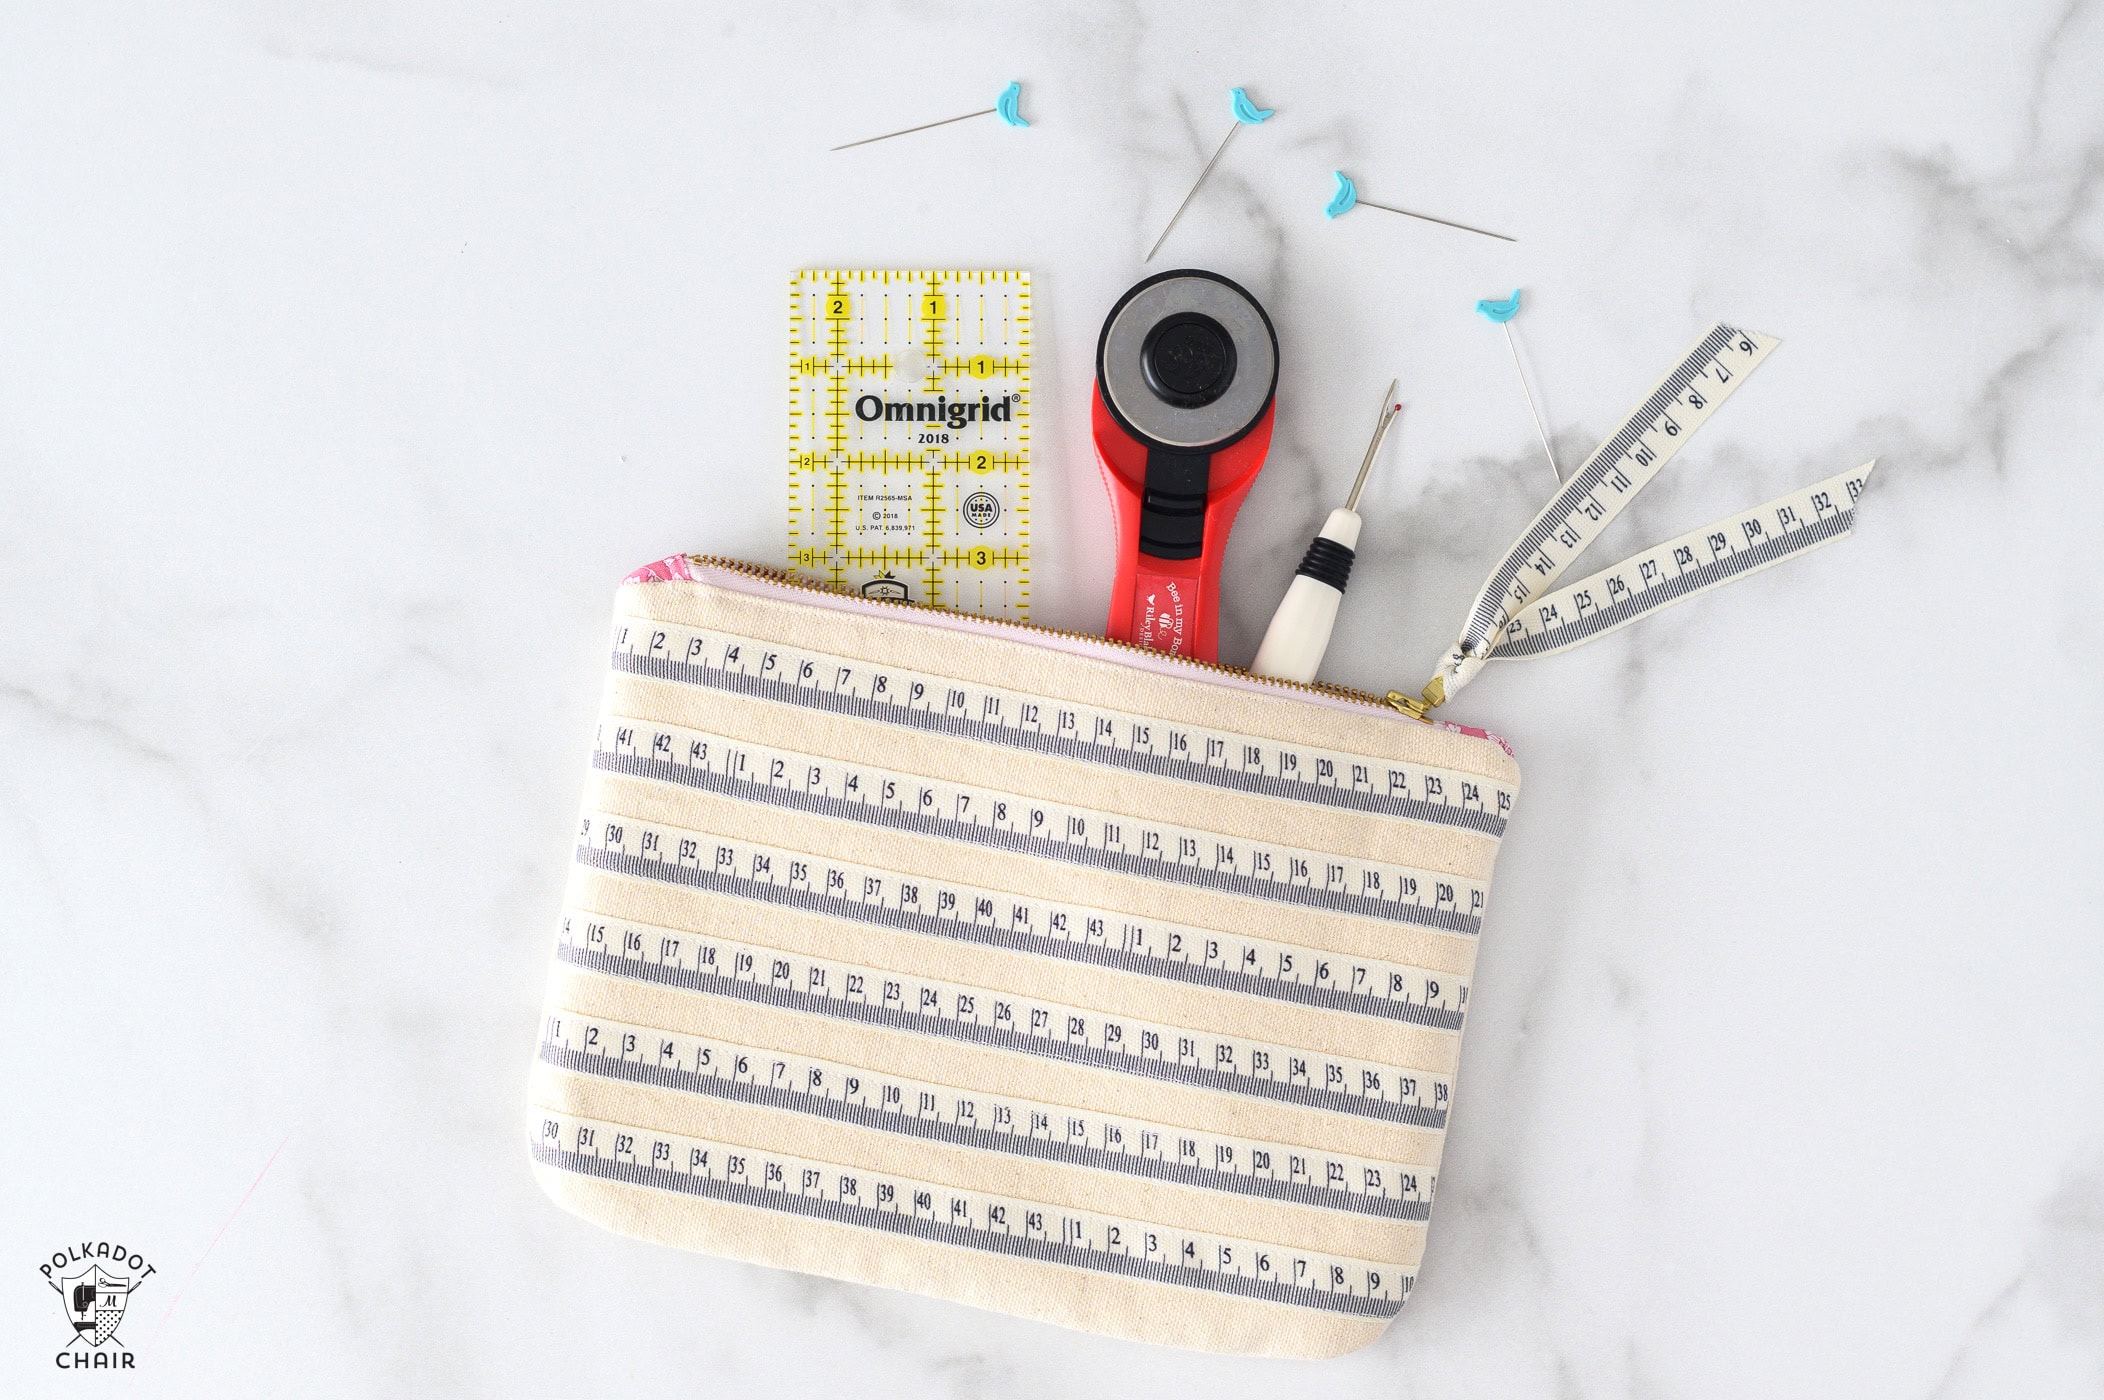
I stitched up a bag with some cute ruler ribbon I found and plan to use it to transport my quilting supplies!
SUPPLY LIST
If you’d like to make a bag like this, here’s what you’ll need:
- 2-3 yards 1/2” wide Ribbon (saved from a gift, OR this ribbon is similar to the ruler ribbon I used)
- 8″ Zipper
- 1/4 Yard Cotton Canvas
- 1 Fat Quarter Fabric for Lining
- Fusible Fleece
- Shape Flex Interfacing
- Corner Round Ruler or Plate/CD to trace round corner
- Fabric Safe Marking Pen
- Glue Pen
- Thread to Match the Ribbon
Video Instructions
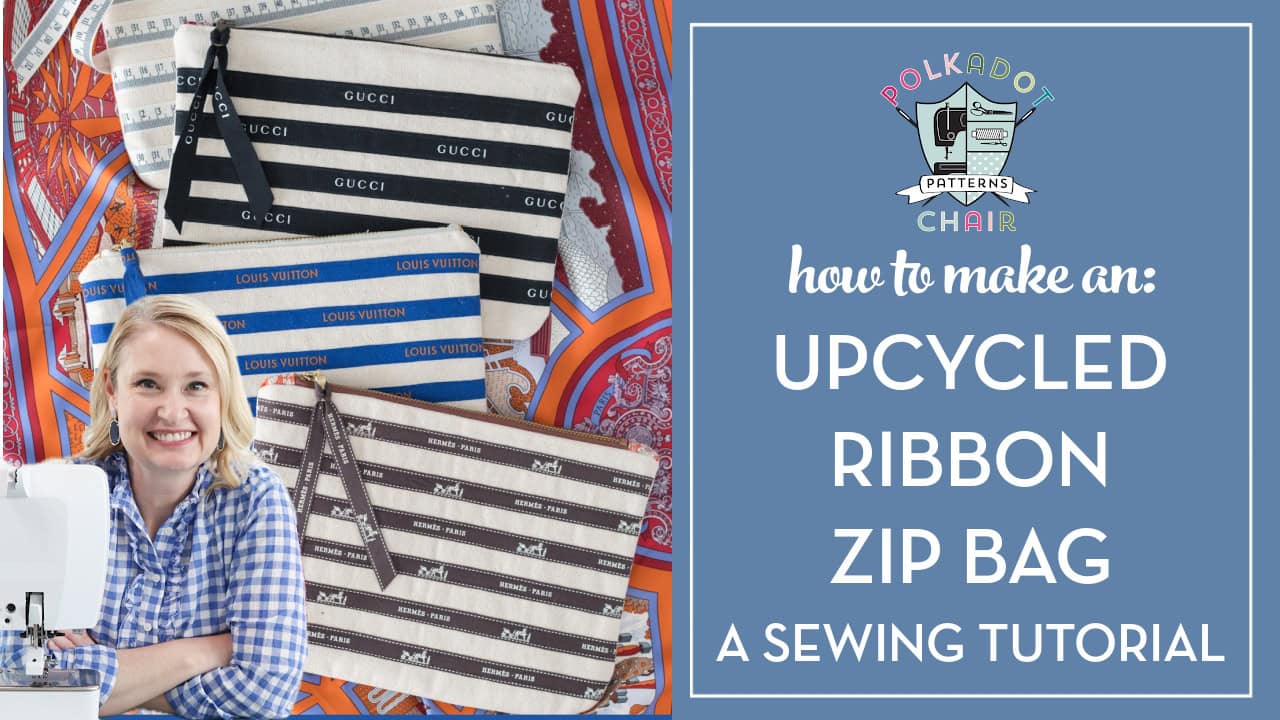
You can find a video walking you through the steps to create this bag on our YouTube channel.
Just a quick reminder: This project, along with all of the projects on our site, is for personal use only and is not meant for commercial use.

Upcycled Designer Ribbon Zip Pouch Sewing Pattern
Equipment
supplies
- 2-3 yards of 1/2" – 1" wide ribbon
- 1/4 Yard Canvas
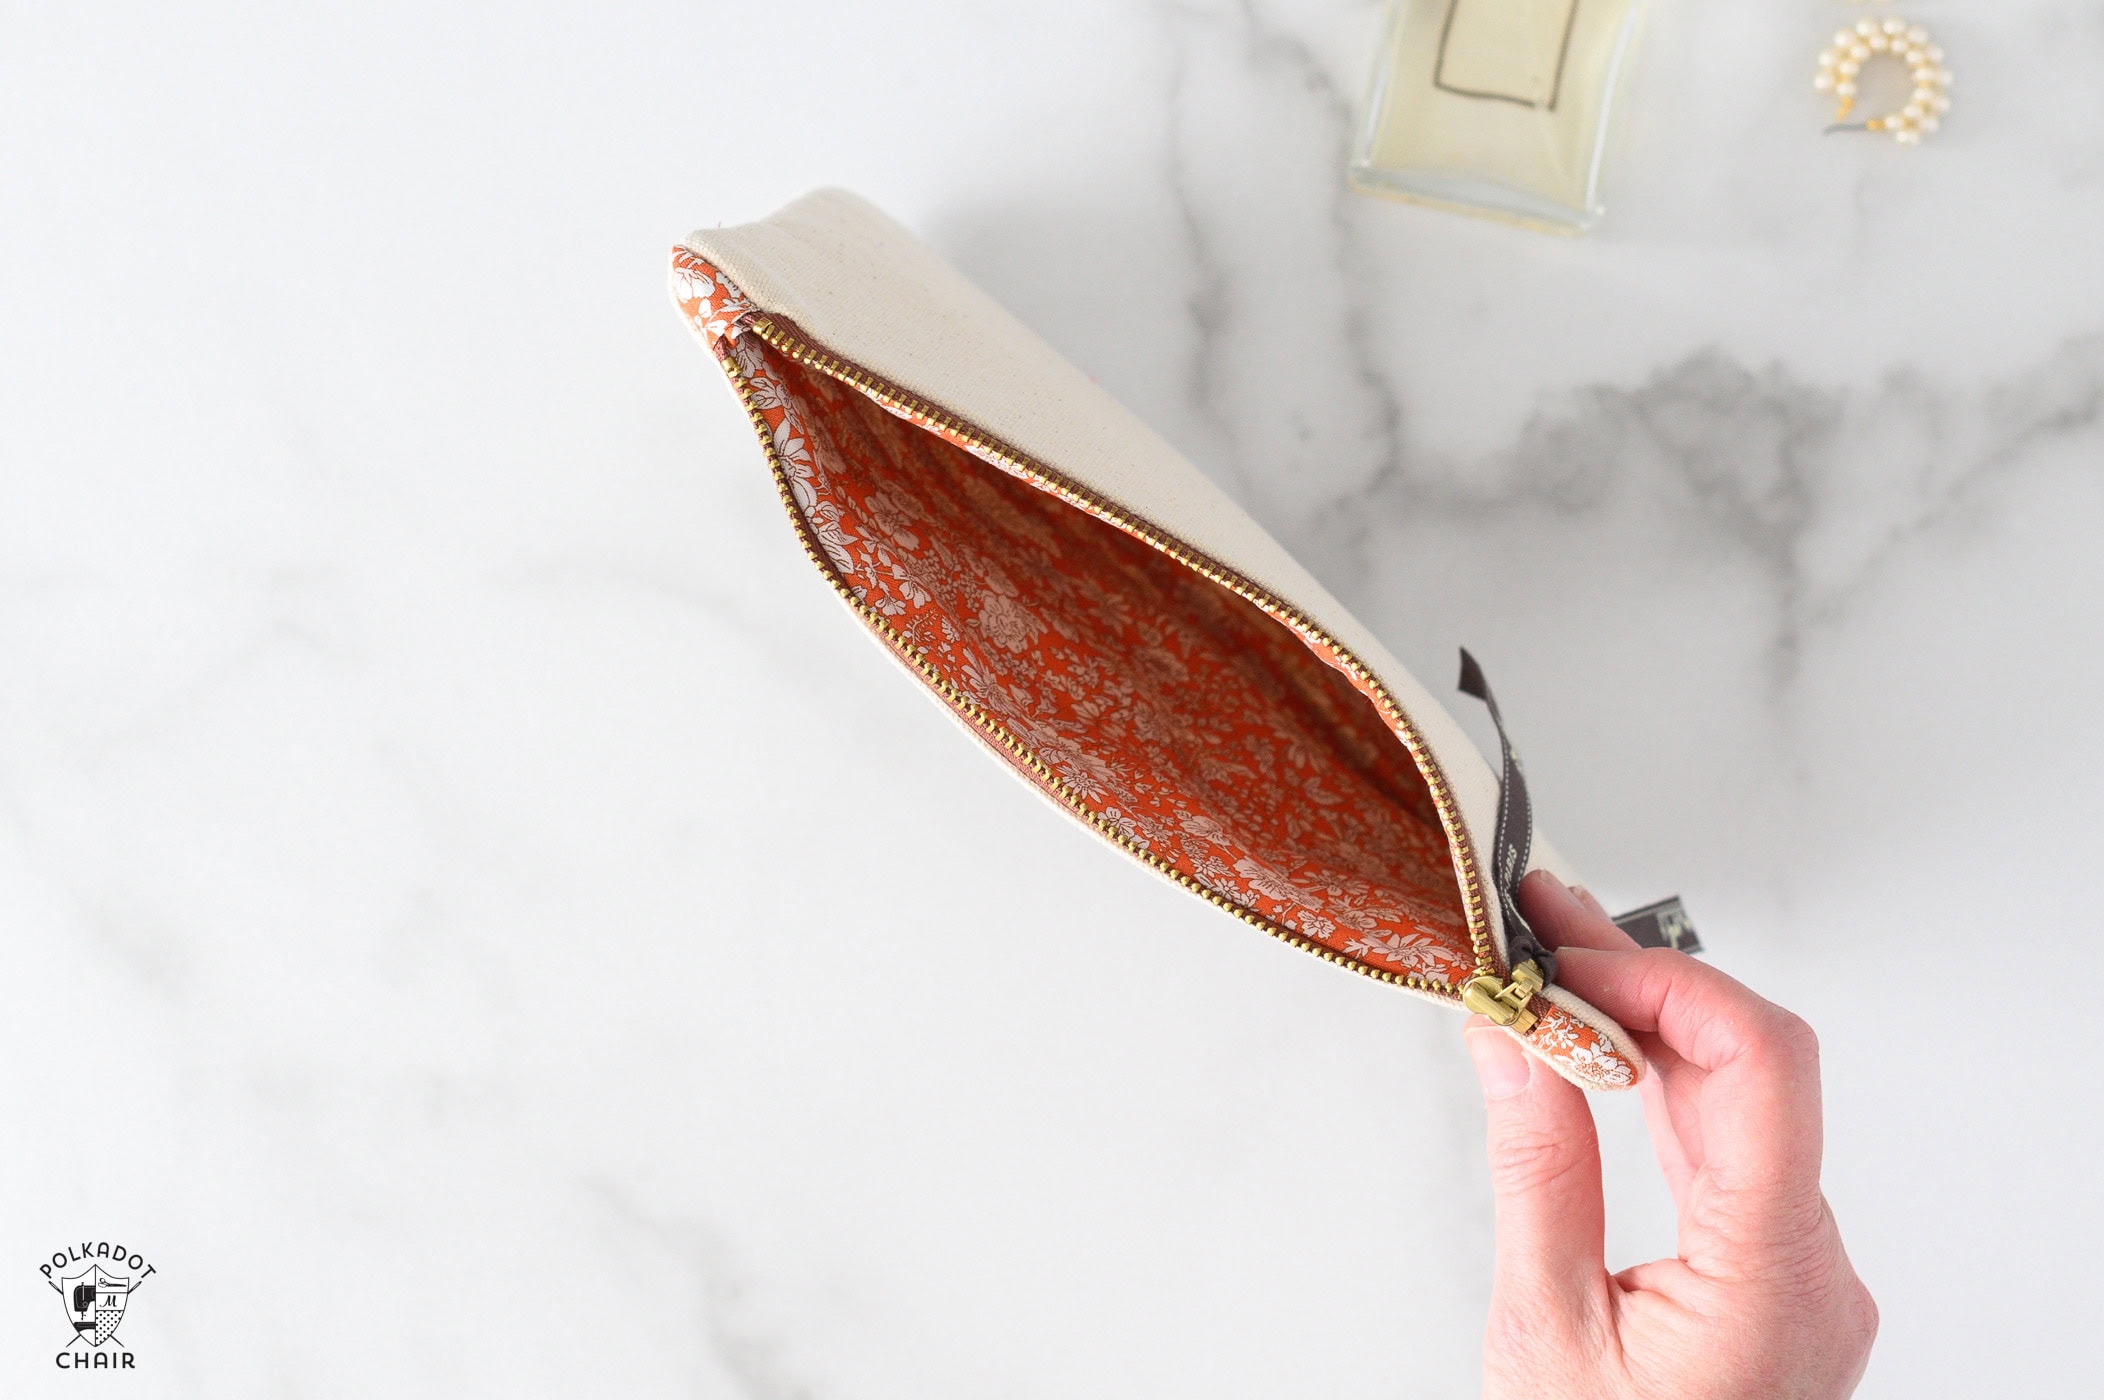
- 1 Fat Quarter Lining Fabric – Liberty Emily Belle
- One 8" Metal Zipper
- 1/4 yard Fusible Fleece 20" wide
- 1/4 Yard Shape Flex Interfacing 20" wide
- Thread to Match the Ribbon
Instructions
Before You Begin:
- Many ribbons are NOT heat safe or include logos/overlays that are not heat safe. For this reason, I recommend using a pressing cloth for all pressing steps of this process. Do not touch the iron plate directly to the front of the ribbon.
Cutting Directions
- From Cotton Canvas Cut: 2 pieces: 7 1/2” x 10 1/2”
- From Lining Fabric Cut: 2 pieces: 7 1/2” x 10 1/2” 2 pieces 1 1/2” x 3” for zipper tabs
- From Fusible Fleece Cut: 2 pieces 7” x 10”
- From Shape Flex Interfacing Cut: 2 pieces 7” x 10”
Step One: Apply Interfacings
- Using the directions on the package of your interfacing, apply the cut fusible fleece to the wrong side of the two cut lining pieces.
- Using the directions on the package, apply the Shape Flex interfacing to the wrong side of the two cut canvas pieces.
- Note: the interfacings are deliberately cut 1/2” shorter than the bag to reduce bulk in the seam.
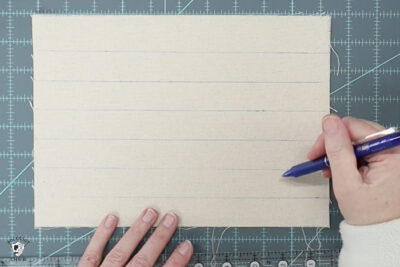
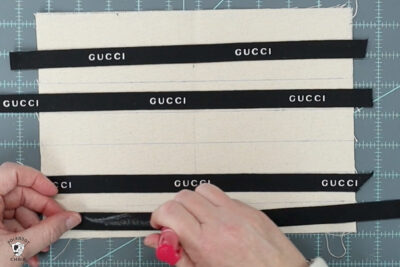
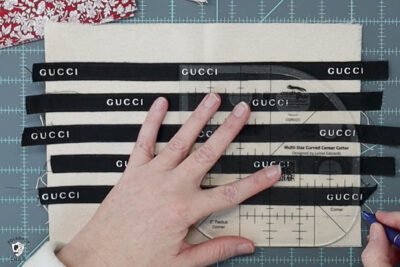
Step Two: Mark Lines on the Bag
- Using a ruler and fabric-safe marking pen, mark lines on one of the canvas pieces.
- Start the first line 1- 1 1/2” from the bottom of the bag, and mark lines 1” up towards the top of the bag.

- Note: the location of the first line will depend on your specific ribbon.Depending on the width and pattern on your ribbon you will have 6 to 7 lines marked on your bag front when done.
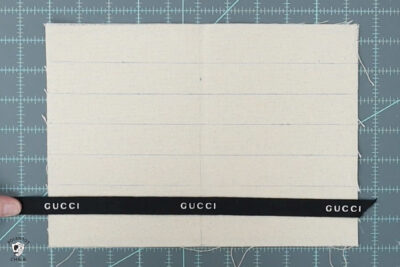
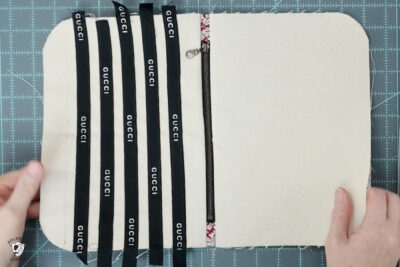
Step Three: Ribbon
- Before you cut your ribbon, take a moment and plan how you want the ribbon to appear on the front of the bag.
- If your ribbon has a motif or a logo, decide if you want the logo lined up in each row or if you want the logo offset on each row.
- Mark the center front of the bag.
- Cut the first ribbon, centering the ribbon on the bag and leaving a bit of ribbon hanging off the sides of the bag.
- Cut the next piece of ribbon for the next row.
- TIP: Take a moment and plan how you want to cut all of your ribbon before you cut it. Use pins or a marking pen to mark the cut lines. This will help you conserve ribbon if you don’t have much to work with.
- Keep cutting the ribbon for each row of the bag until you get to the top of the bag.
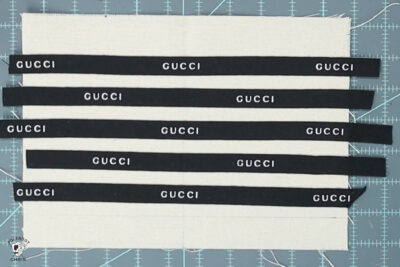
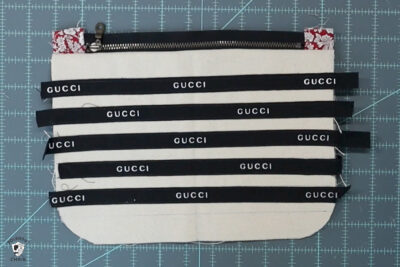
Step Four: Apply Ribbon
- Apply a thin layer of glue to the back of the ribbon and glue the ribbon to the canvas piece.
- Repeat until you have all of the ribbon glued to the canvas.
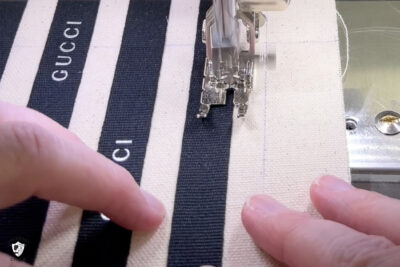
Step Five: Sew
- Thread your sewing machine with thread that matches your ribbon. Sew along the edge of the ribbon very close to the edge along both sides of the ribbon.
- Keep going until all of the ribbon is sewn.
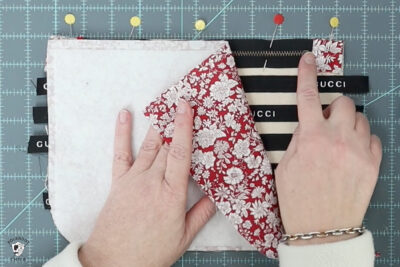
Step Six: Zipper
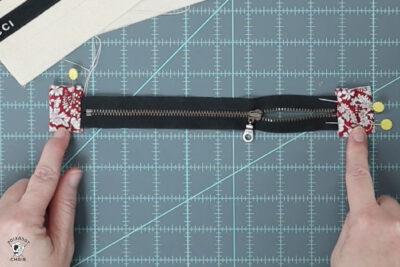
- Fold the 1 1/2” x 3” fabric in half wrong sides facing and press. Fold under the two raw edges of the piece 1/4” and press.
- Pin the pressed piece to the end of the zipper. The two folded edges will be close to the end of the zipper. Sew in place close to the fold in the fabric. Do this on both ends of the zipper.
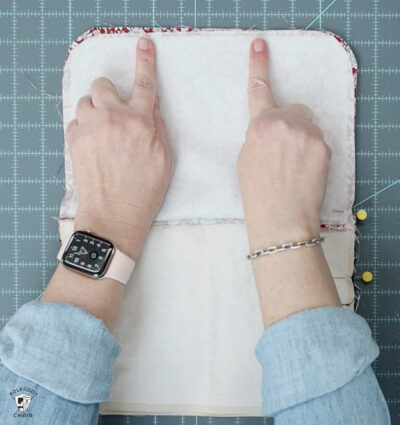
Step Seven: Assemble the Bag
- Using your curve ruler or other round object, trace a curve on the bottom two corners of the Canvas Bag & Lining pieces. Cut the fabric along the curve that you drew.
- Pin the right side of the zipper to the right side of the canvas piece with the ribbon applied.
- Pin the right side of one of the lining pieces to the wrong side of the zipper.
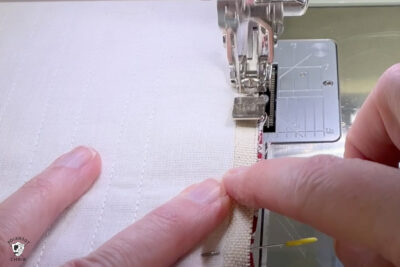
- With a zipper foot on your sewing machine, sew the zipper/bag seam with a 1/4” seam allowance.
- Lightly press the fabric pieces away from the zipper.
- Repeat with the other side of the zipper.
- Pin the right side of the other canvas bag piece ot the right side of the other side of the zipper.
- Pin the other lining piece to the wrong side of the zipper.
- Sew in place with 1/4” seam allowance.
- Press the fabric away from the zipper. Top stitch along both sides of the zipper.
- Unzip the zipper
- Pin the two canvas zipper pieces to each other. Pin the two lining pieces to each other.
- When you do this, the zipper/bag seam should be pressed/pinned toward the lining portion of the bag.
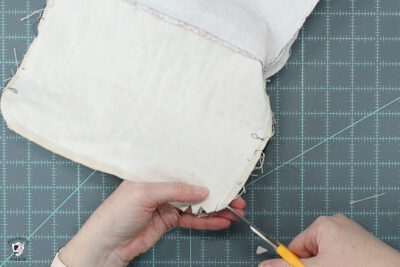
- Sew around the outside of the bag with a 3/8”-1/2” seam allowance, leaving a 3” opening on the lining side of the bag.

- Clip the seams of the bag to reduce the bulk in the seam. Trim 1/4” from the stitching line, but be careful NOT to trim too close to the seam.
- Turn the bag’s right side out through the opening you left in the lining.
- Smooth out the seams of the bag and press well.
- If you’re happy with the bag’s appearance, sew the opening in the lining closed. You can hand sew the opening closed, but I prefer to machine sew this seam.
- Give the bag a final pressing! Add a bit of extra ribbon to the zipper pull.


I think this is such a great idea for friends who love specialty bags. I can’t wait to use ribbons and cute selvages for doll up a bag.
Thank you
Such a cute pouch and great idea! Thanks for the tutorial. I do think some of my family would like this, if I sewed it as a gift.
What a unique idea. Thank you!