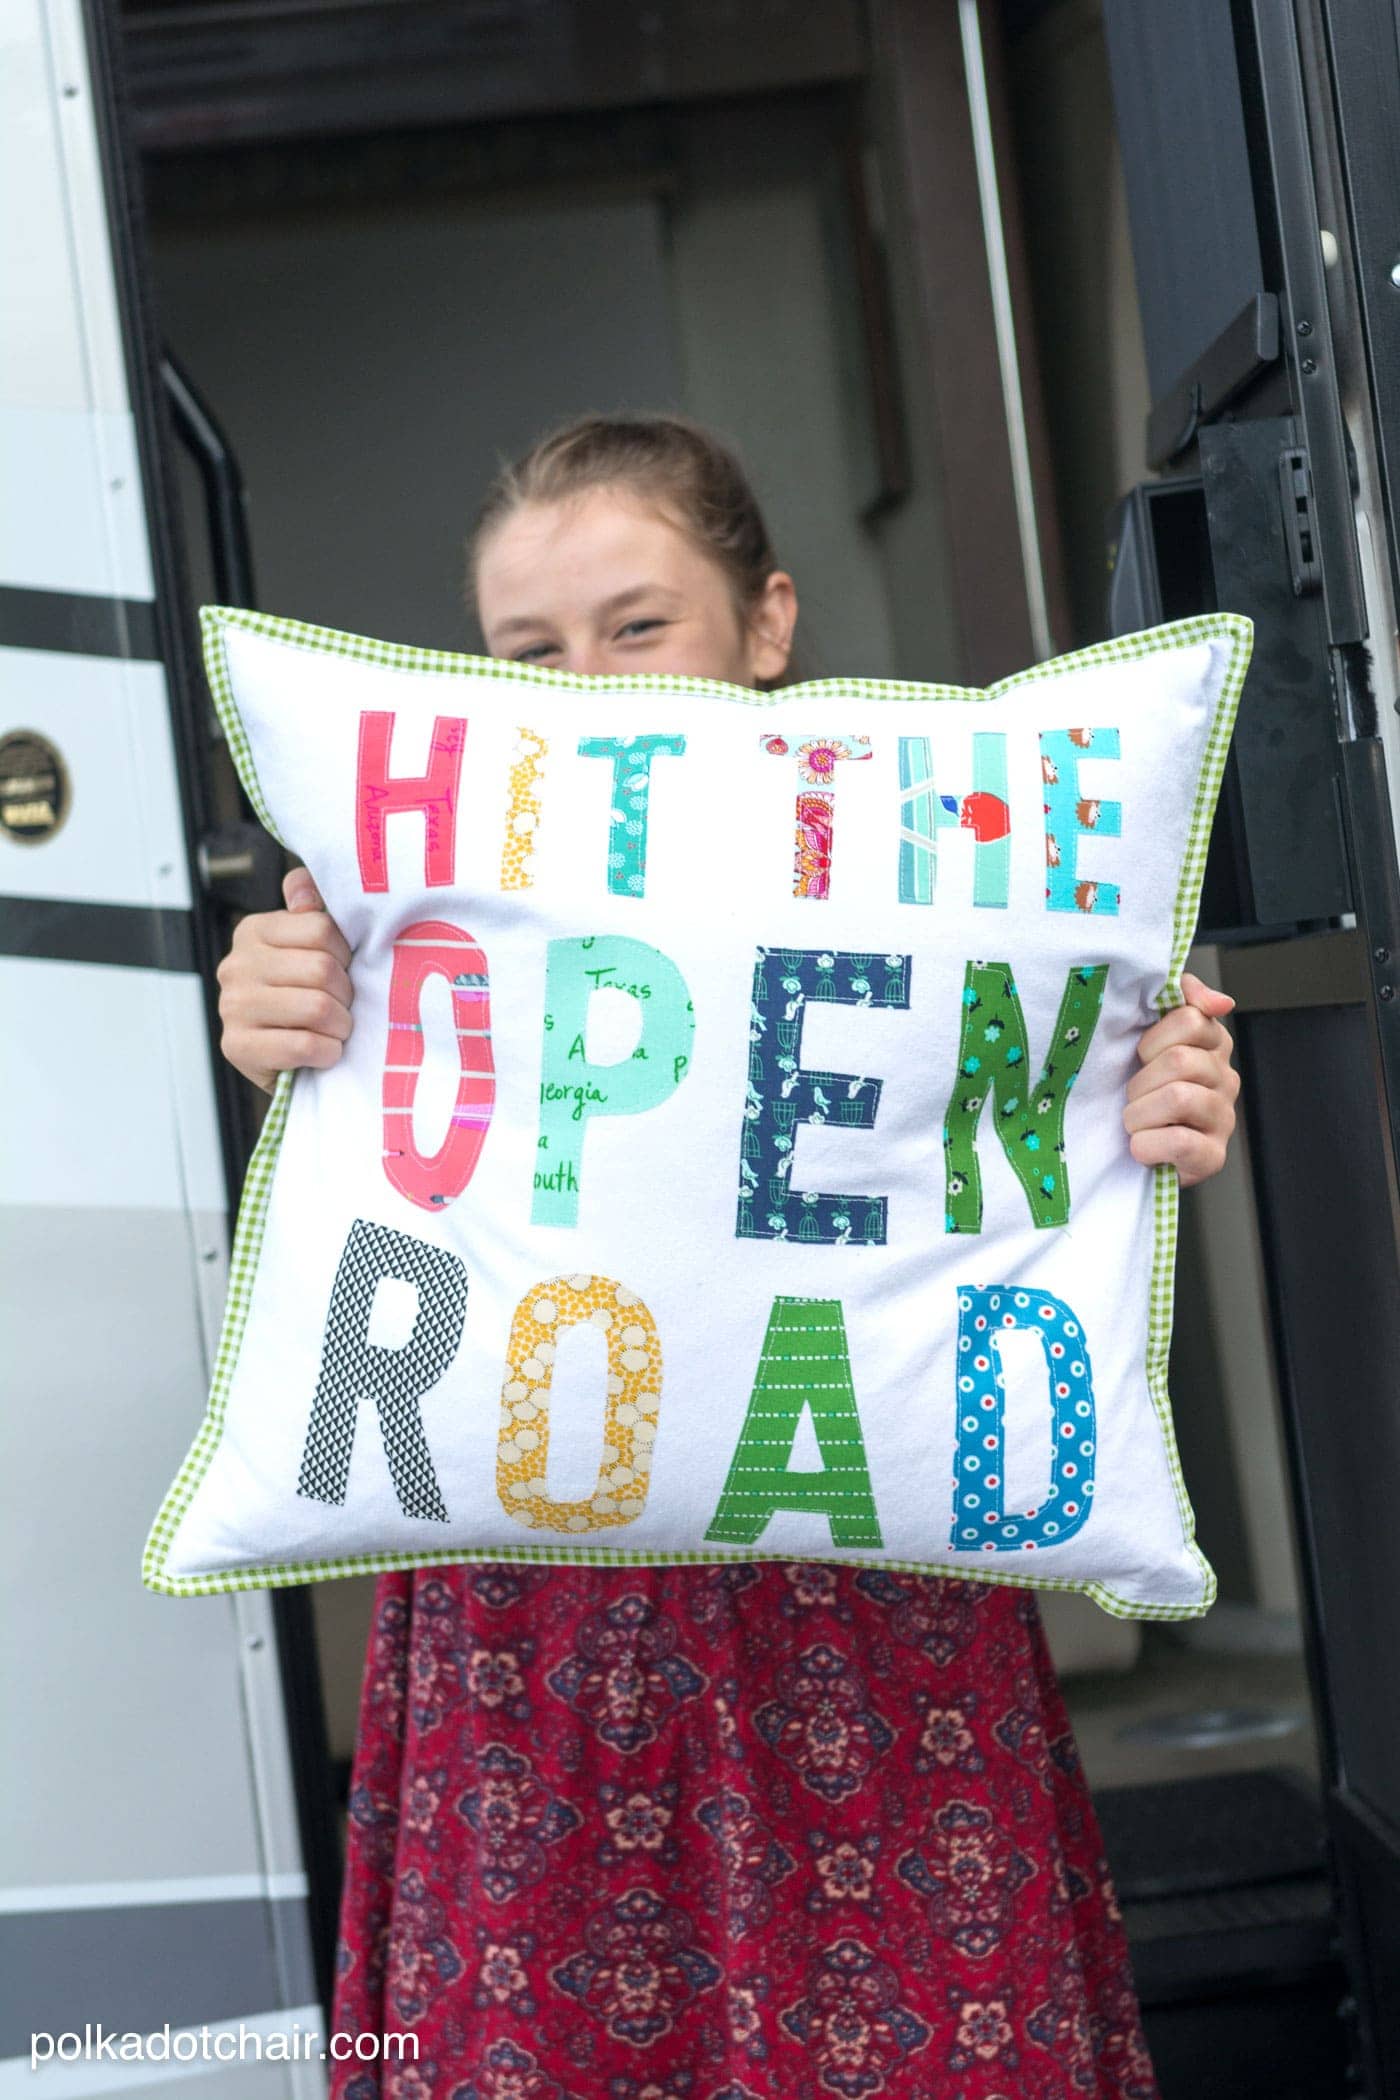
Hit the Open Road Pillow Sewing Pattern
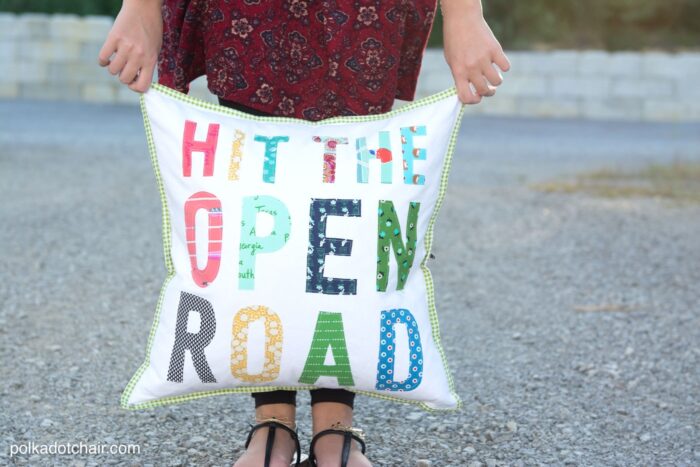
Get ready for summer sewing with this updated free pattern for a “Hit the Open Road” pillow. It features easy raw edge applique techniques, perfect for adding a touch of adventure to your home, camper, or RV!
Summer is the perfect time for a new sewing project, and I’m excited to share a fun and easy one with you today!
The “Hit the Open Road” pillow pattern features raw-edge applique sewing techniques. This project is ideal for adding a touch of adventure to your home decor.

This pillow is an update of a previous tutorial many of you loved. I’ve added some new details and techniques to make creating it even easier.
This pillow lives in our Winnebago motorhome! We’ve had it for years; if you’re curious about our RV experiences, you can read all about our experience as first-time RV owners.
Pillow Project Details
The raw edge applique gives the pillow a relaxed, casual look that is perfect for summer. It’s a quick and satisfying project for those warm, lazy afternoons.

Things You Should Know
Pillow Supplies
- 20″ Pillow Form
- Scraps of Fabric
- Heat N Bond Lite
- Lightbox or Bright Window
- Pencil
- 21″ long (or longer) polyester zipper
- 1/4 yard of fabric for pillow binding
- 20″ x 20″ piece of fabric for pillow front
- 2 pieces of fabric each 20″ x 11″ for pillow back
- Template for letters: fill out the form on this page, and we will email you the template.
How to Get the Template
Fill out the form below, and we will email you a copy of the template. You’ll still need to use the directions on this page to complete your project.
Hit the Open Road Pillow Pattern Instructions
OPTIONAL: To make this project a no-sew project, purchase an already sewn 20″ pillow cover and 20″ pillow insert. You must also purchase Heat N Bond Ultra Hold instead of Lite. If you do this, skip the tutorial portion where the letters are stitched down.
Gather your sewing supplies, and let’s hit the road (or at least the sewing machine) together for this fun and easy project!

Hit the Open Road Pillow
Equipment
supplies
- 1 Pillow Form; 20" x 20"
- 10-15 Scraps of Fabric at least 3" x 5" each
- 1 package Heat N Bond Lite
- 1 zipper 21" or longer polyester zipper
- 1/4 yard of fabric for pillow binding
- 1 piece 20″ x 20″ piece of fabric for pillow front I used lightweight cotton canvas in white
- 2 pieces of fabric each 20″ x 11″ for pillow back
Instructions
STEP 1:
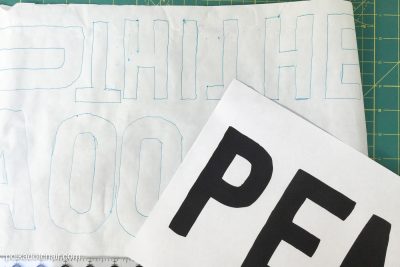
- Download and print out the letter template onto plain paper. Ensure your Acrobat settings are “actual size” and not “fit to page”.
- With the paper upside down (so the letters are reversed) trace the letters onto the paper side of the Heat N Bond Lite.

- Cut out loosely around the letters.
STEP 2:
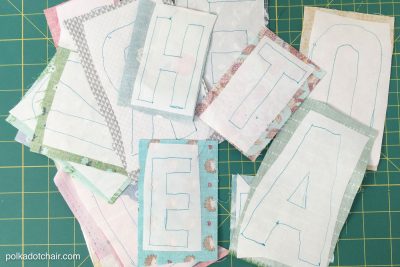
- Press each letter onto the wrong side of a scrap of fabric using an iron.
- Cut out precisely.


STEP 3:
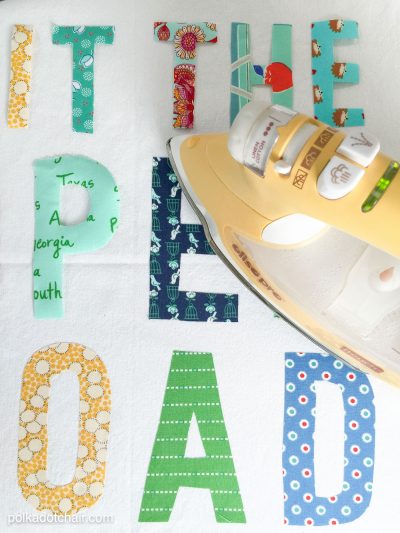
- Peel off the backs of the letters and begin to lay them out on your pillow front piece. It is helpful to mark the center of the pillow both horizontally and vertically before you lay out the letters.

- Once the letters are in the correct spots, use your iron to secure them.
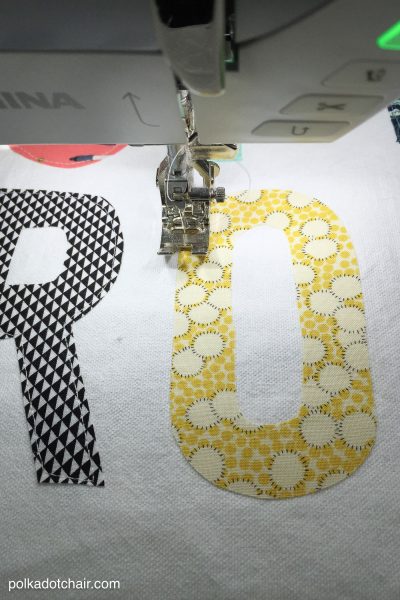
STEP 4:
- Using a straight stitch on your sewing machine, stitch around the perimeter of each letter, pivoting at all four corners.

STEP 5:
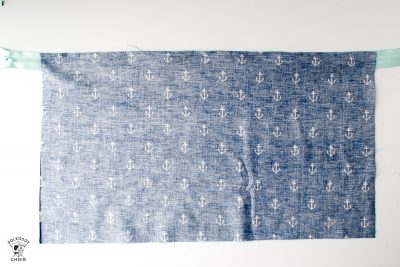
- Place the right side of one side of the zipper on the right side of one of the pillow back pieces, along the 20″ side. Stitch in place using a zipper foot. If your zipper is longer than your pillow, let the end hang over the side of the pillow piece.Note: photo is from our "How to add a zipper back to a pillow" sewing lesson, if you need additional help with this step, please visit that post.
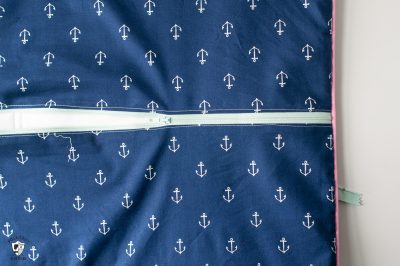
- Place the right side of the other zipper on top of the right side of the other pillow back piece.
- Press the seam open and top stitch down both sides of the zipper.

- Trim the entire piece down to 20″ x 20″. It’s okay to trim off the end of the zipper; just make sure it’s not the end with the zipper pull. Also, do not unzip the zipper until the pillow construction is finished.

STEP 6:
- Place the pillow front and pillow back pieces WRONG sides facing. Stitch around the edge with a 3/8″ seam allowance.
- Cut three strips of binding fabric, each 2 1/2″ wide by the length of the fabric. Stitch the pieces together along the short ends and trim the seam allowances to 1/8″.
- Press the binding in half with the wrong sides facing.
- You will next bind the pillow in the same way that you would bind a quilt.
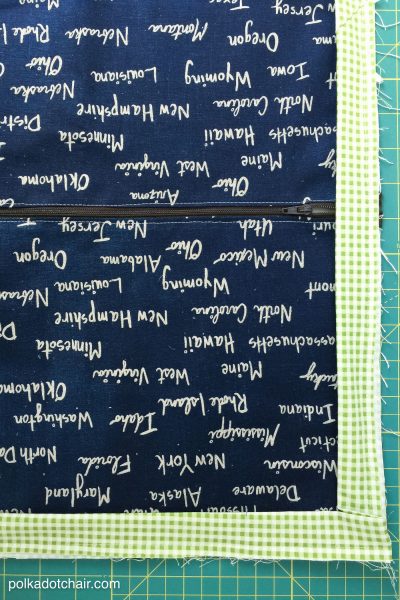
- Place the raw edge of the binding flush with the raw edge of the back side of the pillow. Stitch in place using a 1/4″ seam allowance. Pivot at corners.
- Fold the binding over to the front of the pillow and press. Secure in place using binding clips.
- I find it also helps to use a bit of glue or seam tape to hold the binding in place.
- Stitch binding down by stitching close to the folded edge of the binding on the front of the pillow.
- Unzip the zipper and insert the pillow form. CONGRATS! You’re done!

More Pillow Patterns You may Like:
Giant Pocket Pillow Sewing Pattern
Road Trip Pillow Case Sewing Pattern