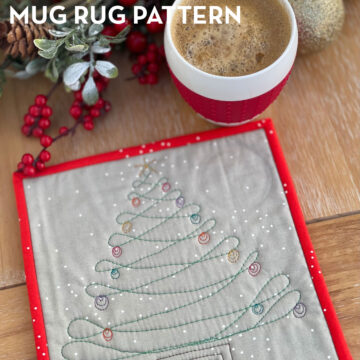
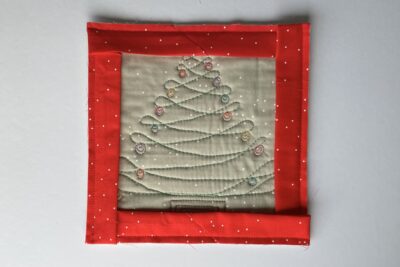
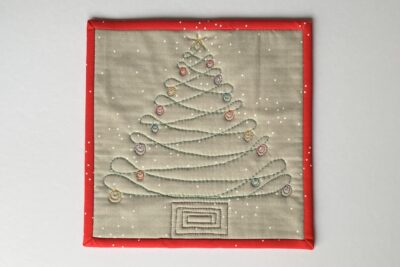
Christmas Tree Mug Rug Pattern
Our November Free Mug Rug Pattern is a festive, fun, free-motion quilted Christmas Tree Mug rug. Not only is this a great way to practice your free motion quilting skills, but it also makes the perfect gift!

It’s time for a festive make!!! ‘Tis the season to deck the halls, trim the tree, and indulge in the warmth of holiday cheer.
What better way to infuse your home with the spirit of Christmas than by adding a touch of handmade magic? In this joyous season of giving, we bring you a delightful gift – a free-motion quilted Christmas mug rug pattern that will not only adorn your table but hopefully brighten your day as well!
This mug rug pattern is a part of our year-long series of free quilted mug rug patterns here on our quilt blog! Amy Ball designed the pattern along with the others featured this year.
This month’s skills focus is free motion quilting.
Monthly Mug Rug Patterns and Skill Focus
- January: Fabric Flash Mug Rug – Using Selvages
- February: First Edition Mug Rug – Fussy Cutting
- March: English Bloom Mug Rug – English Paper Piecing (EPP)
- April: Coffee Cabin Mug Rug – Binding with Quilt Backing
- May: Street Party Bunting – Raw Edge Applique
- June: Big Stitch Mug Rug – Hand Quilting
- July: Summer Sun Mug Rug – Improv Piecing
- August: Heart Mug Rug – Patchwork Piecing
- September: Pumpkin Face Mug Rug – Reverse Applique
- October: Cozy Cup Mug Rug – Big Stitch Binding
- November: Christmas Tree Mug Rug – Free Motion Quilting
What is Free Motion Quilting?
Free-motion quilting is a technique in which the quilter moves the fabric freely under a sewing machine’s needle, creating intricate and detailed designs. Unlike traditional quilting, where the machine’s feed dogs guide the fabric, free-motion quilting allows the quilter to have complete control over the movement of the fabric.
In free motion quilting, the feed dogs are lowered or covered, and the quilter uses their hands to move the fabric in any direction. This freedom of movement enables the creation of various designs, such as swirls, loops, flowers, and intricate patterns, giving a unique and personalized touch to the quilt.
Free Motion Quilting Tips
If you’ve never tried FMQ, starting with a small project like a mug rug is the perfect way to start. Here are a few tips to get you going:
- Before you put needle to fabric, drawing and doodling free-motion quilting motifs is a must. It will help with your hand-eye coordination and create muscle memory for the motifs.
- For free motion quilting, you need to drop your feed dogs (the little teeth in your sewing machine plate that help guide the fabric under the machine’s foot) because you need to be able to move the fabric around yourself.
- Always check and adjust, if needed, your machine tension every time you sit down to free-motion quilt. Make some scrap quilt sandwiches to test your tension before starting work on a project.
Note that not all sewing machines can free-motion quilt. Check your machine’s manual to see if you can lower the feed dogs to complete this project.
If you have any stitch problems at any time during free-motion quilting, you should
- Rethread your machine,
- Swap to a new needle (and check it is the correct size for quilting; I use 90/14),
- Clean your machine.
Always follow these simple steps before you try anything else, as there is a good chance one of them will fix the issue.
Supply List
- Red, Green, Yellow & Brown Thread
- Main Fabric; 1 fat eighth
- Backing Fabric; 1 fat eighth
- Binding Fabric; 1 fat eighth
- Batting 9” square
Instructions
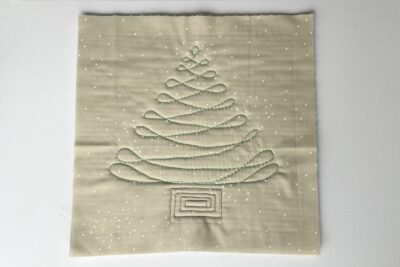
Christmas Tree Mug Rug
Equipment
- Washi Tape
supplies
- 1 Fat Eighth Main Fabric
- 1 Fat Eighth Backing Fabric
- 1 Fat Eighth Binding Fabric
- 1 piece Batting 9” square
Instructions
Cutting:
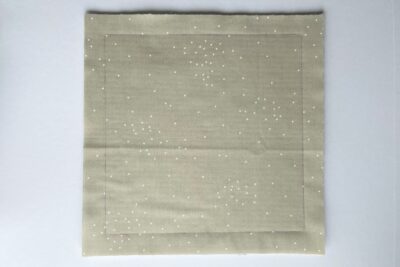
- From Main Fabric cut 9” square (1). From Backing Fabric cut 9” square (1).From Binding Fabric cut WOF x 2¼” (2).
Construction:
- Use a ¼” seam allowance unless stated otherwise.
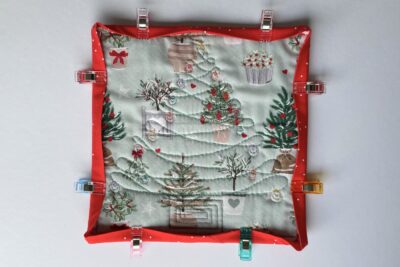
- Take the Backing Fabric 9” square and place it the right side facing down. Add the batting square on top and then place the Main Fabric 9” square on top with the right side facing towards you. Make sure all the layers are smooth and flat, then baste together using your preferred method. I highly recommend a spray basting method because removing pins whilst free motion quilting is more difficult.

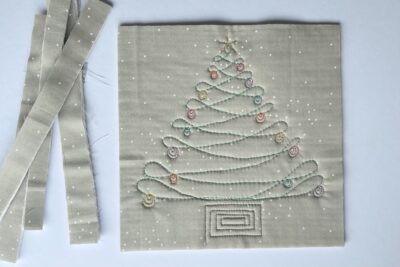
- Mark the front of the quilt sandwich square with a 7½” square. You will be using this line as a cutting guide once the quilting is done so you need to be careful to keep any stitching no closer than ¼” from this marked square.
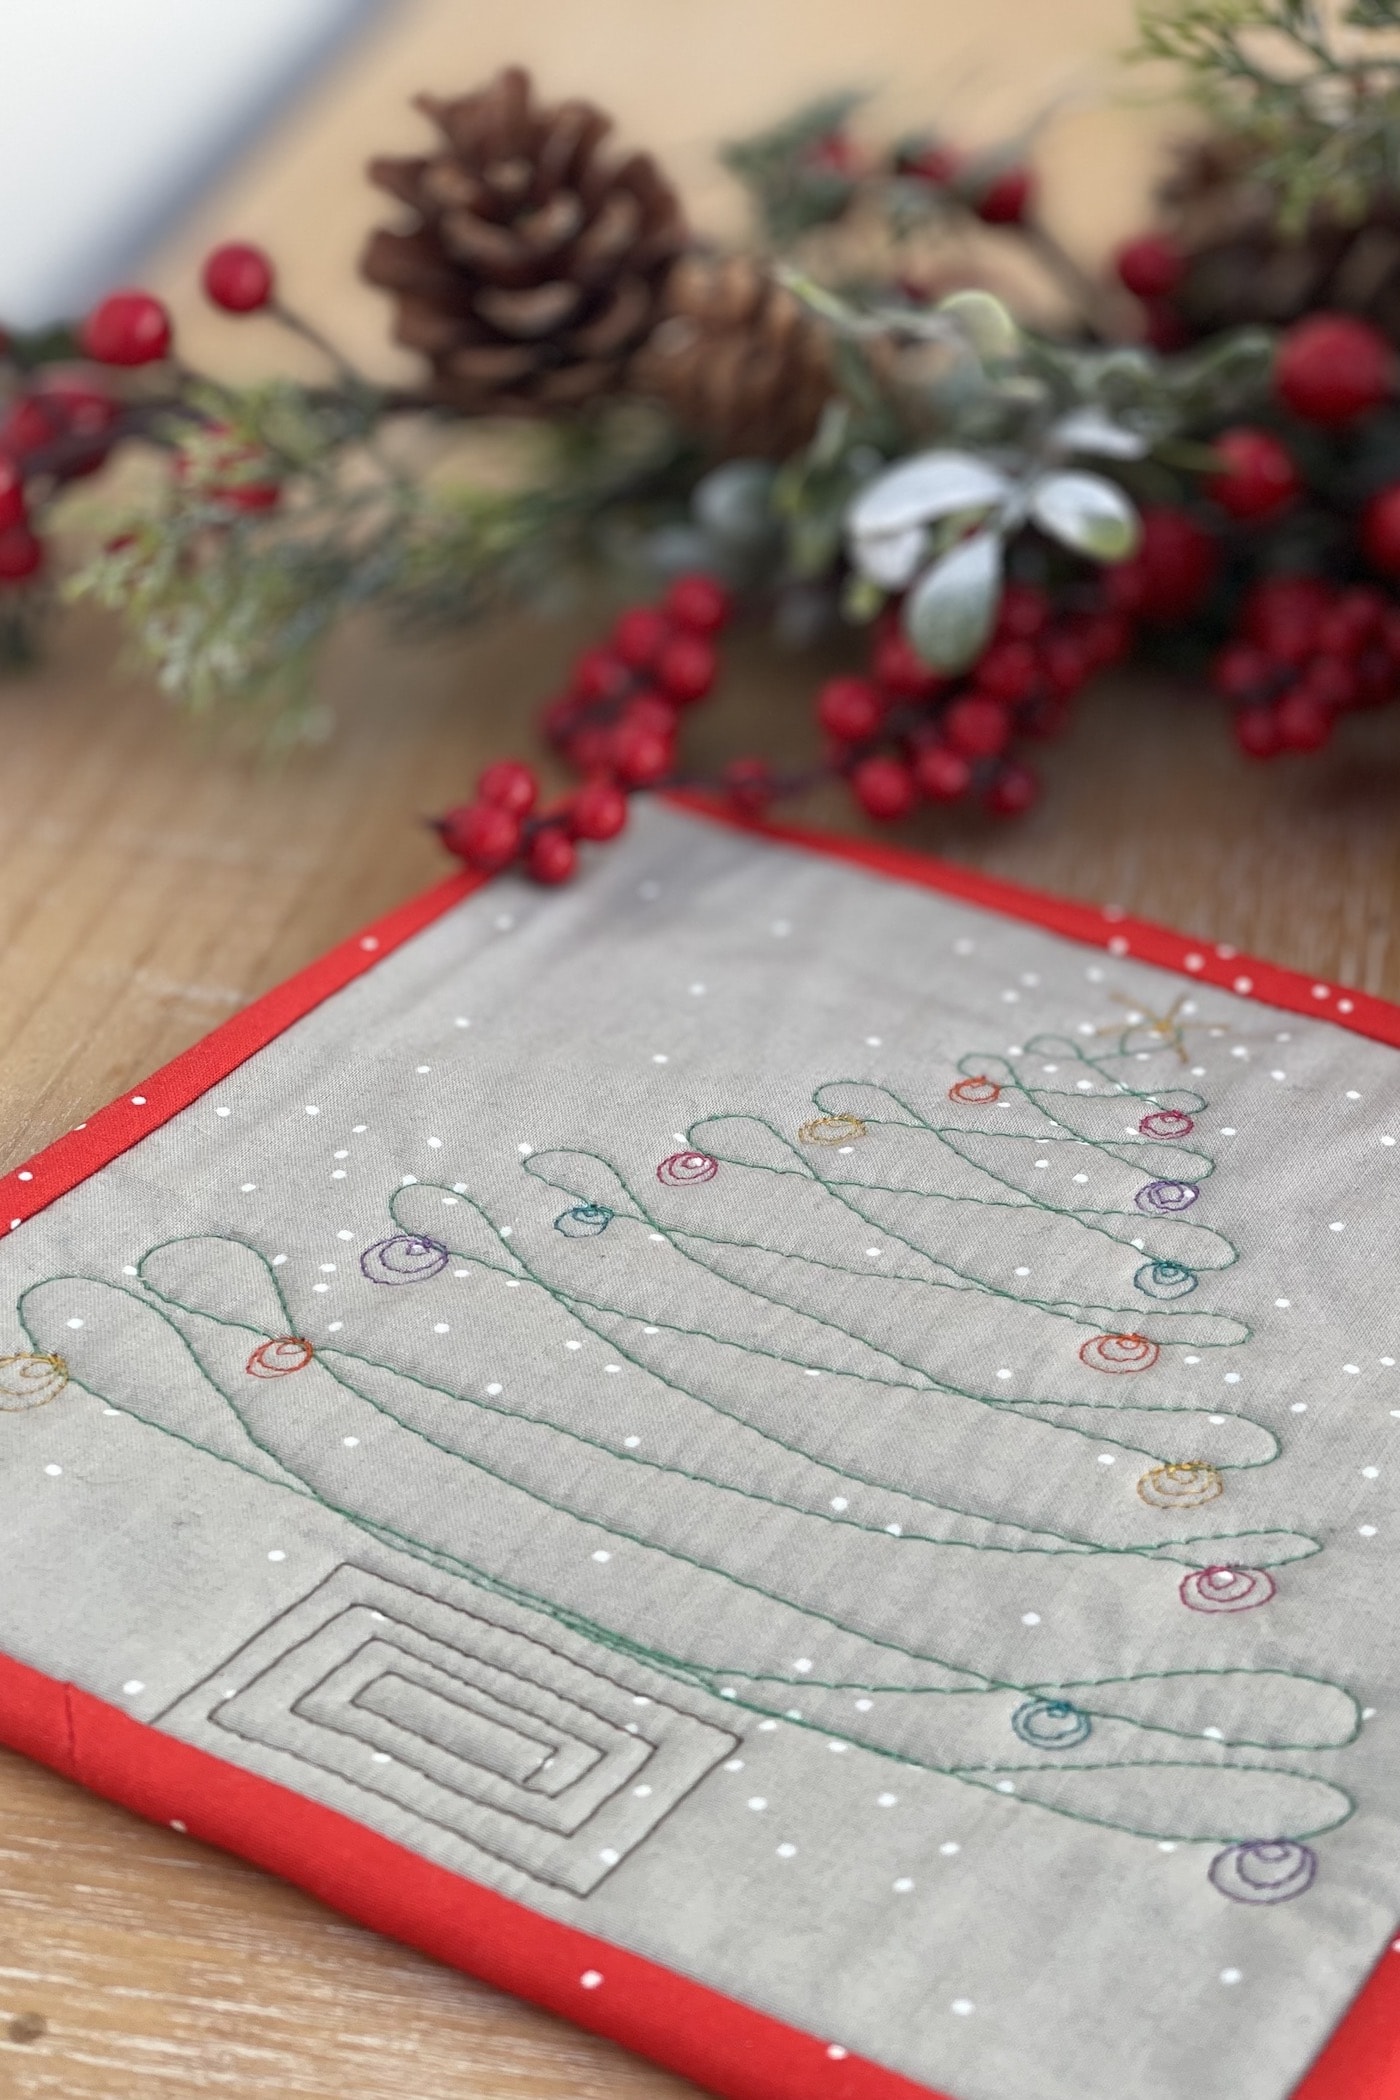
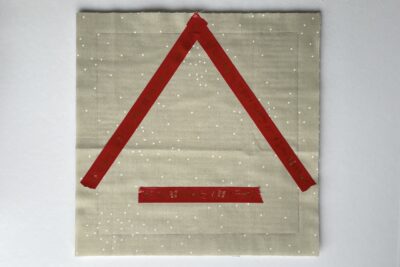
- Now, you need to mark some guides for the Christmas tree shape. You can use a fabric pen or an indentation tool like a Hera Marker, but I prefer to use some strips of washi tape (a paper tape with only a light amount of stick) because then no makes are left behind once you’d finished. Stick the tape (or mark lines) in two diagonal lines that overlap at the centre and are ¼” below the top edge of the marked square from step 2. Then add another piece of top (or mark a third line) horizontally, 1¼” from the bottom edge of the marked square. Use the photo as a guide to help.
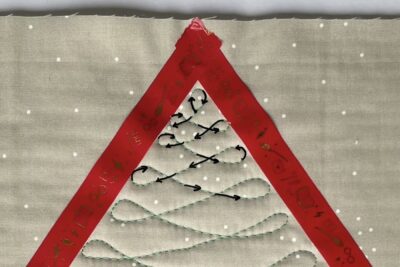
- To create the Christmas tree shape, use a green thread, and free motion quilt a spaced out ribbon candy motif, starting at the top of the marked triangle from step 3 and working your way down, going from left to right, creating a loop near the edge and weaving back and forth, filling the triangle space. One guide photo as the direction to move needle marked with arrows.
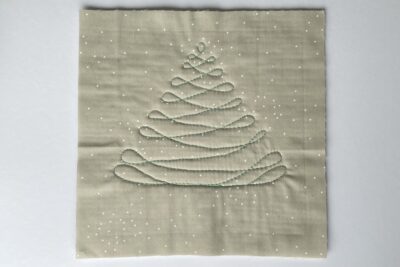
- Remove the washi tape.
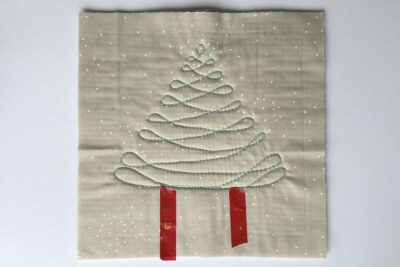
- Now you need to mark some guides for the tree trunk. Stick the tape (or mark lines) in two vertical lines 1” either side of the centre of the bottom edge of the marked square from step 2. Use the photo as a guide to help.
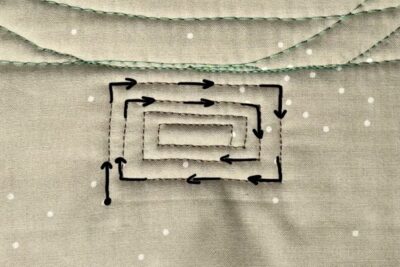
- To create the tree trunk, use a brown thread and free motion quilt a square spiral, starting ¼” up from the bottom edge, next to the lefthand tape/marked line. Quilt a straight(ish!) line vertically up until you get close to the bottom of the Christmas tree, then go horizontally across until you reach the other piece of tape/marked line, then go vertically down stopping about ¼” because you are level with where the spiral started.
- Continue with this pattern working into the center. One guide photo as the direction to move the needle marked with arrows. Remove the tape once you’ve finished.
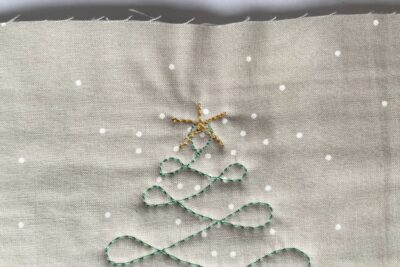
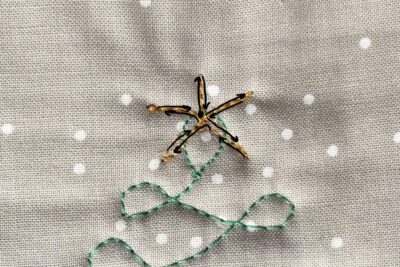
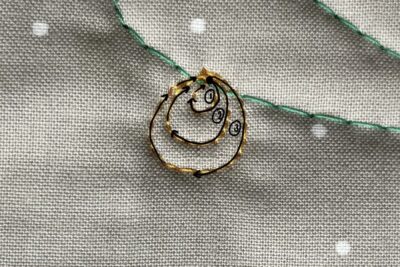
- To create the star, use a gold or yellow thread and free motion quilt a five-point star at the top of the Christmas tree. Start at the center of the star and quilt a short line vertically up, then back down to where you started.
- Then quilt a similar length line diagonally (about a north-east angle) out and then back to the center. Repeat this to quilt three more diagonal lines to complete the star. One guide photo is the direction to move the needle marked with arrows.
- To create the tree decorations, use a selection of thread colors (I have used gold, pink, orange, purple, and teal) and free-motion quilt a small set of three loops on the tree branches. Start just above a quilted line of a tree branch and quilt a small loop, finishing where you started.
- Then, create a slightly larger loop in the same way, and then another that’s slightly larger again. Repeat this on other tree branches; I’ve put them almost all of the branches, but you add as few or as many as you want. One guide photo is the direction to move the needle marked with arrows.
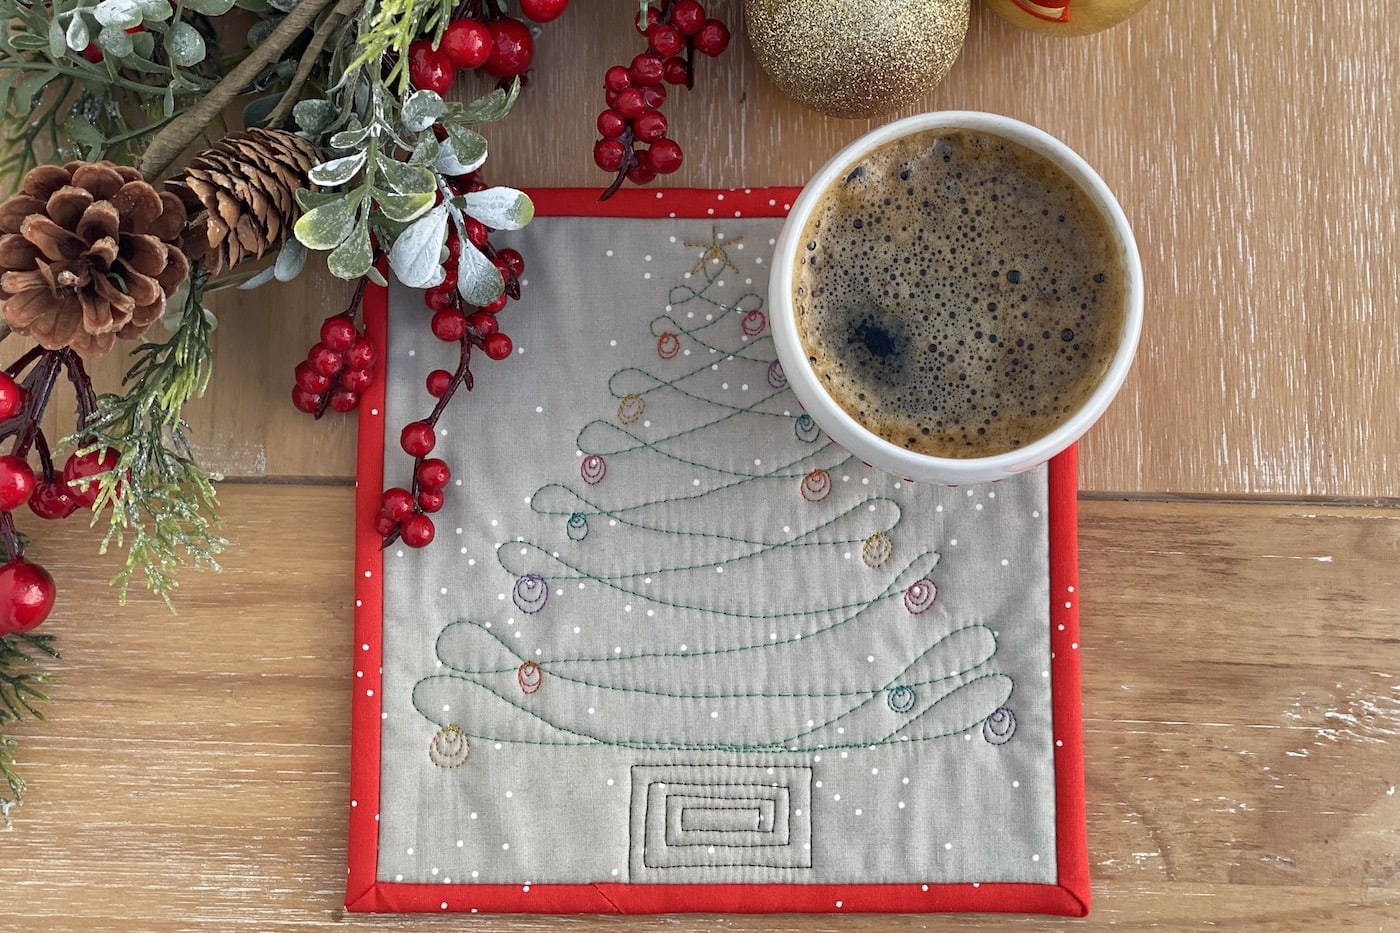
- Press the quilted mug rug to smooth out any uneven fabric.
- Trim the mug rug down to 7½” square.

Finishing:
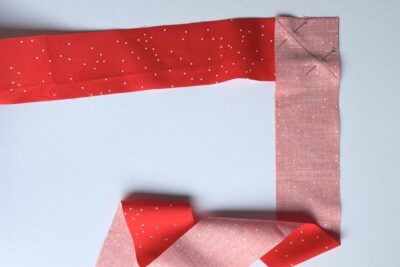
- Take the two Binding Fabric WOF x 2¼” strips. Draw a 45° line on the wrong side of one strip, at the top corner from top left to bottom right. Pin right sides together so the strips are at a right angle to each other and the drawn line is visible.
- Sew along the drawn line then trim off the excess corner fabric with a ¼” seam allowance and press to create a long strip. Fold the strip in half along the full length (wrong sides together) and press.
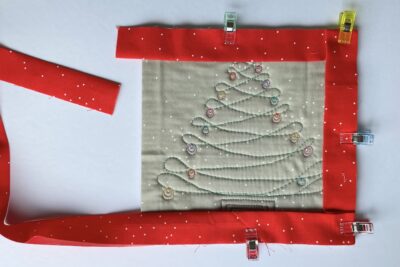
- Pin/clip the binding in place on the front, round the mug rug edges, with the raw edges of the binding and raw edge of the mug rug matching up. [TIP: Clip the binding around all four edges before you start sewing to make sure the seam line from when you joined the two strips aren’t going to be close to any of the corners as this would create too much bulk; ideally you want the binding seams to be close to the middle of the edges.]
- Sew the binding to the front of the mug rug using a ¼” seam allowance, in the same way you would add binding to a quilt top. Take your time to give the four corners neat mitres.
- Fold and press the binding round to the back. Pin/clip in place, making sure your mitred corners are nice and neat, and hand sew the binding in place.
- Grab a festive drink and enjoy your new Quilted Christmas Tree mug rug.

About the Designer

Amy lives in the north of England with her husband and son. When she’s not sewing and quilting, Amy can usually be found baking or reading. You can find her on Instagram @amyatthegate


Thank you for this fun mug rug series!! Just one question…what happened to November?
This is November
Very pretty!