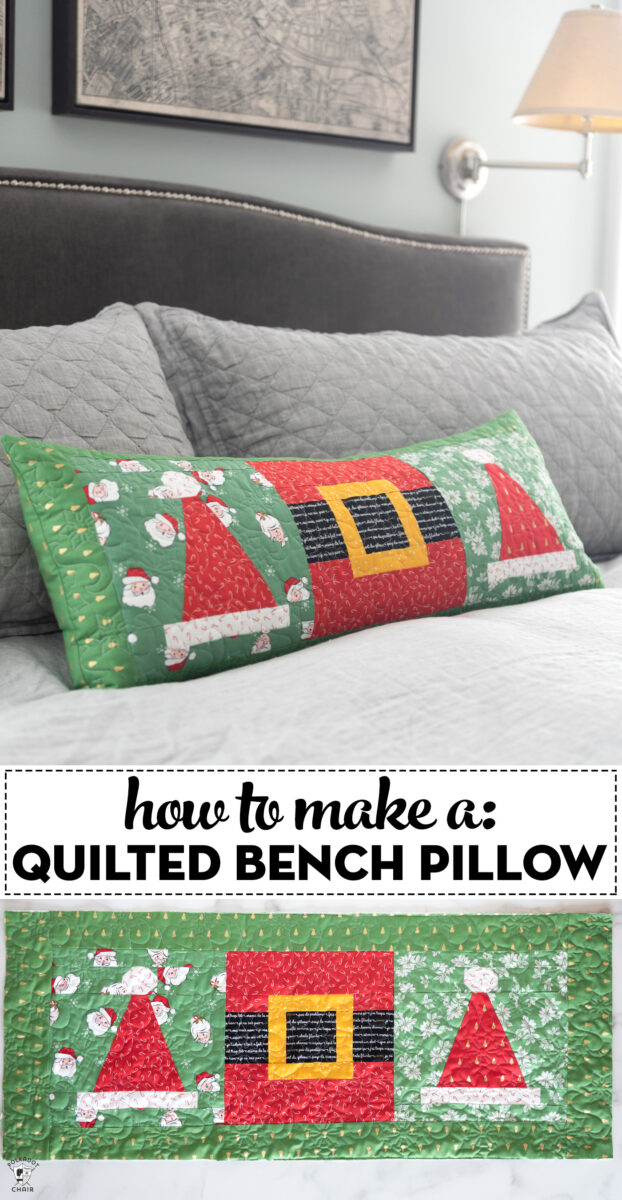
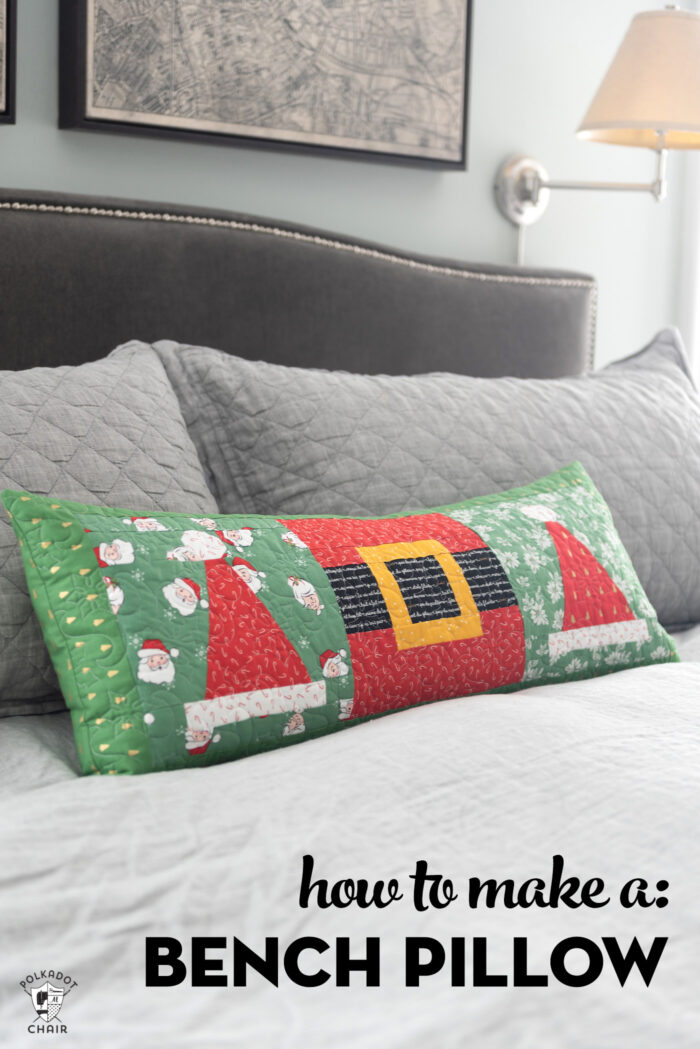
How to Make a Bench Pillow using your Favorite Quilt Blocks
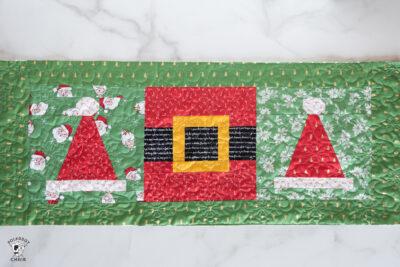
Turn any 3 quilt blocks into a festive bench pillow with our bench pillow pattern. This pattern uses 3 Christmas Quilt blocks creating a fun Christmas Bench pillow. You can substitute any blocks to create a pillow for any holiday!
Welcome to week 3 of our Santa’s Hat Shop Quilt along. Technically this week is “catch up” week for the quilt along. So I hope you’re busy piecing all of your blocks.
This week for the quilt along, I’m sharing a tutorial to turn your quilt blocks into a bench pillow. If you prefer to make a pillow instead of a whole quilt, I hope that you’ll enjoy today’s tutorial.
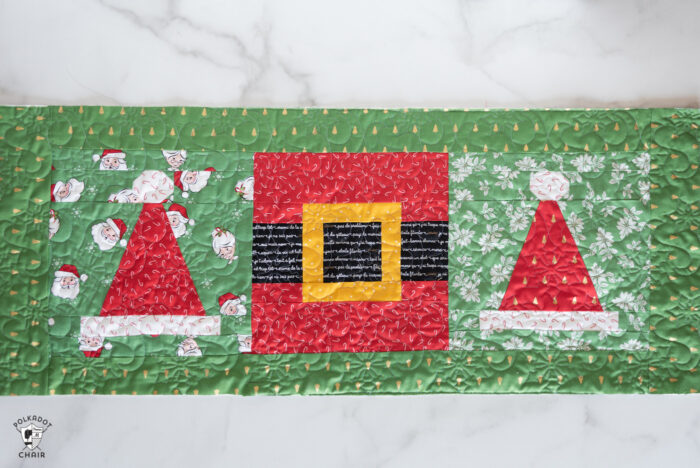
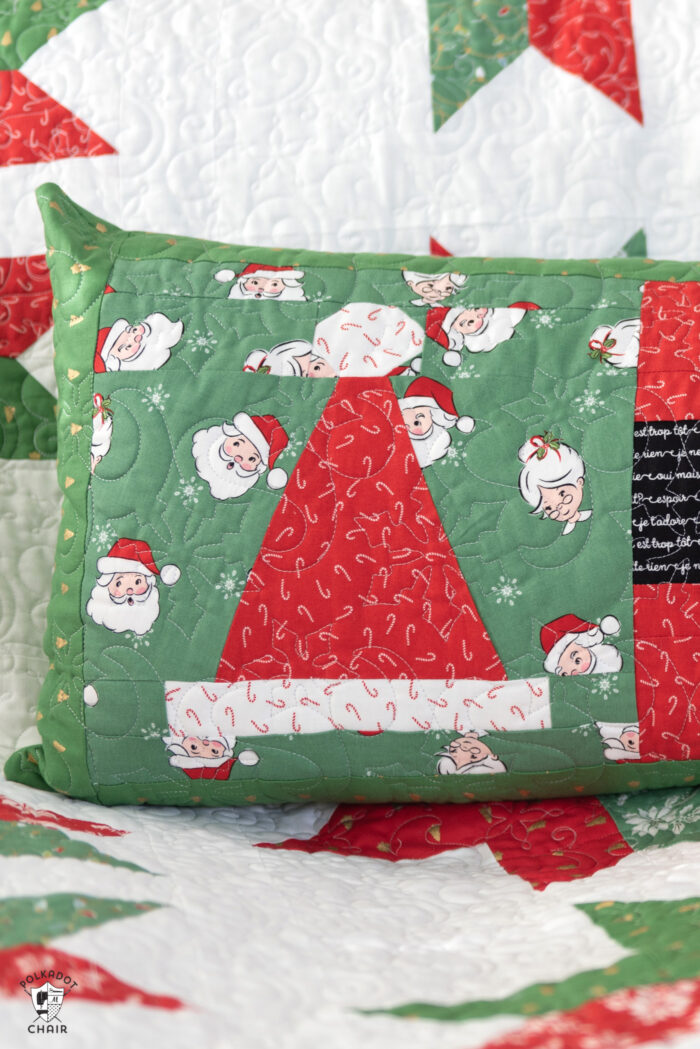
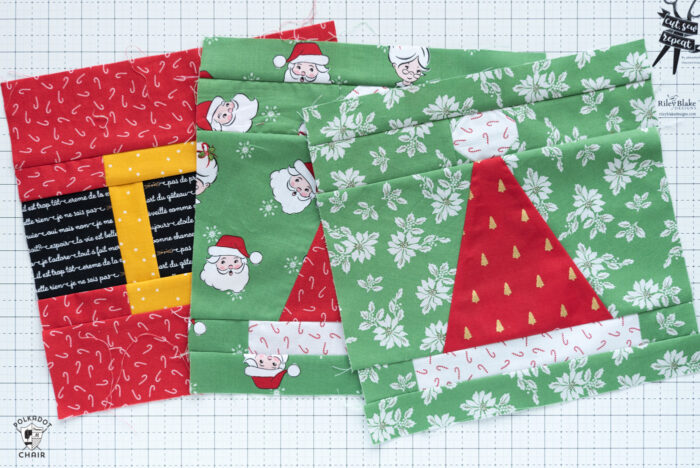
This bench pillow pattern features 2 Santa Hat blocks and one Santa Belt quilt block. It is also machine quilted but you do not have to quilt it if you don’t want to.
Pillow Back Options
To make things simple I created an envelope back for my pillow but it’s also really easy to create a zippered back for the pillow using our tutorial. If you go this route I’d make the zipper run along the short side of your pillow.
(note: the measurements refer to the quilt block size BEFORE finishing).
Since this pattern calls for ANY 3 10 1/2″ quilt blocks you can use it as a base for a large variety of bench pillows. Think of how cute it would be for Halloween or with hearts for Valentine’s Day.
I used a similar method to make a cute Halloween quilt block tote a couple of years ago!
How to Adapt the Pattern for Other Size Quilt Blocks
If you want to make this pillow using other size quilt blocks, simply size the sashing up or down by 1/2 the difference in block size.
For example; if you want to use 12 1/2″ quilt blocks, you simply need to REDUCE the width of sashing by 1″ for each piece.
Similarly, if you want to use 9 1/2″ quilt blocks you would INCREASE your sashing width by 1/2″ on each side.
The largest quilt block you can use for this method is 14 1/2″ square. I would not recommend this method with smaller than a 9 1/2″ block.

Bench Pillow Pattern
supplies
- 3 completed Quilt Blocks Blocks should be 10 1/2" x 10 1/2" BEFORE they are sewn into the pillow
- 1/4 Yard Fabric For sashing around blocks
- 1/2 Yard Fabric For pillow back
- 1 Pillow Form 14" x 36"
- 1 piece Batting or fusible fleece at least 15" x 36 If you do not want to quilt your pillow front you can use fusible fleece. If you want to quilt your pillow front use batting.
Instructions
Cutting Directions
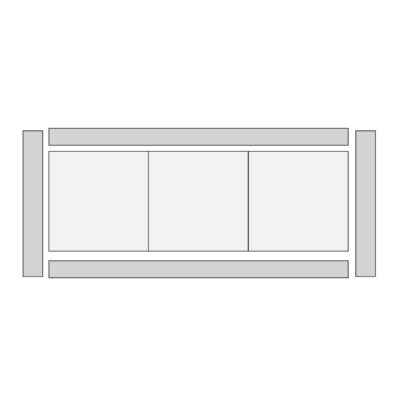
- Cut 2 pieces 3" x 14 1/2" from sashing fabricCut 2 pieces 2 1/2" x 30 1/2" from sashing fabric
- Cut 1 piece 14 1/2" x WOF (width of fabric) from pillow backing fabric. Cut this piece in half so that it is approx 14 1/2" x 21" leaving the selvage edges attached.
Create the Pillow Front
- Sew the 3 quilt blocks together in a row.

- Sew one of the 2 1/2" x 30 1/2" pieces of sashing fabric to the top of the blocks.
- Sew the other 2 1/2" x 30 1/2" piece of sashing fabric to the bottom of the blocks. Press the seams to one side.
- Sew one 3" x 14 1/2" piece of sashing fabric to each side of the sewn pieces.

Quilt
- If desired quilt the blocks. If you are quilting the blocks I recommend creating a "quilt sandwich" with the quilted blocks & cotton batting with scrap fabric on the back. You can easily quilt this size pillow on a home sewing machine.If you do not wish to quilt your pillow front, press the fusible fleece onto the wrong side of the sewn quilt blocks according to the package directions.

Sew Pillow Back
- Hem the edge of the pillow back pieces by turning under the selvage edge of both of the 14 1/2" x 21" pieces 1/2" and press. Stitch in place.
- Place one of the pillow back pieces on top of the quilted pillow front piece right sides facing. Pin in place. Place the other pillow back piece on top of this. The pieces will overlap.
- Stitch around the perimeter of the pillow using a 1/2" seam allowance.
- Turn right side out and insert the pillow form.

Video
Notes
Where to Get the Santa Hat Pattern
Santa’s Hat Shop Quilt Along Schedule
If you’re particpating in our quilt along or stumbling on this post at a later date, here is the scheudle for the quilt along. It incluses links to all of the blog posts shared in the project to date.
- All About the Quilt Along
- November 4th – Kick-Off & Design Suggestions
- November 11th- Begin Piecing Blocks – with video tutorial
- November 18th- Pattern for Santa’s Belt Quilt Block
- How to Make a Bench Pillow Tutorial
- November 25th- Catch Up Week
- December 9th- Finishing
More Christmas Pillow Patterns
Gnome Christmas Pillow Pattern
Quilted Star Christmas Pillows
Easy Log Cabin Block Christmas Pillows
More than 25 Cute Things to Sew for Christmas