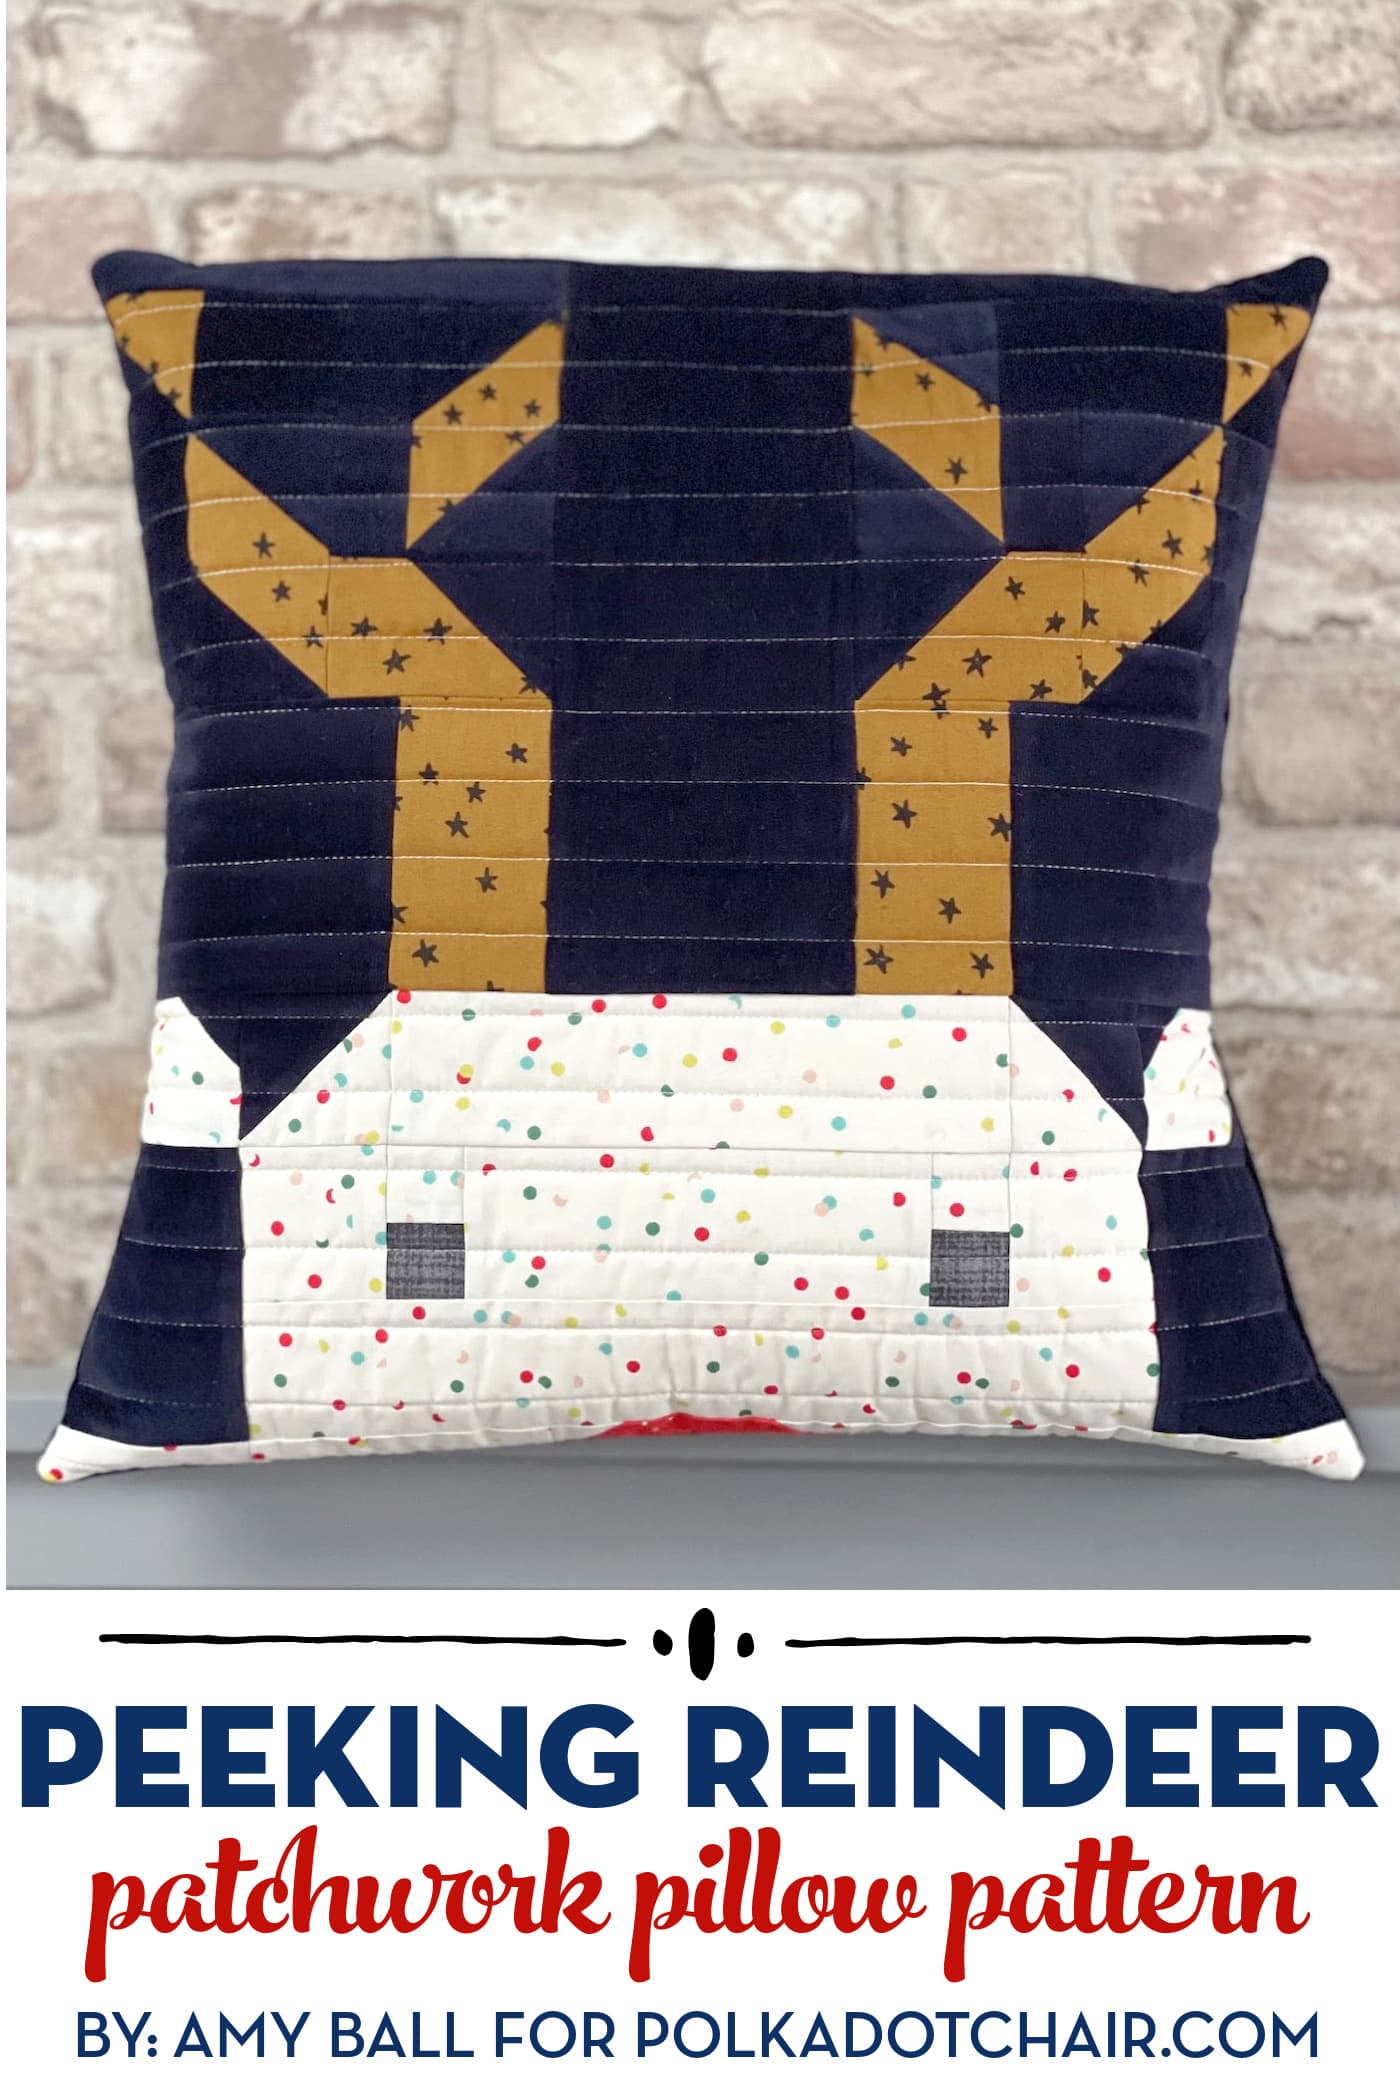
Peeking Rudolph Christmas Pillow Pattern
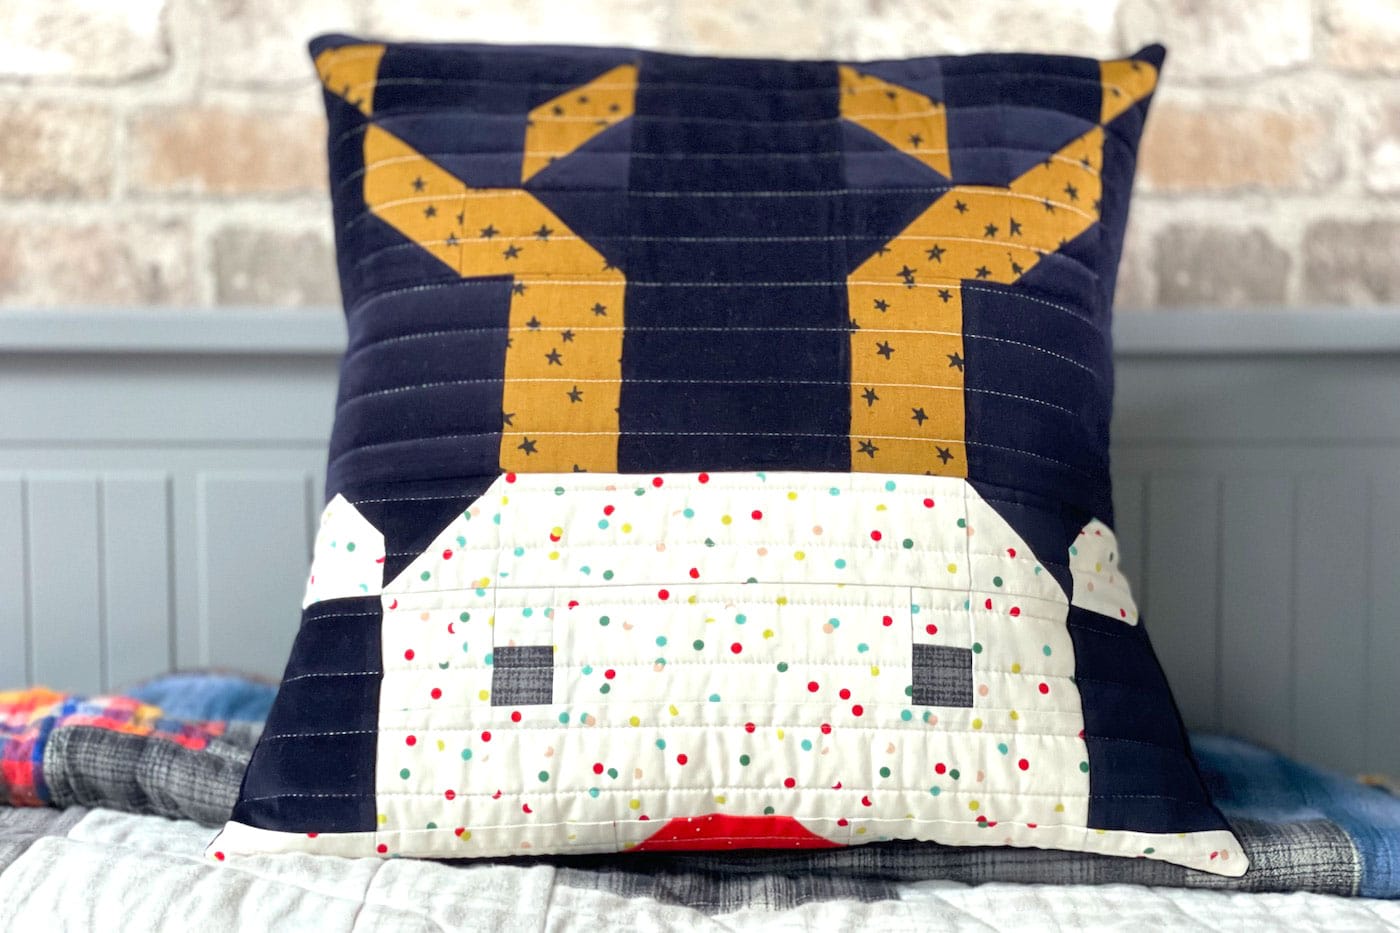
This quilted reindeer quilt block patchwork pillow has a cozy little secret. It’s made with velvet fabrics! Keep reading to find out how to make this Christmas pillow and a few of our tips for sewing with velvet.
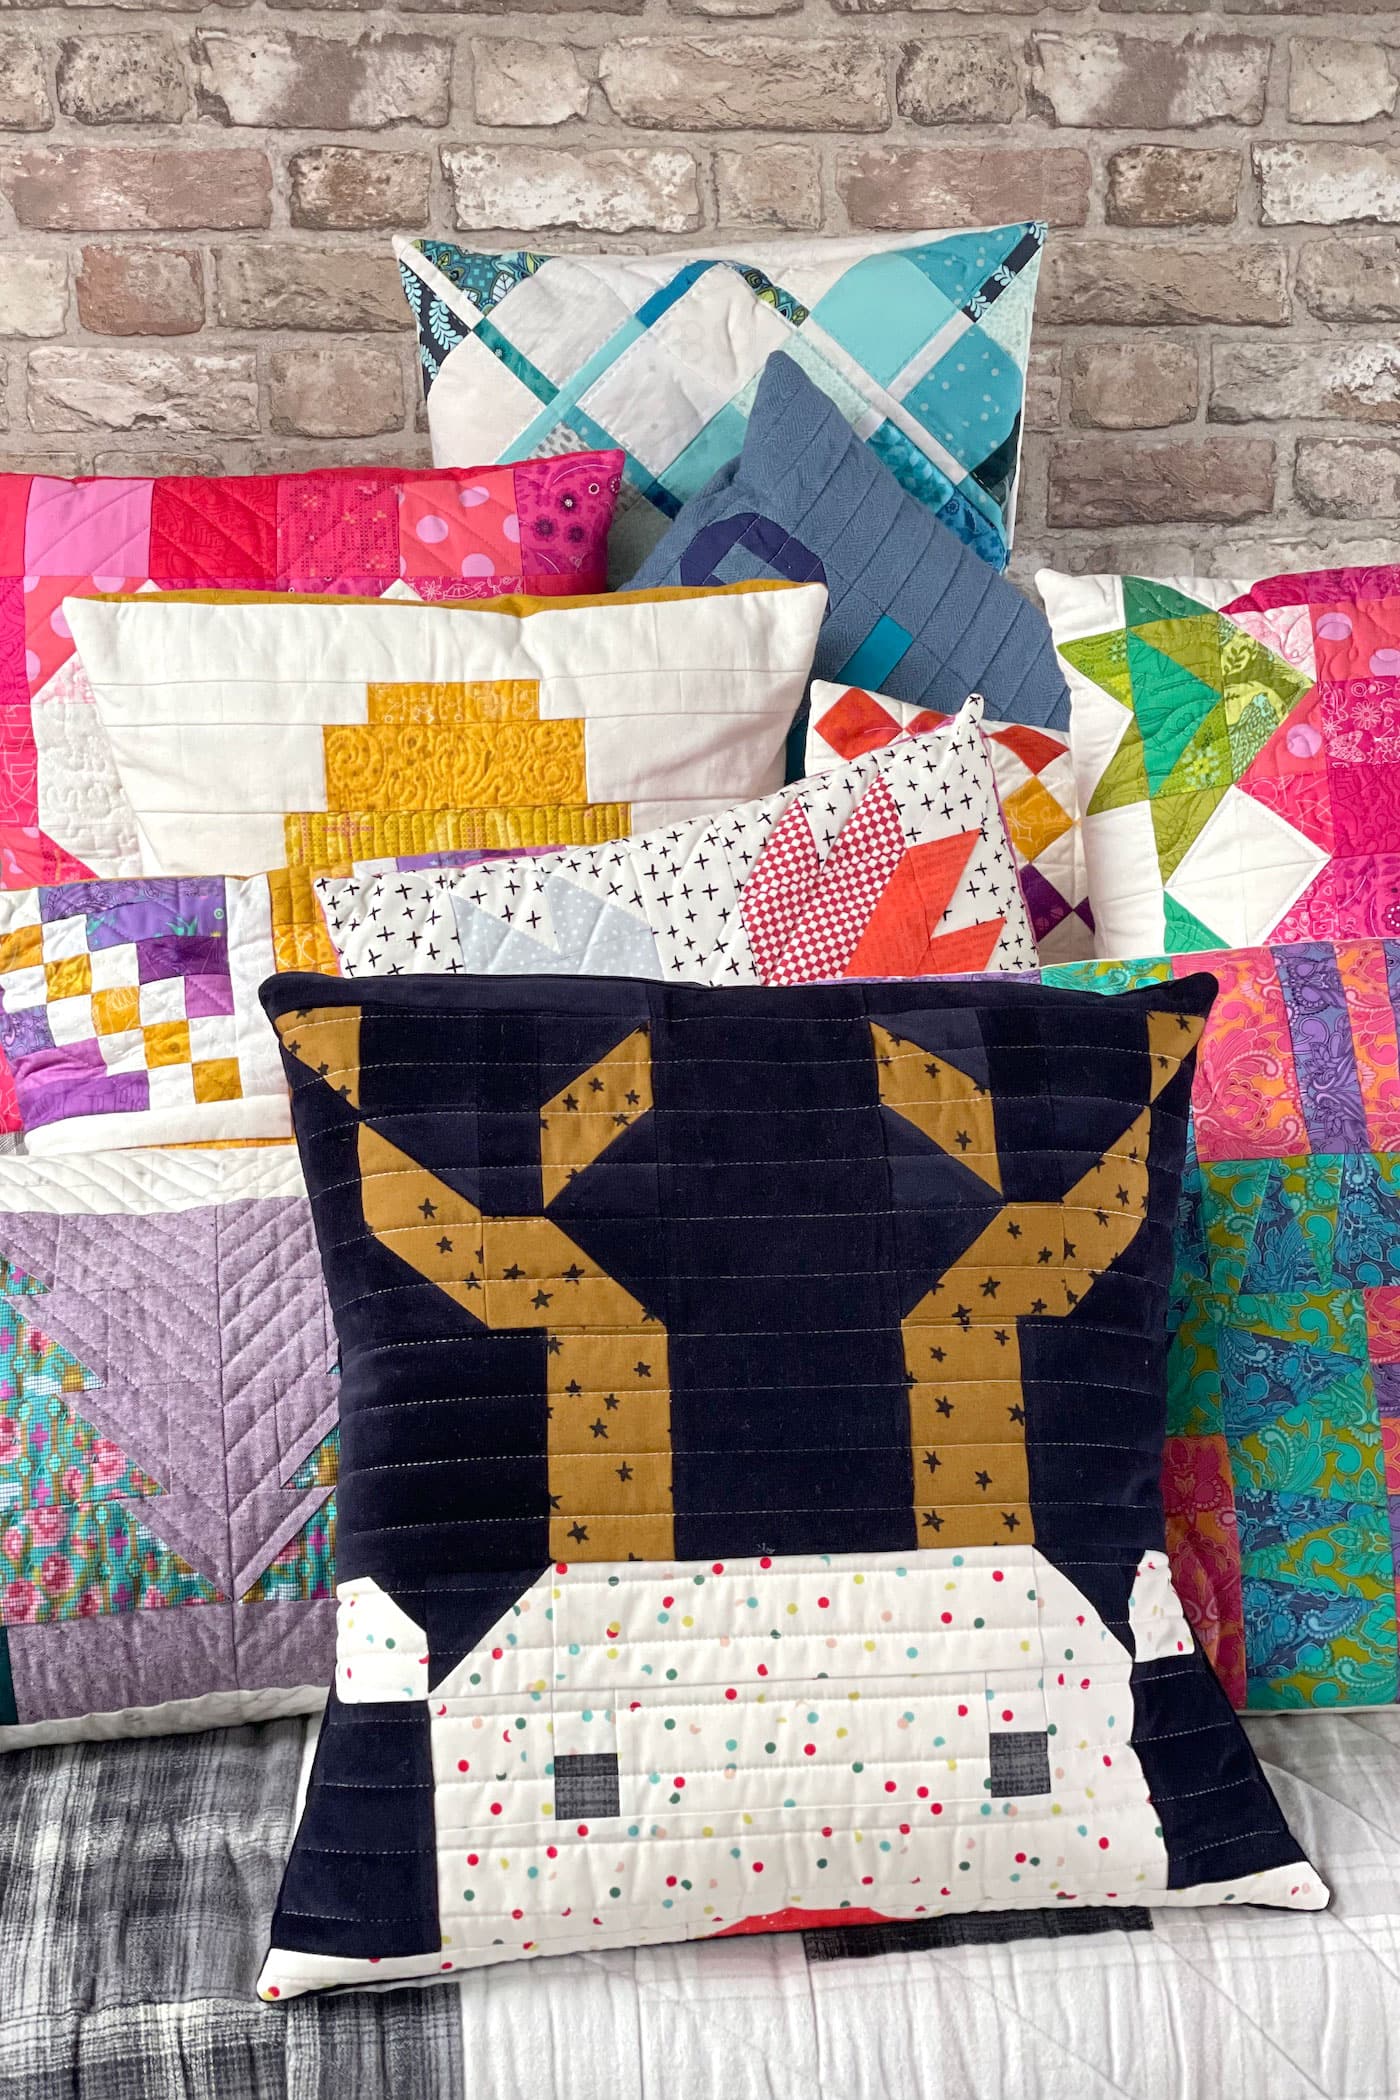
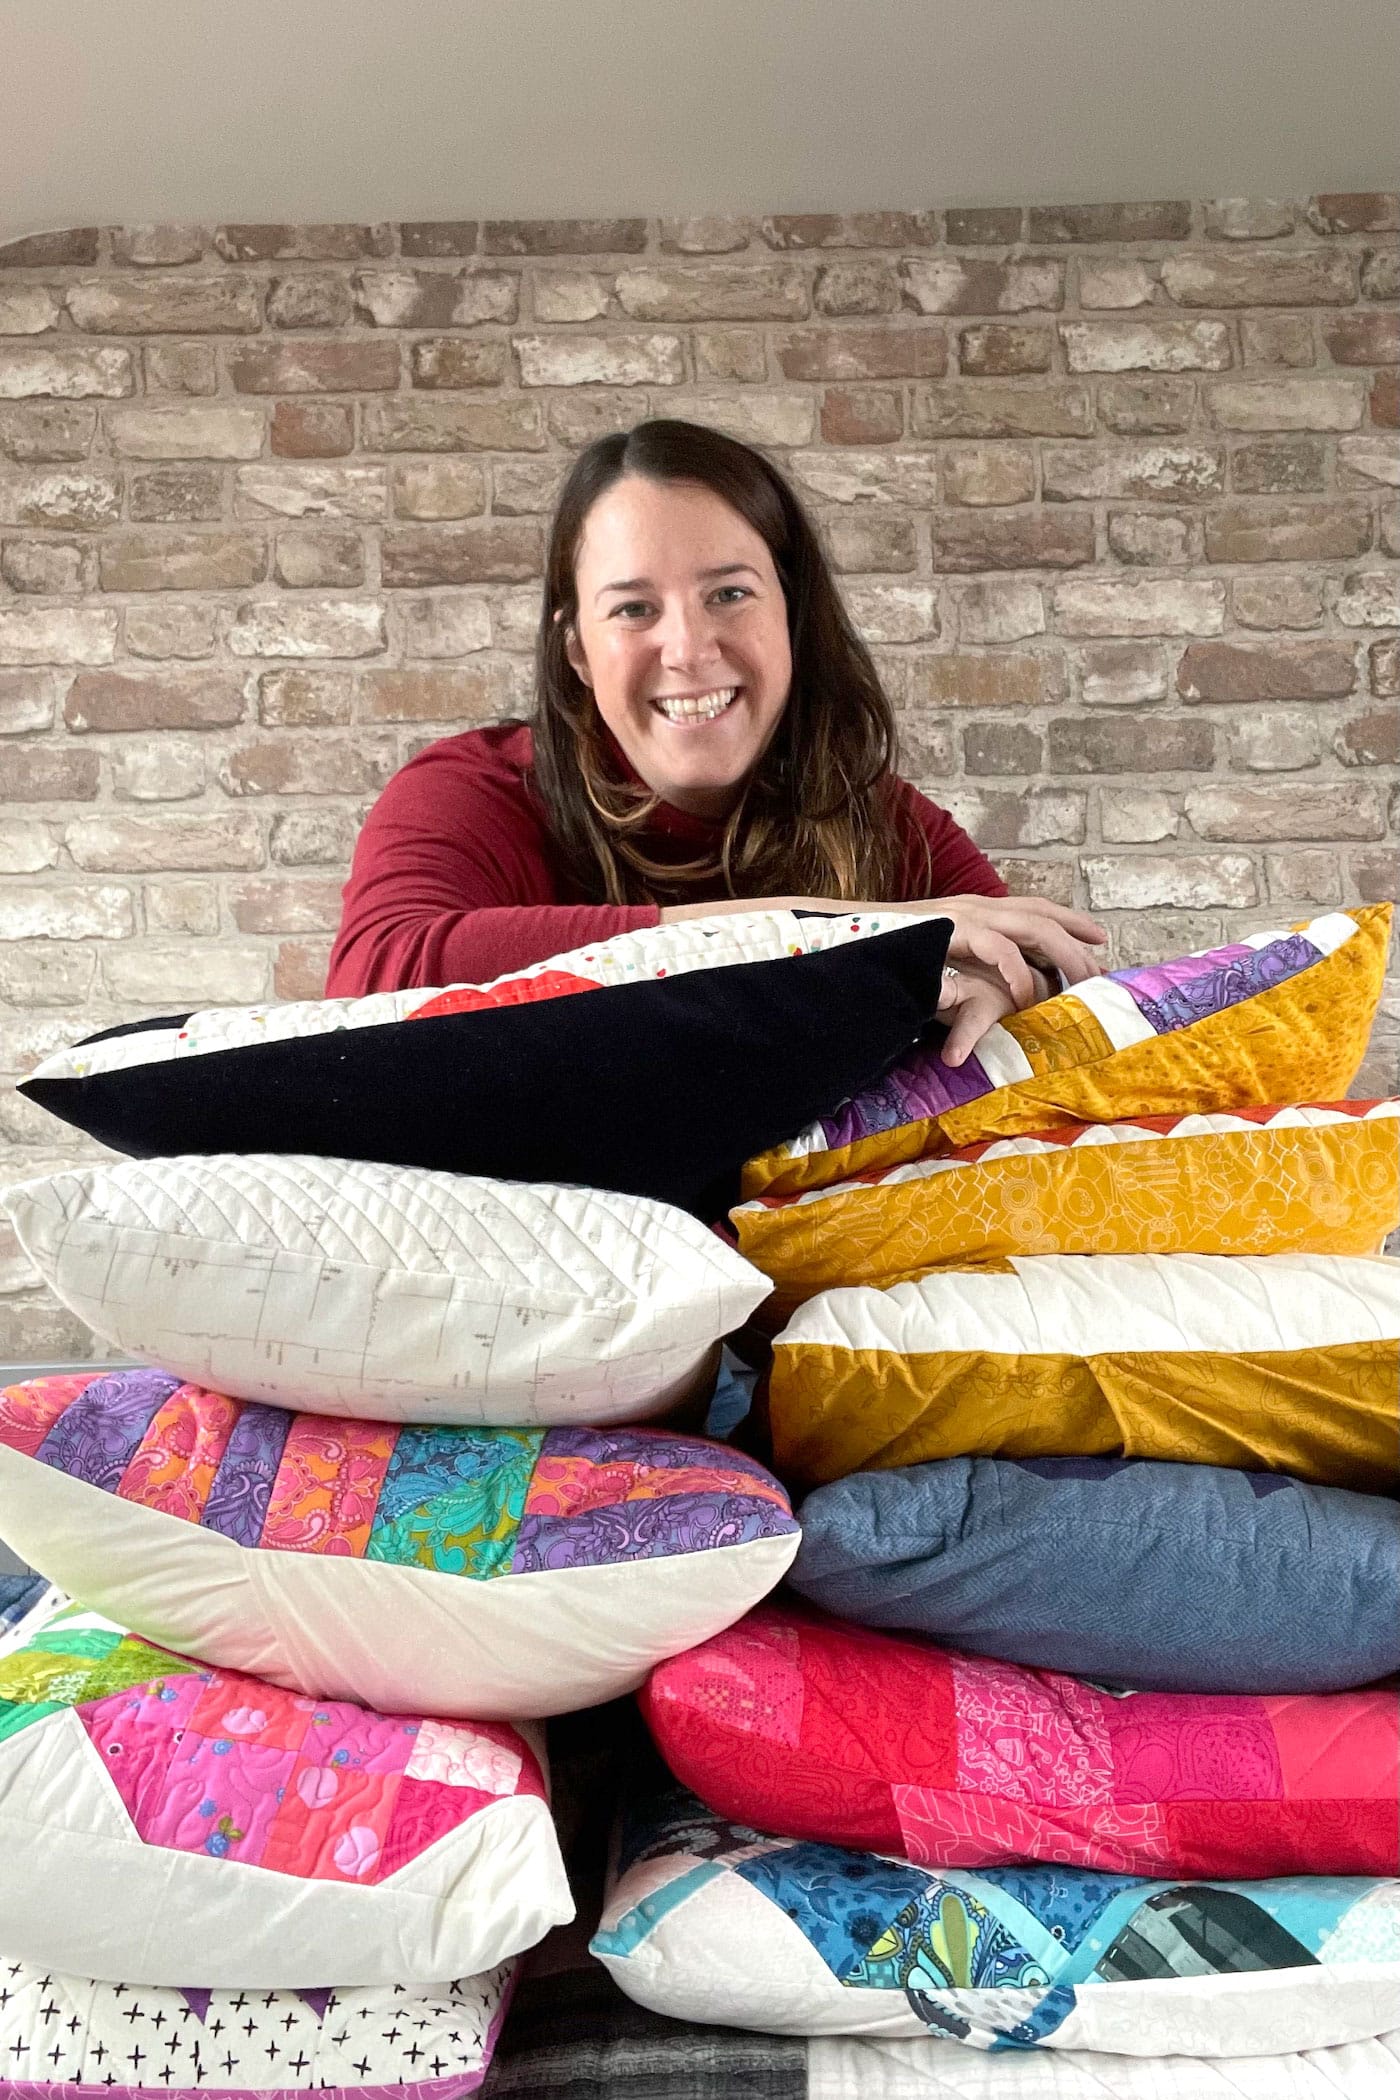
Amy Ball is again with us, sharing another amazing pieced quilted pillow pattern. This is Amy’s 11th quilted pillow pattern for the Polka Dot Chair “Pillow of the Month” series.
If you missed any of the other pillow patterns, you can find them all on our site.
- January: Patchwork Plaid Pillow
- February: Heart Quilted Pillow
- March: SLEEP Pieced Letters Pillow Pattern
- April: Patchwork Beehive Pillow
- May: Queens Jubilee Celebration Pillow Pattern
- June: Moroccan Tiles Pillow
- July: Prism Paw Quilted Pillow Pattern
- August: Strawberry Fields Patchwork Pillow
- September: Improv Patchwork Pillow Pattern
- October: Twin Pines Quilted Pillow Pattern
- November: Peeking Reindeer Patchwork Pillow
- December: Christmas Presents Pillow
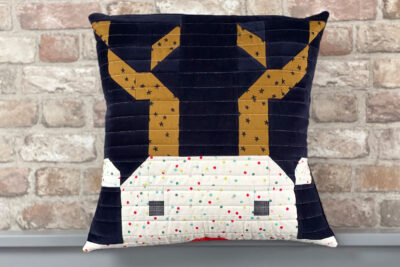
This month’s pillow is extra cozy, thanks to the addition of velvet! Yes, you read that right, velvet! Amy has figured out how to make velvet patchwork. I have to say the end product is absolutely gorgeous.
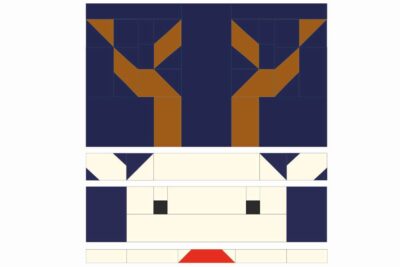
Quilted Reindeer Pillow Pattern
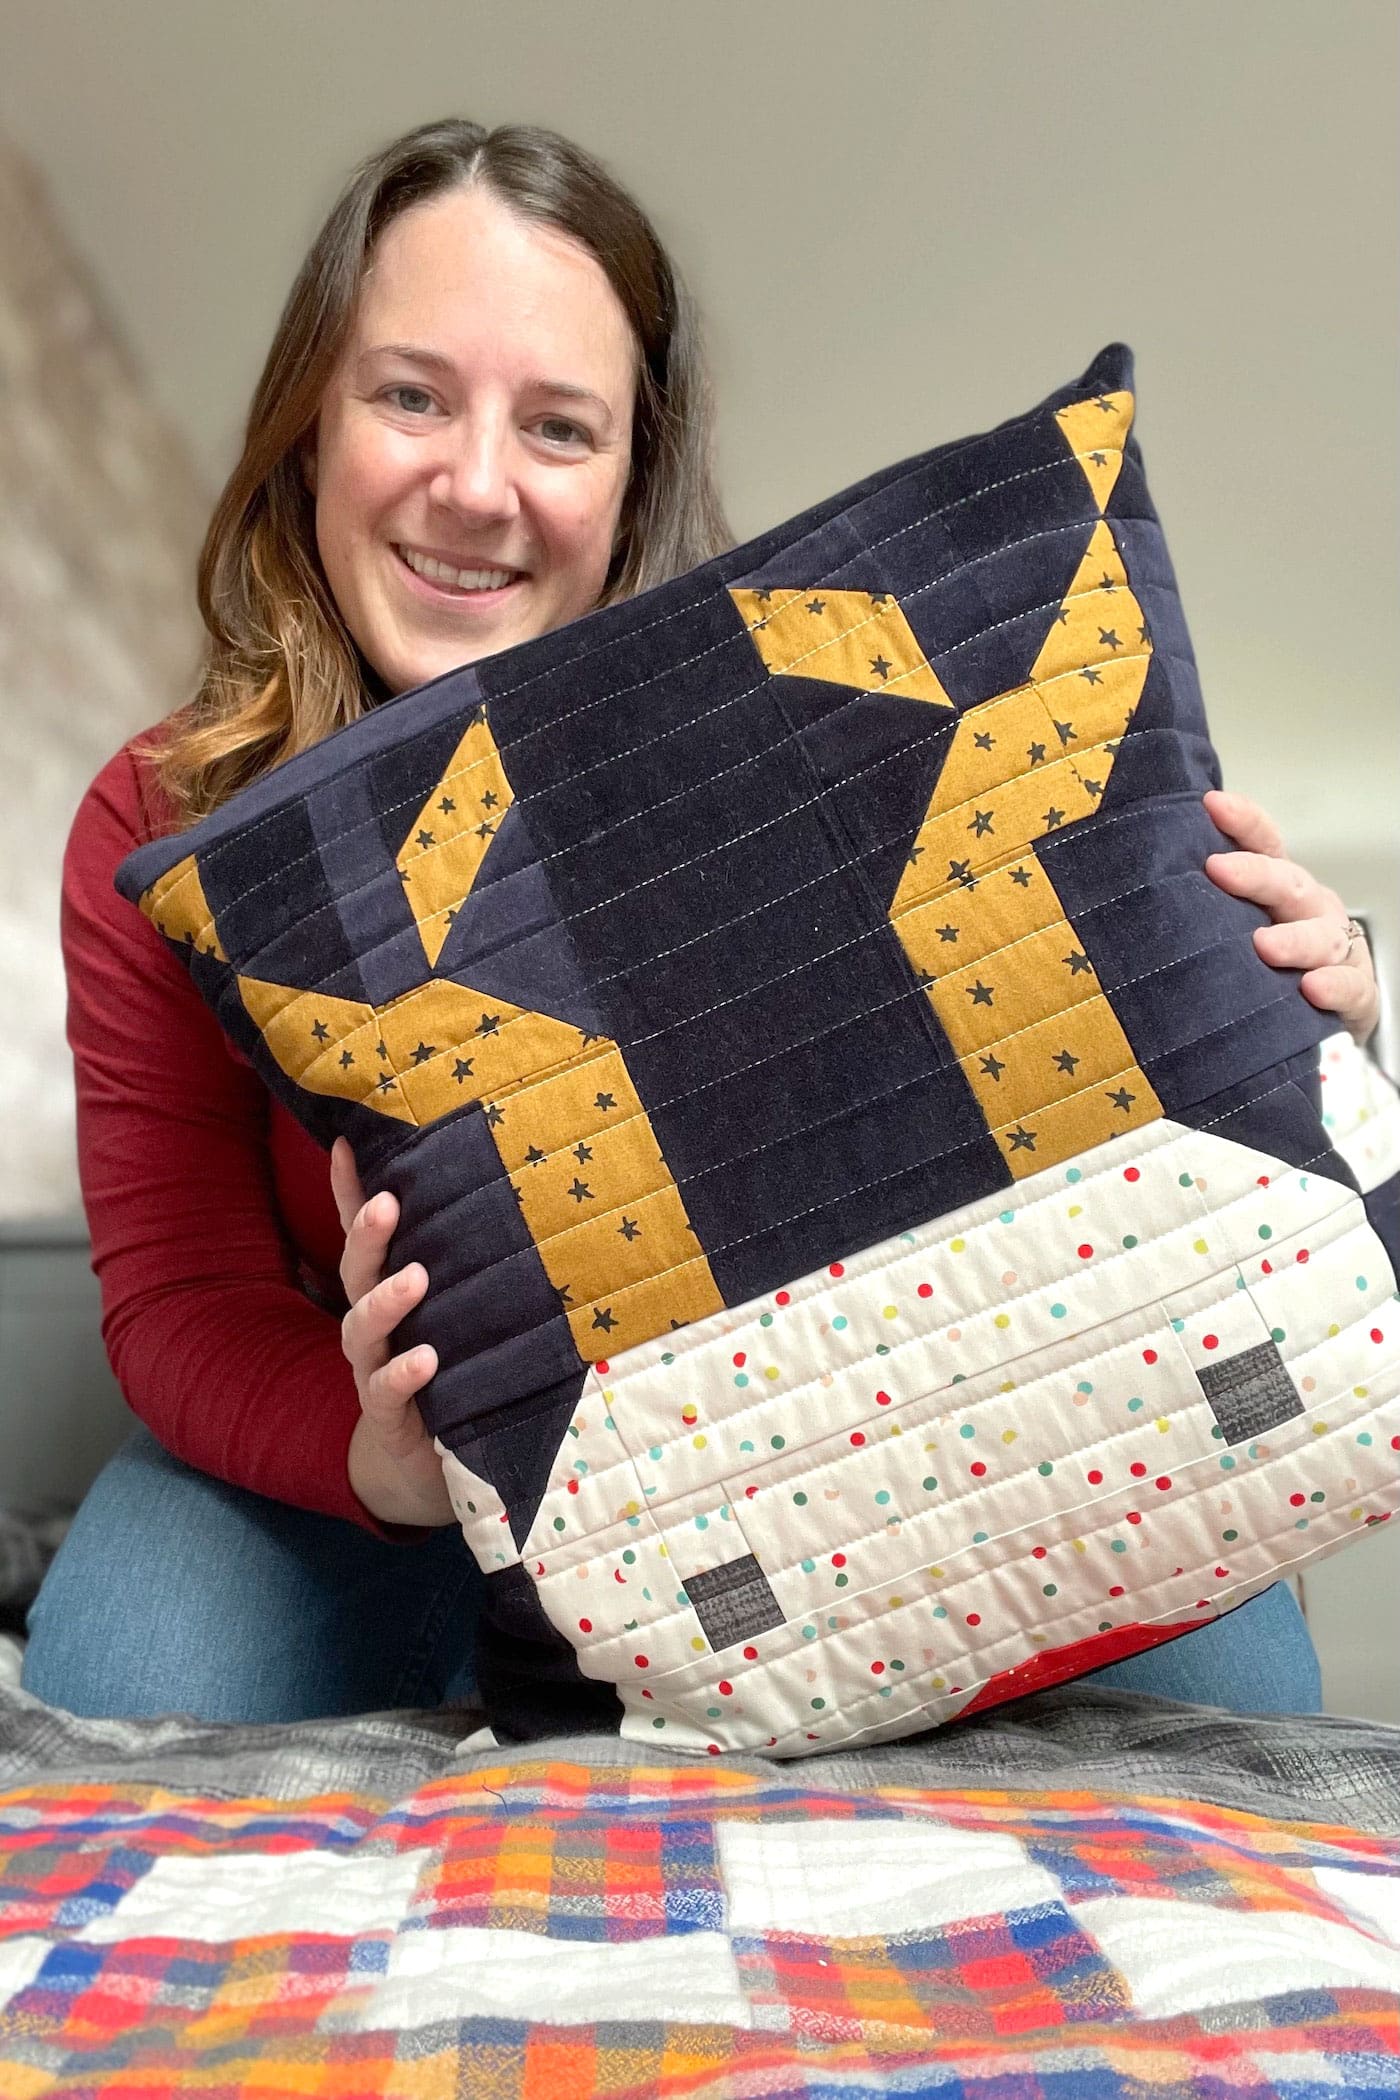
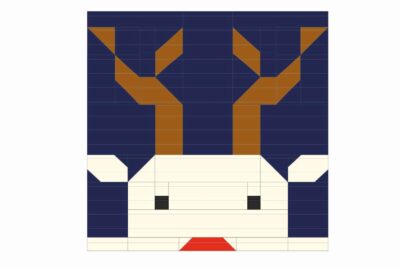
This cute little patchwork Rudolf is peeking up from the bottom of this month’s pillow of the month to say a festive hello.
I have used navy velvet for the background fabric to give the pillow a warmer and more luxurious feel.
Sewing with Velvet
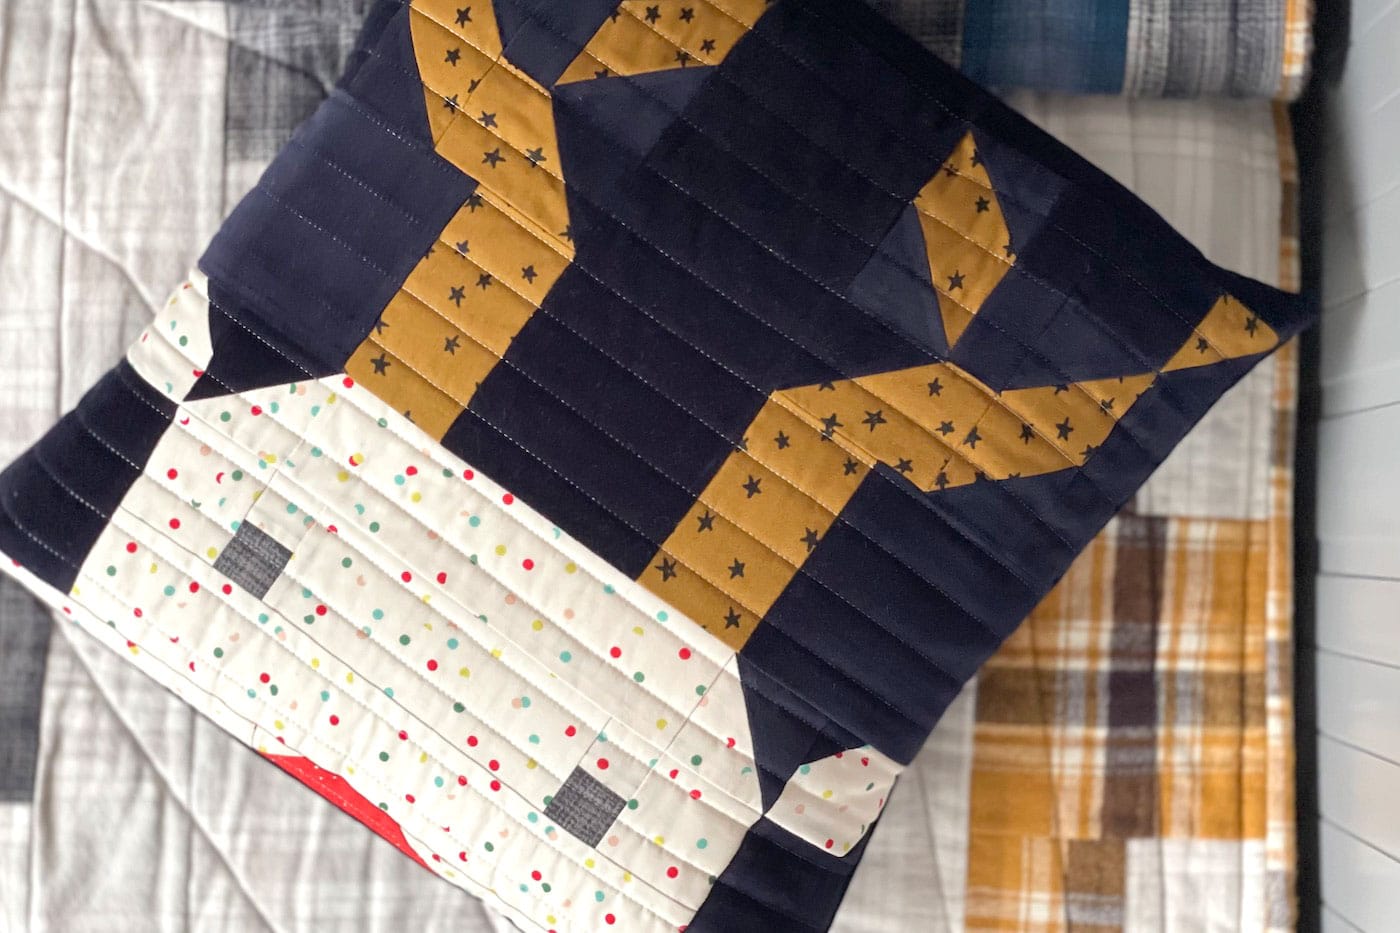
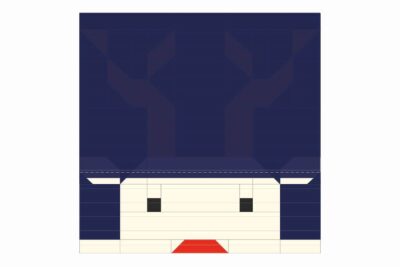
I even feel like the subtle shimmer that the textured surface of velvet has, gives this design an extra festive pop too.
But a note of caution if you decide to use a thicker fabric like velvet for this patchwork pillow (or any other patchwork projects!)… velvet can be quite a bit thicker than quilting cotton, and this will have a domino effect on your seam allowance.
Also note that
As you go, make sure you check your seam allowances and block sizes and make any adjustments as necessary before you start sewing. You will most likely need to use a slightly smaller seam allowance.
You should also note that when pressing velvet, you may get what is referred to as “iron shine”. I think the shine adds extra interest to the finished project, but if you’d like to reduce the amount of iron shine that you get, always press the fabric on the wrong side. You can also use a pressing cloth.
Before you use your iron on the velvet, press a test piece to ensure that your fabric can hold up to the heat of the iron.
Peeking Rudolph Quilted Christmas Pillow Pattern
Equipment
supplies
Fabrics:
- 1 Fat Eighth Copper/brown fabric for antlers
- 1 Fat Eighth Cream fabric for face & ears
- 1 scrap Black fabric for eyes
- 1 scrap Red fabric for nose
- 1 Fat Quarter Navy fabric for background. I used lightweight velvet
- 1 Fat Quarter Light backing fabric
- 1/2 Yard Pillow back fabric
Other Materials
- 1 piece
Batting 20” x 20”
- 1 Cushion pad: 18” x 18”
Instructions
Cutting:
- From copper “antlers” fabric cut: 2½” square (2), 2½” x 4½” (6), and 3½” x 2½” (2). From cream “face” fabric cut: 1½” square (4), 2½” square (4), 3½” x 1½” (2), 3½” x 2½” (2), 4½” x 1½” (2), 6½” x 2½” (1), 8½” x 2½” (1), and 12½” x 2½” (1). From black “eyes” fabric cut: 1½” square (2). From red “nose” fabric cut: 4½” x 1½” (1). From navy “background” fabric cut: 1½” square (4), 1½” x 2½” (4), 2½” square (16), 2½” x 4½” (2), 3½” x 4½” (2), 4½” x 11½” (1), 5½” x 4½” (2), and 7½” x 1½” (2). From pillow back fabric cut:18½” x 12” (2).
Construction: Use a ¼” seam allowance unless otherwise stated.
- [Note: I am using the single method to make all the HSTs in this project due to the instability of the velvet background fabric. If you use a regular quilting cotton for the background fabric, you could use different HST construction methods.]
Make the antlers section:
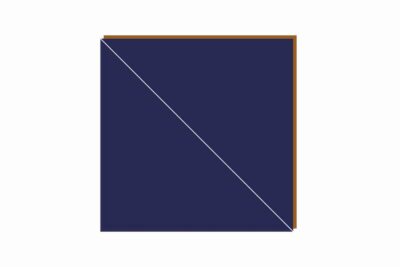
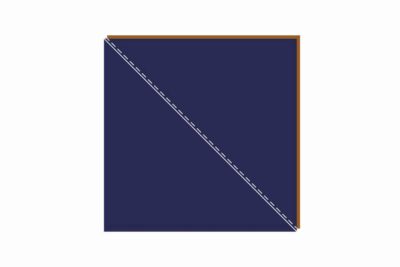
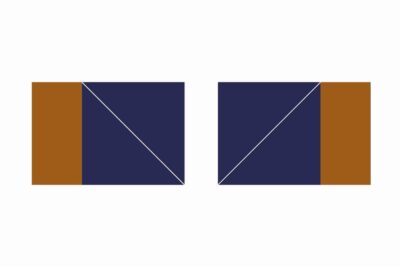
- Pair one navy 2½” square and one copper 2½” square right sides together. Pin together and draw a diagonal line on the wrong side of one square

- Sew just above the drawn line.
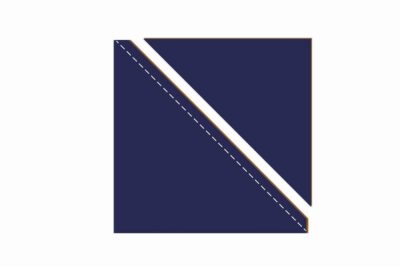
- Trim the excess corner away leaving a ¼” seam allowance above the sewn line.
- Press the half square triangle open and trim to 2½” square if required.
- Repeat steps 1 to 4 to make a second navy-copper HST.
- At this stage you can repeat steps 1 to 5 using two navy 2½” squares and two cream 2½” squares to make two navy-cream half square triangles and then set these aside for much later. Or you can wait and make this second pair of HSTs later in the instructions.
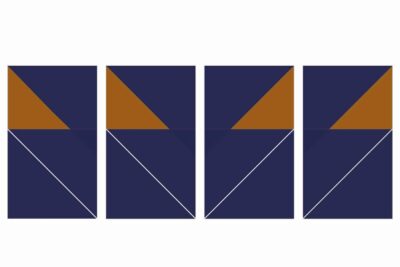
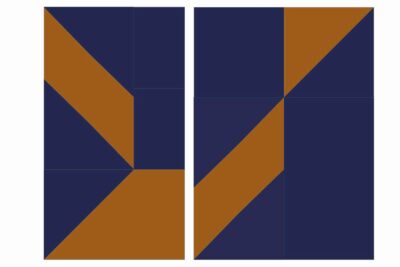
- Take four copper 2½” x 4½” rectangles and four navy 2½” squares. Draw a diagonal line on the wrong side of each square then pin one square, right sides together, to each rectangle using the diagram as a guide for placement.
- Sew just above the drawn lines, trim the excess corners away, press the corners into place and trim to 2½” x 4½” if required.
- Repeat steps 7 to 8 with four more navy 2½” squares added to the units you have already made. Set aside.
- Take two copper 3½” x 2½” rectangles and two navy 2½” squares. Draw a diagonal line on the wrong side of each square then pin one square, right sides together, to each rectangle using the diagram as a guide for placement.
- Sew just above the drawn lines, trim the excess corners away, press the corners into place and trim to 3½” x 2½” if required.
- Take one navy-copper HST and one navy 2½” square. Sew together with the HST on the left and with the HST’s copper corner in the top right.
- Take one navy 2½” x 4½” rectangle and one unit from step 9 (with the navy corners top right and bottom left). Sew together with the rectangle on the left.
- Take the units from step 12 and 13 and sew together using the diagram as a guide.
- Take two navy 1½” x 2½” rectangles and sew them together matching the short edges. Then sew this to the left edge of one of the units from step 9 (with the navy corners top left and bottom right).
- Take the unit from step 15 and one unit from step 11. Sew together with the step 11 unit on the bottom with the navy corner in the top right.
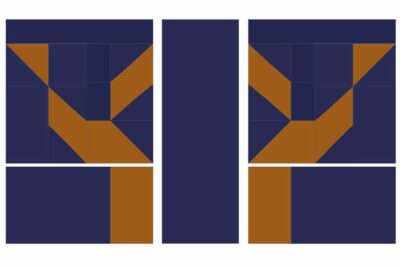
- Now take the units from steps 14 and 16 and sew together using the diagram as a guide for placement. Set aside.
- Take one navy-copper HST and one navy 2½” square. Sew together with the HST on the right and with the HST’s copper corner in the top left.
- Take one navy 2½” x 4½” rectangle and one unit from step 9 (with the navy corners top left and bottom right). Sew together with the rectangle on the right.
- Take the units from step 18 and 19 and sew together using the diagram as a guide.
- Take two navy 1½” x 2½” rectangles and sew them together matching the short edges. Then sew this to the right edge of one of the units from step 9 (with the navy corners top right and bottom left).
- Take the unit from step 21 and one unit from step 11. Sew together with the step 11 unit on the bottom with the navy corner in the top left.
- Now take the units from steps 20 and 22 and sew together using the diagram as a guide for placement. Set aside.
- Take the antler unit from step 17 and sew a navy 7½” x 1½” rectangle to the top edge.
- Repeat with the antler unit from step 23.
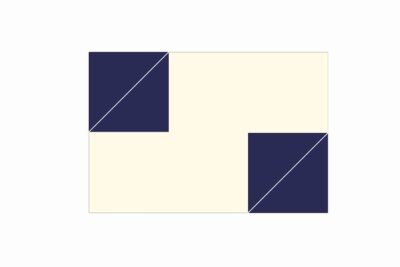
- Take one navy 5½” x 4½” rectangle and one copper 2½” x 4½” rectangle. Sew together with the navy rectangle on the left.
- Repeat step 26 but sew together with the copper rectangle on the left.
- Take the unit from step 26 and sew it to the bottom of the antler unit from step 24. Then take the unit from step 27 and sew it to the bottom of the antler unit from step 25. Sew these together with one navy 4½” x 11½” rectangle in the centre. Use the diagram as a guide for placement.


Make the face section:
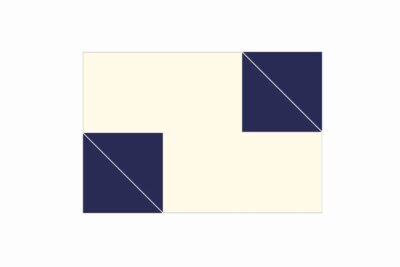
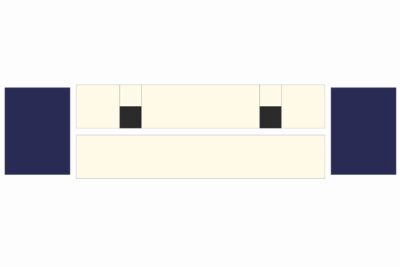
- Take one cream 3½” x 2½” rectangle and two navy 1½” squares. Draw a diagonal line on the wrong side of each square then pin both squares, right sides together, to the rectangle using the diagram as a guide for placement.
- Sew just outside the drawn lines, trim the excess corners away, press the corners into place and trim to 3½” x 2½” if required. This is one ear.
- Take one cream 3½” x 2½” rectangle and two navy 1½” squares. Draw a diagonal line on the wrong side of each square then pin both squares, right sides together, to the rectangle using the diagram as a guide for placement.
- Sew just outside the drawn lines, trim the excess corners away, press the corners into place and trim to 3½” x 2½” if required. This is another ear.
- If you haven’t already made these HSTs in step 6, pair one navy 2½” square and one cream 2½” square right sides together. Pin together and draw a diagonal line on the wrong side of one square
- Sew just above the drawn line.
- Trim the excess corner away leaving a ¼” seam allowance above the sewn line.
- Press the half square triangle open and trim to 2½” square if required.
- Repeat steps 5-8 of face section to make a second navy-cream HST.
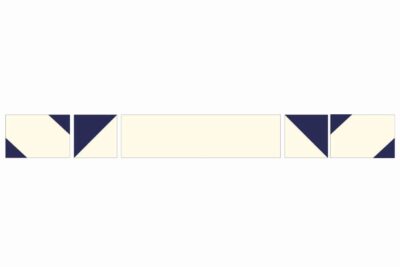
- Take one ear unit, one navy-cream HST, one cream 8½” x 2½” rectangle, another navy-cream HST, and another ear unit. Using the diagram as a guide for position and placement, sew them together to make a long row. Set aside.
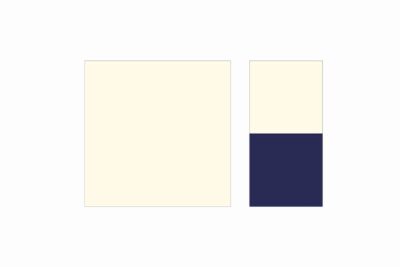
- Take one cream 1½” square and one black 1½” square. Sew them together with the cream square on top. Then sew this to one cream 2½” square with the black square in the bottom right corner. This is one eye.
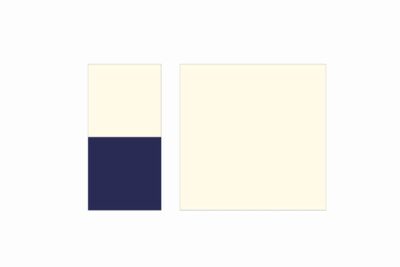
- Take one cream 1½” square and one black 1½” square. Sew them together with the cream square on top. Then sew this to one cream 2½” square with the black square in the bottom left corner. This is another eye.
- Take both eye units and one cream 6½” x 2½” rectangle. Using the diagram as a guide for position and placement, sew them together, with the cream rectangle in the centre, to make a long row.
- Take two navy 3½” x 4½” rectangles and sew them to the outside edges of the row from step face section step 13. Set aside.
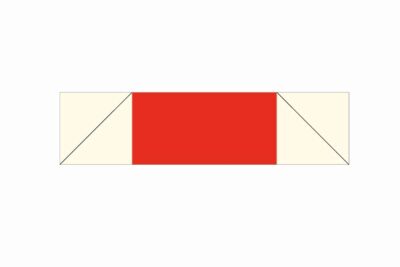
- Take one red 4½” x 1½” rectangle and two cream 1½” squares. Draw a diagonal line on the wrong side of each square then pin them, right sides together, to the edges of the rectangle using the diagram as a guide for placement.
- Sew just above the drawn lines, trim the excess corners away, press the corners into place and trim to 4½” x 1½” if required. This is the nose.
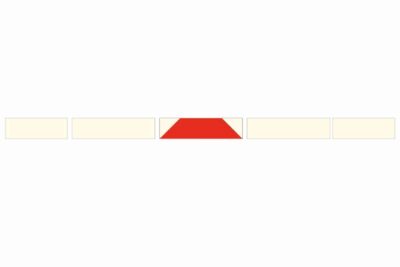
- Take one cream 3½” x 1½” rectangle, one cream 4½” x 1½” rectangle, the nose unit, another cream 4½” x 1½” rectangle, and another cream 3½” x 1½” rectangle. Using the diagram as a guide for position and placement, sew them together to make a long row.


Finish the pillow top:
- Take the antlers unit from step 28, the ears row from face section step 10, the eyes row from step face section step 14, and the nose row from step 17.
- Sew them together in this order to complete the patchwork pillow top. Press well.
Quilting:
- Now it’s time to make a quilt sandwich. Place your light backing fabric (right side facing down) with your batting on top, then add the patchwork pillow top with the right side facing towards you. Make sure all the layers are smooth and flat then baste the layers together using your preferred method.
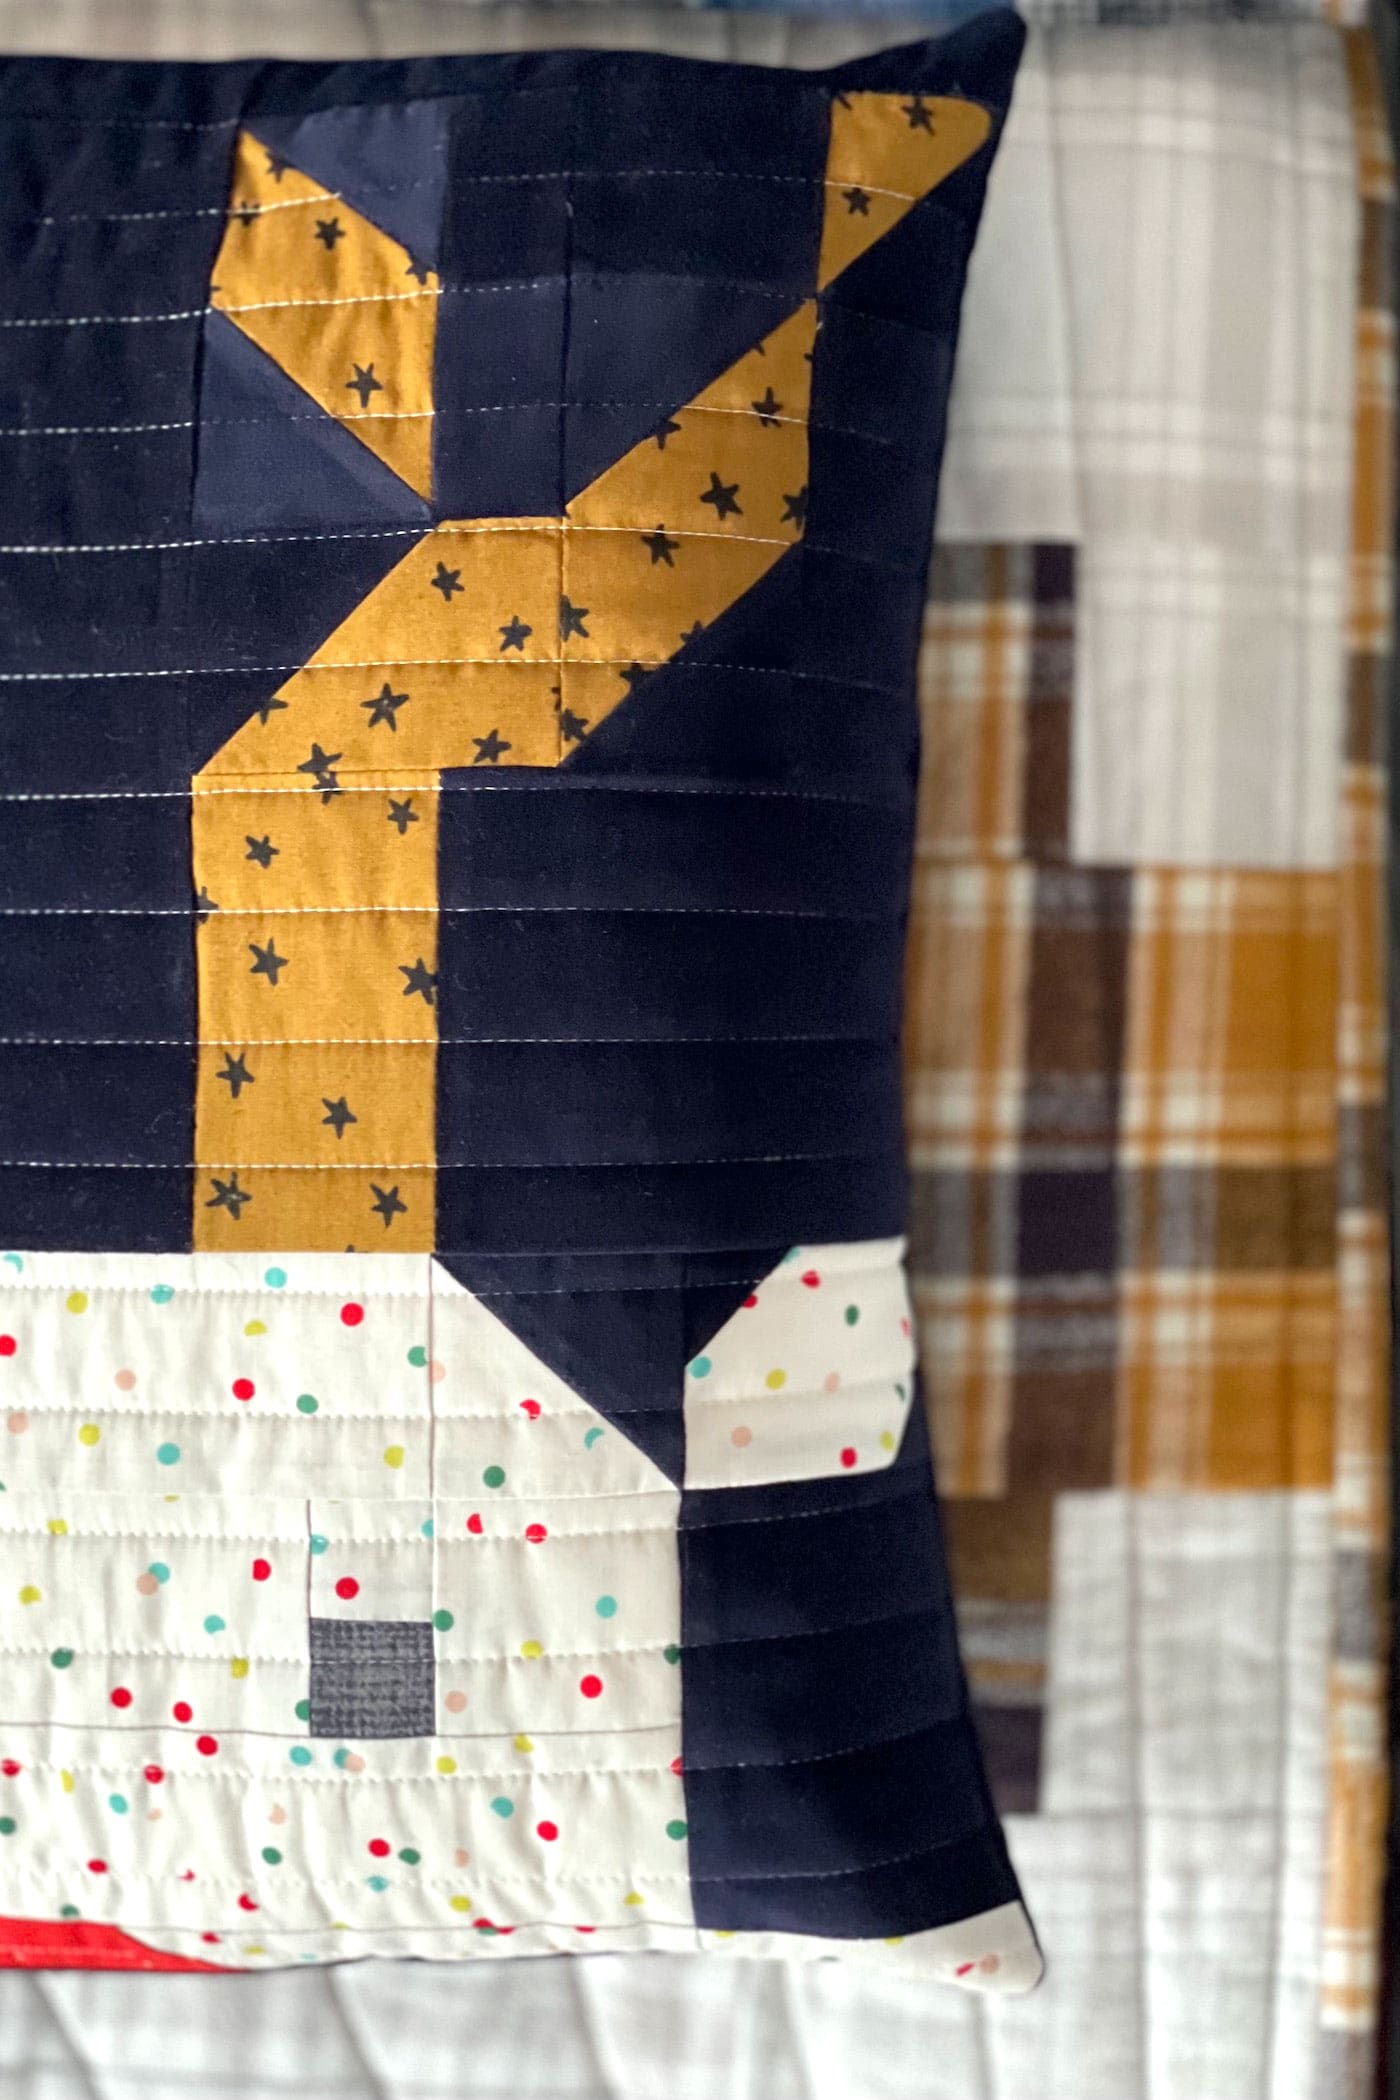
- Quilt as desired. I have used horizontal straight line quilting in pale pink, with 1” spacing. To avoid having a line of quilting on top of some of the horizontal seams of the pillow top, I quilted the first line ¾” from the bottom edge and then continued with 1” spacing until I got to the top. Other quilting ideas: an all-over free motion quilting motif.
- Once you have finished quilting, trim off the excess backing fabric and batting, and square up your pillow block if required.
Finishing:
- Take one cushion back 18½” x 12” rectangle and hem one long edge by pressing the raw edge to the wrong side by ¼” then again by another ¼”. Press well and sew. Then repeat for the second cushion back 18½” x 12” rectangle.
- Pin or clip the cushion back pieces to the quilted block, right sides together, all around the four sides.
- Sew around all four edges using a ¼” seam allowance, securing the start and finish with some back-stitching.
- Trim the corners, turn the pillow cover the right way out, carefully poke out the four corners and then press.
- Stuff with an 18” square pad and enjoy your new Peeking Rudolf pillow!


I’m looking at the adorable reindeer pillow pattern but I’m confused about what a cushion pad is.
It’s a pillow form, the author Amy is from the UK and that is the term they use over there.