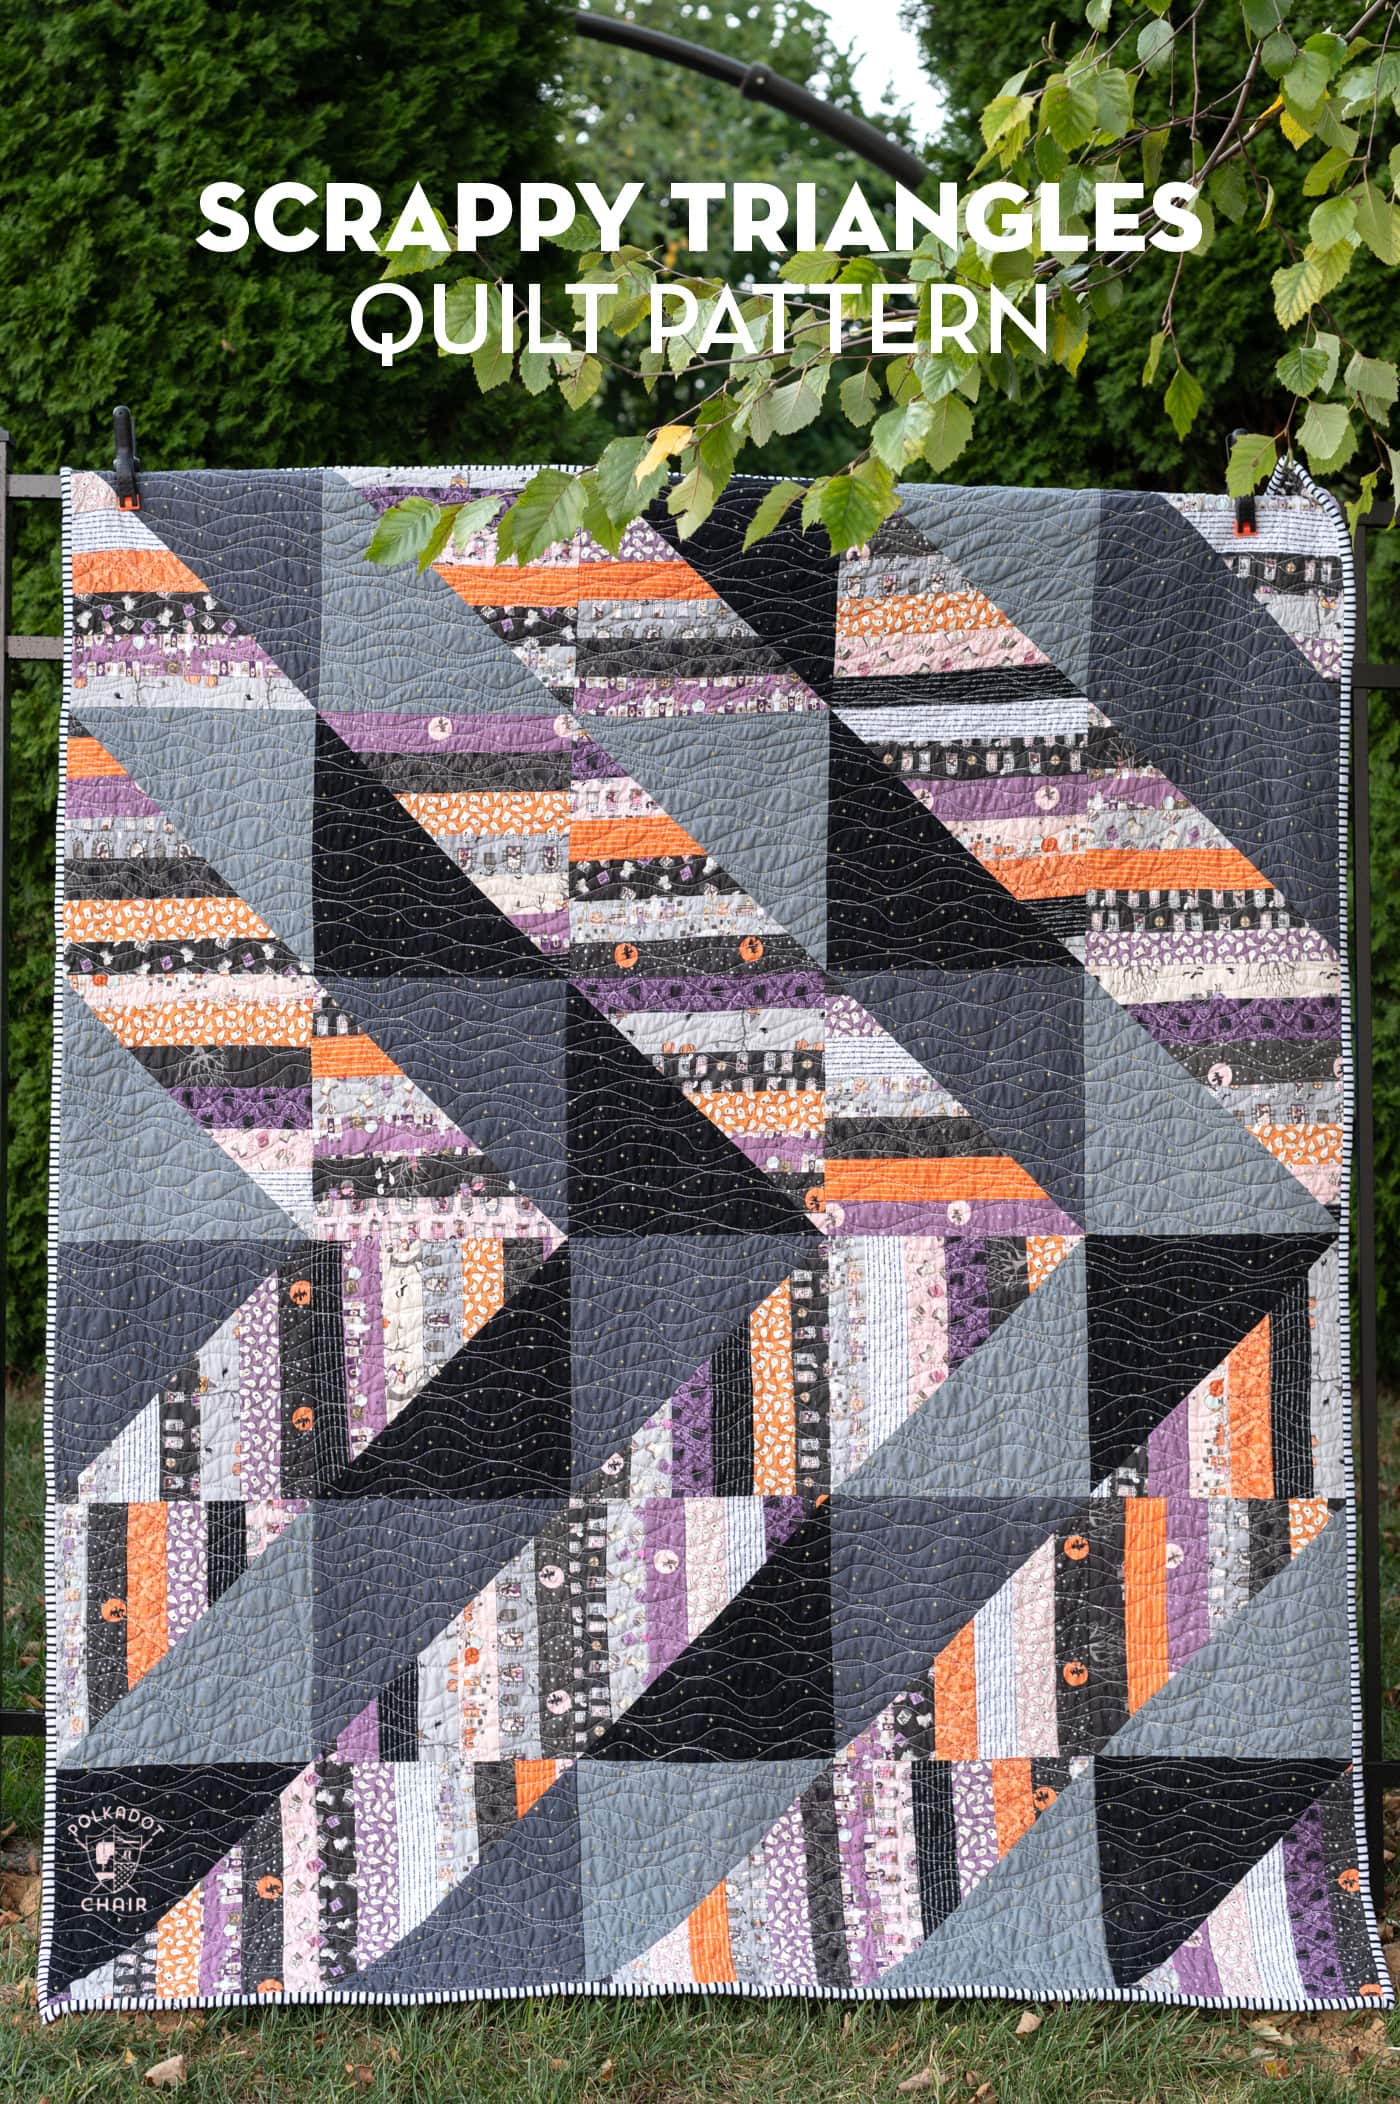
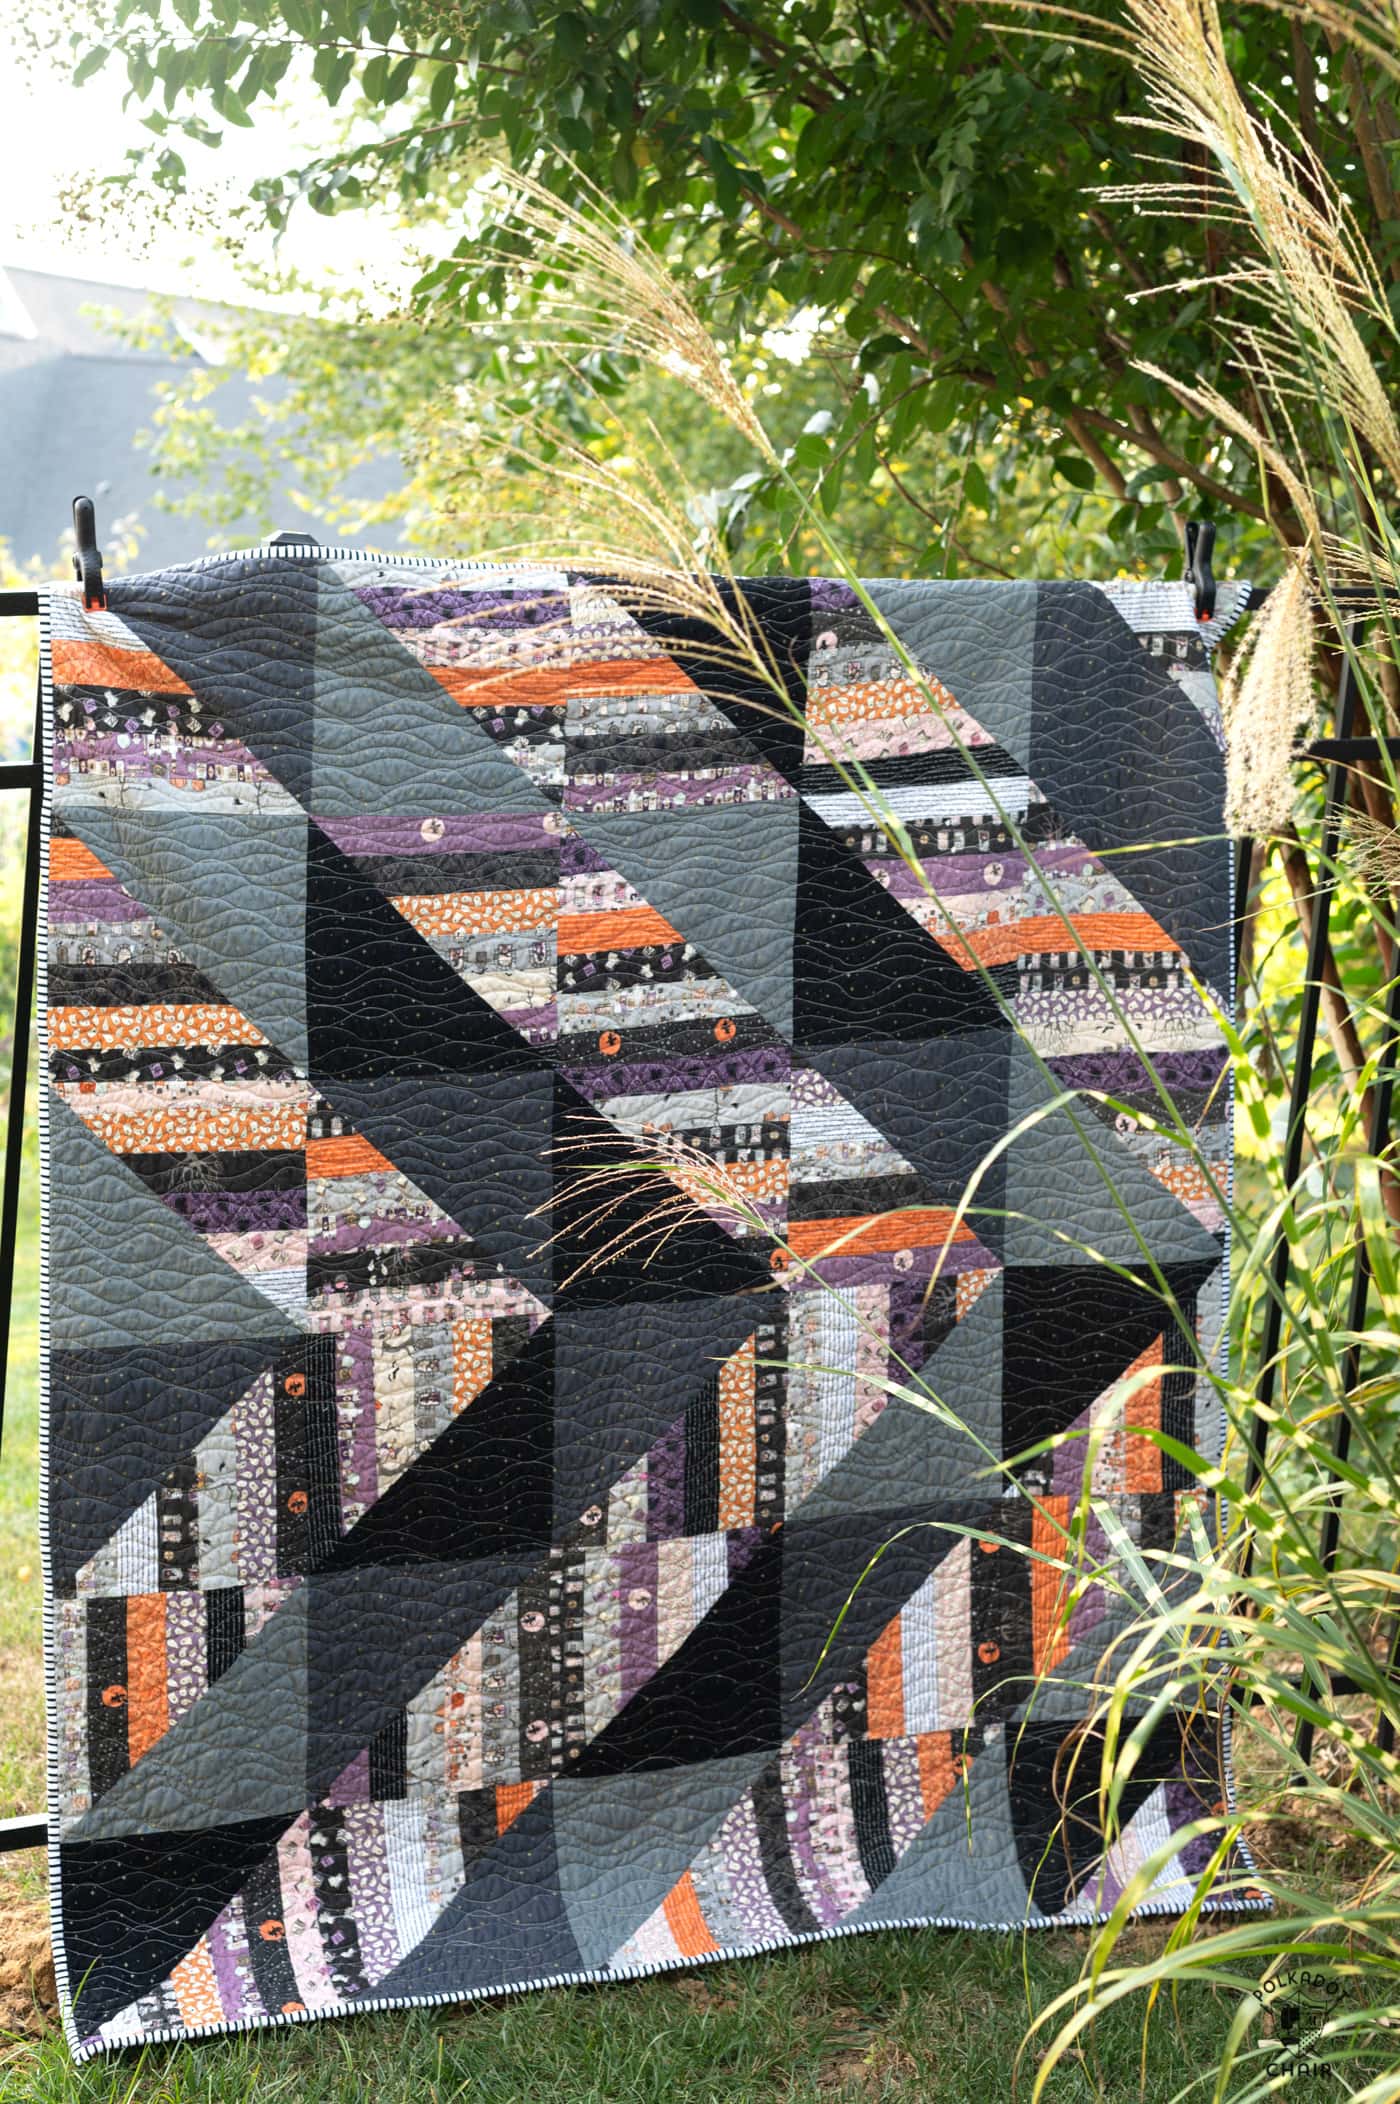
Scrappy Triangles Free Quilt Pattern
Create a snuggly lap quilt out of 3 yards of fabric and a Jelly Roll of fabric with our free Scrappy Triangles Quilt Pattern!
Today, I have a special guest tutorial for you! Traci of Quilted Imperfection is sharing with us how she makes her scrappy quilts! You may remember that she created this Wonky Log Cabin quilt for us several years ago.
The scrappy triangles quilt can be made from a variety of leftover 2 1/2″ precut strips, or it can be made using one 2 1/2″ Rolie Polie of fabric (sometimes called a Jelly Roll).
About the Quilt Pattern
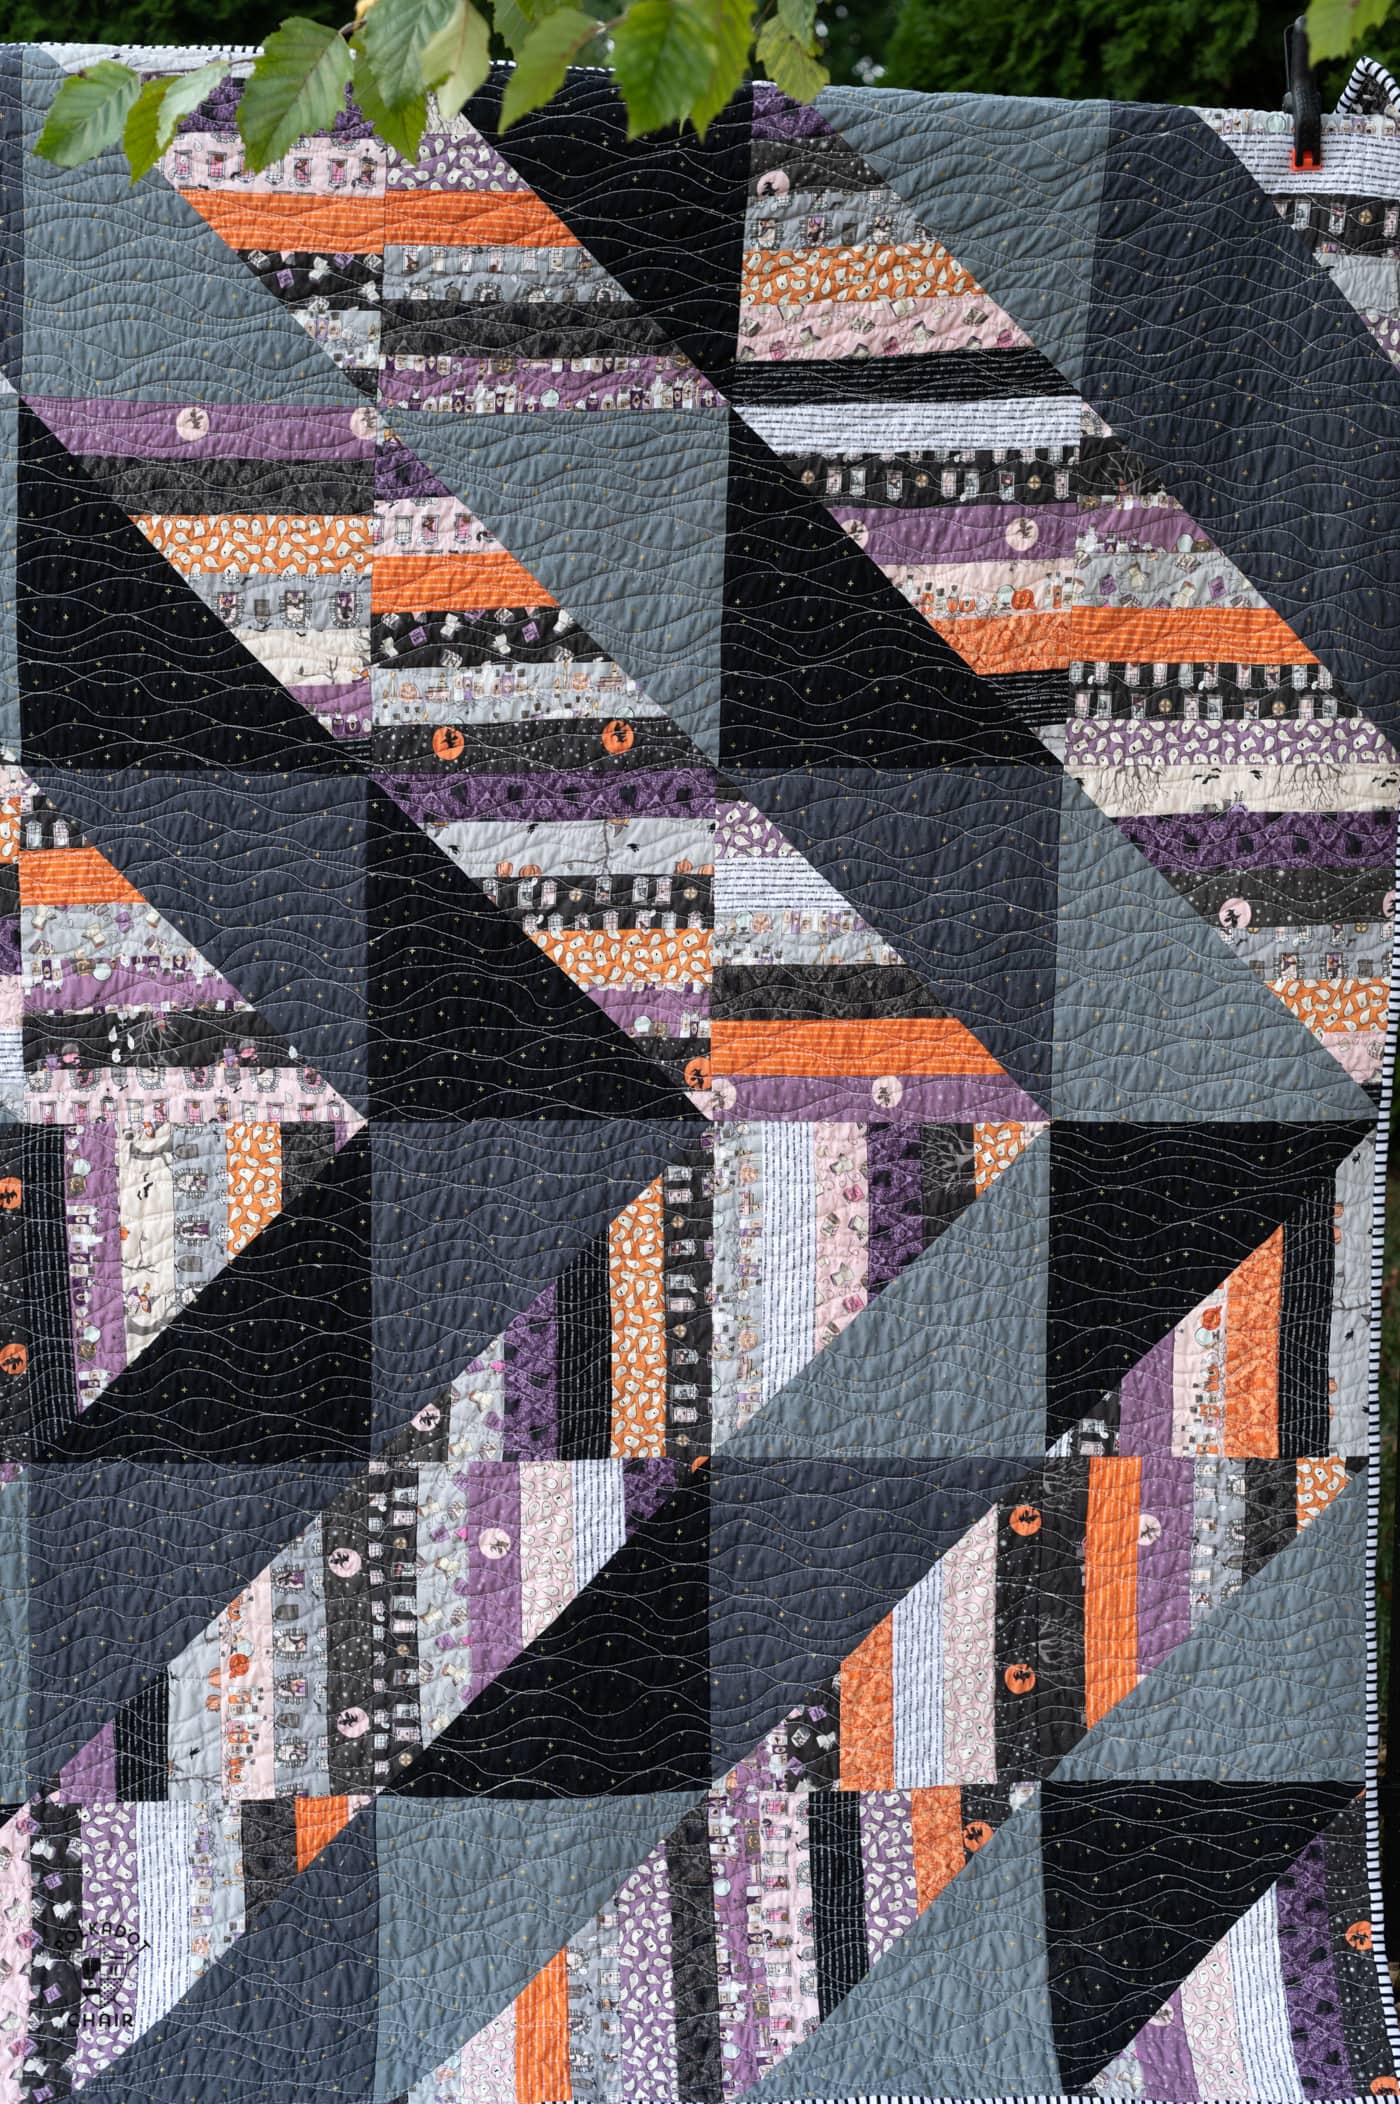
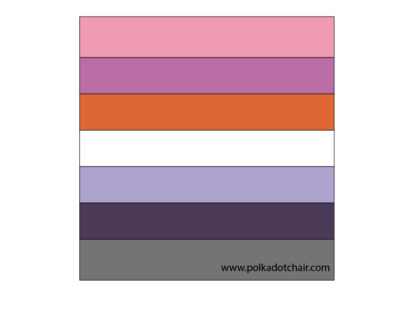
This quilt is constructed using three different shades of Sparkler fabric for the background, which gives the quilt a cool tonal texture and is a great alternative to sewing with all of the same background fabric.
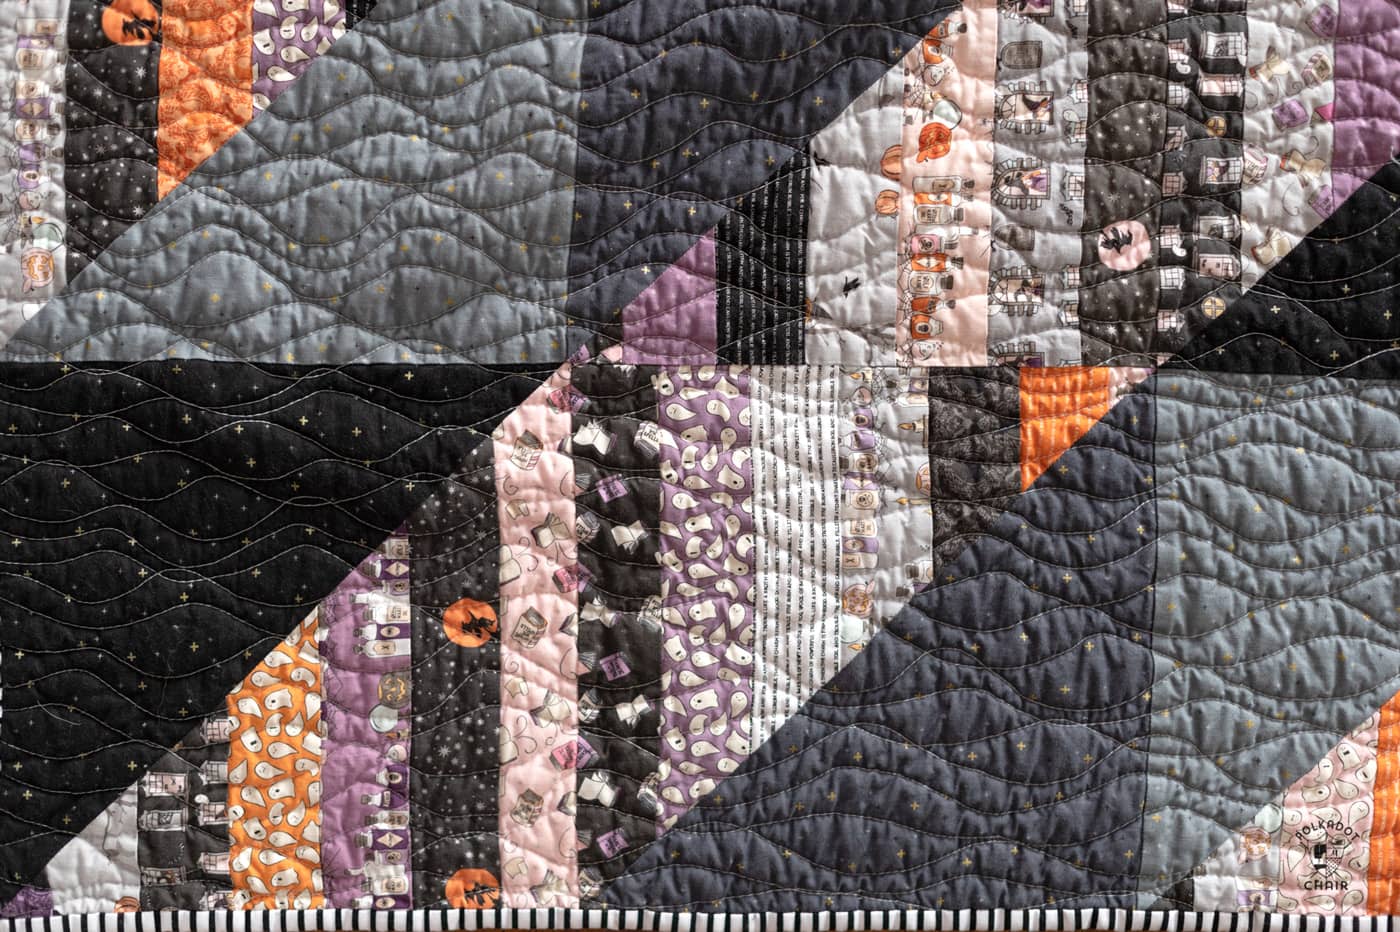
The half-square triangles in the quilt are made by first sewing the strips of fabric together, then creating a square, and then creating the half-square triangle using the two-at-a-time method. This block is similar to the Half Square Triangle String Block tutorial that I shared YEARS ago, but the math is simpler and more straightforward.
A Halloween Quilt Pattern
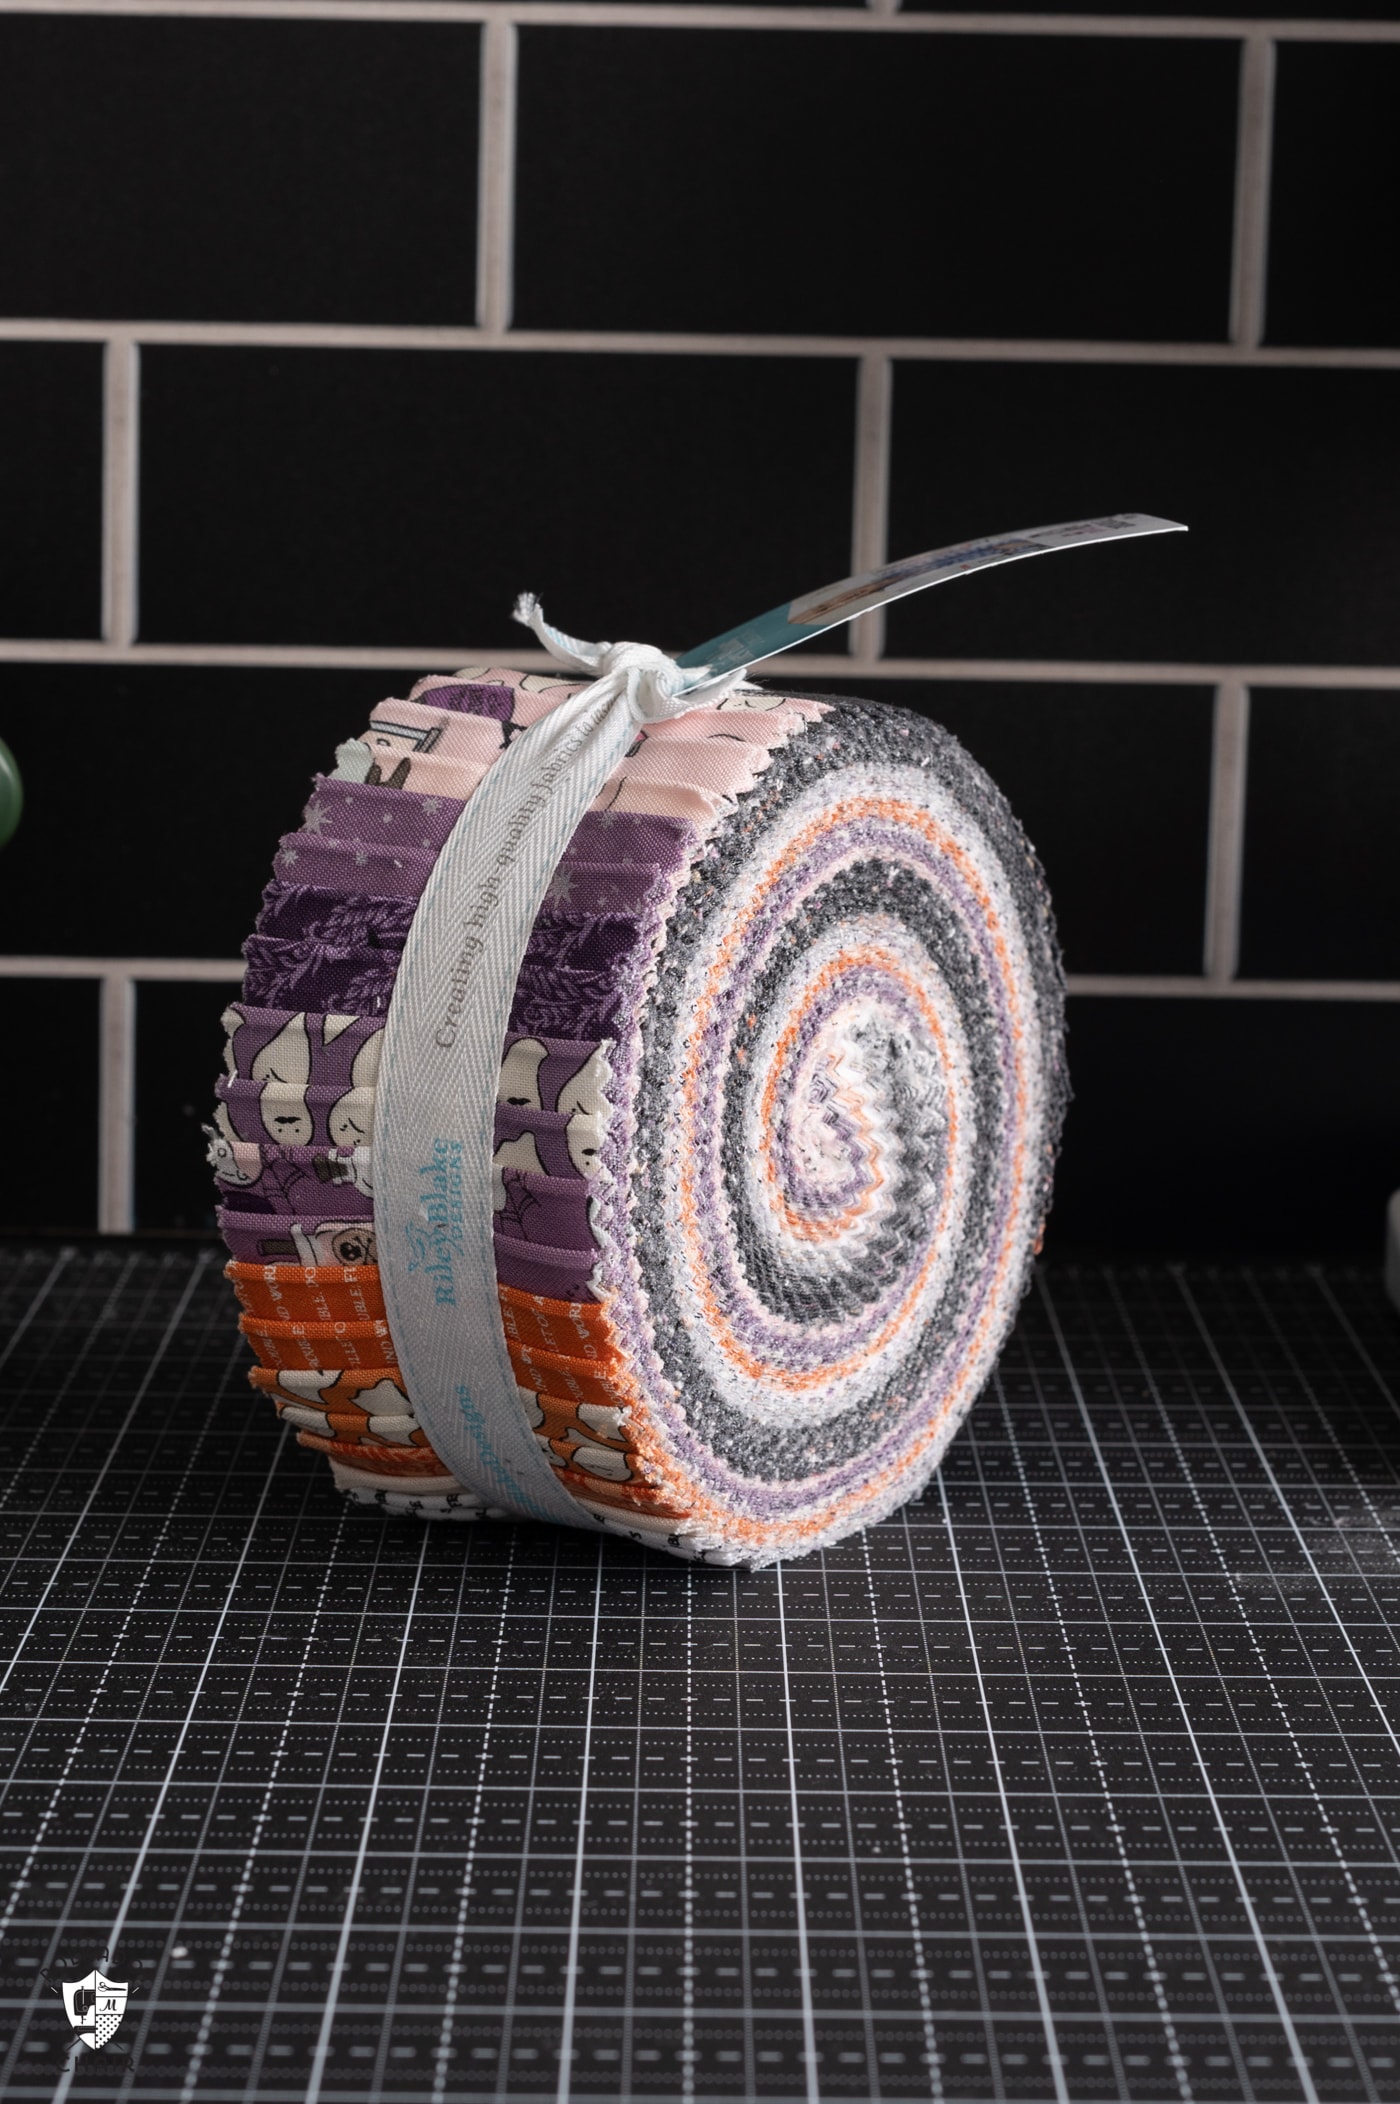
This quilt is made with 2 1/2″ strips from my Spooky Schoolhouse fabric collection with Riley Blake Designs, which makes it a Halloween quilt! You can, however, make it from any fabric you like, but the quilt’s texture makes it perfect for Halloween and Fall!

Construction Process
One of the great things about precut rolls of fabric is that you can sew multiple strips of fabric together and then cut them into smaller pieces, saving you a lot of time while piecing.
While this method is fast, it can lead to inaccurate seams, as pressing long strips of fabric can be difficult. The strips may have a tendency to distort as you press them.
For this reason, two cutting methods exist to create the blocks in this quilt. If you feel confident in your pressing and piecing abilities, you will first sew the strips of fabric uncut, then sub-cut them to size.
I think most people will be more comfortable cutting the strips into smaller lengths then sewing the strips to each other to create the blocks.
Quilting Method
Traci prefers to machine quilt her quilts on her home machine. She backs them with Minky fabric, then quilts wavy lines that intentionally overlap. One of these days, we might have to get her to share her method with us!
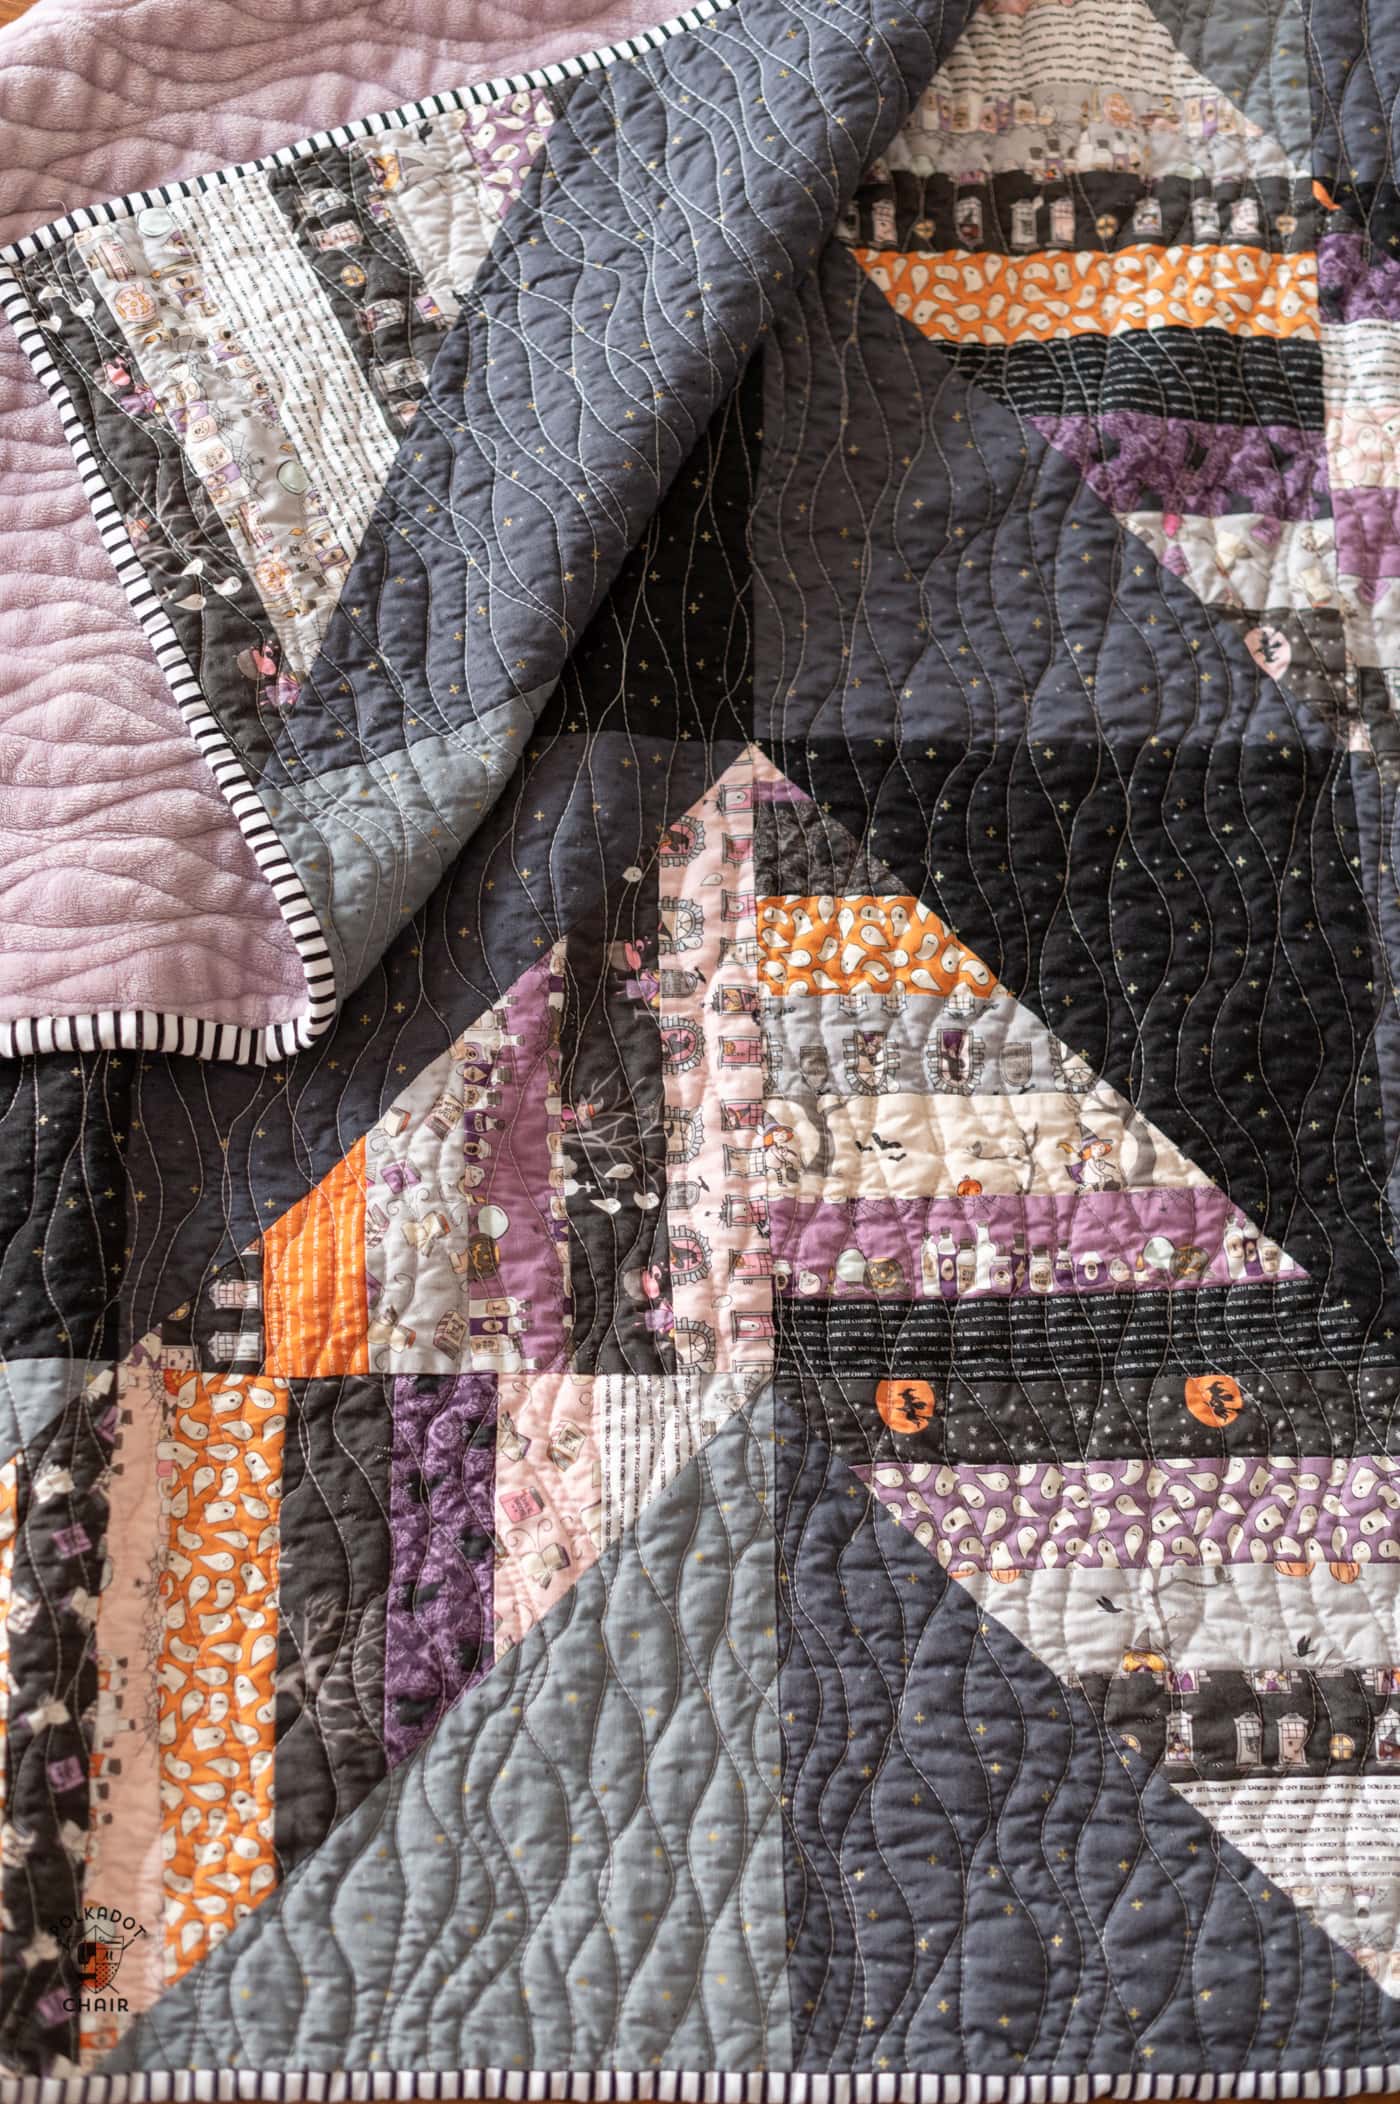
Combining these two methods yields the softest, fluffiest, most cuddle-friendly quilt! Just look at that texture!
Supplies Required
1 Yard Sparkler Fabric; Black
1 Yard Sparkler Fabric; Charcoal
1 Yard Sparkler Fabric; Iron
One 2 1/2” Precut Roll Spooky Schoolhouse Fabric
Approximate Size: 65” x 78”
Instructions

Scrappy Triangles Quilt Pattern
Equipment
supplies
- 1 Yard Sparkler Fabric; Black
- 1 Yard Sparkler Fabric; Charcoal
- 1 Yard Sparkler Fabric; Iron
- One 2 1/2” Precut Roll Spooky Schoolhouse Fabric
- 1/2 Yard Fabric for binding
Instructions
Approximate Size: 65” x 78” WOF = Width of Fabric
Step One: Cutting
- Cutting Notes: Many people prefer to sew long strips of fabric together, then press and sub-cut into smaller pieces. I have noticed when sewing longer pieces of fabric together, like those in the precut roll, that the seams have a tendency to distort. This may be challenging for someone who is a beginning quilter. Therefore, I recommend the precut strips be cut into smaller pieces and THEN sewn to each other.
- If you are an experienced quilter and feel confident sewing and pressing long strips, do not cut the 2 1/2” precut strips during this step. You will cut them during the construction phase.
- From the 2 1/2” Precut Strips Cut: 105 pieces, each 2 1/2” x 14”. NOTE: Make sure you cut all the way to the end of the selvage edge so that you can get three 14” pieces from each strip of fabric.
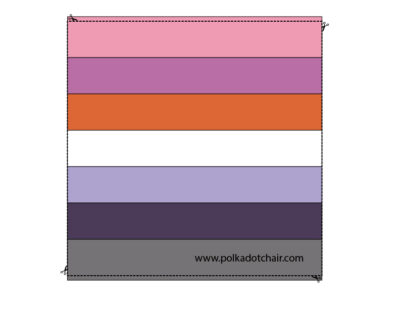
- From Black Sparkler Fabric Cut: 5 pieces each 14” x 14” From Charcoal Sparkler Fabric Cut: 5 pieces each 14” x 14”. From Iron Sparkler Fabric Cut: 5 pieces each 14” x 14”.
Step Two: Block Construction If you did not cut your strips in Step One.
- Sew seven 2 1/2” x WOF strips to each other along the long sides.
- Repeat four more times so that you have five sewn strip sets.
- Press the seams and cut each sewn strip set into three pieces, each 14” long.
Step Two: Block Construction If you cut strips in Step One
- Pair your strips into sets of 7 prints each. You will need to create 15 sets of strips each with seven strips.

- Sew seven of the strips together along the long sides.
- Repeat until you have fifteen sewn units.
Step Three:
- Each of your strip blocks should be 14” x 14 1/2” at this point. Trim and square up your strip block to 14” x 14”. You will remove 1/4” from each of the sides of the block.note: trimming the block at this point allows the strips in the blocks to be offset when sewn into the completed quilt.
Step Four: Create Half Square Triangles
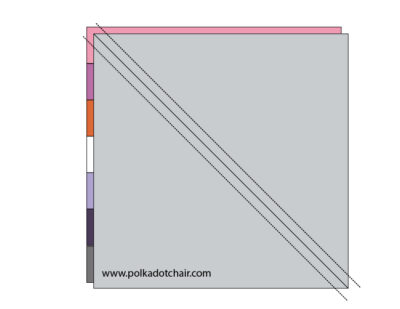
- Draw a diagonal line down the wrong side of all of your 14” squares of Sparkler fabric.
- Layer one 14” square of Sparkler fabric with one sewn strip block, right sides facing.
- Sew 1/4” on each side of the line that you drew.
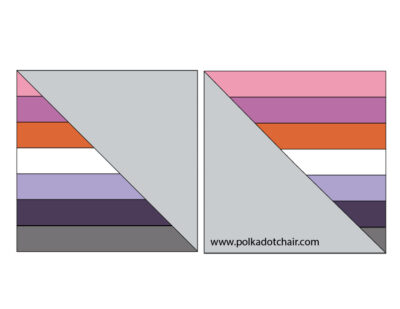
- Cut the piece apart along the line you drew.
- Trim and square up to 13 1/2” x 13 1/2”.
- Repeat until you have thirty sewn blocks.
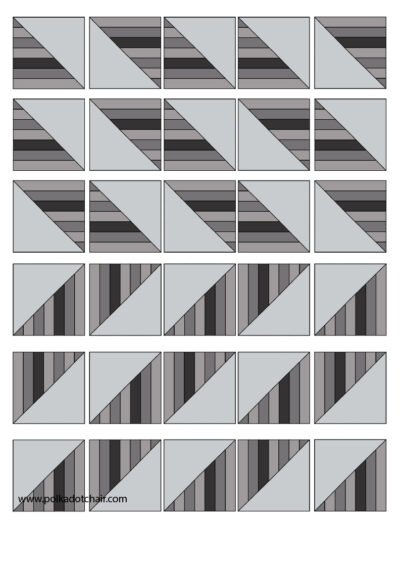
Step Five: Assembly
- Lay out your blocks according to the diagram below. You will have five blocks on each row and six rows of blocks.

- Sew all five blocks in row one to each other, repeated by rows two, three, four, five and six.
- Sew the rows to assemble the quilt.
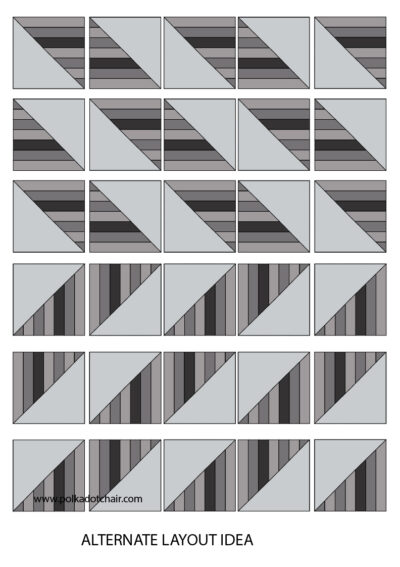
Alternate Layout
- Traci, the creator of this quilt, likes a “wonky” unexpected layout pattern when assembling her quilts and purposely laid out the blocks in row 1 in another arrangement. If you don’t like that and prefer a different look, you can use this diagram as an alternate layout.
About the Designer:

I’m Traci, and I make quilts.
I believe in warm quilts, joyful quilts, picnic quilts, worn-soft quilts, good-cry quilts, funky quilts, stormy-night quilts, and chilly-morning quilts.
I don’t strive to make perfect quilts; the wonkier, the better. Keep an eye on my shop for the next quilt drop. I sell handmade, scrappy quilts all backed with the softest fabric!