Moroccan Tile Inspired Patchwork Pillow Pattern
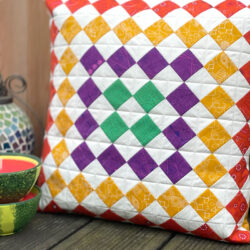
I’m excited to announce that our June Free Pillow Pattern of the Month is this bright, colorful and graphic Moroccan Tile-inspired quilted pillow pattern by Amy Ball. The beautiful colors and striking patterns are perfect for summer!
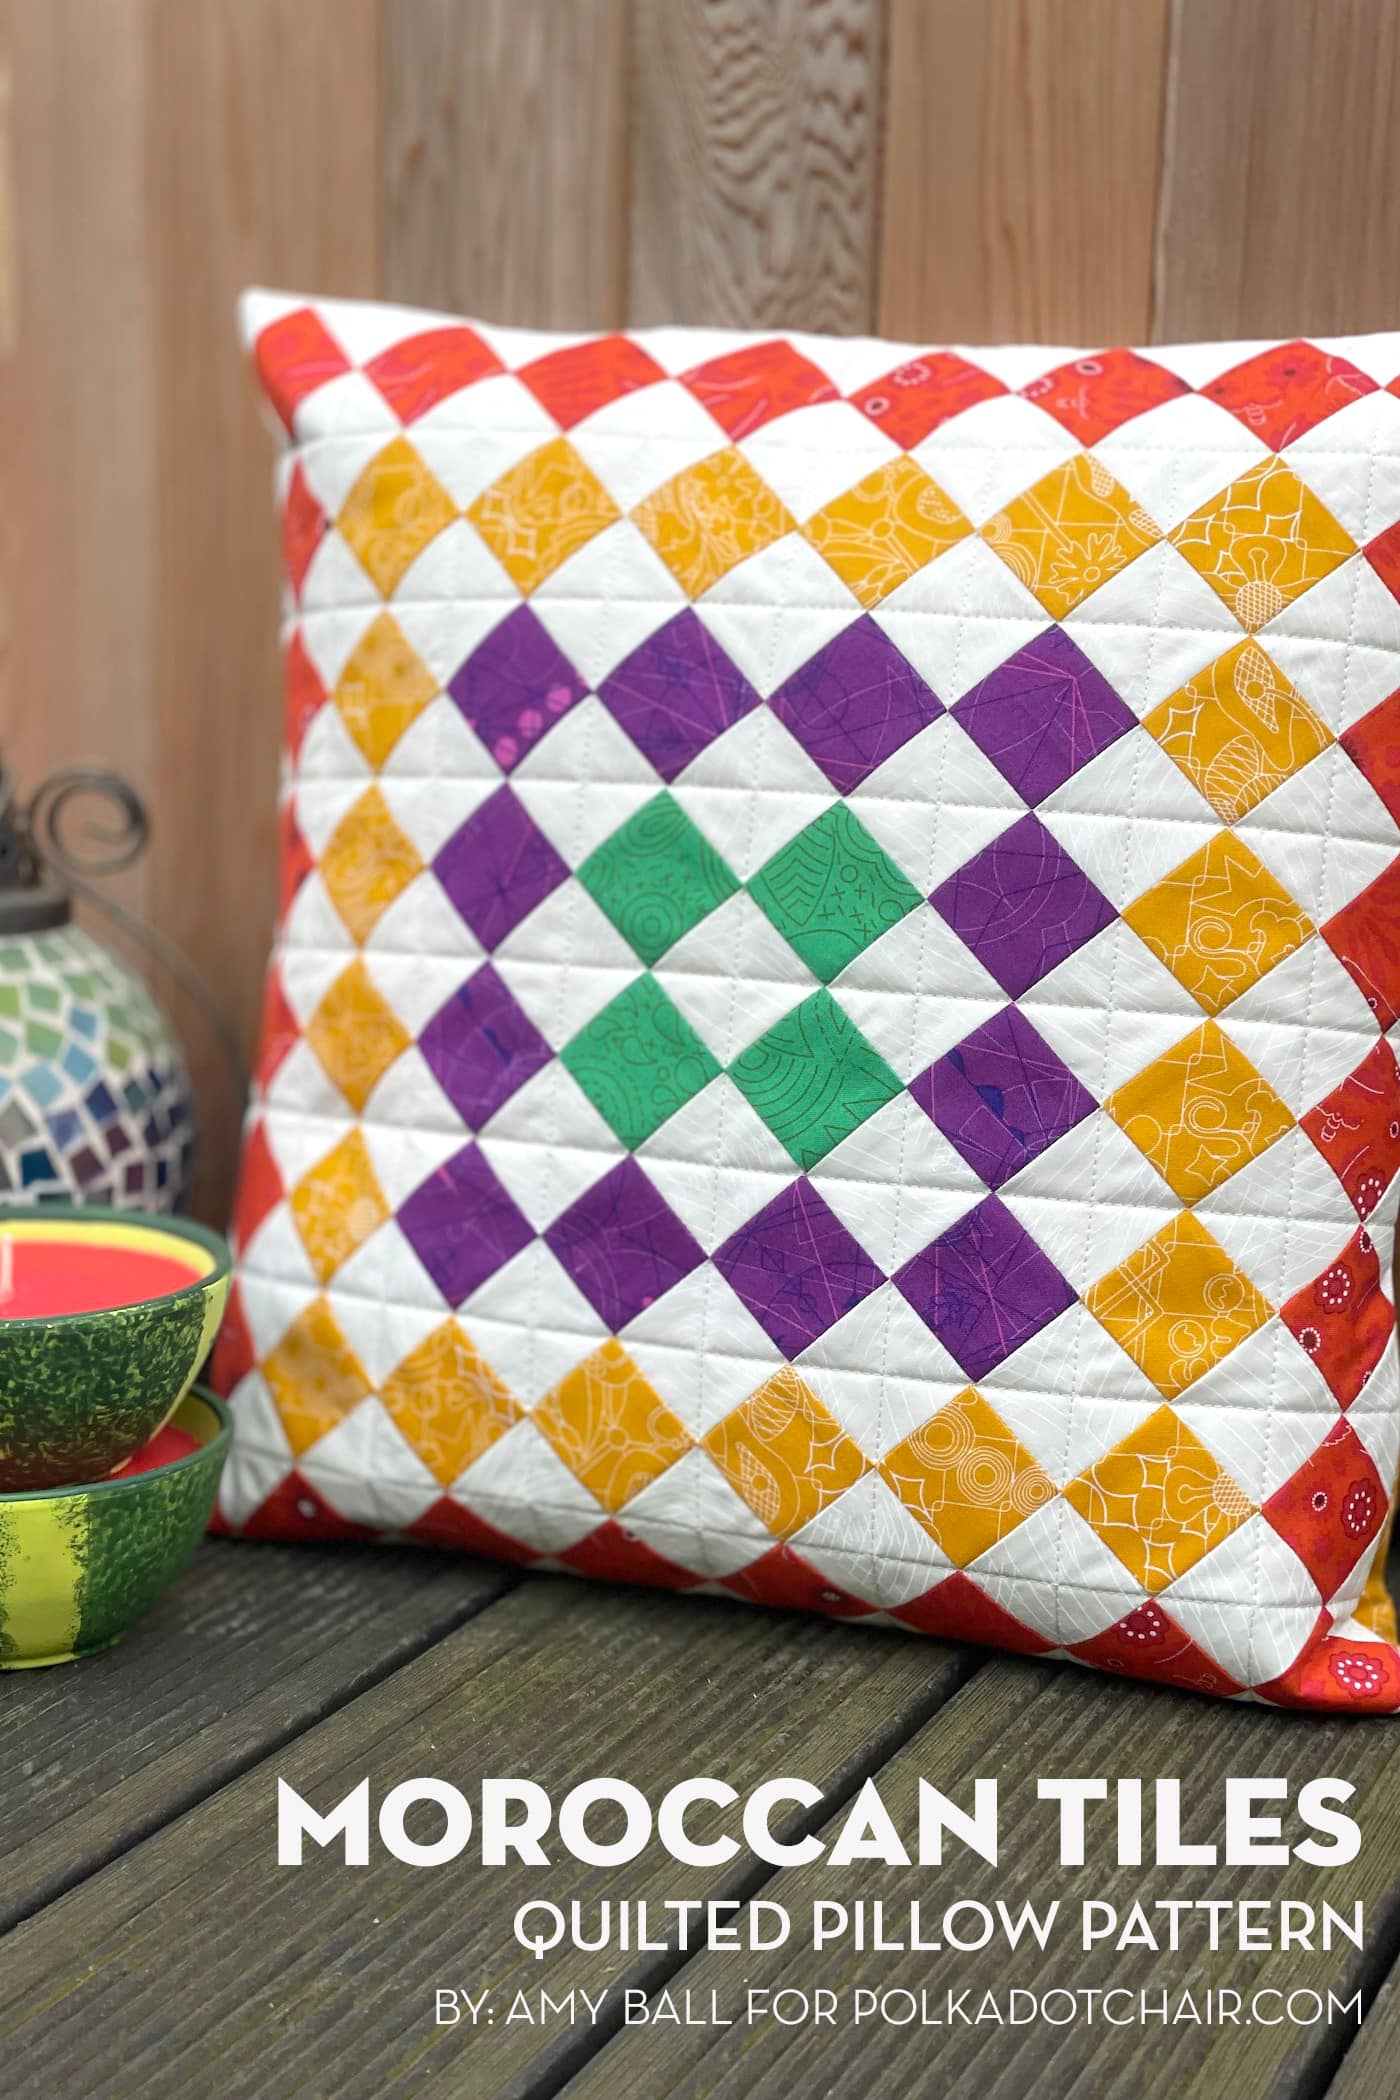
Tiled floors and walls are a fabulous source of inspiration for patchwork due to the repetitive nature of the designs. For me, the most beautiful tiles are Moroccan with their intricate geometric patterns made from shapes like squares, triangles, stars, diamonds, and crosses.
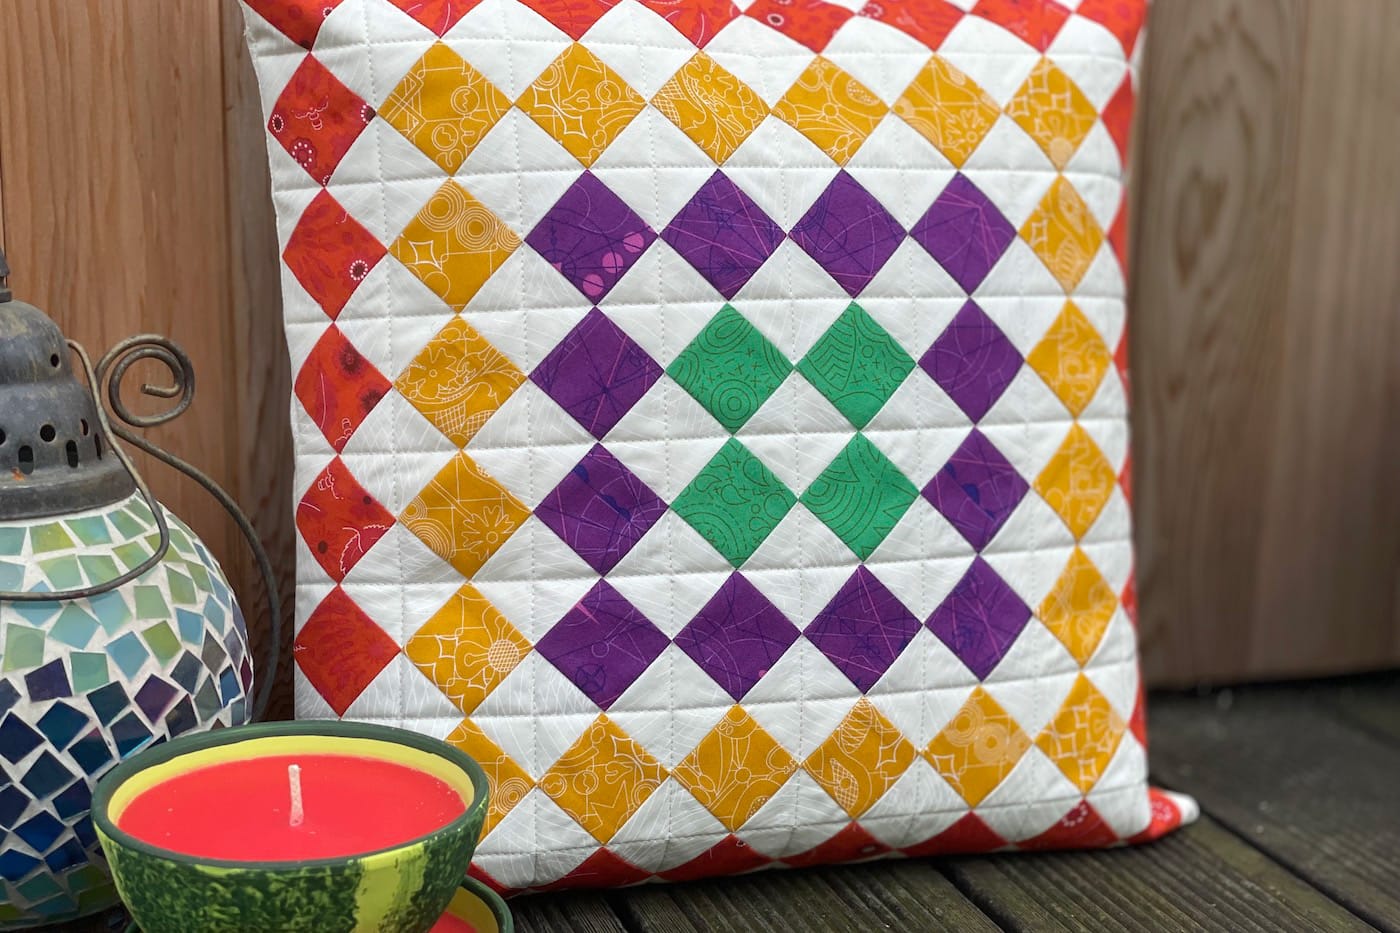
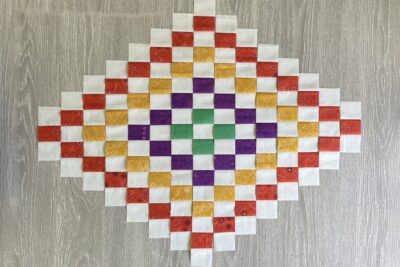
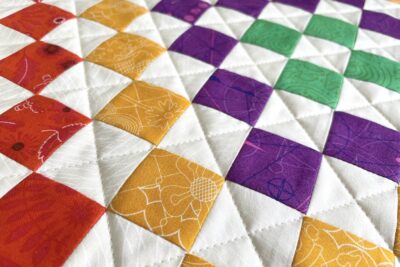
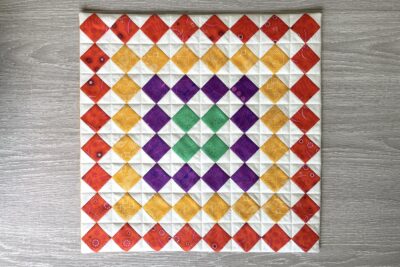
I’ve created a simplified Moroccan-inspired design from diagonal rows of small squares in deep, jewel colors in my Moroccan Tile pillow.
All of the Pillow of the Month Free Patterns
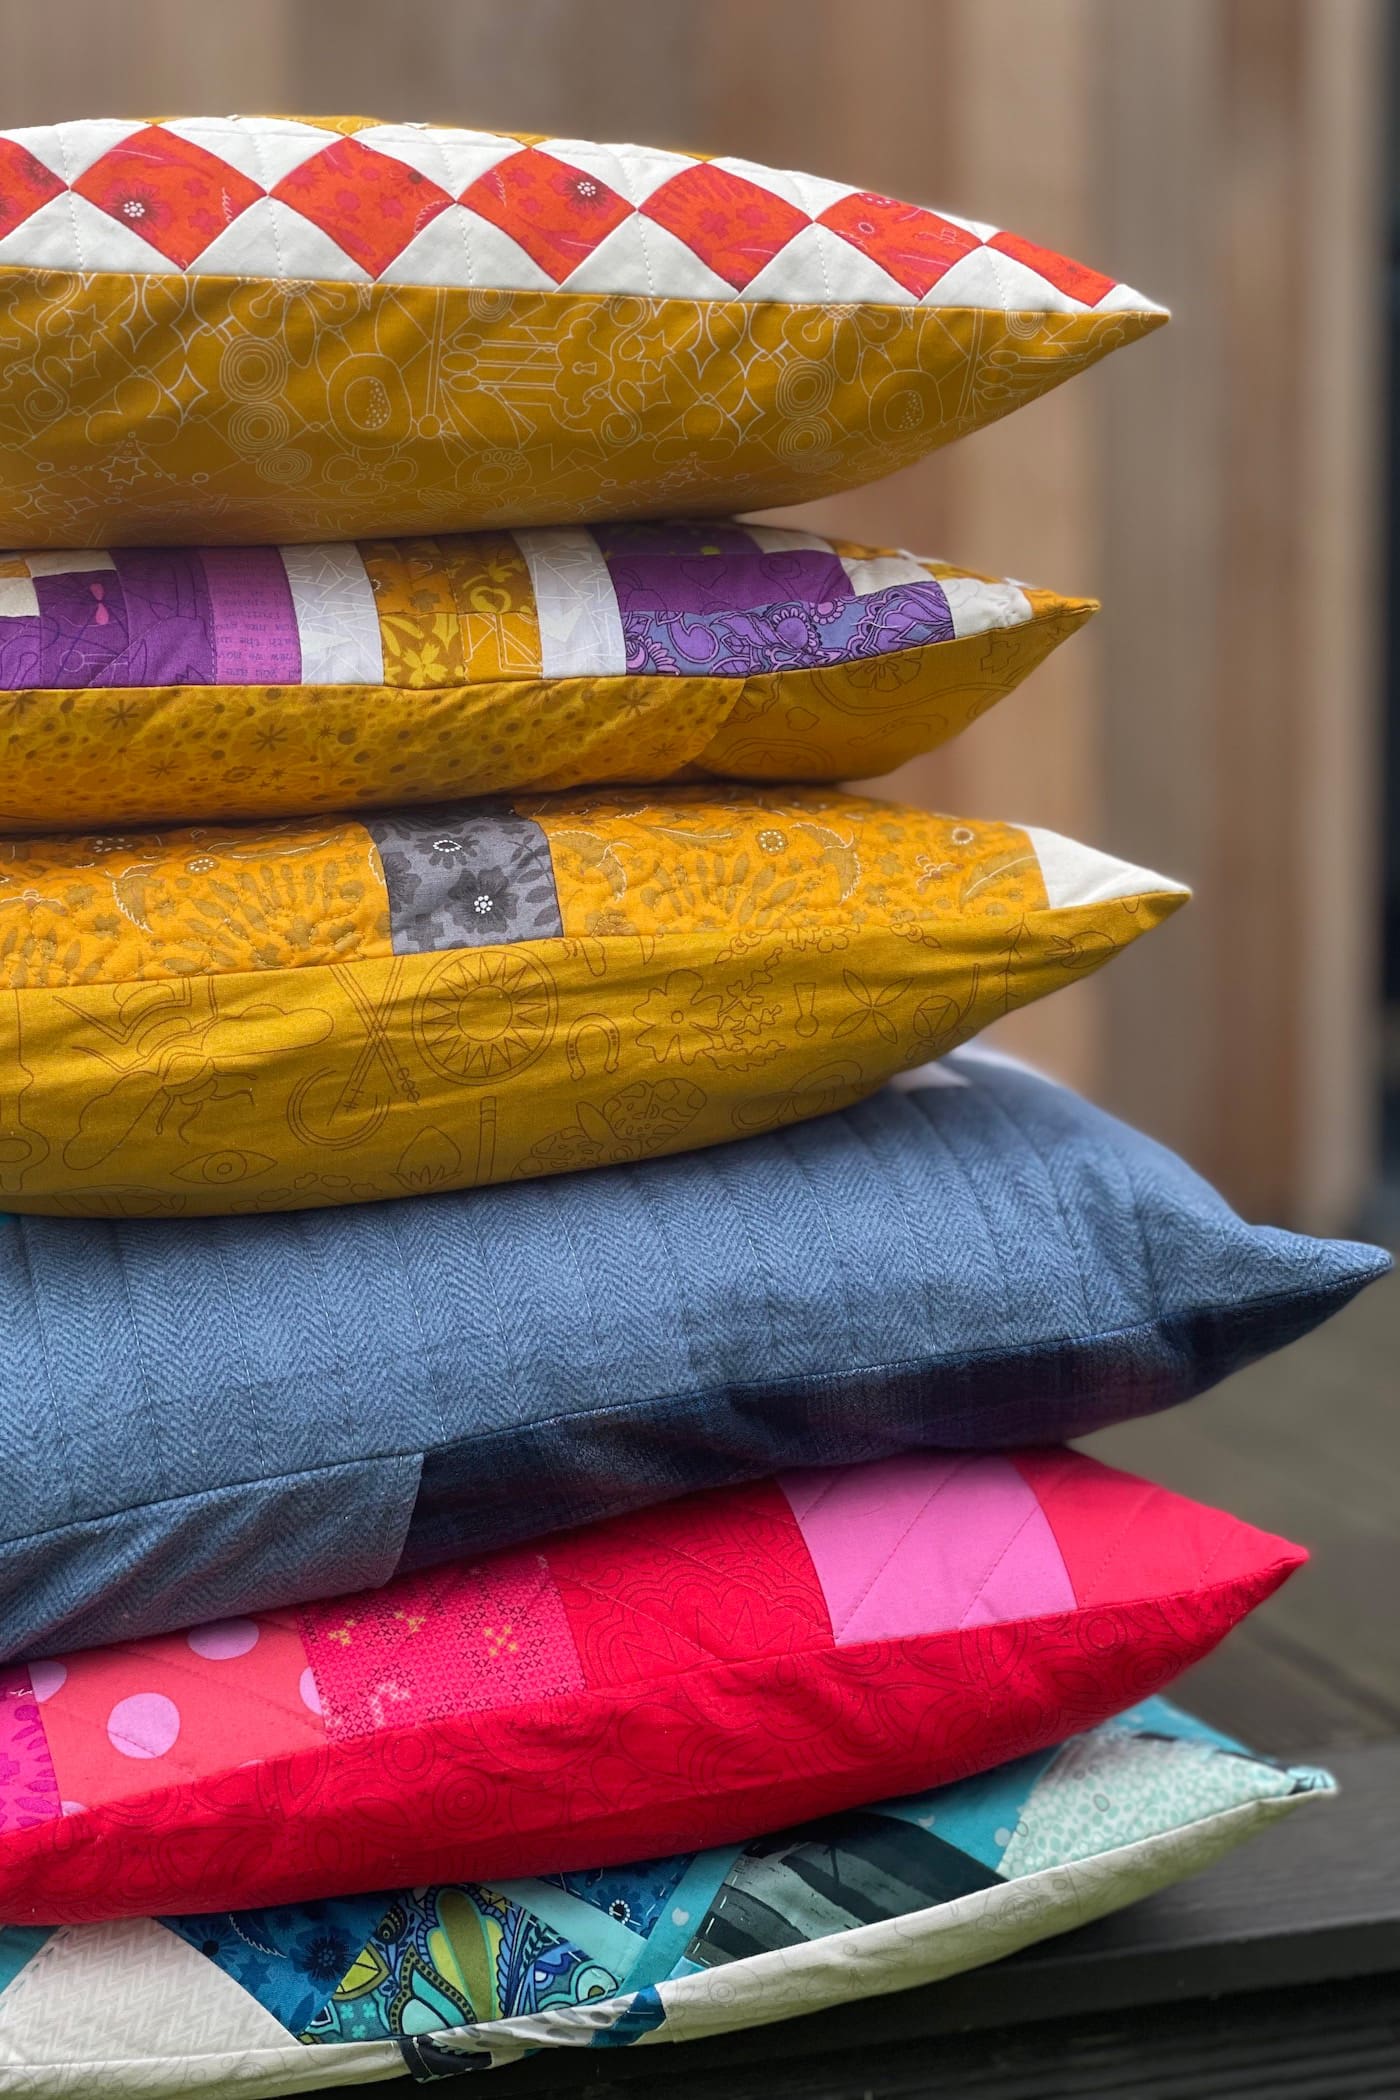
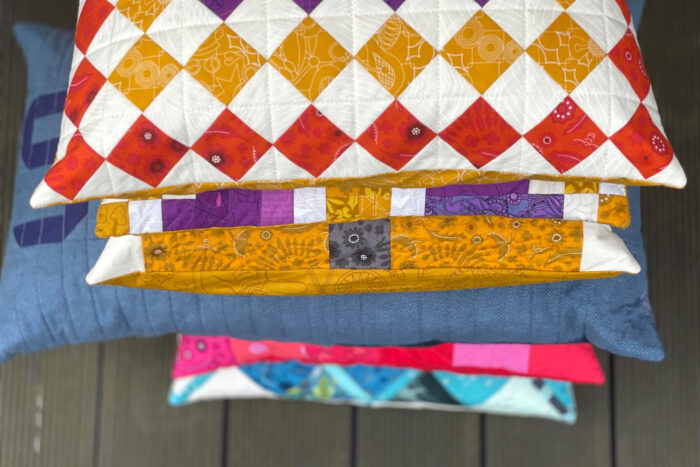
In case you missed any of them, be sure to check out all of the patchwork patterns shared so far this year! They are all so fantastic!
- January: Patchwork Plaid Pillow
- February: Heart Quilted Pillow
- March: SLEEP Pieced Letters Pillow Pattern
- April: Patchwork Beehive Pillow
- May: Queens Jubilee Celebration Pillow Pattern
- June: Moroccan Tiles Pillow
- July: Prism Paw Quilted Pillow Pattern
- August: Strawberry Fields Patchwork Pillow
- September: Improv Patchwork Pillow Pattern
- October: Twin Pines Quilted Pillow Pattern
- November: Peeking Reindeer Patchwork Pillow
- December: Christmas Presents Pillow

Supplies for Pillow
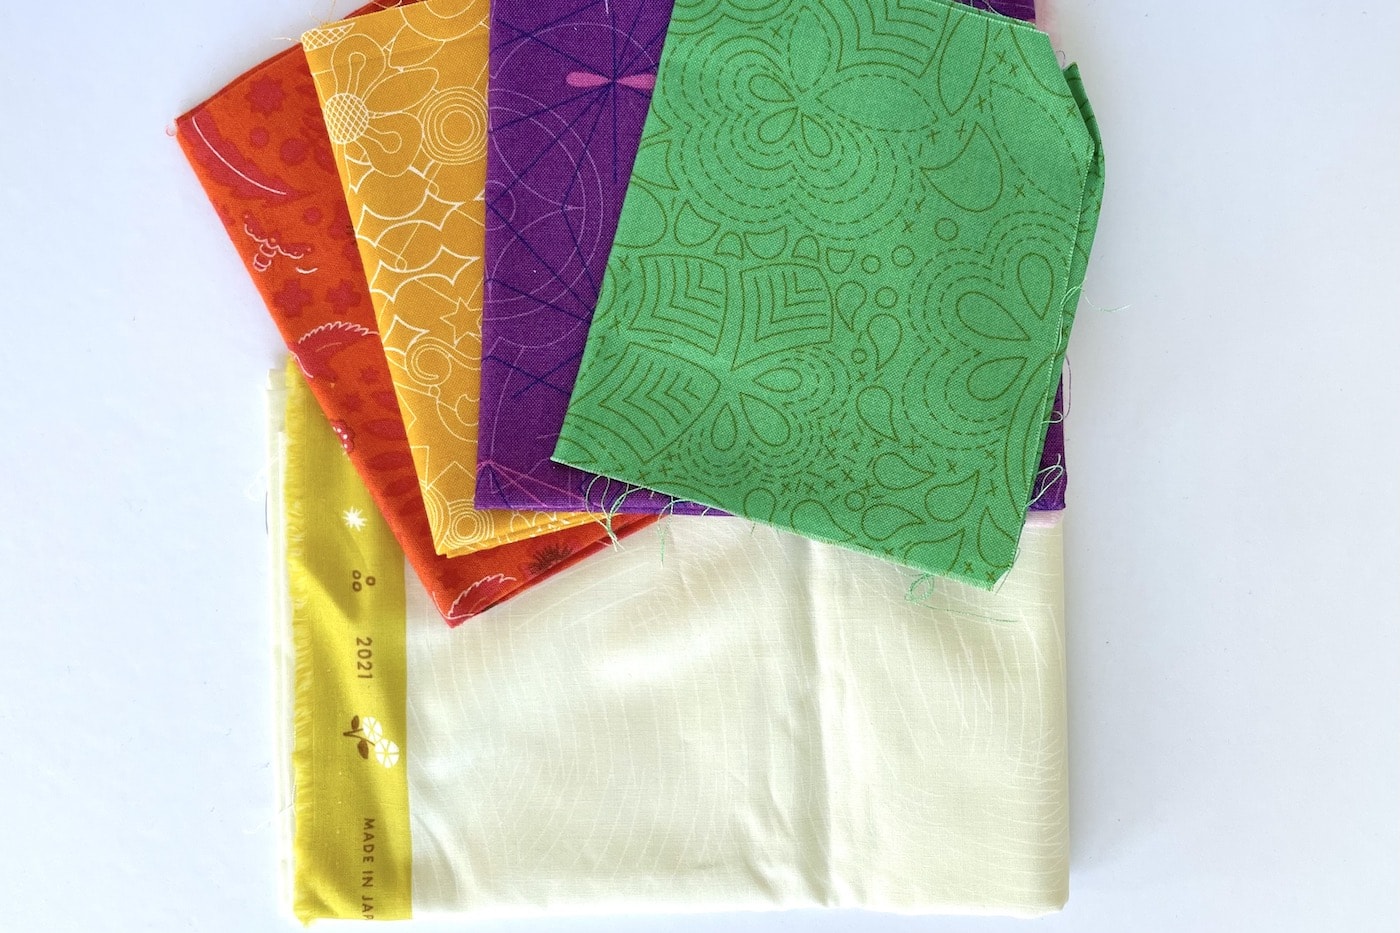
- 1 Fat Quarter Cream fabric
- 1 Fat Eighth Red fabric
- 1 Fat Eighth Gold fabric
- 1 Fat Eighth Purple fabric or a large scrap
- 1 Fat Eighth Green fabric or a large scrap
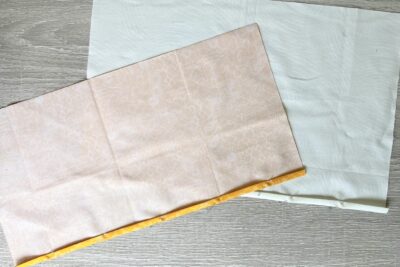
- 1 Fat Quarter Light backing fabric
- 1 piece of batting 19” x 19”
- 1/2 yard Fabric for Pillow back
- 1 Pillow Form: 16” x 16”
Moroccan Tile Inspired Quilted Pillow Pattern
Equipment
supplies
- 1 Fat Quarter Cream fabric
- 1 Fat Eighth Red fabric
- 1 Fat Eighth Gold fabric
- 1 Fat Eighth Purple fabric or a large scrap
- 1 Fat Eighth Green fabric or a large scrap
- 1 Fat Quarter Light backing fabric
- 1 piece
Batting 19” x 19”
- 1/2 yard Fabric for Pillow back
- 1 Pillow Form: 16” x 16”
Instructions
Cutting:
- From cream fabric cut 2” square (81).From red fabric cut 2” square (28).From gold fabric cut 2” square (20).From purple fabric cut 2” square (12).From green fabric cut 2” square (4).From Pillow back fabric cut 17” x 11” (2).
Construction: Use a ¼” seam allowance unless otherwise stated.
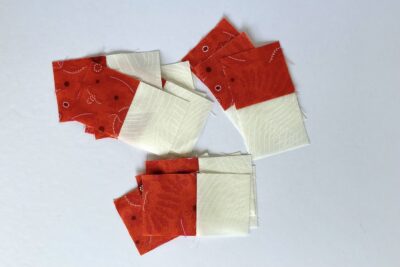
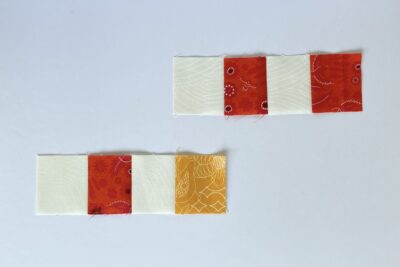
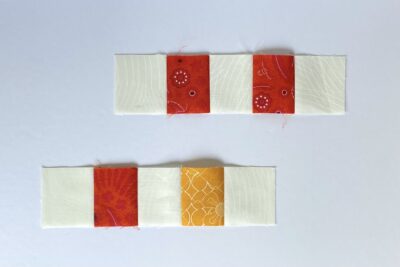
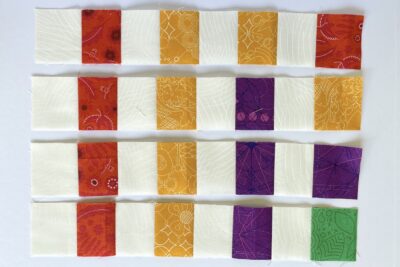
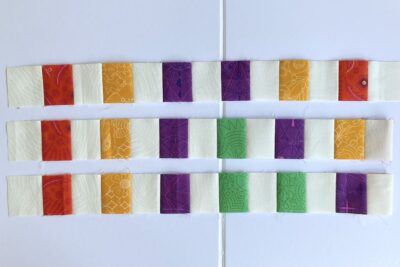
- Step One: Take one cream square and one red square. Sew them together and press the seams towards the red fabric. Repeat to make fifteen pairs in total.

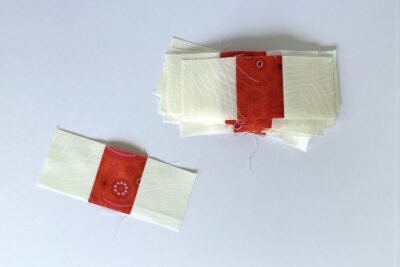
- Step Two: Add one cream square to each red square from the pairs made in step one. Press the seams towards the red fabric. Set aside two rows for later.
- Step Three: Add one red square each to two rows from step two, and add one gold square each to eleven rows from step two. Press the seams towards the colours.
- Step Four: Add one cream square to each color square from the rows made in step three. Press the seams towards the color fabric. Set aside the two red/cream rows for later.
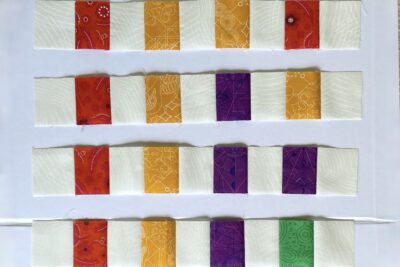
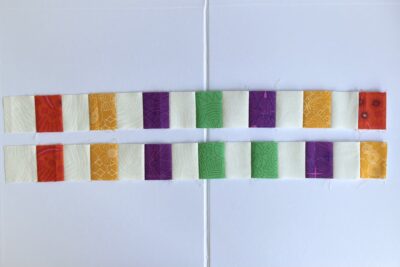
- Step Five: Add one red square each to two rows from step four, add one gold square each to two rows from step four, and add one purple square each to seven rows from step four. Press the seams towards the colours.
- Step Six: Add one cream square to each color square from the rows made in step five. Press the seams towards the color fabric. Set aside the two red/gold/red rows for later.
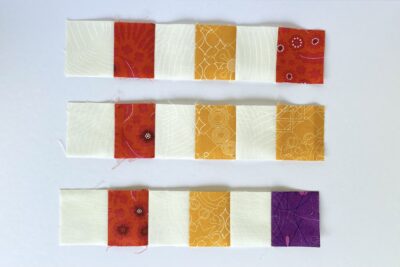
- Step Seven: Add one red square each to the two red/gold/gold rows. Then to the remains rows add one gold square each to two of them, one purple square each to two of them, and one green square each to three of them. Press the seams towards the colors.
- Step Eight: Add one cream square to each color square from the rows made in step seven. Press the seams towards the color fabric. Set aside the two red/gold/gold/red rows for later.
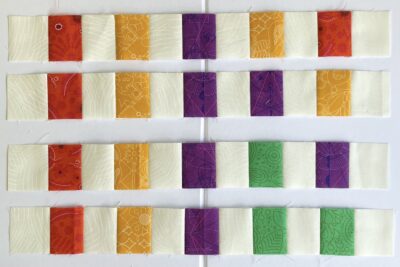
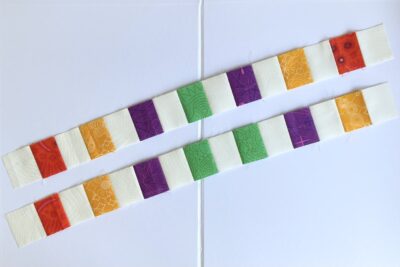
- Step Nine: Add one red square each to the two red/gold/purple/gold rows. Add one gold square each to the two red/gold/purple/purple rows. Add one purple square each to the two red/gold/purple/green rows. Finally add one green square to the remaining red/gold/purple/green row. Press the seams towards the colours.
- Step Ten: Add one cream square to each color square from the rows made in step nine. Press the seams towards the color fabric. Set aside the two red/gold/purple/gold/red rows for later.
- Step Eleven: Add one red square each to the two red/gold/purple/purple/gold rows. Add one gold square each to the two red/gold/purple/green/purple rows. Add one purple square to the remaining red/gold/purple/green/green row. Press the seams towards the colours.
- Step Twelve: Add one cream square to each color square from the rows made in step eleven. Press the seams towards the color fabric. Set aside the two red/gold/purple/purple/gold/red rows for later.
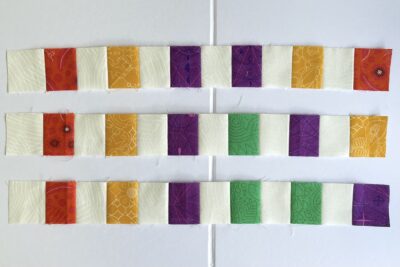
- Step Thirteen: Add one red square each to the two red/gold/purple/green/purple/gold rows. Add one gold square to the remaining red/gold/purple/green/green/purple row. Press the seams towards the colours.
- Step Fourteen: Add one cream square to each color square from the rows made in step thirteen. Press the seams towards the color fabric. Set aside the two red/gold/purple/green/purple/gold/red rows for later.
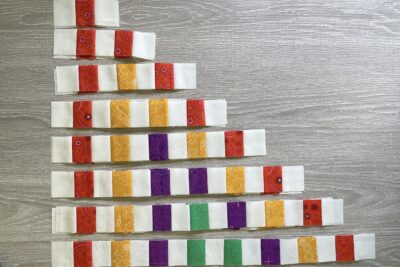
- Finally add one red square then one cream square to the remaining row, and press the seams towards the coloured fabric. You will now have fifteen rows.
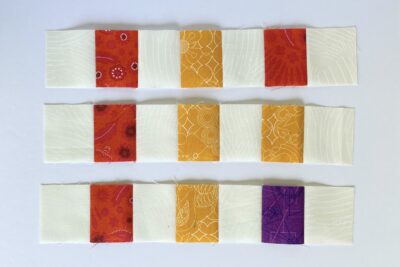
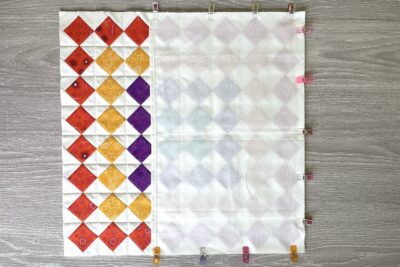
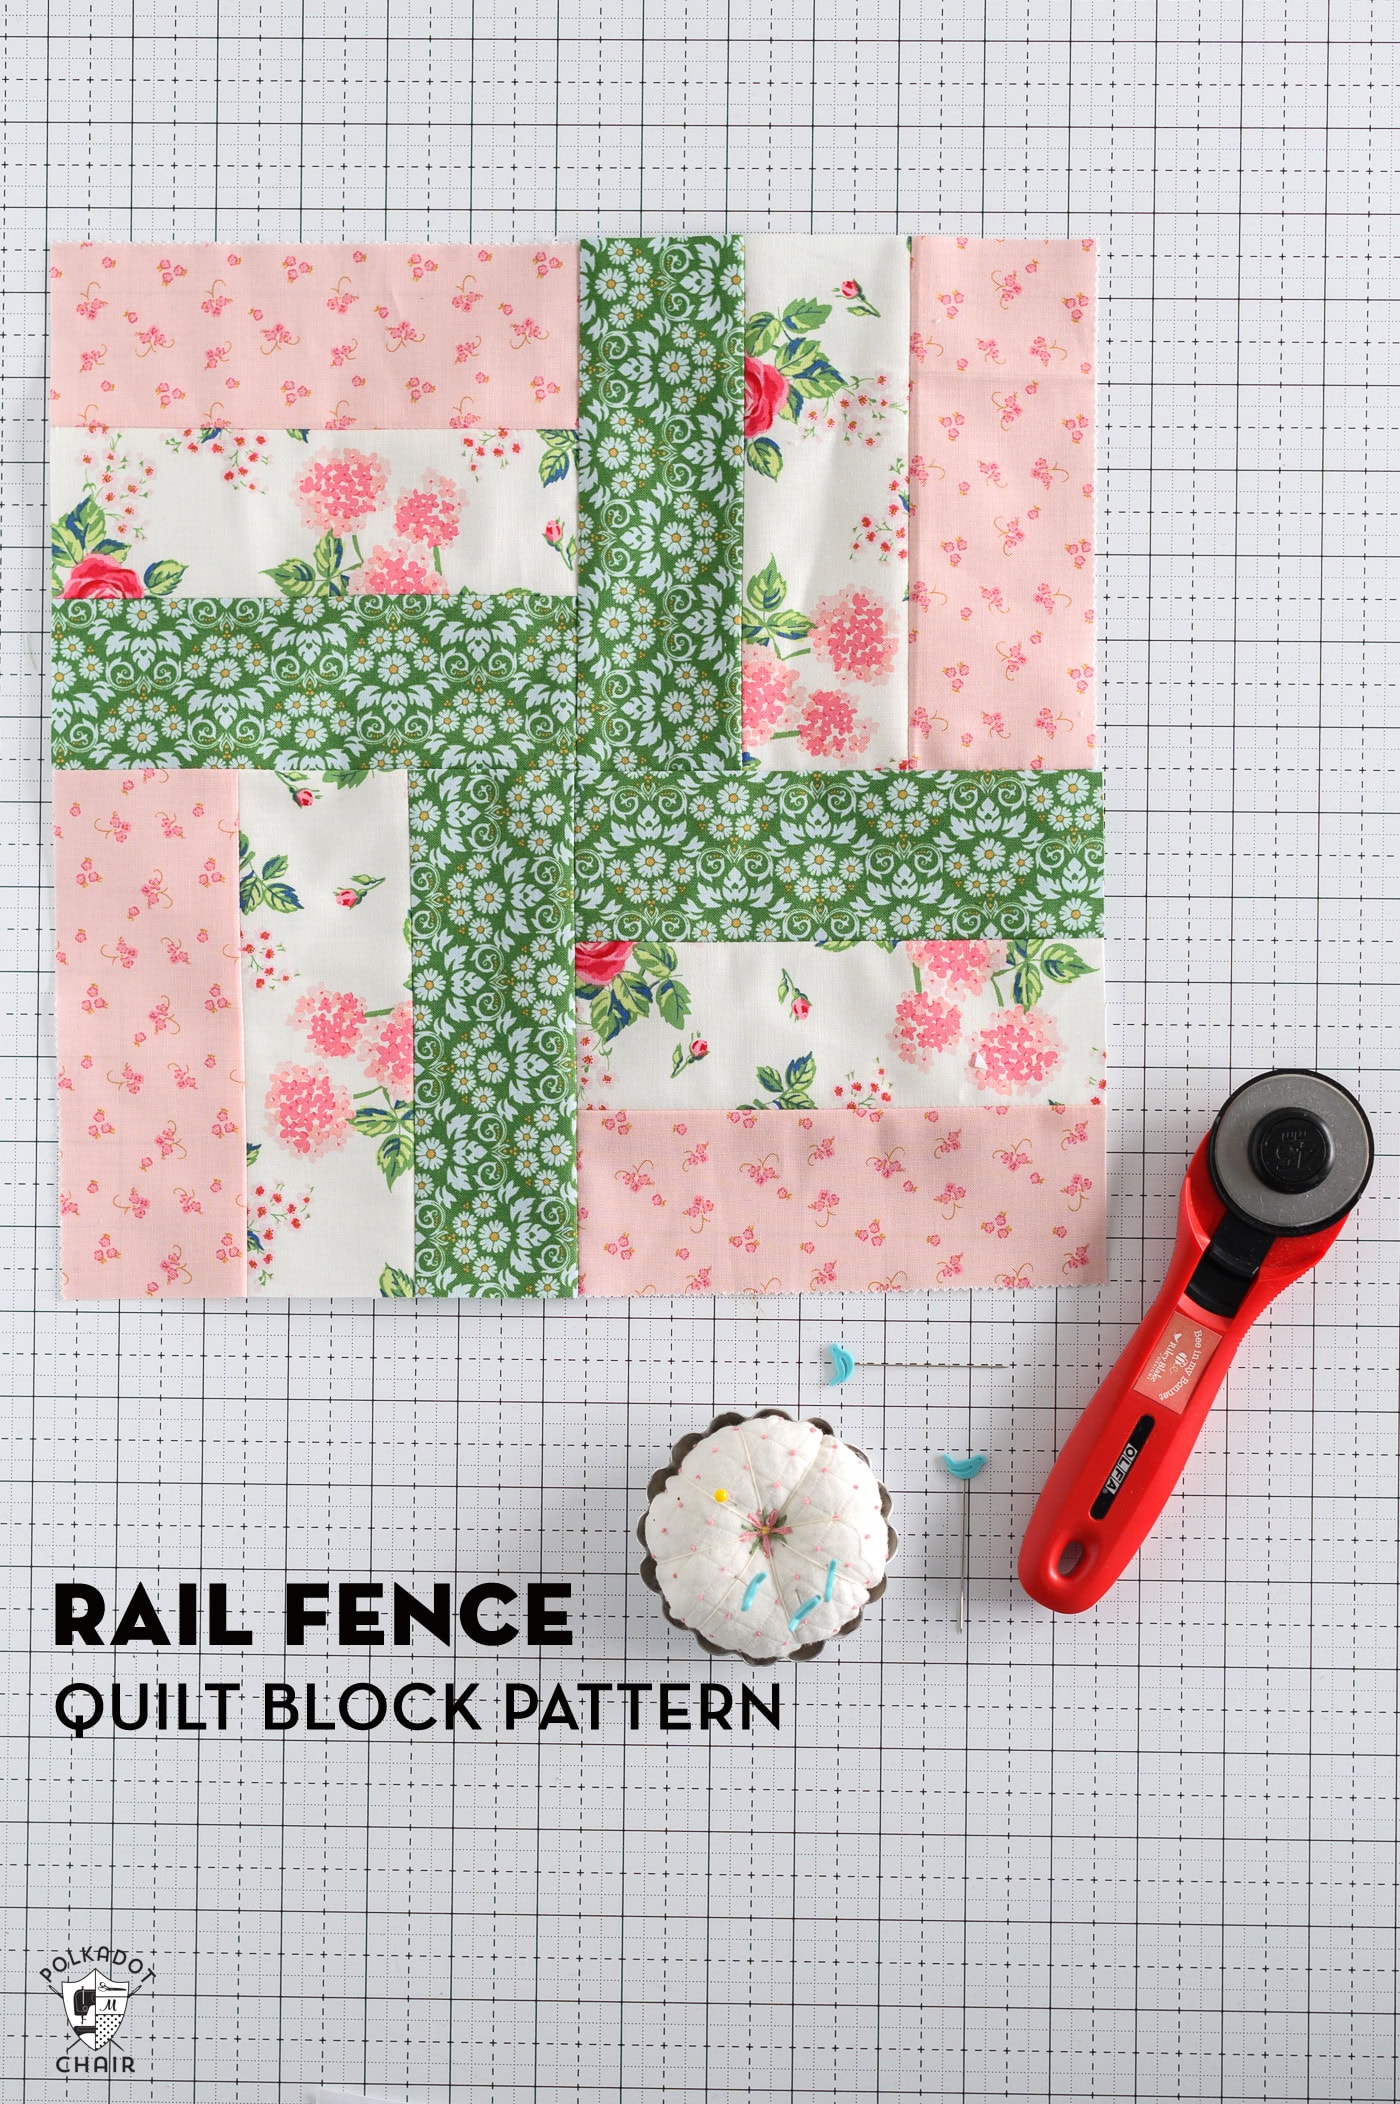
- Sew all the rows together using the photo as your guide for the order and placement. Work from the longest (and the central) row out and make sure you match the central squares together first as the rows are different lengths. As the seams have all been pressed towards the color fabrics, you’ll be able to nest the seams to help keep all the squares aligned. [Tip: When sewing together rows are different lengths, sew beyond the edge of the shorter row to make pressing easier.]
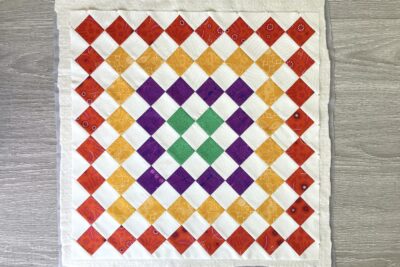
- Add one cream square each to the centre of the two shortest outer rows. Press all the row joining seams open.
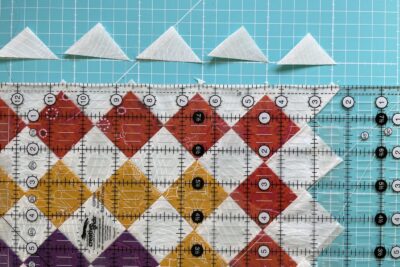
- Trim the patchwork pillow front to 17” square. Be careful to trim evenly on all four edges leaving ¼” beyond all the outside red points.
Quilting:
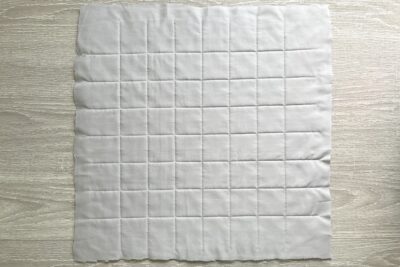
- Now it’s time to make a quilt sandwich. Place your light backing fabric square (right side facing down) with your batting on top, then add the patchwork pillow front with the right side facing towards you. Make sure all the layers are smooth and flat then baste the layers together using your preferred method.
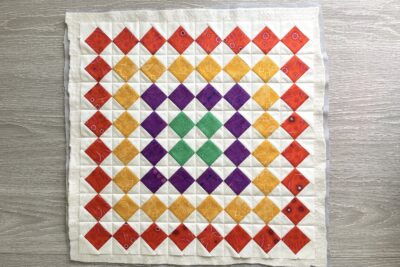
- Quilt as desired. I have used straight line quilting in cream to coordinate with the pillow front background fabric in evenly spaced vertical and horizontal lines just between the points of the squares.
- Other quilting ideas: diagonal straight lines across the whole pillow front or hand quilting within each color square.
- Once you have finished quilting, trim off excess backing fabric and batting, and square up your pillow block if required.
Finishing:
- Take one pillow back 17” x 11” rectangle and hem one long edge by pressing the raw edge to the wrong side by ¼” then again by another ¼”. Press well and sew. Then repeat for the second pillow back 17” x 11” rectangle.
- Pin or clip the pillow back pieces to the quilted block, right sides together, all around the four side.
- Sew around all four edges using a ¼” seam allowance, securing the start and finish with some back-stitching.
- Trim the corners, turn the pillow cover the right way out, carefully poke out the four corners and then press.
- Stuff with an 16” square pad and enjoy your new Moroccan Tile pillow.
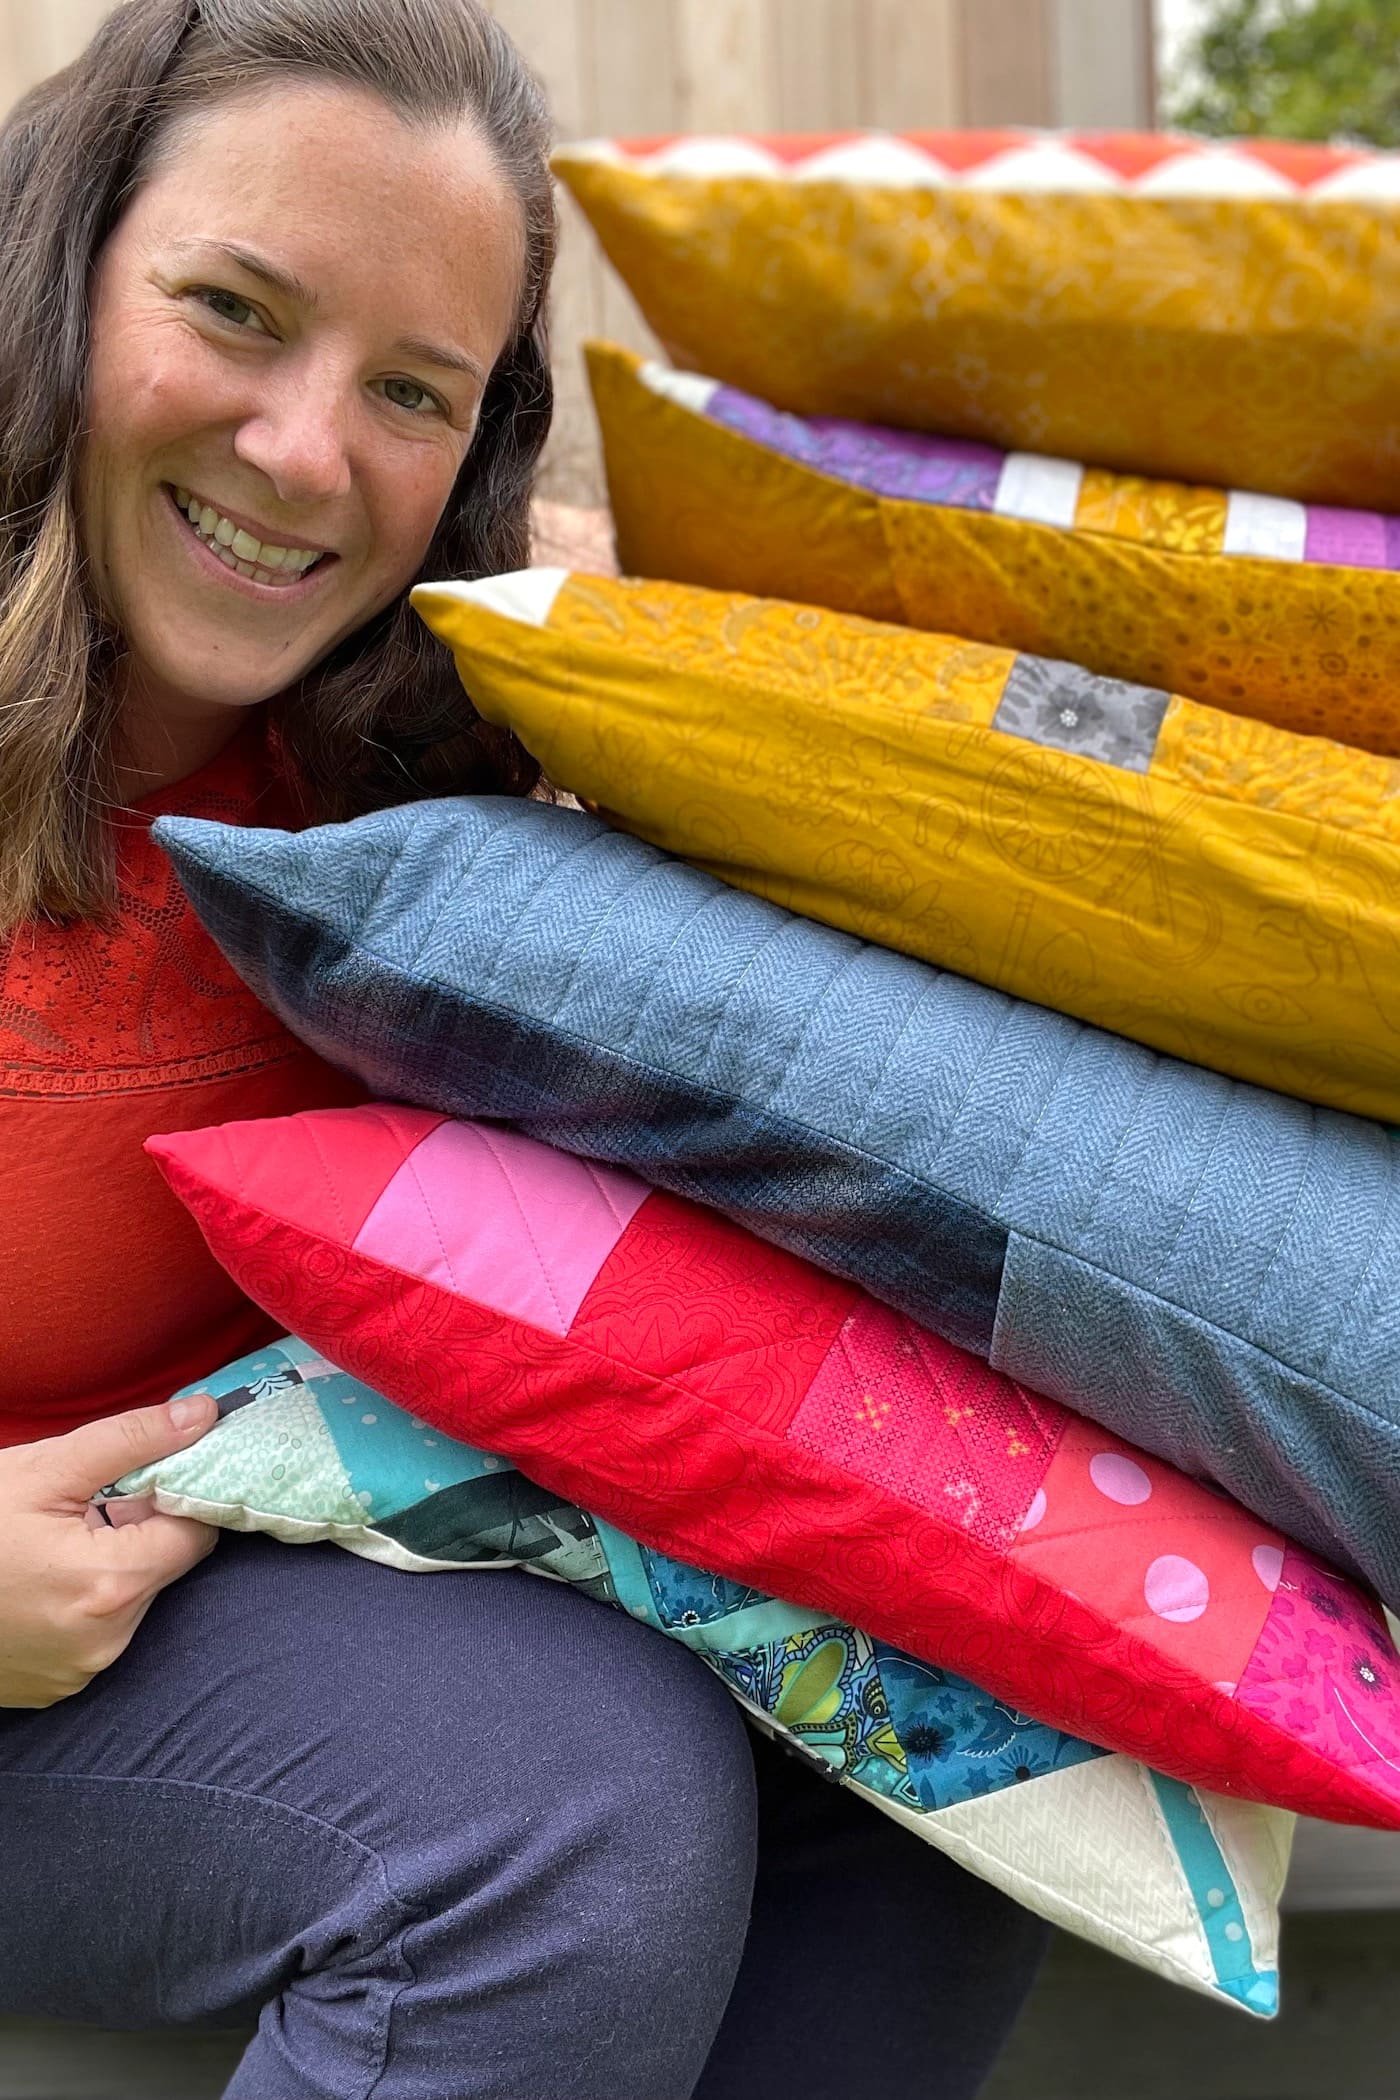
About the Designer

Amy lives in the north of England with her husband and son. When she’s not sewing and quilting, Amy can usually be found baking or reading. You can find her on Instagram @amyatthegate
Also by Amy
Sewing Machine Feet | Patchwork Piecing
Sewing Machine Feet | Quilting
The Ruler Rules: Online course – get the measure of your quilting rulers and learn how to use them with confidence and accuracy.


Thank you for this beautiful Moroccan pillow design and pillow pattern. It is really nice and colorful. Plan for soon project.