Christmas Presents Quilt Block Pillow Pattern
This Christmas presents pieced quilted pillow pattern features a fun twist on a courthouse steps quilt block! This pillow pattern is perfect for Christmas or any other celebration!
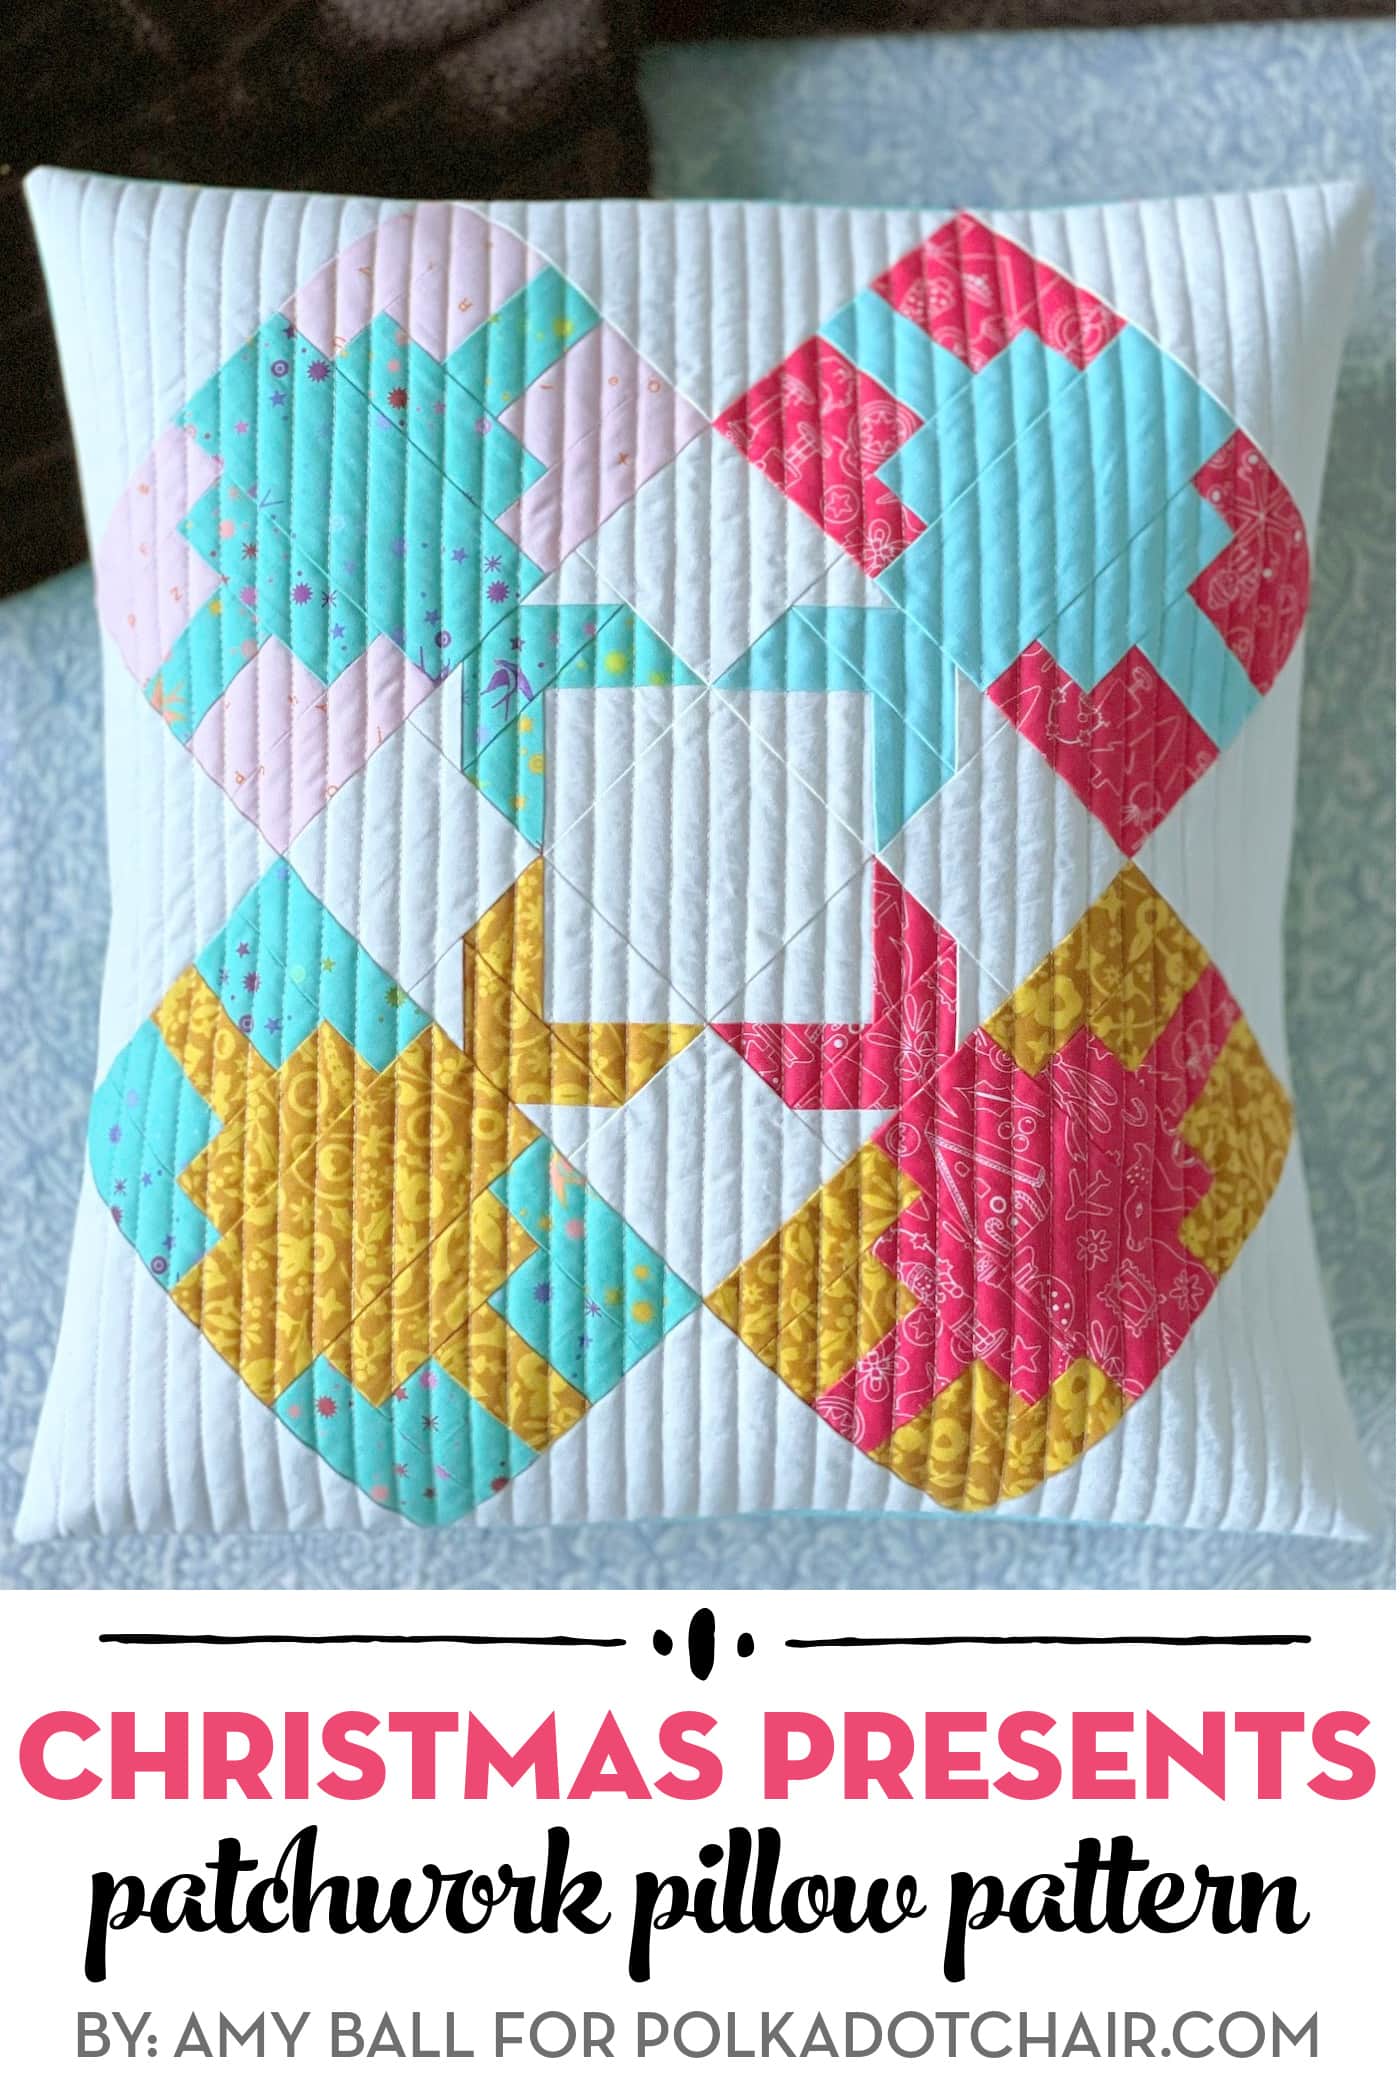
Our patchwork pillow pattern of the month program has now come to a close. We are ending it with one last fabulous pillow tutorial by Amy Ball. If you missed any other patterns, you can find them below.
Patchwork Pillow Patterns
- January: Patchwork Plaid Pillow
- February: Heart Quilted Pillow
- March: SLEEP Pieced Letters Pillow Pattern
- April: Patchwork Beehive Pillow
- May: Queens Jubilee Celebration Pillow Pattern
- June: Moroccan Tiles Pillow
- July: Prism Paw Quilted Pillow Pattern
- August: Strawberry Fields Patchwork Pillow
- September: Improv Patchwork Pillow Pattern
- October: Twin Pines Quilted Pillow Pattern
- November: Peeking Reindeer Patchwork Pillow
- December: Christmas Presents Pillow
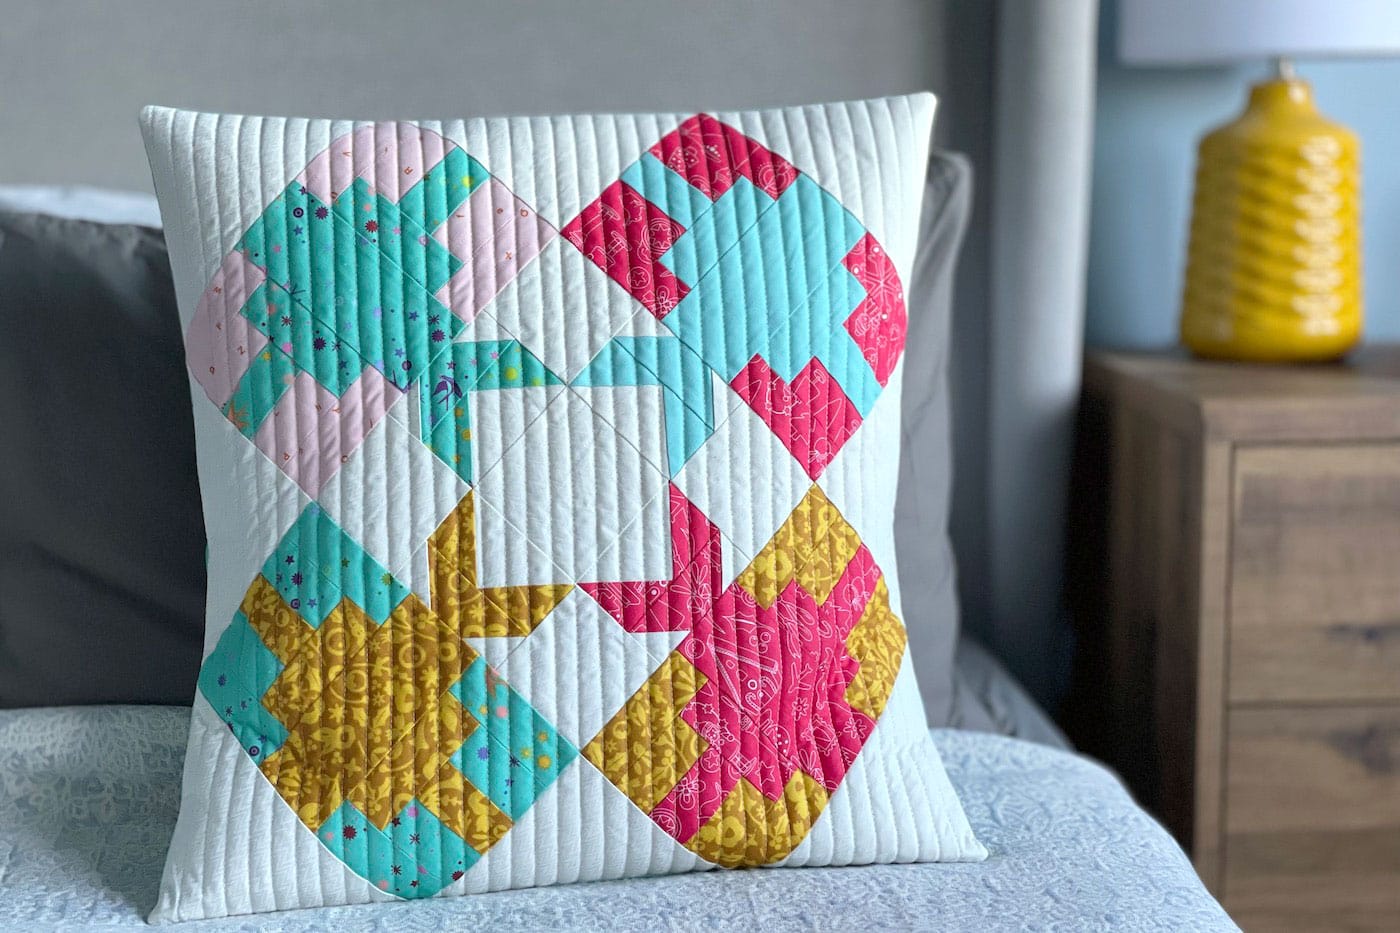
For my final pillow of the year, it had to be another festive theme…presents!
Present or Gift Quilt Block Pattern
I love adding a bit of a different twist to traditional block designs. The presents on this pillow are sort of a reverse courthouse steps block. Or a courthouse steps block that has been cut in half; the two halves swapped over, then the pieces sewn back together!
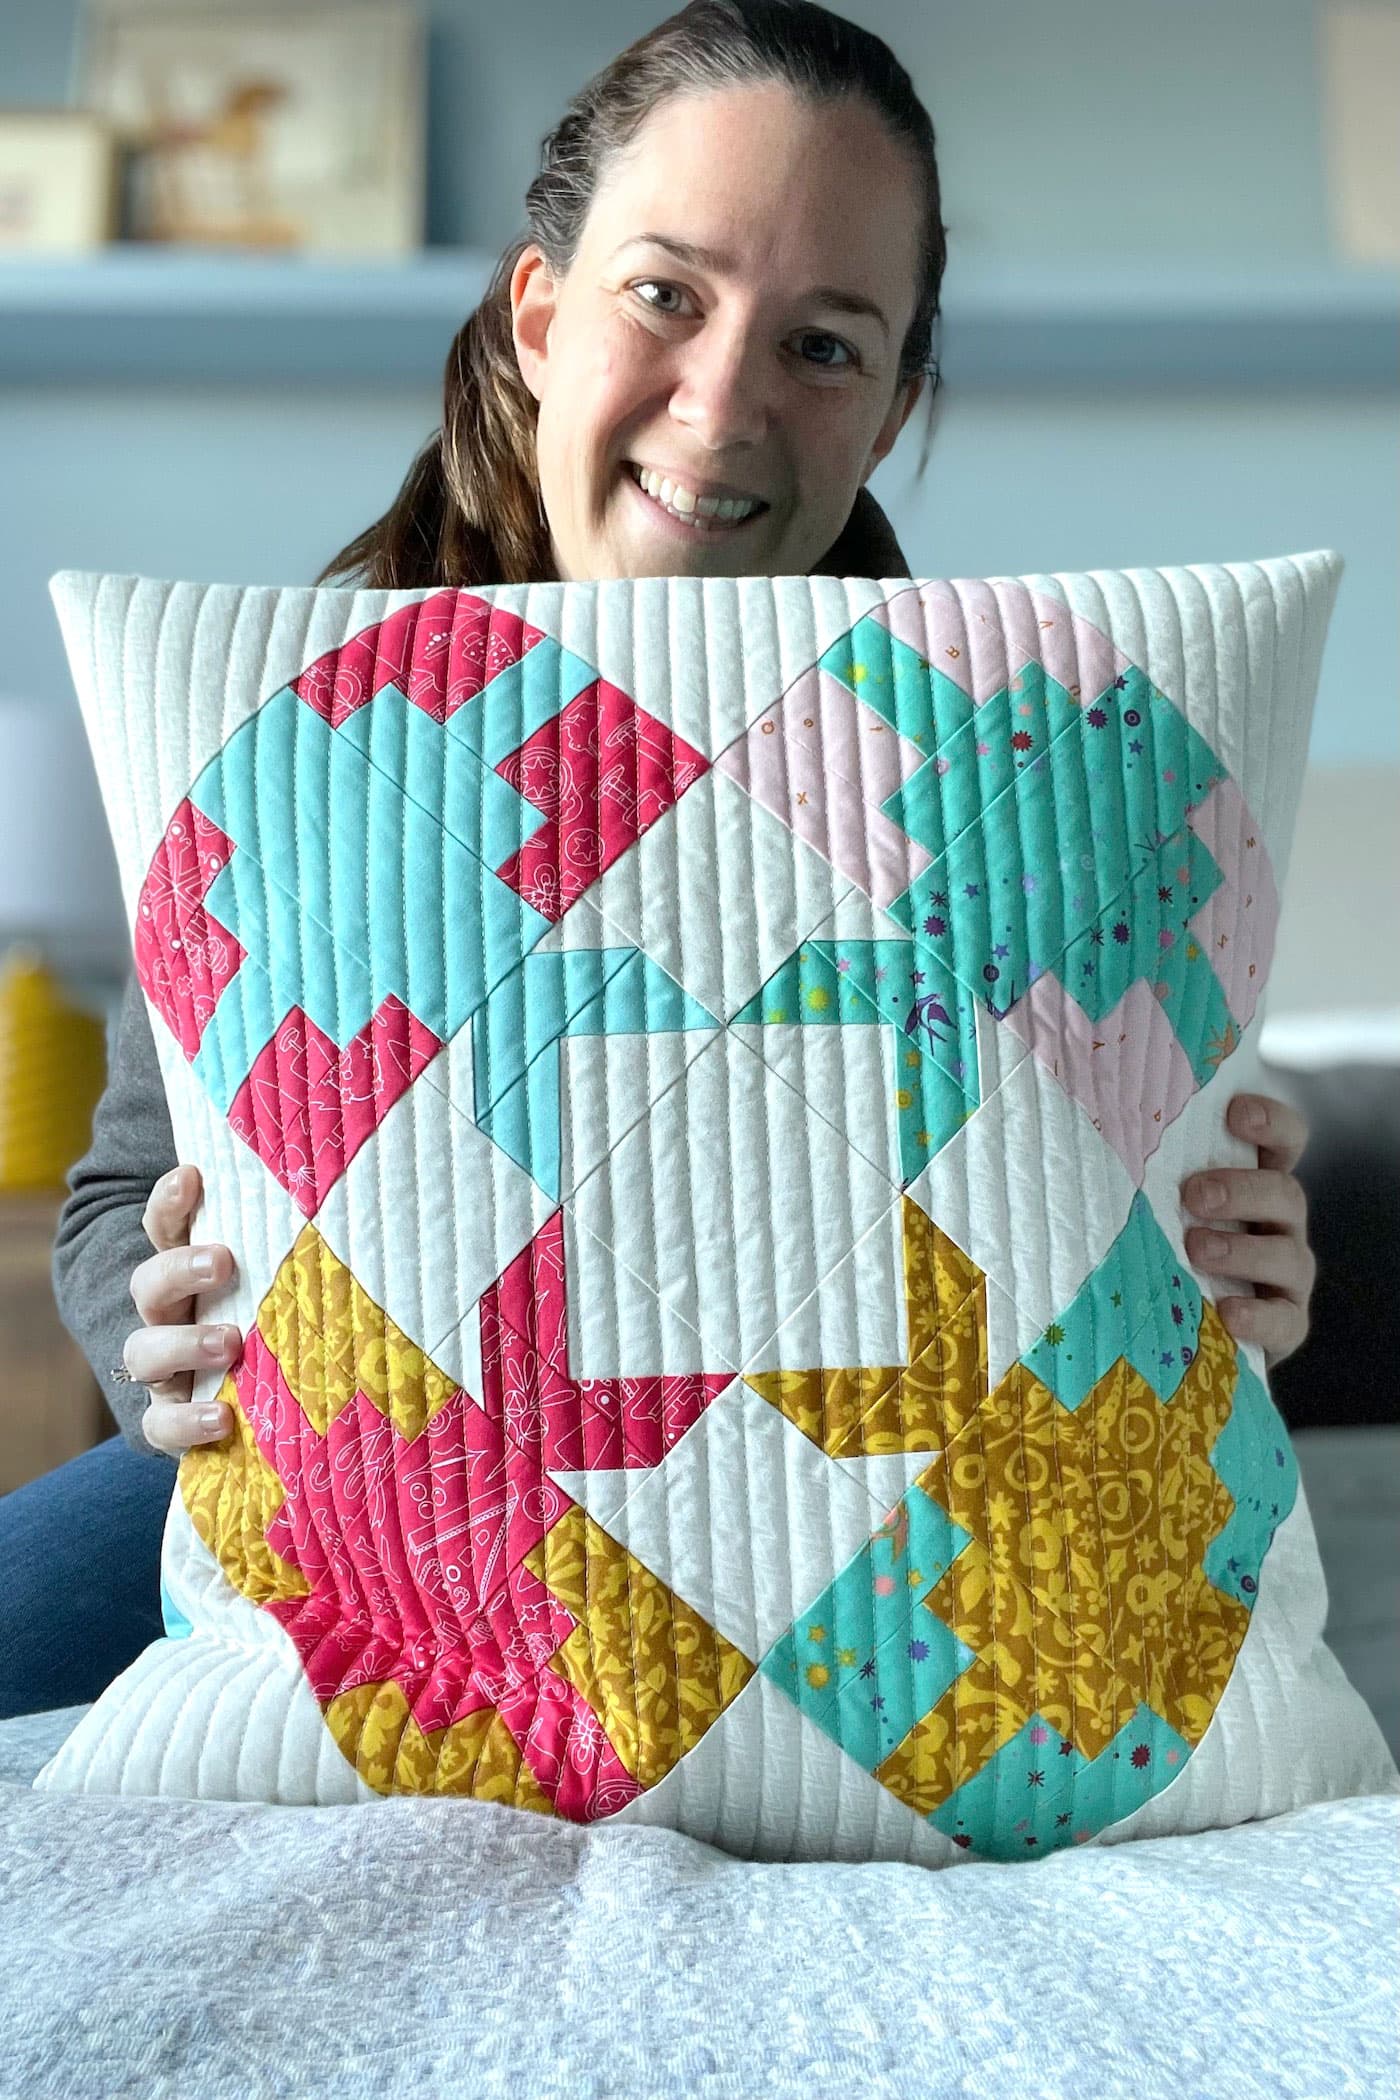
Although this is a pillow design, I think it would be great as a quilted wall hanging. Or you could sew each present individually and put them together in a long strip to make a festive table runner.
If you make it with fabrics that don’t really shout “Christmas”, then you could make a pillow that comes out every time someone in your household has a birthday.
Christmas Presents Pieced Patchwork Pillow Pattern
Equipment
supplies
- 1 Fat Eighth Gold fabric present and ribbon
- 1 Fat Eighth Hot pink fabric present and ribbon
- 1 Fat Eighth Turquoise fabric present and ribbon
- 1 Fat Eighth Pale pink present or large scrap
- 1 Fat Eighth Pale blue ribbon or large scrap
- 1/2 Yard Cream fabric background
- 1 Fat Quarter Light backing fabric
- 1 Piece Batting 20” x 20”
- 1/2 Yard Fabric Pillow back
- 1 Pillow form 18" x 18"
Instructions
Cutting:
- From gold fabric cut: 3½” x 1½” (5), 2½” x 1½” (6), 2½” x 5½” (1), 2” square (2), and 1½” x 3½” (2).
- From hot pink fabric cut: 3½” x 1½” (5), 2½” x 1½” (6), 2½” x 5½” (1), 2” square (2), and 1½” x 3½” (2).
- From turquoise fabric cut: 3½” x 1½” (5), 2½” x 1½” (6), 2½” x 5½” (1), 2” square (2), and 1½” x 3½” (2).
- From pale pink fabric cut: 3½” x 1½” (4) and 2½” x 1½” (4).
- From pale blue fabric cut:3½” x 1½” (1), 2½” x 1½” (2), 2½” x 5½” (1), 2” square (2), and 1½” x 3½” (2).
- From cream fabric cut: 8½” x 5” (4), 5½” square (4), 3½” x 2” (4), 3½” square (1), 3” square (4), and 1½” square (8).
- From pillow back fabric cut: 18½” x 12” (2).
Construction: Use a ¼” seam allowance unless otherwise stated.
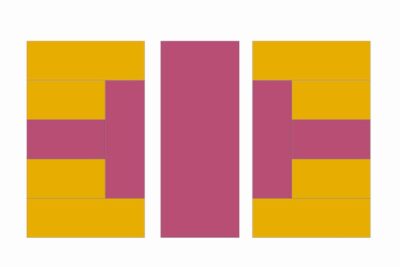
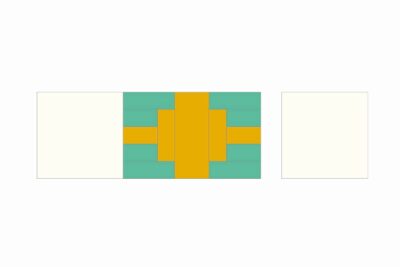
- Take two gold 2½” x 1½” rectangles and one hot pink 2½” x 1½” rectangle. Sew together along the long edges with the pink rectangle in the centre. Then sew one hot pink 3½” x 1½” rectangle to the right edge.
- Take two gold 2½” x 1½” rectangles and one hot pink 2½” x 1½” rectangle. Sew together along the long edges with the pink rectangle in the centre. Then sew one hot pink 3½” x 1½” rectangle to the left edge.
- Take the unit from step 1 and sew one gold 3½” x 1½” rectangle to the top edge and one gold 3½” x 1½” rectangle to the bottom edge.
- Take the unit from step 2 and sew one gold 3½” x 1½” rectangle to the top edge and one gold 3½” x 1½” rectangle to the bottom edge.
- Take one hot pink 2½” x 5½” rectangle and the two units from steps 3 and 4. Sew together with the hot pink rectangle in the centre, using the diagram as a guide.
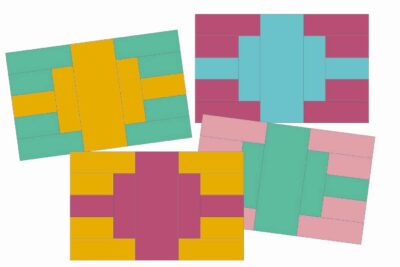
- Repeat steps 1 to 5 using pale pink and turquoise, hot pink and pale blue, and turquoise and gold. You should now have four presents. Press well and set aside.
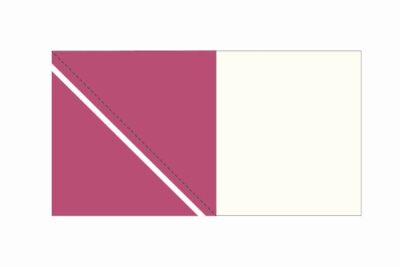
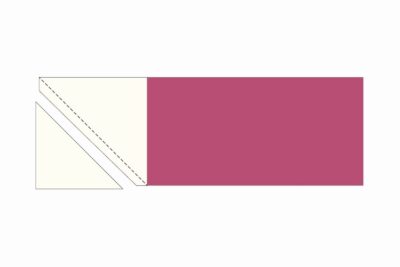
- Take one cream 3½” x 2” rectangle and two hot pink 2” squares. Draw a diagonal line on the wrong side of both hot pink squares.
- Pin one square, right sides together, to the left edge of the cream rectangle with the diagonal line running top left to bottom right. Sew just above the drawn line then trim the excess corner away.
- Carefully press the corner into place.
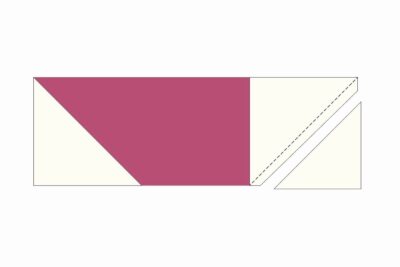
- Pin the second square square, right sides together, to the right edge of the cream rectangle with the diagonal line running top right to bottom left. Sew just above the drawn line then trim the excess corner away.
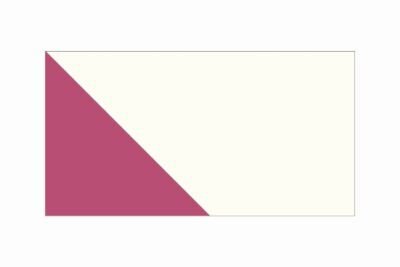
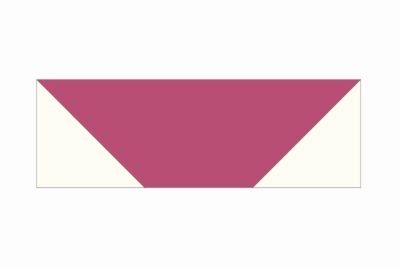
- Carefully press the corner into place and trim to 3½” x 2” if required.
- Take one hot pink 3½” x 1½” rectangle and two cream 1½” squares. Draw a diagonal line on the wrong side of both cream squares.
- Pin one square, right sides together, to the left edge of the hot pink rectangle with the diagonal line running top left to bottom right. Sew just above the drawn line then trim the excess corner away. Carefully press the corner into place.
- Pin the second square, right sides together, to the right edge of the hot pink rectangle with the diagonal line running top right to bottom left. Sew just above the drawn line then trim the excess corner away.
- Carefully press the corner into place and trim to 3½” x 1½” if required.
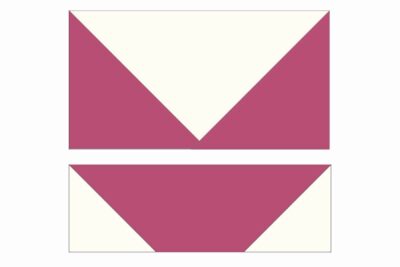
- Take the units from steps 11 and 15. Sew together using the diagram as a guide.
- Repeat steps 7 to 16 using turquoise, gold and pale blue with cream. You should now have four bows. Press well.
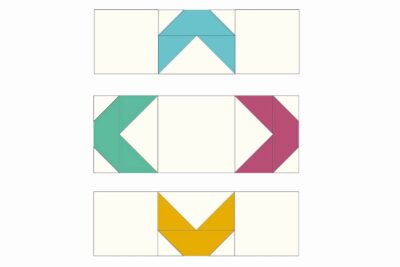
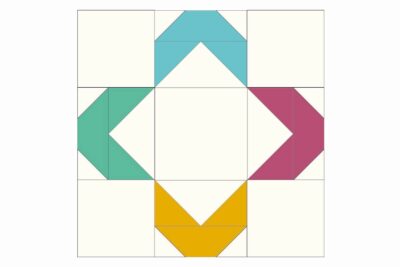
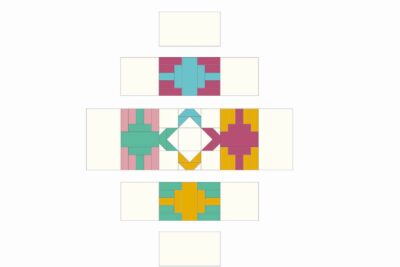
- Take two cream 3” squares and the pale blue bow. Sew together with the bow in the centre with its points facing downwards. Now take one cream 3½” square and the turquoise and hot pink bows. Sew together with the square in the centre and with both bow points facing towards the middle. Finally take two cream 3” squares and the gold bow. Sew together with the bow in the centre with its points facing upwards. Use the diagram as a guide and be careful to get the bows’ positions correct.
- Take the three rows from step 18 and sew together in the order you made them using the diagram as a guide. Set aside.
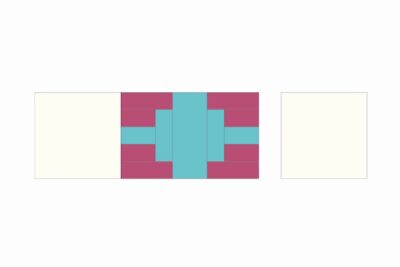
- Take two cream 5½” squares and the hot pink and pale blue present. Sew together with the present in the centre and press well.
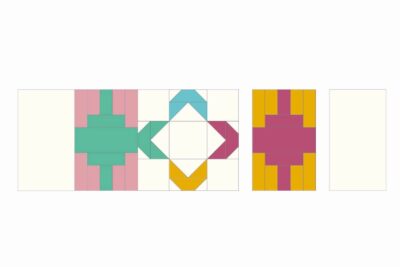
- Take one cream 8½” x 5” rectangle, the pale pink and turquoise present, the bows block from step 19, the gold and hot pink present, and one cream 8½” x 5” rectangle. Sew together in this order using the diagram as a guide and be careful to get the different bow colours positioned correctly. Press well.
- Take two cream 5½” squares and the turquoise and gold present. Sew together with the present in the centre and press well.
- Take two cream 8½” x 5” rectangles and the three rows from steps 20 to 22. Sew together using the diagram as a guide for position and placement. The rows and rectangles aren’t all the same length so you need to match them at their centre points first. When sew together rows that aren’t the same length, I like to sew beyond the edges of the shorter piece as this makes it easier to press them into place.
- Press carefully.
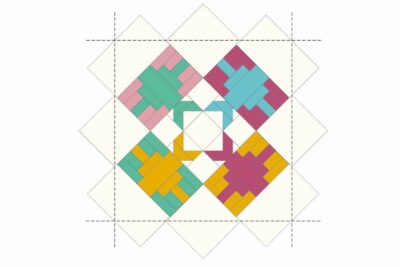
- Rotate the patchwork top so the presents are now in the four corners. Now you need to trim off the excess fabric to turn the patchwork top into a square; I recommend drawing guide lines before you cut. Draw your guide lines ¼” away from the present corners that are closest to the edge; using the diagram to help. This should give you an even 18½” square patchwork pillow top. Once you are happy with the placement of the guide lines, trim away the excess fabric to finish the pillow top.
Quilting:
- Now it’s time to make a quilt sandwich. Place your light backing fabric (right side facing down) with your batting on top, then add the patchwork pillow top with the right side facing towards you. Make sure all the layers are smooth and flat then baste the layers together using your preferred method.
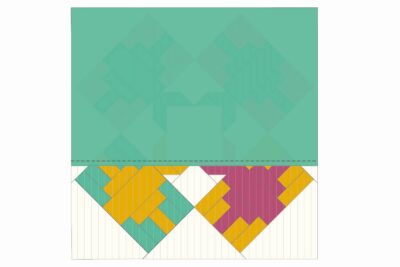
- Quilt as desired. I have used vertical straight line quilting in cream, with ½” spacing. I started by quilting a line right down the centre (going through where the corners of two pairs of presents and two pairs of bows meet) and added lines at 1” spacing. Then I went back over and added more quilting lines down the middle of all the 1” spaces. Other quilting ideas: hand quilting round the bow and present edges in co-ordinating thread colours.
- Once you have finished quilting, trim off the excess backing fabric and batting, and square up your pillow block if required.
Finishing:
- Take one cushion back 18½” x 12” rectangle and hem one long edge by pressing the raw edge to the wrong side by ¼” then again by another ¼”. Press well and sew. Then repeat for the second cushion back 18½” x 12” rectangle.
- Pin or clip the cushion back pieces to the quilted block, right sides together, all around the four sides.
- Sew around all four edges using a ¼” seam allowance, securing the start and finish with some back-stitching.
- Trim the corners, turn the pillow cover the right way out, carefully poke out the four corners and then press.
- Stuff with an 18” square pad and enjoy your new Christmas Present pillow!
About the Designer

Amy lives in the north of England with her husband and son. When she’s not sewing and quilting, Amy can usually be found baking or reading. You can find her on Instagram @amyatthegate

Become a Block Boss | Your Ultimate Patchwork Block Handbook
The Ruler Rules | Get the measure of your quilting rulers and learn how to use them with confidence and accuracy.

Seams Perfect | Create spot on patchwork seams with precision and confidence.

