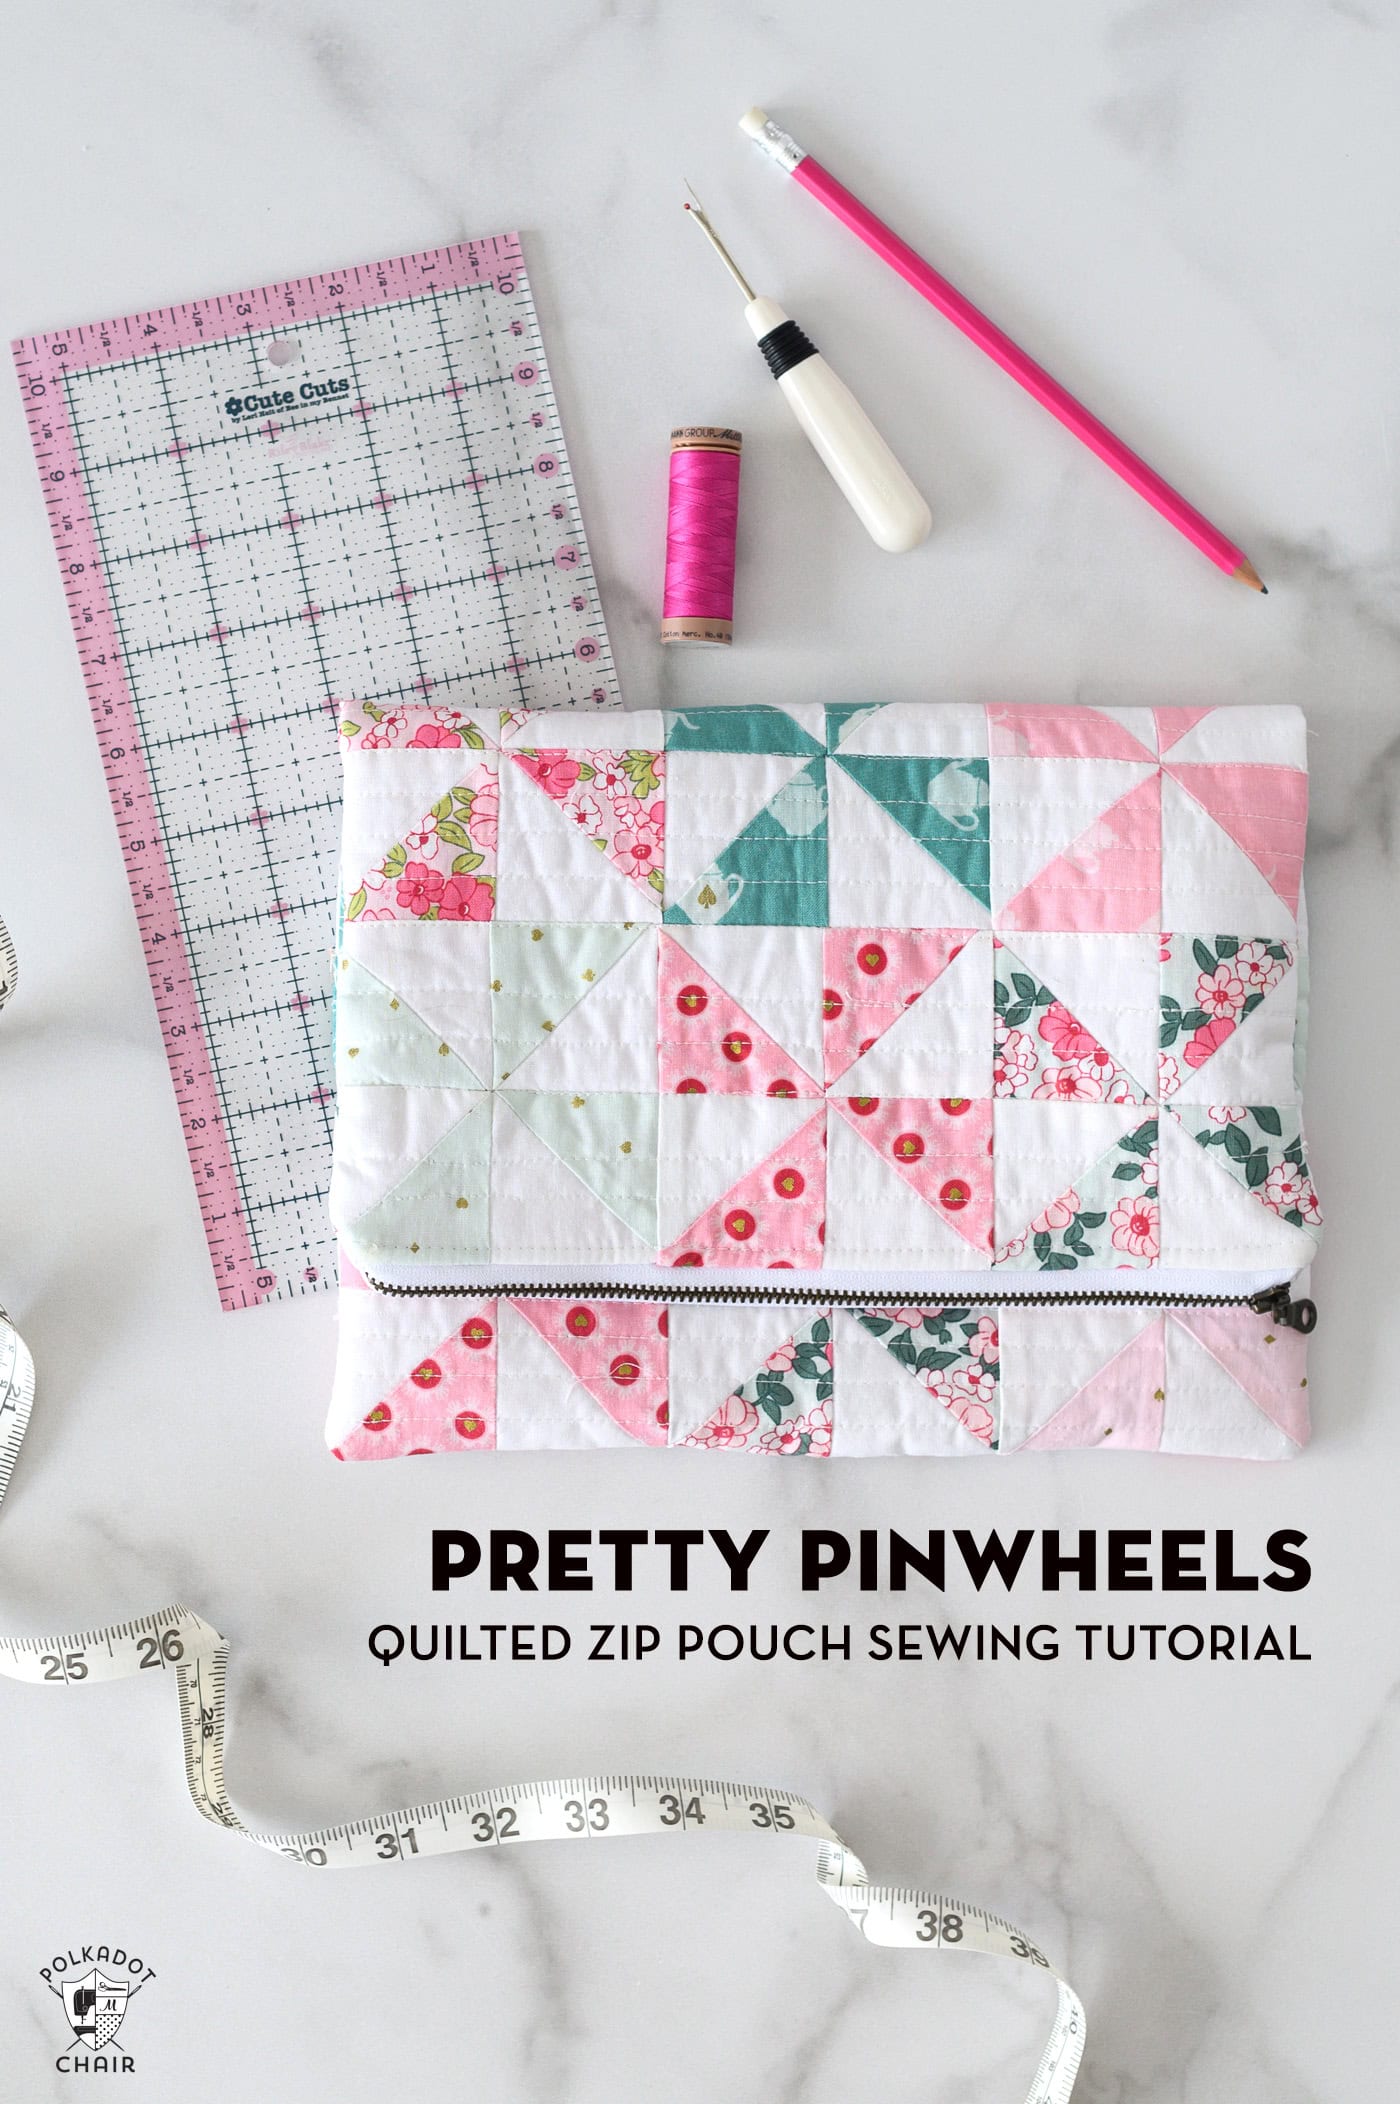
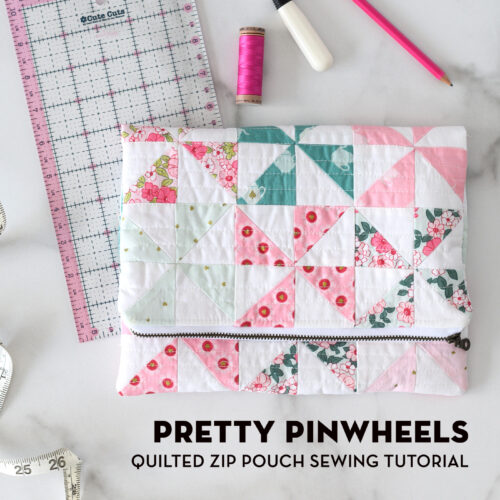
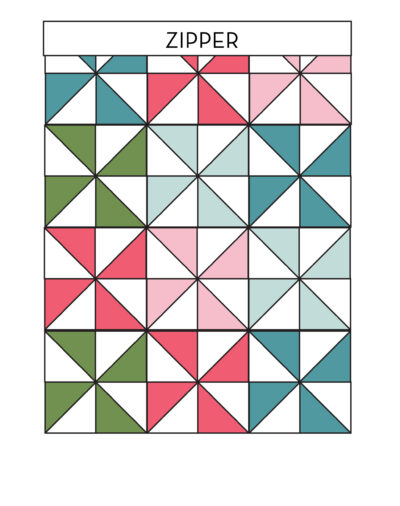
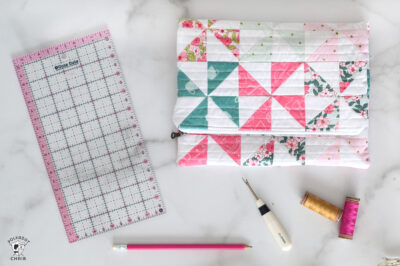
Pretty Pinwheels Quilted Fold Over Pouch Tutorial
Use the eight-at-a-time half-square triangle technique to quickly piece the quilt blocks needed for this adorable Pretty Pinwheels Quilted Zip Pouch! Follow along with our free sewing pattern to find out how to do it.
I’m always looking for small sewing and quilting projects you can make in an afternoon. I have an enjoyable project to share with you: it’s fast to sew and “sew” cute!
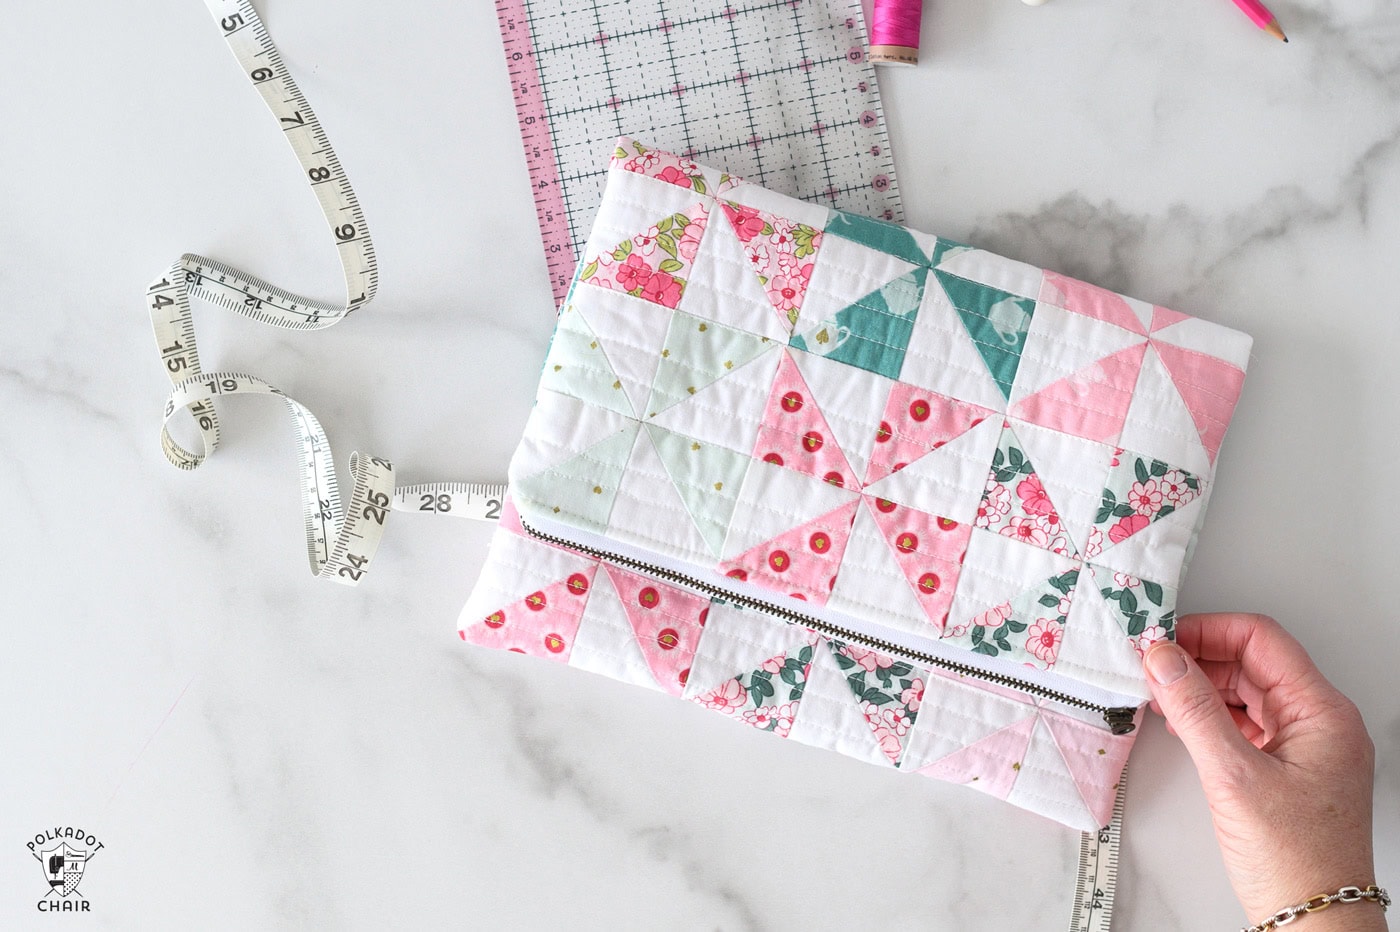
This Pretty Pinwheels fold-over zip pouch pattern is created from half-square triangle quilt blocks.
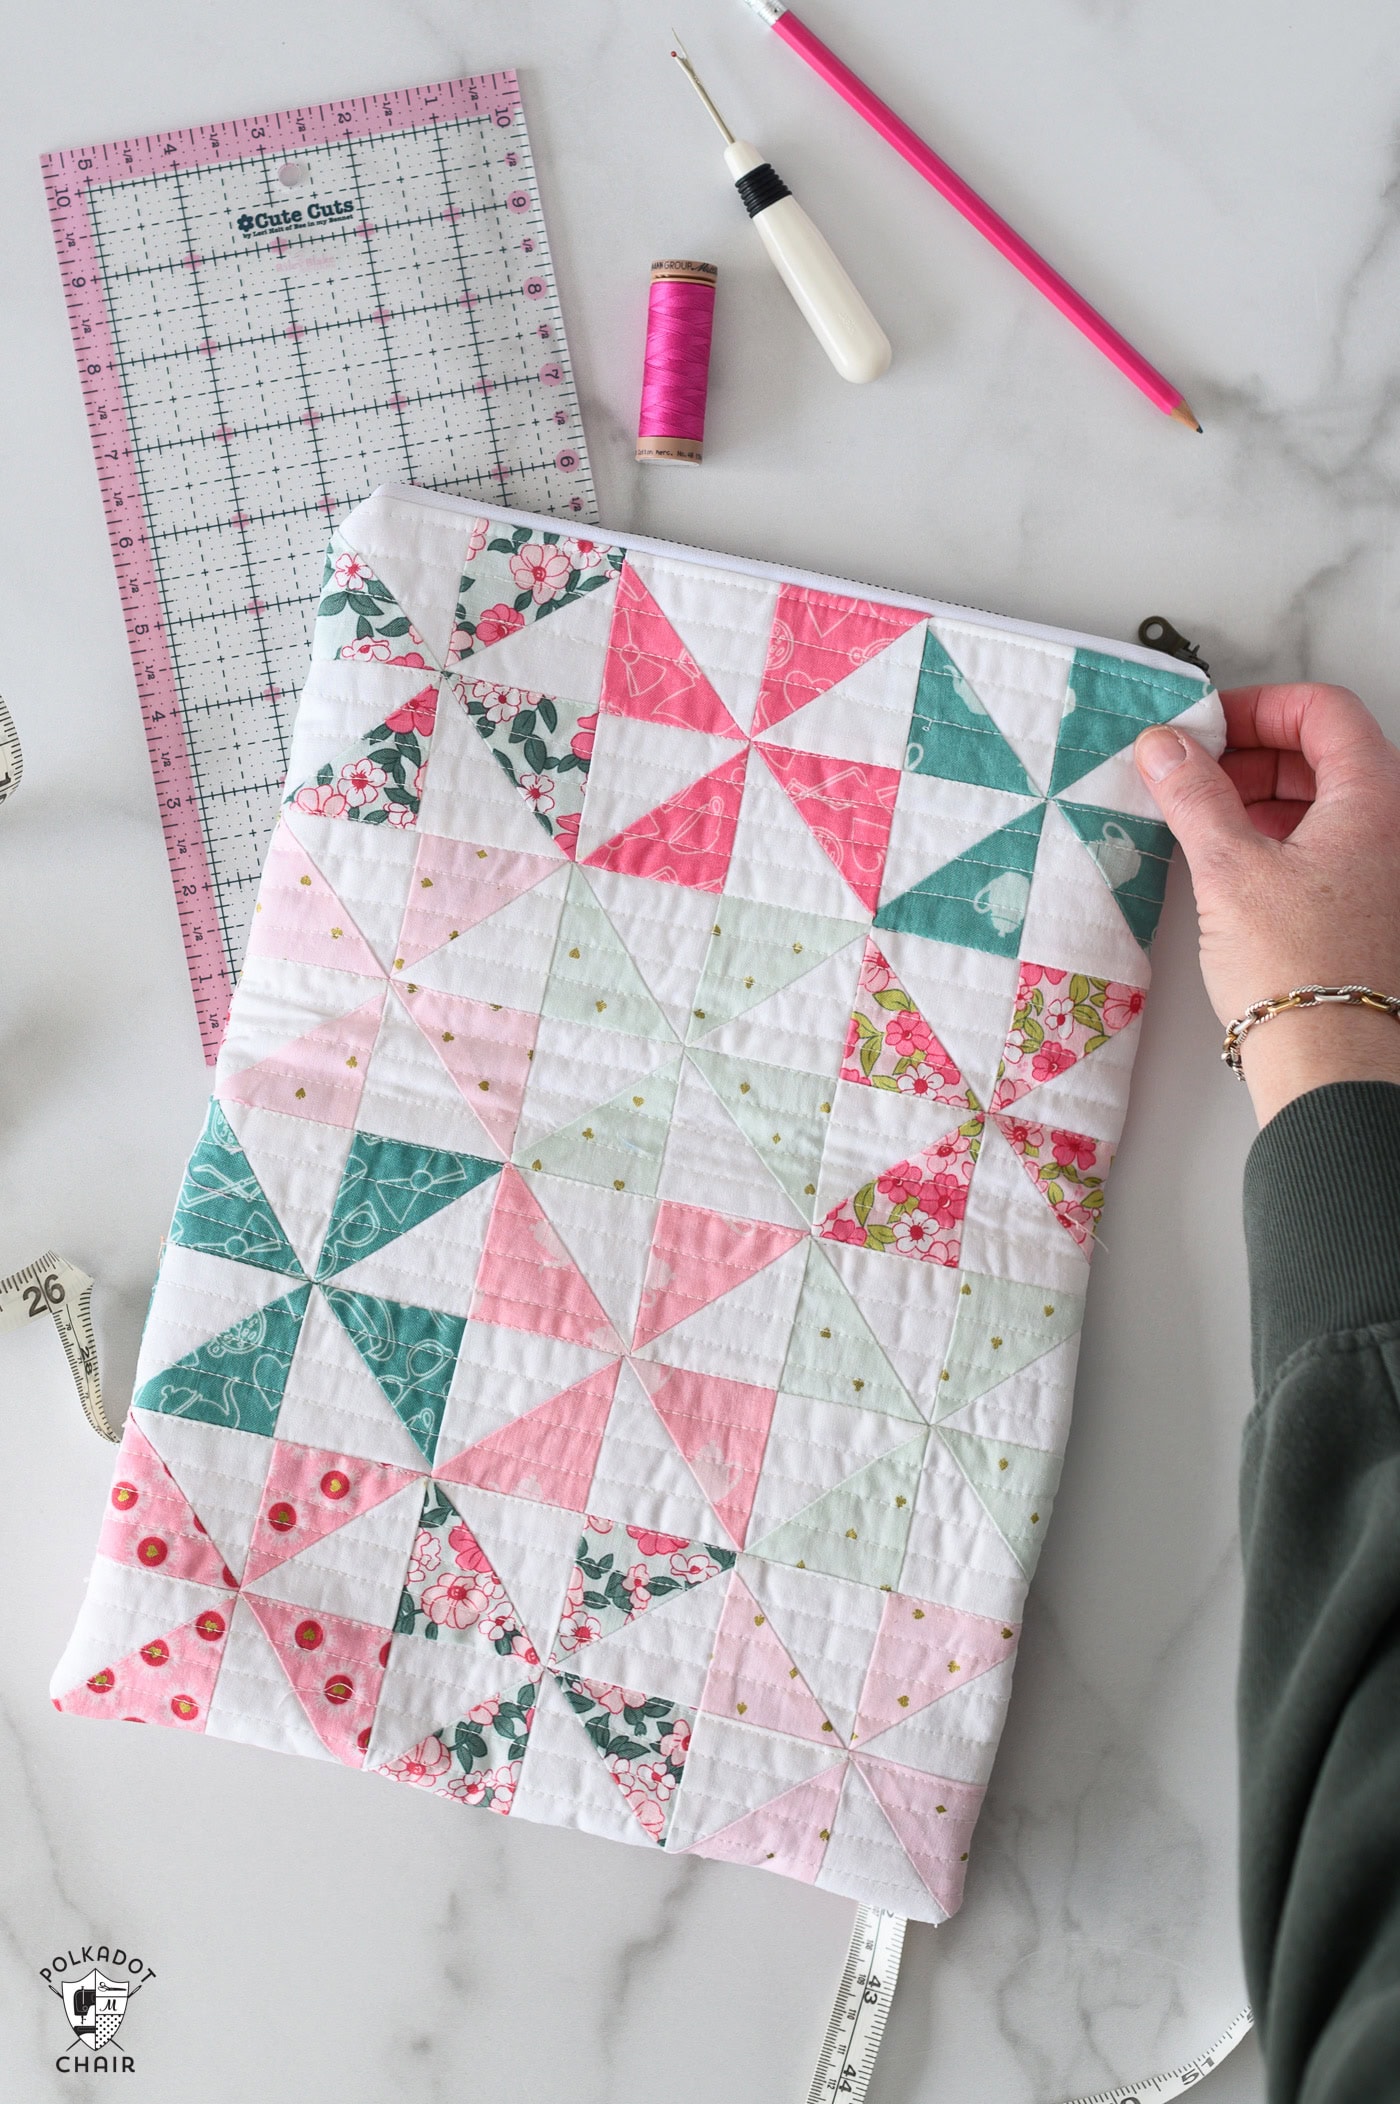
TIP: This rectangular zip pouch makes it great for holding odd-sized quilting notions (like a small cutting mat); you don’t need to fold it over when finished.
If you’ve never made a half-square triangle quilt block, you’ll be an expert when you finish this project!
SUPPLY LIST
- SIZE: Approximately 11″ x 15″
- 10″ Zipper
- 1/2 yard Fabric for Lining
- 1/2 yard Quilting Backing Fabric (does not show in the final project)
- 1/2 yard White Fabric for Pinwheels
- 1/2 yard TOTAL of various prints of fabric for the pinwheels
- 1/2 yard Quilt batting
Eight at a Time Half Square Triangle Technique
To save time piecing all of the half-square triangles needed for this pouch, we will use a technique to make eight from one cut of fabric.
The eight-at-a-time half-square triangle (HST) technique is a quilting method that allows you to quickly create eight identical HST units from just two fabric squares.
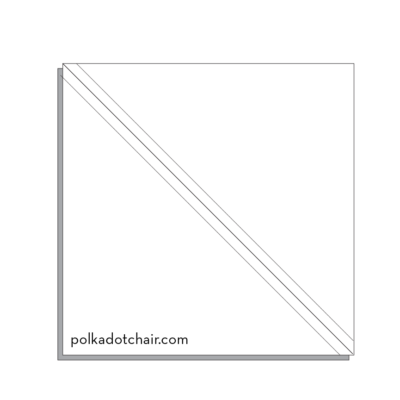
To use this technique, you place two squares of fabric with the right sides together, draw two diagonal lines from corner to corner, and sew a quarter-inch seam on both sides of each line.
After cutting along the drawn lines and horizontally and vertically across the center, you end up with eight perfectly sized HSTs, making it an efficient way to produce multiple units for quilt blocks.
The fabric in this zip pouch is from my now-retired Wonderland Two fabric collection. While it is no longer available on the market, similar fabric collections can be found in stores.
Pretty Pinwheels Fold Over Zip Pouch Sewing Pattern
Equipment
supplies
- 1 Zipper 10"
- 1/2 yard Fabric for Lining
- 1/2 yard Quilting Backing Fabric does not show in the final project
- 1/2 yard White Fabric for Pinwheels
- 1/2 yard TOTAL of various prints of fabric for the pinwheels
- 1/2 yard Quilt batting
Instructions
Cut:
- From Various Prints of Fabric: 12 pieces 5 3/4” x 5 3/4”
- From White Fabric: 12 pieces 5 3/4” x 5 3/4”
- From Quilt Backing:2 pieces 14” x 18”
- From Batting:2 pieces 13” x 17”
- From Lining: 2 pieces 12” x 16”
Part One: Make the Pinwheel Quilt Blocks
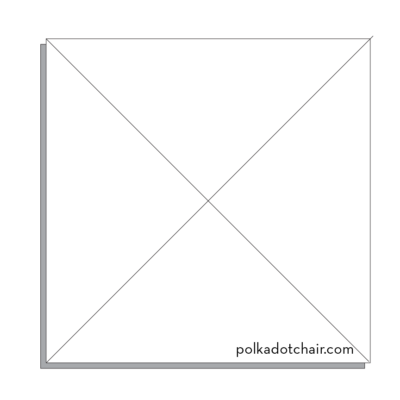
Step One: Mark the Fabric
- Draw an X diagonally on the wrong side of all of the white 5 3/4” x 5 3/4” pieces of fabric.

Step Two: Pin
- Pin one marked fabric square with one square from a 2nd fabric, right sides facing.
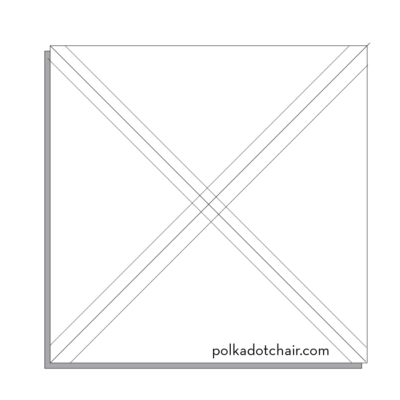
Step Three: Sew
- Ensure you know the 1/4″ seam mark on your sewing machine foot. For these steps, stitching exactly 1/4″ on each side of the line is essential.
- Stitch 1/4″ on each side of the line you drew in both directions.
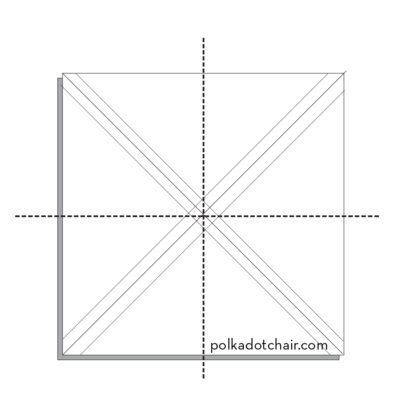
Step Four: Cut
- You are now ready to cut your square into eight smaller pieces. Using your rotary cutter and quilt ruler, make four cuts.
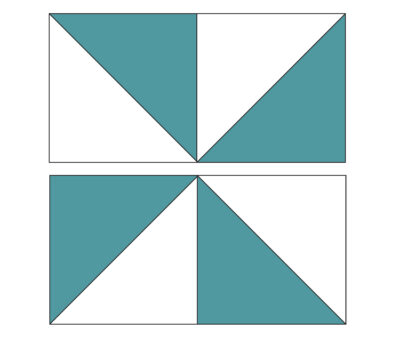
- First, cut a line horizontally across your block precisely in the center. Next, make a vertical cut also in the center.
- The last cuts are made diagonally along the line you drew in step one.
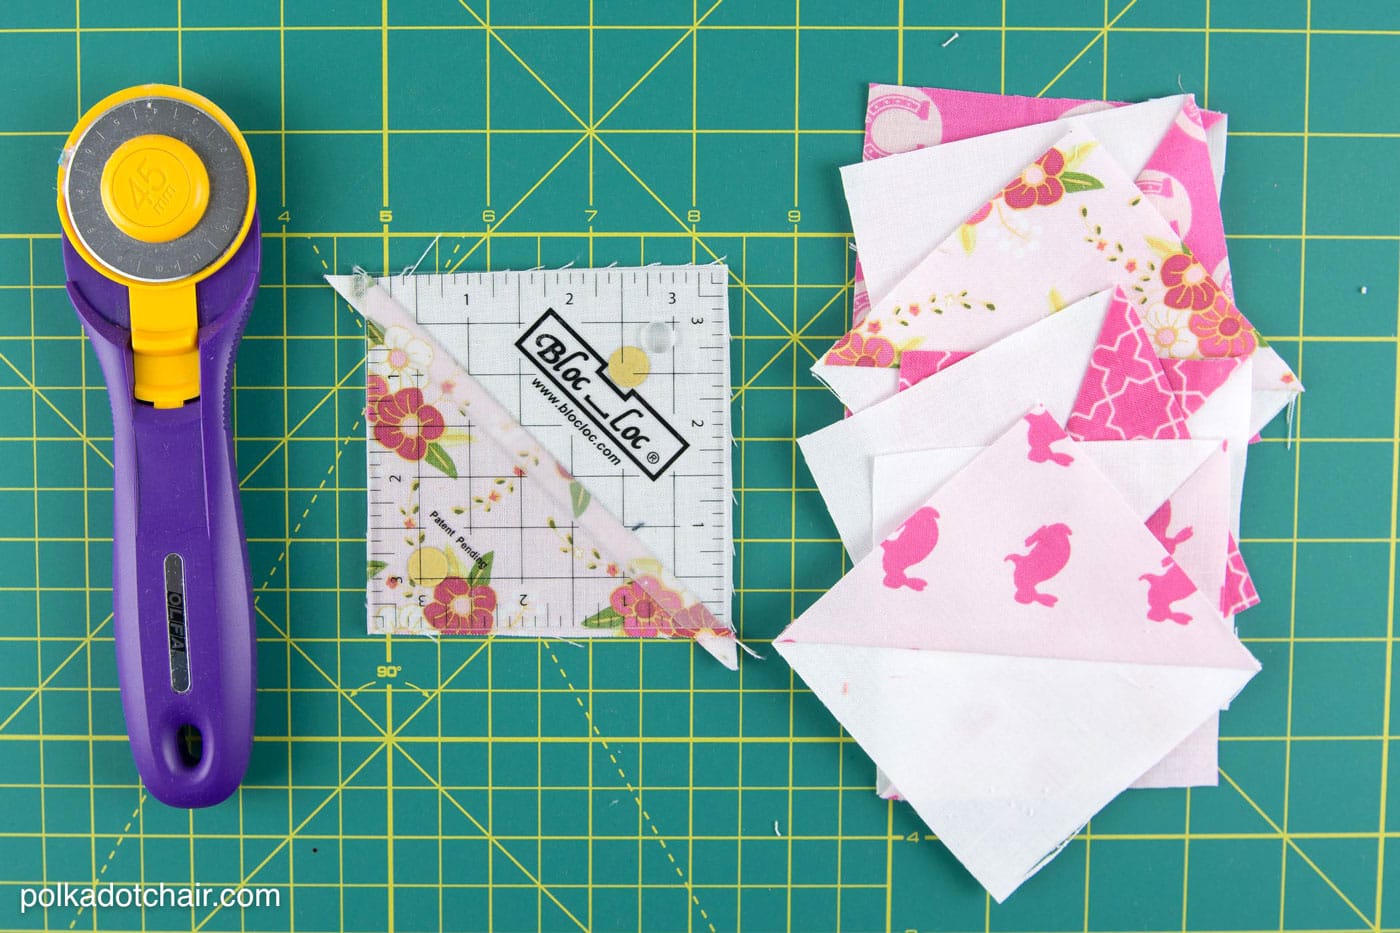
Step Five: Press & Trim
- You should now have eight pieces of fabric. Open up the HSTs and press the seam towards the darker fabric.
- Trim up each sewn HST to 2 1/2″ x 2 1/2″. I like to use a Bloc-Loc ruler to trim and square up my HSTs.
- Repeat eleven more times so that you have 96 sewn Half Square Triangle units.

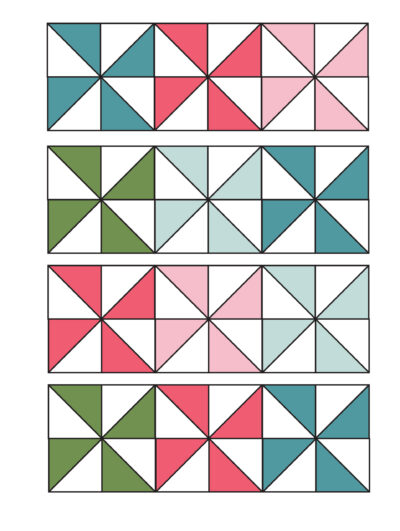
Step Six: Construct Pinwheel Blocks
- Sew four of the HST units (all made with the same print of fabric) together as shown in the diagram.

- Repeat 23 more times so that you have 24 sewn pinwheel blocks.


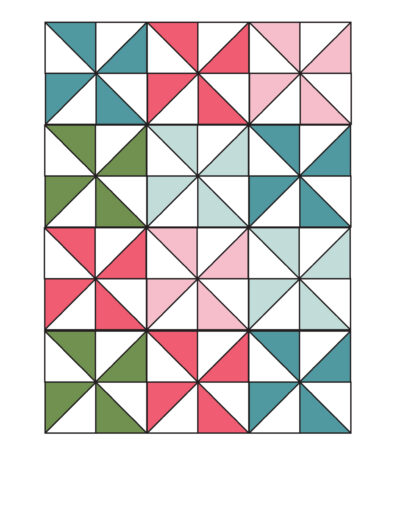
Step Seven: Create Pouch Front & Back
- Sew the units created in Step Two into four rows of blocks, each three wide.

- Use the diagram as a guide.
- Repeat so that you have a second piece.

Part Two: Quilt
- Create a quilt sandwich with the Quilt Backing Fabric, the quilt batting and the sewn pinwheel top.If you need help with machine quilting, check out our "Basics of Machine Quilting" Guide.
- Secure in place with pins or spray baste.
- Quilt with a walking foot on your machine, lines 1/2” apart.
- Repeat with the second sewn pinwheel piece.
- Trim each piece to 12” x 16” (remove excess batting and backing fabric).
Part Three: Pouch
- Choose one of the quilted pieces created in Part Two to be the front of the bag.
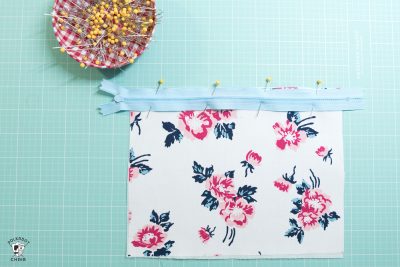
- Note: The following photos are from my "How to Sew a Simple Zip Pouch" pattern. The photos may be different, but the steps are exactly the same. If you've never made a zip pouch, you may want to check out that blog post and the accompanying video.
- Pin the zipper to this piece, along the 12” side; the right side of the zipper will be facing the right side of the fabric.

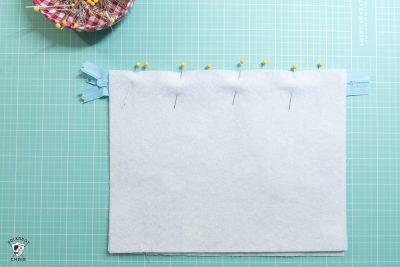
- Pin the cut lining piece to this piece, the right side of the fabric facing the wrong side of the zipper.
- With a zipper foot on your sewing machine, sew the zipper/bag seam with a 1/4” seam allowance.
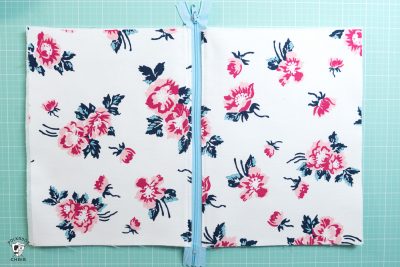
- Lightly press the fabric pieces away from the zipper.
- Repeat with the other side of the zipper.
- Pin the right side of the other quilted pinwheel bag piece to the right side of the other side of the zipper.
- Pin the other lining piece to the wrong side of the zipper.
- Sew in place with a 1/4” seam allowance.
- Press the fabric away from the zipper. Top stitch along both sides of the zipper.
- Unzip the zipper
- Pin the two quilted pinwheel pieces to each other. Pin the two lining pieces to each other.
- When you do this, the zipper/bag seam should be pressed/pinned toward the lining portion of the bag.
- Sew around the outside of the bag with a 3/8”-1/2” seam allowance, leaving a 3” opening on the lining side of the bag.Trim your seam allowance down to reduce bulk in the seams.

- Turn the bag’s right side out through the opening you left in the lining.
- Smooth out the seams of the bag and press well.

- If you’re happy with the bag’s appearance, sew the opening in the lining closed. You can hand sew the opening closed, but I prefer to machine sew this seam.


Melissa,
Your points are SO perfect & your quilts are always so neat .
Super cute zipper bag! Love the simplicity of half square triangles especially when you can make them in bulk! Thanks for the very detailed instructions!