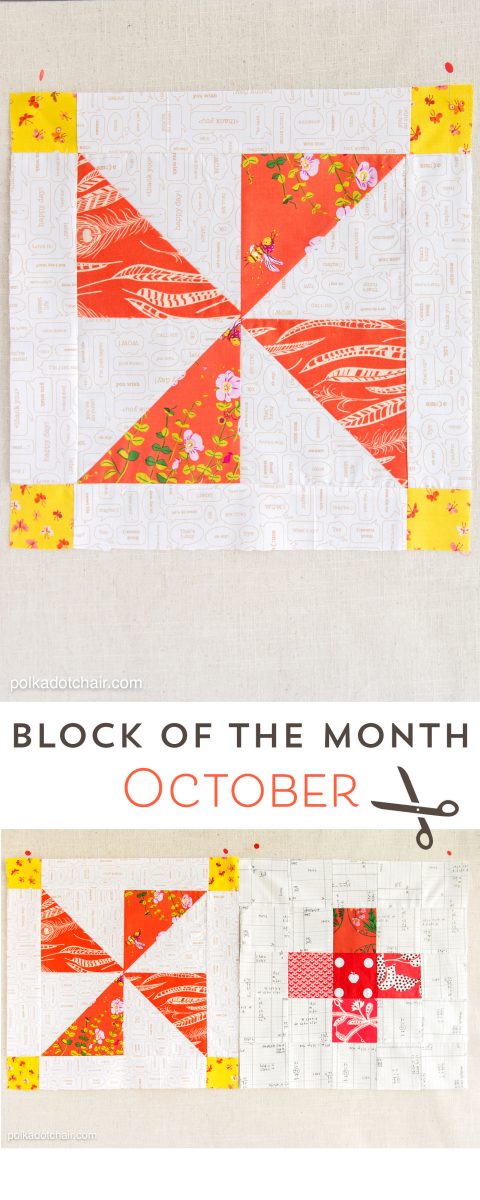
How to Make a Pinwheel Quilt Block – October Quilt Block of the Month
I hope you’re ready to sew! It’s month two of the Block of the Month series here on the Polka Dot Chair! This month, we are continuing the series with a variation of a Pinwheel Quilt Block. This is block #2 of 12. It’s also designed to be a skill-builder block, teaching you how to make a Half Square Triangle!
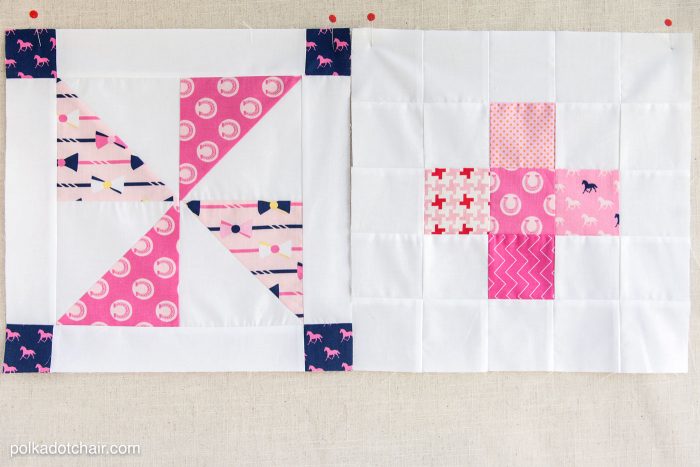
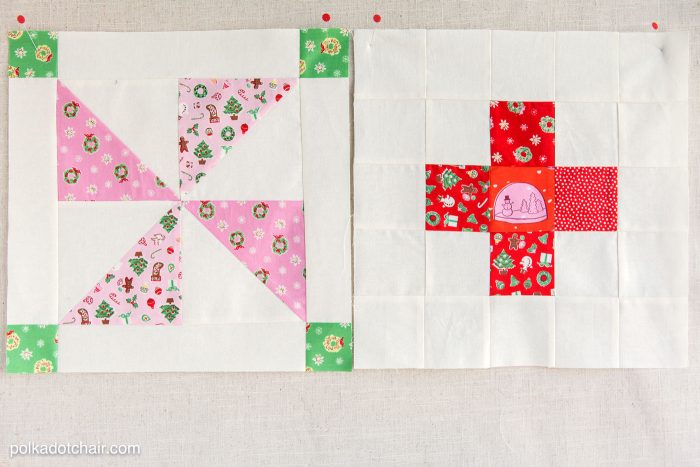
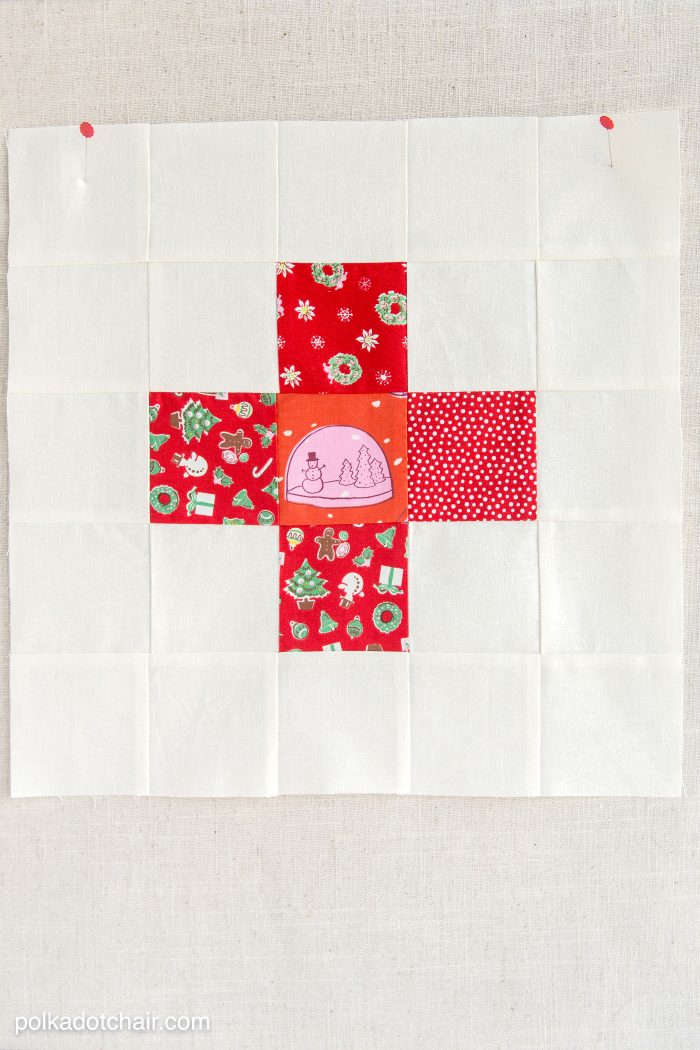
I hope you guys had a great time constructing your September Plus Quilt blocks! I know that I really enjoyed making that block I ended up making four of them. I’ll show you my other variations on the block later in this post.
If you missed it be sure to check out this post offering tips and trick to picking out fabric for a quilt. You can find an index to all the posts in this quilt block series to date by clicking here.
About our Quilt Block of the Month Series
I remember several years ago looking at all of the fantastic quilts I saw in magazines and thinking, “I want to do that but don’t even know where to start.” If you’re feeling that way about quilting, I invite you to join this “block of the month” series. You just make ONE block a month, and at the end, you will have made a quilt ALL BY YOURSELF! Pretty cool, huh?!
All of the Blocks in this Series
- Plus Quilt Block Pattern
- Pinwheel Quilt Block Pattern
- Sawtooth Star Quilt Block Pattern
- Half Square Triangle String Block Pattern
- Turnstile Quilt Block Pattern
- Shoofly Quilt Block Pattern
- Keystone Quilt Block Pattern
- Log Cabin Quilt Block Pattern
- Friendship Star Quilt Block Pattern
- Grandma’s Favorite Quilt Block Pattern
- Ohio Star Quilt Block Pattern
- Dresden Quilt Block Pattern
As a reminder, I’m writing these tutorials assuming you are a beginner. I hope that many of you will “take the plunge” into quilting, even if you’ve never quilted before!
If you’re an experienced quilter, you may find some of the instructions a review, but I wanted to make sure that everyone could play along that wanted to.
Last month, we learned how to stitch simple squares into rows and then into a block. Hopefully, this gave you practice stitching correct 1/4″ seams and matching seams.
Let’s Make Half Square Triangles!
Now, let’s move on and learn something new: how to make a Half-Square Triangle (or HST). HSTs are used a lot in quilting. They are simple to construct and can be rearranged into endless blocks. They are also the building blocks of many other more complex quilt blocks.
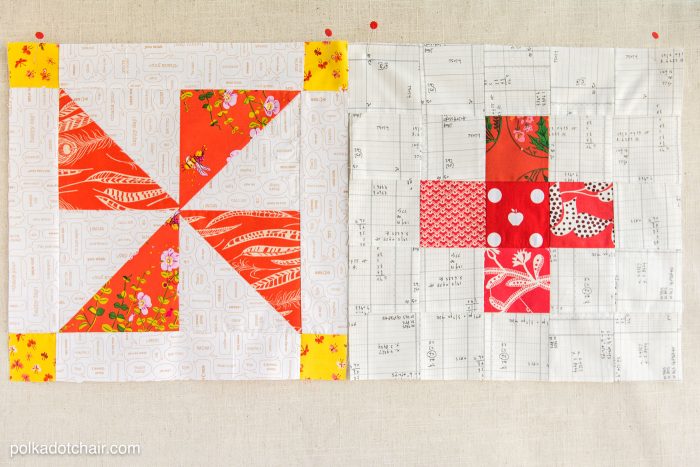
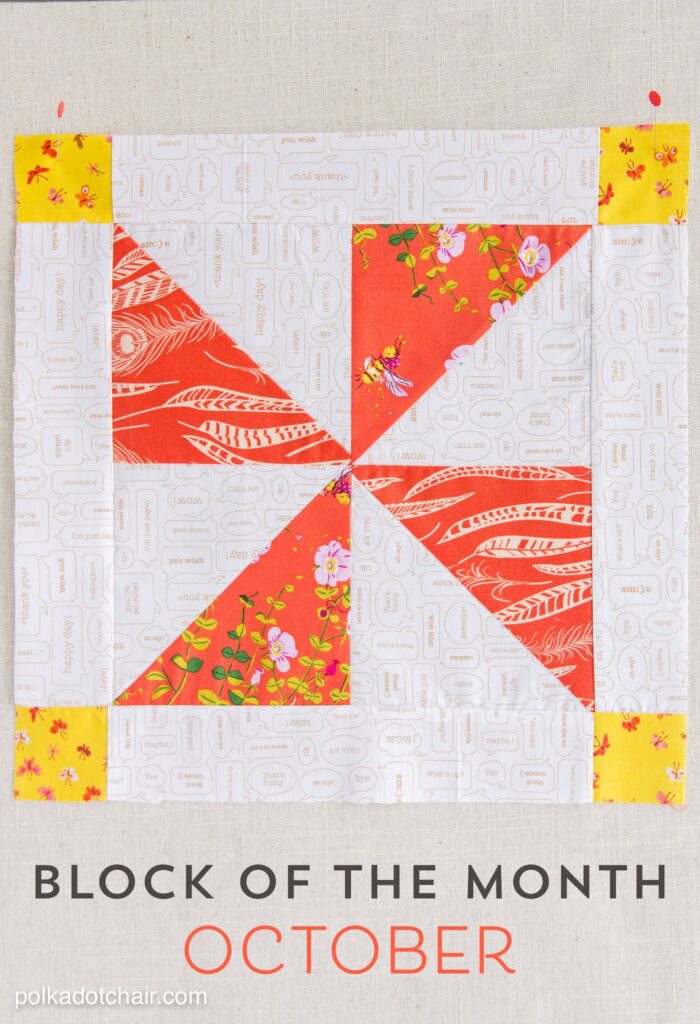
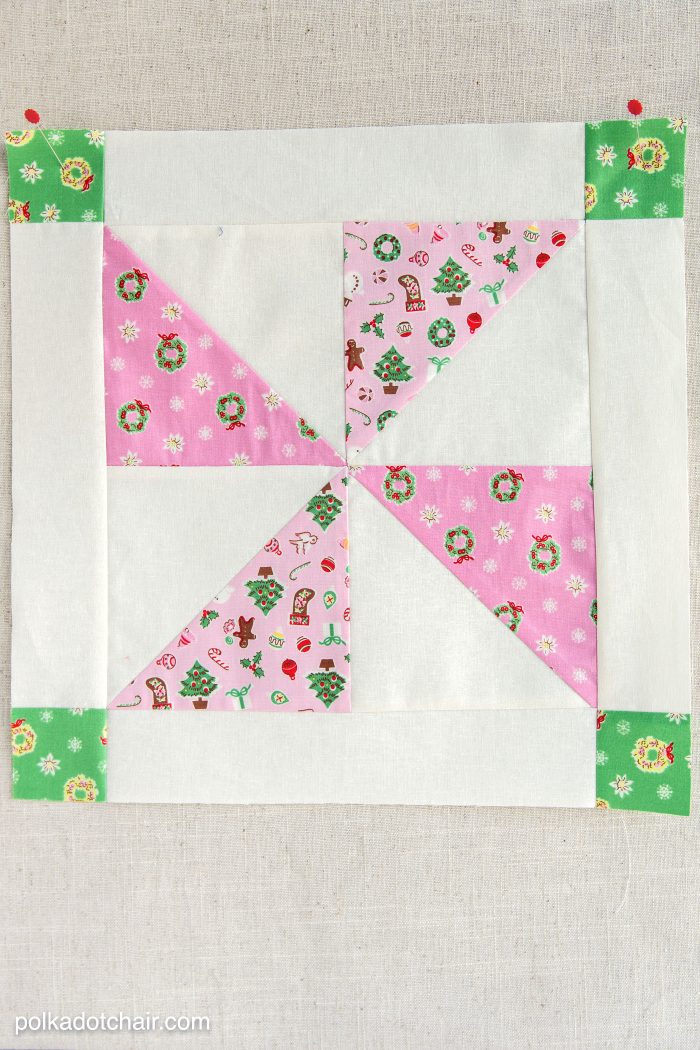
Today, we are going to use the HSTs to create a “boxed-in” pinwheel block. Above, you can see my variation using low volume fabric.
It’s my “hidden holiday” quilt, so for September, we had an apple, and for October, I used orange feathers, which reminded me of the gorgeous colors all the trees in Kentucky turn every Autumn.
For this block, I recommend using two different fabric colors (last month we just used one color). Pick one color for the pinwheel and one color for the corners. You can use two different prints of the same color if you like.
Pinwheel Quilt Block Pattern
As a reminder, all blocks will be 15 1/2″ before finishing.
There will be 12 blocks, and you can add sashing or borders at the end, but we will discuss that after all the blocks are done.
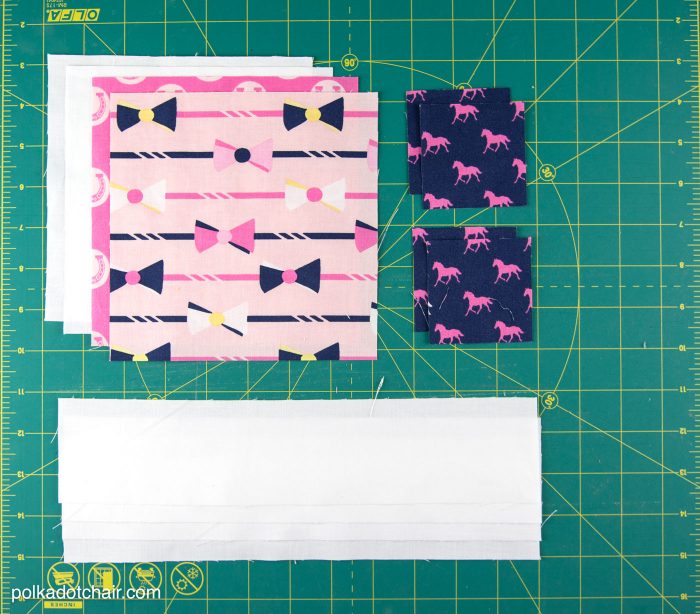
For the Pinwheel Quilt Block Cut:
Two pieces 6 1/2″ x 6 1/2″ of white (or your chosen background) fabric
Two pieces 6 1/2″ x 6 1/2″ of color fabric (it can be the same print or two different ones, but keep the color the same)
4 pieces 2 1/2″ x 2 1/2″ for corners
4 pieces 2 1/2″ x 11 1/2″ from background fabric.
You will also need (affiliate links):
Fabric marking pen (I use Frixion pens, they disappear when heat is applied to most fabrics, test on a swatch first)
6″ wide ruler (you most likely have this, it’s a common size quilt rule), you can also buy a shorter version like the one I used here
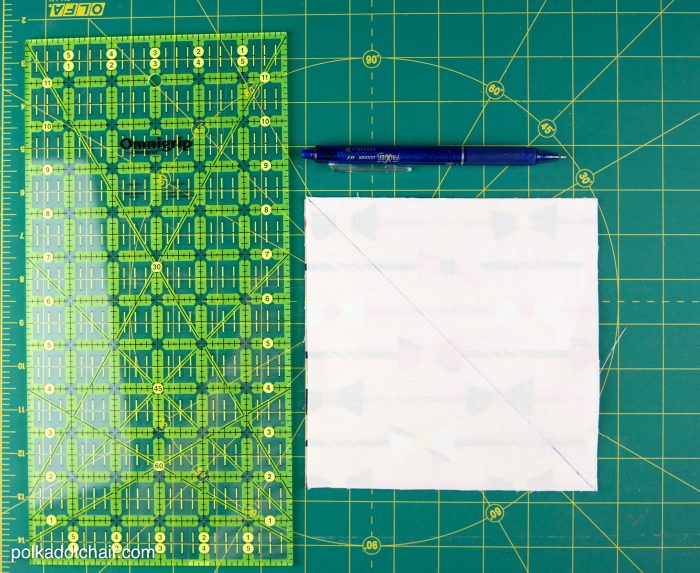
1. Begin by marking a diagonal line on the wrong side of one of your 6 1/2″ x 6 1/2″ background pieces.
Place it on the right side facing the 6 1/2″ x 6 1/2″ colored fabric piece.
2. Stitch down each side of the marked line, precisely 1/4″ from the line.
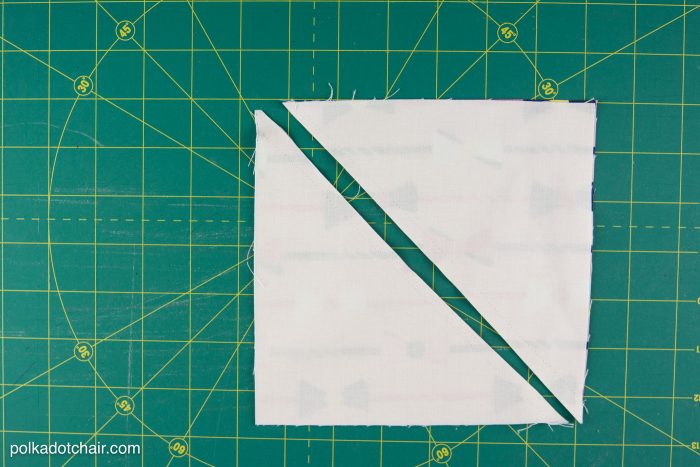
3. Cut along the drawn line Using your quilt ruler and rotary cutter. You will have two pieces that look like this.
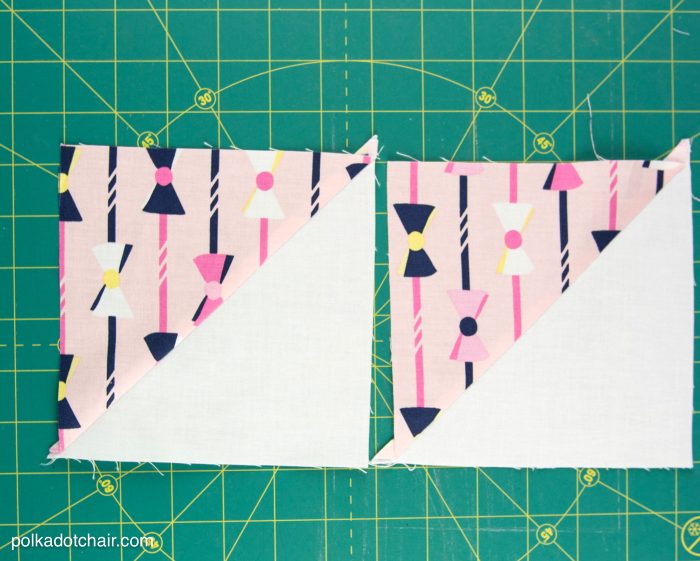
Press the pieces with the seams going towards the darker fabric. Be careful not to distort the shape. Repeat for other 6 1/2″ x 6 1/2″ squares.
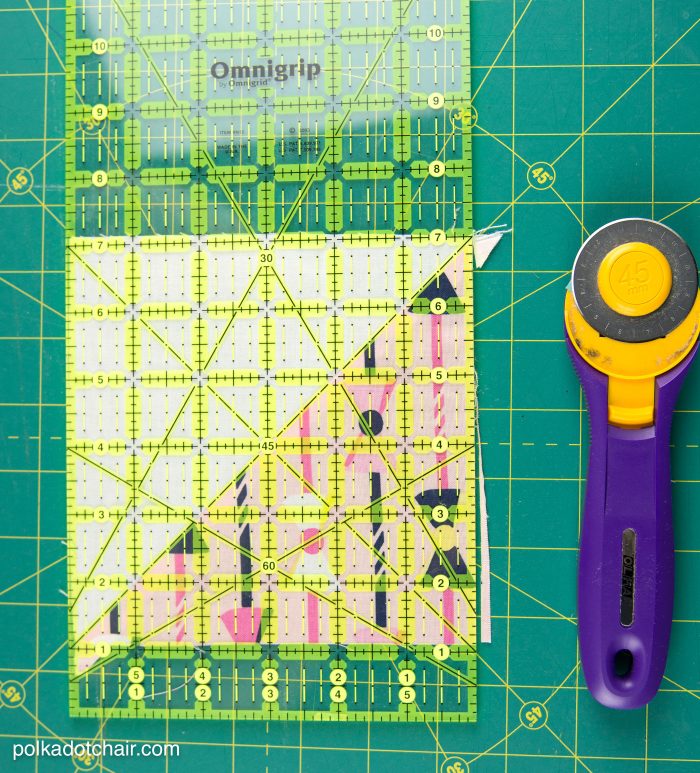
4. Square Up the Block.
Place the 45-degree angle of your 6″ wide ruler along the seam between the two fabrics on the block.
Trim any excess fabric. This is referred to as “squaring up” your blocks. Normal distortion occurs as you stitch and press the HST, and you want to make sure it’s a perfect square before you proceed.
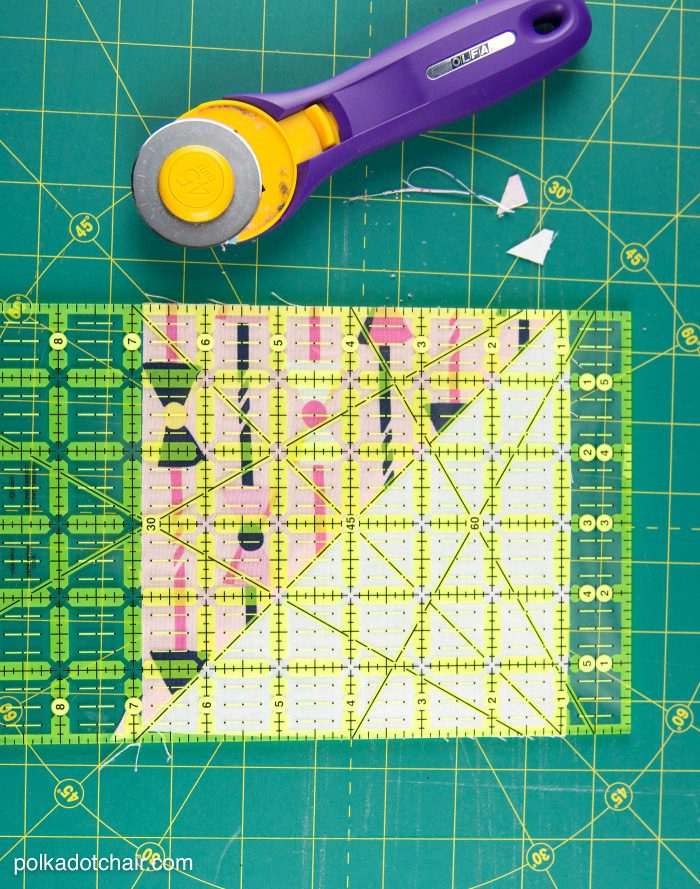
Flip the ruler the other way and trim the opposite sides.
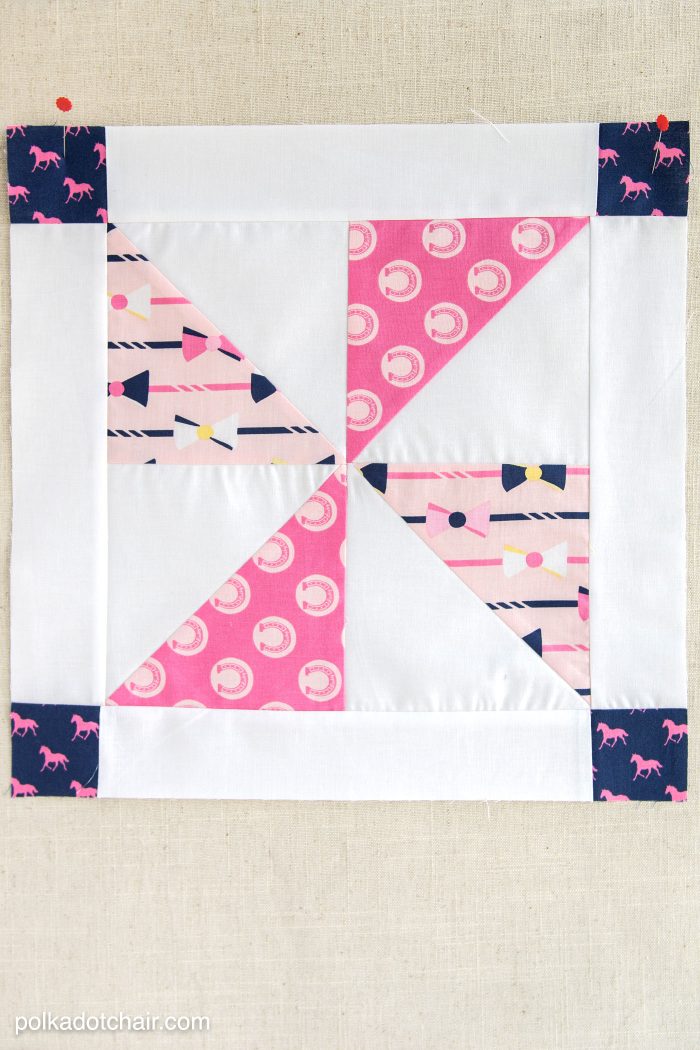
5. To Assemble the Block
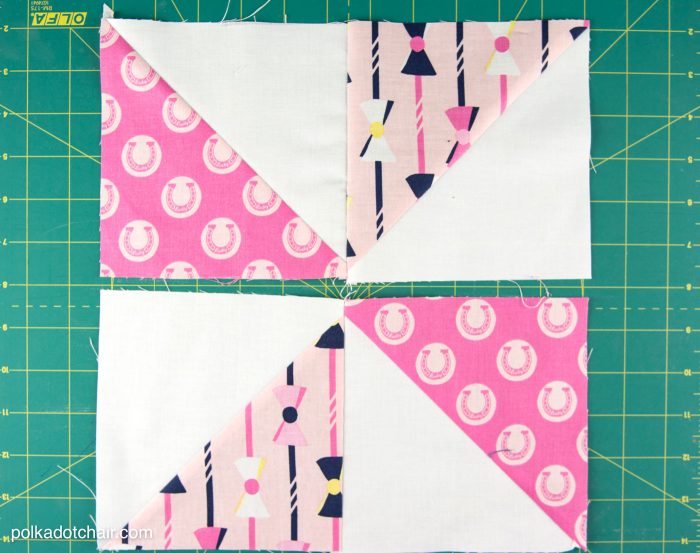
Stitch two sets of 2 HST pieces together in the arrangement shown above. Don’t sew all four pieces together yet. Press seams toward the darker fabric.
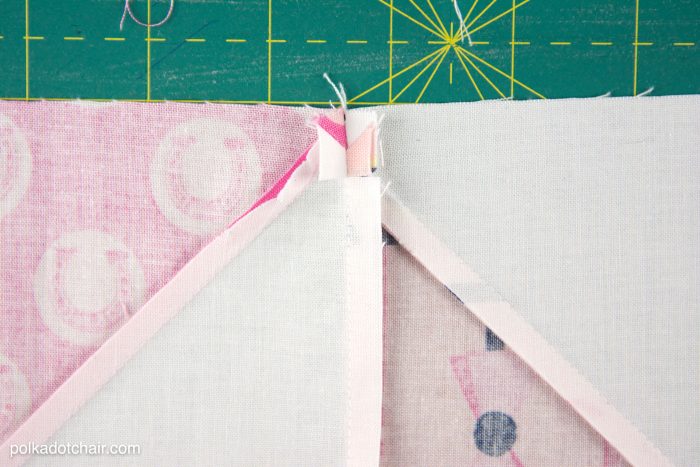
Clip the seam 1/4″ up from the edge on the back of the stitched pieces. Press this section of the seam OPEN.
This will help you reduce the bulk at the center of the block caused by overlapping seam allowances.
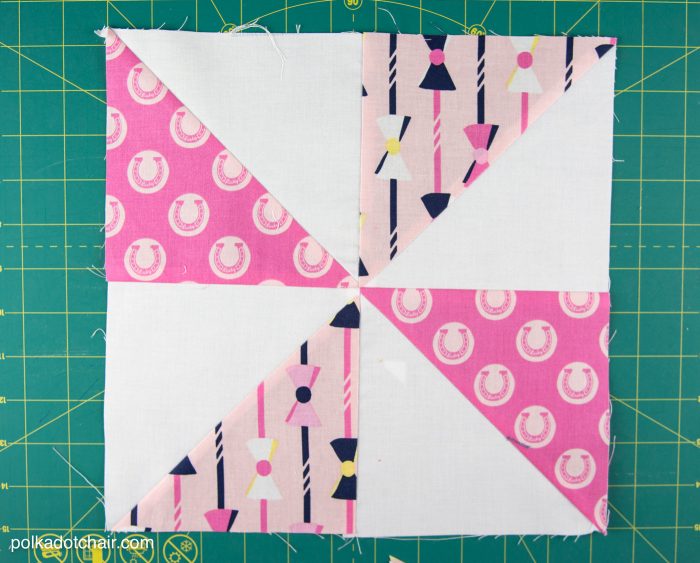
Finish stitching the 4 HSTs together. Make sure to match that center seam.
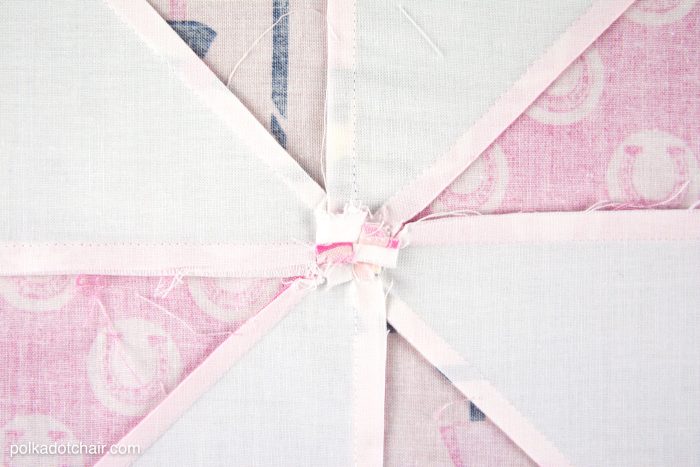
Clip 1/4″ on each side of the seam you just stitched. Press this section open.
6. Add Outside Borders
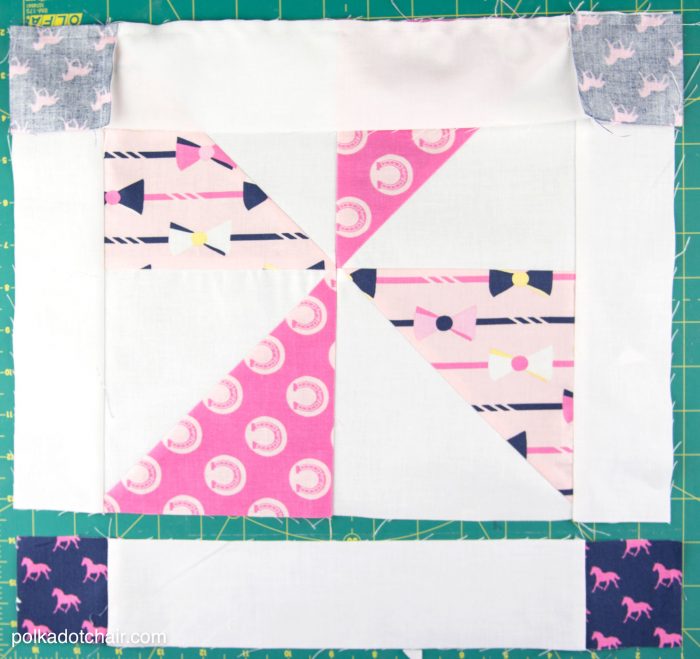
Stitch one 2 1/2″ x 2 1/2″ piece to the 2 1/2″ ends of two of the 2 1/2″ x 11 1/2″ pieces. Press seams towards the darker fabric.
Stitch the remaining 2 1/2″ x 11 1/2″ pieces to the two sides of the sewn pinwheel block. Press seams to one side.
Stitch the sewn strip/corner pieces to the top and bottom of the block. Press all seams.
Trim and square up the block to 15 1/2″ x 15 1/2″
That’s it, you’re done!
At this point, it’s kind of fun because you can start to see how the quilt will come together. It will also give you a good idea of what direction you want to head color-wise with the rest of your blocks. We will keep adding colors as we go. Next month, count on 3-4 colors per block.
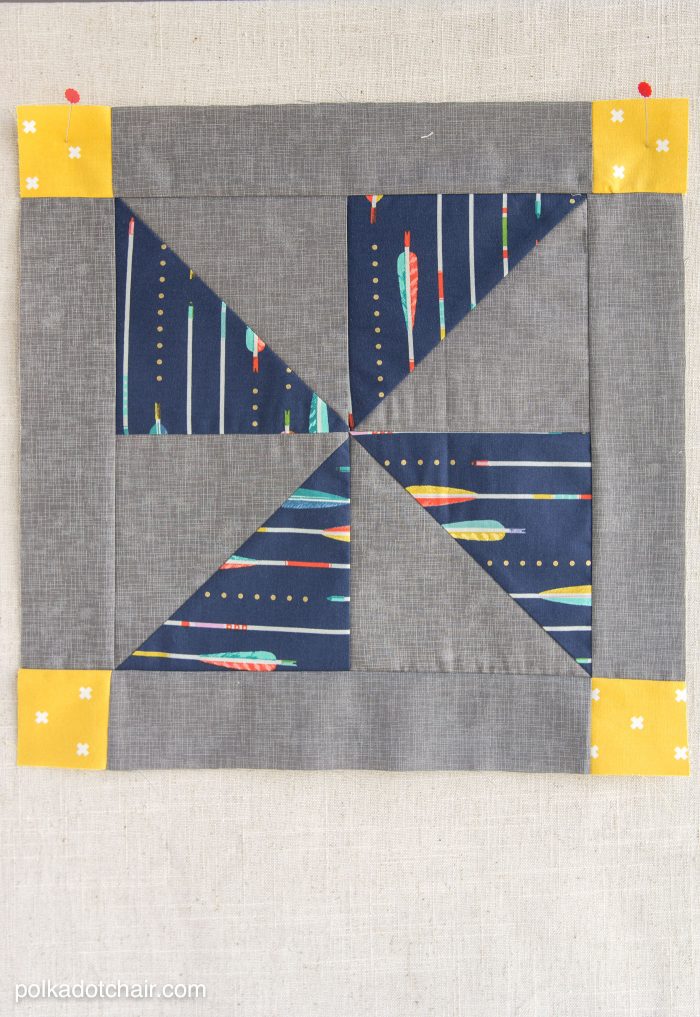
More Pinwheel Quilt Block Coloring Ideas:
Here is the gray background version I’m working on for my teenage son. Yes, I’m being brave and sewing something for my 14-year-old son! This will have to be a long quilt, as I’m sure he’ll break the 6-foot mark before it’s finished.

Here’s the Christmas version that I started working on. It has an ivory linen background, and almost all of the fabrics are from Elea Lutz’s “Little Joys” line for Penny Rose Fabric.
UPDATE: You can now purchase a PDF with ALL of the block instructions for each month in one place!! Click here to PURCHASE
Okay, now go forth and STITCH! I can’t wait to see your blocks!
More Free Quilt Block Tutorials:
String Pieced Half Square Triangle Block
Melissa,
I’m confused! Not unusual for me. You said to square up the first block to 15 inches square. But in a comment for the first block said the quilt without sashes or borders would be 45″ by 60″. Wouldn’t it be accurate to say that quilt of just the 12 blocks would be 43.5″ by 58″. I was guessing by cutting 3.5″ squares for September, to square the block to 15.5″ square and finish at 15″ after piecing the blocks together. HELP before I do any more blocks!
I practiced this one and it didn’t work out right. Love your blocks, will keep trying!
I’m a new quilter, just started a couple months ago. My first 2 quilts were done with the method “quilt as you go” and I think they turned out pretty decent. Now I’m doing a regular quilt and am in the process of machine quilting it; must say that it is not easy doing this method so I’ll have to practice practice practice a lot, lol. Anyway I just wanted to say thank you for being so kind in helping us quilters out here. My next project is a Christmas table runner that will need several HST, your tutorial on them is giving me a lot of help. Thanks again. I will be on your site a lot now that I know of it.
Hi,
Enjoying this so far, but ran into a problem today. My 11 1/2″ strips were too short. If the 4 quadrants finish at 6″ ea, then together they would measure 12″. Should the directions say to cut 4 strips 2 1/2″‘ x 12″?
Thanks for the BOM. I’ll post pictures of my efforts,
Mary
It should be 11 1/2, you have two 6×6 pieces…. after they are sewn you lose 1/4″ from each due to seam allowances leaving you with a piece that is 11 1/2″ wide