How to Make a Plus Quilt Block – September Block of the Month
I hope you’re ready to play along with the Quilt Block of the Month series here on the Polka Dot Chair! This month we kick things off with a 15 inch Plus Quilt Block Tutorial. It’s designed to be a skill-builder block.
Let’s get this party started, shall we? The first block in our series is a Plus Block. I picked this block because I thought it would give you great practice stitching those 1/4″ seams.
UPDATE: You can now purchase a PDF with ALL of the block instructions for each month in one place!! Click here to PURCHASE
About The Plus Quilt Block:
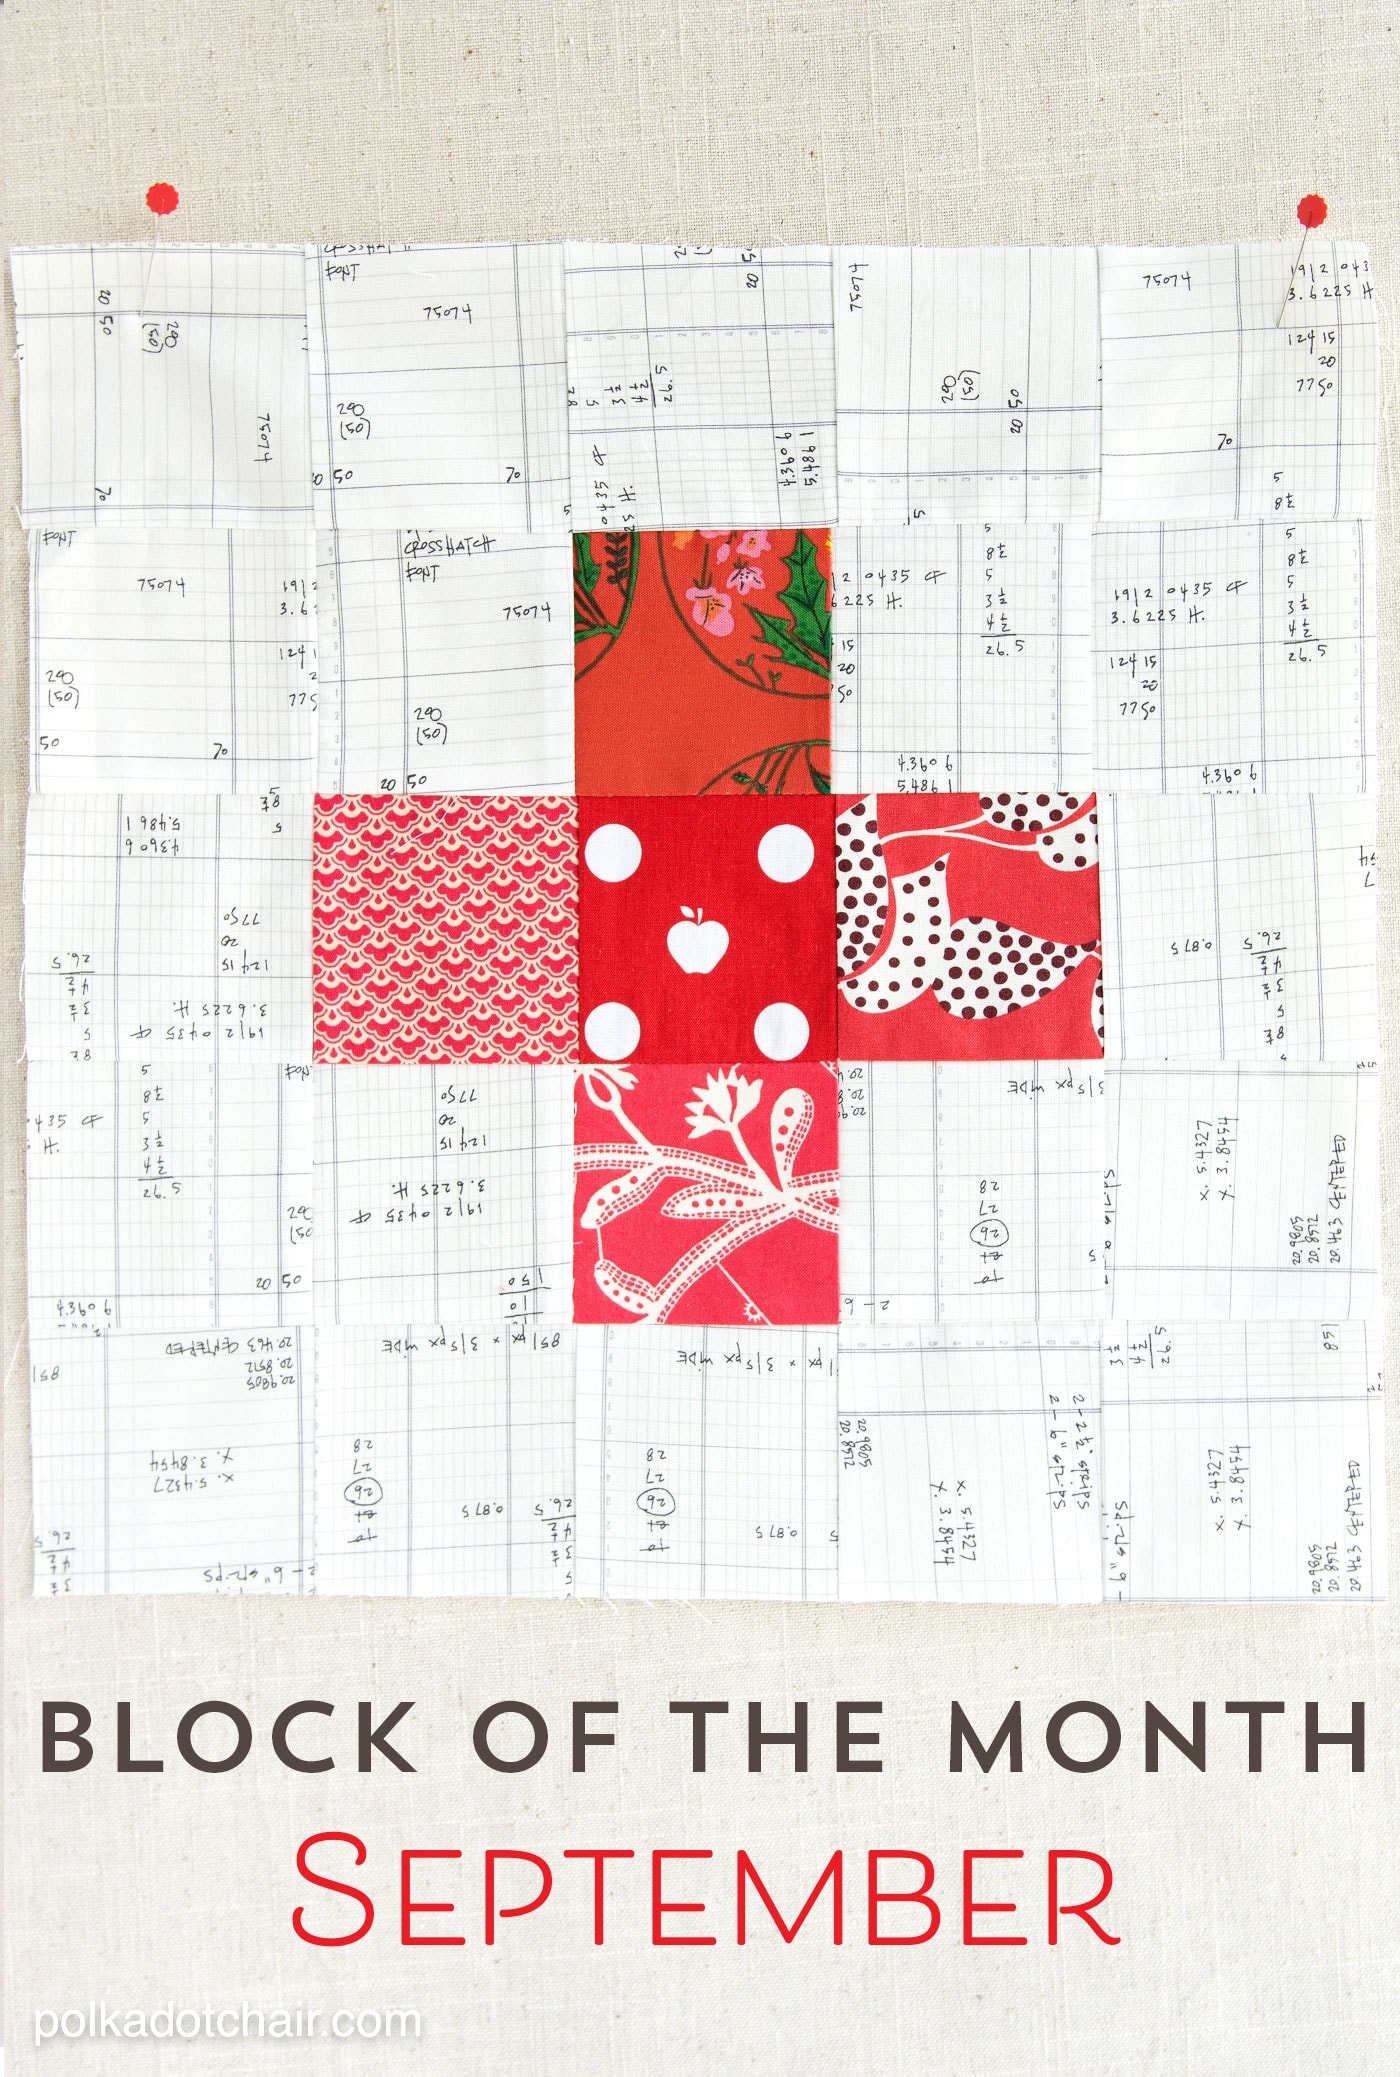
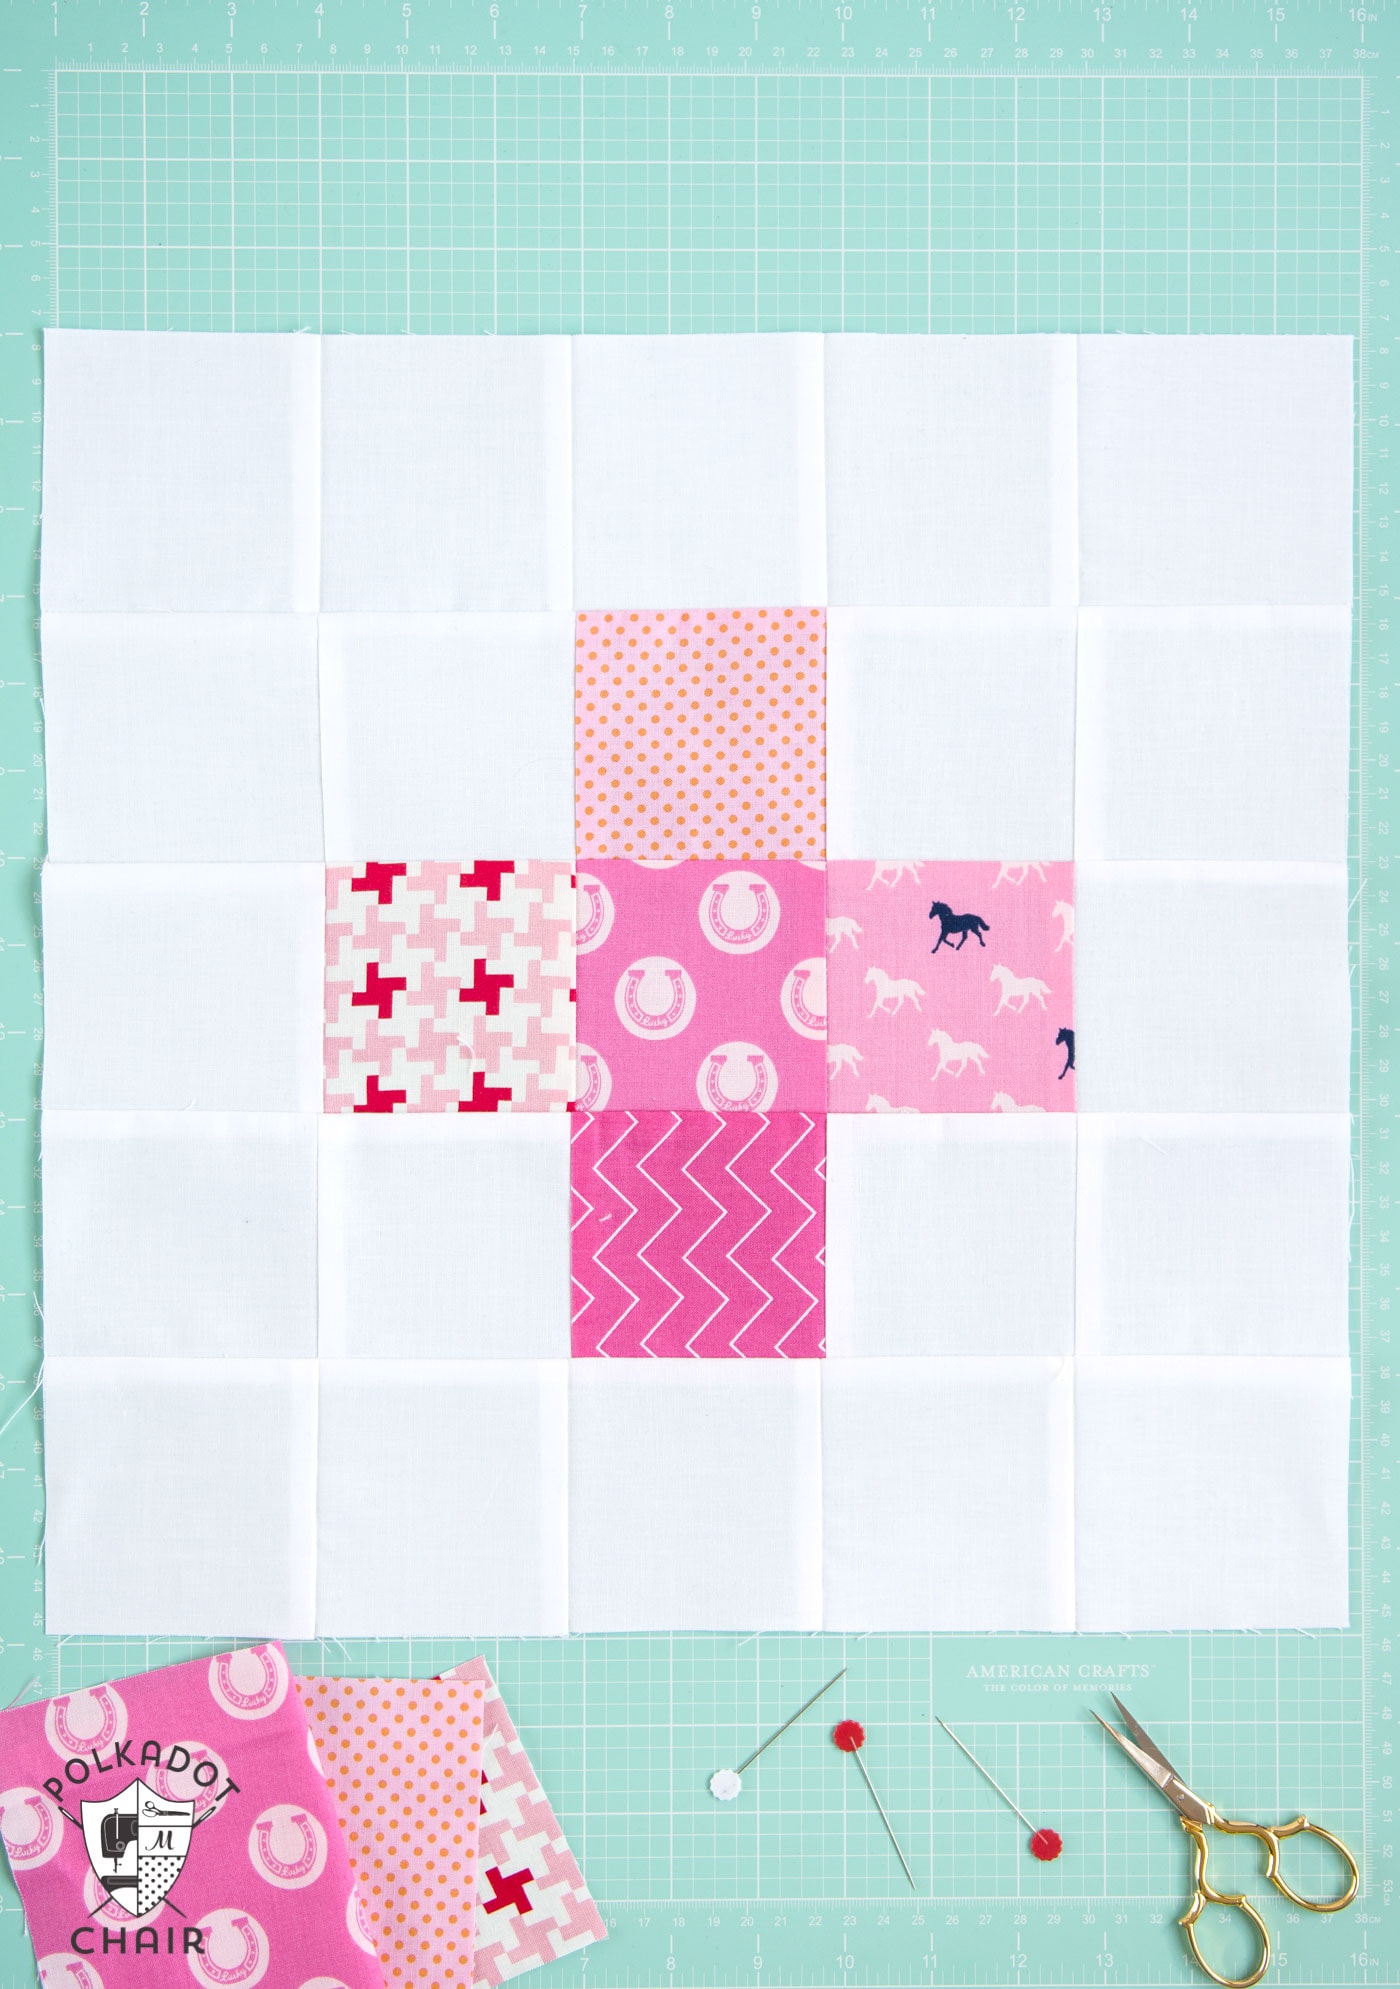
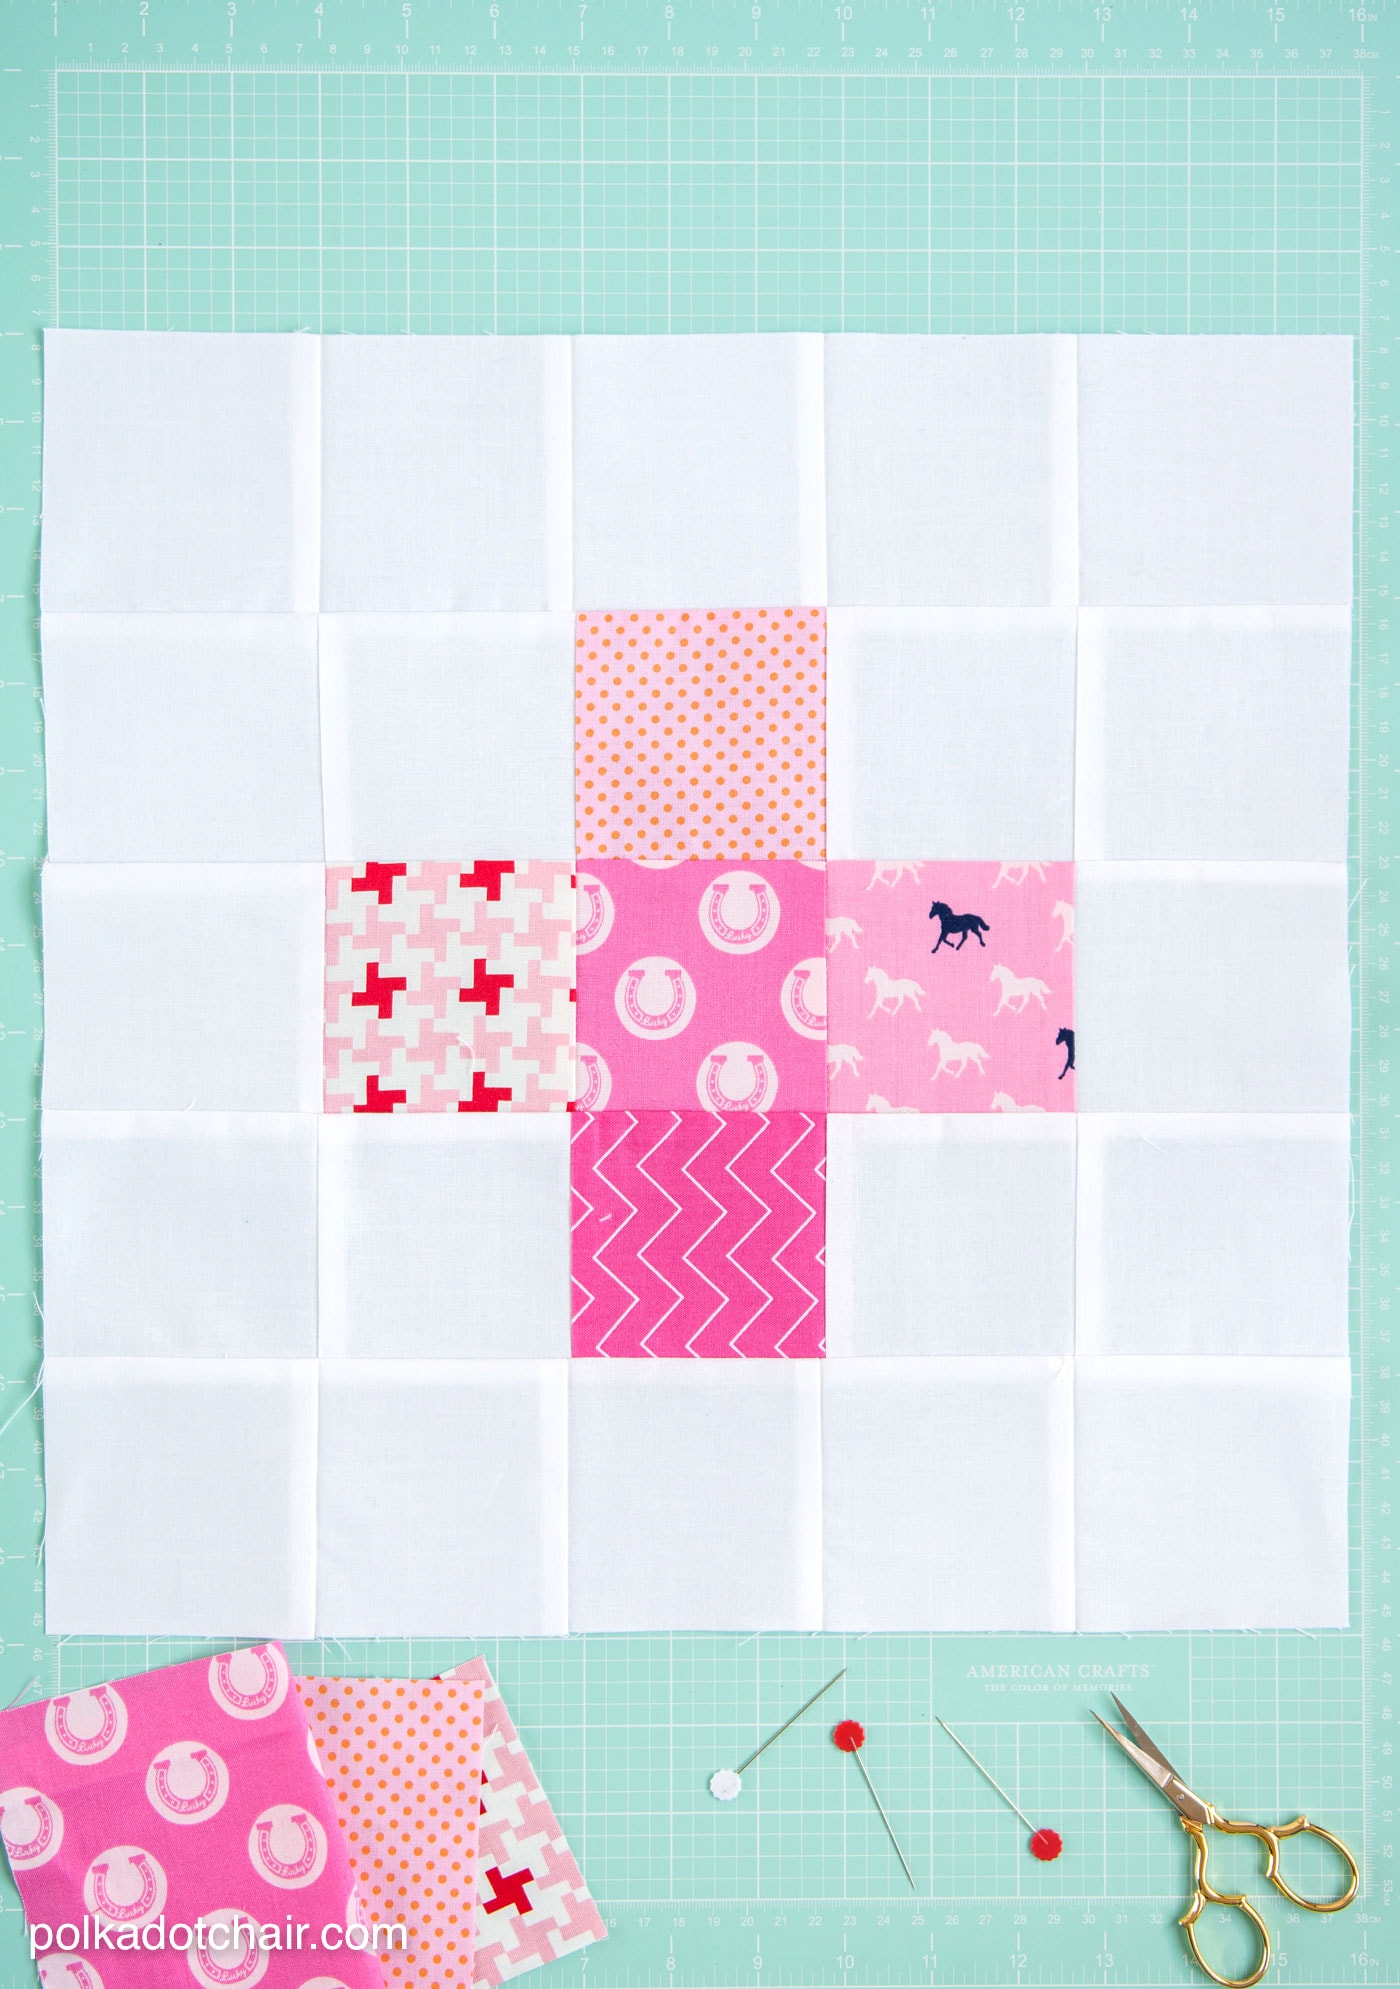
This block measures 15″ x 15″ (after finishing) and is composed of 25 3 1/2″ x 3 1/2″ squares. It’s just a simple grid, but the pattern comes alive when you pick which fabrics go in which spot in the grid. Does that make sense?
I stitched it up in 3 different fabric variations to give you some ideas for changing the look of the block. There is a low-volume version above. I’m calling this one my “hidden holiday” quilt. Notice the Apple in the center there?
It’s my “nod” to September. There may be a pumpkin hidden in the block next month 🙂
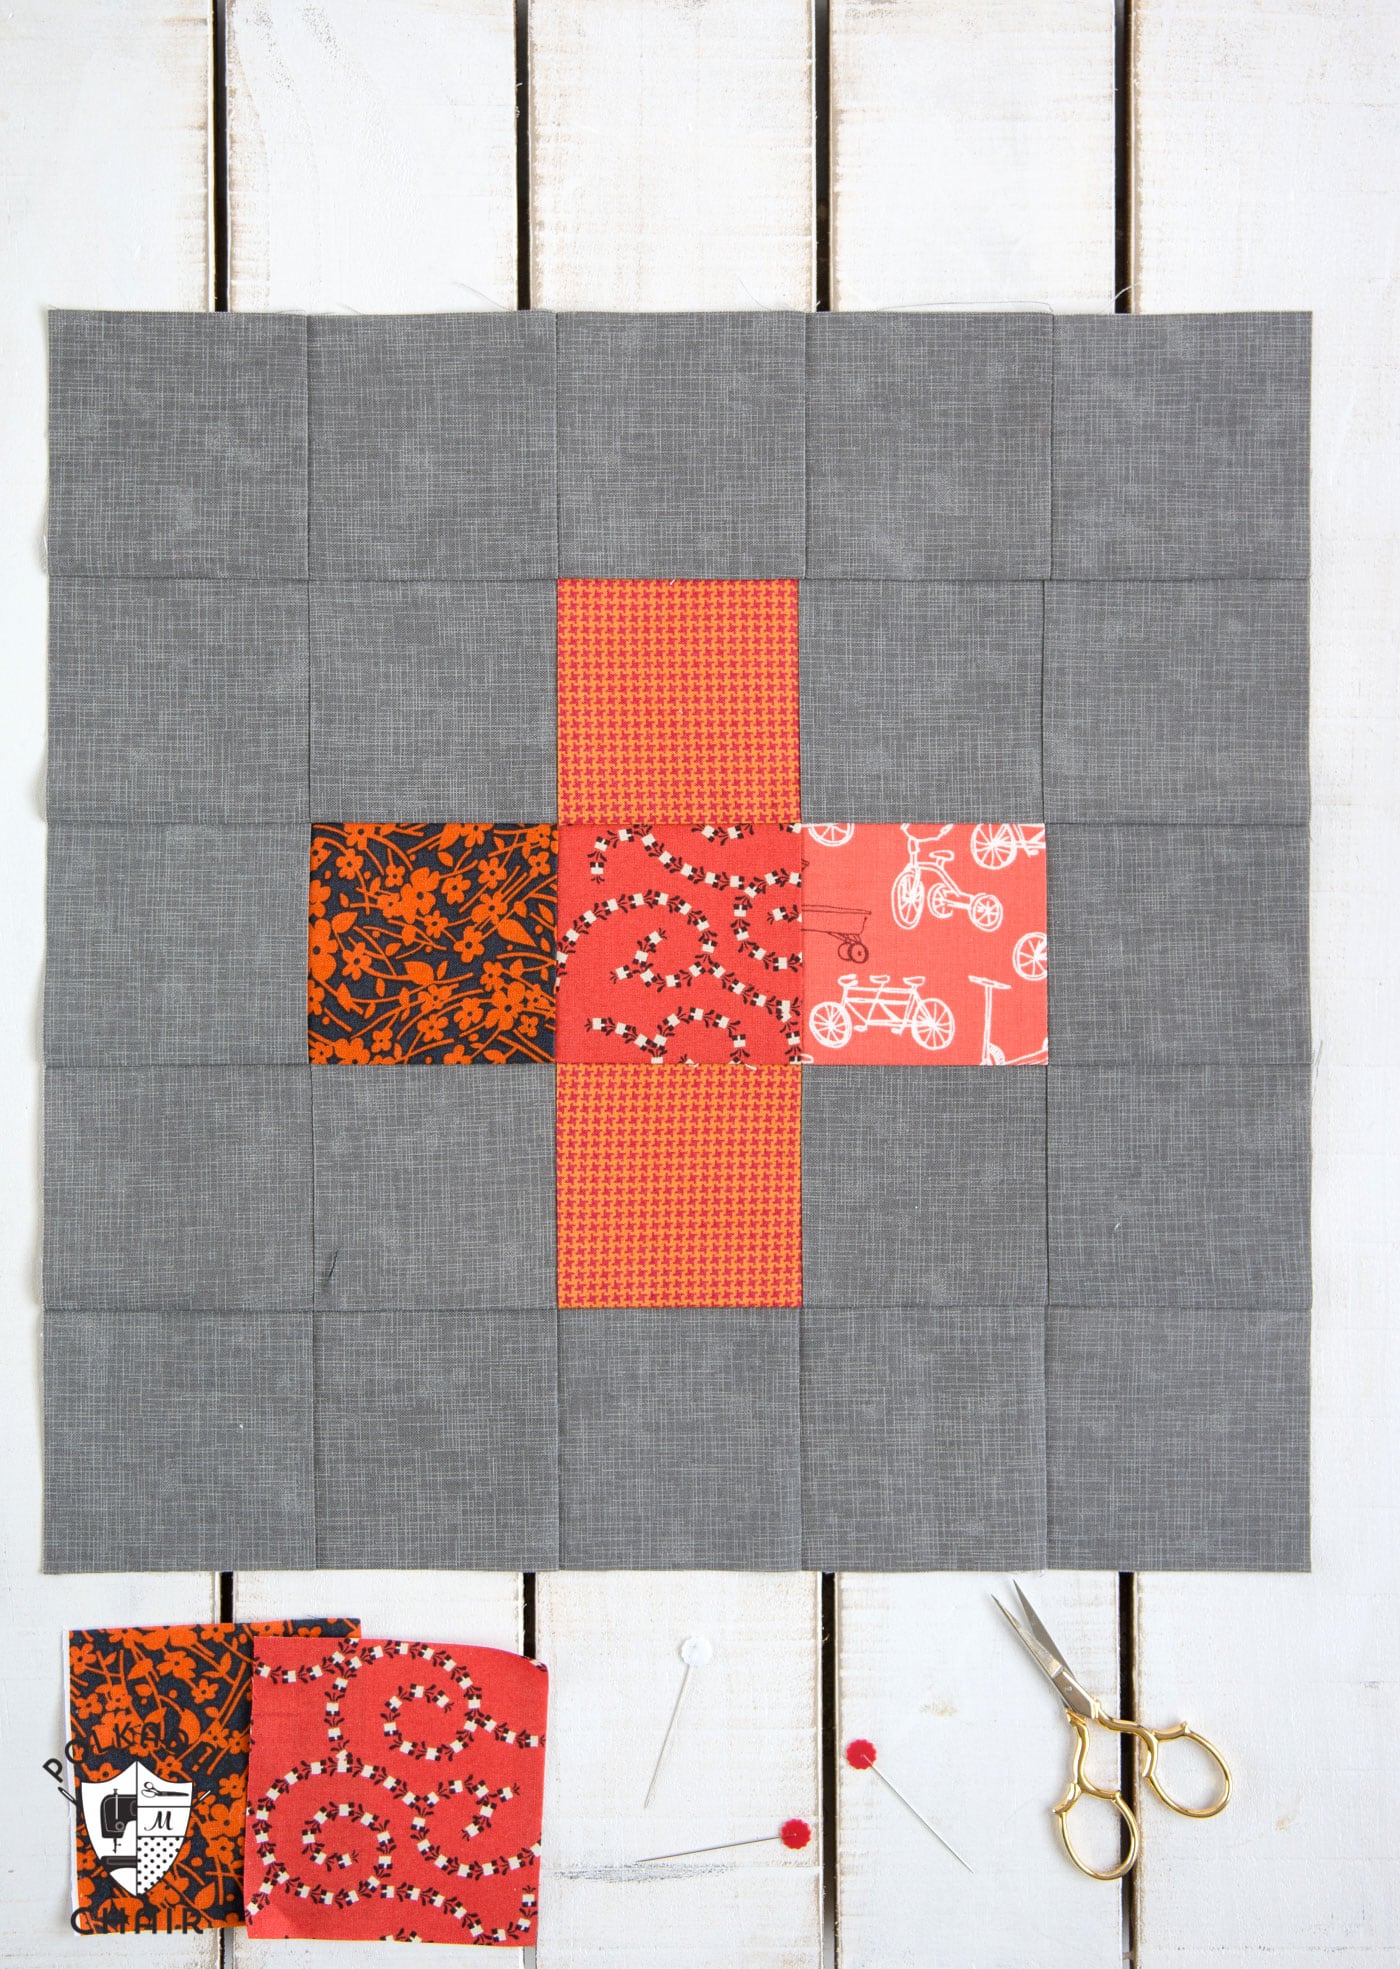
This version has a gray “linen look” background—I’m working on this one for my teenage son—and this version has a simple white background.
I’m also planning to make a Christmas themed set of blocks, but I will stitch that one along with you guys this month.
Let’s get started!
15 Inch Plus Quilt Block Pattern:

Begin by cutting:
20 squares from your background fabric, each 3 1/2″ x 3 1/2″
5 squares of all the same color of fabric in various prints, each 3 1/2″ x 3 1/2″ (you can repeat a print if you like, but keep them all the same basic color so that the “plus” shows up well in your block).
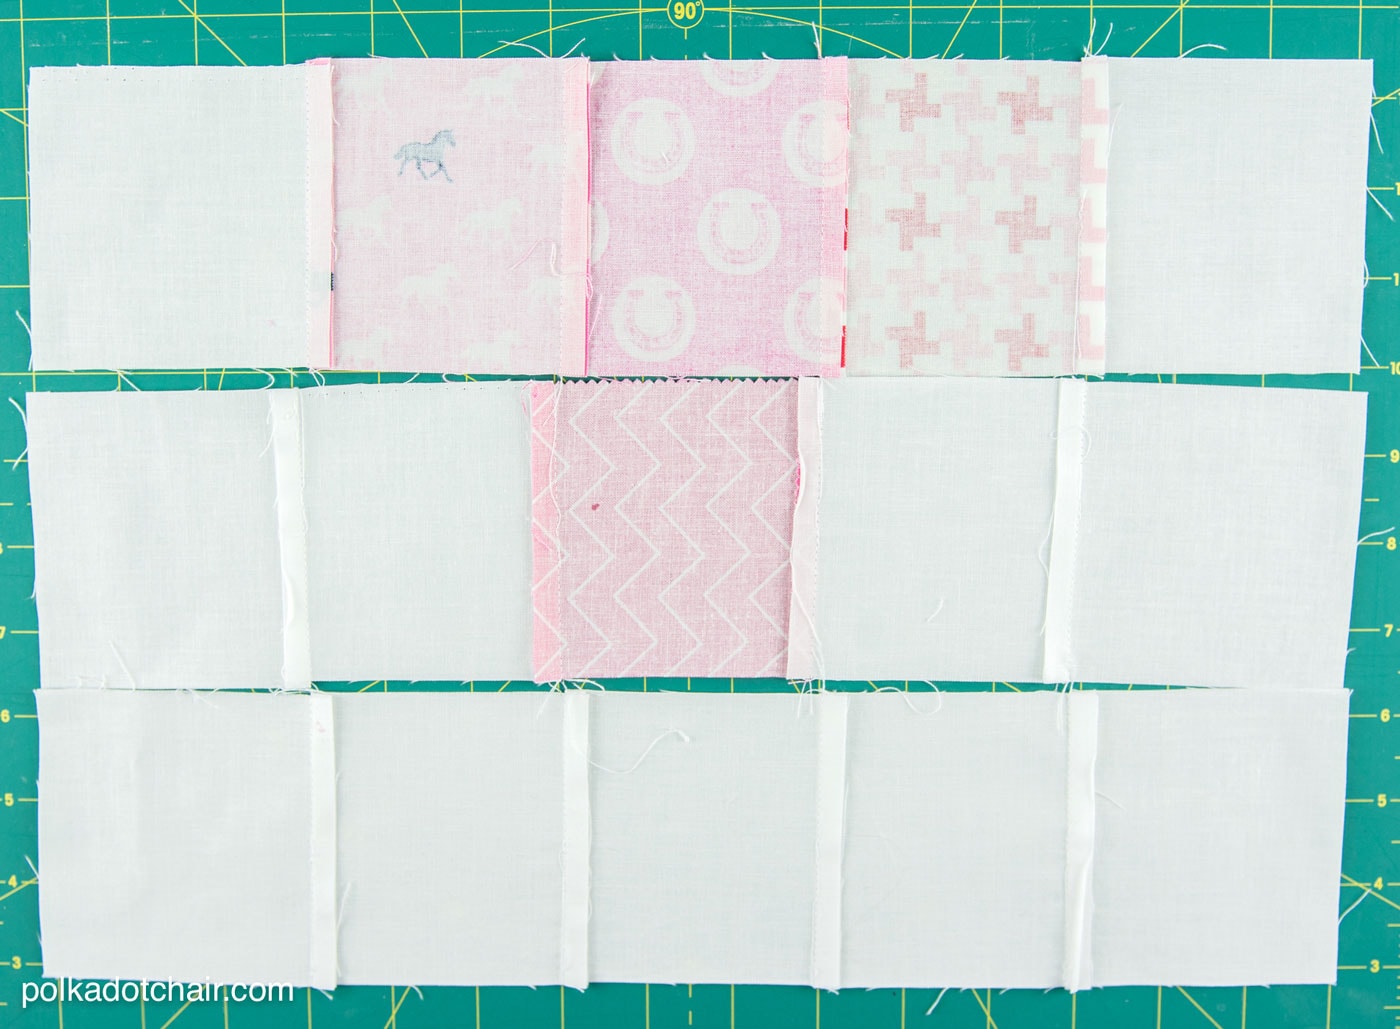
Plus Block Layout:
Lay out your squares in a grid with the colored pieces of fabric, making a plus sign in the center.

You are going to stitch this block together by rows.
Stitching:
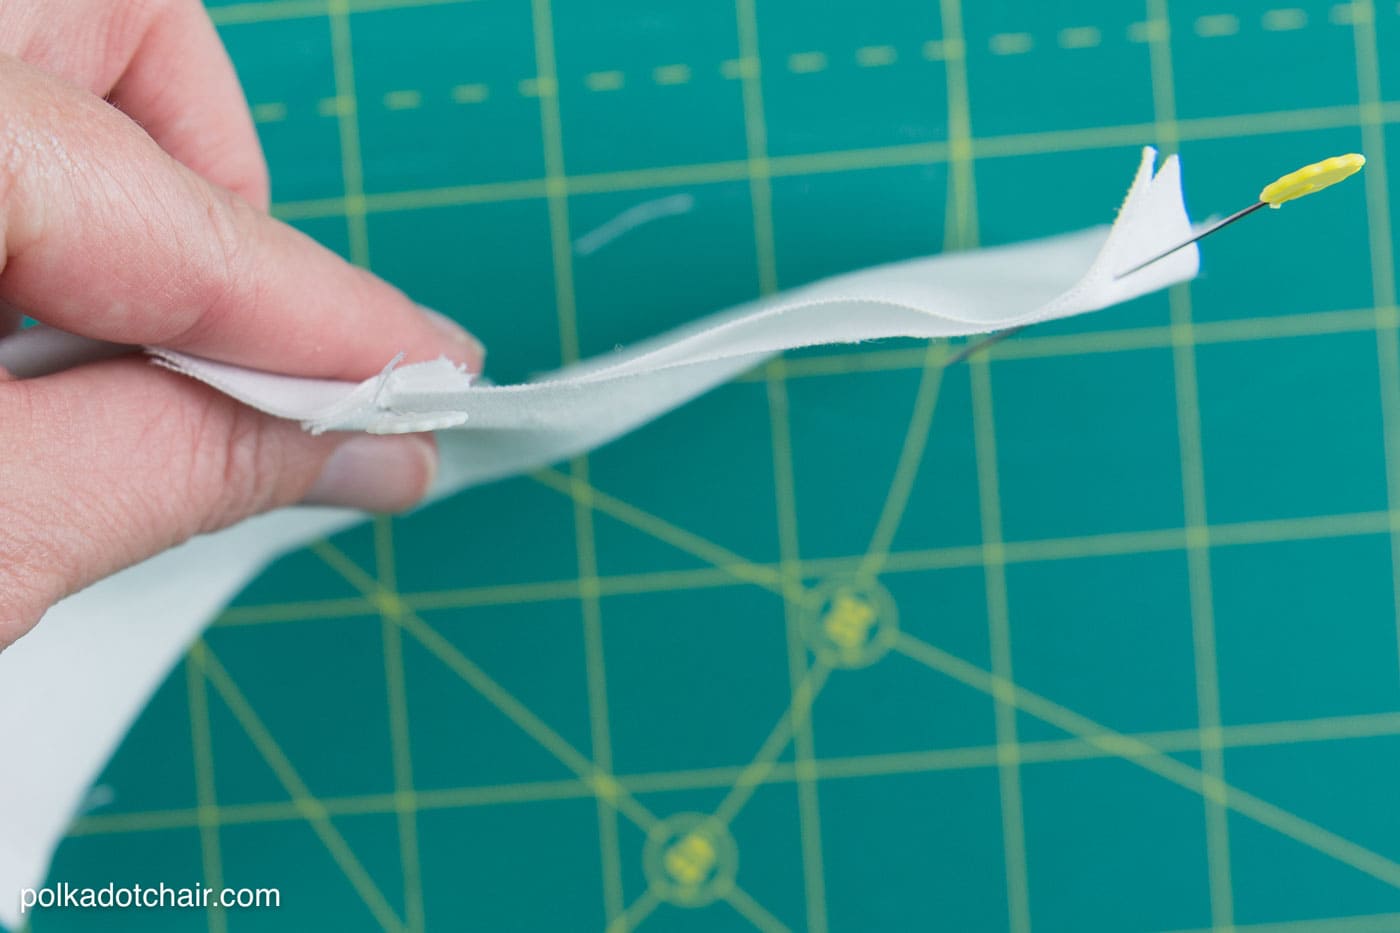
Please pick up the pieces in row 1 and pin them together. Stitch with 1/4″ seam.

Repeat for all five rows.
Press the seams of your block to one side in alternating directions. For example, the even-numbered rows press to the right, and the odd-numbered rows press to the left. This nifty trick will help you line up your seams when you stitch the rows together.
Stitch the Rows Together:
Lay out your rows in order again.
Pin row 1 to row two right sides facing.
Quilt Tip!
“Nest” the seams next to each other. Since the seams are pressed in opposite directions, they will snuggle right up next to each other.
Place a pin in every seam.
Stitch with 1/4″ seam allowance.
Next, stitch row 2 to row 3 until you’ve stitched all five rows together.

Press the seams all to one side again. Remember to go “up and down” with your iron, not side to side.
Square up and trim the block so that it measures 15 1/2″ x 15 1/2″.
That’s it!!
If you have questions about the block construction just leave them in the comments section, I’ll answer them there. That way others will benefit from all of the answers.
All of the Blocks in the Block of the Month Series
- Plus Quilt Block Pattern
- Pinwheel Quilt Block Pattern
- Sawtooth Star Quilt Block Pattern
- Half Square Triangle String Block Pattern
- Turnstile Quilt Block Pattern
- Shoofly Quilt Block Pattern
- Keystone Quilt Block Pattern
- Log Cabin Quilt Block Pattern
- Friendship Star Quilt Block Pattern
- Grandma’s Favorite Quilt Block Pattern
- Ohio Star Quilt Block Pattern
- Dresden Quilt Block Pattern

I’m just beginning my quilting journey. I”m very excited and thankful to find this blog post! Thank you so much! I love your website and all the wonderful tips I’ve already found here. Can’t wait to start on this first block, it looks simple enough for a newbie like me!
two questions for you: how would denim and flannel work for this? Thinking I’d like to make my married kids a picnic blanket that’s rugged and would hold up to use and “abuse”? and then… this looks like a perfect “beginner” piecing project. I know you said it’s not ok to use it in a shop for a class… however, would you consider giving permission to a church group of ladies meeting once a week to learn? If I promised to make sure every lady that signed up for the class “liked” or pinned the project? We would like to help get a new group of quilters started!
I would not recommend flannel or denim. There are too many seams and the heavier fabric won’t work well. Especially if it’s for beginners. Just stick with standard weight quilting cotton.
Melissa’s, I’m super late to the party but starting now. Do you use reverse stitches on the block pieces?
No, most people don’t but you can… if your stitch length is about 2.5 the stitches will hold well enough until they are sewn into blocks
OK, thanks for your help.
One more question – my block is a bit small. Is there a chance to “save” it later? Or do I need to redo it? Apparently my 1/4″ seam was a tad bit larger than that.
YES Save it! You can always add a border around it to get it to fit into your quilt. Remind me when we get to the end and I’ll help you figure it out.
Mellissa, how do I print out the pattern and instructions for the BOM quilt. I’m new at sewing and it seems don’t know a whole lot about the techie things. I feel stupid for asking this question but I’ve spent a great deal of time trying to figure this out. Please help me. Thank you. I enjoy all the post you share with us and learning a lot.
the print outs are for me only. Your instructions are easier for me to follow than the two books I have been trying to follow. I wish to print the rest of the block for September & the block for October if you don’t mind. which ever way you decide I am thanking you for being so clear with your instructions
I enjoy BOM’s, especially when there’s a mystery about the finished product, but I’m also a bit picky about making quilts of a useable size. Do you know how big this will be when finished? Should I make 2 of each block if I want it twin sized or bigger? Thanks!
There will be 12 blocks each 15″ x 15″. You can choose to add sashing or a border if you like. Without any borders or sashing the quilt will be approx, 45×60.
Hope that helps!
Is there a sashing to this quilt? I’m new at this.
I’m going to leave it up to everyone at the end of the project. I’ll show how to do it if you want to add sashing.
Love this block! One question, will all the BOM be a 15″ block?
Thank you,
Ana
I was going to use fat quarter bundle. How many do I need to do the whole quilt? I understand 3 yards for background.
I was going to purchase fat quarter bundle. How many would I need to do the whole quilt? I see that it’s about 3 yards for the background. Thank you
My guess would be yes…. Most of the blocks are only using around 1 fat quarter per block, so you should be fine. I would start with that for sure, and if you need more at the end you can always add in something simple like a pin dot or solid
Simple, but explained well! Great little tutorial!
Mellissa, I’m going with just stash for this quilt, trying to reduce my blue section! Then I can buy more blue. I think I’m going to do the block with out cutting them all 3.5, just the color blocks and the 2 side squares. I’ll post it on Instagram when I’m finished!
“If you missed it be sure to check out this post offering tips and trick to picking out fabric for a quilt. You can find an index to all the posts in this quilt block series to date by clicking here.”
PLEASE HELP… the “click here” is not letting me click here or anywhere…..
Try again, I think it’s fixed now… also this is the first block in the series..
Hi Melissa! I just LOVE this block! And I’m excited to be participating in your BOM! I made the September block earlier today and posted a picture of it on Instagram (which you already commented on), Flickr, my personal FB page and my Gina’s Custom Creations FB page. I also blogged about it and shared your link and/or hashtag with these posts as well. Thanks so much for your fantastic tutorials and this BOM! Have a great weekend 🙂
Oh I’m so glad that you like it!!! Thanks so much for sharing about it online!!!!!
For consistency in the background fabric, approximately how much will you need to buy for the entire quilt. Thanks…..
Conservatively I’d plan on 1/4 yard for each of the 12 blocks. So 3 yards. That’s how much I bought for my gray background quilt, but I also wrote down the manufacturer and color “just in case” 🙂
Hope this helps!
Melissa
This looks like fun! Thanks for the opportunity!
A great block, simple but with a lot of possibilities!
Thanks Phyllis!