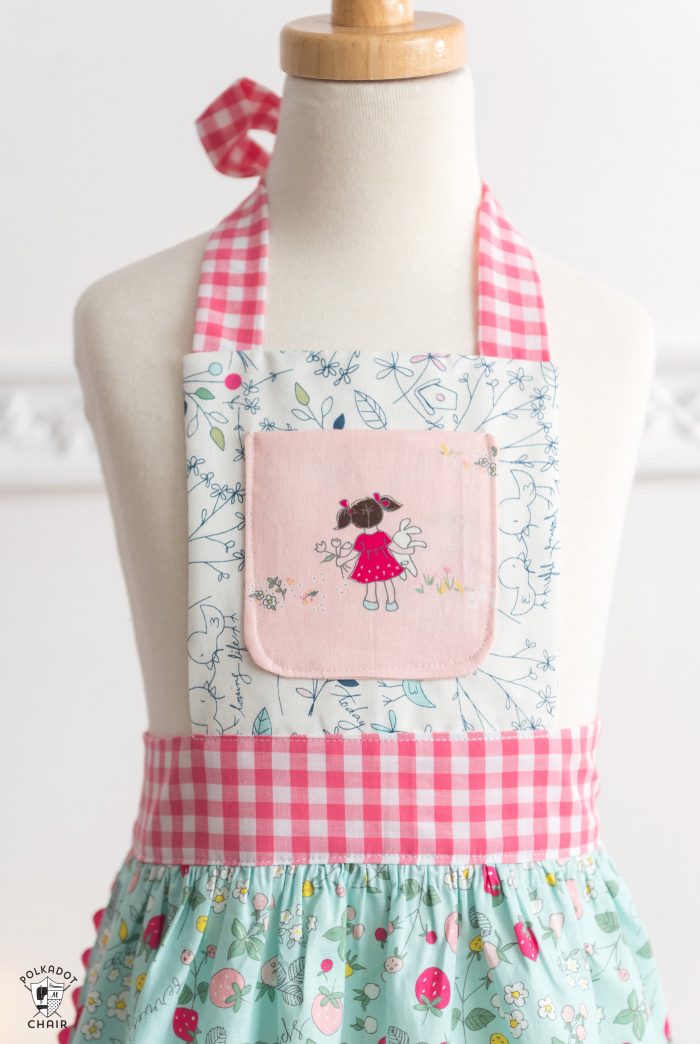
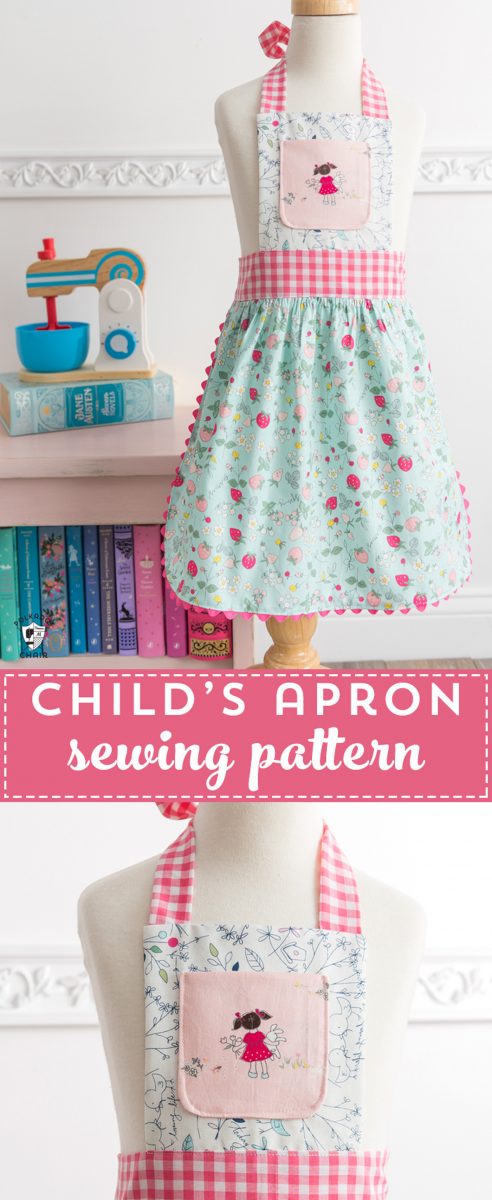
Child’s Apron Pattern with Video Instructions
Today I have a fun sewing project to share with you, this Child’s Apron pattern. It’s pretty simple to stitch up and would make a great gift for your favorite kid!
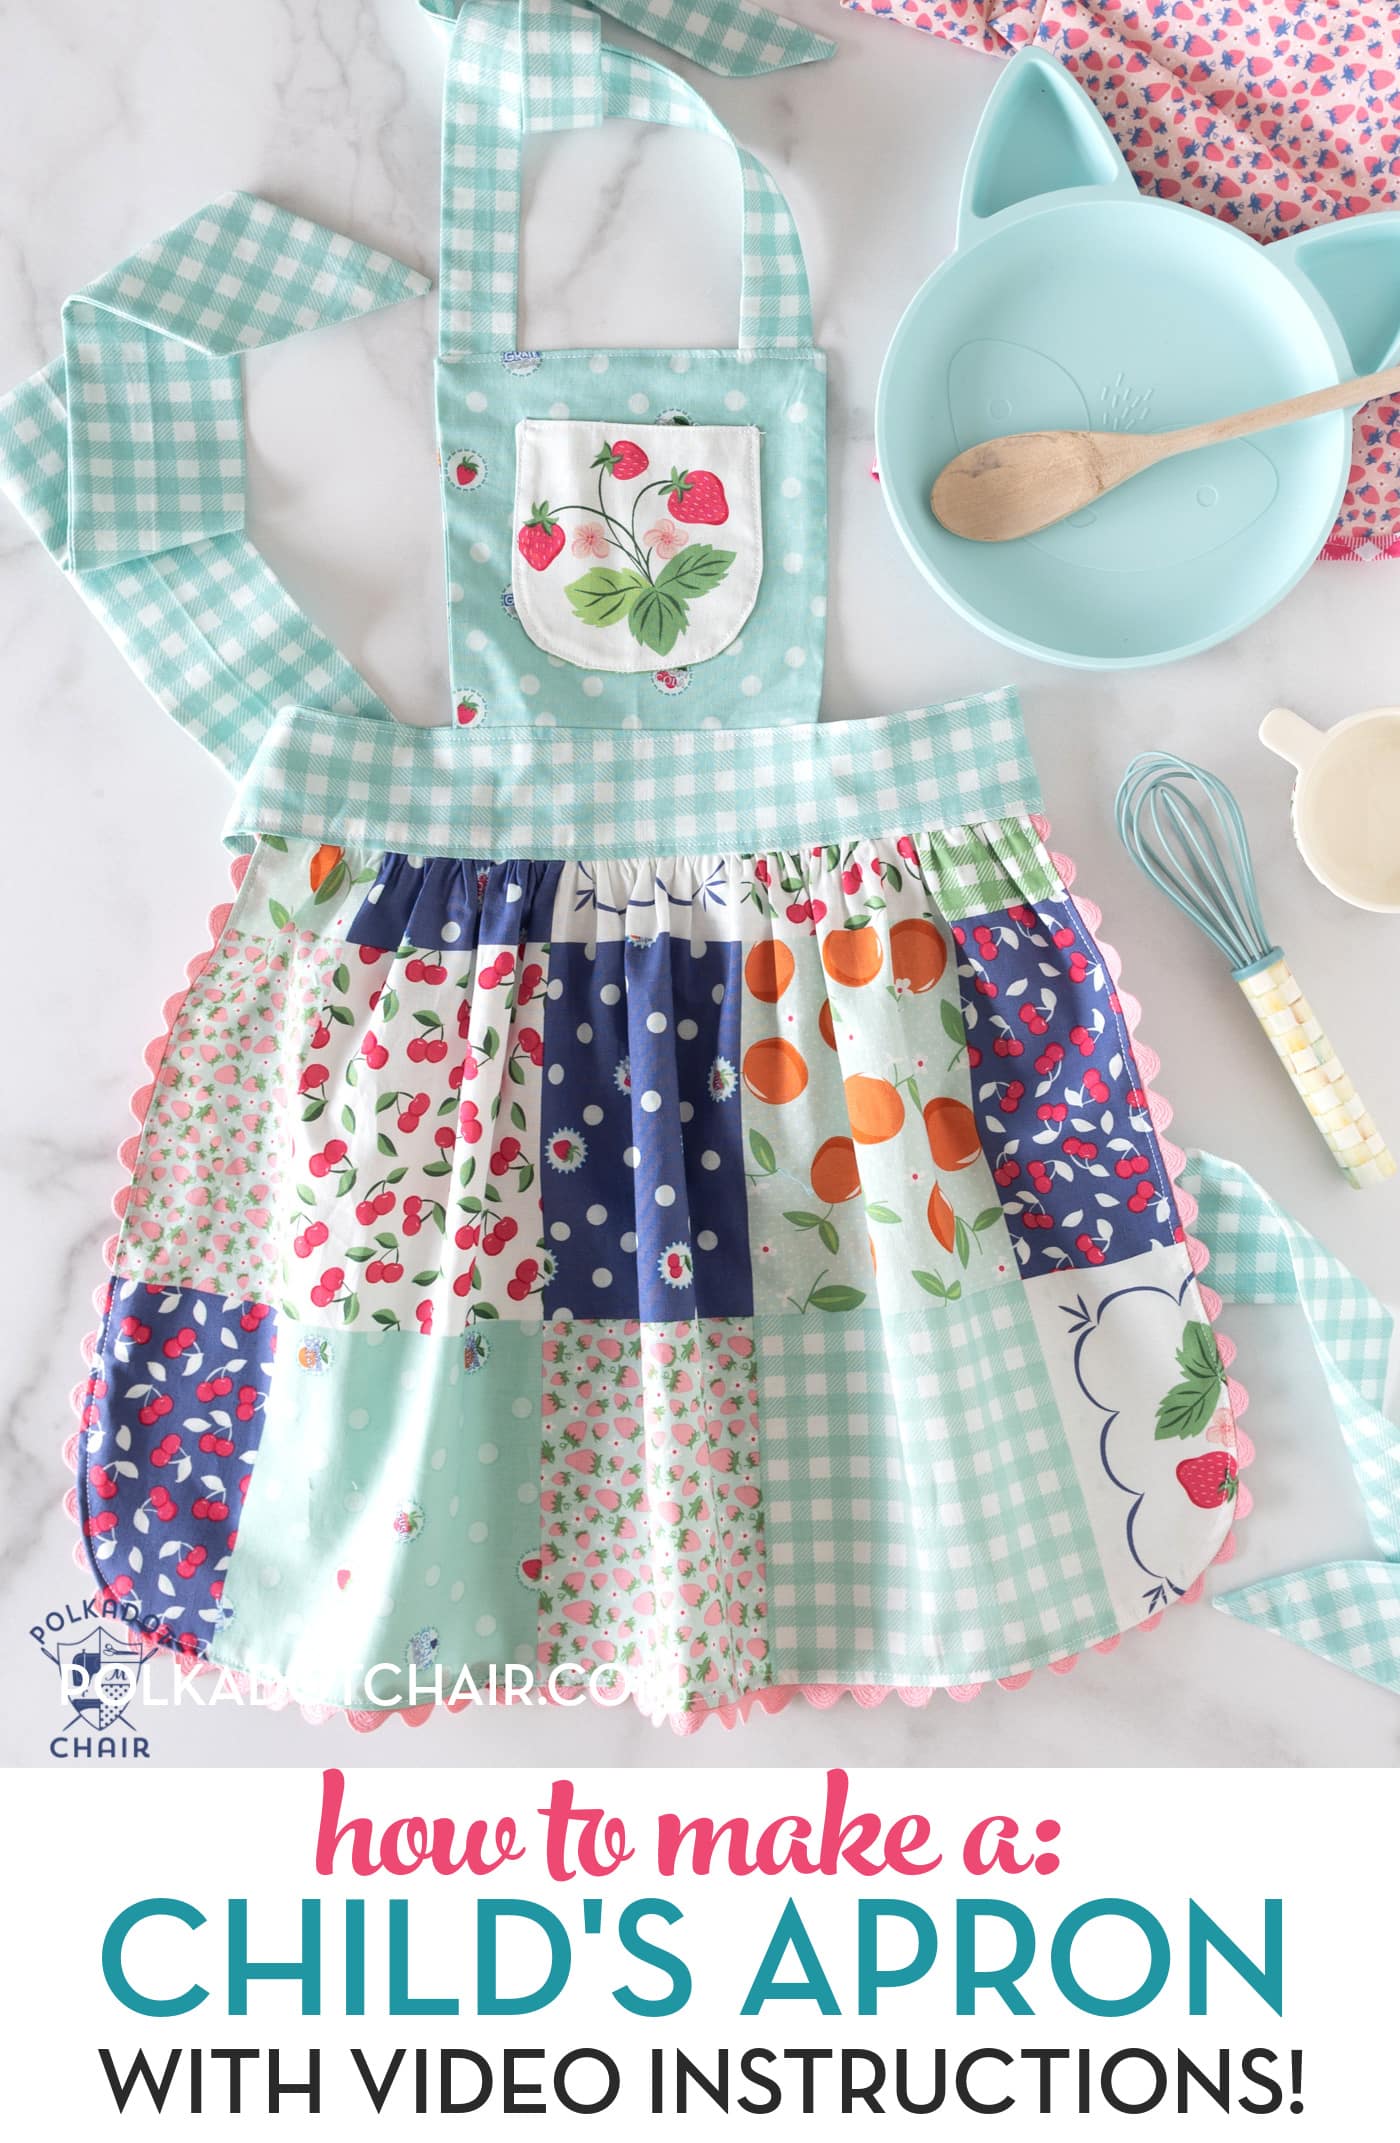
A few years ago, I wrote this Child’s Apron sewing pattern for the blog. Recently, I’ve gone in and updated and refreshed the tutorial AND added video instructions. I hope that you enjoy the updated project!
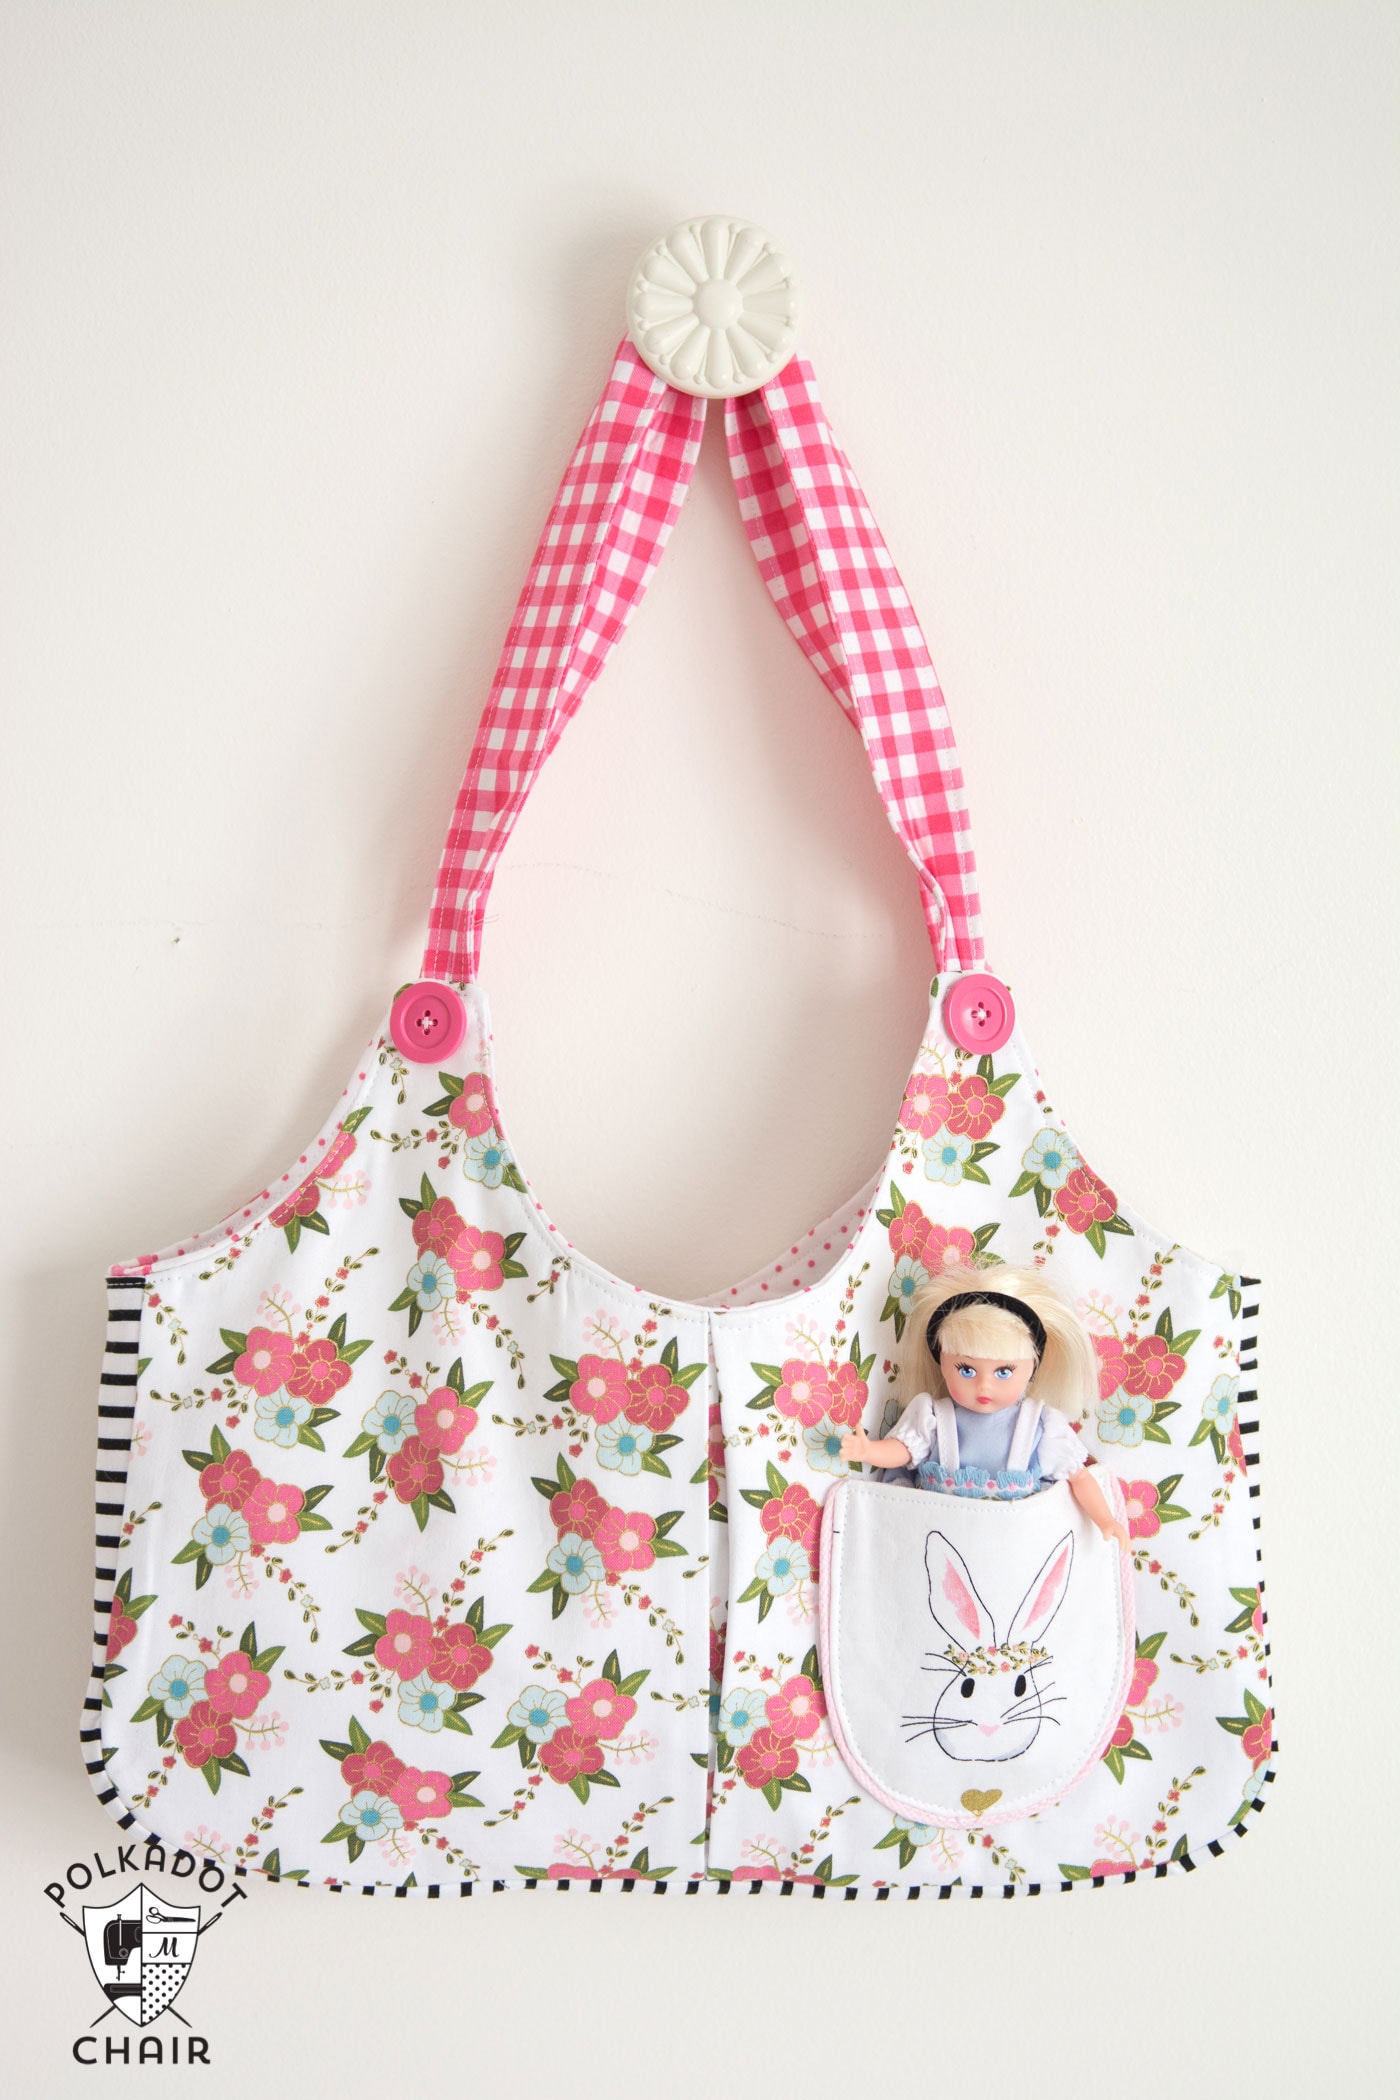
If you like this project, then you may also like the Ruby Lou Bag sewing pattern.
I adore making things for kids. I think that children’s sewing projects must be some of my favorite sewing projects. When my girls were small, I stitched up Easter dresses, skirts, and aprons like they were going out of style.
Now that my girls are older, I no longer make them Easter dresses. However, I did just make my daughter a summer skirt to take with her on her internship. I tend to jump at the chance to stitch something up for a little one.
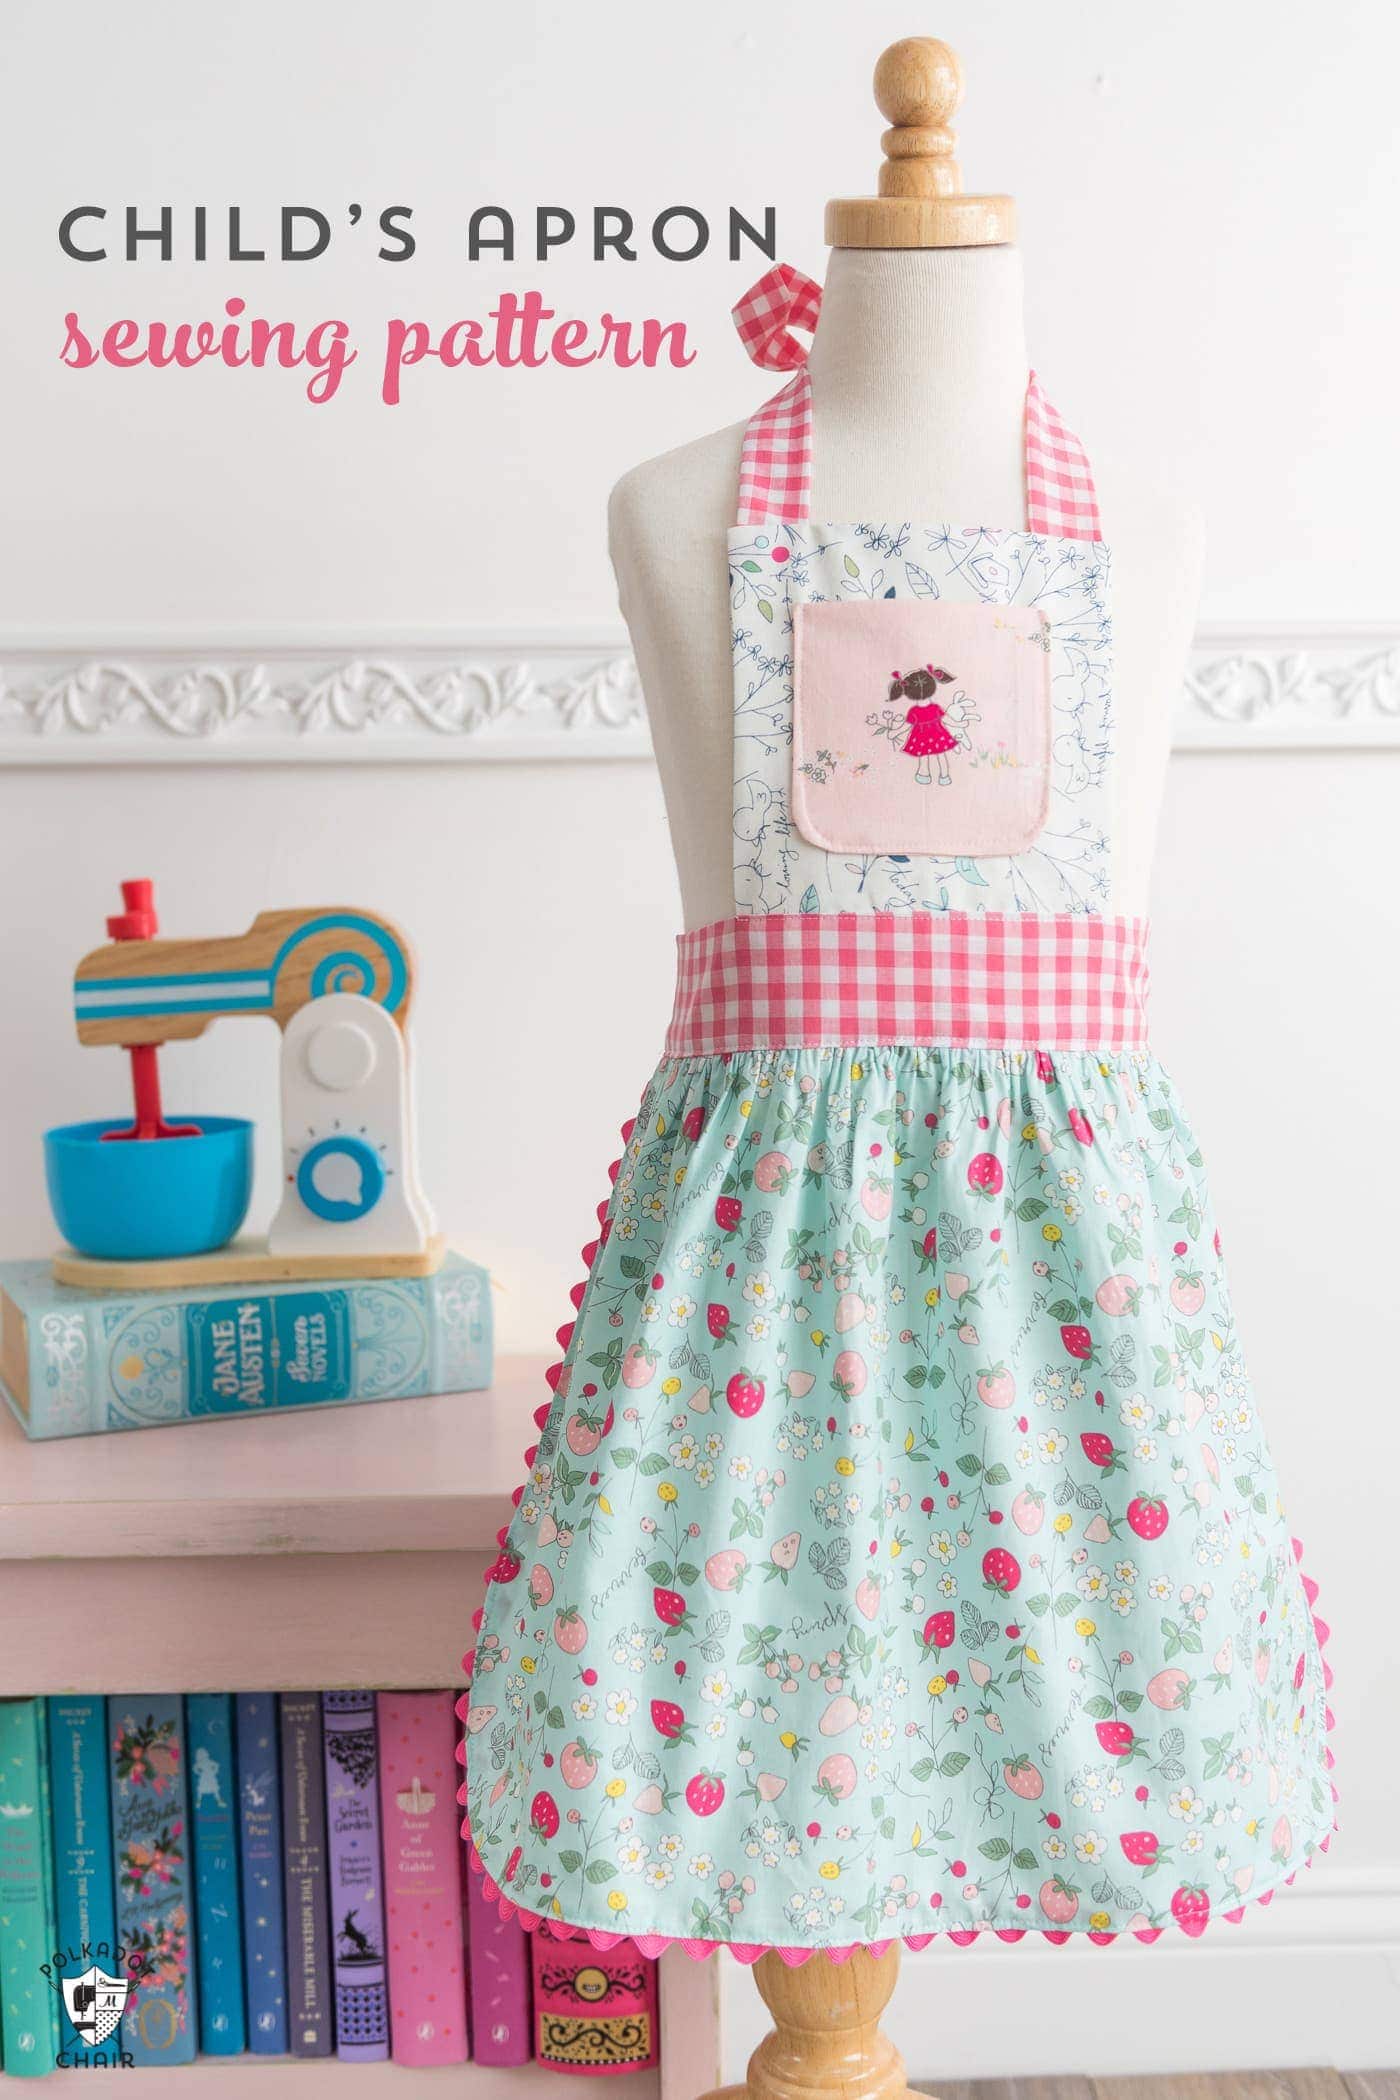
Child’s Apron Sewing Pattern
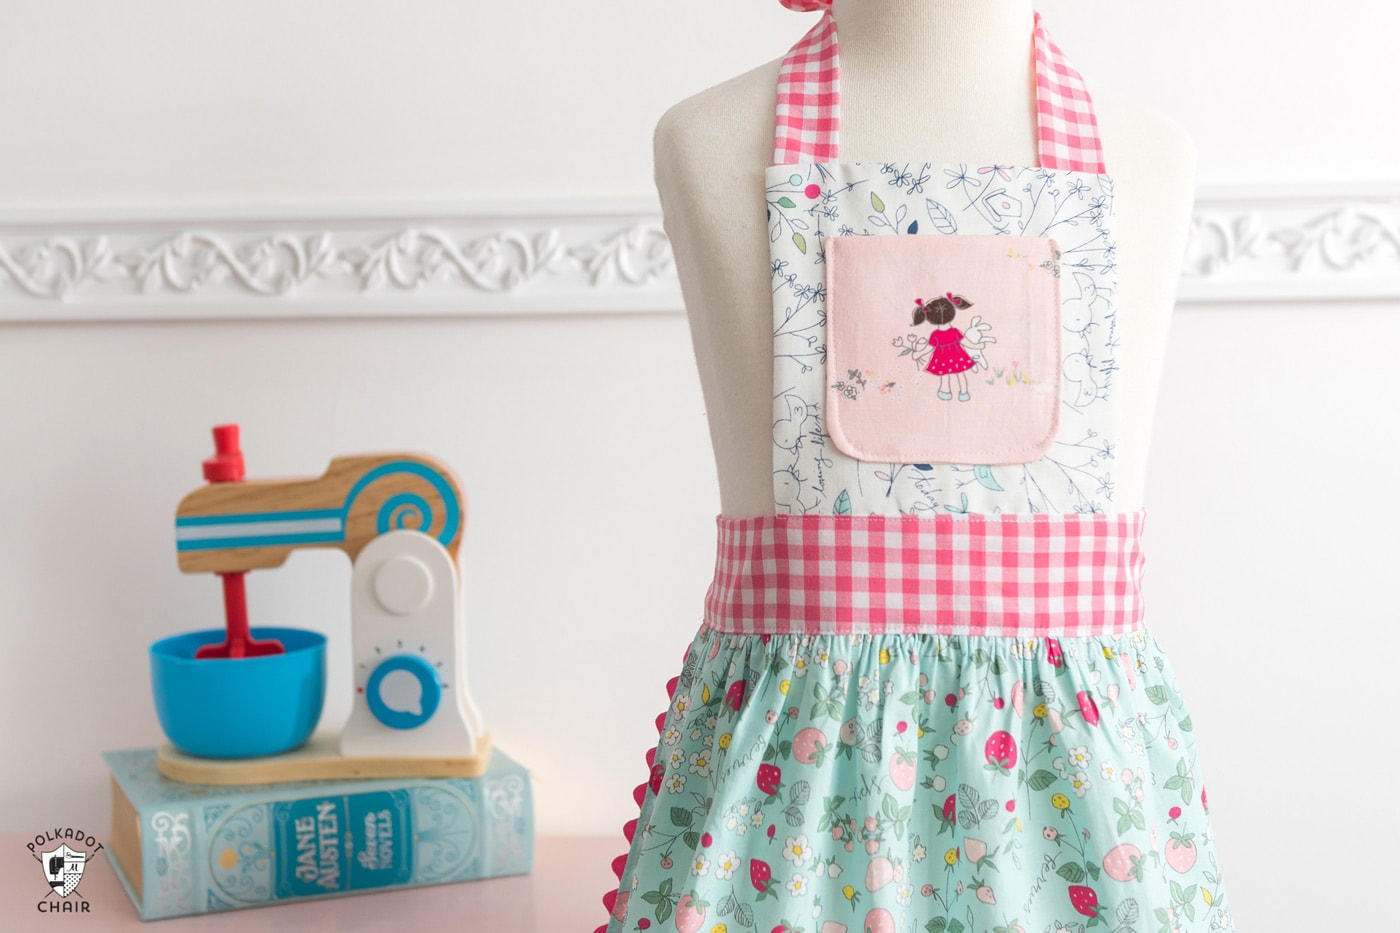
I designed this Apron to coordinate well with my Ruby Lou Bag sewing pattern. There are many cute illustrations in designer fabric collections that can be fussy cut for the pocket of the bag. The small pocket at the top of the Apron is the same as the sweet little one on the kid’s purse.
Kids Apron Sizes
This apron is sized for a small child, probably about 5 years old. Since it’s an apron sewing pattern, it’s quite forgiving in terms of sizing.
Aprons are fairly forgiving when it comes to sizing. The one in the photo for which I wrote the original tutorial is a size 4-7.
If you’d like to make an apron that is kids’ size 8-12, I’ve listed those measurements separately BELOW the cutting directions.
If you’re looking for an adult-sized apron, then I recommend this Apron Tutorial instead.
Video Instructions
We are so excited to announce that we now have a video to help you create this apron. You can find the video on our Polka Dot Chair YouTube channel or in the instructions below.
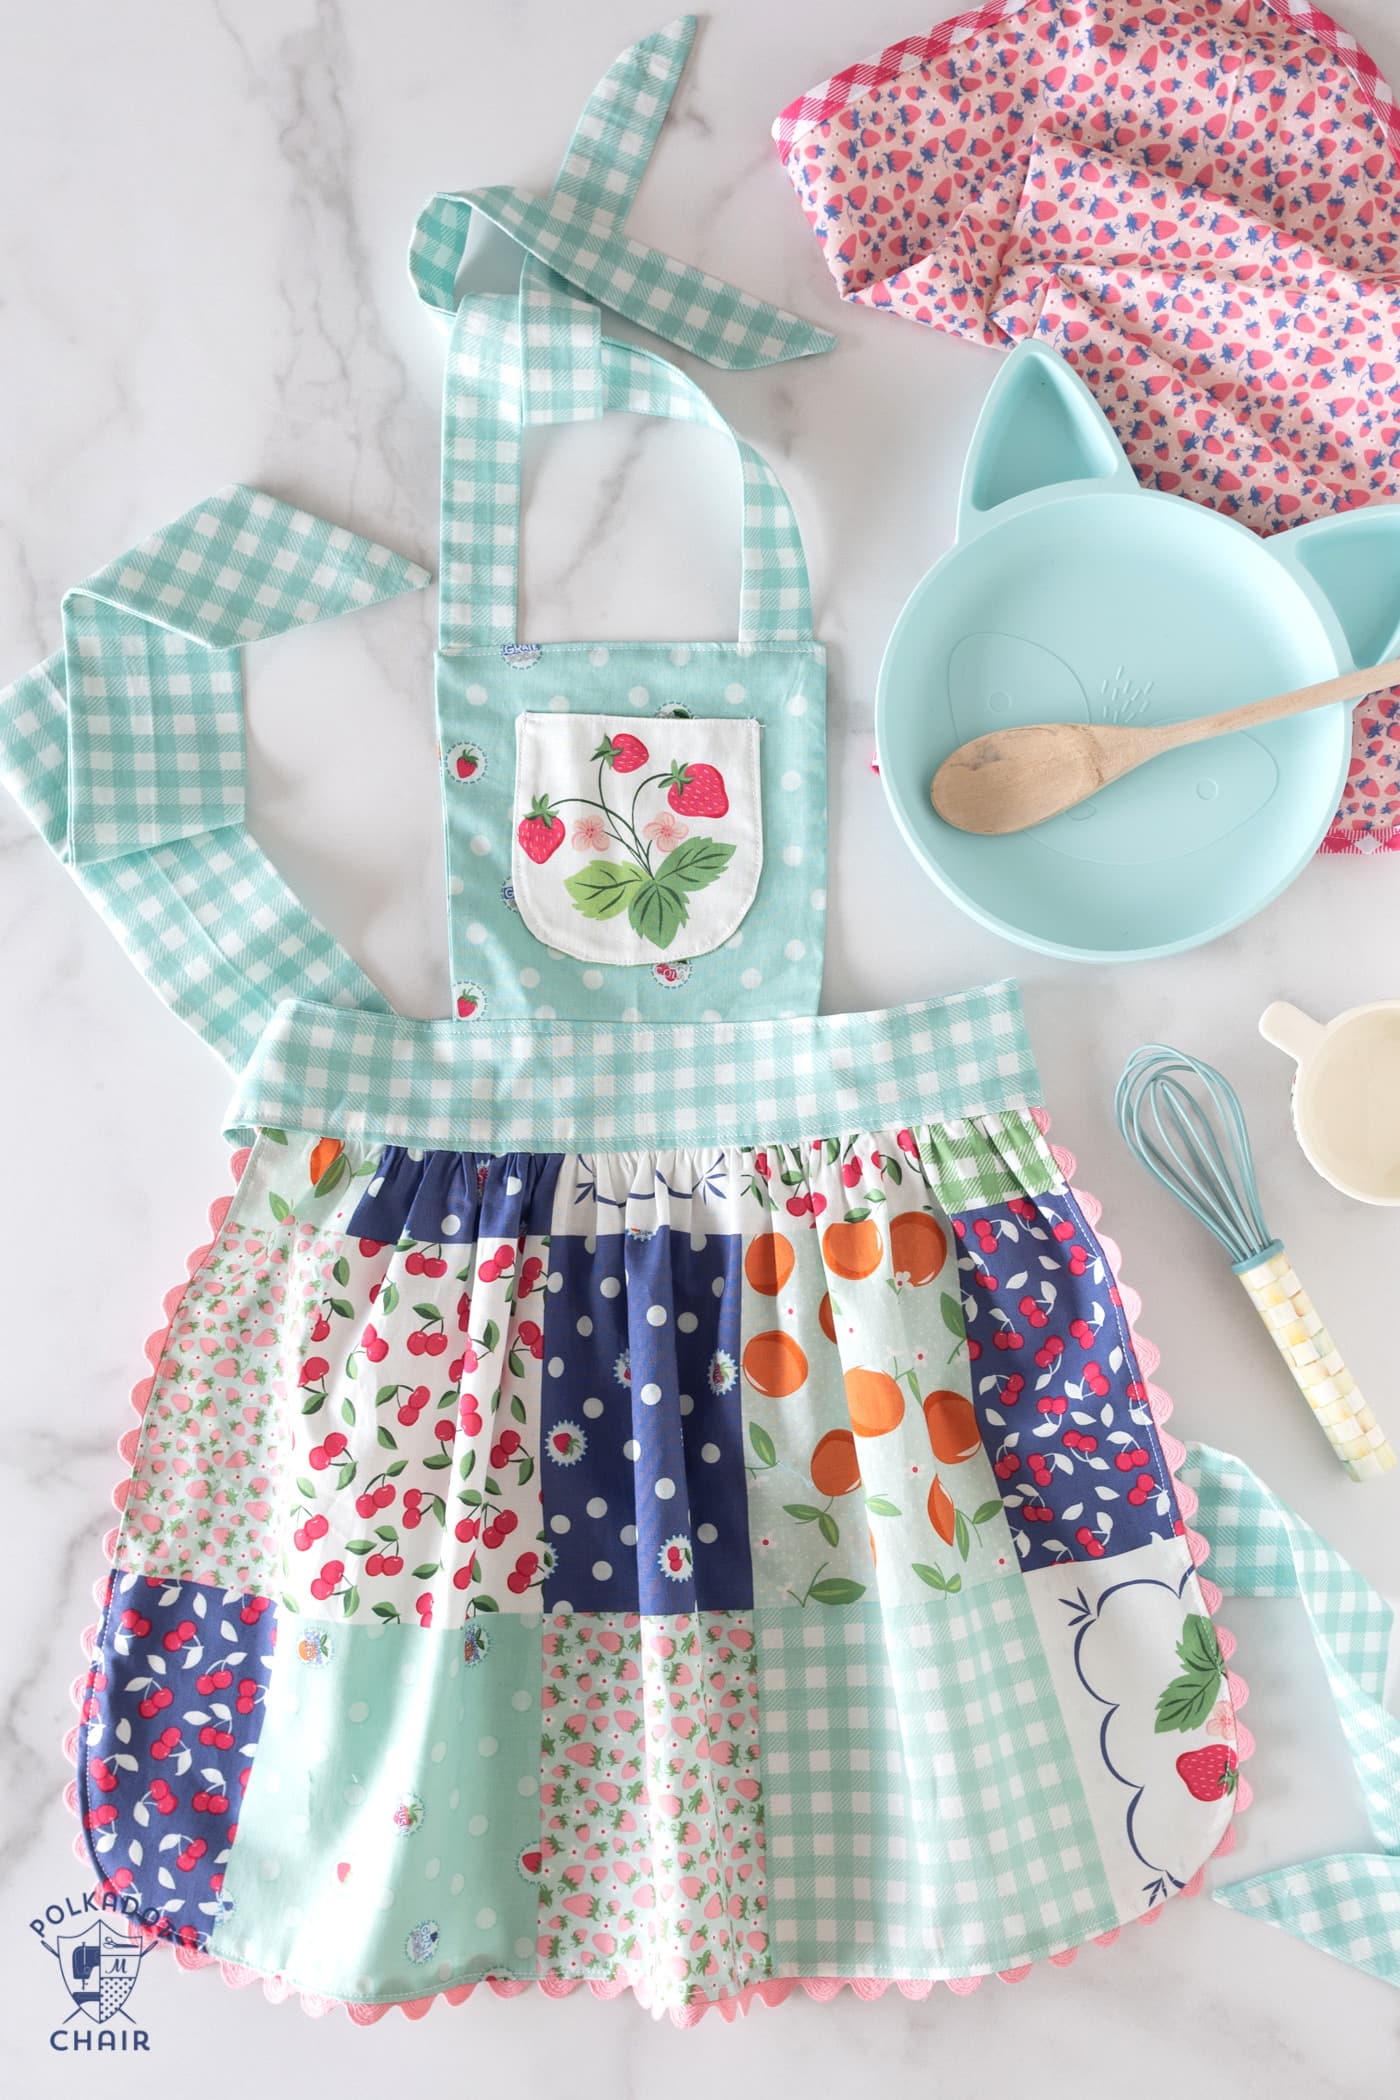
The fabric above the apron is from my Summer Picnic Collection with Riley Blake Designs.
Childs Apron Pattern
Equipment
- Curved Corner Ruler optional
supplies
- ½ Yard Fabric for Skirt
- ¼ yard fabric for Apron Top
- 1 Fat Quarter Fabric Fat Quarter for Pocket
- ½ yard Fabric for Ties
- 1 package ric rack
Instructions
Cutting Directions For a size 4-7 Apron:
- For Skirt Cut:
- 1 piece 24″ x 14″ (it is 24″ wide and 14″ tall- the 24″ will be gathered)
- For Apron Top Cut:
- 2 pieces 7″ x 7″
- From Pocket Fabric Cut:
- 2 pieces 4 ½″ x 4 ½″ – note for this step I made sure to fussy cut the fabric so that the illustration I wanted was in the center of the pocket.
- For Shoulder Straps:
- 2 pieces each 3″ x 18″
- For Waistband:
- 2 pieces each 3″ x 18″
- For Waist Ties:
- 2 pieces each 6″ x 30"
Cutting Directions/Changes For a Size 8-12 Apron:
- For Skirt Piece Cut:
- 1 piece 17″ x 29″ (it is 29″ wide and 17″ tall- the 29″ will be gathered)
- For Apron Top Piece Cut:
- 2 pieces, 9″ x 9″
- Pocket Piece is not changed: 2 pieces, 4 ½″ x 4 ½″
- Shoulder Straps:
- 2 pieces 3″ x 24″
- Waistband:
- 2 pieces 3″ x 20″
- Ties:
- 2 pieces 6″ x 40″
Construction Steps
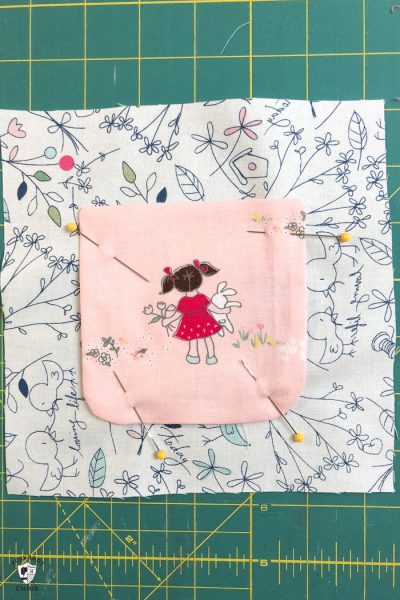
Step One: Create the Pocket:
- Using a Curved Corner Ruler, plate, or an old CD, round the bottom two corners of your two pocket pieces.

- Place the pocket pieces right sides facing, and stitch around the edge, leaving a 2″ opening in the bottom of the pocket.
- Turn the pocket right side out.
- Press well.

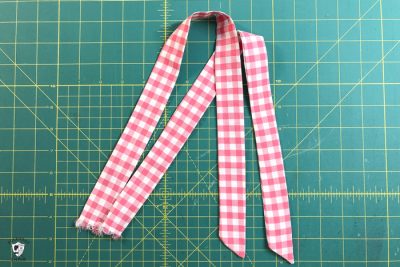
Step Two: Create Ties
- To Make Shoulder Straps;
- Fold one of the shoulder straps in half lengthwise
- Stitch along the outside edge using a ¼″ seam allowance. Leave one end of the strap open and miter the end of the other side of the strap. Turn the strap right side out. For this step, I find it helpful to use a turning tool (linked above).
- Repeat for the other strap piece.
- Make Waistband Strap/Ties:
- Fold the Waist Tie pieces in half lengthwise with right sides facing. Stitch with a ¼″ seam allowance down one long side and one short side. Turn right side out and press. I recommend mitering the ends as you did for the neckties.
Step Three: Apron Top
- Pin the sewn pocket piece to one of the Apron Top pieces.

- Make sure the pocket piece is in the center of the apron top piece. Stitch around the edge of the pocket, making sure to backstitch at the top and the bottom of the pocket.
- Pin the two shoulder straps to the top of the apron top piece, ½″ in from the edge. Stitch in place.
- Pin the other apron top piece to the sewn apron top piece, right sides facing. Stitch around the top and two sides with a ½″ seam allowance making sure not to catch the straps as you sew.
- Turn right side out and press. The bottom seam will still be open.
Step Four: Apply Ric Rack
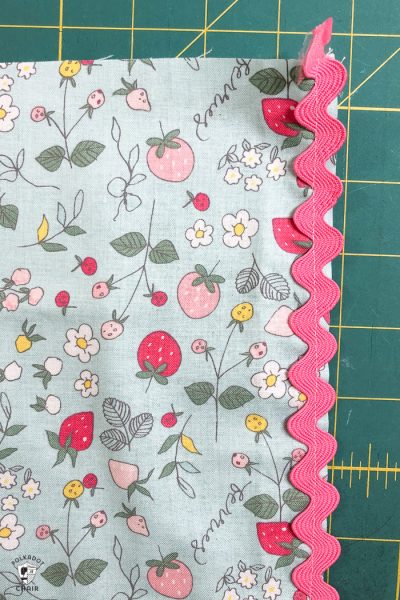
- Round the bottom two corners of the Apron Skirt piece.
- Stitch a piece of ric rack to the outside edge of the right side of the apron skirt piece. The rick rack will be on top of the edge of the skirt and you will stitch right down the middle of the rick rack.
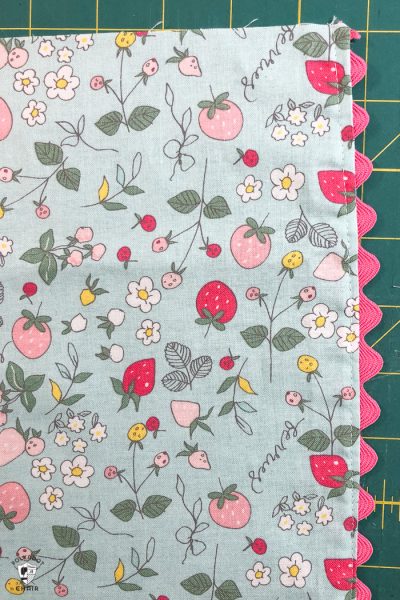
- Turn the rick rack to the wrong side of the fabric and press.
- Top stitch the right side of the fabric.
- Step Five: Skirt Assembly
For Size 4-6:
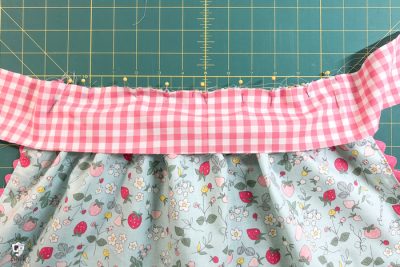
- Find the center of one of your waistband pieces.
- Find the center of your apron skirt piece.
- Run two lines of gathering threads (set your machine stitch length to a 6) along the top of the apron skirt piece.
- Pull up on the gathering threads until your skirt piece is 12″ wide.
- Pin the right side of the gathered skirt to the right side of the marked waistband piece, matching the center of the skirt with the center of the strap. The gathered shirt will NOT extend to the waistband ends as the gathered piece is 12″ and your waistband piece is 18″.
For Size 8-12:
- Find the center of one of your waistband pieces.
- Find the center of your apron skirt piece.
- Run two lines of gathering threads (set your machine stitch length to a 6) along the top of the apron skirt piece.
- Pull up on the gathering threads until your skirt piece is 16″ wide.
- Pin the right side of the gathered skirt to the right side of the marked waistband piece, matching the center of the skirt with the center of the strap.
For All Sizes:
- Stitch the skirt to the waistband with a ½″ seam allowance. You are stitching the top of the skirt to the bottom of the waistband piece right sides facing.
- Press along the seam you just stitched. Flip the waistband piece up so that all fabrics are right side up, pressing the seam allowance towards the waistband.
- If desired, topstitch this seam along the edge of the waistband.
Attach Apron Top Piece:
- Find the center of the sewn apron top piece.
- Place it on the TOP of the right side of the apron skirt/waistband piece on the other side of the waistband (the side of the waistband that does not have the skirt stitched to it). Stitch in place with a ½″ seam allowance.

Attach Waist Ties:
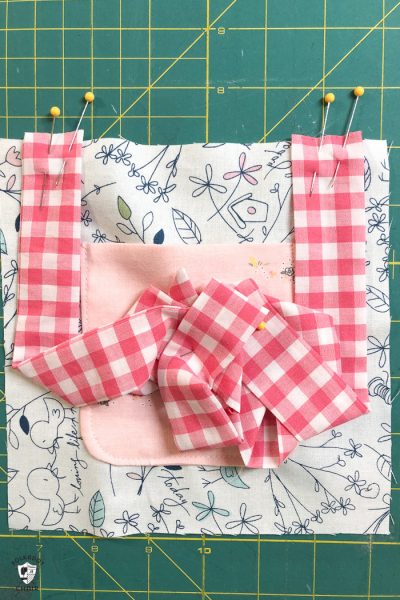
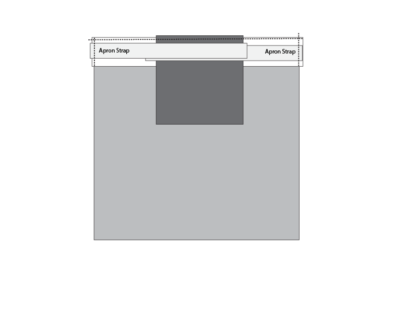
- Pin one of the sewn waistband STRAPS to the edge of the waistband piece. You will want to “pleat” the sewn straps so that they fit inside of the waistband with ½″ left on each side of the strap. Baste in place. Repeat with the other strap on the other side of the waistband.

- Note: Make sure that the waistband ties stay TUCKED in as shown in the illustration above during all of the remaining construction steps. I like to pin mine in place so they don’t slip out.
Attach the waistband lining:
- You are going to make a “sandwich” with the apron top as the “meat” and the waistband and waistband lining pieces as the “bread”.
- Pin the 2nd waistband piece (this is your waistband lining piece) to the sewn waistband/apron top piece along the top edge of the waistband right sides facing, pinning around to the sides of the waistband but not the bottom of the waistband.
- Photo is from another apron I made, construction steps are identical.
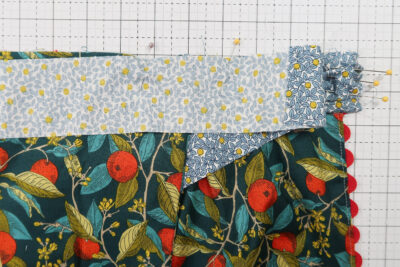
Finishing:
- Make sure that the waistband lining and waistband pieces are RIGHT SIDES FACING.
- Stitch the waistband lining with a ½″ seam allowance beginning at one side and all the way around the top of the waistband to the other side. Again, do not stitch the bottom. Make sure the waist ties are “tucked in” towards the center of the apron as shown in the illustration above)
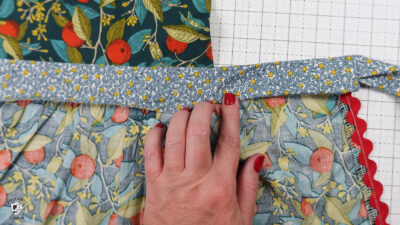
- Turn the waistband lining right side out to the back of the apron and press. The waist ties will “pop out” when you turn it right side out.
- Fold under the raw edge of the waistband lining and hand stitch in place to finish the apron. You can also machine stitch it if you like.

- For an extra finishing touch, topstitch the top of the center strap just below the seam between the apron top and center strap.
Notes
More Apron Patterns you May Like:
Kids Apron Made from Laminate Fabrics
Halloween American Girl Doll Apron Pattern
Giving this as a gift?
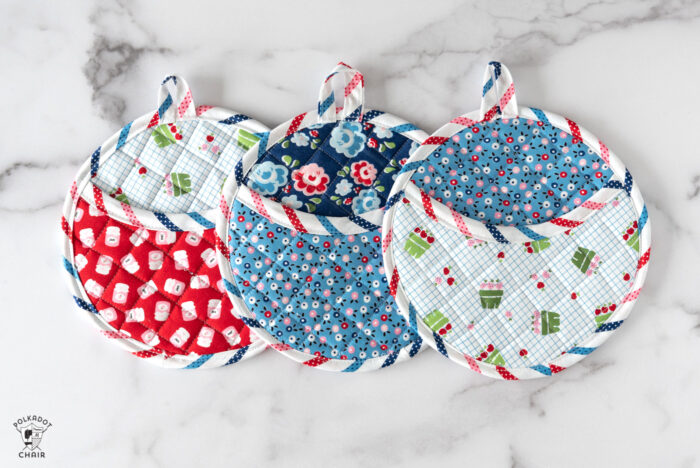
Stitch up a set of cute pot holders to match!
Original post date June 25, 2018.
Darling! Just what I wanted for my grandkids and in time for me to make them for Christmas, too! Thanks for your time designing and posting!🥰
What an awesome pattern. I changed the neck ties to an adjustable neck. Added a ruffle instead of ric rac. Pattern was super easy to follow. Wish I could upload a photo..
Thank you so much for this lovely pattern. I made it to fit a seven year old so I went for the size 8. Patton was very easy to follow and the video was so helpful. Thank you so much again I love it.
Where do you go to download the pattern? I printed out the instructions just fine, but the pattern wasn’t part of it.
This is the pattern on this page, you just print it there is not anything to downlaod
I would like to make this apron in size 2T for my 17 month old granddaughter. Do you know what the dimensions would be for the various pieces in size 2T?
Just made my first apron using the 8-12 year old size. No problems following the instructions. Used a cotton lace instead of ric rac and is covered it takes 1.75 yards to get it around the skirt. I would probably make the waist ties a little shorter if I make it again. Very cute pattern!
Thanks so much for the free apron pattern, I needed one in a hurry and it was so fast and easy, I didn’t use Ric rac or pockets and I sewed it all by machine. Excellent pattern and instructions.
Love this apron! I had no problem following your instructions, especially with the video provided. The only issue is the 40” length for the waist ties on the larger kids size is really too long. I think keeping them at 30” would have been better.