How to Make a Friendship Star Quilt Block – the May Quilt Block of the Month
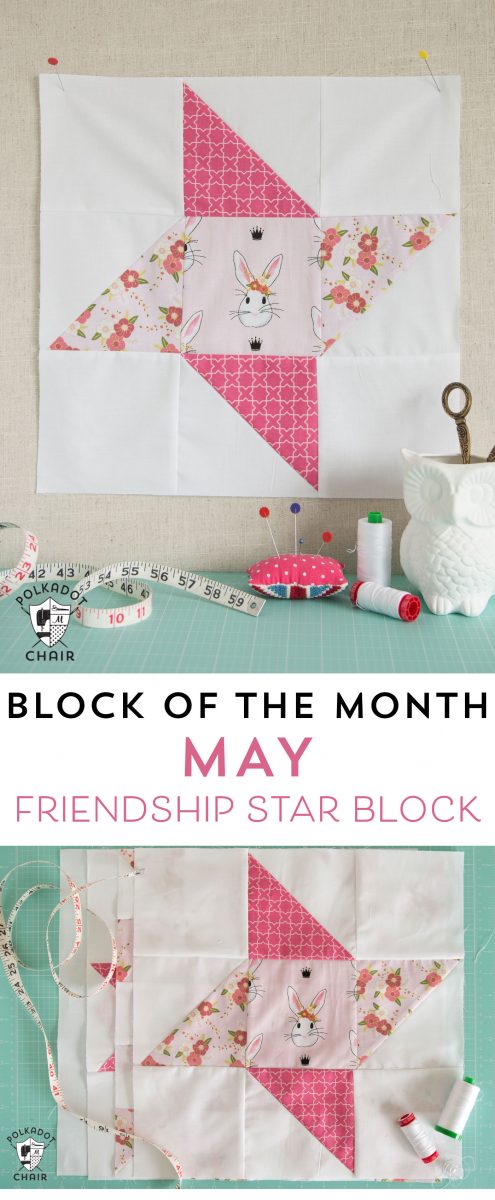
Welcome to May! Today is the 1st and with it comes our next Block of the Month in our Polka Dot Chair Quilt Block series. This month we will be making a 15 inch Friendship Star Quilt Block. Keep reading below to get the tutorial or learn more about our Quilt Block of the Month Series.
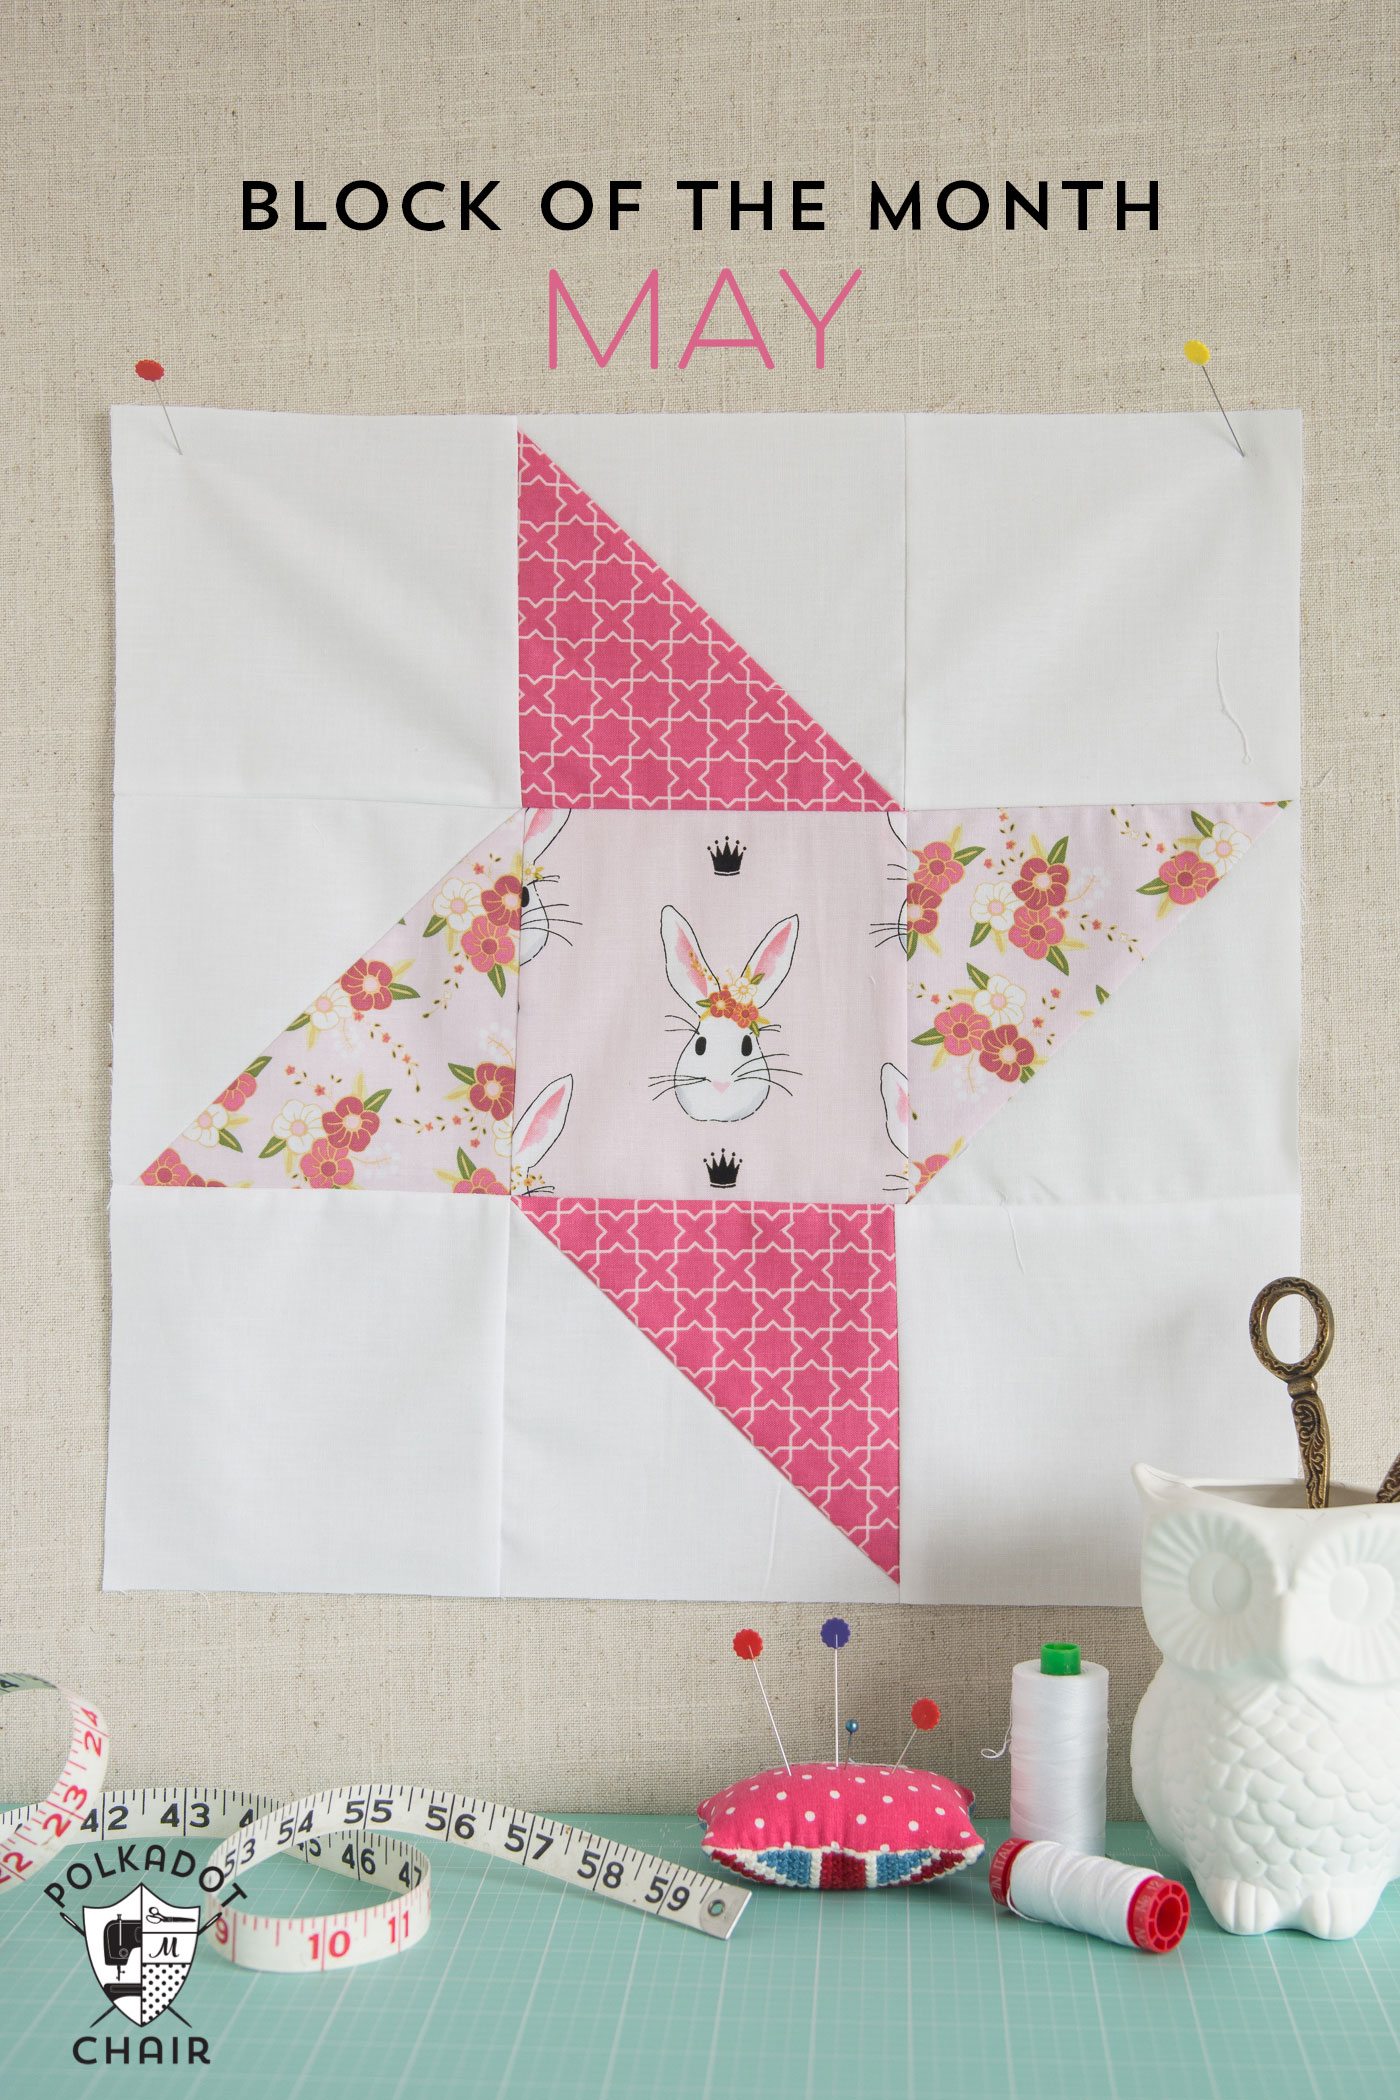
We are heading into the home stretch with the Block of the Month series. I’m having such a good time that I may consider doing it for a second year. This is block 9 of 12; there are only three more left after this one!!
UPDATE: You can now purchase a PDF with ALL of the block instructions for each month in one place!! Click here to PURCHASE
About the Friendship Star Quilt Block
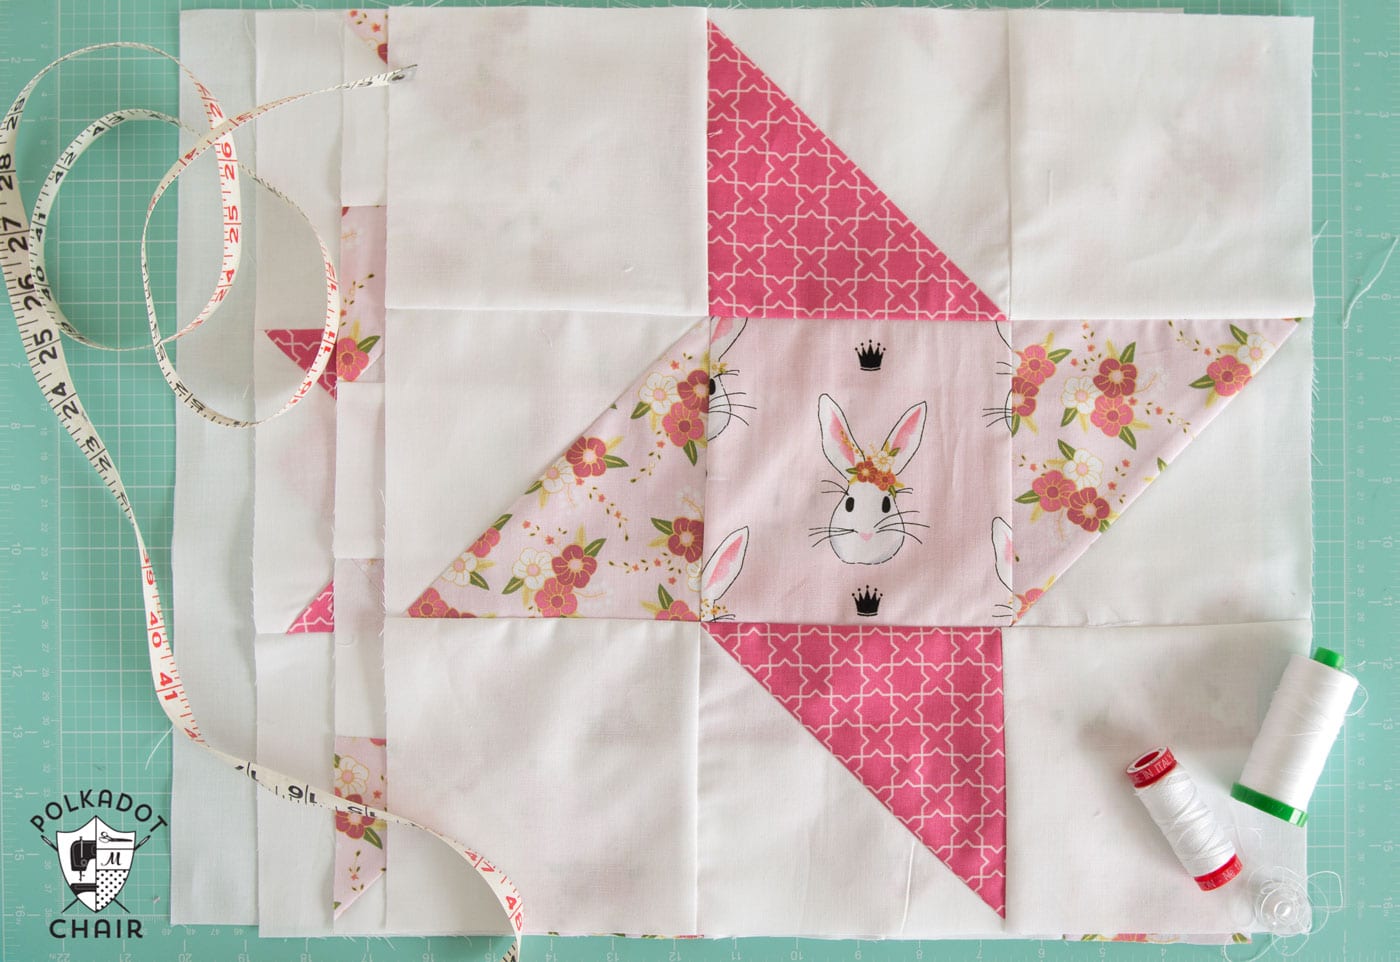
This Friendship Star Block is another “quick sew.” Depending on your personal preference, you can use up to four different fabrics on the block.
If you’re stuck picking fabrics, just stick with 3 (background, star points, and center). However, if you’re feeling adventurous and don’t mind having some pieces left over, you can use six different fabrics.
This block uses the quick piecing method for making Half-Square Triangles that we’ve discussed in the past. If you’ve not used this method before, don’t stress; on the next page, I’ll provide a link to the tutorial for the HST with the instructions.
Okay, are you ready to make one???
How to Make a Friendship Star Quilt Block:
Yields One 15 1/2″ x 15 1/2″ block.
Cutting
4 pieces of white fabric cut to 5 1/2″ x 5 1/2″
1 piece of fabric for center square 5 1/2″ x 5 1/2″
2 pieces of white fabric cut to 6″ x 6″
1 piece print fabric cut to 6″ x 6″
1 piece of print fabric cut to 6″ x 6″
One: Create the Half Square Triangles
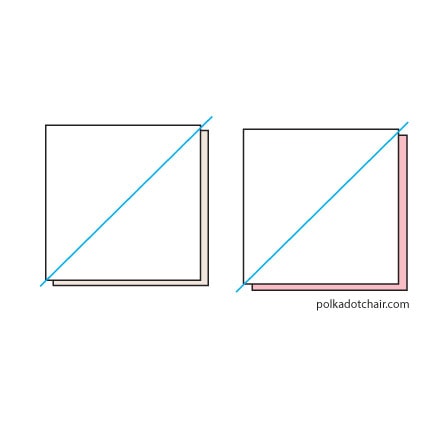
Begin by creating 4 Half Square Triangles using the 2 white 6″ x 6″ squares and the 6″ x 6″ squares in the 2 prints.
You will layer one print fabric with one white fabric; right sides facing. Draw a diagonal line down the center of the white square. Stitch on 1/4″ from each side of the diagonal line.
Cut along the line.
Press the seam towards darker fabric and trim the pieces to 5 1/2 “x 5 1/2”.
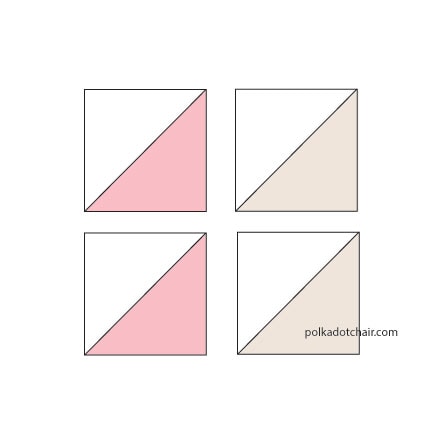
You should now have 4 Half Square Triangles. For more help constructing Half Square Triangles CLICK HERE
Two: Lay Out the Pieces and Construct the Quilt Block
Lay out your HST and remaining pieces of fabric as shown below:
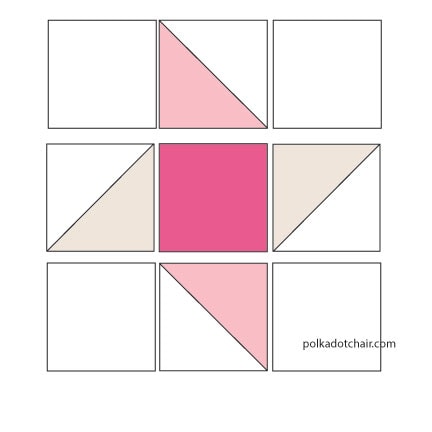
Stitch each row together and press seams towards one side. After each row is stitched, stitch the rows to each other.
Trim block to 15 1/2″ x 15 1/2″
That’s it!
I’m still working on my other three quilts (one low-volume, one Christmas, and one for my teenage son). Right now, they are on the “back burner” while I finish my quilt market prep. I’ll be sure to share them with you as I complete them.
For review, here are the Quilt Blocks we’ve made so far:
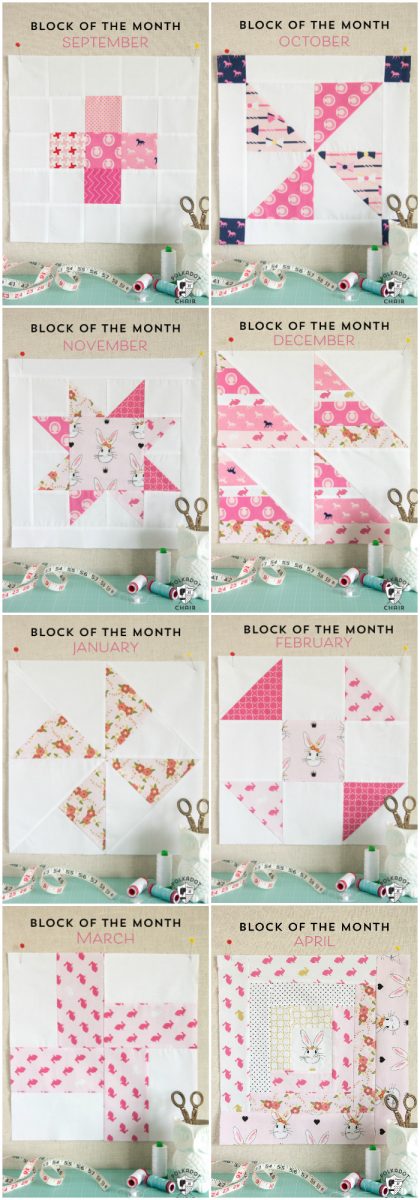
- Plus Quilt Block Pattern
- Pinwheel Quilt Block Pattern
- Sawtooth Star Quilt Block Pattern
- Half Square Triangle String Block Pattern
- Turnstile Quilt Block Pattern
- Shoofly Quilt Block Pattern
- Keystone Quilt Block Pattern
- Log Cabin Quilt Block Pattern
- Friendship Star Quilt Block Pattern
- Grandma’s Favorite Quilt Block Pattern
- Ohio Star Quilt Block Pattern
- Dresden Quilt Block Pattern
Just a quick reminder: This project along with ALL of the other projects on this blog are offered to you for free. The only thing that I ask is that you do not use them for any commercial purpose. If you have a shop, this is not meant to be a program for you to use in your store. It’s meant to help build the online community of people who all LOVE quilting. Please respect that so that I can go on sharing these projects for everyone.

Will you be showing us your other blocks for April. I am doing my quilt with multiple colors and would especially like to see how your looks in your three other quilt block color ways. Thank you!
Yes, I’m planning to do it. I’ve just got to get some of this quilt market prep crossed off my list. That quilt is going in the RV and my husband is bugging me about getting it done!! 🙂
Eek, I am so excited to have just taken delivery of your gorgeous Wonderland fabrics – they are so scrummy. I’m about to send some to Louise of Sew Sofia (who is apparently one of your biggest fans 🙂 and is going to make a lovely tutorial for Poppies & Polka Dots – I can’t wait to see it. Many thanks xx