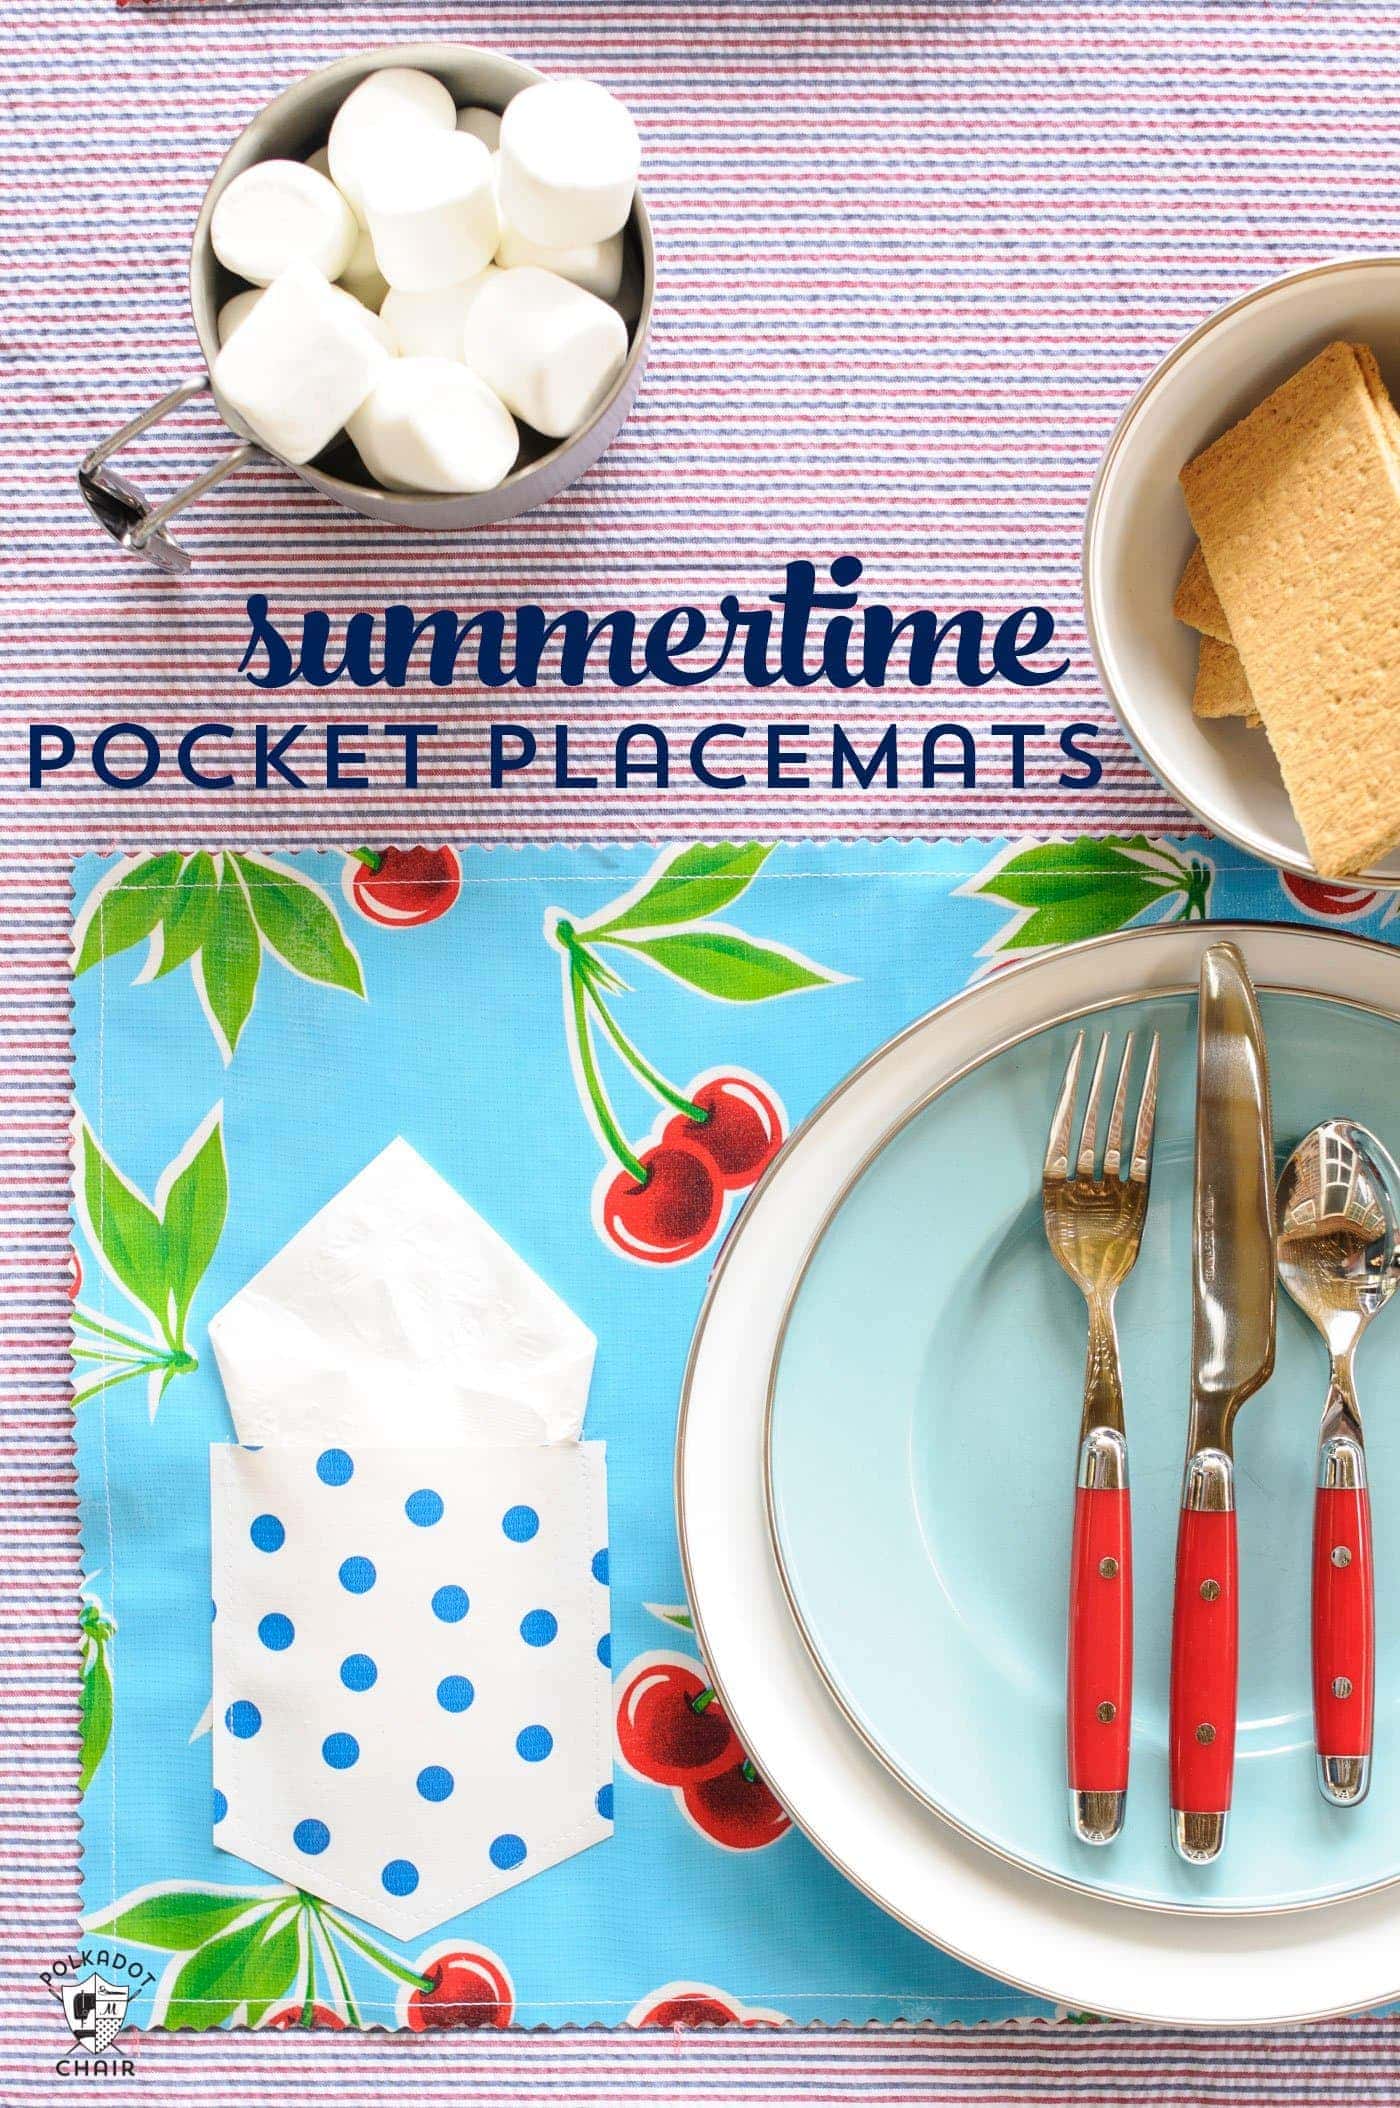
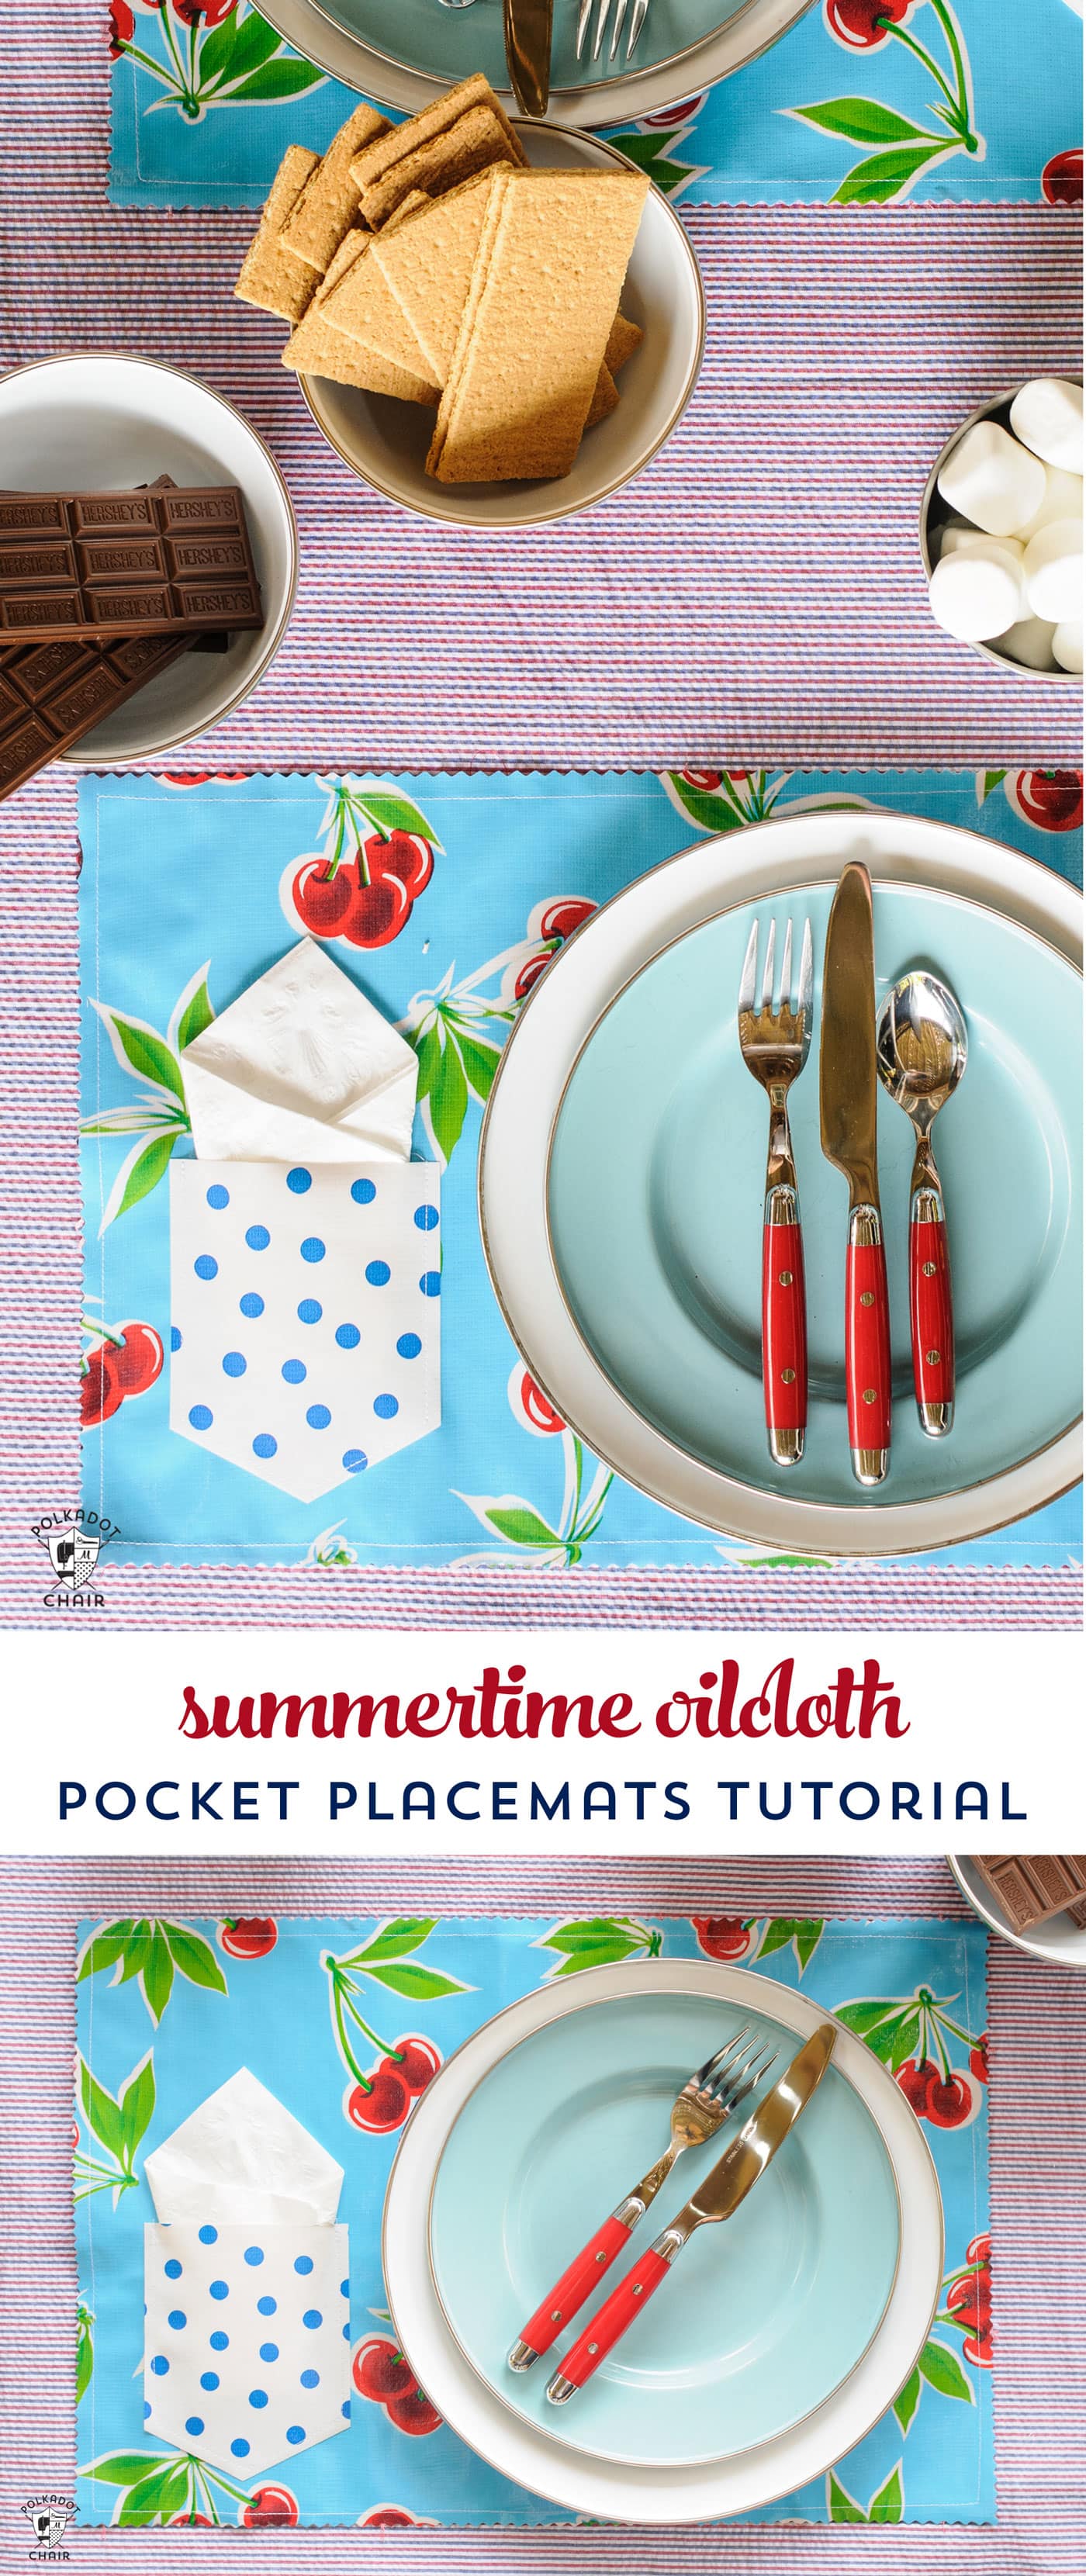
How to make Oilcloth Placemats with a Pocket
Keep your napkin from blowing away when you’re eating outdoors with this cute and functional Oilcloth Placemat! Keep reading to learn a few tips and tricks for working with oilcloth and how to make placemats with pockets perfect for the Outdoors. If you like this project, you may also like this roll-up chalkboard placemat sewing tutorial.
I took a good look at our deck last week. The weather is warming up, and soon, we will eat dinner outside again (hallelujah!).
It was the first time I’d looked at the deck since the Fall. I was trying to “access” how much grime had built up over the winter. What I found was not pretty. The thing looks pretty dirty. I foresee a weekend of power washing soon.

Our Favorite Outdoor Placemats
I love our deck. It has a great view of our neighborhood and a pergola on top that filters the harsh afternoon sunlight. When the weather is cooperative, I try to eat dinner outside each evening.
Even though we keep the table on our deck pretty well cleaned, I noticed that it gets a bit dusty, and I like to have a set of placemats to use when we eat outside.
I was using plastic placemats until one day, the pattern from the placemat MELTED onto our tabletop! What’s worse, it was Thanksgiving placemats! We ended up with turkeys all over the top of our table. Note to self: Hot temperatures and plastic placemats DO NOT MIX!
We managed to remove the turkeys from the table, and ever since then, I’ve been more careful about what we use outside.
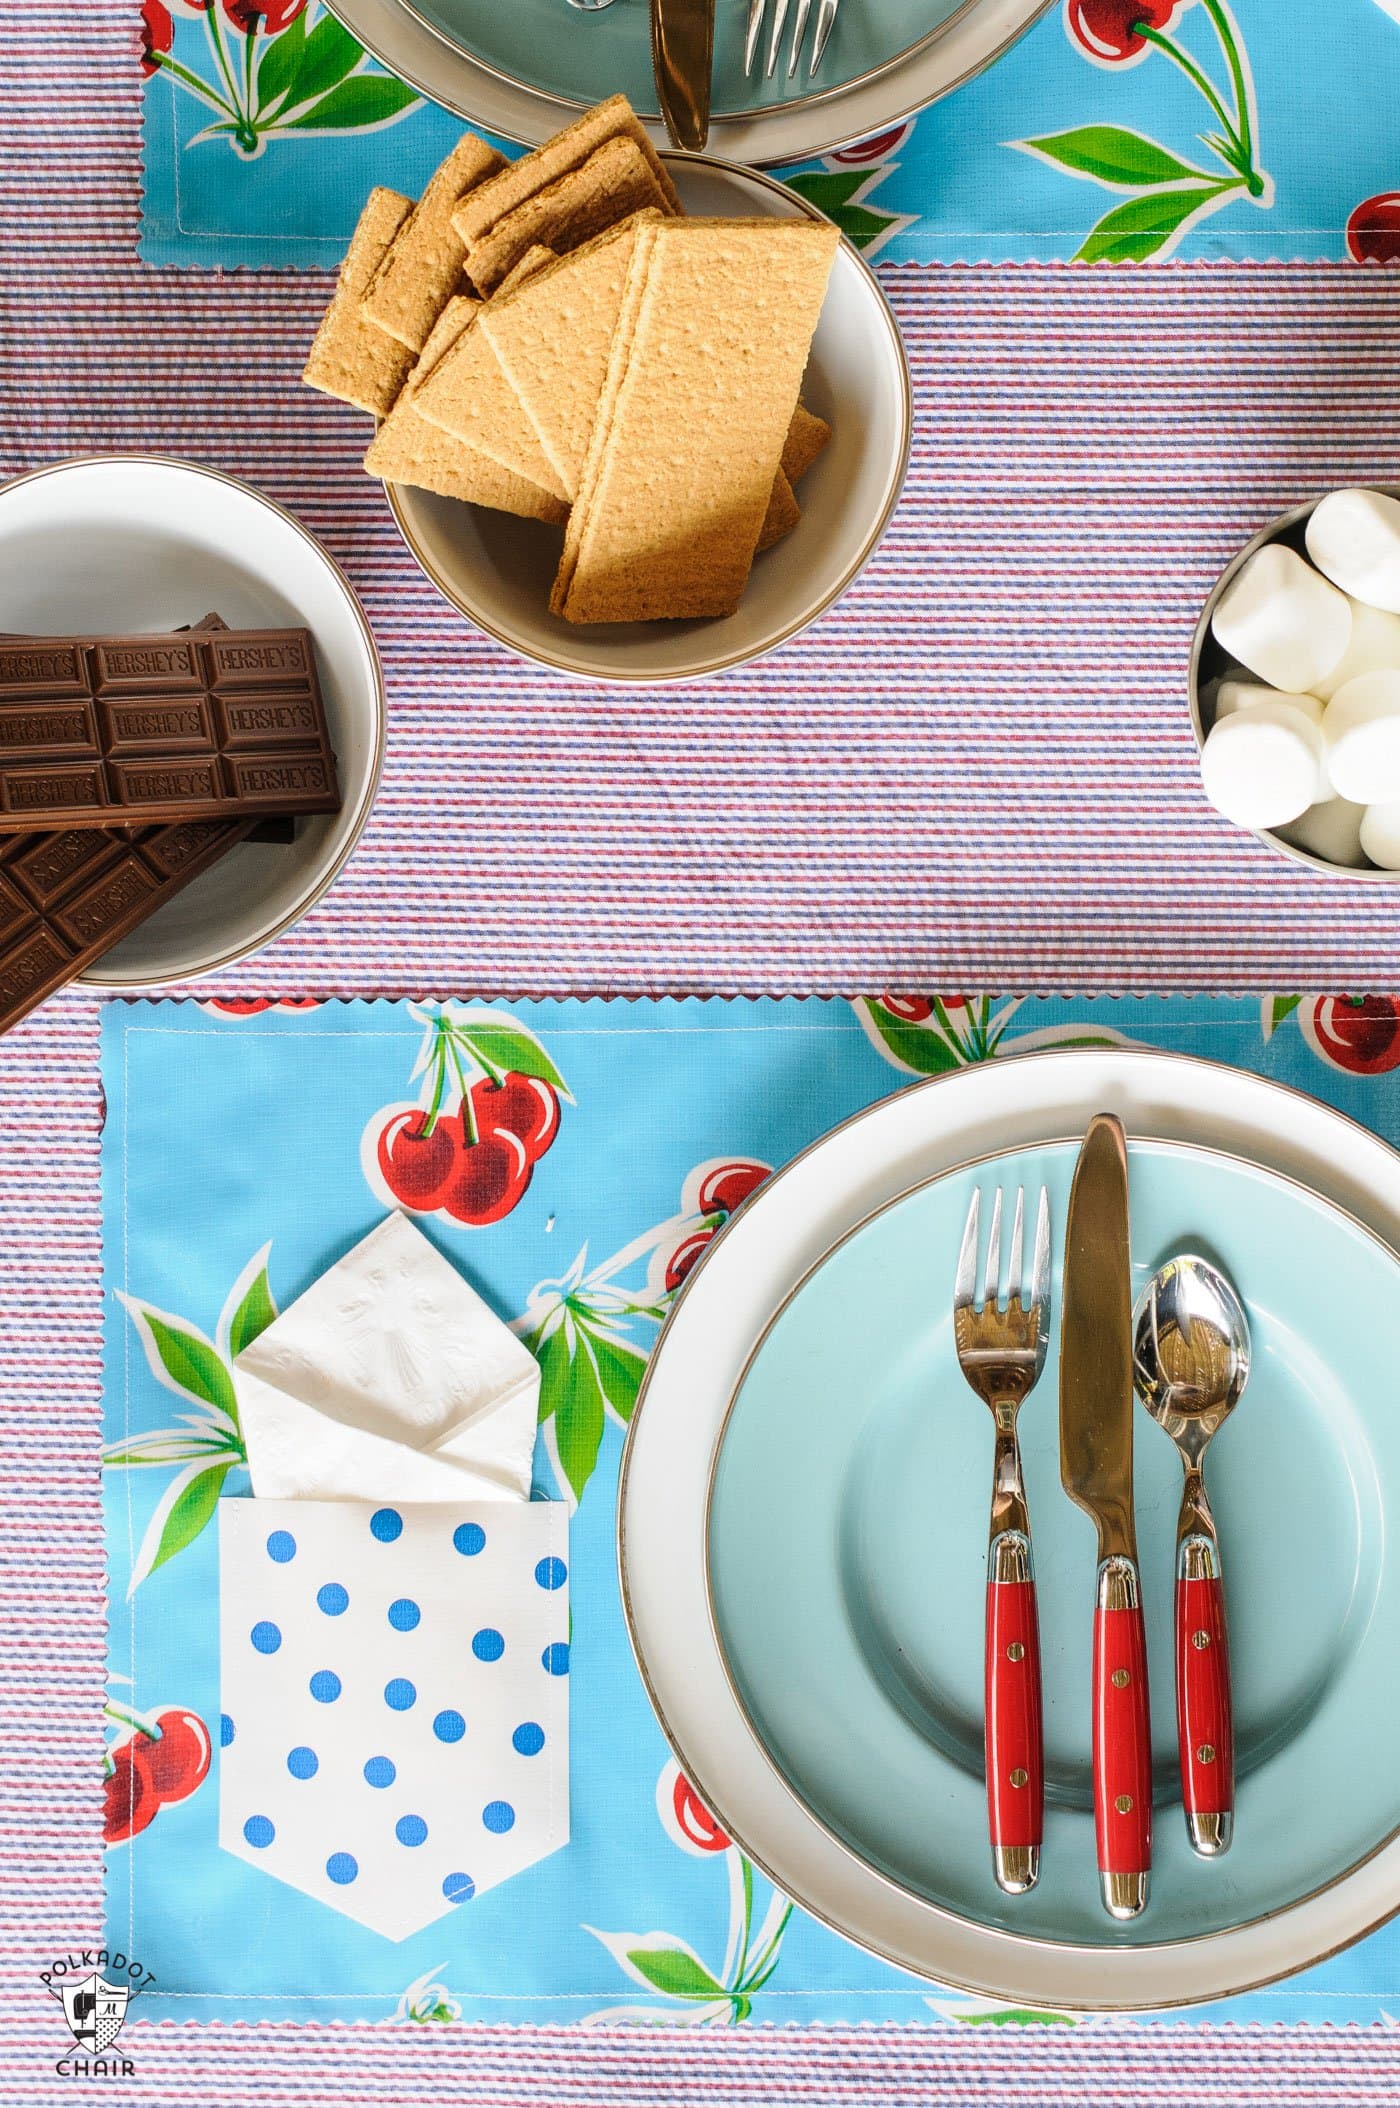
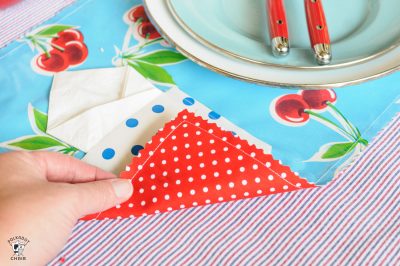
Today, I will teach you how to sew a set of placemats for outdoor eating. These oilcloth placemats are easy to store and wipe clean. You can even add a pocket to hold a napkin. I hate it when my napkin blows away while I’m eating!
To keep it simple, you can use pinking shears or blades instead of sewing on bias tape to finish the edge of these placemats. The oilcloth is pretty easy to sew with; you need to know a few tips, which I’ll share with you today.
Are you ready to make some??
How to Make Placemats from Oilcloth Fabric
How to Get the Pocket Template
Fill out this form and we will email you a copy of the PDF file of the pocket template.

Oilcloth Pocket Placemats Sewing Pattern
Equipment
- Teflon Foot for your sewing machine. You can also use a piece of Scotch tape on the bottom of your standard foot.
- Glue Stick
supplies
- 1/2 yard Oilcloth The yardage is up to you. You can get three placemats out of every 1/2 yard of 60″ wide oilcloth.
- 1/4 yard Oilcloth for pocket or large scrap
- 1/2 yard Cotton Fabric for the back of the placemats for every three placemats
Instructions
Cutting Directions
- Using the instructions on this page, download and print the pocket template.
- To begin, cut out your oilcloth for the placemats. Each piece is 12″ x 18″; you will get the most yardage if you cut your oilcloth 12″ wide and then into 18″ sections.

- Cut out your lining fabric; it’s also 12″ x 18″, but for this fabric, cut it 18″ wide, then cut that strip into 12″ sections.
- Cut out the pocket pieces.

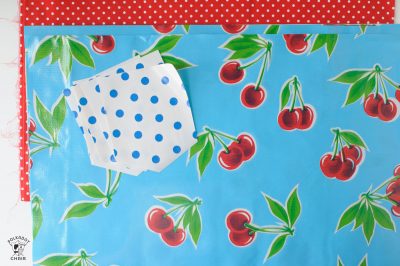
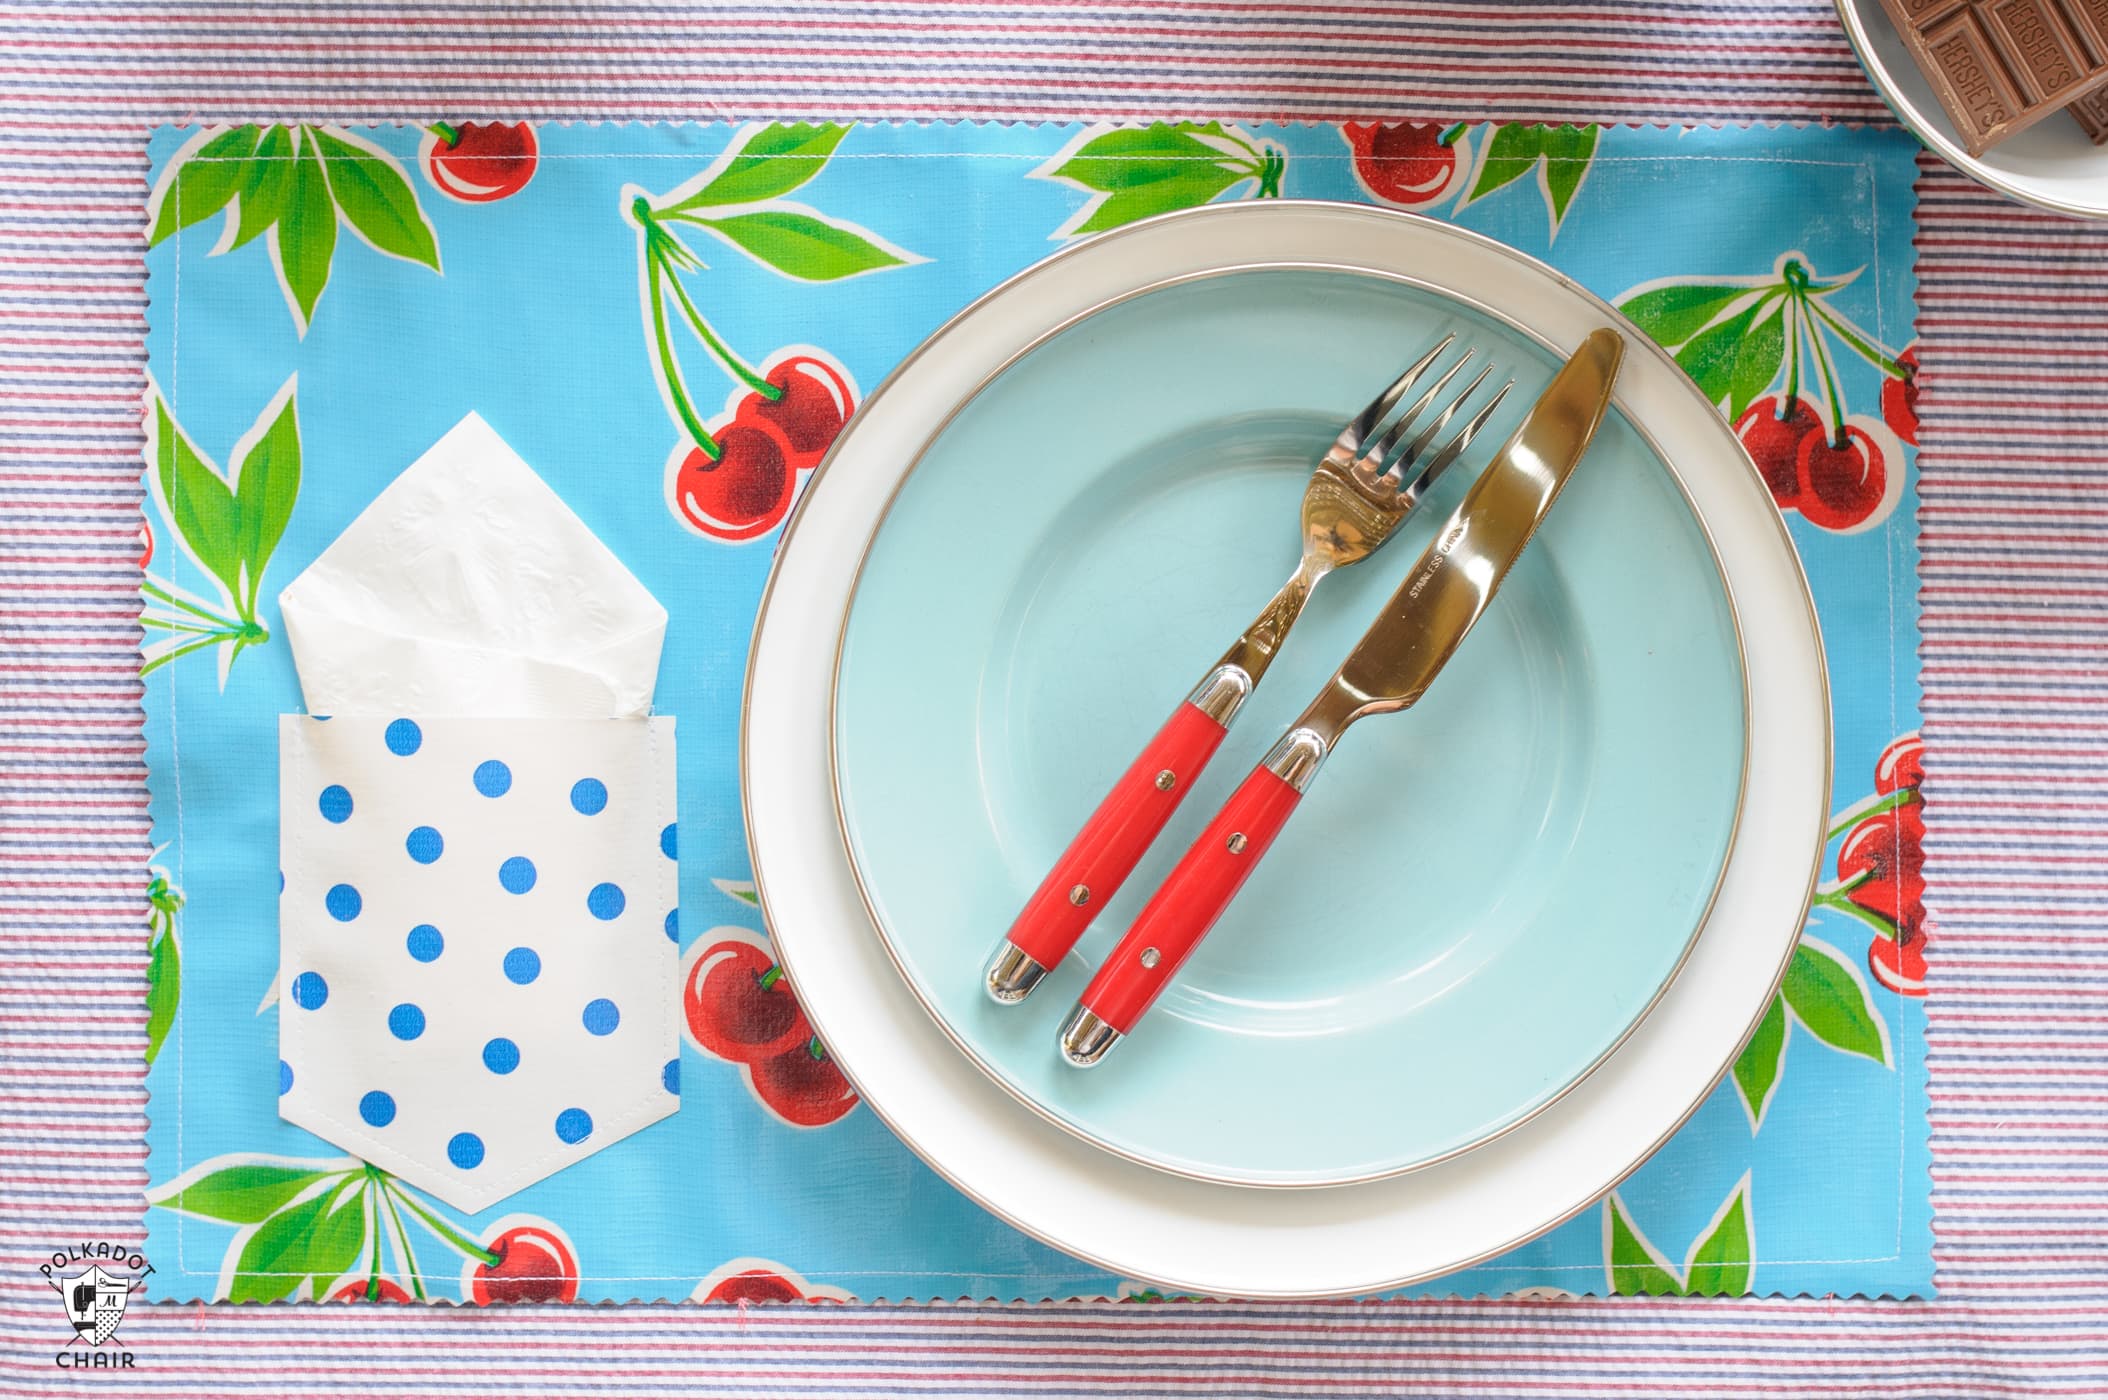
Step One: The Placemat Pocket
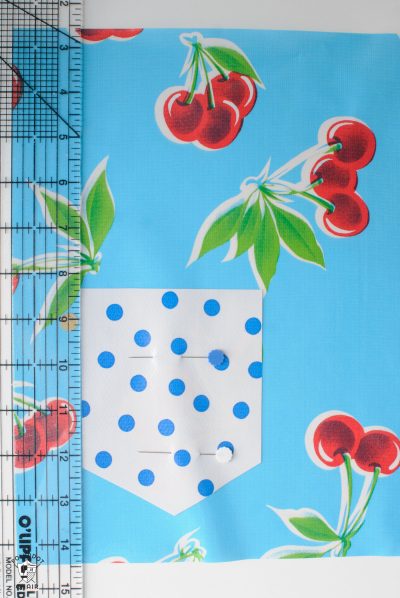
- Usually, I would tell you not to pin oilcloth, but this time, we will have to. Using two pins, pin the pocket to the placemat front 1 1/2″ in from the edge and 1″ up from the bottom—stitch the pocket to the placemat. Ensure you have the Teflon foot on your sewing machine for this ENTIRE project.
Step Two: Assemble Placemat
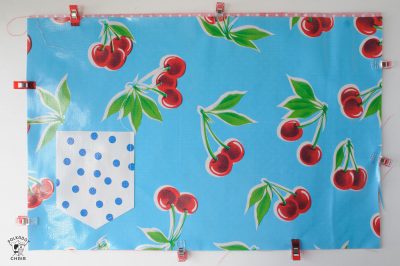
- Using your glue stick, put a bit of glue on the center of a 12″ x 18″ lining piece of fabric. This will help keep the lining from sliding around while sewing it to the oilcloth. Glue the lining to the back of the oilcloth… wrong sides together. Secure it with binding clips.
- Stitch around the edge of the placemat (oilcloth facing up) using a 1/2″ seam allowance.
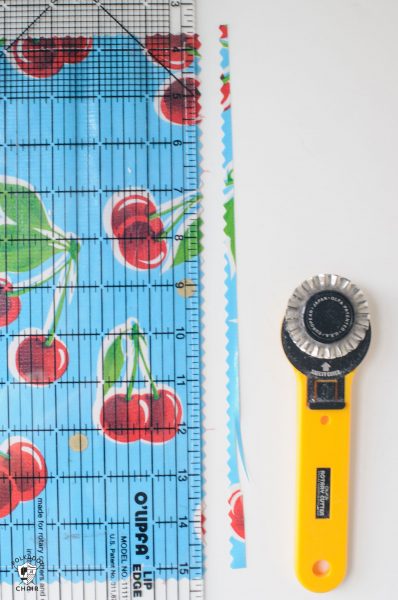
Step Three: Pink the Edges
- Using your quilt ruler and the pinking blade on your rotary cutter, cut off the edge of the placemat 1/4″ out from the seam you just stitched.

- Clip your strings, and you’re done!
More Fun Summer DIY’s:
How to Make Outdoor Curtain Rods
How to Recover Outdoor Pillows
Is there a pdf for this tutorial? And what are the dimensions for the pocket? I didn’t see them. Thanks, this is a really cute idea!
The pocket is a printable available in our Library. All the links to get it are in the tutorial.
I’ve been making oilcloth aprons and have extra oilcloth left over. I want to make placemats with oilcloth on both sides. Trouble is the oilcloth print from the other side shows through on the ones with a white background.
Should I put a third layer in between, such as canvas?
I think canvas would be too thick. I’d try a sew in interfacing and see how that works. It also will not fray.
What settings do you recommend on machine. Never used oilskin before.
I just use my regular machine settings. You need a teflon foot or tape on the bottom of your presser foot. Read thru this post first to get started and you’ll be fine! https://www.polkadotchair.com/2014/02/sew-laminated-fabric.html/
Love the placemat post! Just thought about them yesterday. The step by step makes it easier. Thanks
Those are really cute and I love the pocket. That was a great idea. I have thought about making a cushion cover for the outside bench out of oilcloth.
Thanks for the tutorial! Looks easy enough for even me to do!!
Do you think home dec weight or canvas would work for the backing fabric? And wouldn’t glue stick (or something else sticky like sticky tac) work for securing the pocket for sewing? Or what about taping all pocket sides down except for the edge you’re sewing on, then removing tape as you sew the next sides?