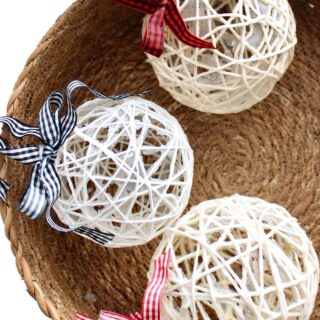
How to Make String Christmas Ornaments
These DIY String Christmas ornaments are so easy to make! They would be a great last-minute Christmas craft to make as a family! All you need is some string, balloons, and a few craft supplies.

Hello, friends; it’s Julia from Bayhill Studio. It’s time for another installment in my monthly ornament series! Today I’m sharing a quick, inexpensive, and super charming little String Ornament you can add to your growing ornament collection.
Julia’s Christmas Ornament Tutorials
- July: Paper Poinsettia Ornaments
- August: Paper Memory Christmas Ornaments
- September: Kimekomi Fabric Ornaments
- November: Granny Rocker Christmas Ornaments
- December: String Christmas Ornaments
- January: Retro Diorama Ornaments
- February: DIY Splatter Paint Glass Ornaments
- March: Blown Egg Ornament
- April: Retro Photo Ornament Tutorial
- May: Vintage Folded Fabric Ornament
- June: Patchwork Heart Ornament
- July: Improv Pieced Heart Ornaments
- October: Plastic Canvas Gift Card Holder
- November: Yarn Stitched Jingle Bell Ornament
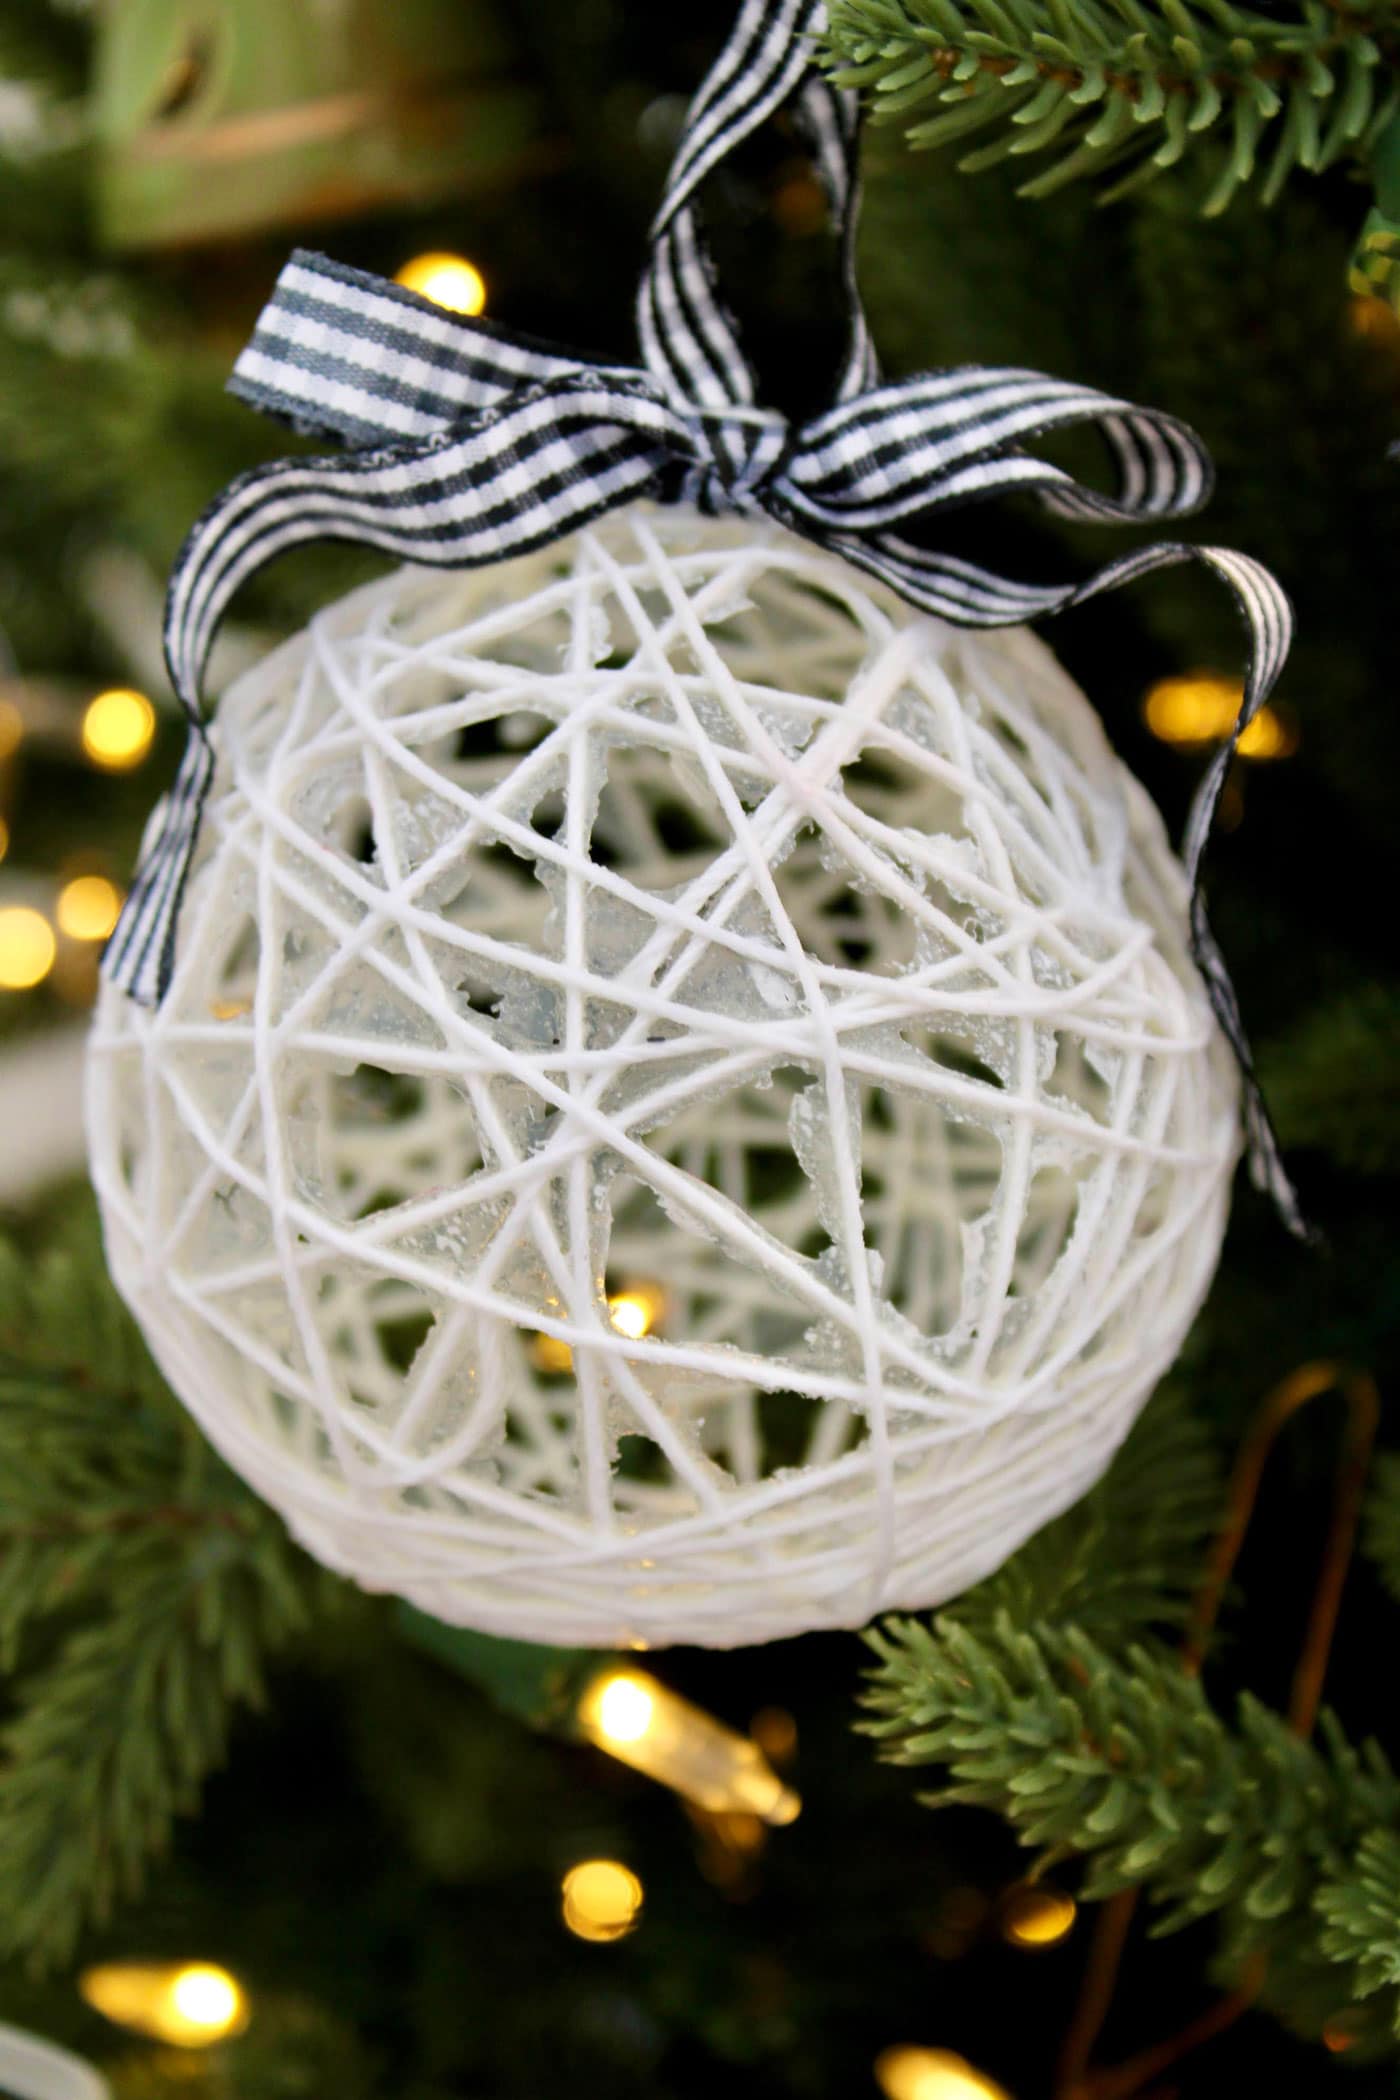
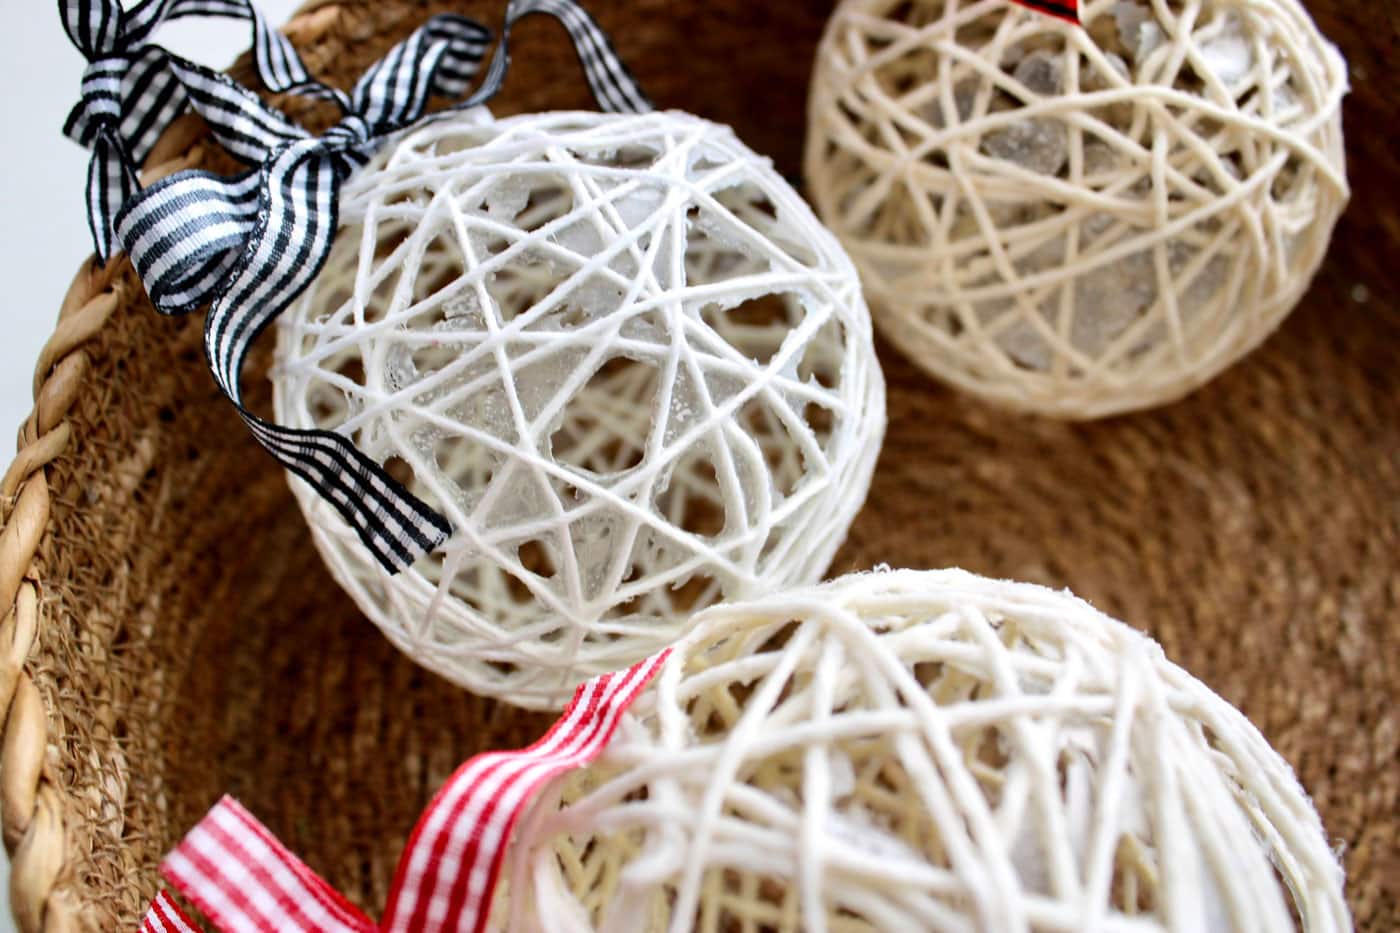
Leave off the loop and the bow if you want, and this String Ornament can also be made as a simple string ball to be used as decor for your coffee table or bookshelves.
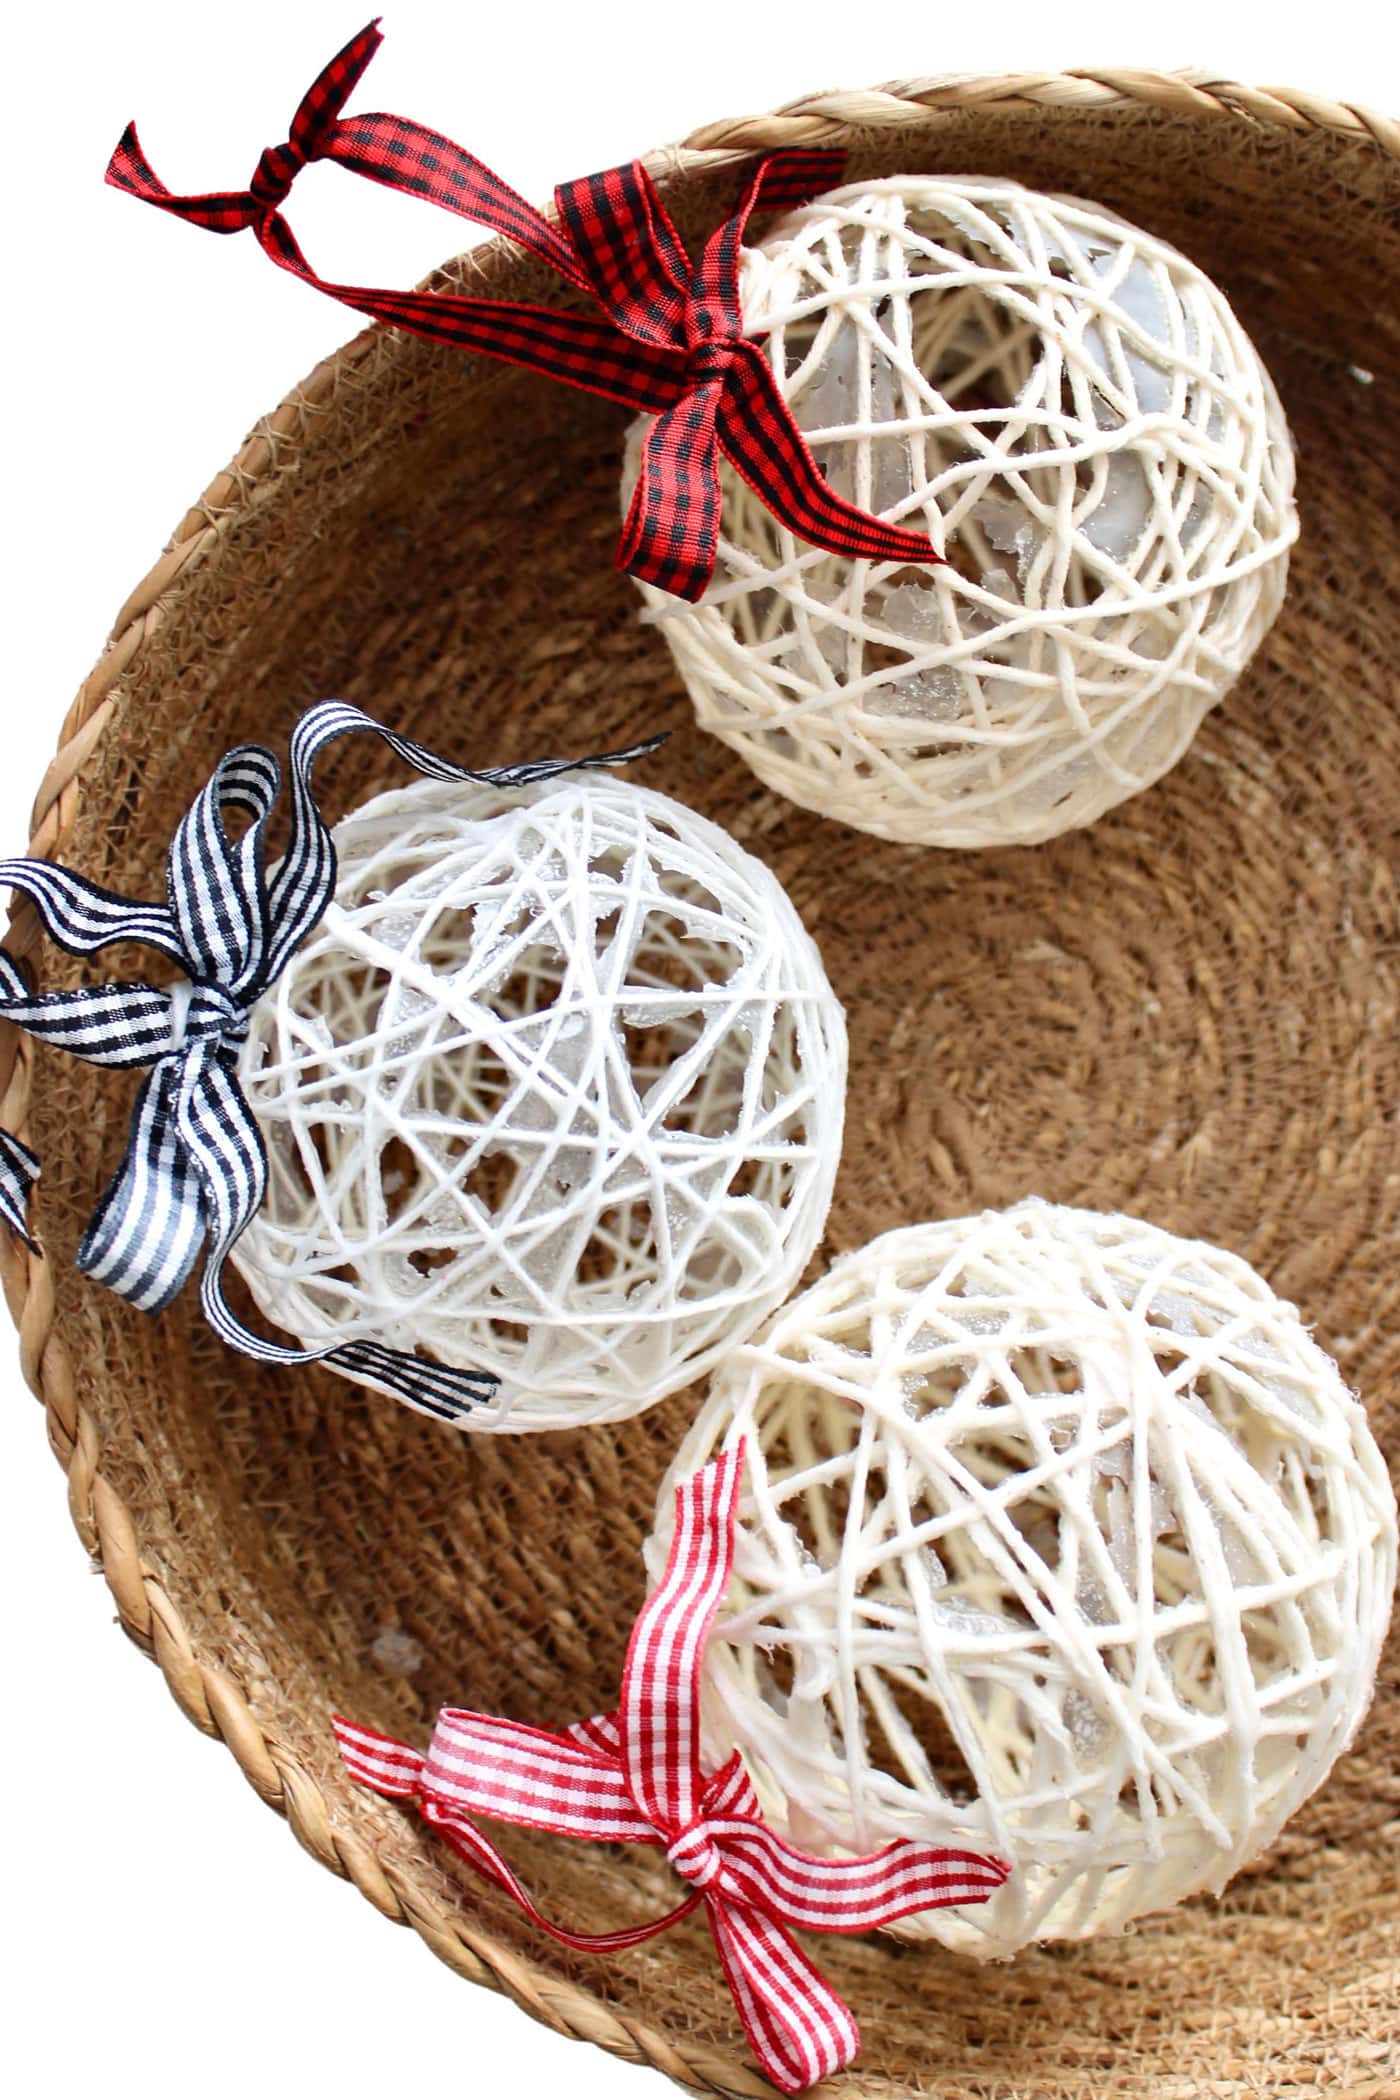
You can use any type of string for this ornament — from crochet string to classic yarn. You will find, however, that different types of string or yard work better than others as far as ease of use and not getting tangled. This is trial and error, but in this tutorial, I will be sharing a few tips from my experience.
Ornament Supplies
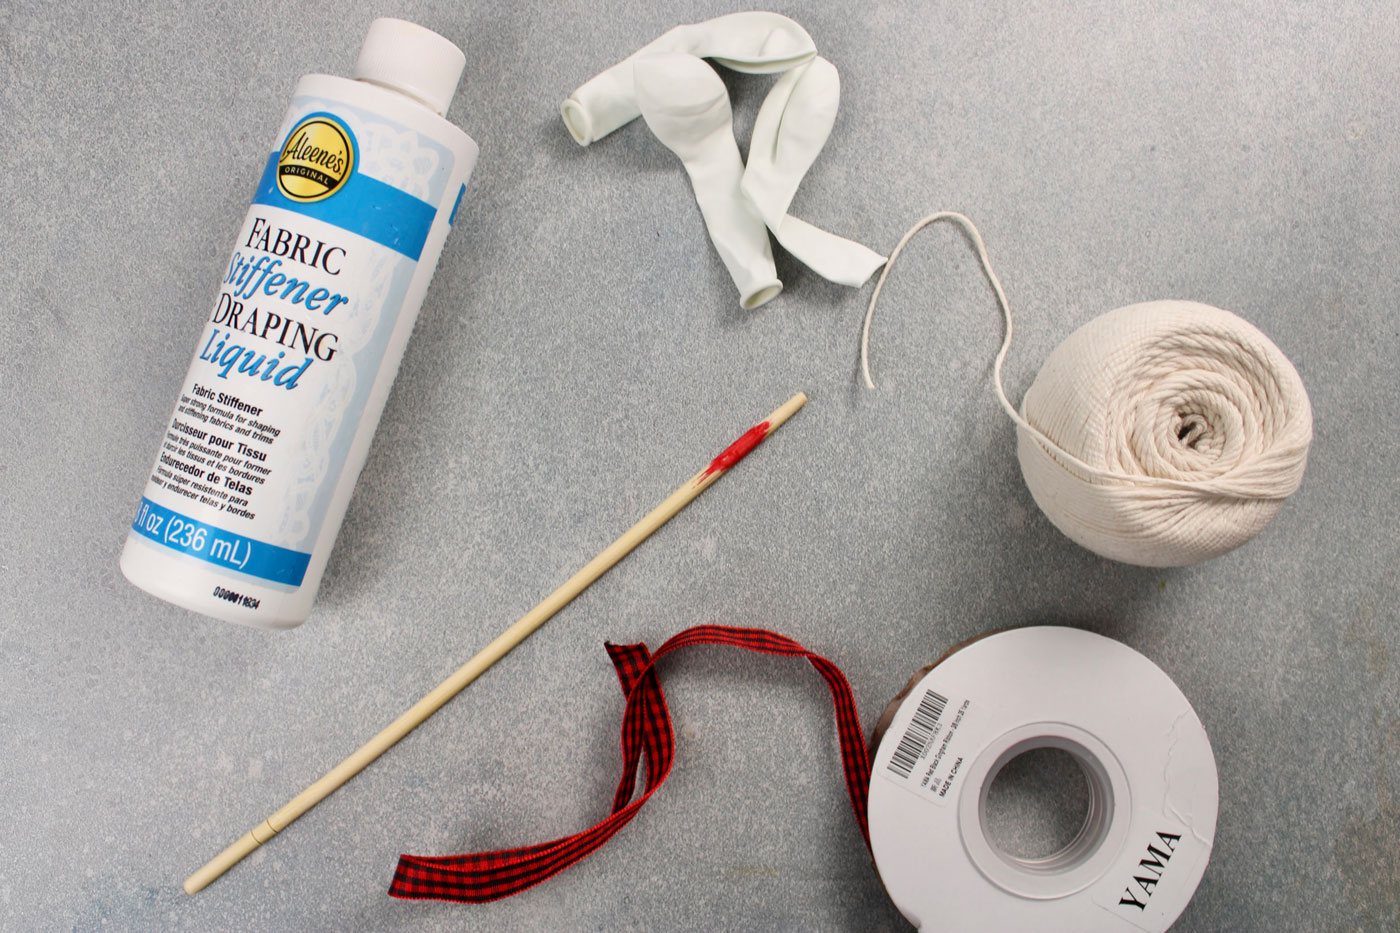
To make this ornament, you will need these few simple ingredients:
- Fabric Stiffener Draping Liquid
- 5” balloons
- crochet thread, yarn, fine twine, or any string of your choice
- ⅜” ribbon of your choice
- a chopstick or paintbrush
How to Make String Christmas Ornaments
Equipment
- Stick end of paint brush or chopstick
supplies
- 1 bottle Fabric Stiffener
- 1 package 5" balloons
- 1 spool Crochet yarn or any other string of your choice
- 1 bottle Tacky Glue or any craft glue
Instructions
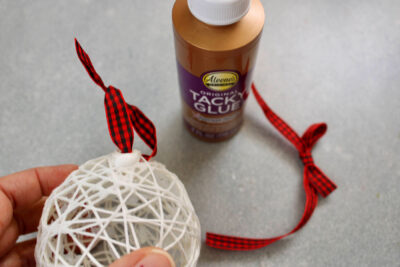
Step 1:
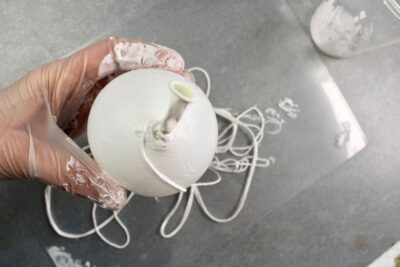
- Blow up your balloon to the size you want. I aim for about 3”-4” in diameter. Then cut a length of string about 2-3 yards long. Fold it up neatly and immerse it in the fabric stiffener liquid. Make sure all of the string is covered in fabric stiffener, but try not to tangle up the string or it will be very difficult to work with in the next step.
Step 2:
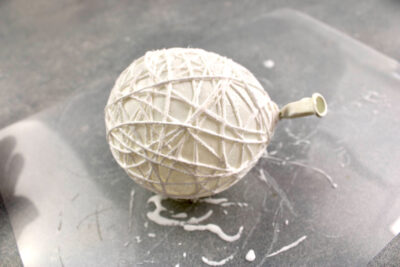
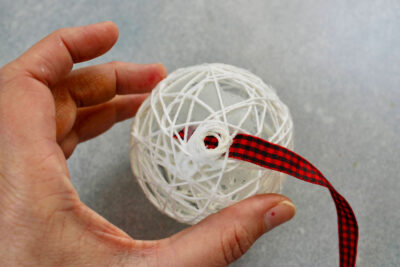
- Carefully unfold the string. Starting at the top of the balloon where the knot is, wrap the string around, forming a “neck.” This is where you will loop the ribbon later on. However, you don’t have to form a “neck” at all if you don’t want to. If that’s the case, skip to Step 3.

Step 3:
- Wrap the string around the balloon, criss-crossing over itself, making sure you don’t have any large gaps. You may have to cut another section of string if you don’t have enough from your first cut. I always end up cutting a second length of string. For a second length of string, repeat the exact same process in Step 1. When you come to the end of a length of string, align the end with another piece of string so it blends in.Allow the string to dry completley.
Step 4:
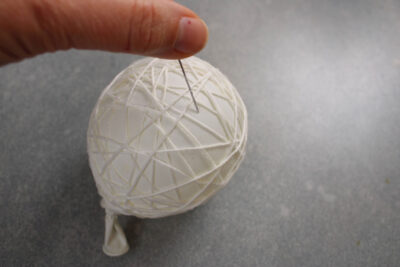
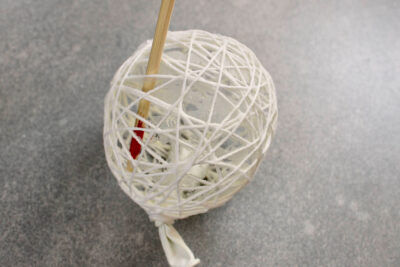
- Use a pin or sharp object to puncture the balloon. I may not deflate immediately because it is stuck to the string, but it will slowly pull away. You can help it along by gently nudging it with your chopstick or the end of a paintbrush.
Step 5:
- Extricate the balloon by either pushing it through an opening or if the tip of the balloon remains intact, like this one here, you can just pull it out.
Step 6:
- Slip one end of the ribbon through an opening to the side of the “neck”. If you didn’t create a neck, just slip the ribbon through any opening on the ball.
Step 7:
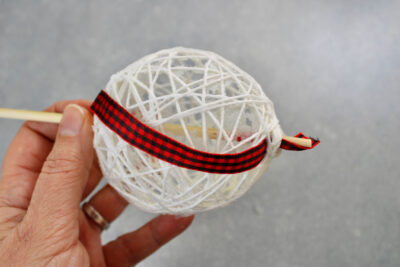
- Use the end of the chopstick or paintbrush to push the ribbon through the neck opening.
Step 8:
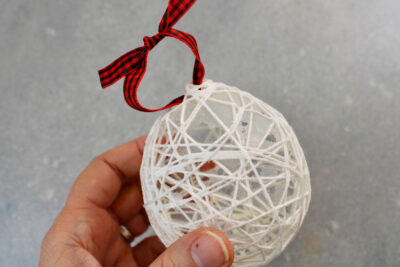
- Tie a knot leaving about a 3” loop for hanging.
Step 9:
- To add a bow, add a dollop of tacky glue on the neck opening. Tie a small bow and set it on the glue to dry.
- And it’s finished! You’ll be surprised just how sturdy this little string ball ornament is. I have no doubt it will last for years to come.
Video
About the Designer:

Julia Frazier is the founder of Bayhill Studio. Julia designs quilts and projects geared toward beginner quilters and crafters. You’ll usually find her at her sewing machine or hiking in the nearby mountains. Follow Julia on Instagram @bayhillstudio, and subscribe to her YouTube channel for new and exciting projects and tutorials. Be sure to check out her Bayhill Studio website for a growing list of tutorials and patterns.
Also By Julia:
Raw Edge Applique Granny Quilt


I have done the same string ornament several times using white glue. It takes about 2 hours dry and a hair dryer helps. I have also used rustic twine instead of string for bigger ornaments. Then glued twigs aorns and artificial leaves in top by the neck, s sprinkle of snowflake glitter works too. Great project for older kids while Thanksgiving dinner is being prepared. Make Thursday am…decorate next day. They are often a Great work of art, but is their creation, thanks for all your ideas.
I let mine dry a lot longer than an hour and when I deflated the balloons the ball collapsed and I purchased the fabric stiffener ?
Oh no! It probably needed more dry time, or less stiffner?