• Skip to primary navigation
  • Skip to main content
  • Skip to primary sidebar

The Polka Dot Chair logo

  • SEWING
    • Free Sewing Patterns
    • Bag Patterns
    • Costumes
    • Apparel
    • Learn to Sew
    • Beginner Friendly
    • Embroidery Projects
    • Tips & Techniques
    • All Sewing
  • QUILTING
    • Quilt Blocks
    • Learn to Quilt
    • Free Patterns
    • Quilt Patterns
    • All Quilting
  • CRAFTS
    • Disney
    • Cricut
    • Printables
    • All Crafts
  • HOLIDAYS
    • Seasonal Projects
    • Valentine’s Day
    • Easter
    • 4th of July
    • Halloween
    • Thanksgiving
    • Christmas
    • All Holidays
  • TUTORIALS
  • ABOUT
    • About Me
    • My Fabric Collections
    • Published Books
    • Press
    • FAQ’s
    • Contact
  • SUBSCRIBE
  • SHOP
menu icon
go to homepage
subscribe
search icon
Homepage link
  • SHOP
  • ALL PROJECTS
  • SEWING
  • QUILTING
  • CRAFTS
  • HOLIDAY PROJECTS
  • ABOUT
    • Published Books
    • My Fabric Collections
    • Facebook
    • Instagram
    • Pinterest
    • YouTube
  • ×

    Home » Sewing

    Color-Blocked Zip Pouch Sewing Pattern

    Updated: Apr 4, 2022 by Melissa Mortenson · This post may contain affiliate links · This blog generates income via ads · Leave a Comment

    Create a stylish and oh so useful zippered pouch with our free Color-Blocked Zip Pouch Sewing Pattern. This clutch is simple to construct and makes a great gift!
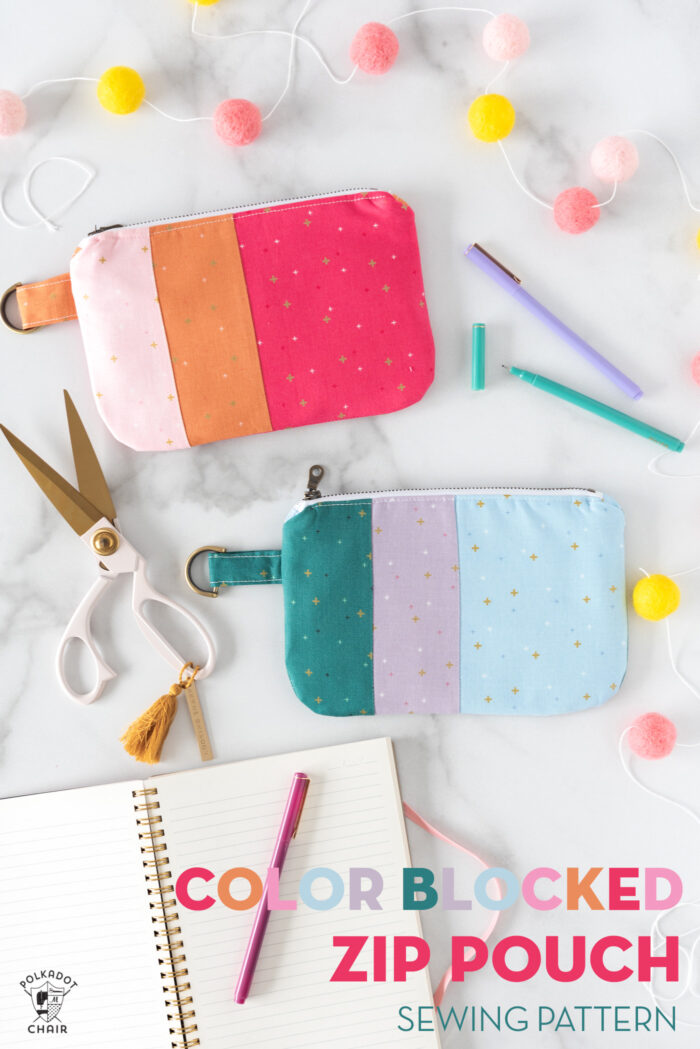
    Pink & orange and blue and green zippered bags on white table top with desk accessories

    Oh, how I love a simple zip pouch! I think they may be one of my favorite things to sew! I remember the first time I made one and it turned out nicely, I felt a huge sense of accomplishment!

    In the years since I stitched my first zippered clutch, I’ve made dozens more. I don’t know if I can count how many. They are the perfect little project when you want to sew something quickly, but still fun and useful.
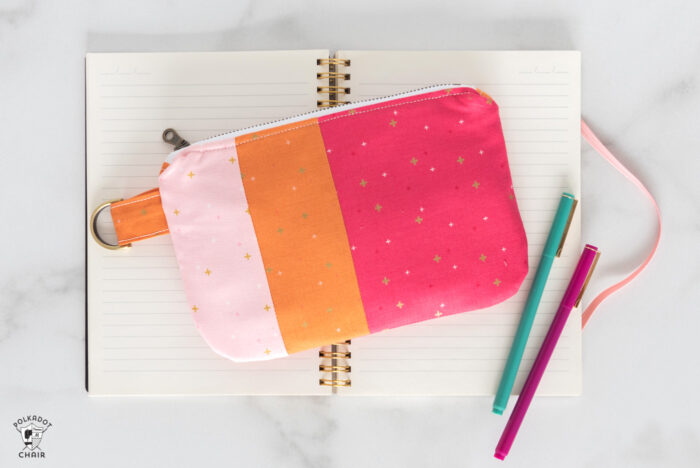
    Pink and orange zip clutch on notebook with pens

    I have a bunch of similar zip bags that I carry with me when I travel. One for cords, another for gum, one for lip balm, etc.

    About the Sewing Pattern
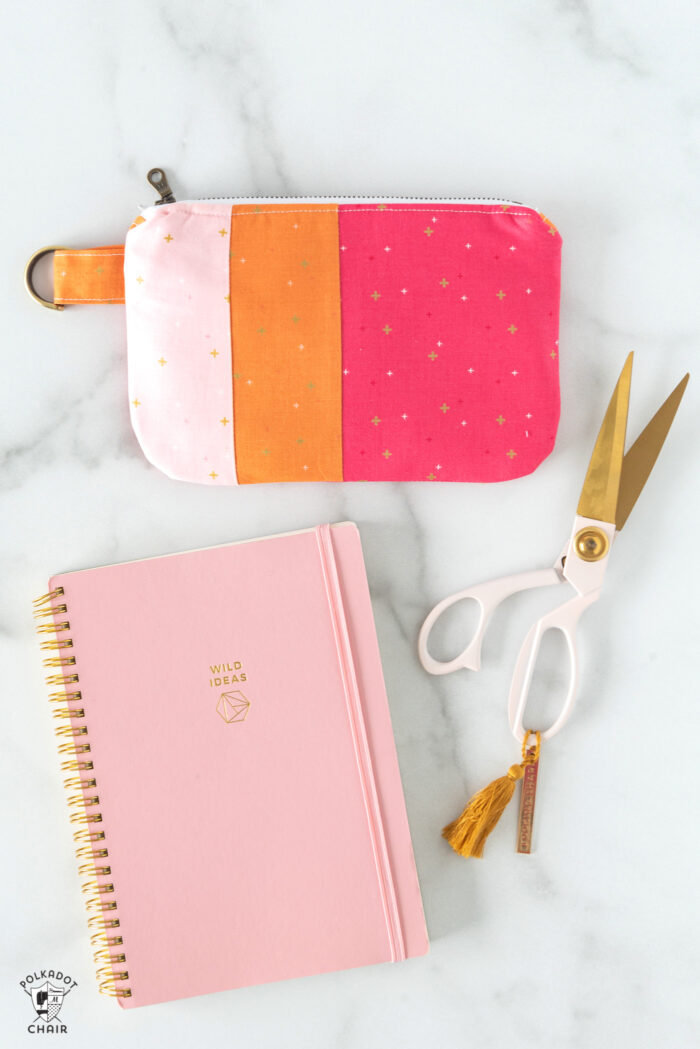
    Pink and orange zip clutch on notebook with pens

    When finished, this zip pouch measures approximately 8″ wide by 5″ tall. It features a metal zipper and a D ring on the side so that you can attach a key ring or lanyard.

    This bag is a little different than a few of the zip bag tutorials I’ve shared in the past in that it features rounded corners. I also added zip tabs to the ends of the zipper.

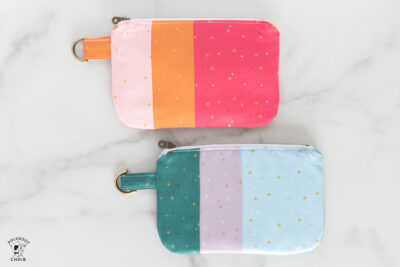
    I created two color-blocked versions of this bag. One featuring pinks and orange, one in green, lavender, and baby blue.
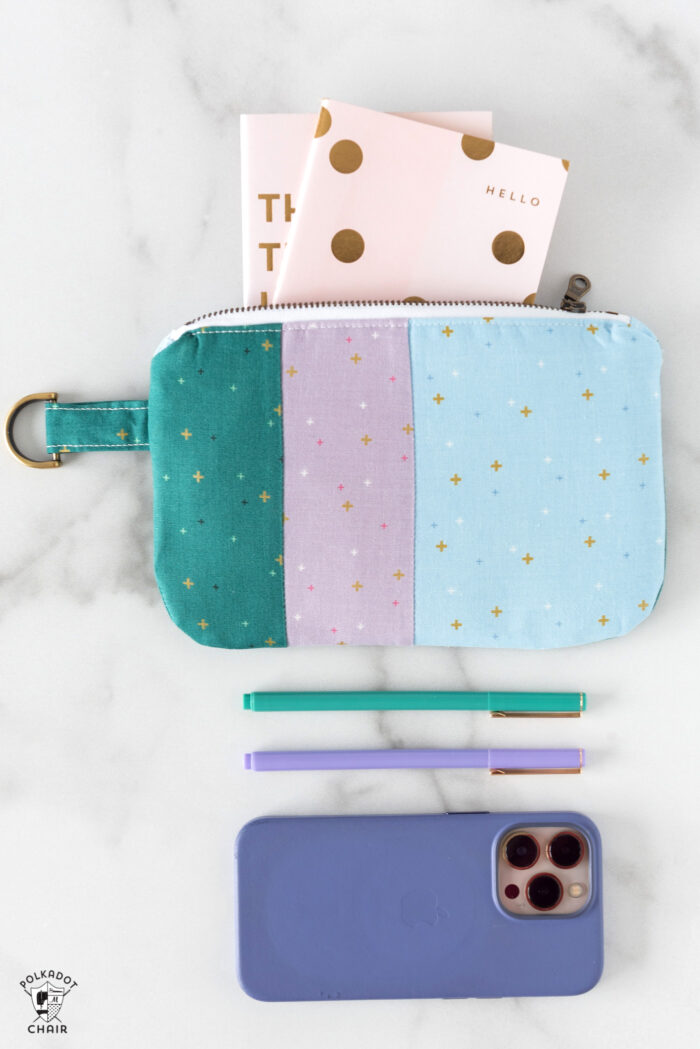
    Blue, lavendar and green zip pouch on white table with phone and pens

    Fabrics are from my Sparkler collection and the exact colors are:

    • Baby Pink
    • Pumpkin
    • Raspberry
    • Jade
    • Lilac
    • Boy Blue

    The bags are fully lined as well.

    Supplies Required

    For this project, you will need.

    • 1 Fat Quarter of Fabric for Bag Lining
    • 3 pieces of fabric at least 6″ x 9″ for the front and back of the bag
    • 7″ metal zipper
    • Fusible Fleece
    • Lightweight Fusible Interfacing
    • Purse D Ring
    • Iron
    • Sewing Machine
    • Sewing Notions

    If this is the first time you’ve created a zip pouch, you might want to check out the highlight bubble on my Instagram profile (@polkadotchair) called Bag Sew Along. I walk you through the steps to create a simple zip pouch.
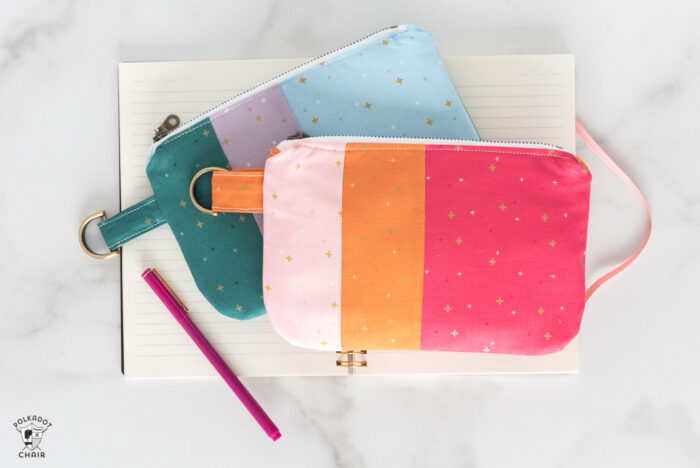
    Pink & orange and blue and green zippered bags on white table top with desk accessories

    A few steps are different, but the portions of the tutorial that you may find a bit confusing are the same.
    Pink & orange and blue and green zippered bags on white table top with desk accessories
    Pin It
    Print
    5 from 1 vote

    Color-Blocked Zip Pouch Sewing Pattern

    Learn how to make a simple zip pouch with curved sides using our free sewing pattern.
    Prep Time30 mins
    Active Time2 hrs
    Total Time2 hrs 30 mins
    Yield: 1 Pouch
    Author: Melissa Mortenson

    Tools

    • Sewing Machine
    • Basic Sewing Tools

    Materials

    • 1 piece Fabric 6" x 9" for bag bag
    • 3 pieces Fabric 6" x 6" or larger for bag stripes
    • 1 Fat Quarter Fabric For Bag Lining
    • 1 package Fusible Fleece
    • 1 package Lightweight Interfacing I prefer Shape-Flex
    • 1 Zipper 7"

    Instructions

    Cutting Directions:

    • For Left Stripe Cut: 1 piece 2 ¾” x 6”
      For Center Stripe Cut: 1 piece 2 ½” x 6”
      For Right Stripe Cut: 1 piece 4 ¾” x 6”
      For Bag Back Cut: 1 piece 6” x 9”
      For Bag Lining Cut: 2 pieces 6” x 9”
      From Fusible Fleece Cut: 2 pieces 6” x 9”
      From Lightweight Interfacing Cut: 4 pieces 6” x 9”
      From Accent Fabric Cut:
      4 pieces 1” x 2” for zipper tabs
      1 piece 2 ½” x 4” for D ring attachment

    Step One: Create the Bag Front

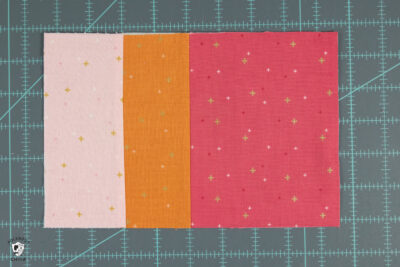
    • Sew the Left, Center, and Right bag front strips together using a ¼” seam allowance.
      cut pieces of pink and orange fabric on cutting mat
    • Press the seams and trim to 6” x 9” if necessary.

    Step Two: Intervacing

    • Following the directions on the package, apply interfacing to the following pieces.
    • Lightweight Interfacing: Apply to the bag front, bag back, and lining pieces.
    • Fusible Fleece: Apply to the bag lining pieces on top of the lightweight interfacing.

    Step Three: Round Corners

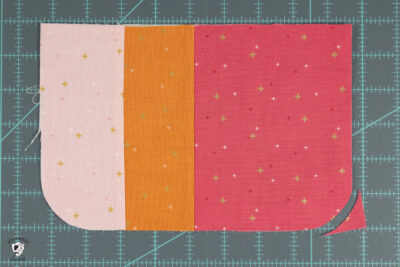
    • Using a round object (like a plate or an old CD), round the two bottom corners of the bag front piece.
      cut pieces of pink and orange fabric on cutting mat
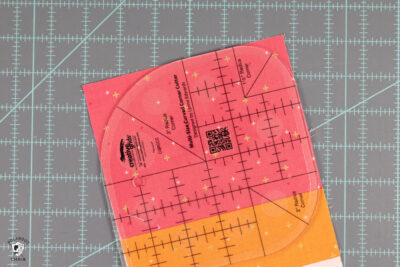
    • I used a Curved Corner ruler, but if you don't have one just use any round object.
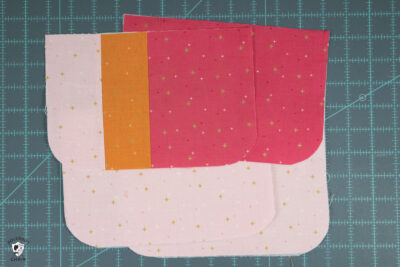
    • Repeat with the bag back and both lining pieces.
      cut pieces of pink and orange fabric on cutting mat

    Step Four: Zipper

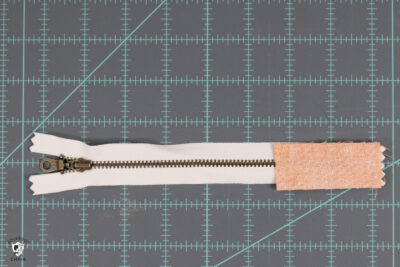
    • Pin one of the 1” x 2” zipper tab pieces to the end of your zipper, right sides facing. Pin another piece to the back of the zipper. Sew in place.
      orange fabric on white zipper
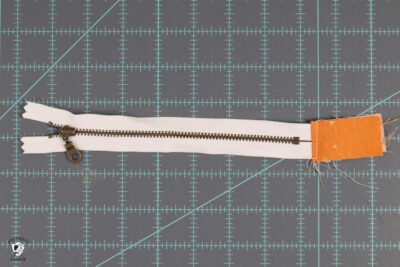
    • Flip the zipper tabs so that they are away from the zipper and the fabric is right side up, and press. Topstitch along the fold.
      orange fabric on white zipper
    • Repeat for the other side of the zipper.
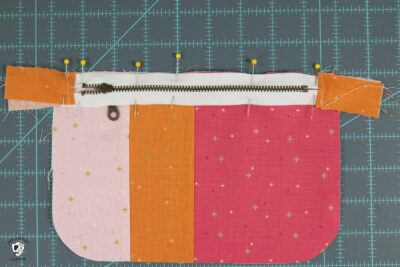
    • Pin the zipper to the bag front piece, aligning the centers. The right side of the zipper will be facing the right side of the fabric.
      zipper and pink and orange fabric
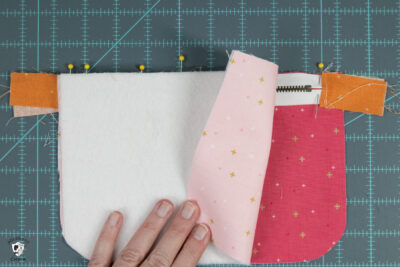
    • Pin one of the lining pieces to the top of this. You will pin it so that the right side of the lining faces the zipper’s wrong side.
      2 layers of fabric and zipper on cutting mat
    • Stitch in place using a zipper foot on your sewing machine with a ¼” – ⅜” seam allowance.
    • Repeat the steps with the bag’s back and the other lining pieces.
      wrong side of bag lining
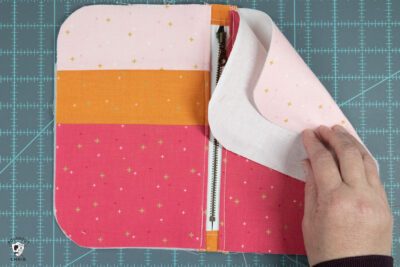
    • Press the fabric away from the zipper and topstitch along both zipper ends. Be careful, as metal zippers can become very hot when ironed.
      hand holding layers of zip bag
    • Trim the excess fabric from the zipper tabs.

    Step Five: D Ring

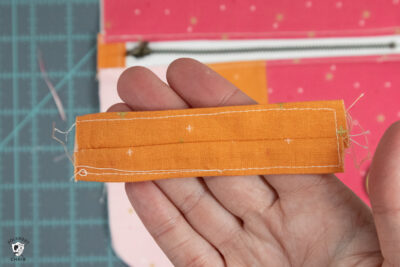
    • Fold the 2 ½” x 4” piece of fabric in half lengthwise and sew with a ¼” seam allowance. Turn right side out.
    • Press the piece so that the seam is centered. Topstitch down both sides of the piece.
      hand holding orange strip of fabric
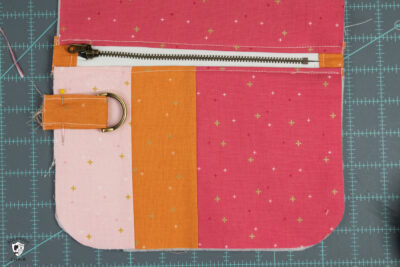
    • Feed the D ring through the fabric and pin to the bag front piece about 2” down from the top of the bag. Stitch in place. Pin the D ring so that it does not get in the way as you finish the bag assembly.
      close up of the front of zip bag in process

    Step Six: Assembly

    • Unzip the zipper.
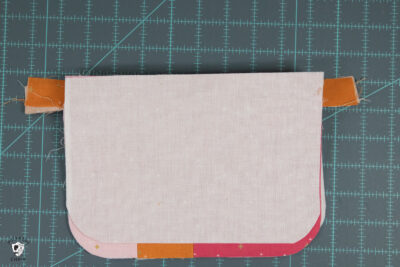
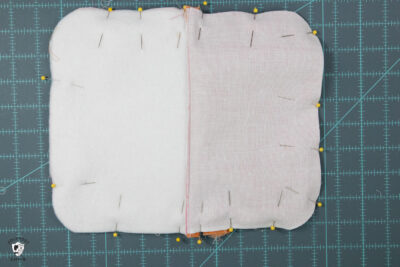
    • Pin the bag front and bag back pieces together, right sides facing. Pin the bag lining pieces together right sides facing.
      two pieces of fabric pinned around perimeter
    • Stitch around the perimeter of the bag with a ⅜” seam allowance. Be VERY careful when you are stitching over the area with the zipper. Make sure that you do not sew over any of the metal parts of the zipper.
    • Leave a 3” opening on the lining side of the bag.

    Step Seven: Finishing

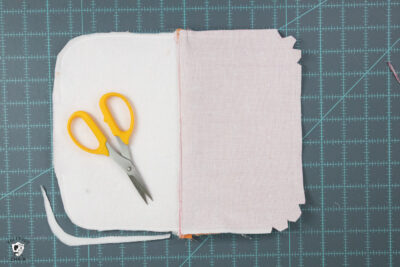
    • Trim the seam allowance of the lining down to ⅛”.
      scissors on top of white fabric on cutting mat
    • Clip the curves on the bag.
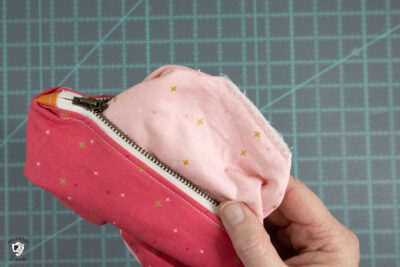
    • Turn the bag right side out through the opening you left in the lining.
    • When you’re sure that the bag is sewn correctly, close the hole in the lining with a zig-zag stitch.
      hand holding bag lining
    • Press the bag well. I recommend that you use steam for this step as it will help to smooth out any wrinkles that may have occurred during the construction process.
      Pink & orange and blue and green zippered bags on white table top with desk accessories

    Copyright Notice

    ©www.polkadotchair.com – This is Copyrighted Content. You may NOT copy it, distribute it, sell it or package it with a kit. You may NOT teach a for-fee class using it. All items are for personal use only. No commercial use is allowed.

    I can’t believe how much blogging has changed since I started in 2008. I remember wondering at that point if this “new thing” ever could turn into a business.

    How things have changed since then! The blogging world is ever-evolving and today I’m very excited to share with you that I am participating as a paid early tester for one of Google’s new pilot programs, Thank with Google.

    Thank with Google is an experimental feature that allows you to purchase a virtual sticker as a way to directly show your appreciation for the content on my website. There is so much that goes on behind the scenes and only a small percentage of that work actually shows up on my blog.

    For example, with the zip pouch tutorial that I have for you today, there are countless hours of sewing, photography, editing, website maintenance, writing, and styling that have to happen before we have a quality workable tutorial to share with all of you at no cost.

    I’m excited at the possibilities that this program has as a way for you to feel more connected and engaged with the content, tutorials, and free patterns that I’m providing you.

    There are a variety of stickers to select from and every time you send a paid sticker, you can add a personal message to me as well. For me, these virtual stickers translate into direct revenue to support the work and cost that goes into running and maintaining the site.

    I would love it if this type of support replaced traditional ad display at one point, but like I said it’s just an experiment at this time, but the possibilities are exciting to me!

    You can find the Thank with Google feature in multiple places on my site, including on my sidebar and at the top and bottom of each blog post. If you try it out let me know what you think! It’s so nice to hear from you!

    You May Also Like

    • Simple Patchwork Color Blocked Baby Quilt Tutorial
    • DIY Polka Dot Zip Pouch
    • How to Make Canvas Zip Bags Perfect for Valentine’s Day

    More Projects You'll Love!

    • collage image of several zip pouches with text overlay
      40+ Free Zipper Pouch Tutorials & Sewing Patterns
    • Fabric Selvage Zip Pouch
      Fabric Selvage Zip Pouch Sewing Tutorial
    • pencil pouch with glue stick and pencil on blue background
      Easy DIY Pencil Pouch Pattern
    • mermaid zip pouch
      Let's Be Mermaids Zip Bags
    • striped pencil pouch on white wood grain table with school supplies
      Striped Pencil Pouch Sewing Pattern
    • white canvas zip pouches with red lettering and hearts on white tabletop
      How to Make Canvas Zip Bags Perfect for Valentine's Day
    « Wind Blown Quilt Block Pattern; RBD Block #10
    Pop Star Quilt Block Pattern; RBD Block #11 »

    • Share
    • Email

    About Author

    Melissa Mortenson

    Melissa Mortenson is a blogger, designer, and content creator. She is the Polka Dot Chair blog founder and has been sharing fresh and creative ideas with readers since 2008. She is the author of “Project Teen, Handmade Gifts your Teen will Actually Love.” Her work and designs have been featured on HuffPost, TODAY, Pioneer Woman, HGTV, BuzzFeed, Better Homes & Gardens, and many other established publications. Her first fabric line, “Derby Style,” debuted in January 2015 through Riley Blake Designs.  Additional fabric collections have followed it in subsequent years. A mom of 3, she considers herself lucky to be living in Kentucky.

    Reader Interactions

    Leave a Reply Cancel reply

    Your email address will not be published. Required fields are marked *

    This site uses Akismet to reduce spam. Learn how your comment data is processed.

    Primary Sidebar

    Hello! It’s nice to meet you.

    I’m Melissa. I like to design things, like fabric, printables, and projects.

    I’m also a Mom and a Maker. I am like most of you, just trying to do my best every day. Some days I succeed, many days I fail.  I find joy in creating, if you do too, then I hope that you find something here bring a little “happy” to your life.  Find out more about me here.

    COPYRIGHT POLICY

    All my images and text are copyrighted. You may NOT use any images from this site in any kind of Video (this includes YouTube). If you would like to feature my work, you may use ONE (1) NON-COLLAGED image and must “follow” link back to my original blog post. You may NOT edit, crop, or change my images in any way without written permission. You MAY NOT print out or copy and distribute any text, images or patterns from this site. All patterns, content, instructions, and templates are for personal use ONLY! Thank you! Violators will be reported.

    Footer

    ↑ back to top

    About

    • Privacy Policy
    • Disclaimers
    • About Melissa

    Newsletter

    • Sign Up! for emails and updates

    Contact

    • Contact
    • FAQ
    • Press
    • Fabric Collections

    Welcome to the Polka Dot Chair! Here you’ll find easy, step-by-step, sewing, quilting, and crafting projects. We design projects for Makers of all skill levels. Beginners are welcome!

    DISCLAIMER:

    While every effort has been made to ensure the accuracy of the content on this website, the information is made available without warranty of any kind. The Polka Dot Chair accepts no responsibility or liability, whether direct or indirect, as to the currency or accuracy of the information, nor any consequence of its uses. This website is not intended to substitute the advice of a professional.

    Copyright © 2020 Polka Dot Chair

    [ Placeholder content for popup link ] WordPress Download Manager - Best Download Management Plugin