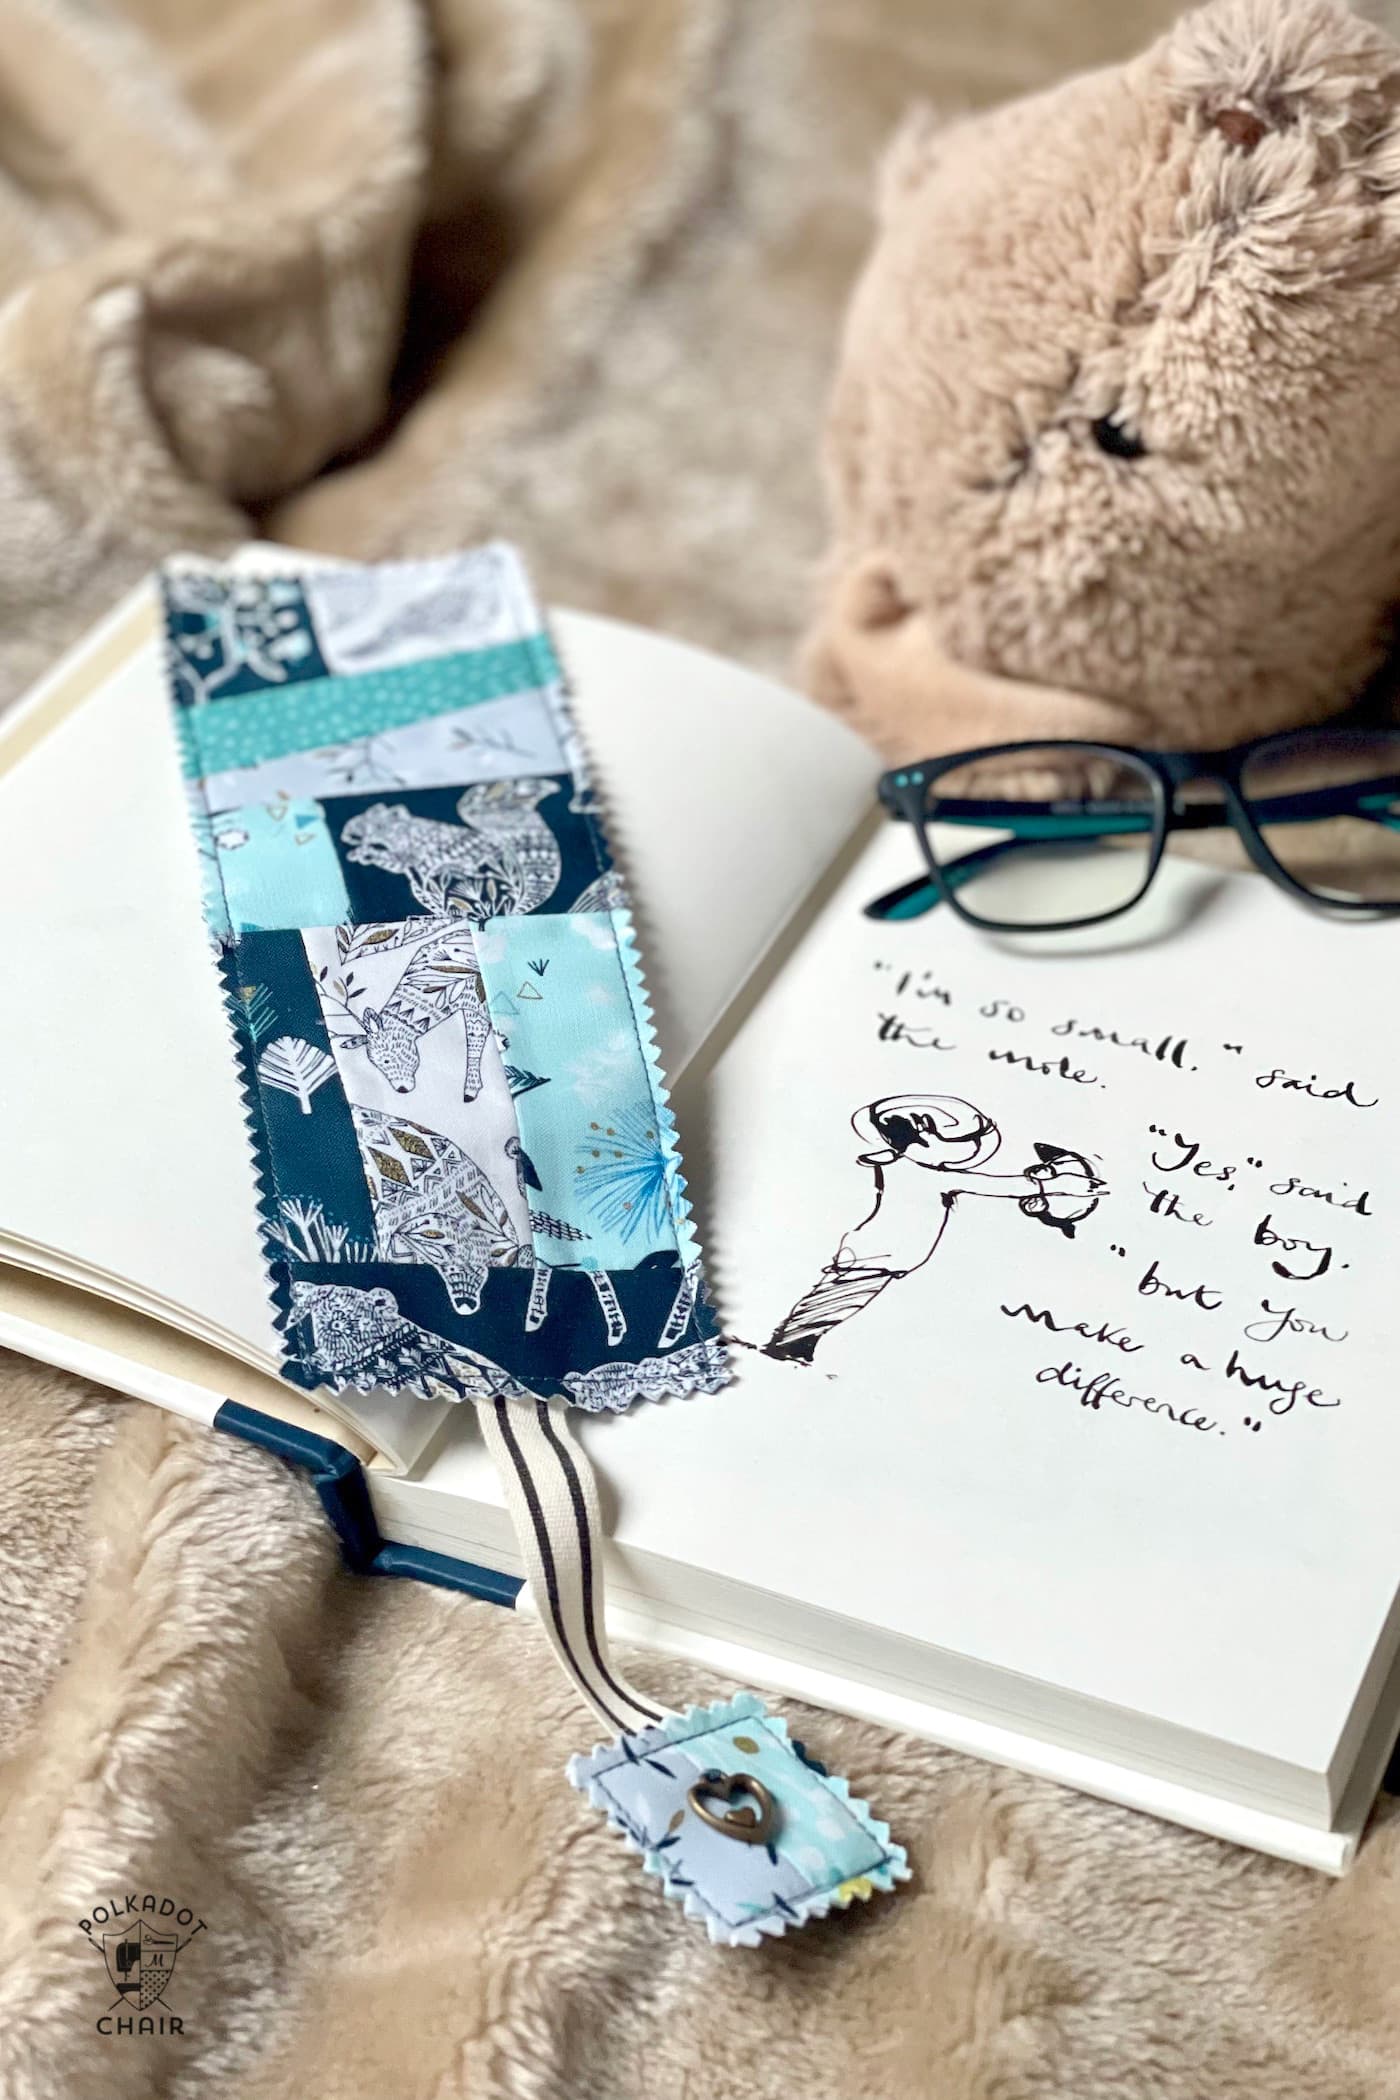
First Edition; Book Quilt Block Mug Rug Pattern
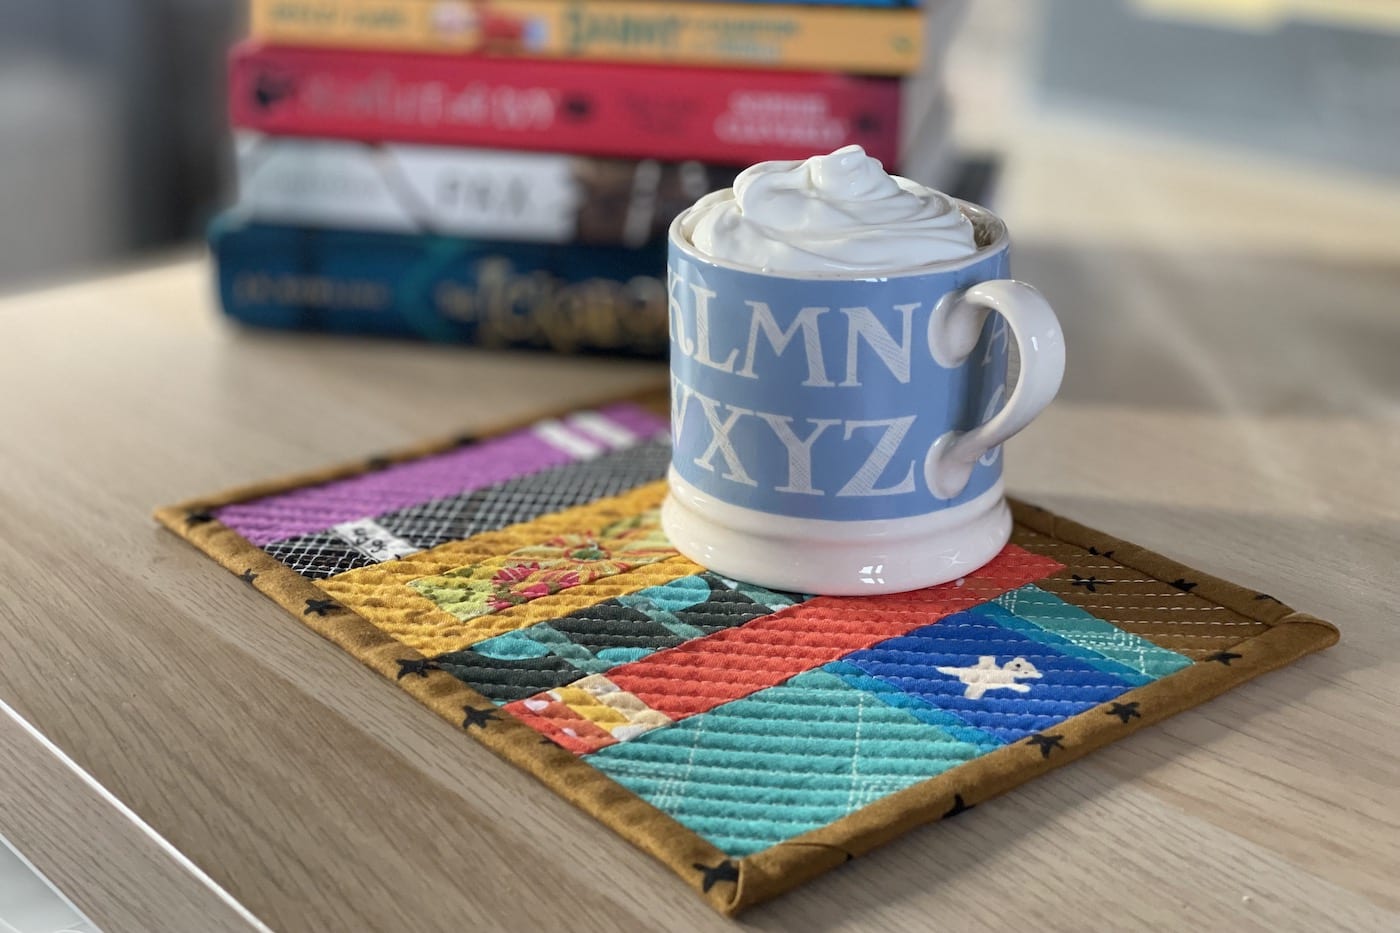
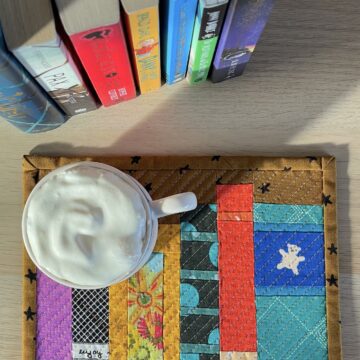
Our February Mug Rug of the Month free pattern is perfect for cold winter nights! It is created from a row of Book Quilt Blocks and is just the right size to hold your cocoa and cookies while you curl up with a good book!
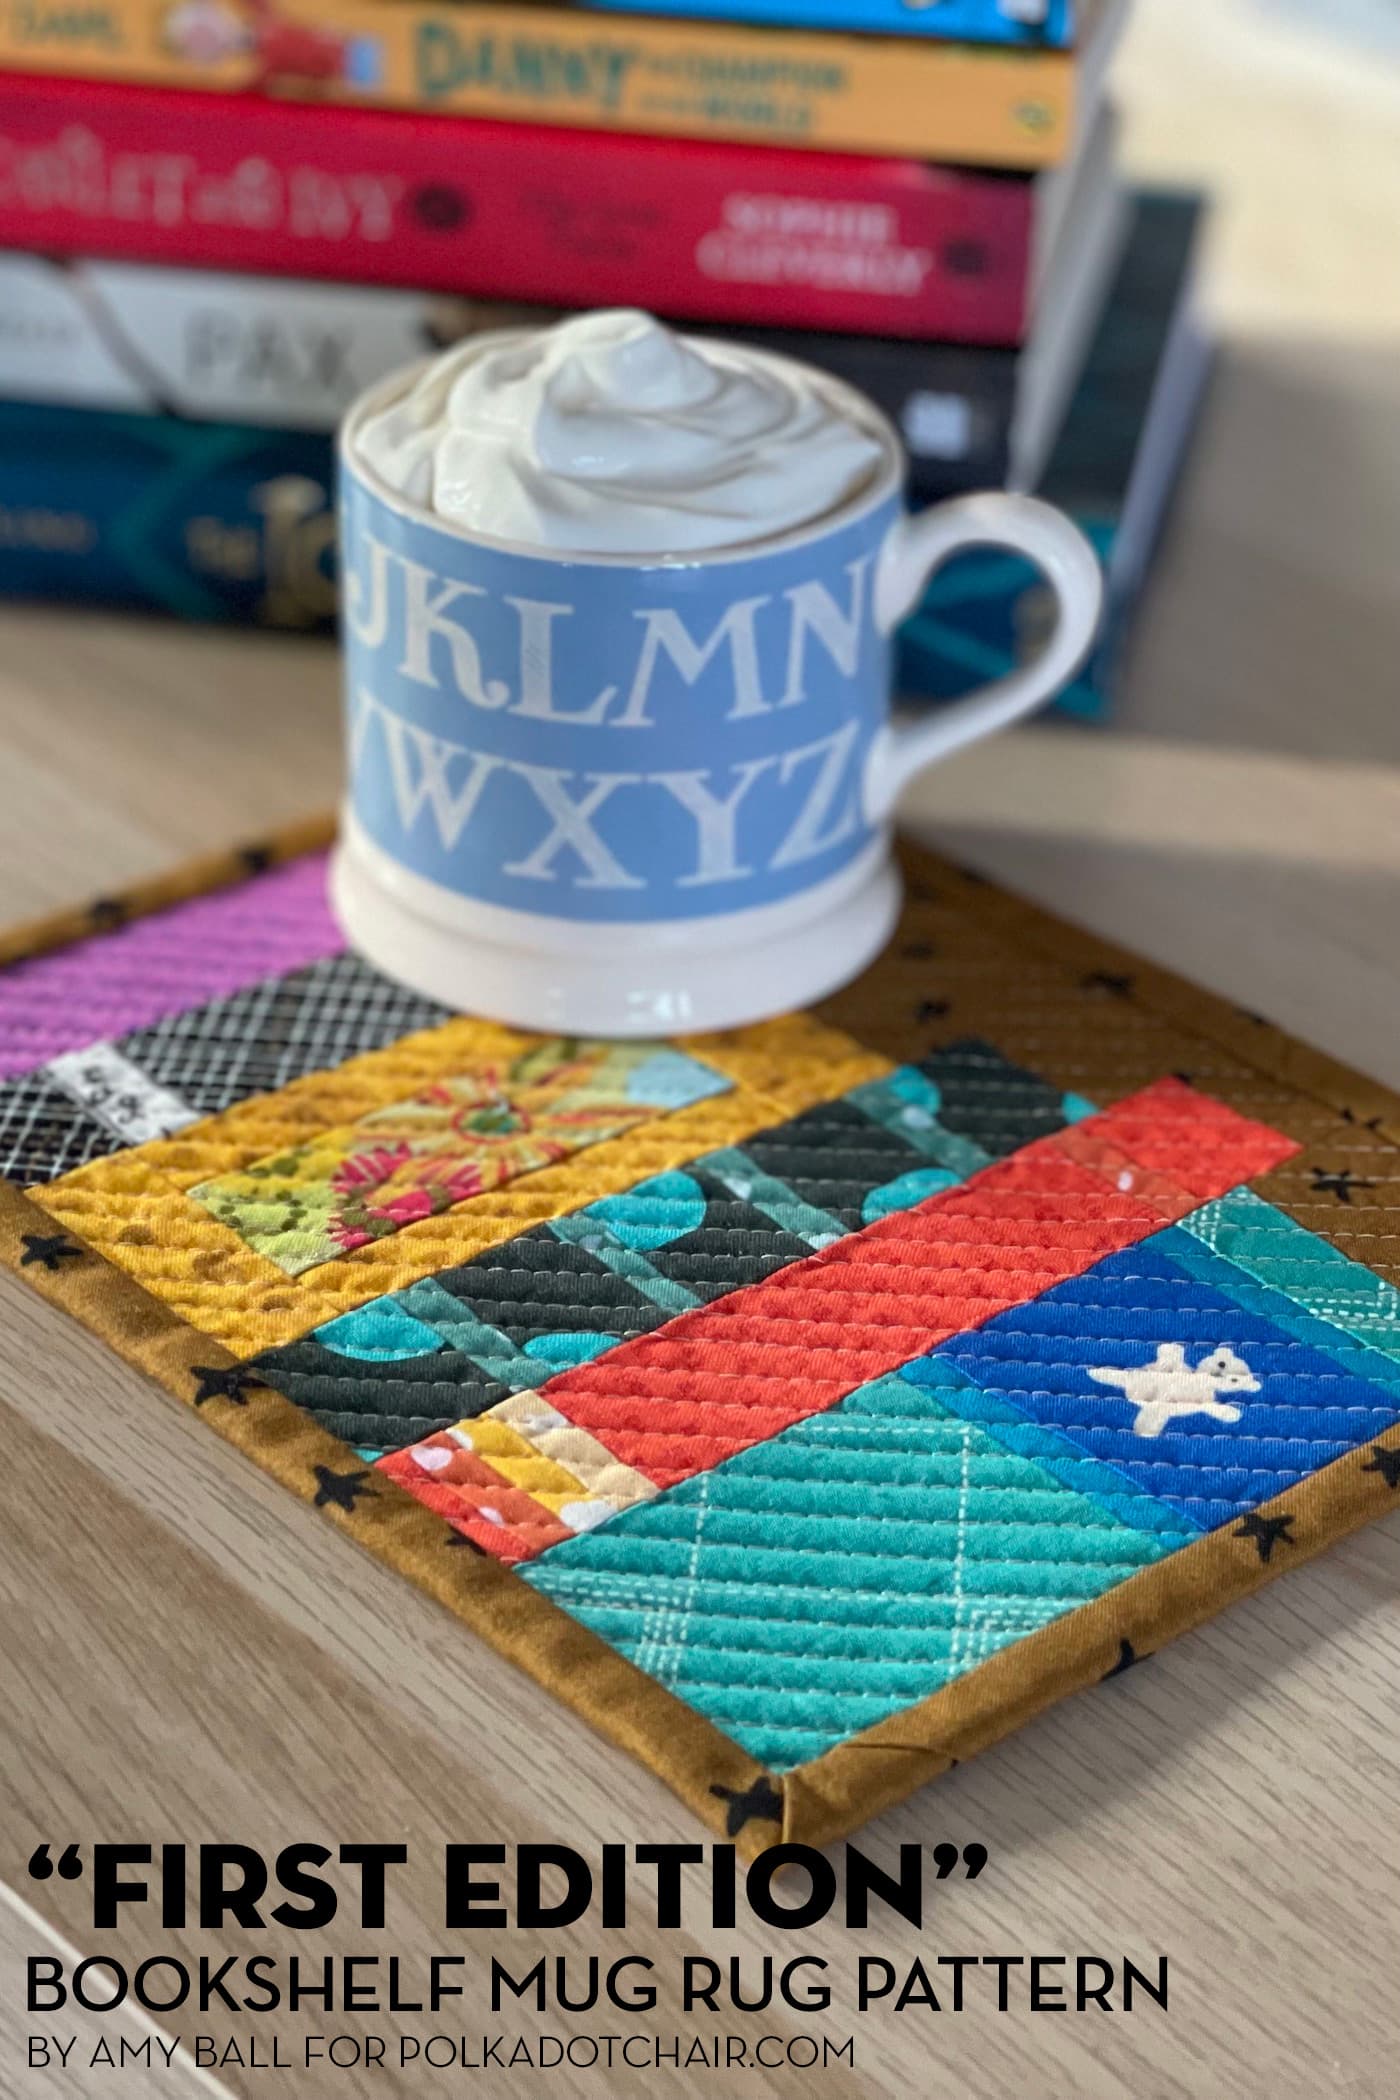
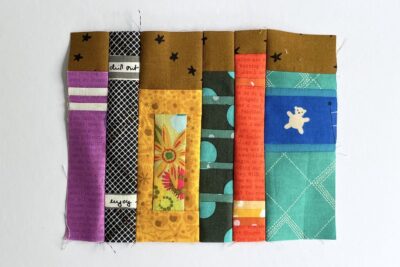
I love nothing more than sitting down with a coffee and a good book. This seemed like the perfect excuse to create a bookshelf mug rug! This design is a great way to use up some scraps because the pieces are small.
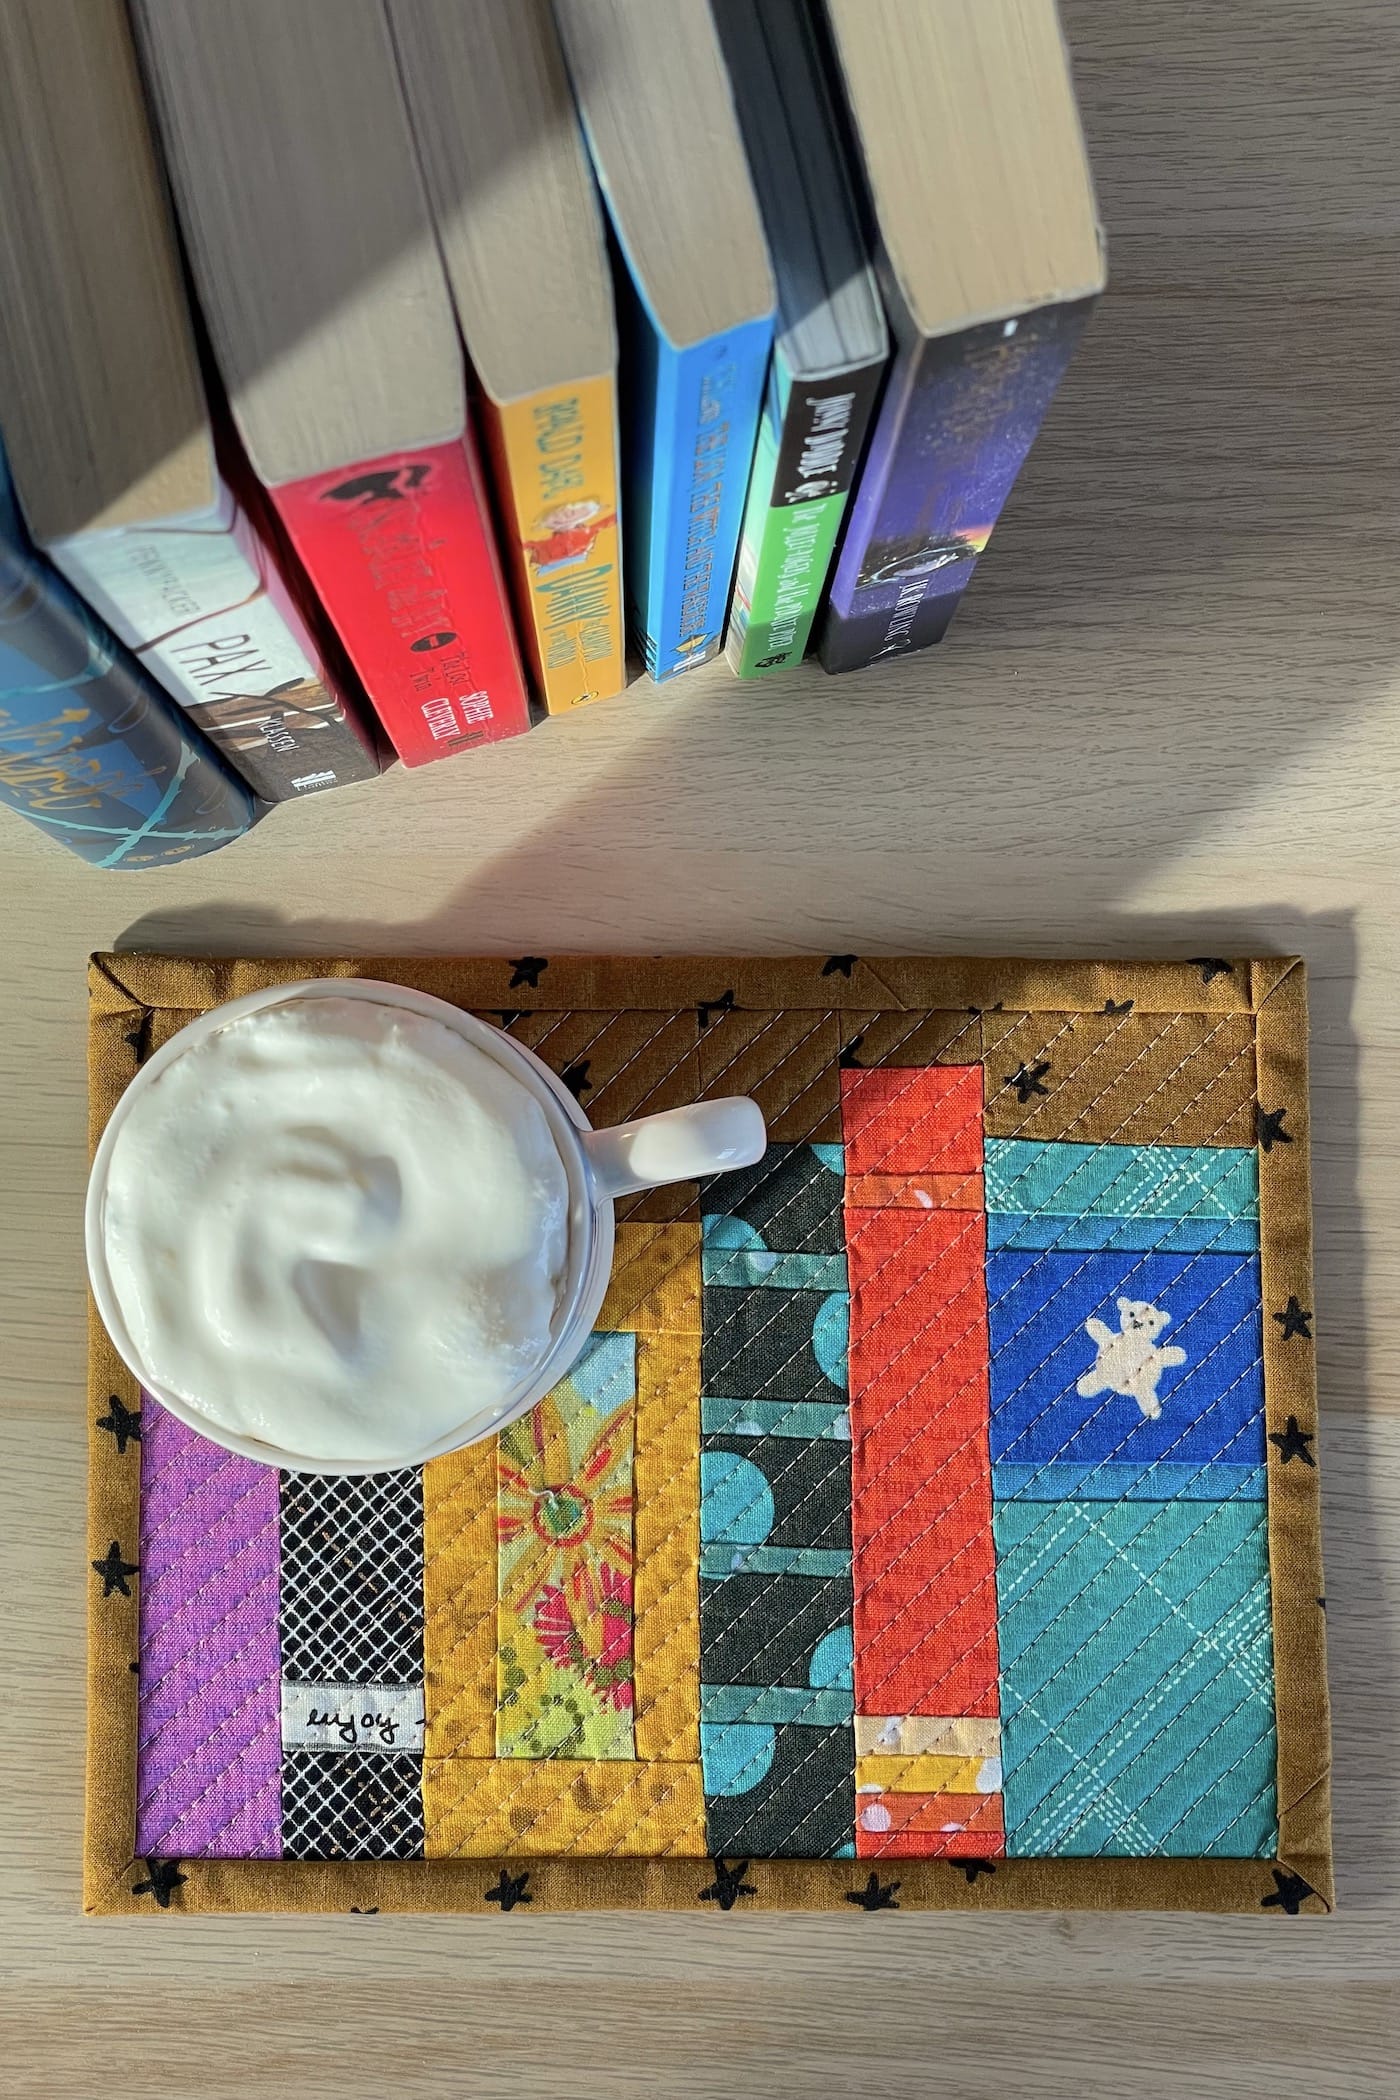
The skill focus for this month is fussy cutting; look for some favorite fabrics with lovely details or images you’d like to highlight.
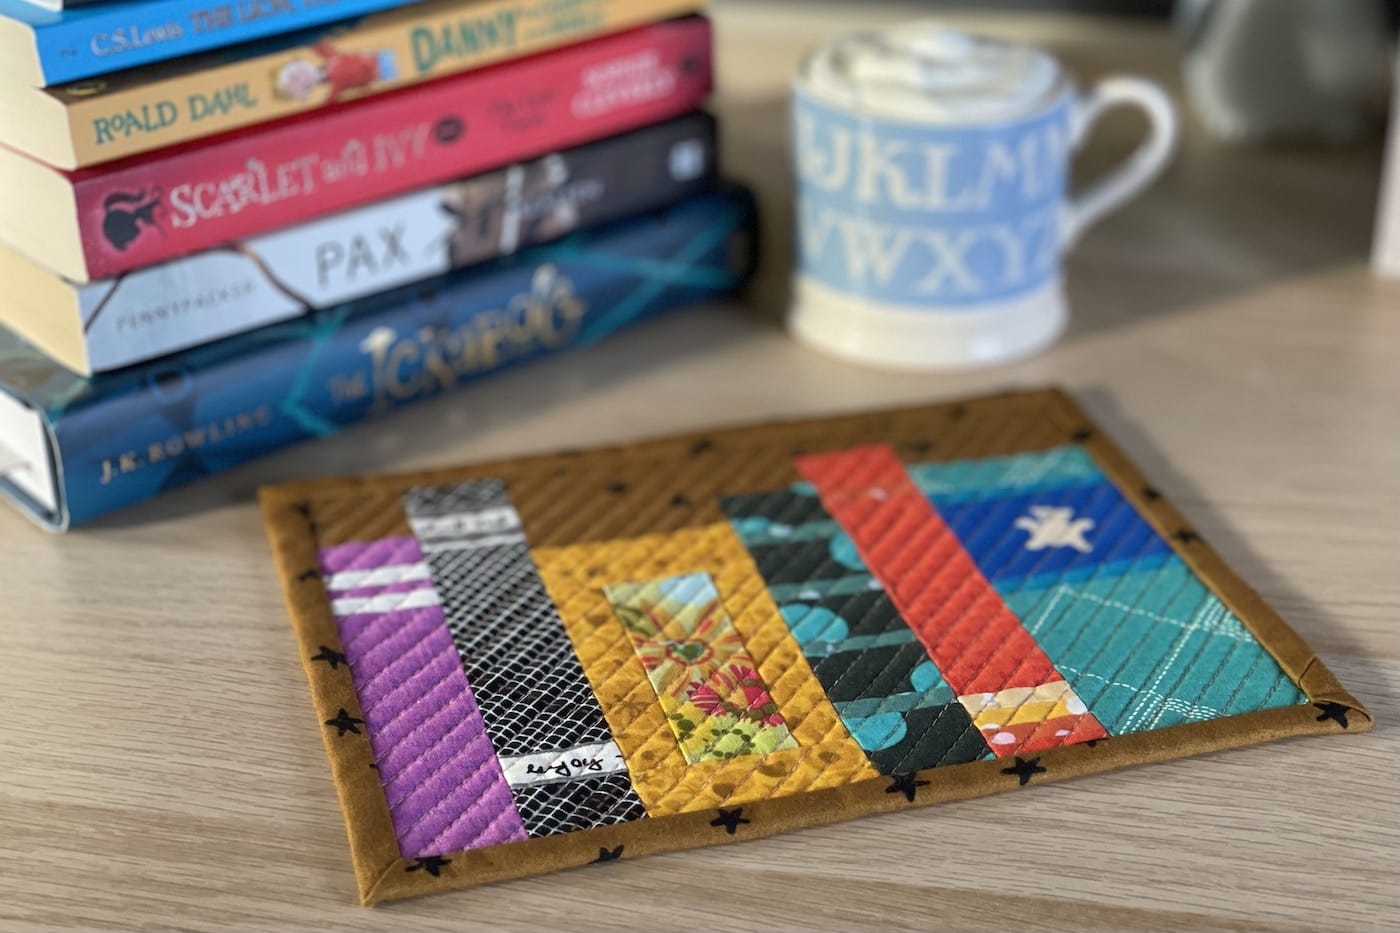
I have used many different fabrics for my mug rug because my bookshelves always look mismatched, but you could use all the same colors or similar colors to create a more orderly selection of books.
Mug Rug Tutorials & Skill Highlights
- January: Fabric Flash Mug Rug – Using Selvages
- February: First Edition Mug Rug – Fussy Cutting
- March: English Bloom Mug Rug – English Paper Piecing (EPP)
- April: Coffee Cabin Mug Rug – Binding with Quilt Backing
- May: Street Party Bunting – Raw Edge Applique
- June: Big Stitch Mug Rug – Hand Quilting
- July: Summer Sun Mug Rug – Improv Piecing
- August: Heart Mug Rug – Patchwork Piecing
- September: Pumpkin Face Mug Rug – Reverse Applique
- October: Cozy Cup Mug Rug – Big Stitch Binding
- November: Christmas Tree Mug Rug – Free Motion Quilting
Supplies Required
Fabrics:
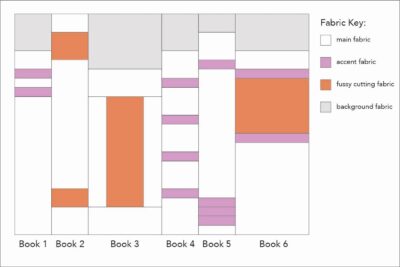
Selection of scraps (you’ll need main fabric, accent fabric, fussy cutting fabric, and background fabric)
Backing and binding fabric; 1 fat quarter
Batting 10” x 8”
Tips for Fussy Cutting
- Don’t forget about the fabric that will become hidden in the ¼” seam allowance when choosing what to have as your fussy cutting focus.
- Think about the motif size and the size of the fabric piece.
- Remember that fussy cutting doesn’t have to put the main focus in the center of the fabric piece. For example, a flower motif coming out of one corner of your fabric piece can be just as effective as placing the flower centrally.
- As this design uses fussy cut pieces in a few different sizes, I’d recommend using one of the following methods to cut your fussy cutting pieces:
a) Use an acrylic quilting ruler so you can see the fabric design through the ruler. To make it even easier to visualize before you cut the fabric, add washi tape to mark the size of fabric piece.
b) Draw the outline of where you might cut the fabric to double-check the fussy cutting focus will appear where you want to it. Make sure you use a pen that can easily be removed from the fabric in case you don’t get it in the right place the first time.
Instructions
First Edition Mug Rug
Equipment
supplies
Fabrics:
- Selection of scraps you’ll need main fabric, accent fabric, fussy cutting fabric and background fabric
- 1 Fat Quarter Backing and binding fabric
- 1 piece Batting 10” x 8”
Instructions
Cutting:
- From backing/binding fabric cut: 10” x 8” (1), and WOF x 2¼” (3). For Book One: From main fabric cut 1½” x 1” (1), 1½” x ¾” (1), and 1½” x 4½” (1). From accent fabric cut 1½” x ¾” (2). For Book Two: From main fabric cut 1½” x 1” (1), 1½” x 4” (1), and 1½” x 1¼” (1). From fussy cutting fabric cut 1½” x 1¼” (1) and 1½” x 1” (1). For Book Three: From main fabric cut 2½” x 1¼” (2) and 1” x 3½” (2). From fussy cutting fabric cut 1½” x 3½” (1). For Book Four: From main fabric cut 1½” x 1¼” (4) and 1½” square (1). From accent fabric cut 1½” x ¾” (1). For Book Five. From main fabric cut 1½” x 1¼” (1), 1½” x 4” (1), and 1½” x ¾” (1). From accent fabric cut 1½” x ¾” (4).For Book Six: From main fabric cut 2½” x 1” (1) and 2½” x 3” (1). From accent fabric cut 2½” x ¾” (2). From fussy cutting fabric cut 2½” x 2” (1).From background fabric cut 1½” square (2), 2½” x 2” (1), 1½” x 1” (1), and 2½” x 1½” (1).

Construction: Use a ¼” seam allowance unless otherwise stated.
- Take the Book One fabric and one background 1½” square. Sew the pieces together in the following order: one background fabric 1½” square, one main fabric 1½” x 1” rectangle, one accent fabric 1½” x ¾” rectangle, one main fabric 1½” x ¾” rectangle, one accent fabric 1½” x ¾” rectangle, and one main fabric 1½” x 4½” rectangle. Press well and set aside.

- Take the Book Two fabric. Sew the pieces together in the following order: one main fabric 1½” x 1” rectangle, one fussy cut fabric 1½” x 1¼” rectangle, one main fabric 1½” x 4” rectangle, one fussy cut fabric 1½” x 1” rectangle, and one main fabric 1½” x 1¼” rectangle. Press well and set aside.
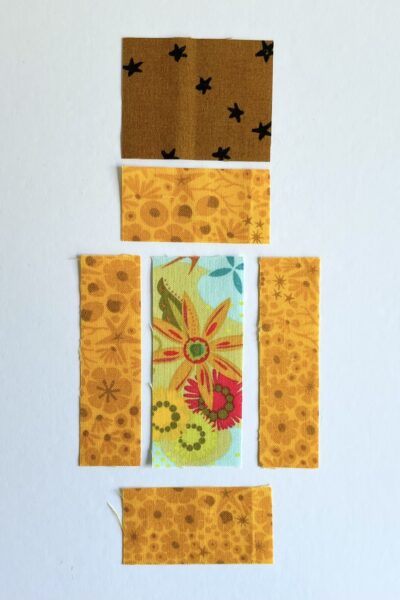
- Take the Book Three fabric and one background 2½” x 2” rectangle. Sew together two 1” x 3½” rectangles and one fussy cut fabric 1½” x 3½” rectangle, matching the long edges and with the fussy cut fabric in the centre. Then sew the remaining pieces and this small unit together in the following order: one background fabric 2½” x 2” rectangle, one main fabric 1” x 3½” rectangle, the fussy cut unit, and one main fabric 1” x 3½” rectangle. Press well and set aside.
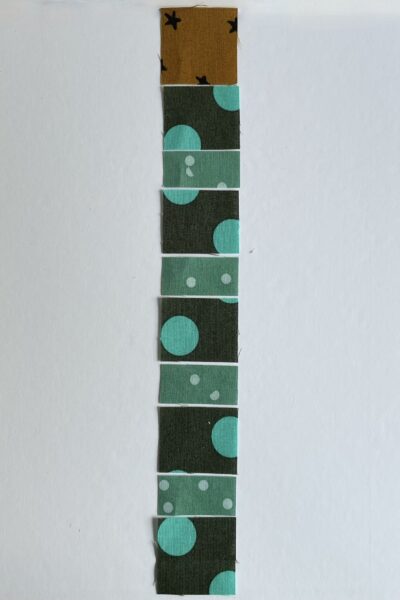
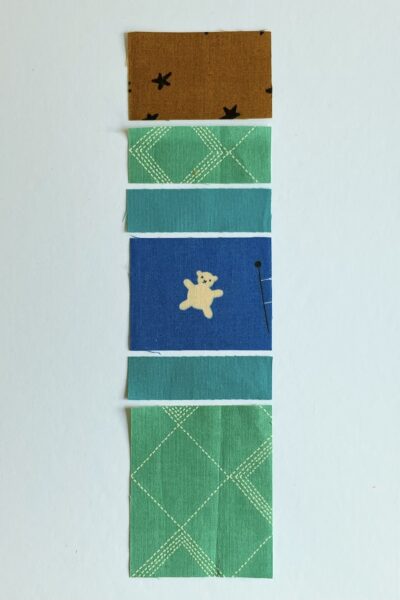
- Take the Book Four fabric and one background 1½” square. Sew the pieces together in the following order: one background fabric 1½” square, one main fabric 1½” x 1¼” rectangle, one accent fabric 1½” x ¾” rectangle, one main fabric 1½” x 1¼” rectangle, one accent fabric 1½” x ¾” rectangle, one main fabric 1½” x 1¼” rectangle, one accent fabric 1½” x ¾” rectangle, one main fabric 1½” x 1¼” rectangle, one accent fabric 1½” x ¾” rectangle, and one main fabric 1½” square. Press well and set aside.
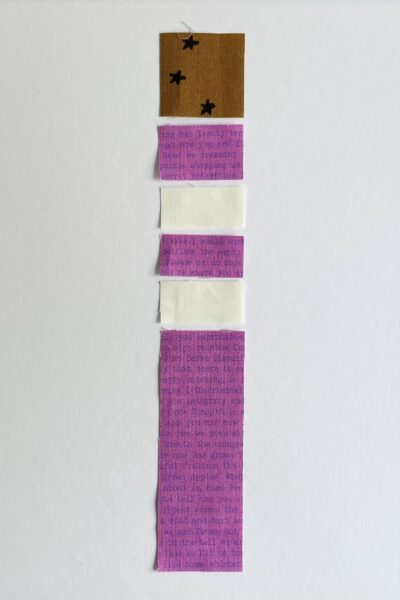
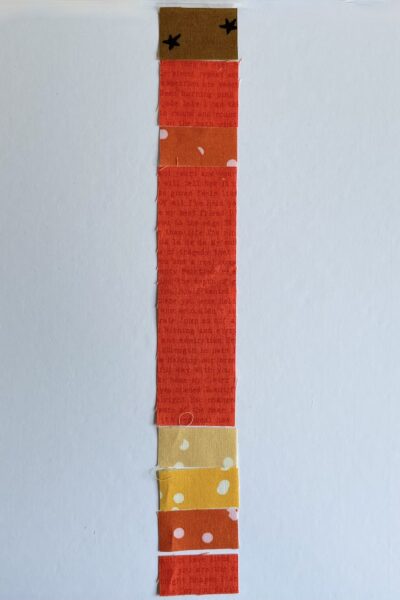
- Take the Book Five fabric and one background 1½” x 1” rectangle. Sew the pieces together in the following order: one background fabric 1½” x 1” rectangle, one main fabric 1½” x 1¼” rectangle, one accent fabric 1½” x ¾” rectangle, one main fabric 1½” x 4” rectangle, three accent fabric 1½” x ¾” rectangles, and one main fabric 1½” x ¾” rectangle. Press well and set aside.
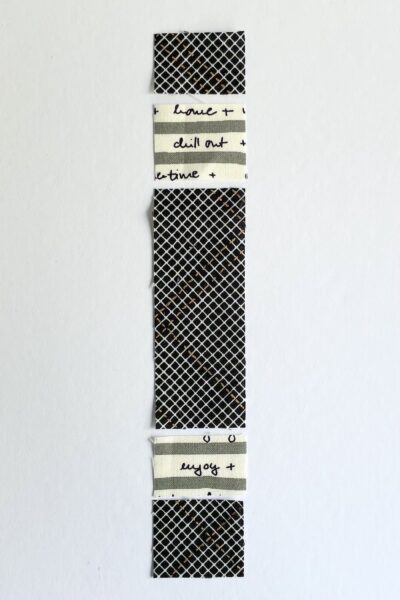
- Take the Book Six fabric and one background 2½” x 1½” rectangle. Sew the pieces together in the following order: one background fabric 2½” x 1½” rectangle, one main fabric 2½” x 1” rectangle, one accent fabric 2½” x ¾” rectangle, one fussy cut fabric 2½” x 2” rectangle, one accent fabric 2½” x ¾” rectangle, and one main fabric 2½” x 3”. Press well and set aside.
- Take all six book units, in the order you made them, and sew together matching the long edges. Press well; I recommend pressing these seams open to avoid excess bulk.

Quilting and Finishing:
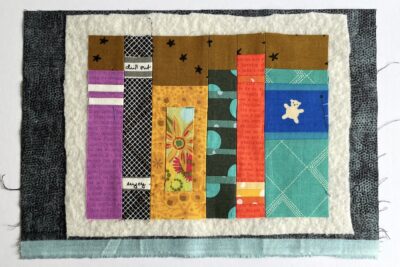
- Take the backing fabric 10” x 8” rectangle and place it right side facing down, put the batting on top, then add the pieced mug rug top with the right side facing towards you. Make sure all the layers are smooth and flat then baste the layers together using your preferred method.
- Quilt as desired. I have used diagonal (45°) straight line quilting with ¼” spacing. I started by quilting the lines at 1” spacing, then added lines in the middle of these spaces (creating ½” spacing) and finally added lines in the middle of these spaces.
- Once you have finished quilting, trim off the excess backing fabric and batting, and square up the mug rug if required.
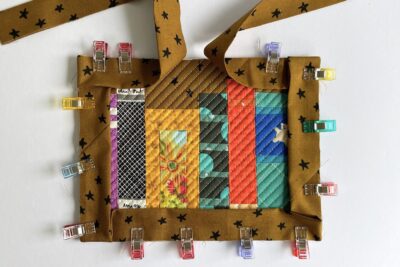
- Take three binding fabric WOF x 2¼” strips. Draw a 45° line on the wrong side of two strips, at the top corner from top left to bottom right. Pin the strips (right sides together) so the strips are at a right angle to each other and the drawn lines are visible. Sew along the drawn lines then trim off the excess corner fabric with a ¼” seam allowance and press to create a long strip. Fold the strip in half along the full length (wrong sides together) and press.
- Pin/clip the binding in place on the front, round the mug rug edges, with the raw edges of the binding and raw edge of the mug rug matching up. [TIP: Clip the binding around all four edges before you start sewing to make sure the seam lines from when you joined the three strips aren’t going to be close to any of the corners as this would create too much bulk; ideally you want the binding seams to be close to the middle of the edges.]
- Sew the binding to the front of the mug rug using a ¼” seam allowance, in the same way you would add binding to a quilt top. Take your time to give the four corners neat mitres.
- Fold and press the binding round to the back. Pin/clip in place, making sure your mitred corners are nice and neat, and hand sew the binding in place.
- Make a hot drink, grab your current book and enjoy your new First Edition mug rug!


Amy lives in the north of England with her husband and son. When she’s not sewing and quilting, Amy can usually be found baking or reading. You can find her on Instagram @amyatthegate
I have been saving selvages for a long time and using them for mug rugs and/or fabric to make bags or quilt blocks. With my mug rugs, I sew the selvages thru all three layers so quilting lines show thru the front and back. Enjoy receiving your site and learning new tips.