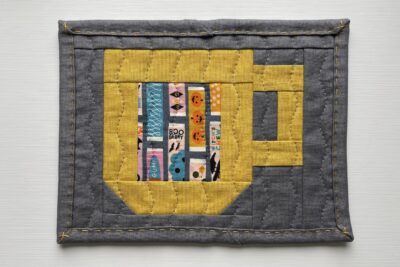
Cozy Cup Mug Rug Pattern
Create a cute and cozy mug rug with our free mug quilt block and instructions. The Cozy Cup Mug Rug is our October free mug rug pattern designed by Amy Ball.
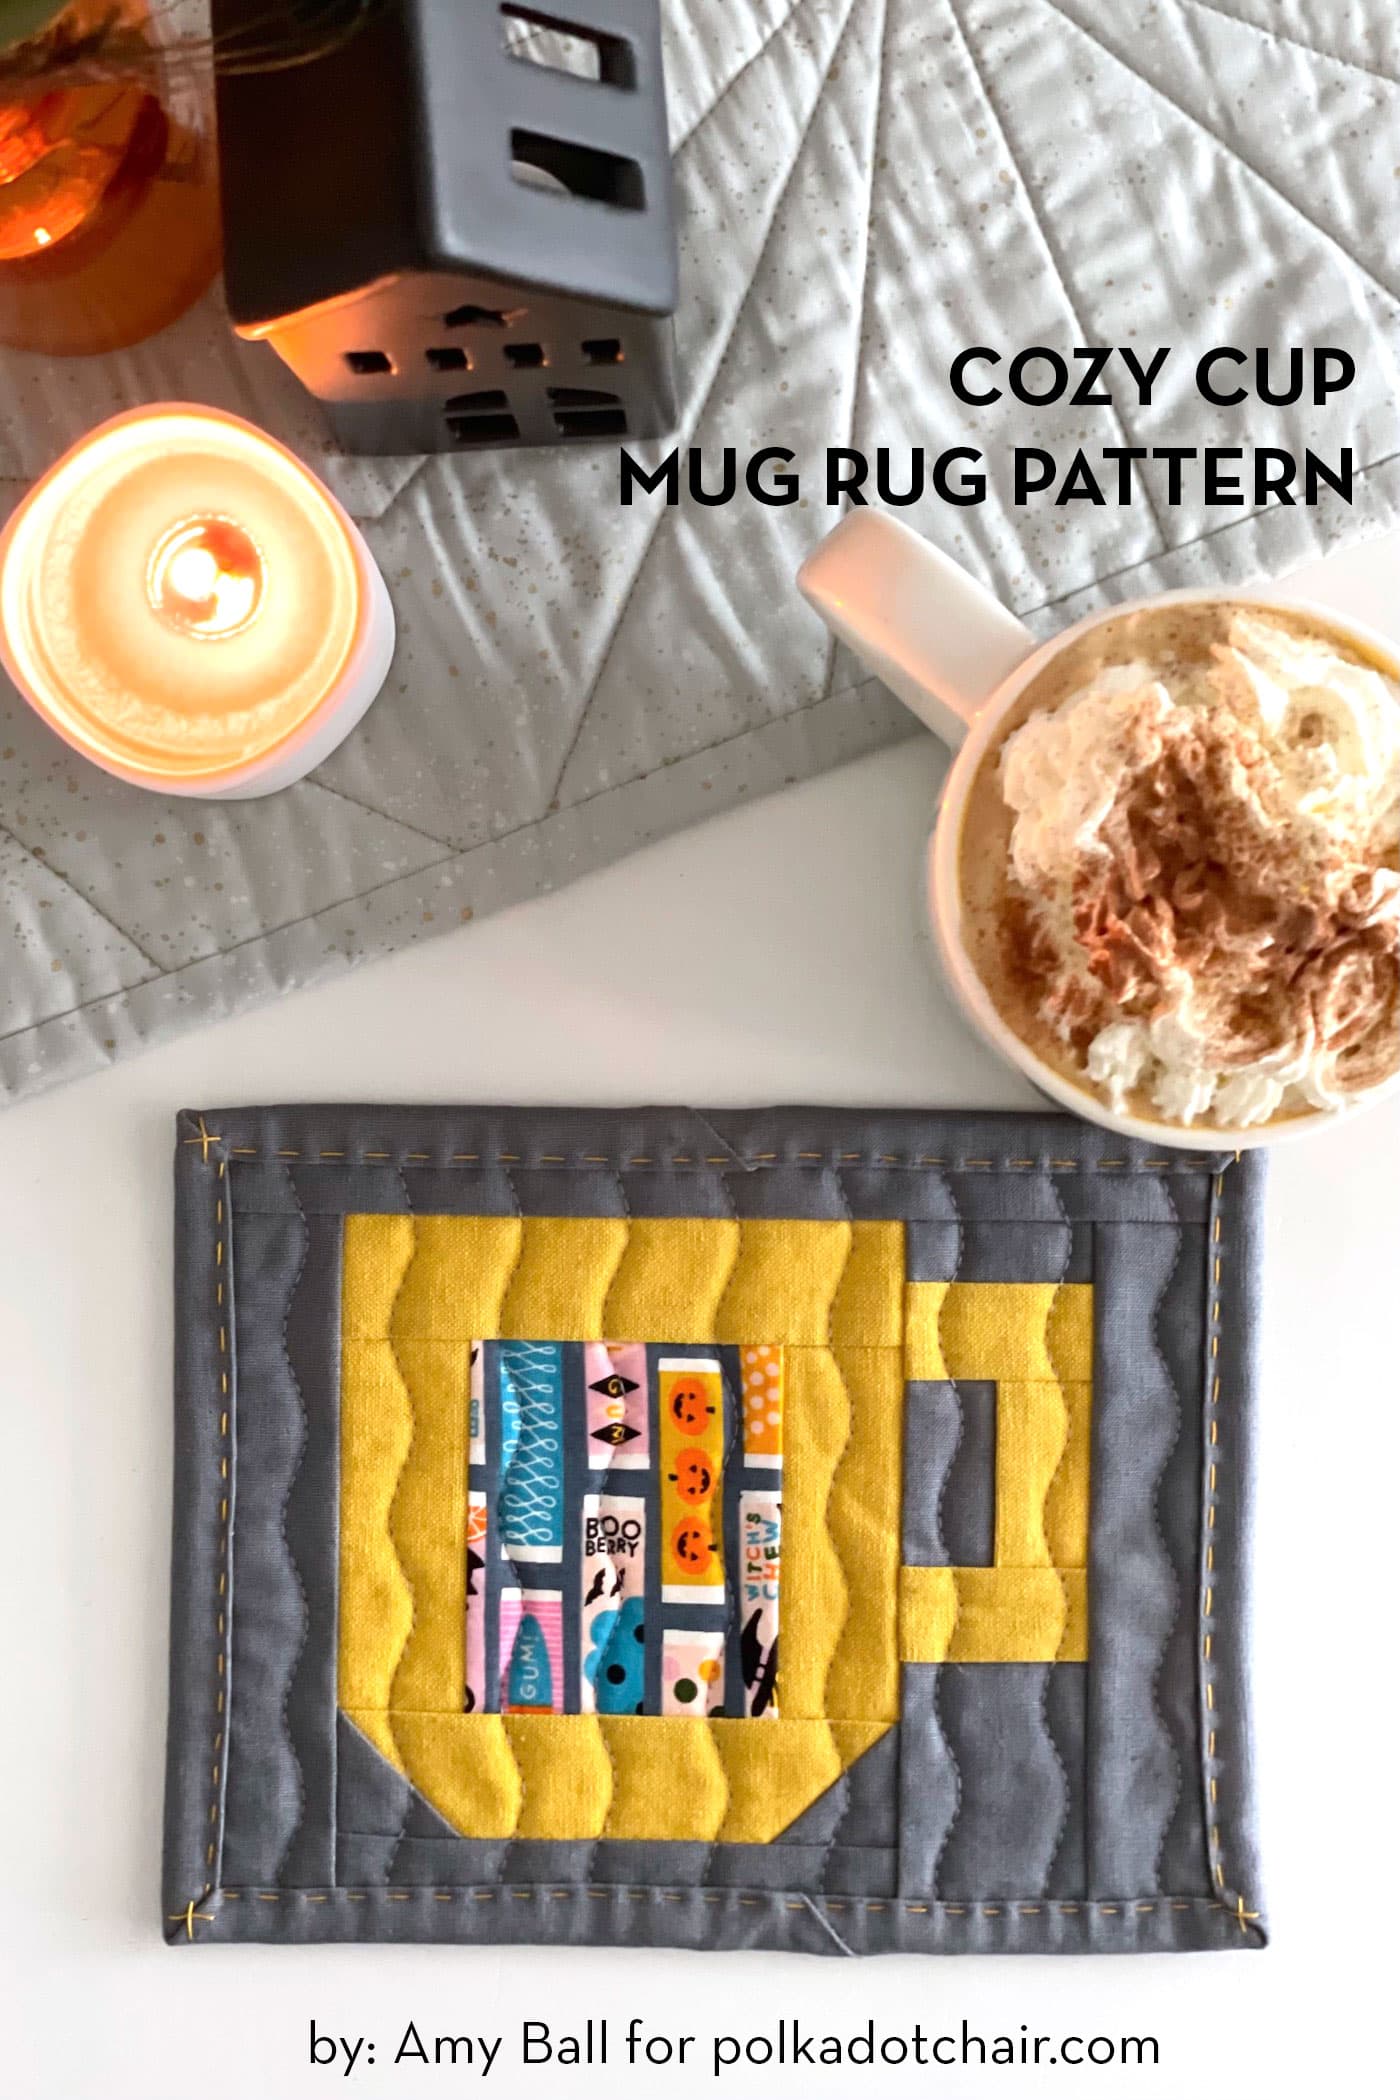
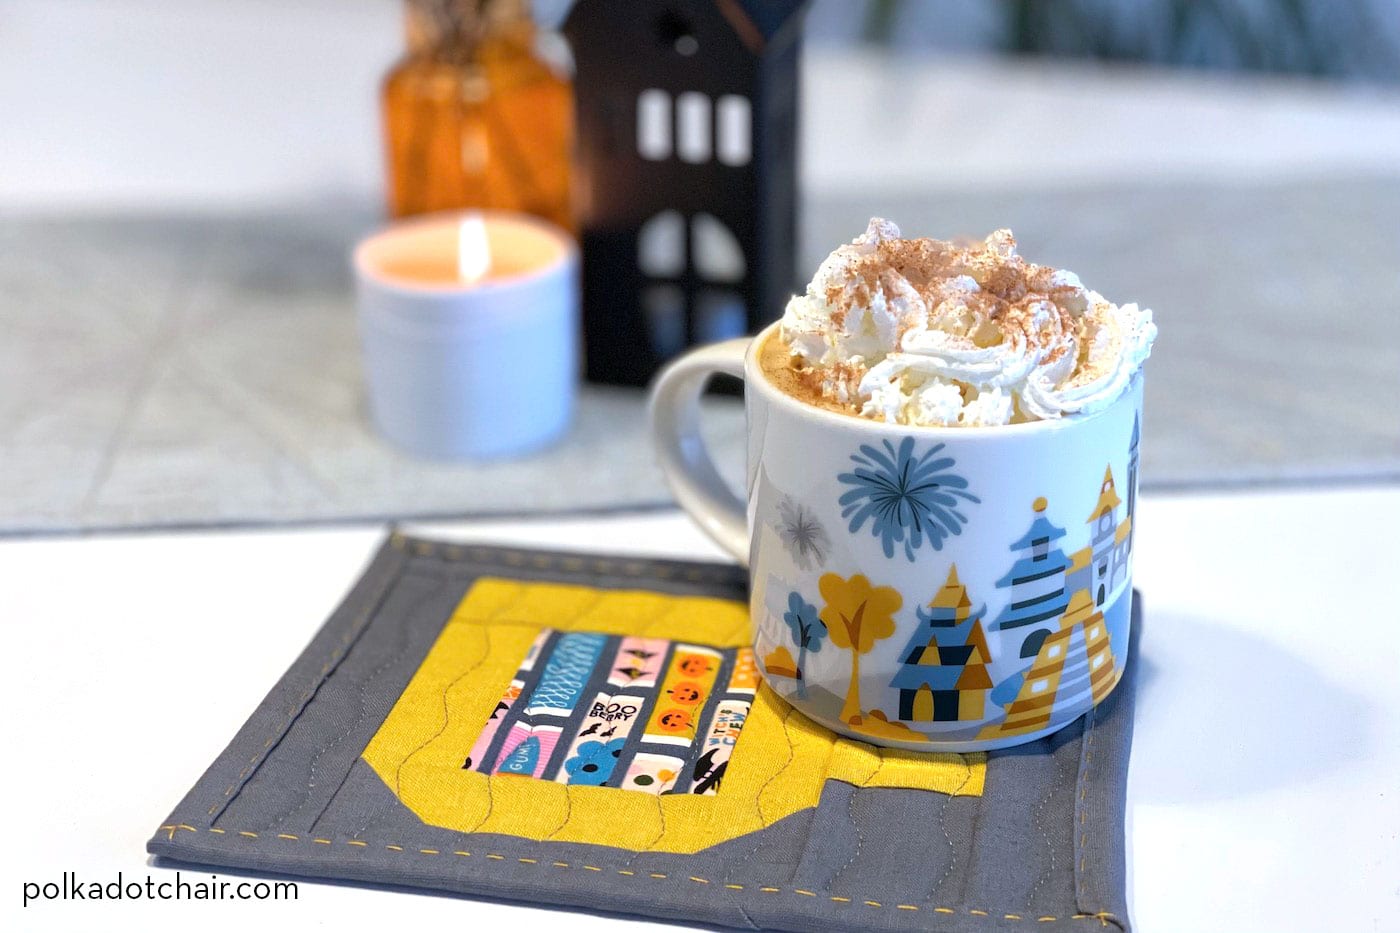
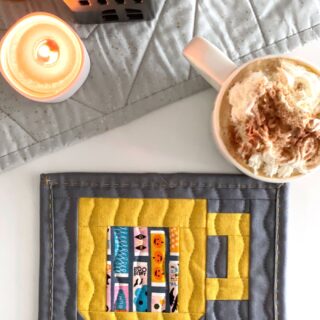
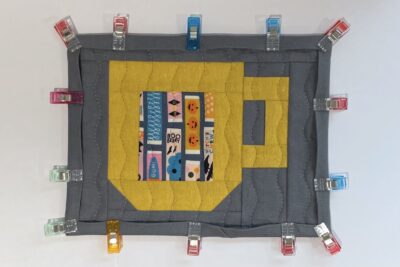
It’s definitely cozy season now, and for me, that says a warm cider or hot chocolate with a generous serving of whipped cream. And what better mug rug to have under your cozy drink than one featuring a cozy cup?
The piecing of the mug quilt block gives you a chance to showcase a favorite fabric in the center…I’ve chosen a Halloween one.
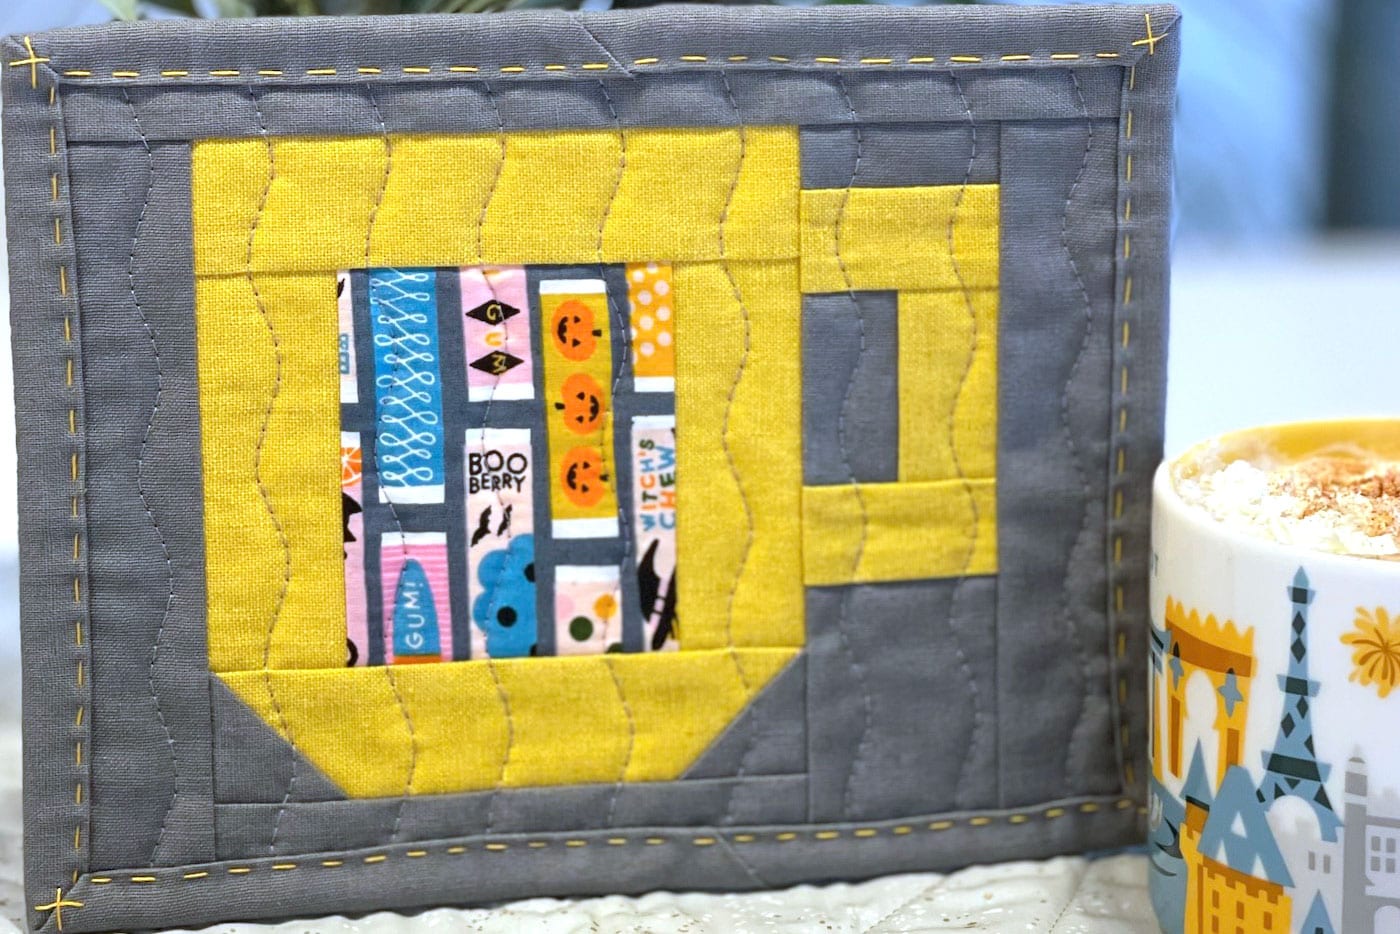
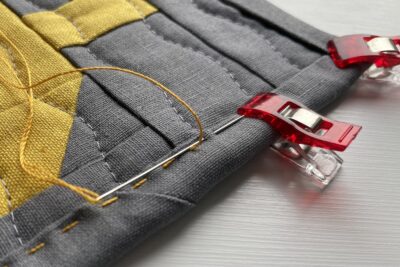
This month’s skills focus is big stitch binding. Instead of attaching the binding with discreet and delicate hand stitching on the back, we will add the binding by using a chunky running stitch on the front of the mug rug.
I love the rustic feel this adds to a project, and I think it matches the cozy cup theme of this design really well. I’ve used a thread color that contrasts with the binding (and coordinates with the cup colors), so it really stands out, but you could use a matching thread color for a more subtle look.
Monthly Mug Rug Free Patterns & Skill Focus
- January: Fabric Flash Mug Rug – Using Selvages
- February: First Edition Mug Rug – Fussy Cutting
- March: English Bloom Mug Rug – English Paper Piecing (EPP)
- April: Coffee Cabin Mug Rug – Binding with Quilt Backing
- May: Street Party Bunting – Raw Edge Applique
- June: Big Stitch Mug Rug – Hand Quilting
- July: Summer Sun Mug Rug – Improv Piecing
- August: Heart Mug Rug – Patchwork Piecing
- September: Pumpkin Face Mug Rug – Reverse Applique
- October: Cozy Cup Mug Rug – Big Stitch Binding
- November: Christmas Tree Mug Rug – Free Motion Quilting
Supplies Needed
Tools
- basic sewing tools
- sewing machine
- cutting mat
- rotary cutter
- quilting ruler
- pins or clips
- fabric pen
Fabrics
- Main Fabric 1 fat eighth
- Centre Fabric small scrap
- Background, Backing, and Binding Fabric 1 fat quarter
- Batting 9” x 7” (1)
Instructions
Cozy Cup Mug Rug Pattern
Equipment
supplies
- 1 fat eighth Main Fabric
- 1 small scrap Center Fabric
- 1 fat quarter Background, Backing & Binding Fabric
- 1 piece Batting 9” x 7”
Instructions
Cutting:
- From Main Fabric cut: 5” x 1½” (2), 2” x 1¼” (2), 1½” x 3½” (2), and 1¼” x 2” (1).
- From Centre Fabric cut 3” x 3½” (1).
- From Background/Backing/Binding Fabric (BBB Fabric) cut: 9” x 7” (1), 8½” x 1” (1), 5” x 1” (1), 2” x 2½” (1), 2” x 1” (1), 1½” x 6” (2),1½” square (2), 1¼” x 2” (1) and WOF x 2¼” (2).
Construction:
- Use a ¼” seam allowance unless stated otherwise.
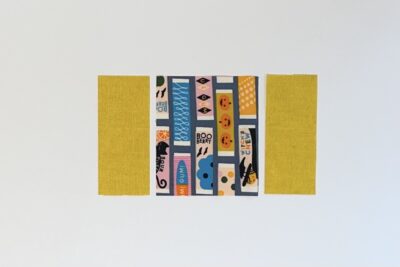
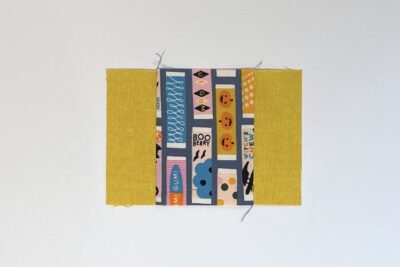
- Take two Main Fabric 1½” x 3½” rectangles and one Centre Fabric 3” x 3½” rectangle. Sew together, matching the long edges, with the Centre Fabric in the middle.

- Press and set aside.
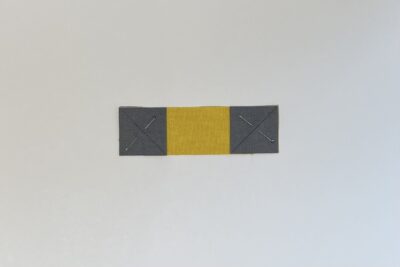
- Take two BBB Fabric 1½” squares and draw a diagonal line on each. Pin the two squares, right sides together, to the corners of one Main Fabric 5” x 1½” rectangle with the left diagonal line running top left to bottom right, and the right diagonal line running top right to bottom left.
- Sew along the drawn lines, trim off the excess fabric, and then press the BBB Fabric out.
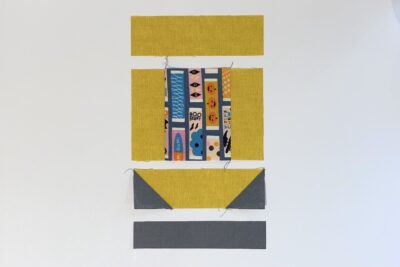
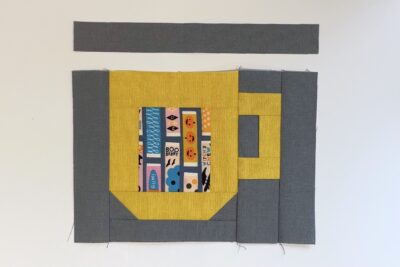
- Take one Main Fabric 5” x 1½” rectangle, the unit from Step 1, the unit from Step 3, and one BBB Fabric 5” x 1” rectangle and sew them together in this order. Use the photos as a guide for placement.
- Set aside.
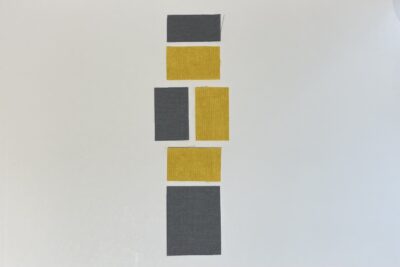
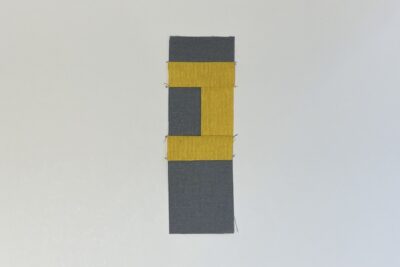
- Take one BBB Fabric 2” x 1” rectangle, one Main Fabric 2” x 1¼” rectangle, one BBB Fabric 1¼” x 2” rectangle, one Main Fabric 1¼” x 2” rectangle, one Main Fabric 2” x 1¼” rectangle, and one BBB Fabric 2” x 2½” rectangle. Start by sewing the two 1¼” x 2” rectangles together along their long edges, then sew the pieces together in the order listed.
- Use the photos as a guide for placement.
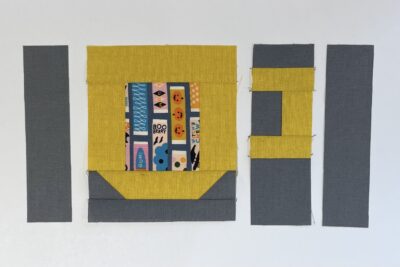
- Take one BBB Fabric 1½” x 6” rectangle, the unit from Step 6, the unit from Step 8, and another BBB Fabric 1½” x 6” rectangle. Sew together in this order, matching the long edges. Use the photos as a guide for placement.
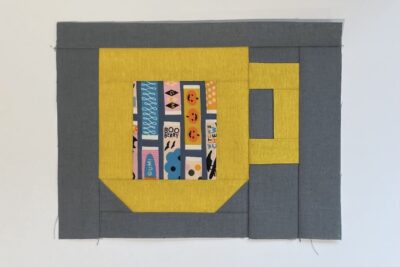
- Take one BBB Fabric 8½” x 1” rectangle and sew it to the top edge of the unit from step 8.
- Press well.

Finishing:
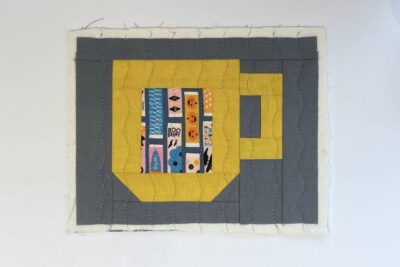
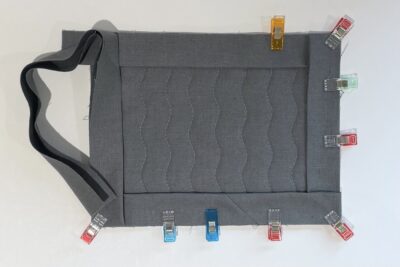
- Take the BBB Fabric 9” x 7” rectangle and place it right side facing down. Add the batting rectangle on top and then place the pieced mug rug block on top, with the right side facing towards you. Make sure all the layers are smooth and flat, then baste together using your preferred method.
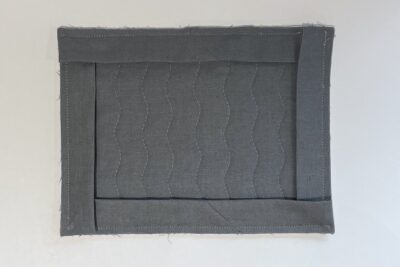
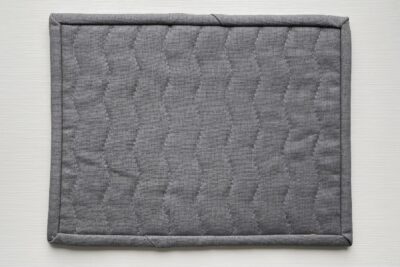
- Quilt as desired. I have used vertical wavy lines of machine quilting spaced at ⅞”.
- Once finished, trim off the excess batting and backing fabric, and square up the mug rug if required.
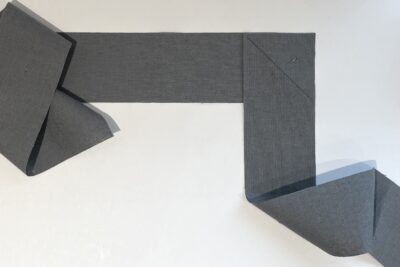
- Take the two BBB fabric WOF x 2¼” strips. Draw a 45° line on the wrong side of one strip, at the top corner from top left to bottom right. Pin the right sides together so the strips are at a right angle to each other and the drawn line is visible. Sew along the drawn line then trim off the excess corner fabric with a ¼” seam allowance and press to create a long strip. Fold the strip in half along the full length (wrong sides together) and press.
- As we’re using decorative hand stitching to attach the binding (and want this to be visible on the front of the mug rug), we’re going to start by attaching the binding to the back. Pin/clip the binding in place on the back, round the mug rug edges, with the raw edges of the binding and raw edge of the mug rug matching up.
- [TIP: Clip the binding around all four edges before you start sewing to make sure the seam line from when you joined the two strips isn’t going to be close to any of the corners as this would create too much bulk; ideally you want the binding seam to be close to the middle of one edge.]
- Sew the binding to the back of the mug rug using a ¼” seam allowance, in the same way you would add binding to a quilt top. Take your time to give the four corners neat miters.
- Fold and press the binding round to the front and clip in place.
- Now we’re going to hand sew the binding to the front of the mug rug but with a chunky hand quilting style/running stitch. Choose a thread with the same weight as you would use for hand quilting. Start in the middle of one of the edges and sew close to the folded edge of the binding, making sure to catch a little of the mug rug underneath so the binding is secured in place.
- Continue to the corner. You can either use the running stitch at the corner of the binding and turn 90° and continue, or you can add a decorative cross. If you’d prefer to use just the running stitch all the way around, then you can skip to the final step.
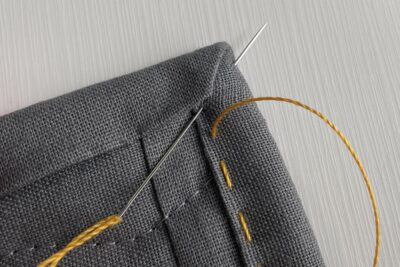
- For the decorative corner cross, start by finishing the running stitch close to the binding corner and then bringing the needle through the binding and out close to the outside edge of the binding, to the right of the mitered corner seam.
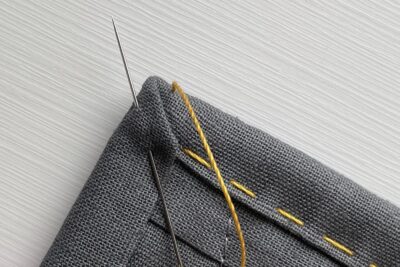
- Then, take the needle into the middle of the binding and to the left of the mitered corner seam, and then out close to the outside edge of the binding. This will create the first diagonal stitch of the decorative cross.
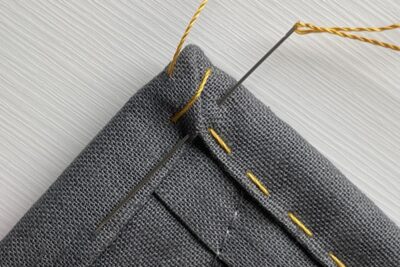
- Now, take the needle into the middle of the binding and to the right of the mitered corner seam, and then out close to the corner of the mitered on the folded edge.
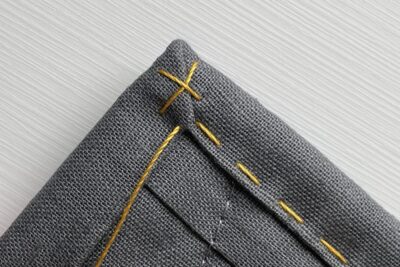
- This will complete the decorative cross and also mean that your needle is in the right place on the binding to continue with the running stitch. Repeat this for each corner.
- Gently press to finish.
- Grab a cup of something warming and enjoy your new Cozy Cup mug rug.
About the Designer
Amy lives in the north of England with her husband and son. When she’s not sewing and quilting, Amy can usually be found baking or reading. You can find her on Instagram @amyatthegate
You May Also Like:
Sewing Machine Feet for Patchwork Piecing

One cannot actually “download” anything from you. It is all ads all the time!
I don’t believe I ever said that this pattern was available as a downlaod. It is printable, which 90% of sewing blogs do not offer for free. The ads allow me to offer you this and thousands of other projects for free. I prefer this to charging for everything as it allows more people to be able to enjoy my projects at little cost to them. If it’s not for you that’s fine, but I won’t apologize for the ads.
There is a green “Print” button at the end (after picture 16). From there you can use a menu to customize what you want to print (like a recipe). Hope this helps!
Thank you.