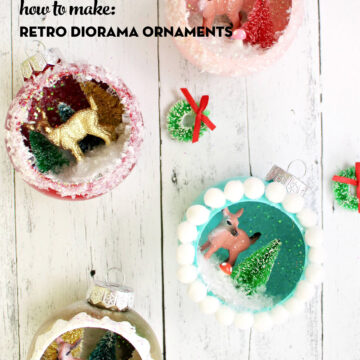
How to Make a Retro Diorama Ornament
These Retro Diorama Ornaments are perfect for Christmas and many other holidays! In addition to the deer used for our ornaments, you could also use bunnies to make a beautiful Easter display! Learn how to make the ornaments with our free tutorial.
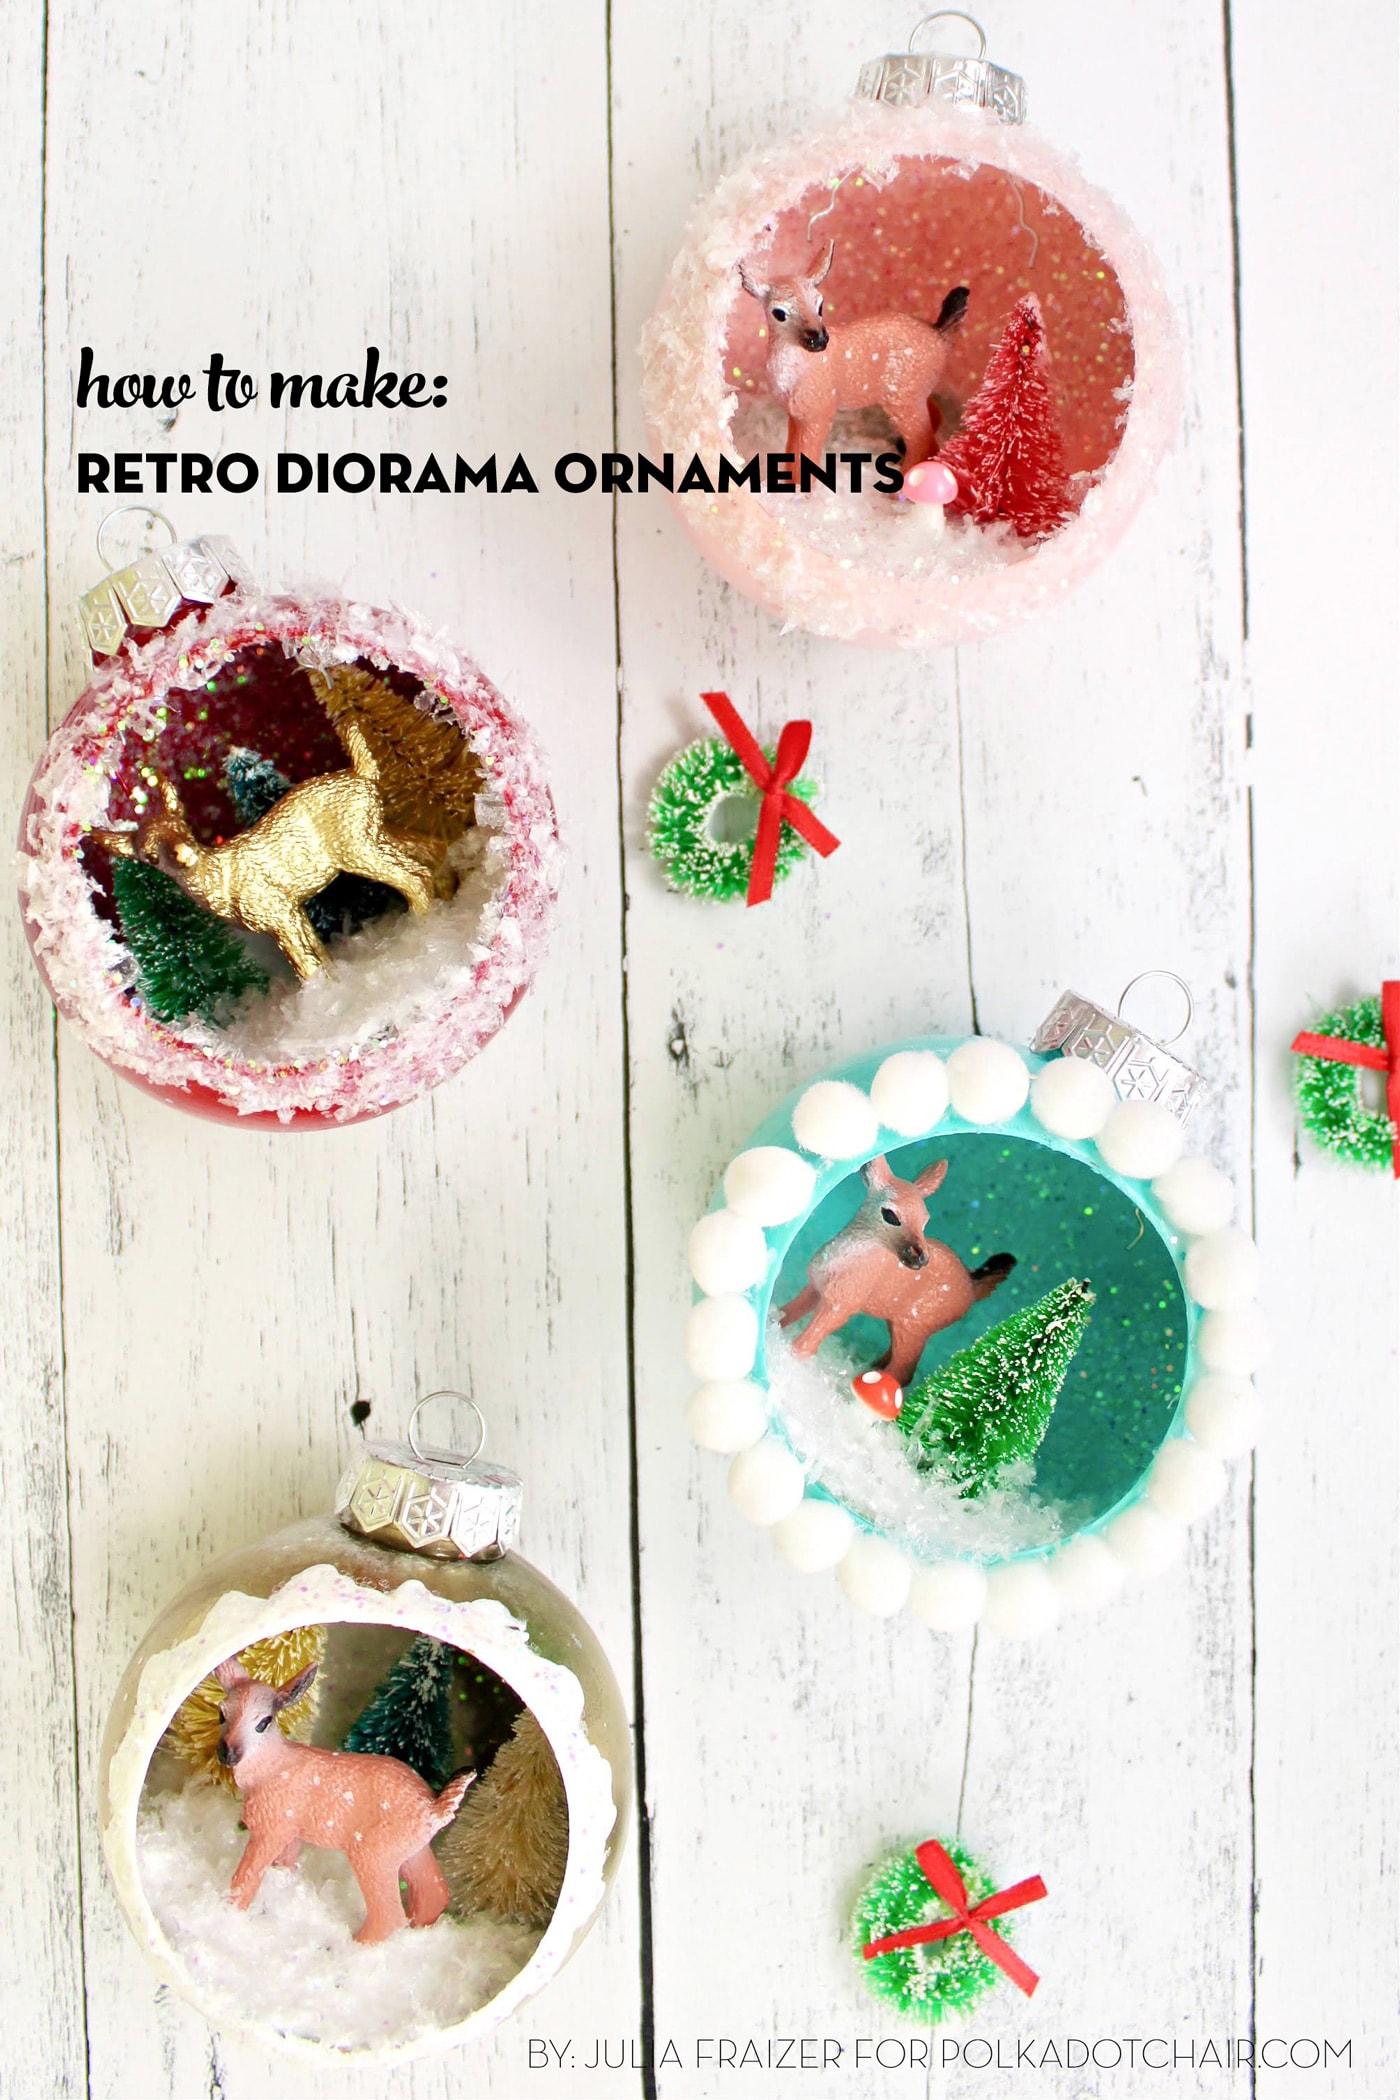
Hello friends! It’s Julia from Bayhill Studio. My Ornament Series continues today with these adorable vintage-inspired diorama ornaments.
Handmade Ornament Tutorials
- July: Paper Poinsettia Ornaments
- August: Paper Memory Christmas Ornaments
- September: Kimekomi Fabric Ornaments
- November: Granny Rocker Christmas Ornaments
- December: String Christmas Ornaments
- January: Retro Diorama Ornaments
- February: DIY Splatter Paint Glass Ornaments
- March: Blown Egg Ornament
- April: Retro Photo Ornament Tutorial
- May: Vintage Folded Fabric Ornament
- June: Patchwork Heart Ornament
- July: Improv Pieced Heart Ornaments
- October: Plastic Canvas Gift Card Holder
- November: Yarn Stitched Jingle Bell Ornament
These little ornaments are so cute and so fun to make! Once you understand how they are made, you can customize them to your taste and interests.
I am going to walk you through the steps of how I made this fun little Gold Woodland version. I have created a short video showing three other versions to give you a few more ideas.
While I am drawn to this quirky mid-century vibe, you don’t have to limit yourself to this specific look. You can bring in miniature cars, people, animals, Lego figures, etc., and customize the ornament to fit your specific taste and interests.
Instructions
Retro Diorama Ornaments
Equipment
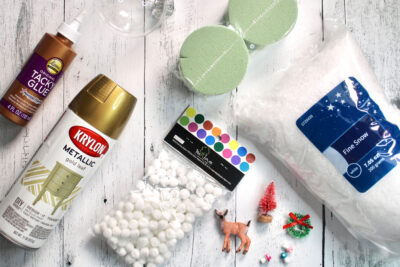
- Tacky Glue
- Paintbrush you will use it for glue
supplies
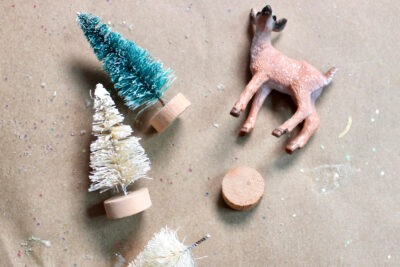
- Diorama Ornament Blanks
- Paint either craft paint or spray paint
- Fake Snow
- Miniature Mushrooms
- Miniature Deer
- Miniature Bottle Brush Trees
- Pom Poms for edging
- Florist Foam
Instructions
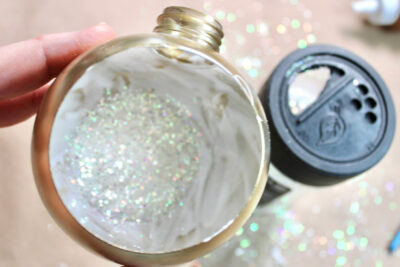
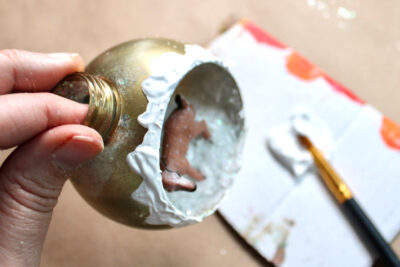
- Start by carefully removing the silver ornament cap and painting your ornament. You can use regular craft paint or spray paint.

- Spray paint offers a more smooth finish, but it can be difficult to get complete coverage, especially on the inside. I used spray paint for this gold version, and I liked seeing a few spots that the paint didn’t reach. It gave the ornament a more weathered, vintage feel.
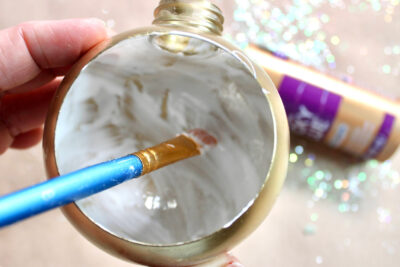
- After the paint has dried, paint a thin layer of craft or Tacky glue over the inside surface of the ornament.
- NOTE: If you want a brighter inside, you can paint the inside of the ornament white.
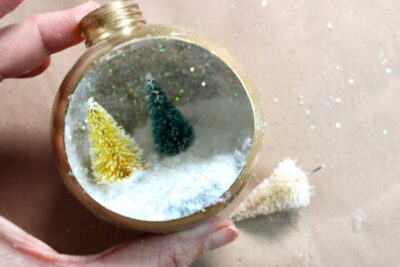
- Now sprinkle some glitter (I used an iridescent white glitter to mimic snow) into the ornament and gently shake it around so the glitter covers all of the inside surfaces.
- Allow the glitter to dry.
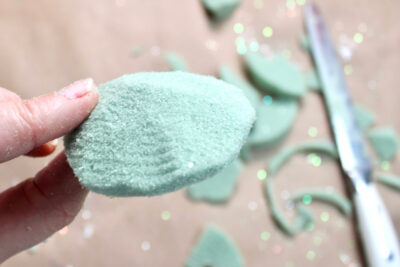
- Next, use a serrated knife to cut your florist foam into a circle shape with a small mound.
- The mound will nest in the bottom inside of the ornament. You want the flat surface of the circle to be even with the bottom opening of the ornament.
- Once you are satisfied with how it fits, glue the foam in place.
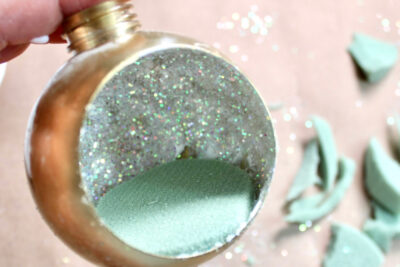
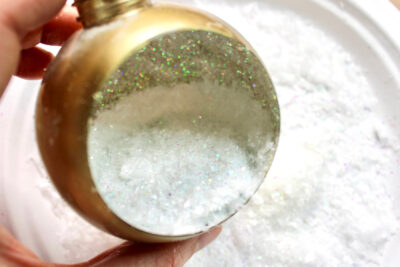
- Cover foam surface with a generous amount of glue. In addition, you can add glue past the foam surface about ½” to create the look of a snow bank like I did here.
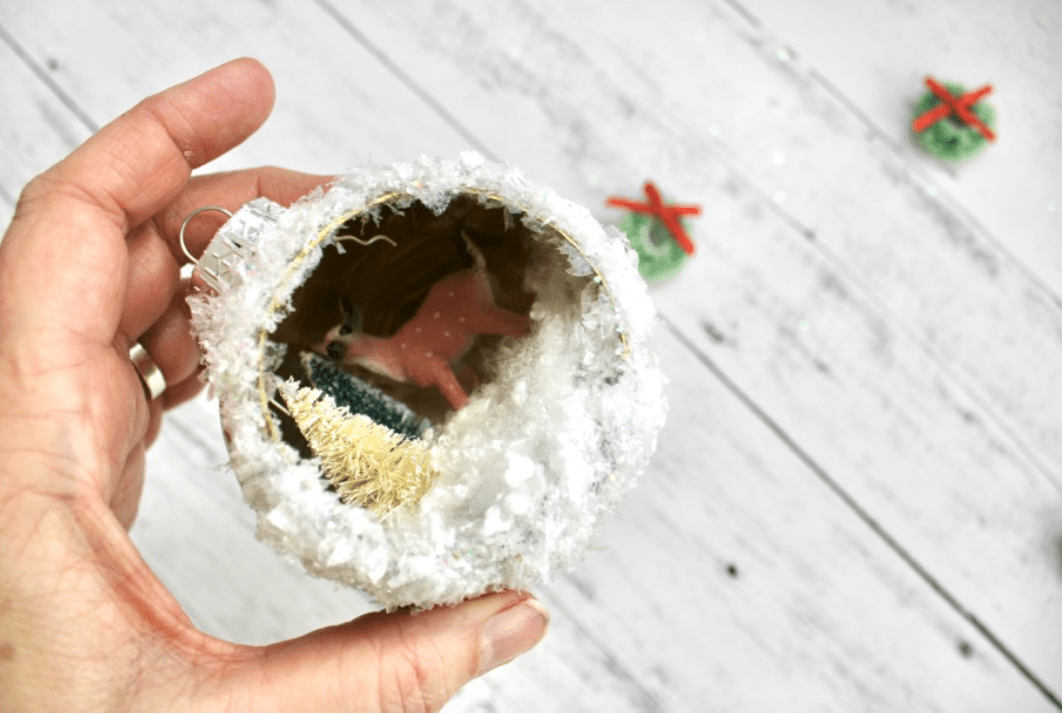
- Add your fake snow, gently pressing it into the glue. *NOTE: It might be hard to see here, but the glue will dry clear and the snow is semi-transparent, so a little bit of the green will probably show through. I like to go back at the end and add a little more glue and snow to any areas that need additional coverage.
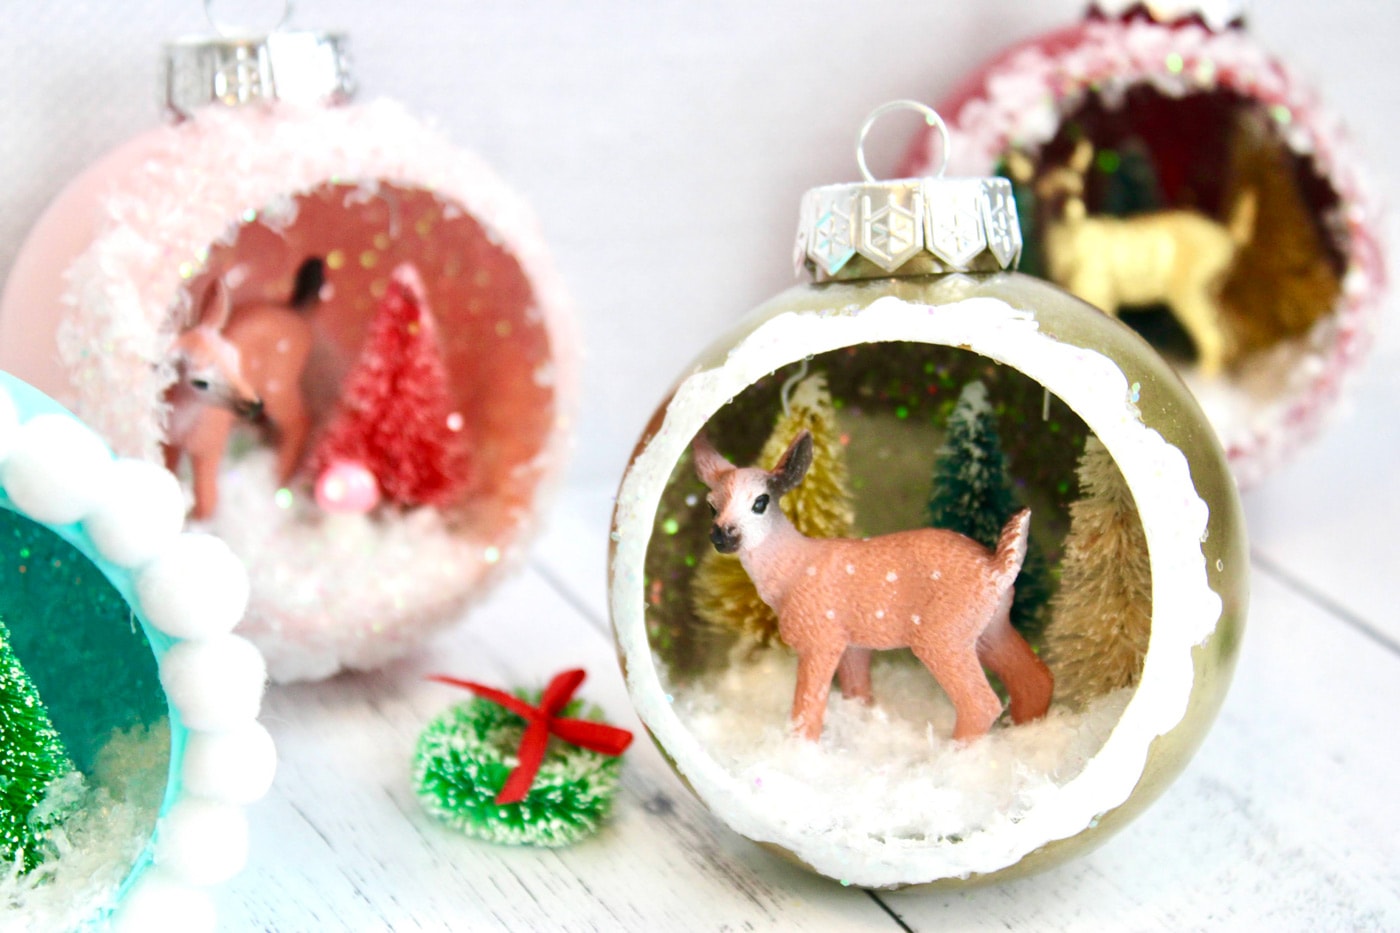
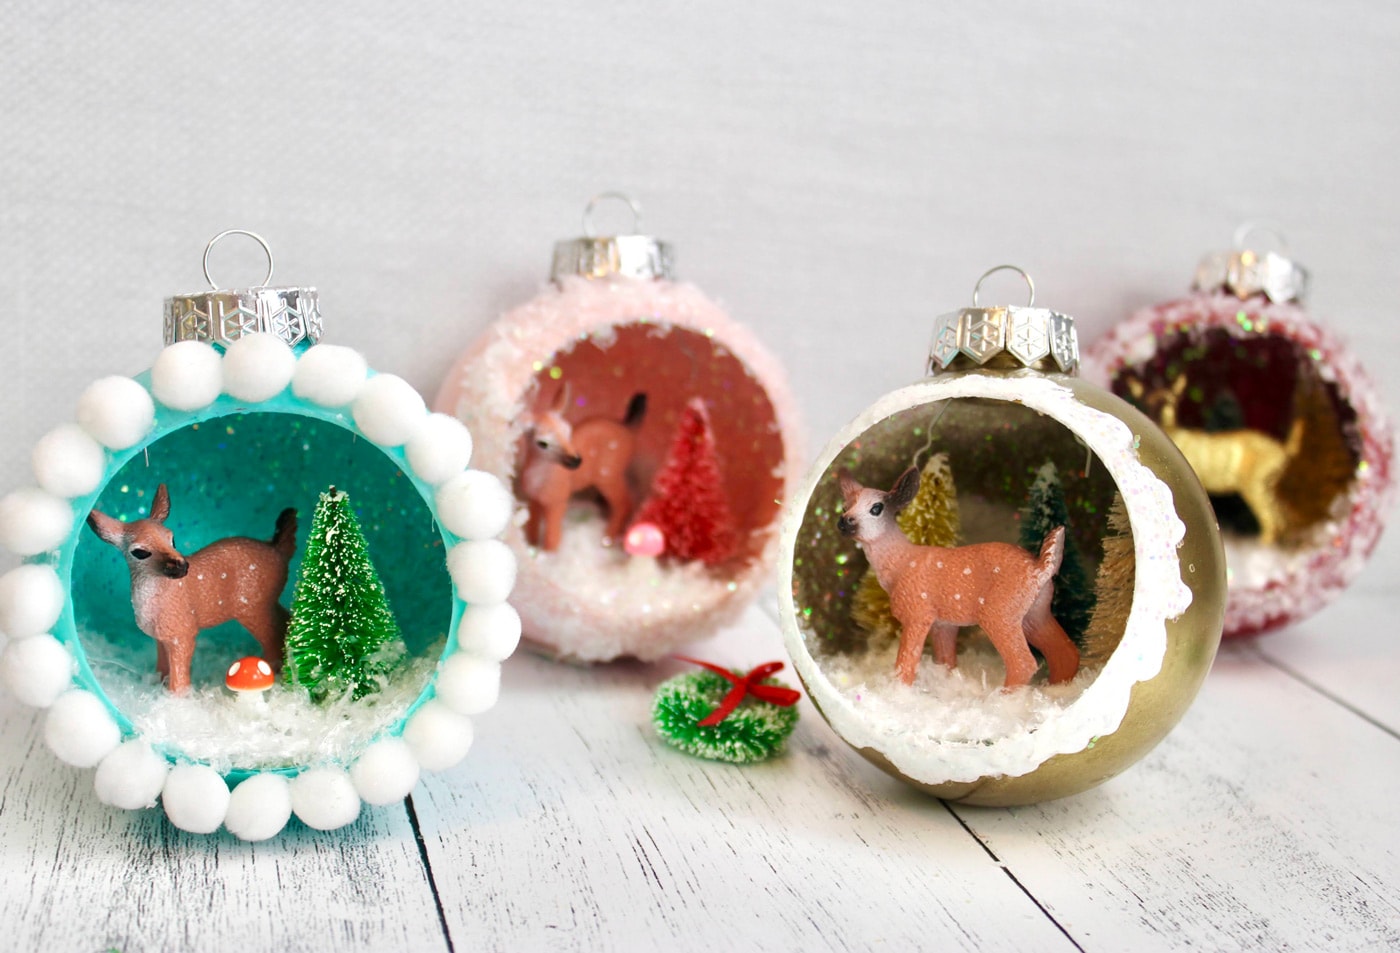
- Gather and prep the miniatures. I like my bottle brush trees to look a little more realistic, so I carefully remove the tree base by twisting it off. If you want, you can also spray paint the woodland animals gold or any other color. For this ornament, I am keeping the deer natural.
- Let’s add the trees! I prefer to add the trees first to create depth and the look of a woodland backdrop. Give the tree trunk and bottom branches a generous dollop of glue, position the tree where you want it in the ornament, and press the wire trunk into the foam.
- If you are adding more than one tree, repeat the previous step for each tree. I have found I can fit 3 trees into an ornament.
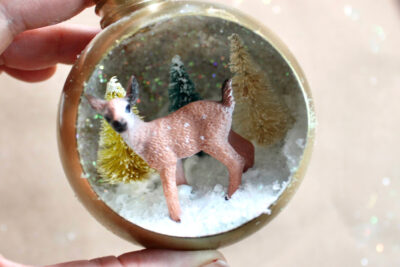
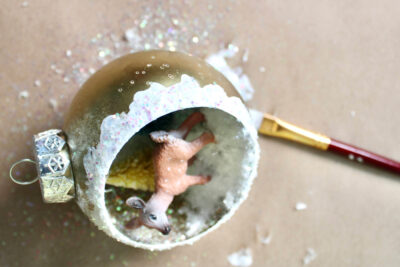
- Position the deer the same way. Add a dab of glue to each hoof, then gently press the feet slightly into the foam. Let everything dry before moving on to the next step.
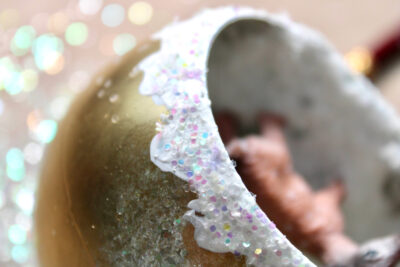
- For the outside edge of this ornament, I decided to paint a white, snowy border. I used simple white craft paint and applied it very thickly, as you can see here. I gave it an uneven edge to look like snow. Let that dry. You can be done at this point, or if you want to add glitter, go to the next step.
- To add some sparkle to your snowy border, simply use a paintbrush to brush on a thin layer of glue.
- Sprinkle or dab with your sparkles (or you can pour some glitter on a dish and dip the edge into the glitter).
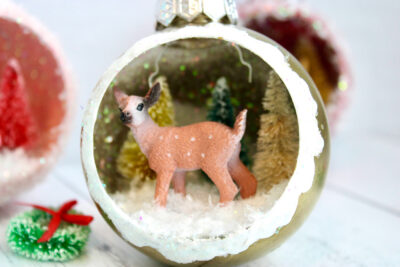
- How pretty is that? Allow the glitter to to dry. Replace the ornament cap and you are finished!
- That’s all there is to it! I love how simple and glam this little ornament looks with the gold paint, neutral trees, and glitter.

Video
Ornament Variations
I wanted to also share this ornament I made to show you a few differences you may or may not like. Here, the trees are to the side, and the deer is in the back.
Personally, I don’t love this look because the deer is hard to see. I also used a different snow, called “curly snow.” It is thicker and has a fiberfill feel, so you only have to use a tiny bit, giving great coverage.
I didn’t love it because it was more difficult to place the miniatures and have them stick and because the volume/fluff filled up quite a bit of the ornament.
However, I realize others may like these things or may be asking themselves what these options might look like, so I’m sharing this for educational purposes.
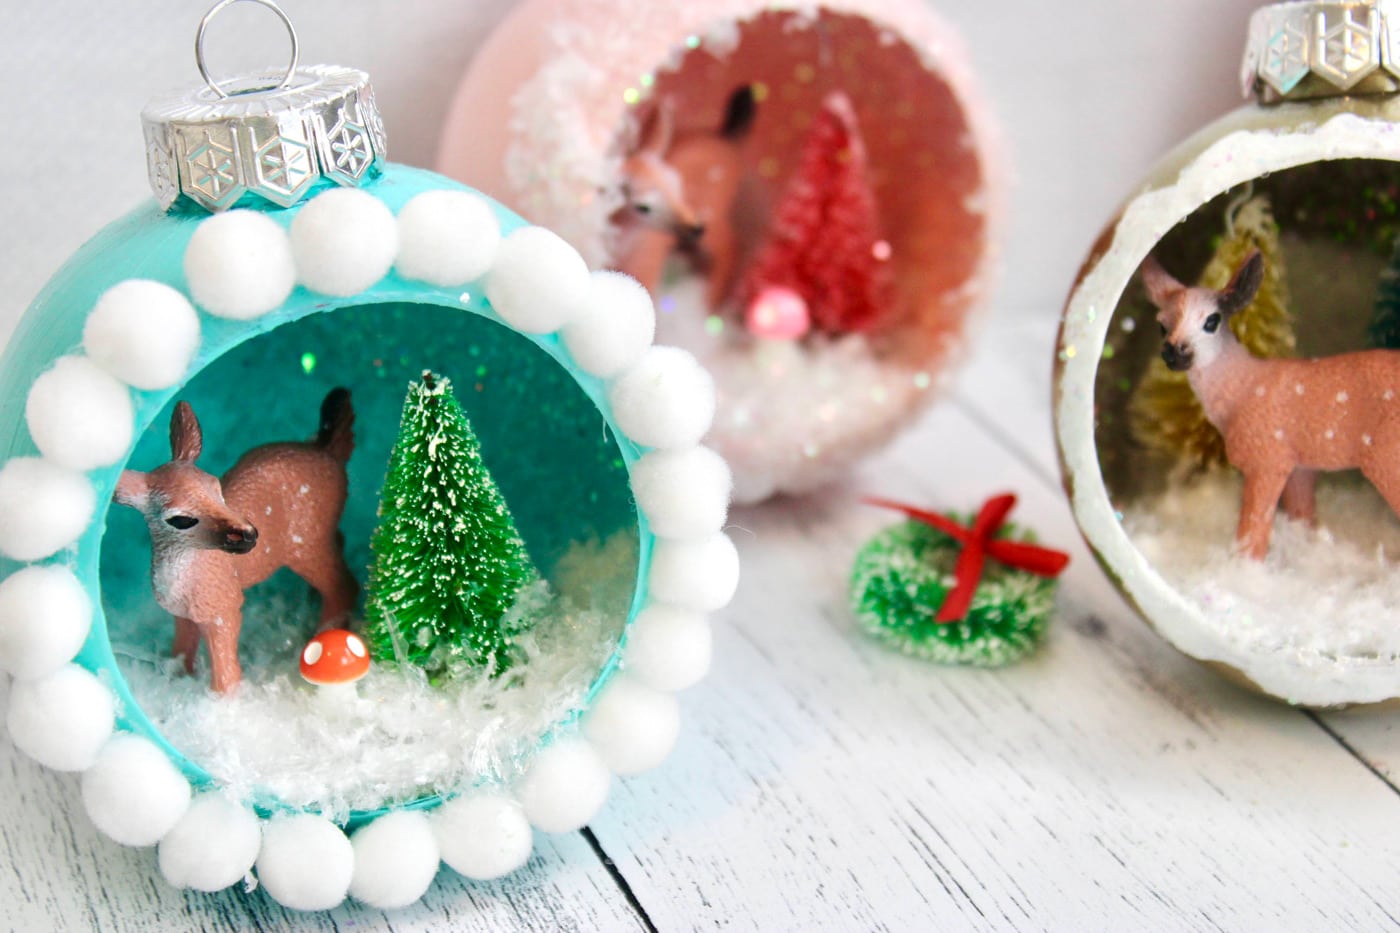
I created three other ornaments with slight variations and demonstrate how to make them in my YouTube video.
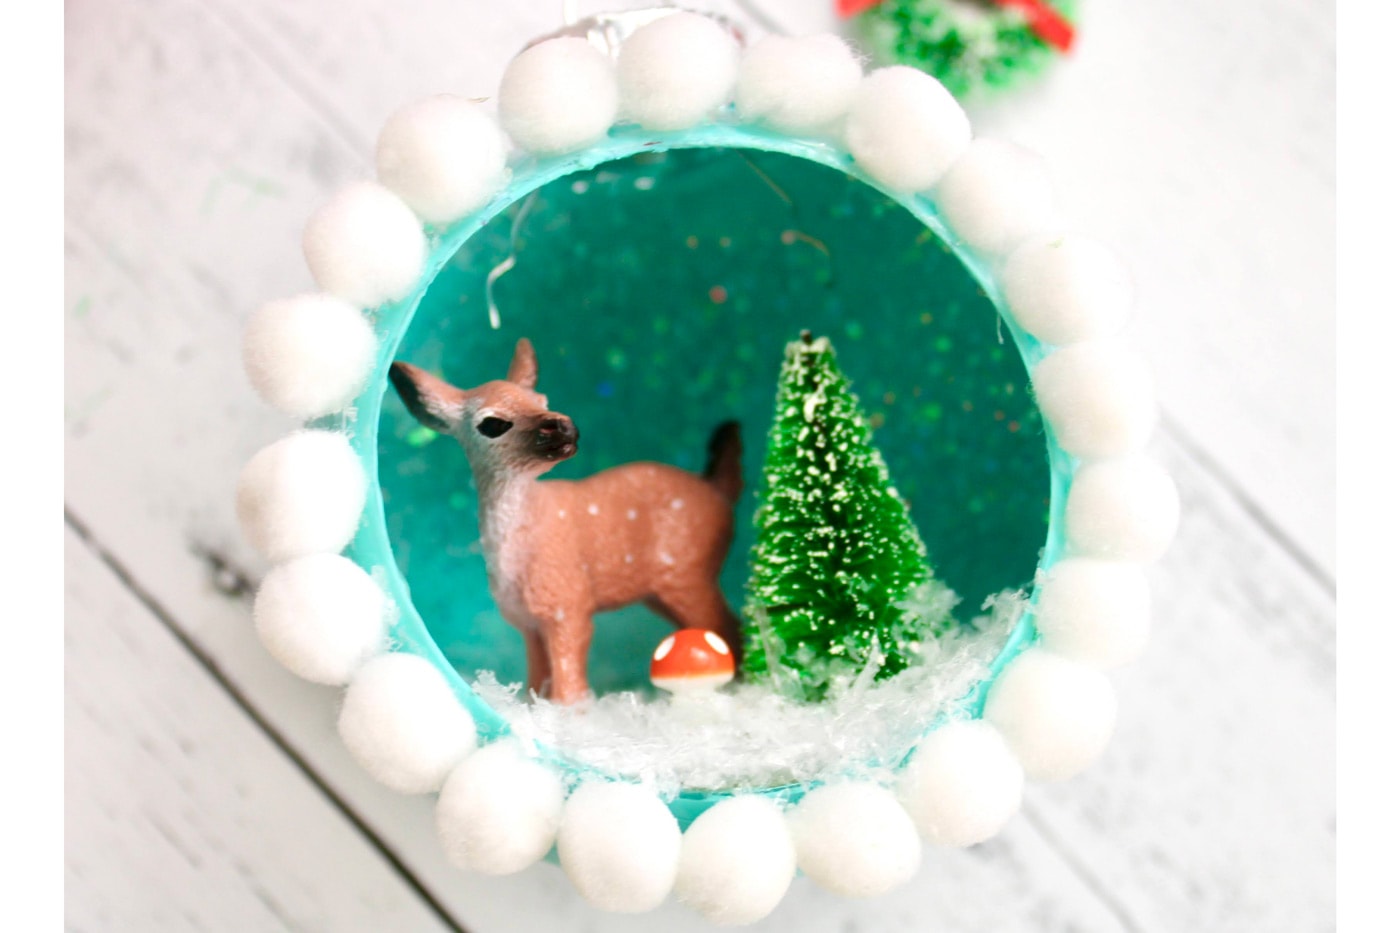
The first is this bright and happy aqua ornament with a pom pom trim. I only added one tree to the inside of the ornament, along with a tiny orange mushroom. This one makes me smile. So cute!
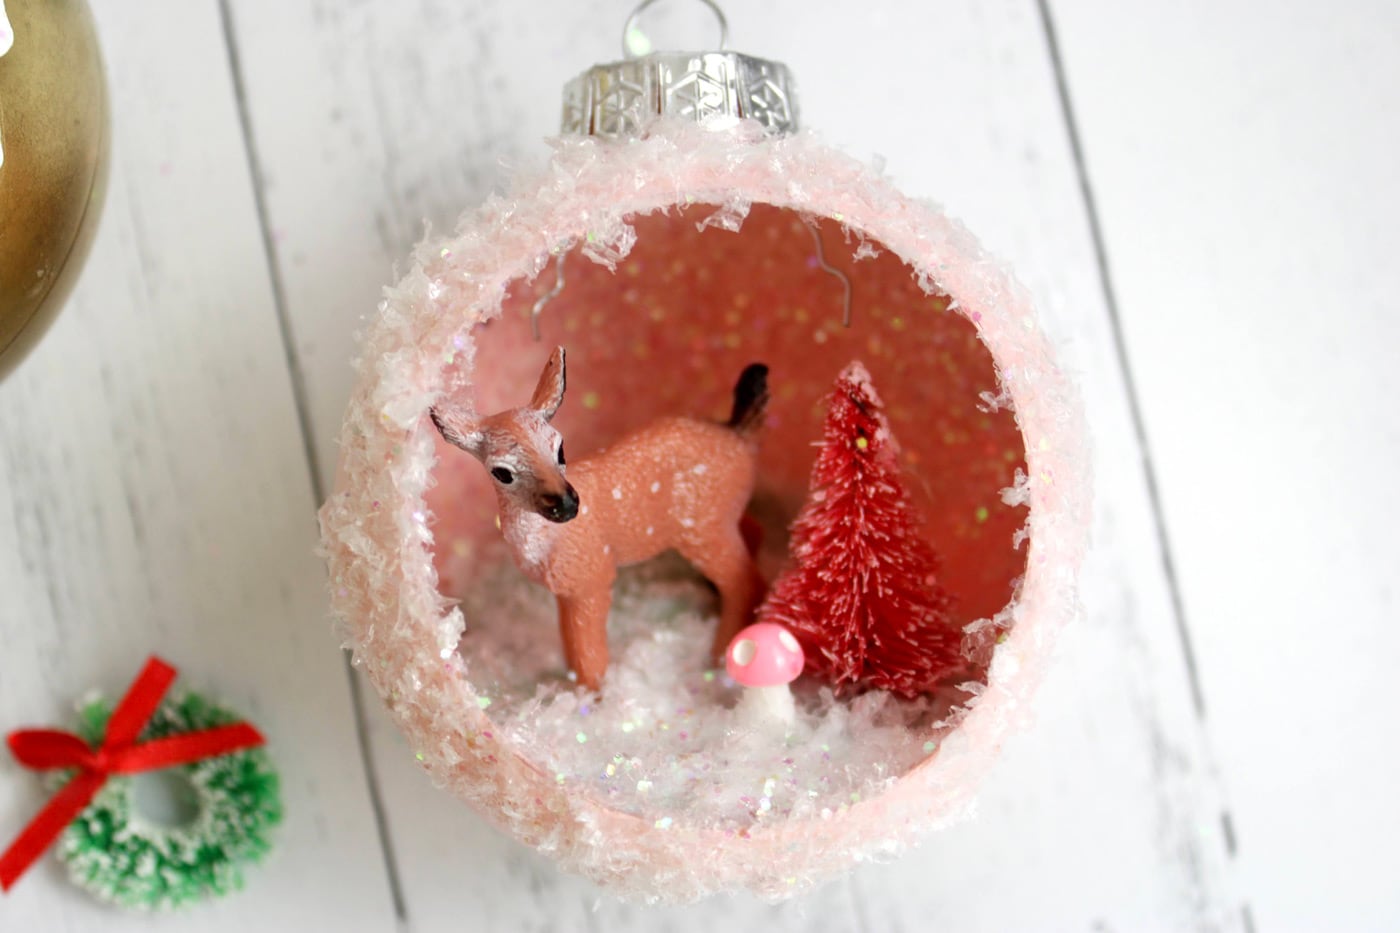
This pink version is the same as the aqua, except I added the fake snow for the border. I love the little pink tree and mushroom paired with the glitter. Totally glam!
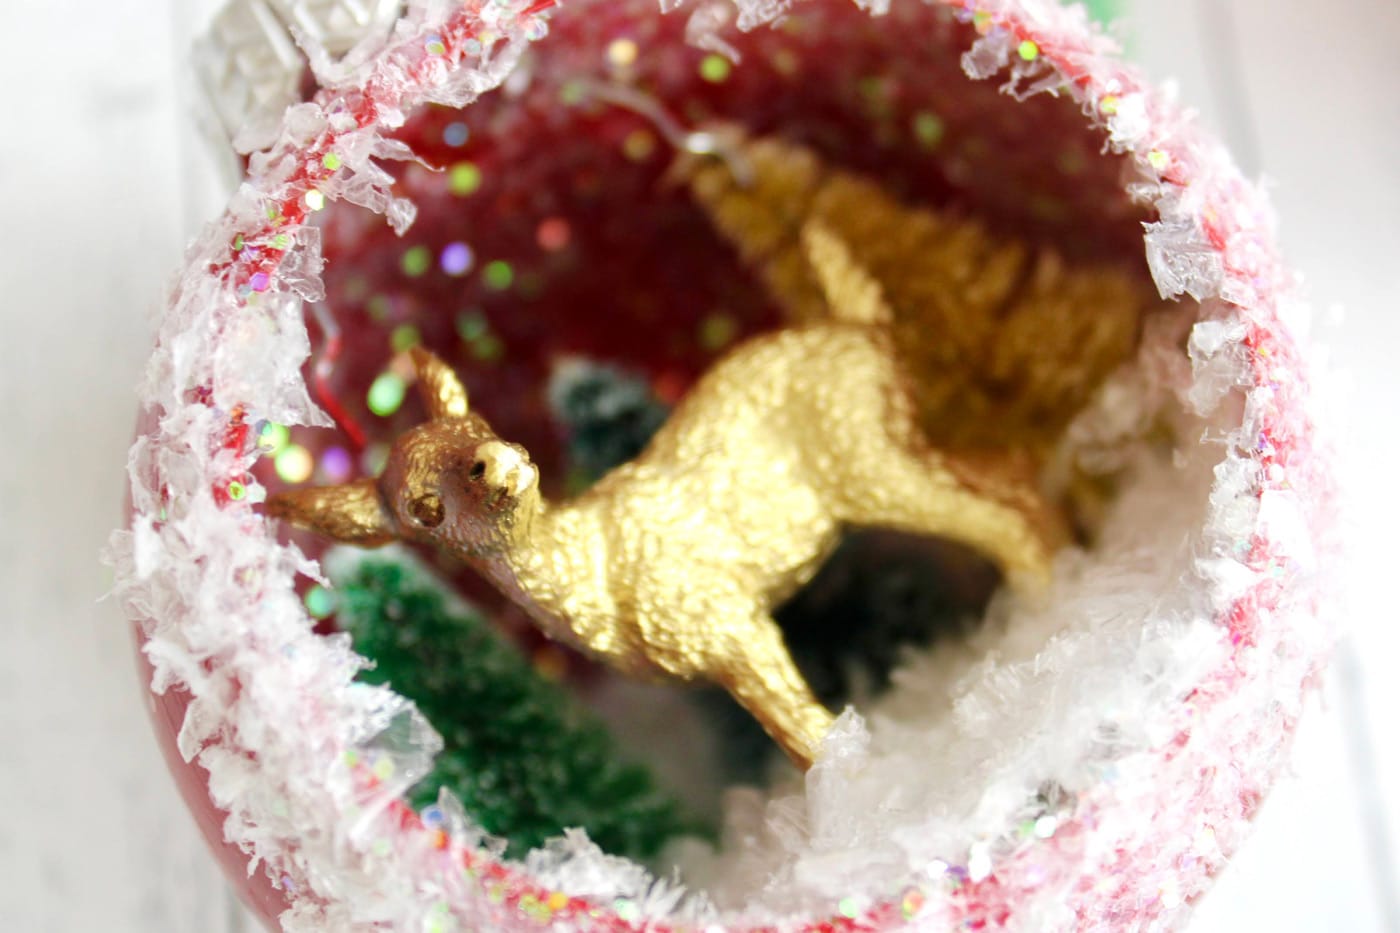
And here is a look at the red ornament. I spray-painted the deer gold to give it a pop of elegance. I added the fake snow for the border, but this would have looked great with a gold sparkle border as well.
Thank you for stopping by! I absolutely loved making these ornaments. They are so loaded with charm I know they will become treasured keepsakes.
Be sure to subscribe to my YouTube Channel and follow me on Instagram for more creative content. Have a blessed day!
About the Designer

Julia Frazier is the founder of Bayhill Studio. Julia designs quilts and projects geared toward beginner quilters and crafters. You’ll usually find her at her sewing machine or hiking in the nearby mountains. Follow Julia on Instagram @bayhillstudio, and subscribe to her YouTube channel for new and exciting projects and tutorials. Be sure to check out her Bayhill Studio website for a growing list of tutorials and patterns.
Also by Julia:
Raw Edge Applique Granny Quilt