• Skip to primary navigation
  • Skip to main content
  • Skip to primary sidebar

The Polka Dot Chair logo

  • SEWING
    • Free Sewing Patterns
    • Bag Patterns
    • Costumes
    • Apparel
    • Learn to Sew
    • Beginner Friendly
    • Embroidery Projects
    • Tips & Techniques
    • All Sewing
  • QUILTING
    • Quilt Blocks
    • Learn to Quilt
    • Free Patterns
    • Quilt Patterns
    • All Quilting
  • CRAFTS
    • Disney
    • Cricut
    • Printables
    • All Crafts
  • HOLIDAYS
    • Seasonal Projects
    • Valentine’s Day
    • Easter
    • 4th of July
    • Halloween
    • Thanksgiving
    • Christmas
    • All Holidays
  • TUTORIALS
  • ABOUT
    • About Me
    • My Fabric Collections
    • Published Books
    • Press
    • FAQ’s
    • Contact
  • SUBSCRIBE
  • SHOP
menu icon
go to homepage
  • SHOP
  • TUTORIALS
  • SEWING
  • QUILTING
  • SUBSCRIBE
  • CRAFTS
  • HOLIDAY PROJECTS
  • ABOUT
    • Published Books
    • My Fabric Collections
  • CONTACT
    • Facebook
    • Instagram
    • Pinterest
    • YouTube
  • subscribe
    search icon
    Homepage link
    • SHOP
    • TUTORIALS
    • SEWING
    • QUILTING
    • SUBSCRIBE
    • CRAFTS
    • HOLIDAY PROJECTS
    • ABOUT
      • Published Books
      • My Fabric Collections
    • CONTACT
    • Facebook
    • Instagram
    • Pinterest
    • YouTube
  • ×

    Home » Crafts

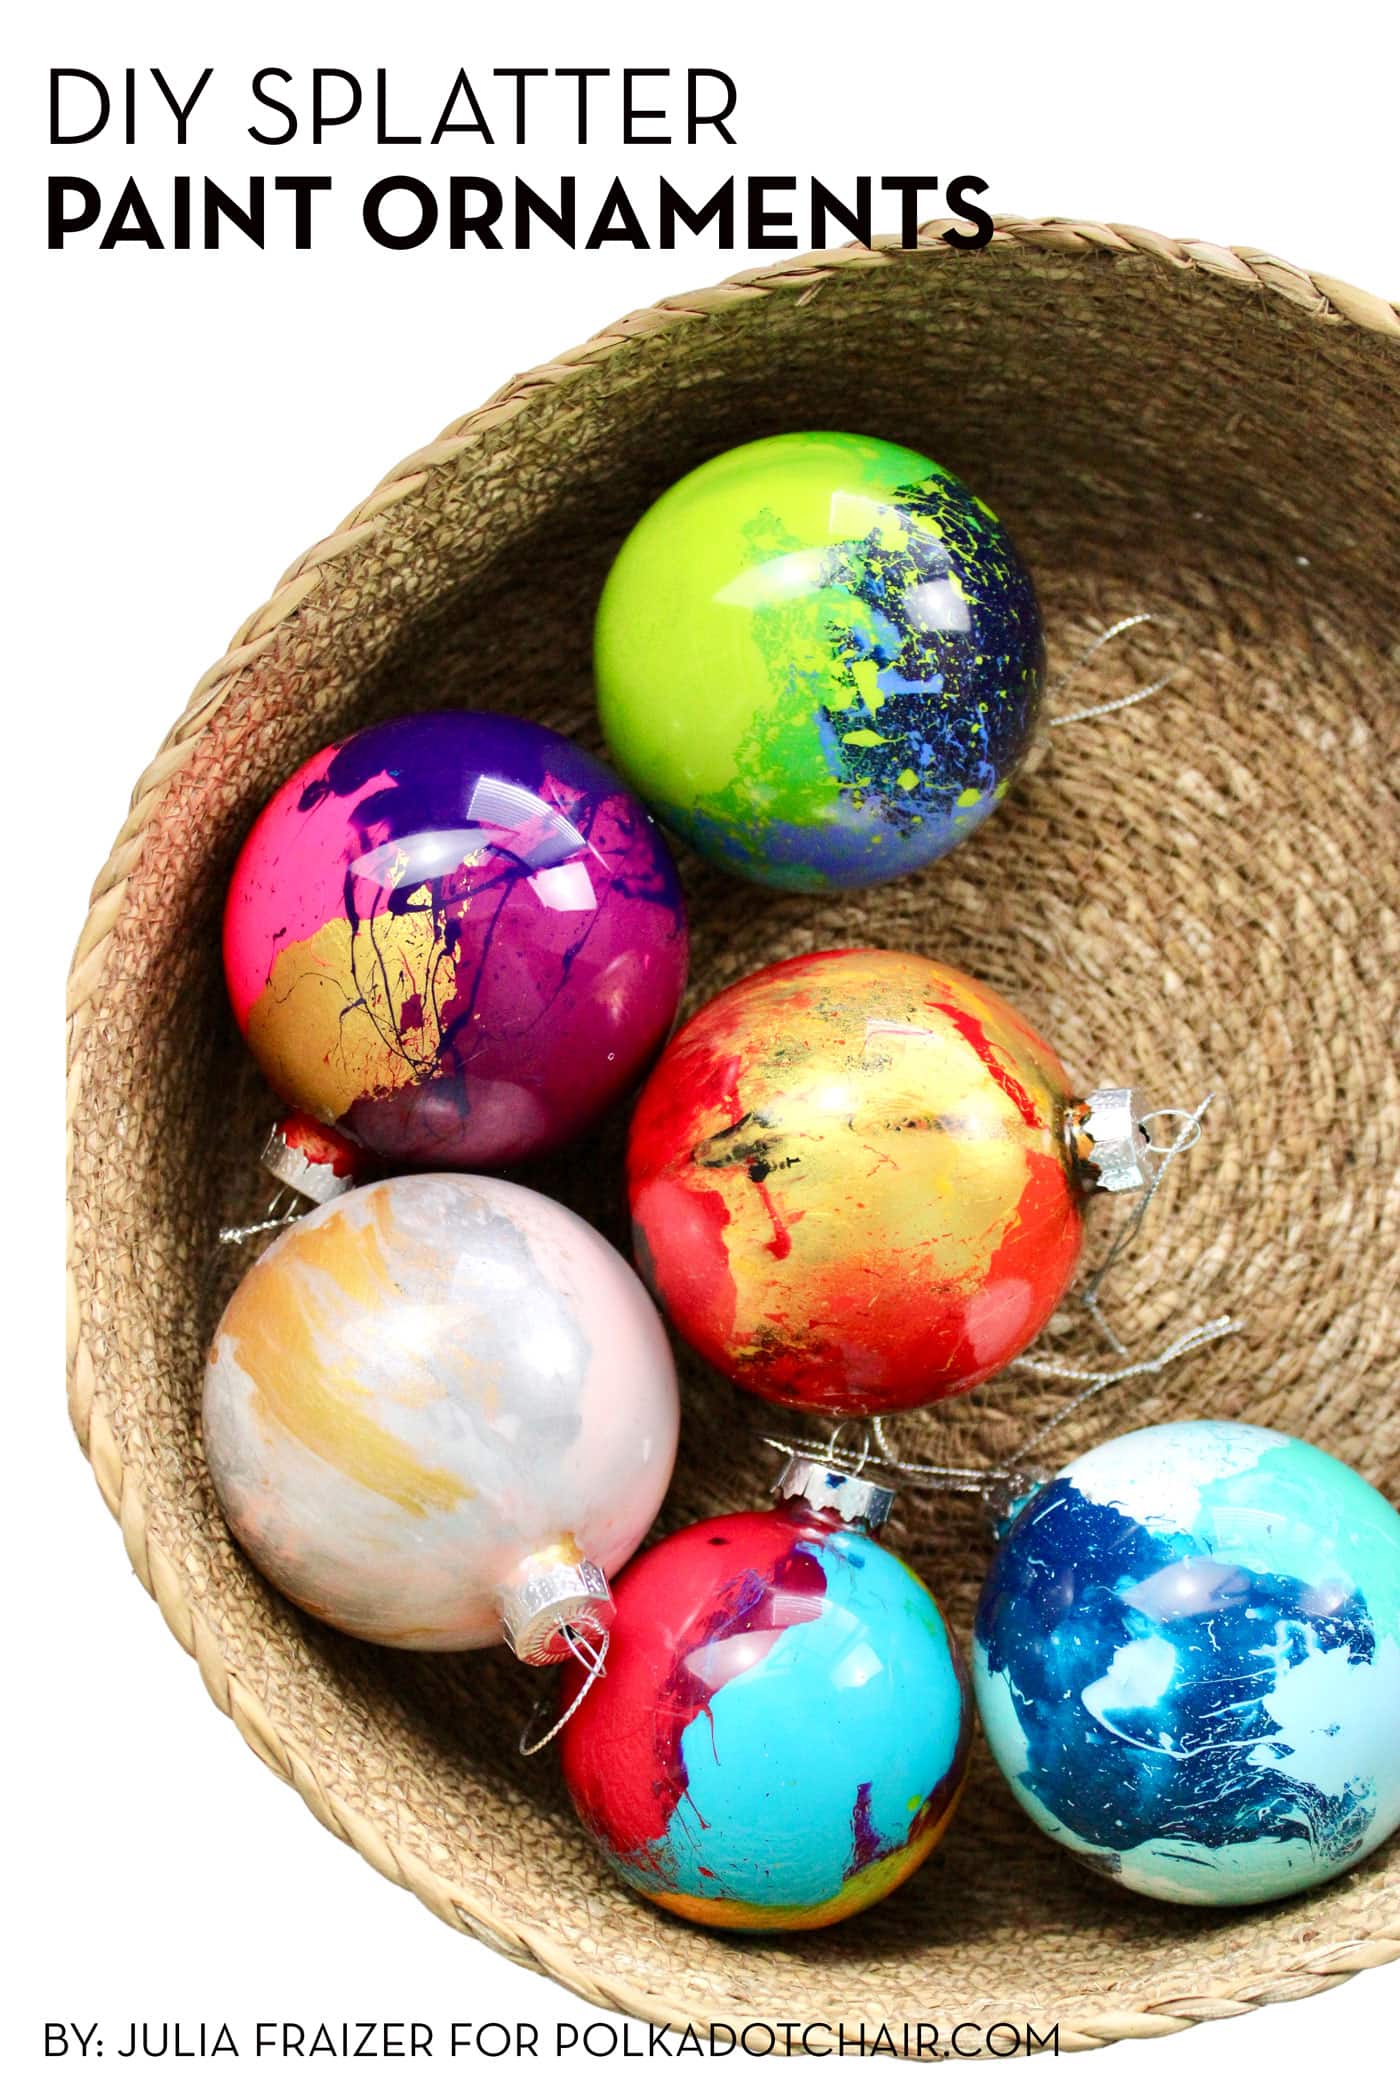
    DIY Splatter Paint Christmas Ornaments

    Updated: Feb 22, 2023 by Melissa Mortenson · This post may contain affiliate links · This blog generates income via ads · Leave a Comment

    Learn how to make these colorful and creative splatter paint ornaments with this handmade glass ornament tutorial by Julia Fraizer. It’s a part of our Monthly Handmade Ornament Series.

    collection of multi colored glass ornaments on white table

    Hello friends, it’s Julia from Bayhill Studio, and I’m excited to bring you a fun, family-friendly project today. These Splatter Paint Ornaments are so easy to make; I guarantee once you start, you’ll be totally hooked! 

    Table of Contents
    • All of our Ornament of the Month Tutorials
    • Splatter Paint Ornament Supplies
    • How to Make Splatter Paint Christmas Ornaments
    • Step One: Paint
    • Step Two: Spread the Paint
    • Step Three: Add Additional Colors
    • Finishing
    • More Color Variations
    • Can I Use Plastic Ornaments?
    • Video Instructions

    The ornaments require no artistic background or ability and allow you to have fun with paint while creating unique, one-of-a-kind painted home or holiday decor. 

    All of our Ornament of the Month Tutorials

    • July: Paper Poinsettia Ornaments
    • August: Paper Memory Christmas Ornaments
    • September: Kimekomi Fabric Ornaments
    • November: Granny Rocker Christmas Ornaments
    • December: String Christmas Ornaments
    • January: Retro Diorama Ornaments

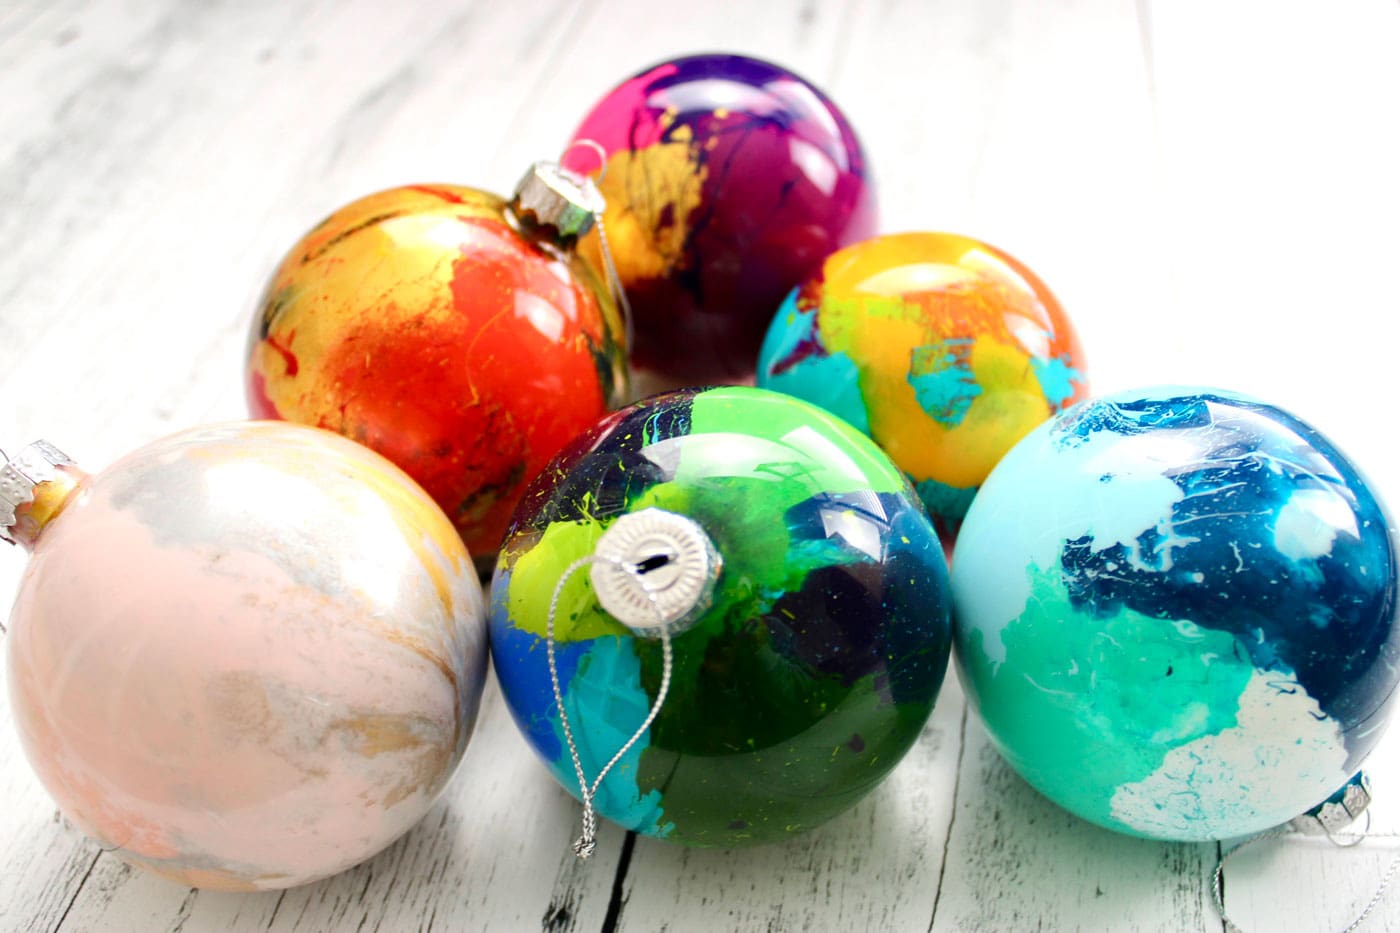
    I created a handful of ornaments playing with different colors and styles — from traditional, to coastal, to super colorful and modern. 

    Splatter Paint Ornament Supplies

    various tubes of acrylic paint on paper

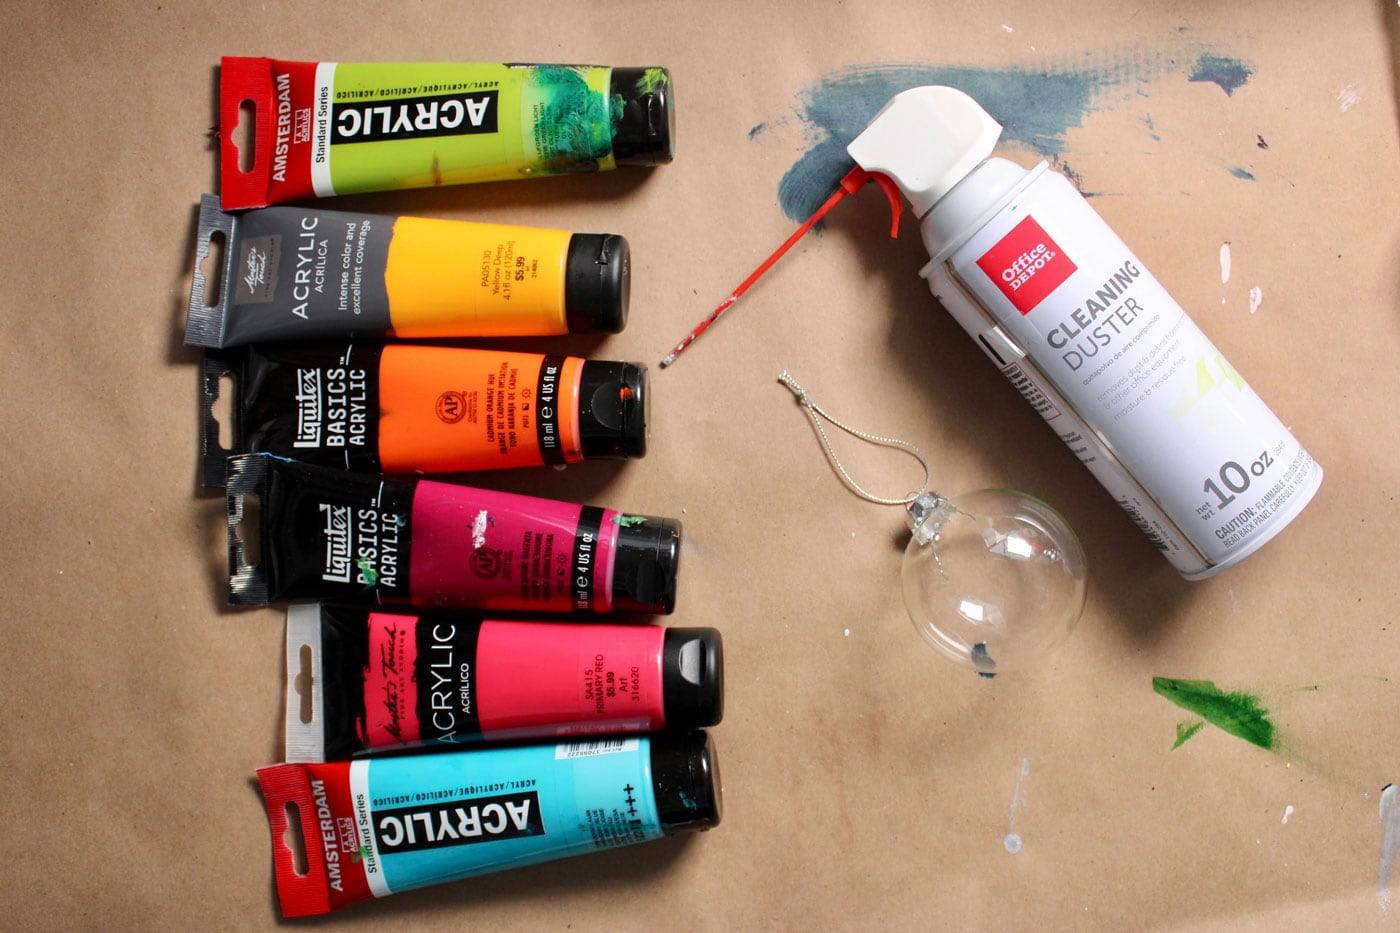
    To make these ornaments, you will need:

    • Glass or Plastic Ball Shaped Ornaments
    • Acrylic Medium Body Craft Paint
    • A Can of Compressed Air

    How to Make Splatter Paint Christmas Ornaments

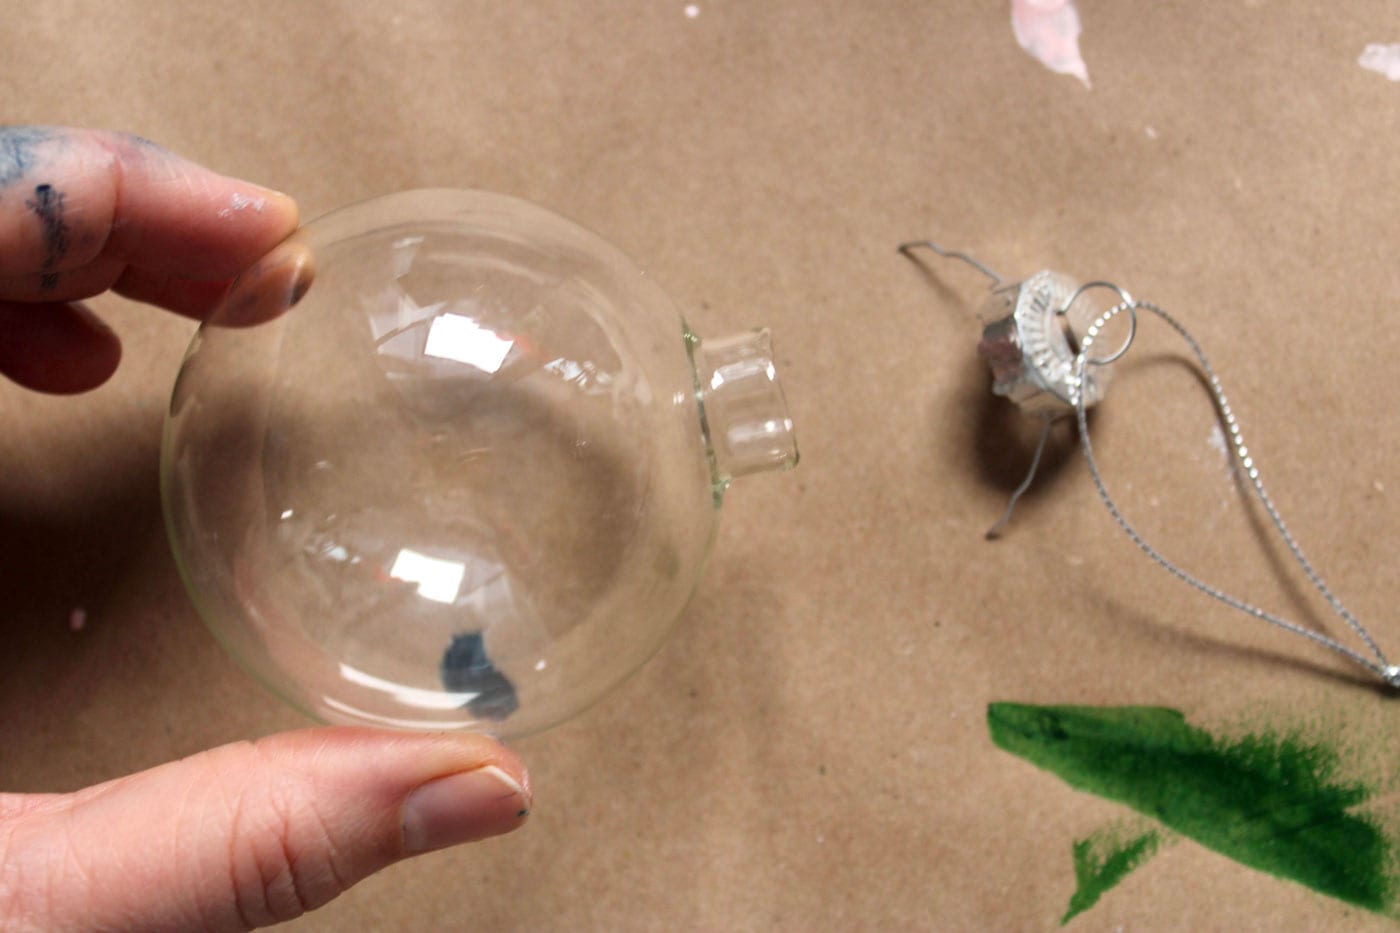
    Begin by removing the silver cap from each ornament. These are easy to remove — pull gently on the wire loop, and it will slide right out. Set the cap aside and save it for the final step. 

    hand holding glass ornament

    Step One: Paint

    yellow paint inside of glass ornament

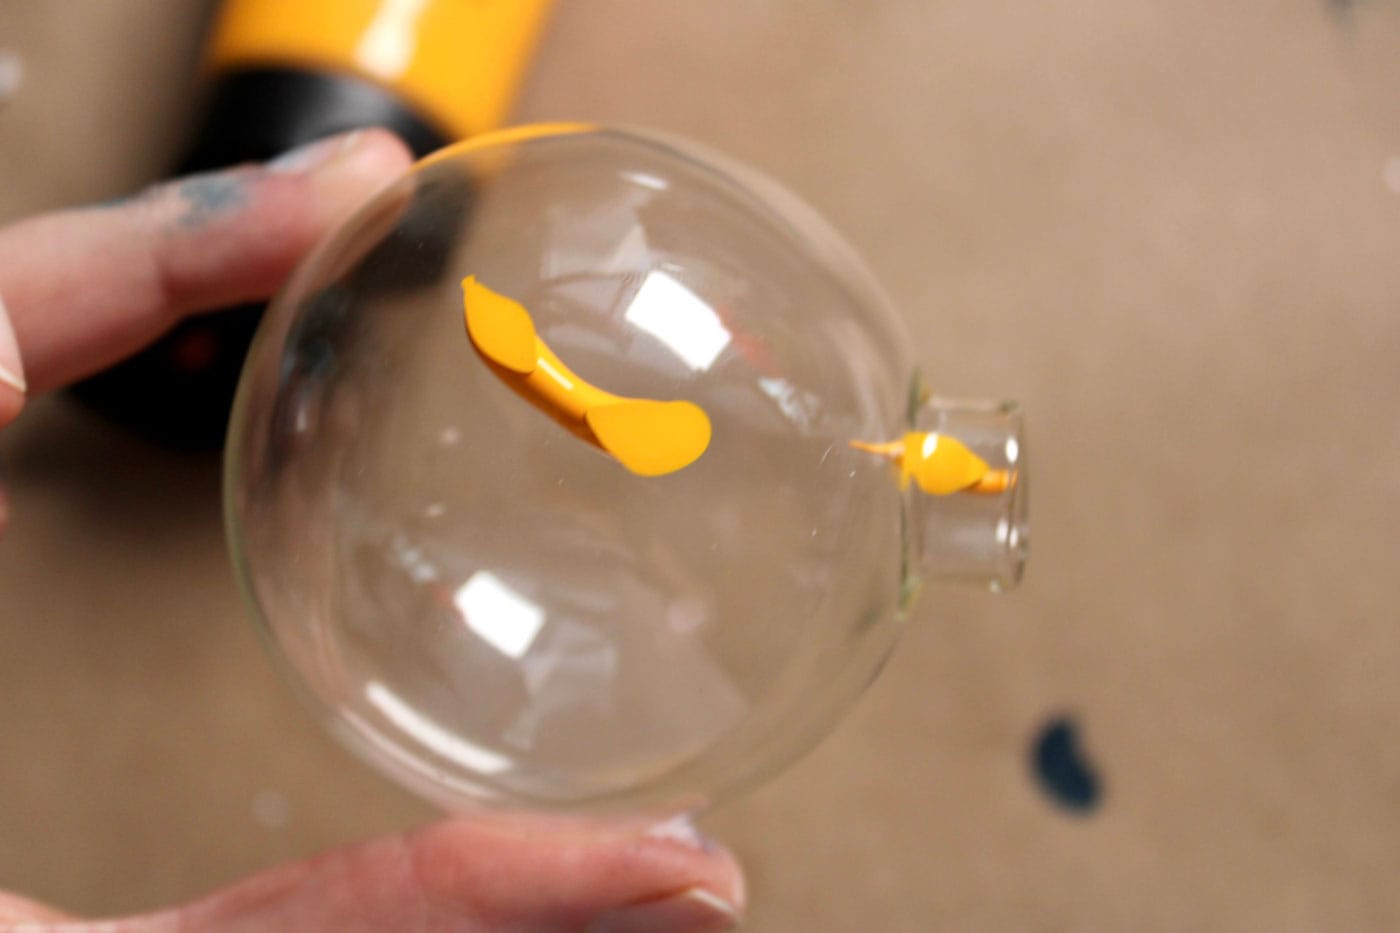
    Now let’s have some fun! Squeeze a dime size dollop of paint into the ornament. Remember that the first paint you add will make up the outer layer of color. Keep that in mind as you decide where you want that paint to land. 

    Step Two: Spread the Paint

    yellow paint inside of glass ornament

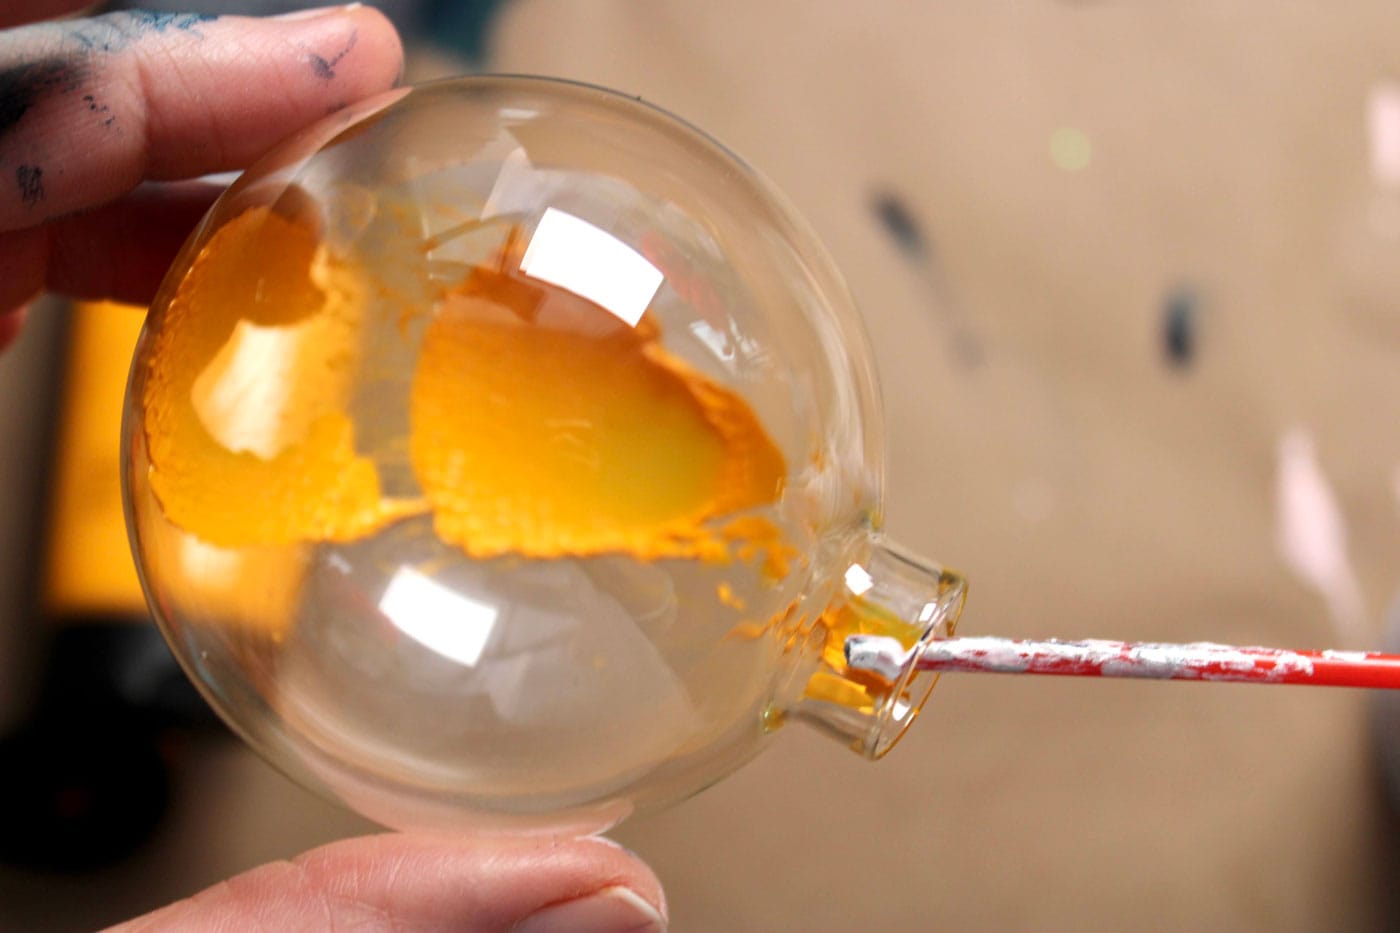
    Now take your compressed air and, with the long plastic tube attached, direct the air towards the paint and give it one or two quick bursts of air, so the paint splatters all over the inside of the ornament. Note: if you hold the air down too long, the paint will spread but not splatter. 

    paint tube and glass ornament on brown table top

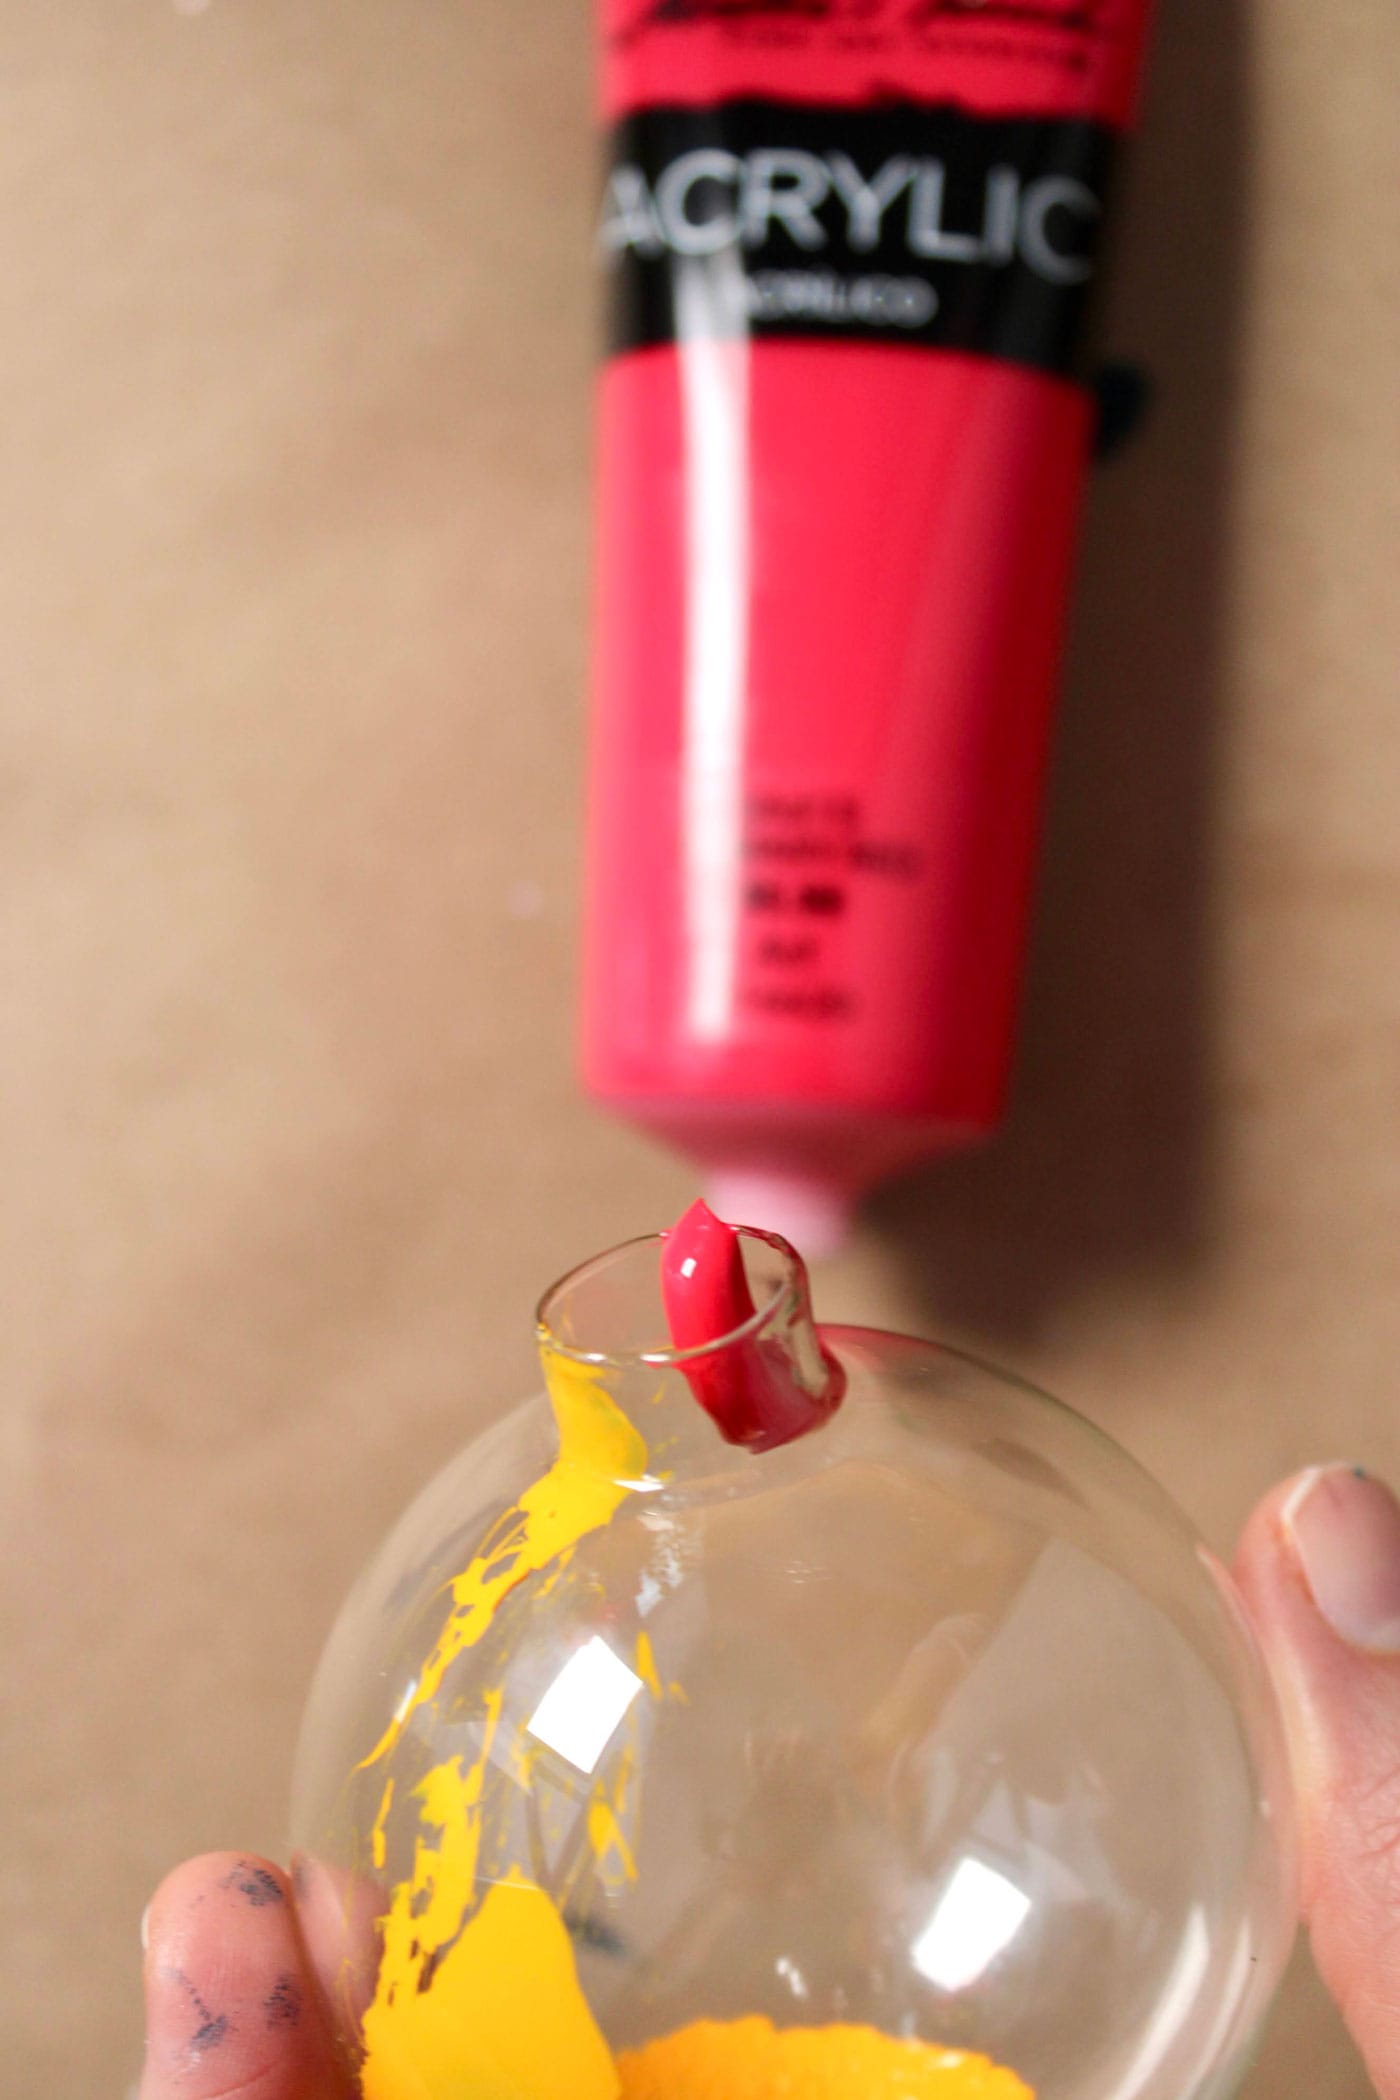
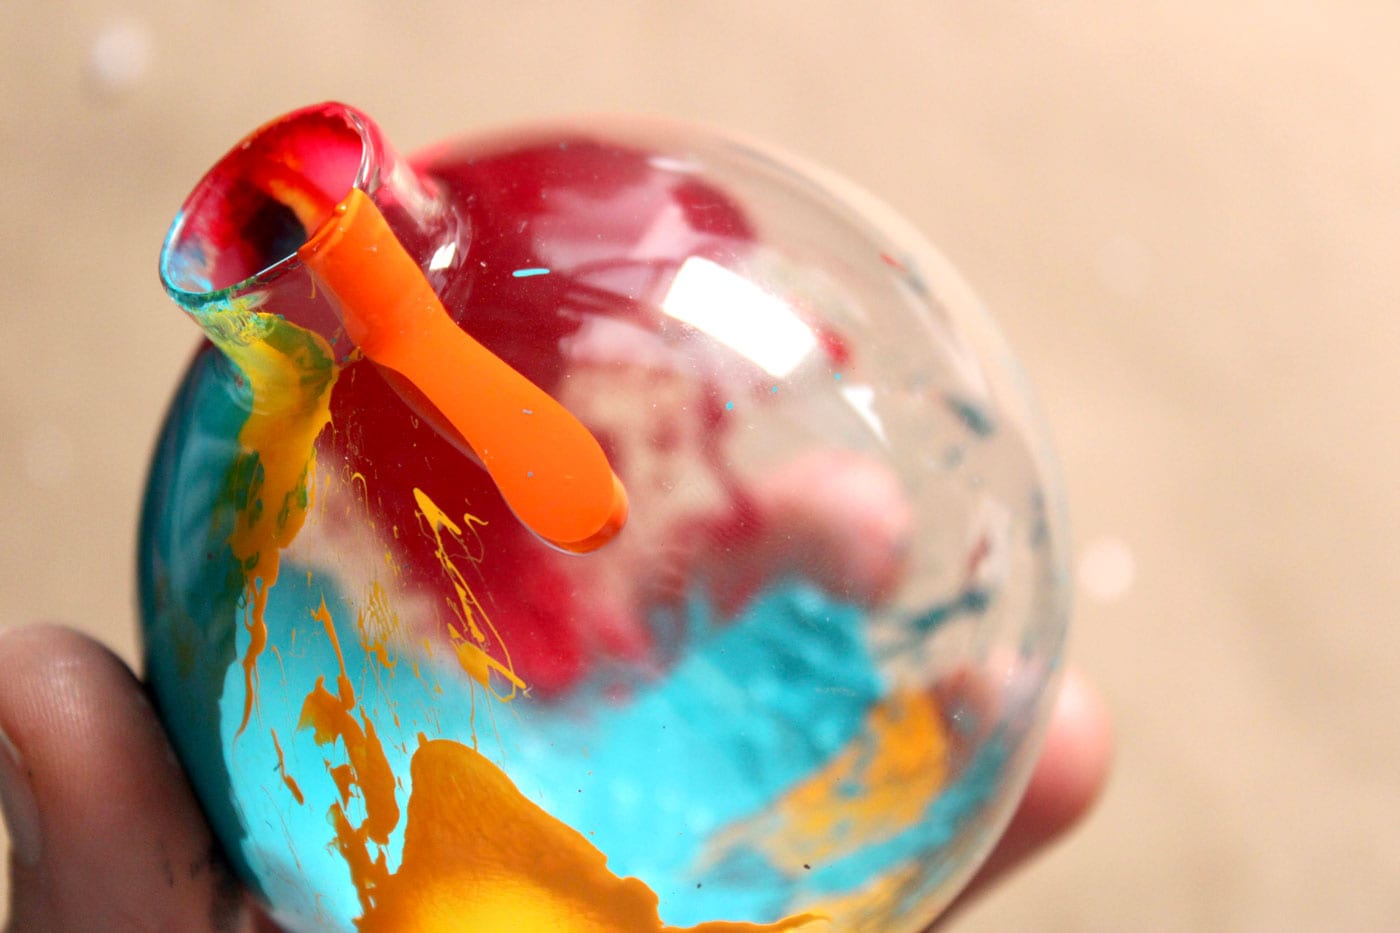
    Repeat with the next color. I am using red here. This time, I let a dollop of paint side right inside the neck of the ornament. The reason for this is that I want the red to spread around the upper part of the ornament. 

    close up of paint inside of glass ornament

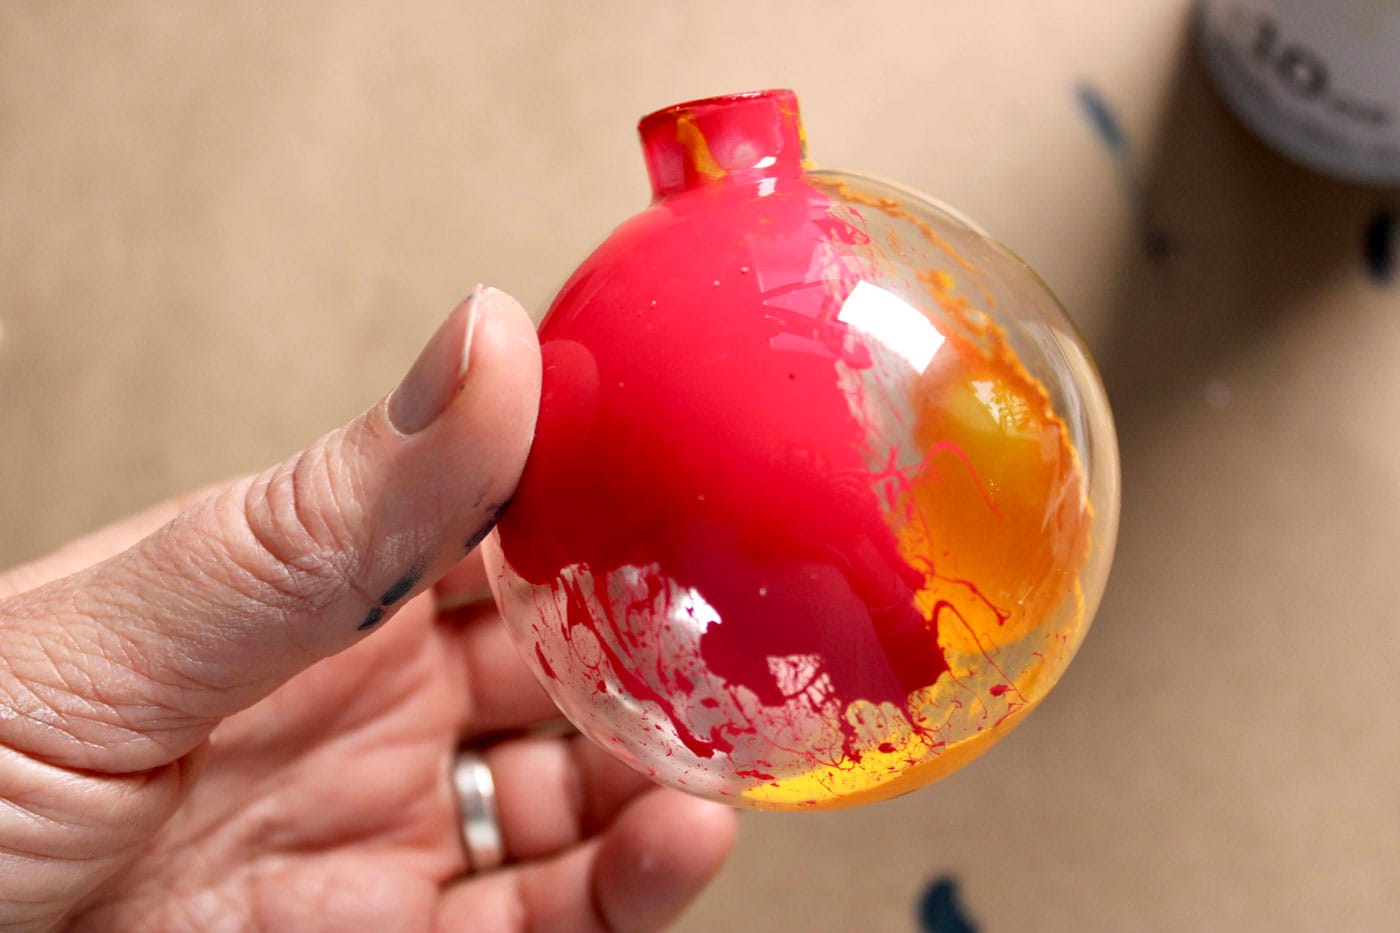
    Getting the paint to spread in the upper part of the ornament requires just a little finesse. You’ll want to aim the compressed air at the neck of the ornament and then gently move it downward, coaxing the paint into that curve. 

    I put a dollop of blue paint in the neck of the ornament as well. A little bit dropped into the main part of the ornament, and that’s completely fine. Just go with it! 

    close up of paint inside of glass ornament showing dollop of turquoise paint

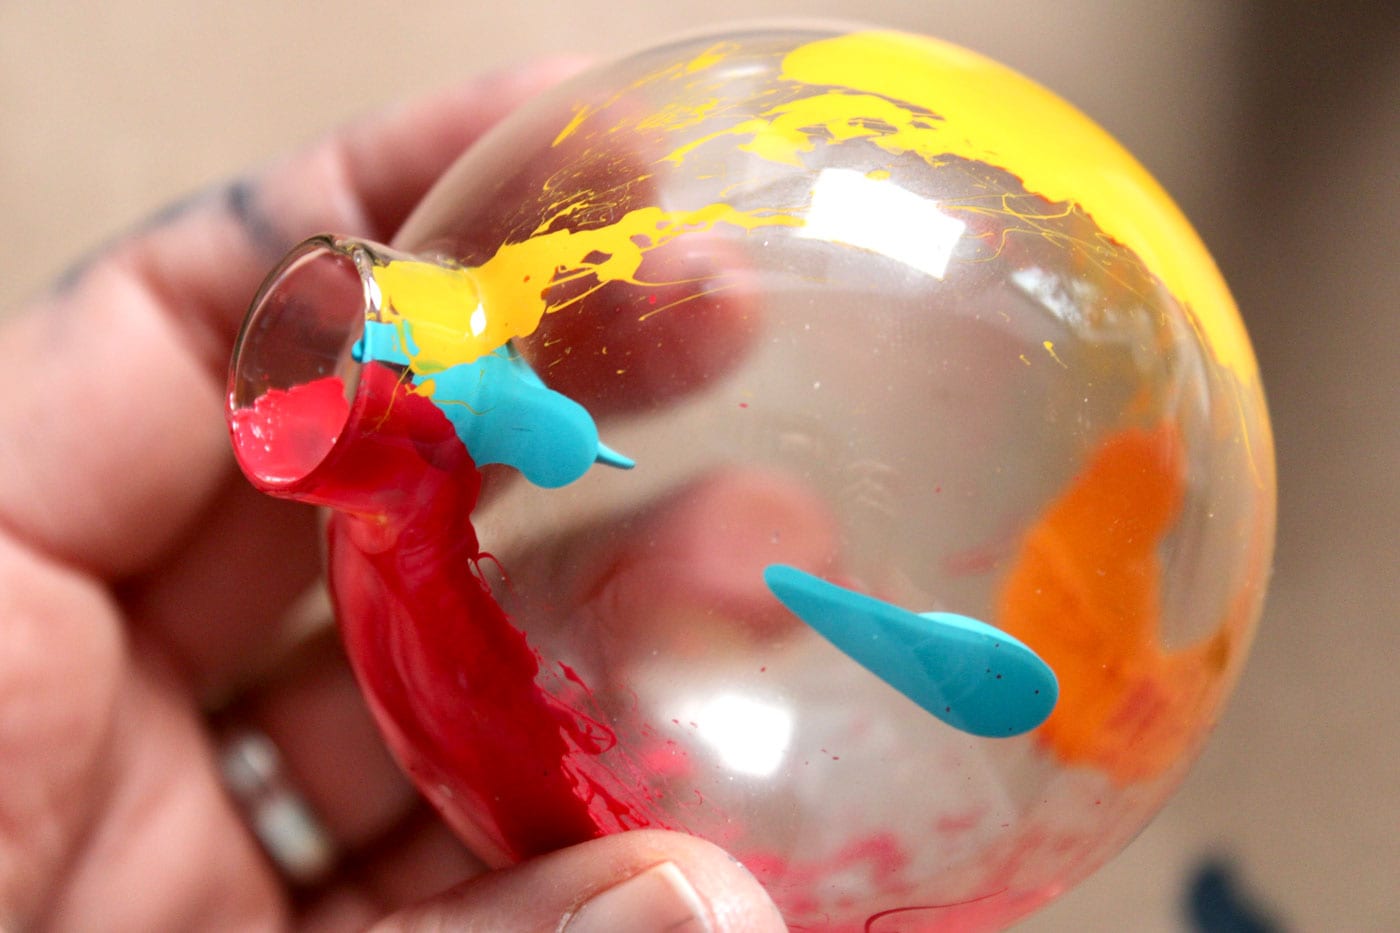
    Here you can see how the blue begins to layer a little behind the yellow and red. Each subsequent layer will become more of the background. 

    close up of paint inside of glass ornament

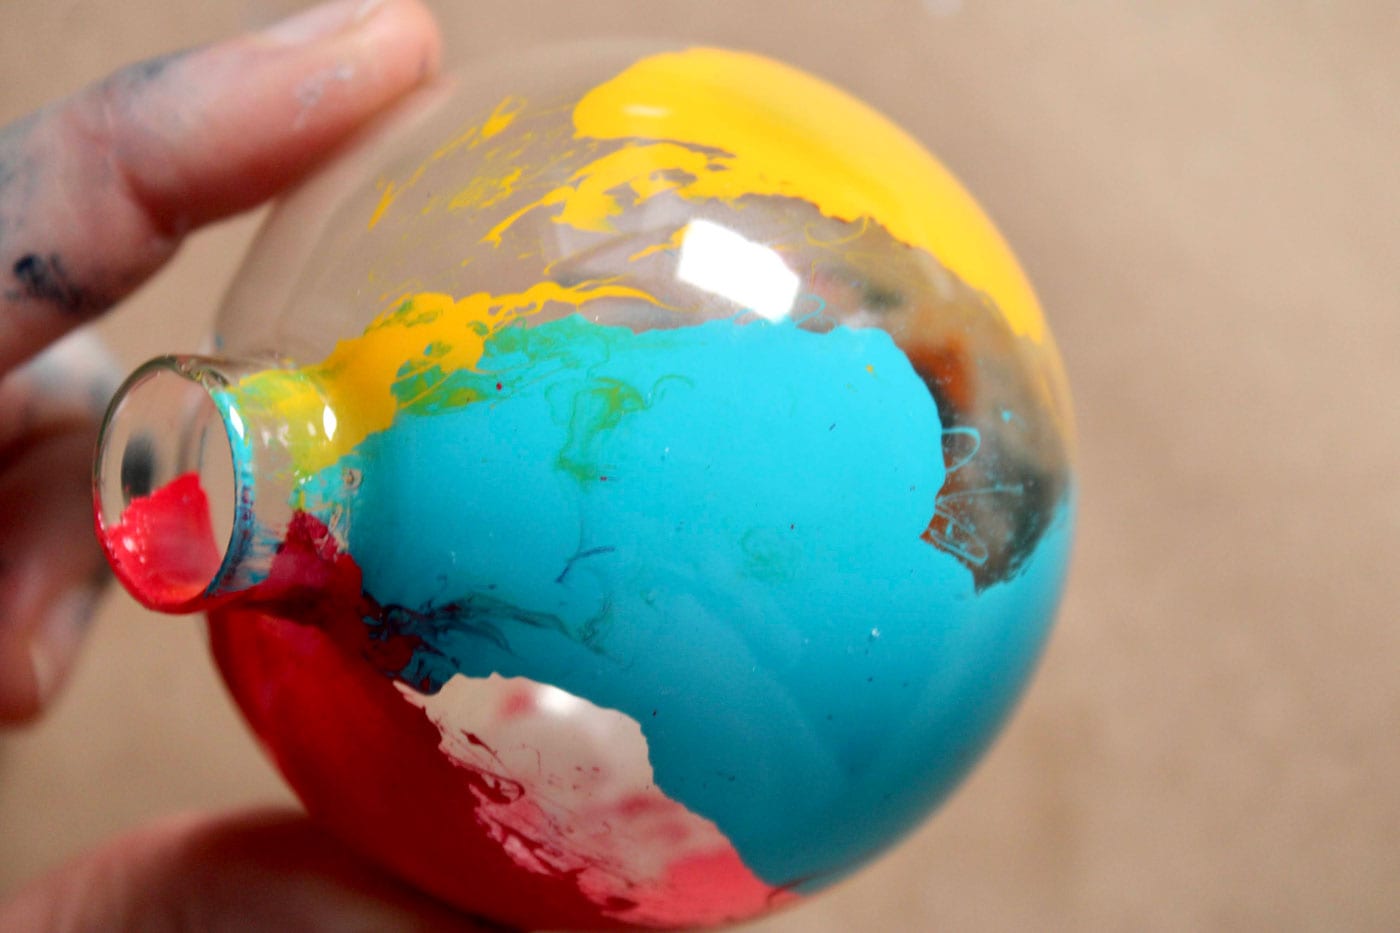
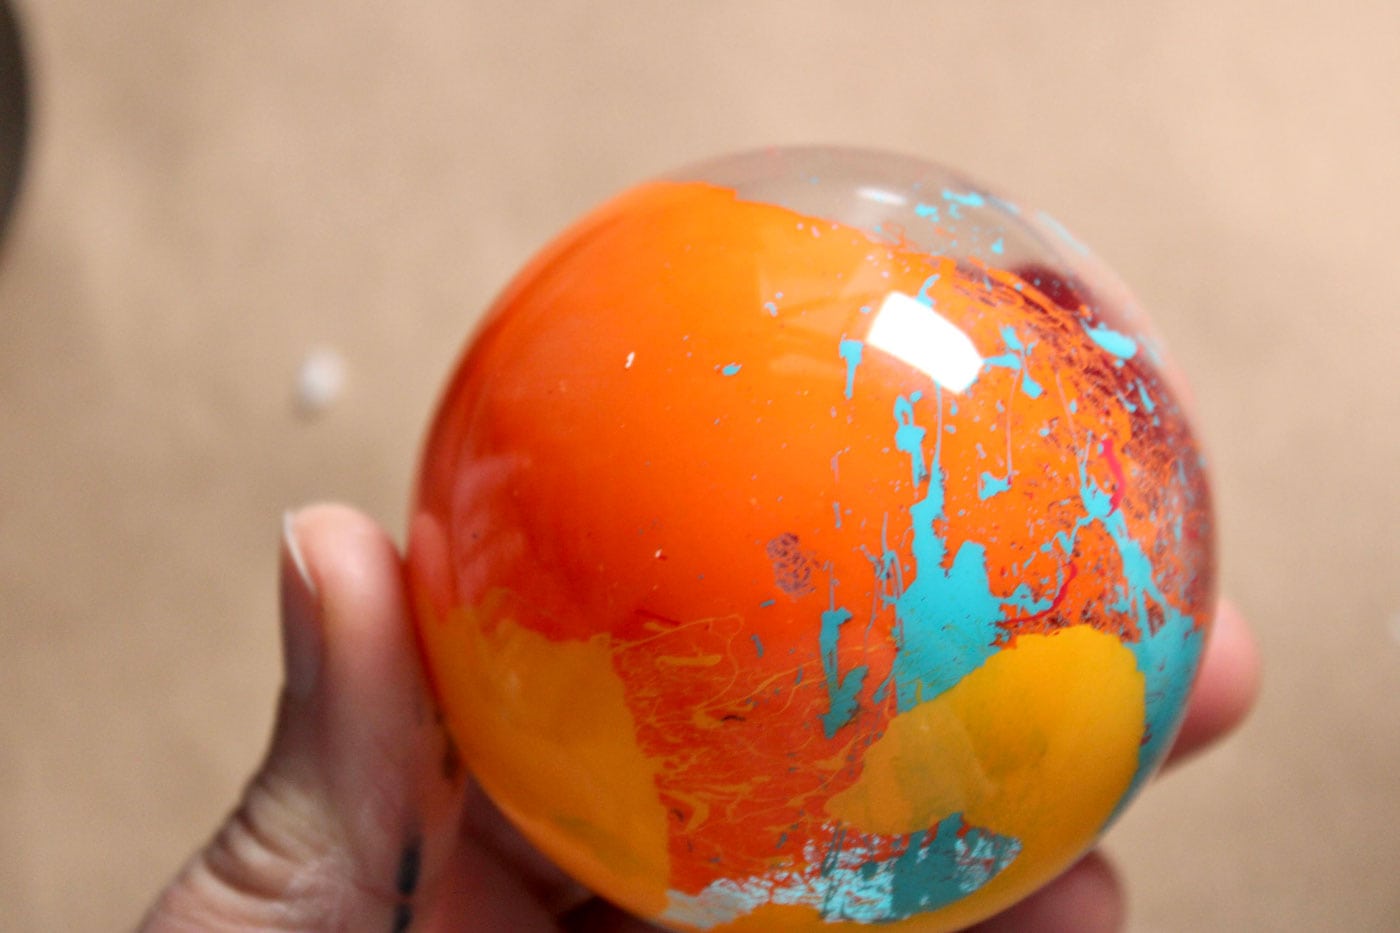
    You will find that each paint spreads has a slightly different consistency from the others, which makes them spread a little differently. I added this orange to the neck of the ornament, expecting it to fill in a small side area. 

    close up of paint inside of glass ornament

    Instead, it spread all the way to the base of the ornament and provided a gorgeous contrast to the blue and yellow paints. 

    close up of paint inside of glass ornament

    Step Three: Add Additional Colors

    Next, I added some lime. It didn’t spread far but again added some fabulous splatter effects and color contrast. 

    close up of paint inside of glass ornament

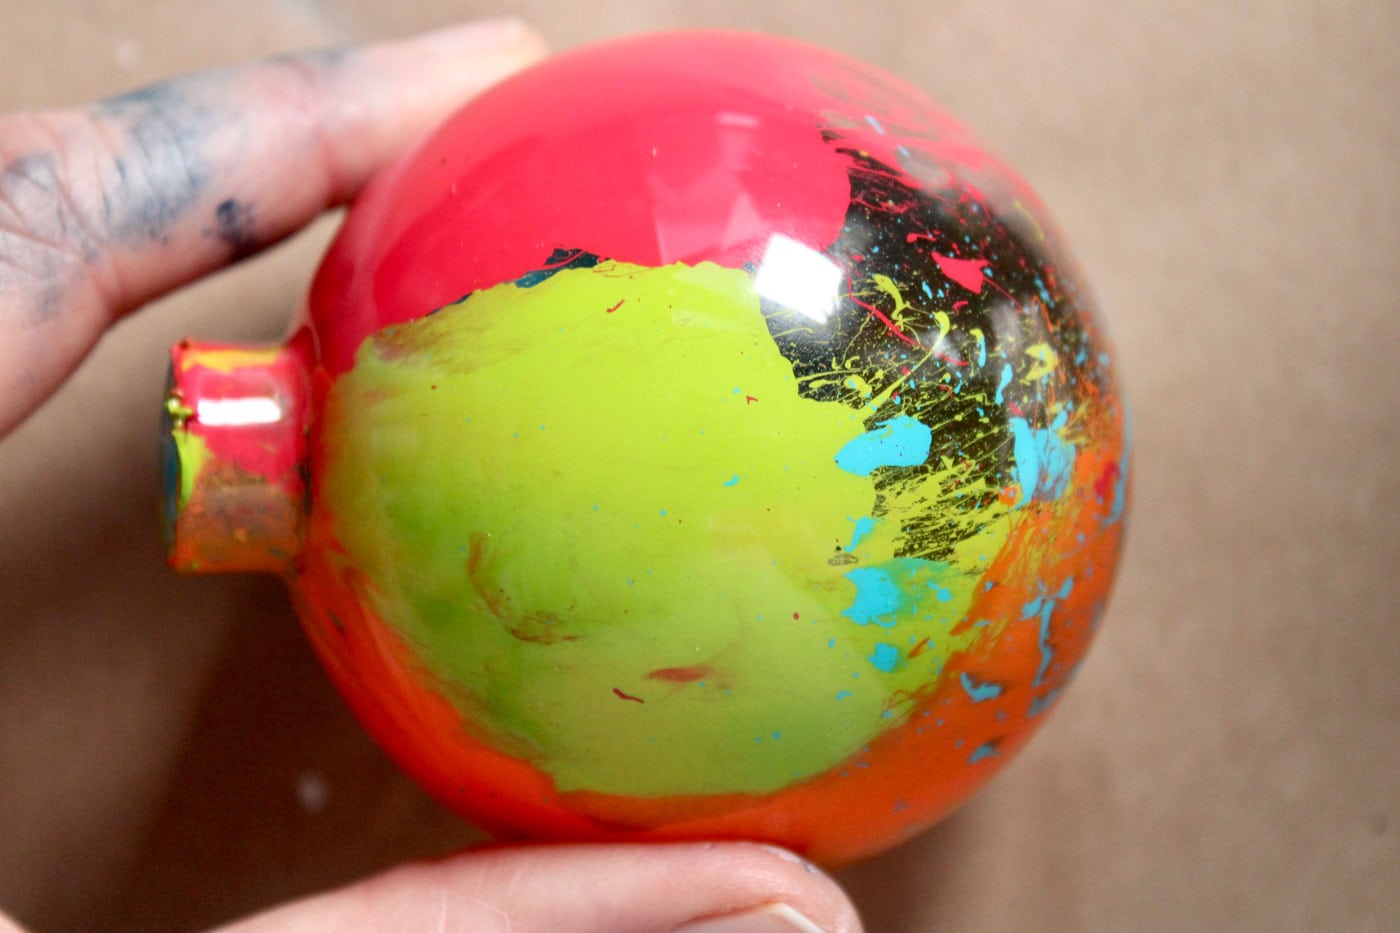
    This ornament was all about bright, vibrant colors, so magenta was next. Notice I continue adding paint to the neck of the ornament in order to fill in the empty gaps on the side of the ornament. 

    close up of paint inside of glass ornament

    I LOVE how the magenta fills in the background and really lights up those yellow splatters! 

    Finishing

    Once you have finished, you’ll want to let the paint dry. It needs a long time to dry because the paint doesn’t get much air flowing inside the ornament.

    hand holding multi color splatter paint ornament

    I let mine dry for a week. After the paint is dry, I go back and check to see if any of the paint has settled. The settling can cause some paint to pull downward, leaving exposed glass/plastic.

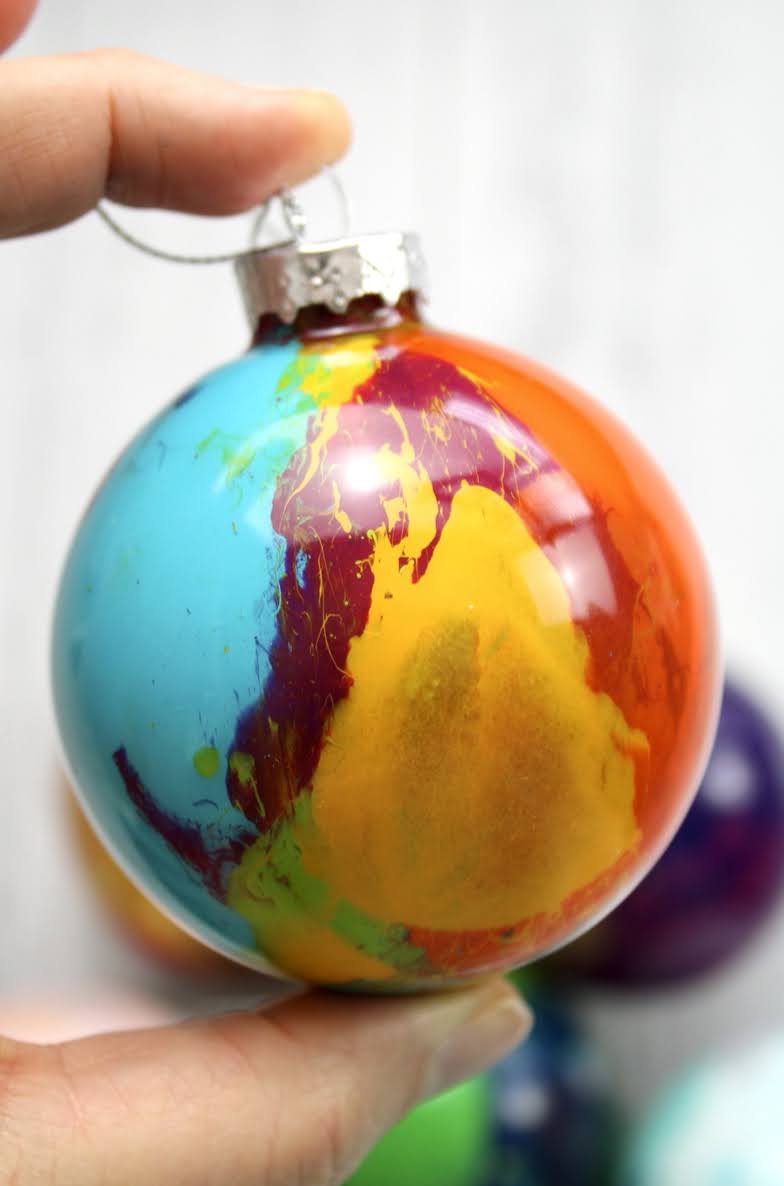
    If this happens, go back over it with a little more paint, and let dry again. After it is dry, replace the metal cap, and your ornament is finished! 

    More Color Variations

    close up of paint inside of glass ornament

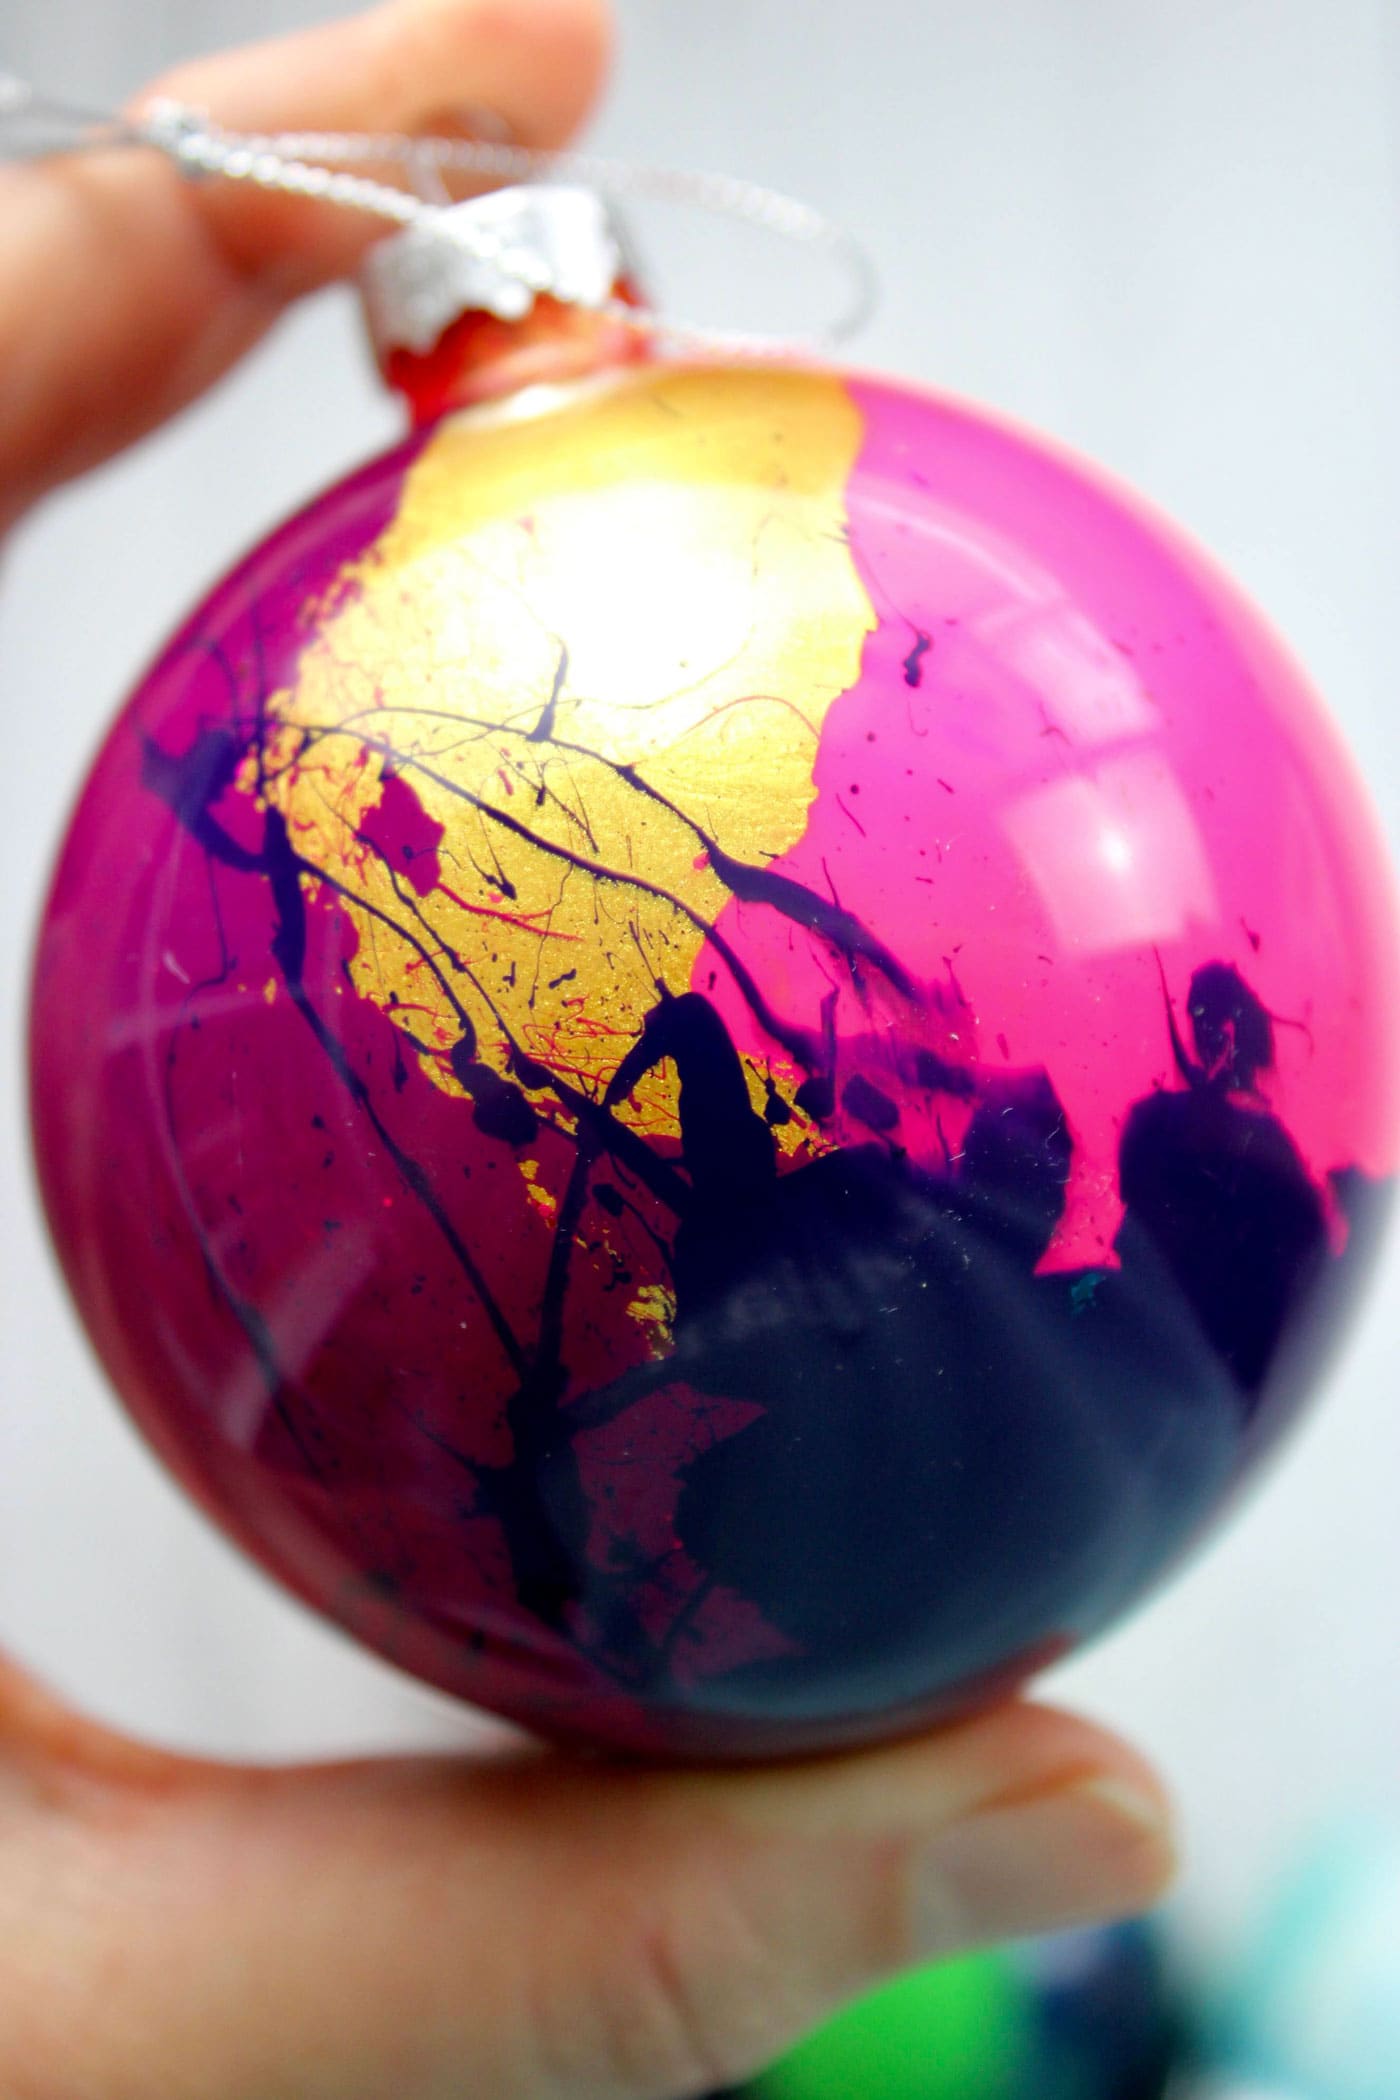
    Here is a purple and gold version I made. The gold looks like gold leafing. So pretty! And I love how the deep purple splatter adds so much energy to it. 

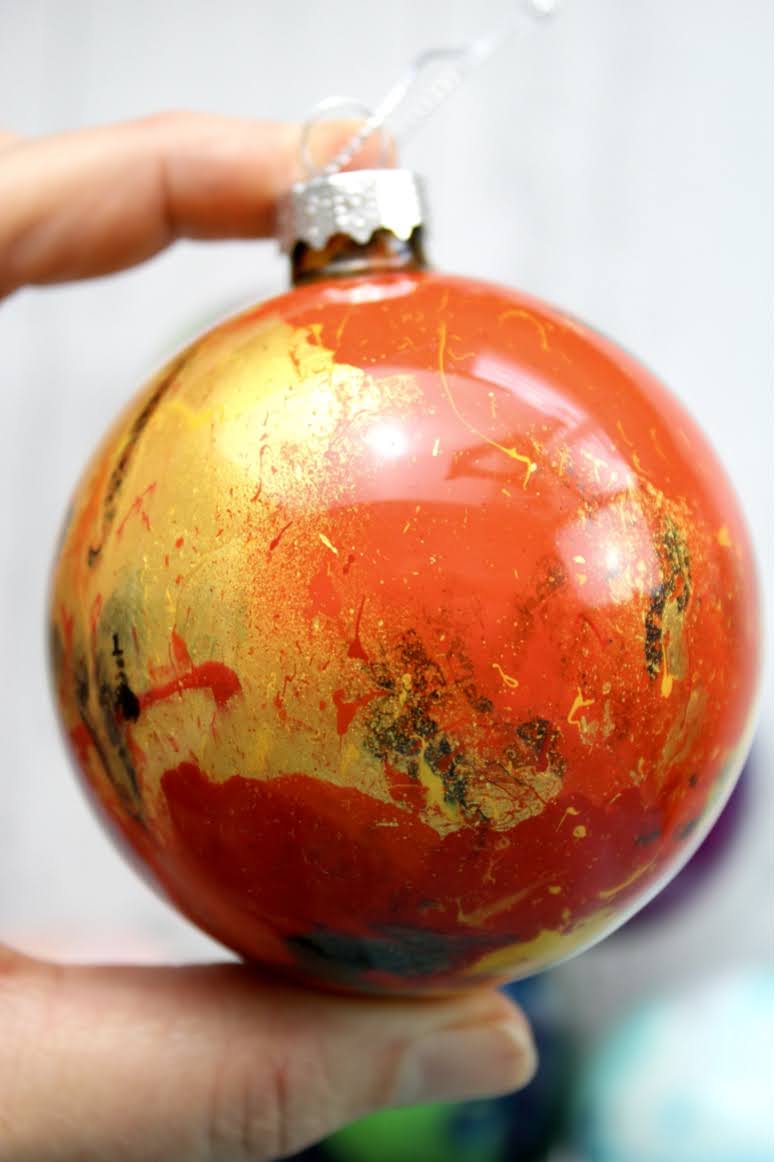
    Do you like something a little more traditional and elegant? I used red, persimmon, gold, and black to create this beauty. Again, the gold adds such a fun pop of wow factor, don’t you think? 

    close up of paint inside of glass ornament

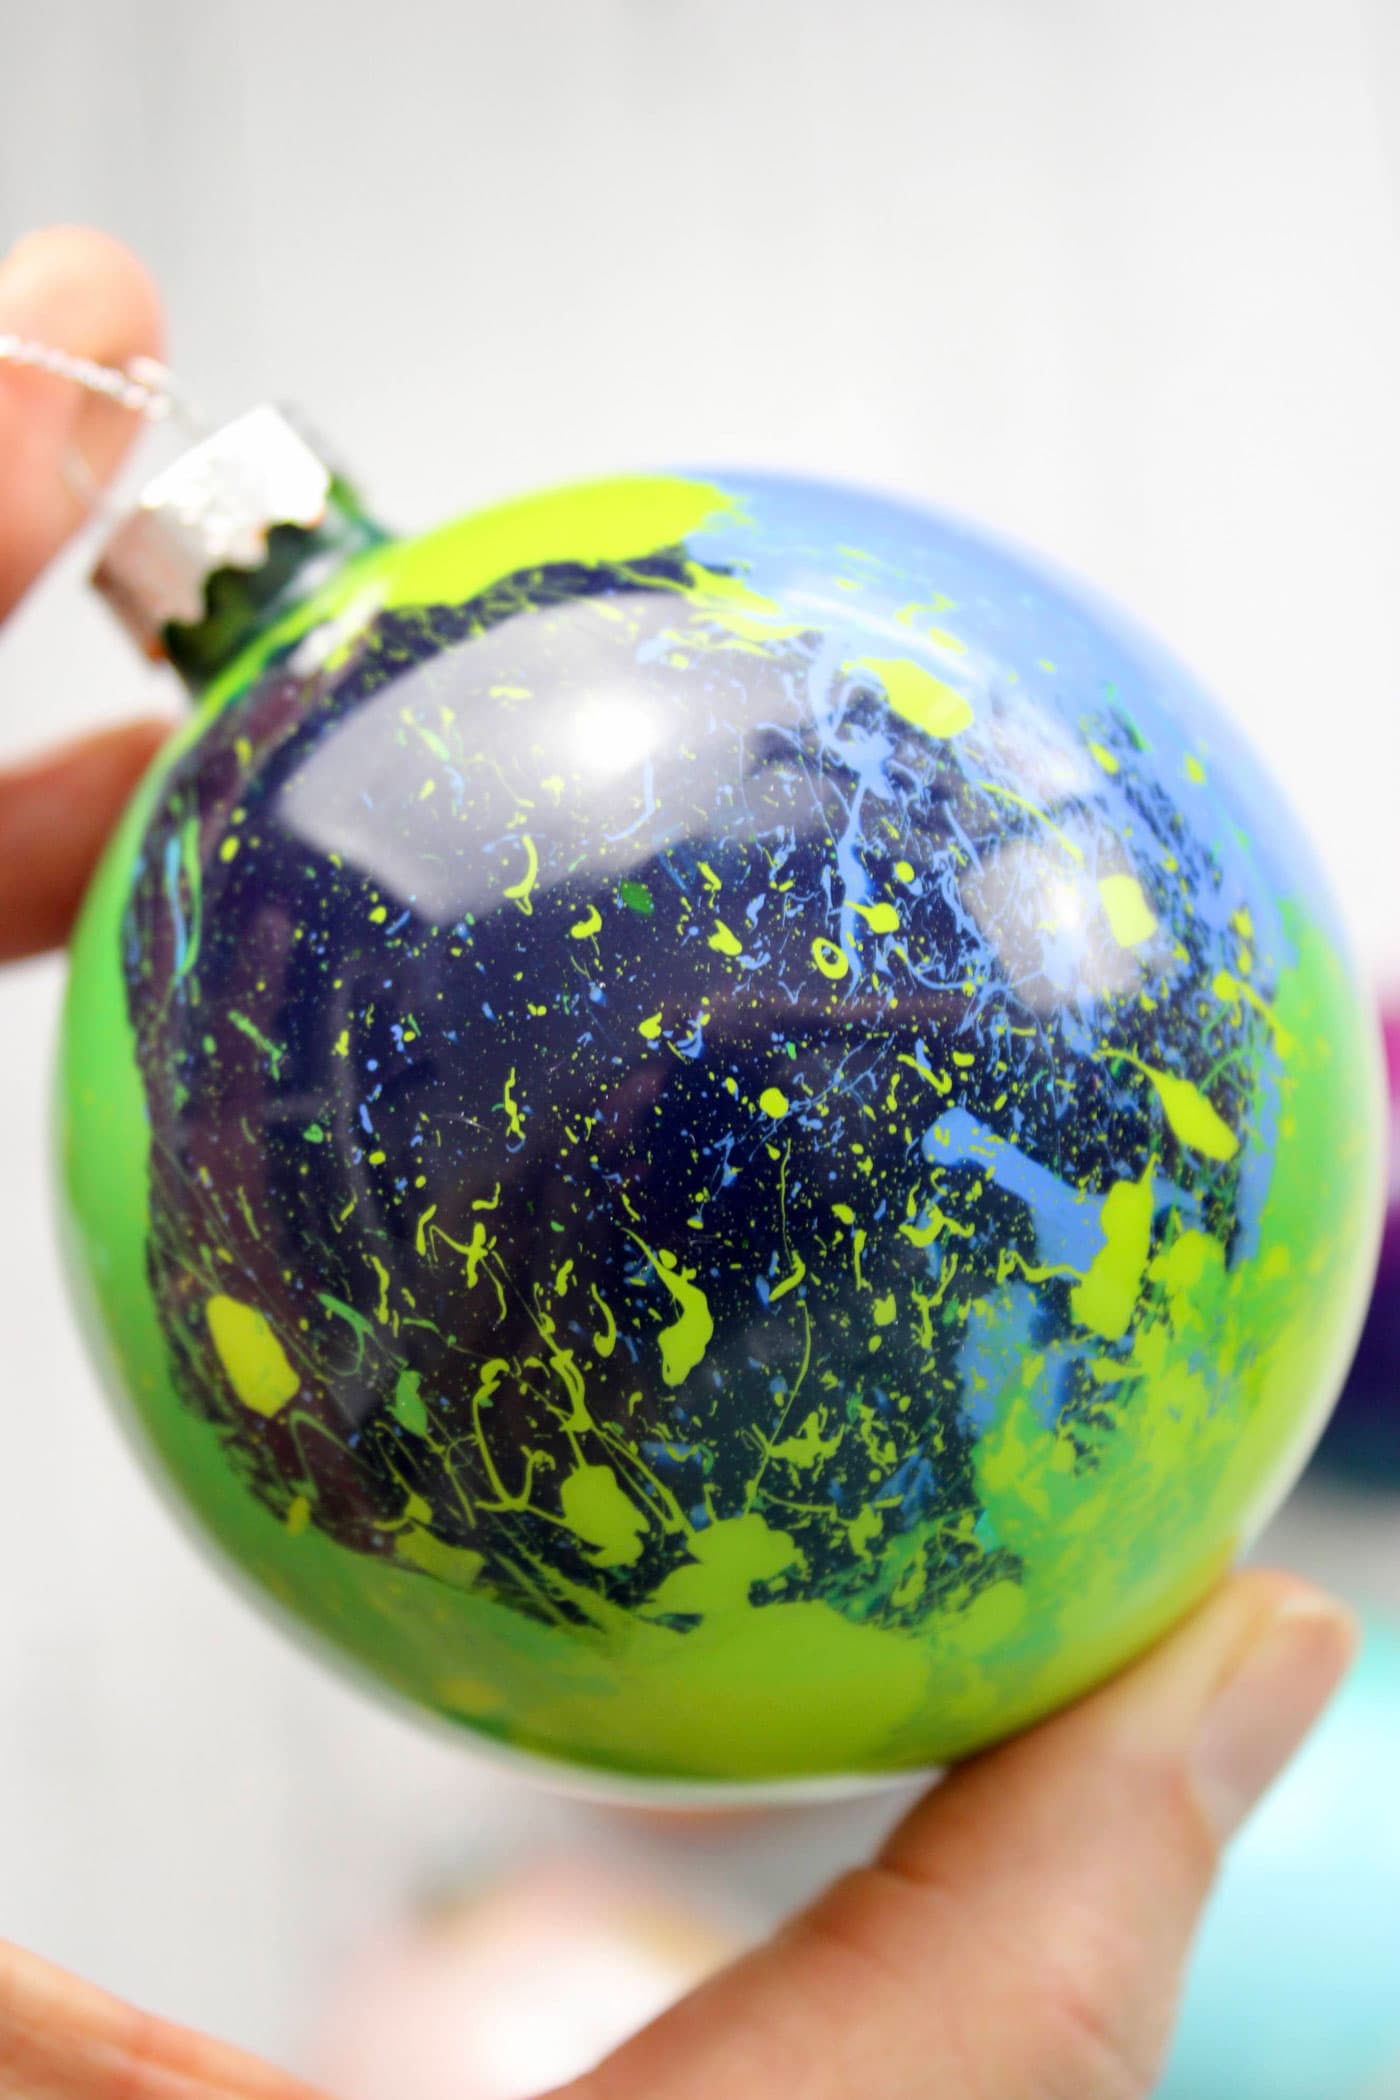
    This one is for all of the nature lovers out there. I used various shades of green and blue to create this abstract earth. 

    close up of paint inside of glass ornament

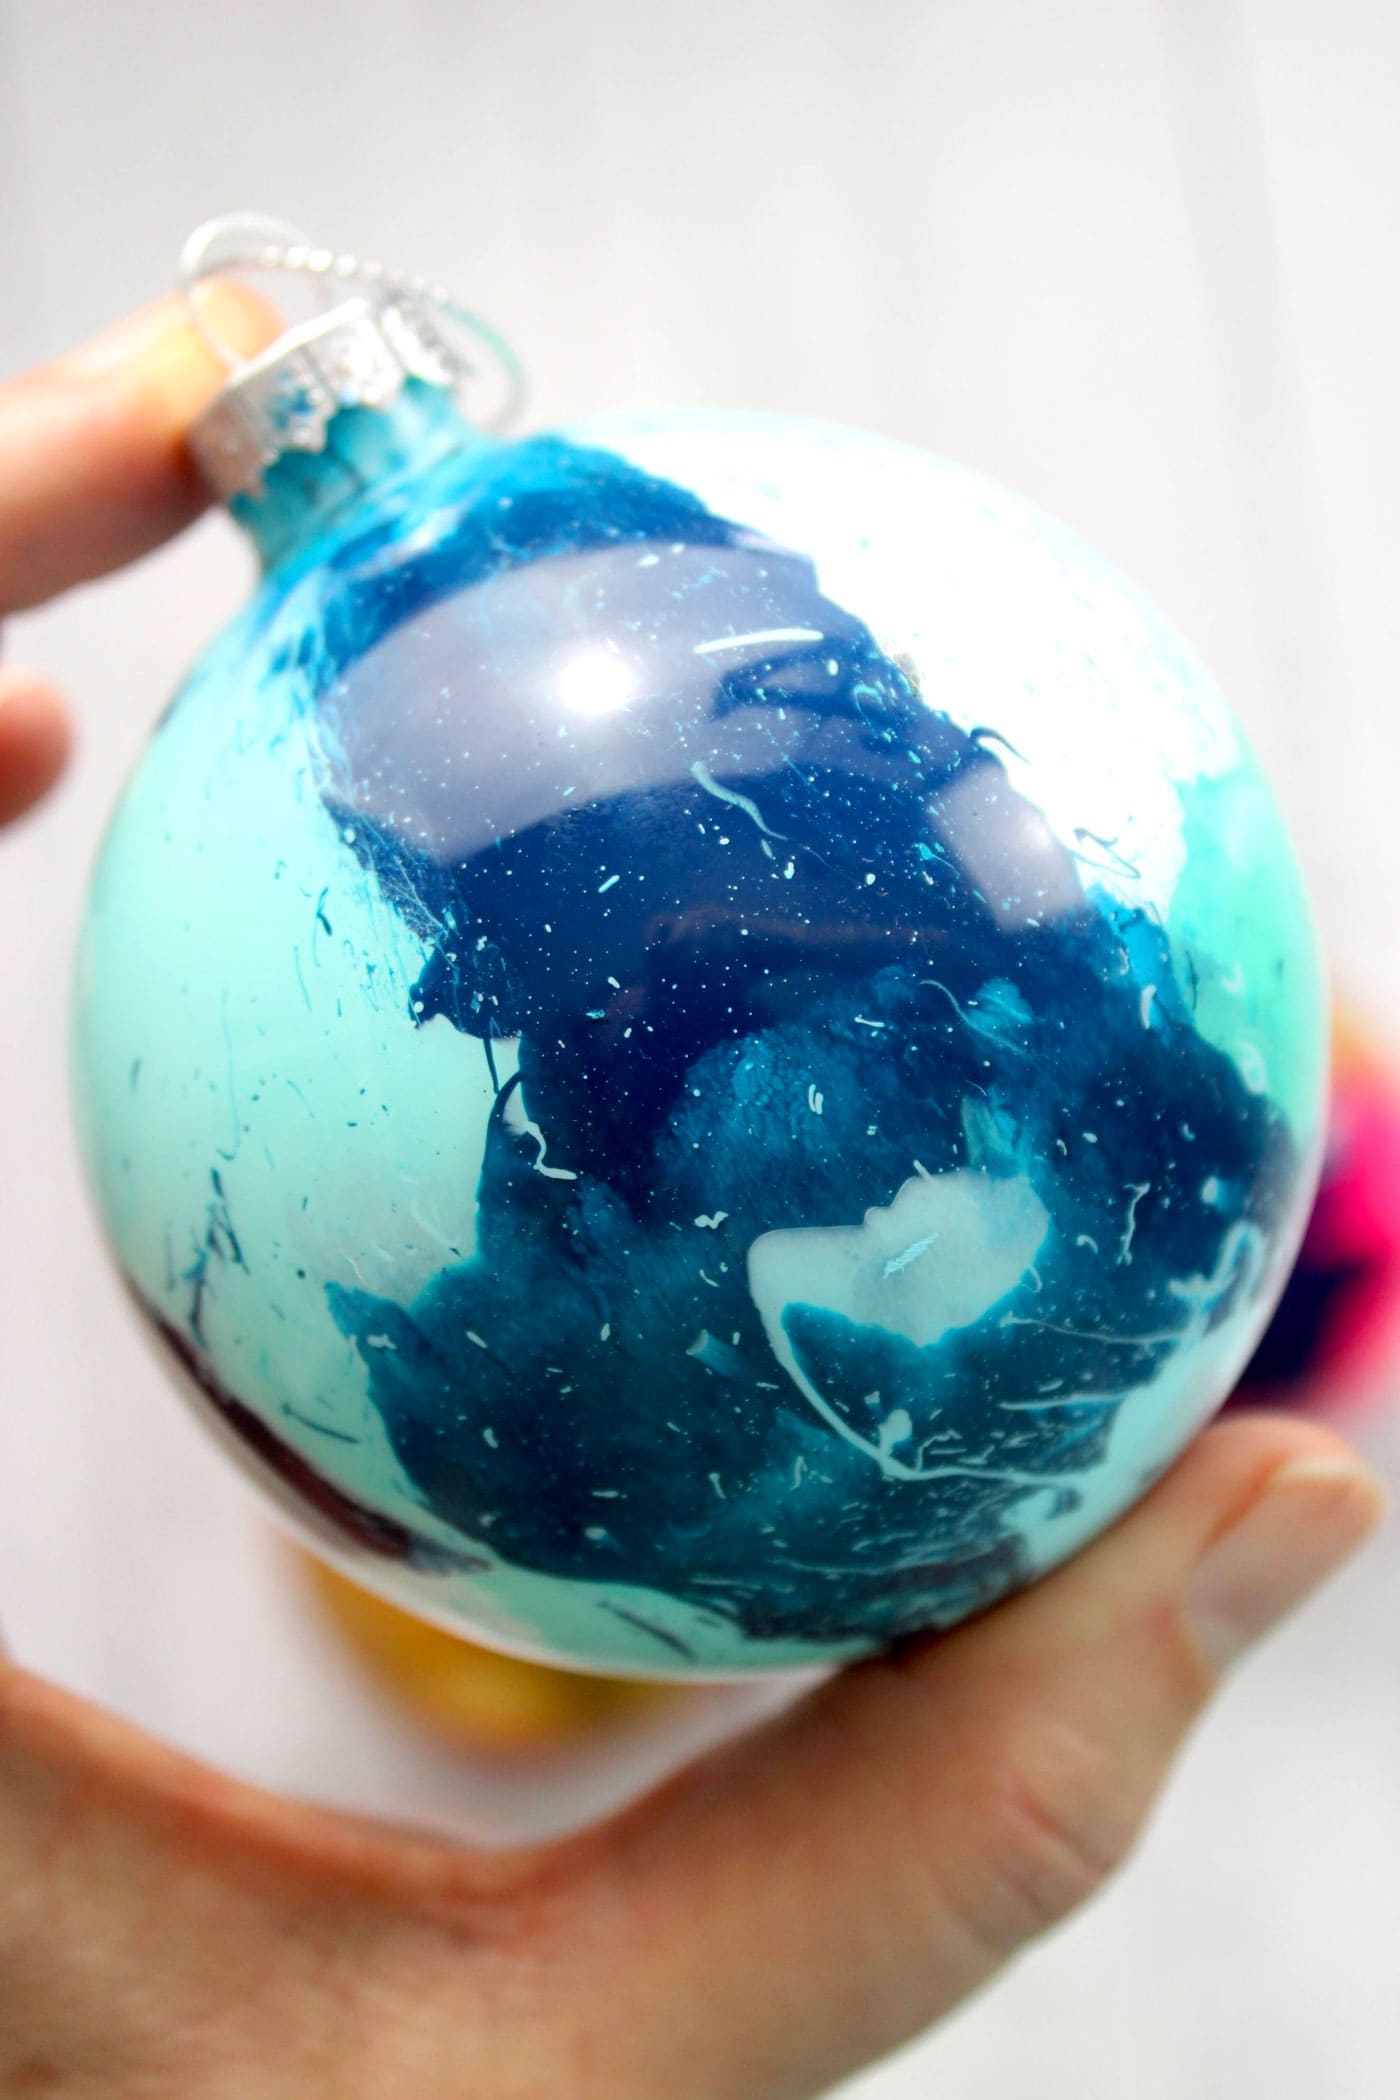
    I’m a sucker for cool, coastal vibes, and this ornament has it with calming shades of blue and a splash of white. 

    Need something a little more understated and elegant? Pictures don’t do this one justice. This lovely ornament is painted with soft shades of pink, coral, silver, and gold. Gorgeous! 

    I love these glass ornament balls because they aren’t just for the holidays. You can take off the string and arrange them in a decorative bowl, and you have yourself some FABulous custom home decor! 

    Can I Use Plastic Ornaments?

    You can make kid-friendly versions by using plastic ornaments instead of glass. These are so easy to make and would be a perfect activity for the whole family to get in on. 

    Thank you so much for stopping by! I hope you’ll make your own Splatter Paint ornaments and share them with me on Instagram @bayhillstudio. Take a moment to subscribe to my YouTube Channel and follow me on Instagram for more creative content and project inspiration. Have a blessed day! 

    Video Instructions

    If you’d like additional instructions, be sure to check out the video of the entire process on Julia’s YouTube channel.

    About the Maker

    woman sitting at sewing machine

    Julia Frazier is the founder of Bayhill Studio. Julia designs quilts and projects geared toward beginner quilters and crafters. You’ll usually find her at her sewing machine or hiking in the nearby mountains. Follow Julia on Instagram @bayhillstudio, and subscribe to her YouTube channel for new and exciting projects and tutorials. Be sure to check out her Bayhill Studio website for a growing list of tutorials and patterns.

    Also By Julia:

    colorful patchwork quilt pattern outdoors in snow

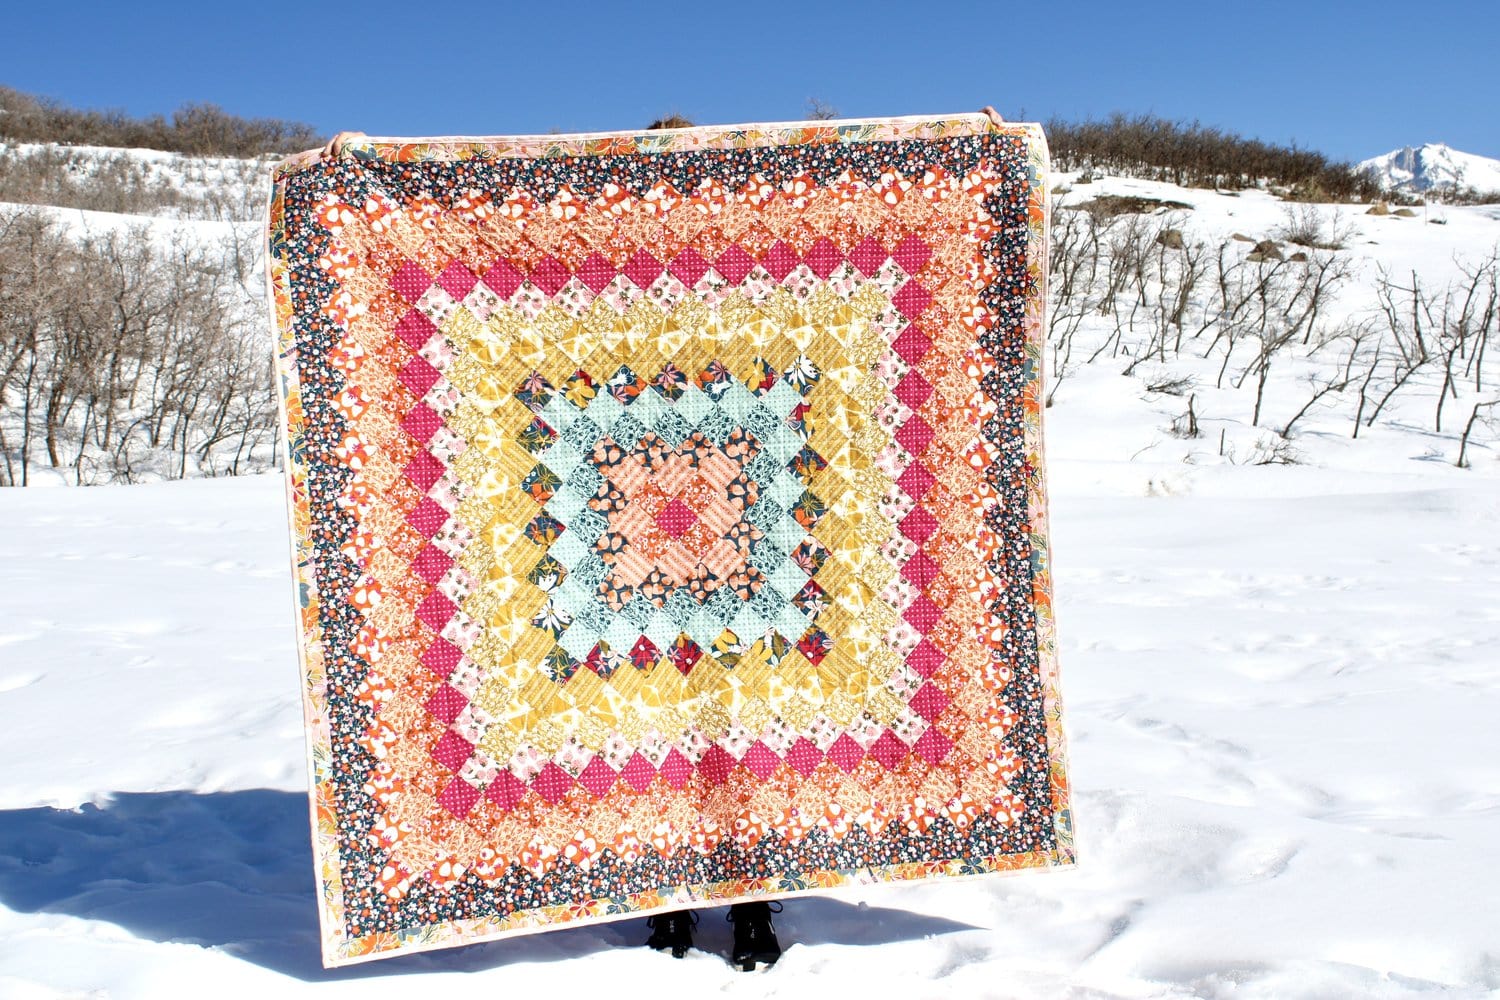
    Giant Granny Square Trip Around the World Quilt

    black and yellow patchwork quilt outdoors

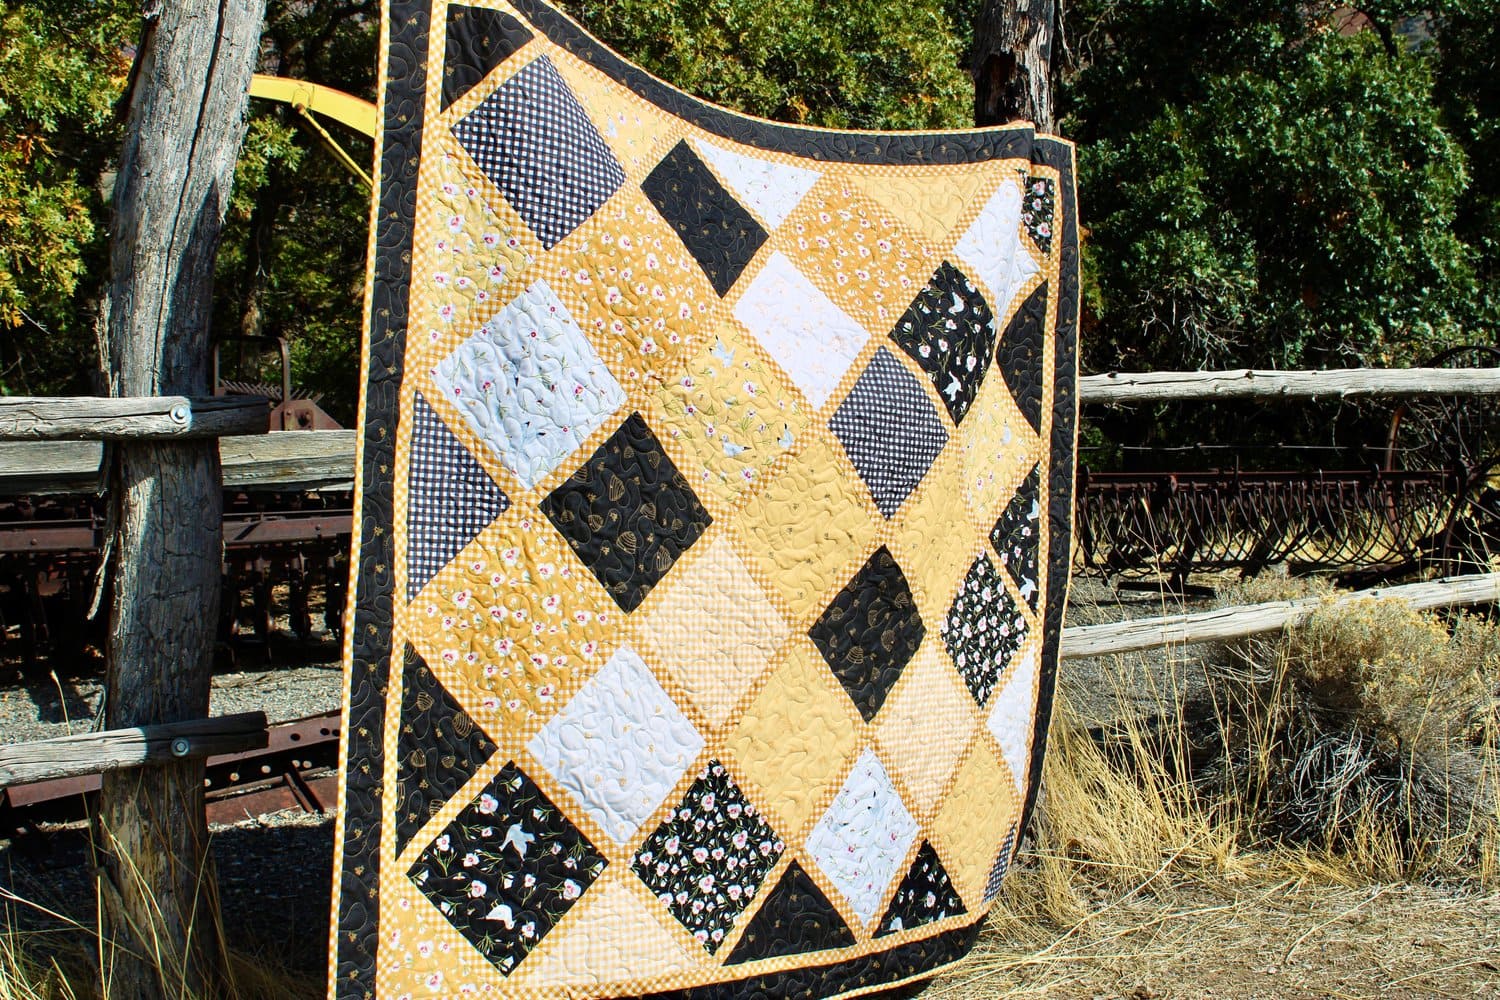
    Pre-Cut Friendly Lattice Quilt Tutorial

    red, white and blue patchwork quilt

    Star Attraction Quilt Pattern

    You May Also Like:

    • Scallop Neck DIY T-Shirt Refashion
    • Hydro-Dipped Sneaker Tutorial
    • 30 Handmade Christmas Ornament Patterns & Sewing Tutorials
    • Quilt As You Go Scrappy Christmas Ornament Tutorial
    • How to Make Paper Memory Christmas Ornaments

    More Projects You May Enjoy

    • How to Make a Retro Diorama Ornament
    • How to Make String Christmas Ornaments
    • How to Make a Halloween Potions Centerpiece & Free Printable Potions Jar Labels
    • How to Make Fabric Kimekomi Christmas Ornaments

    • Share
    • Email

    About Author

    Melissa Mortenson

    Melissa Mortenson is a blogger, designer, and content creator. She is the Polka Dot Chair blog founder and has been sharing fresh and creative ideas with readers since 2008. She is the author of “Project Teen, Handmade Gifts your Teen will Actually Love.” Her work and designs have been featured on HuffPost, TODAY, Pioneer Woman, HGTV, BuzzFeed, Better Homes & Gardens, and many other established publications. Her first fabric line, “Derby Style,” debuted in January 2015 through Riley Blake Designs.  Additional fabric collections have followed it in subsequent years. A mom of 3, she considers herself lucky to be living in Kentucky.

    Reader Interactions

    Leave a Reply Cancel reply

    Your email address will not be published. Required fields are marked *

    This site uses Akismet to reduce spam. Learn how your comment data is processed.

    Primary Sidebar

    Hello! It’s nice to meet you.

    I’m Melissa. I like to design things, like fabric, printables, and projects.

    I’m also a Mom and a Maker. I am like most of you, just trying to do my best every day. Some days I succeed, many days I fail.  I find joy in creating, if you do too, then I hope that you find something here bring a little “happy” to your life.  Find out more about me here.

    COPYRIGHT POLICY

    All my images and text are copyrighted. You may NOT use any images from this site in any kind of Video (this includes YouTube). If you would like to feature my work, you may use ONE (1) NON-COLLAGED image and must “follow” link back to my original blog post. You may NOT edit, crop, or change my images in any way without written permission. You MAY NOT print out or copy and distribute any text, images or patterns from this site. All patterns, content, instructions, and templates are for personal use ONLY! Thank you! Violators will be reported.

    Footer

    ↑ back to top

    About

    • Privacy Policy
    • Disclaimers
    • About Melissa
    • Instagram
    • Facebook
    • YouTube
    • Pinterest

    Newsletter

    • Sign Up! for emails and updates

    Contact

    • Contact
    • FAQ
    • Press
    • Published Books
    • Fabric Collections

    Welcome to the Polka Dot Chair! Here you’ll find easy, step-by-step, sewing, quilting, and crafting projects. We design projects for Makers of all skill levels. Beginners are welcome!

    DISCLAIMER:

    While every effort has been made to ensure the accuracy of the content on this website, the information is made available without warranty of any kind. The Polka Dot Chair accepts no responsibility or liability, whether direct or indirect, as to the currency or accuracy of the information, nor any consequence of its uses. This website is not intended to substitute the advice of a professional.

    Copyright © 2022 Polka Dot Chair

    [ Placeholder content for popup link ] WordPress Download Manager - Best Download Management Plugin