DIY Plastic Canvas Christmas Gift Card Holder
Julia of Bayhill Studio is back with us again today, sharing another retro-inspired Christmas craft with all of you! This tutorial for a plastic canvas gift card holder can be adapted in many ways and is a great way to make giving a gift card a little more special this holiday season!
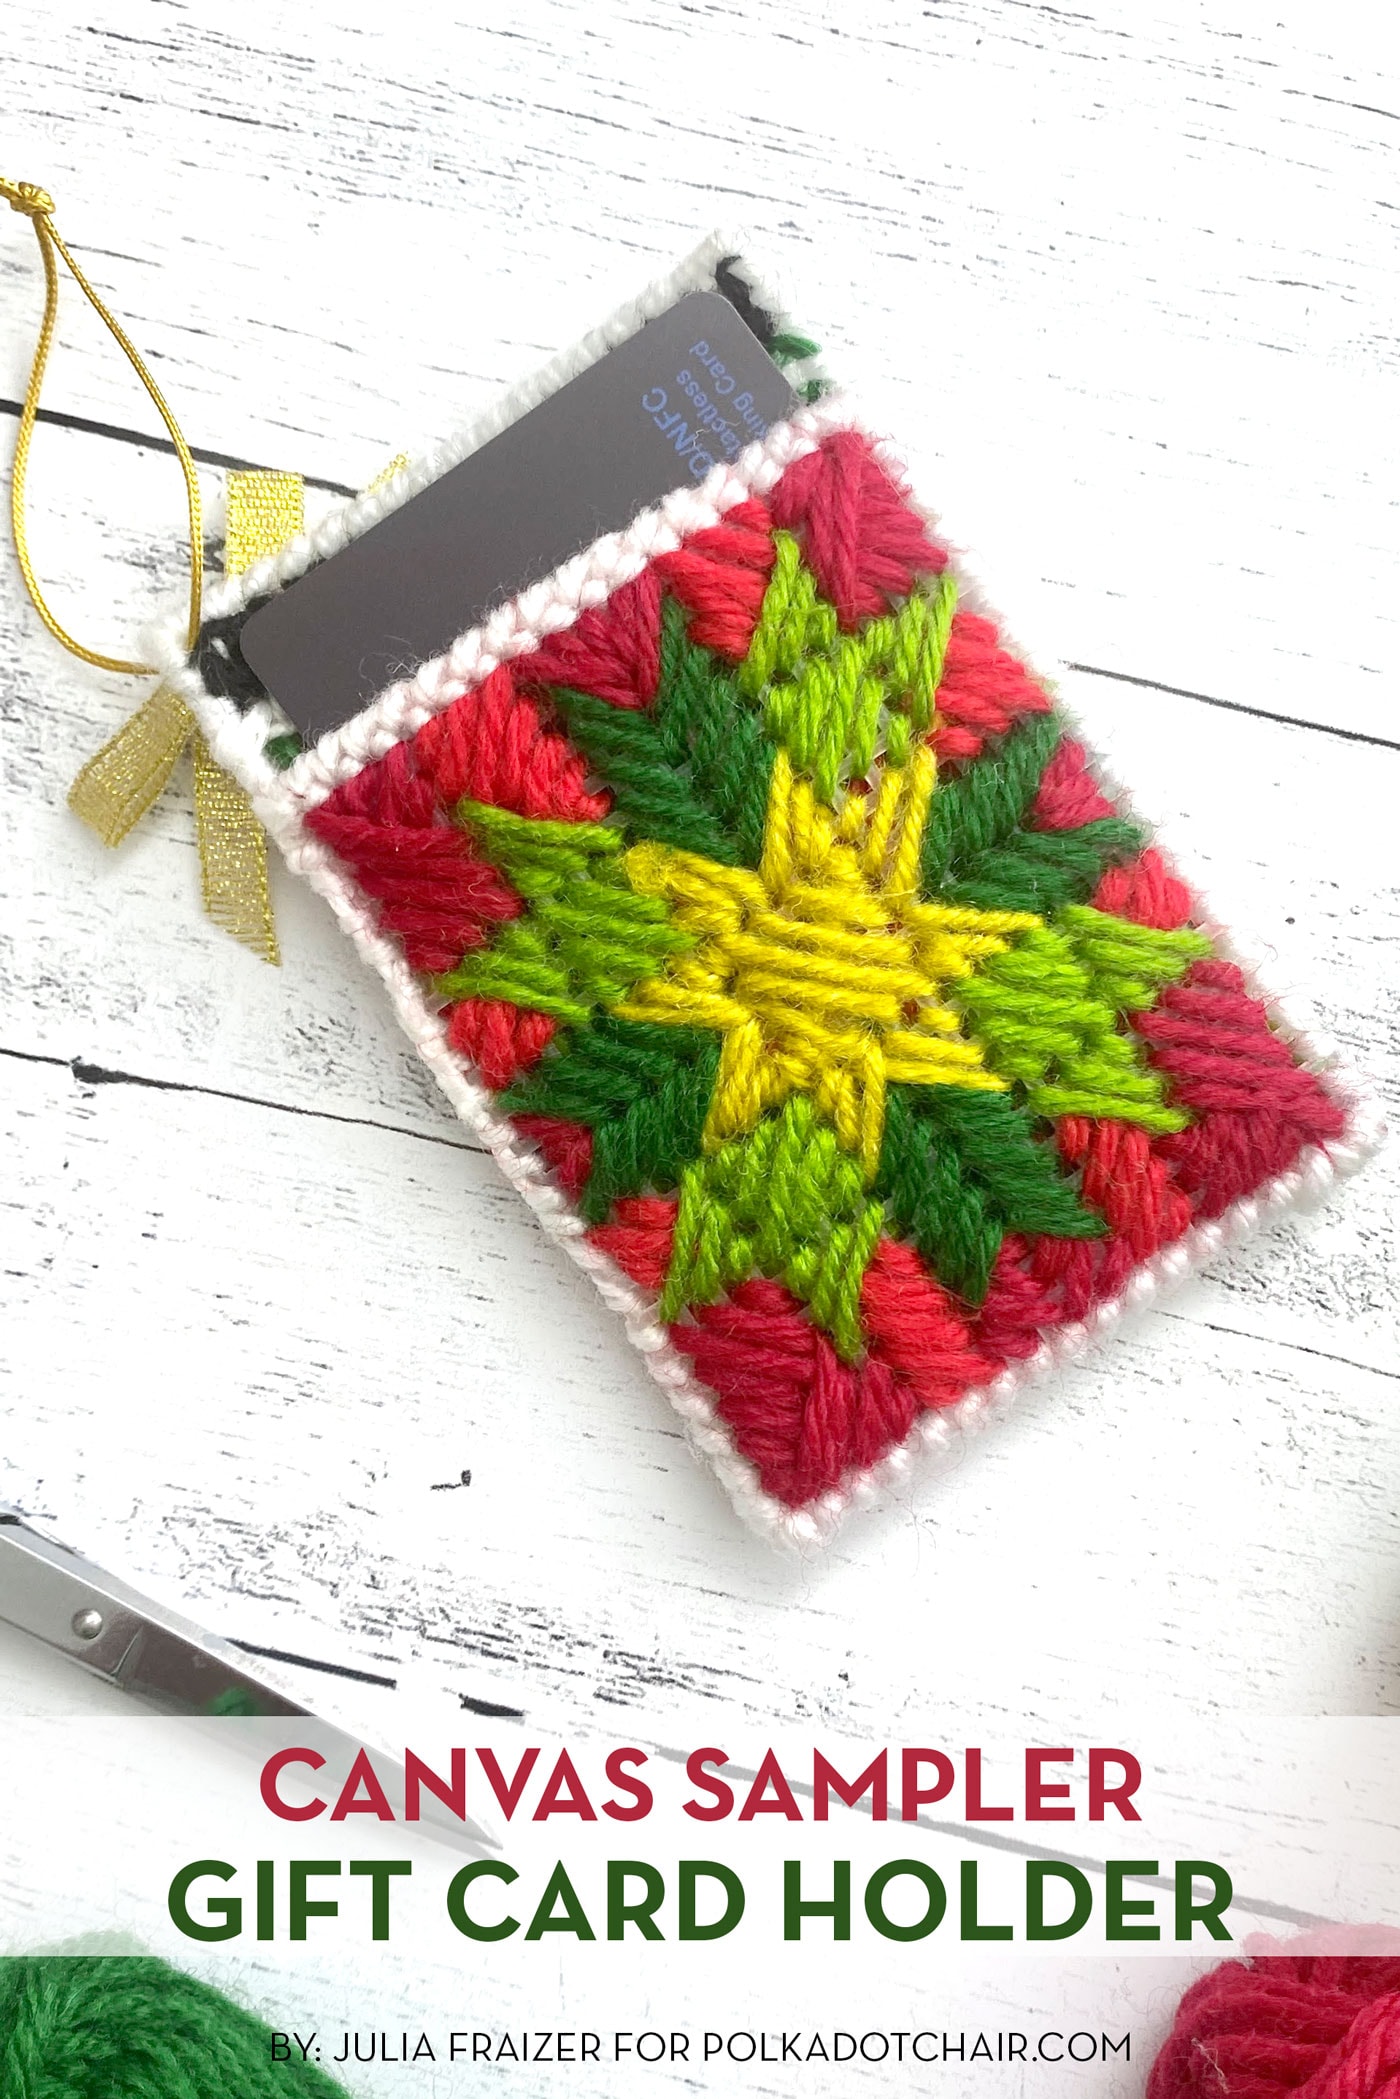
Hello, friends! It’s Julia at Bayhill Studio. Today, I am excited to share a fun, beginner-friendly Holiday Sampler Gift Card Holder that is certain to become a favorite for years to come.
Plastic Canvas Craft Ideas
When I was a little girl, my grandmother loved to work with plastic canvas. She made tissue box covers and other fun home decor items, but the thing I remember most is the tote bag she made for me and for each of my sisters.
We used our bags for years as church bags to hold our scriptures, papers, and pens. I seriously wish I still had that tote bag!
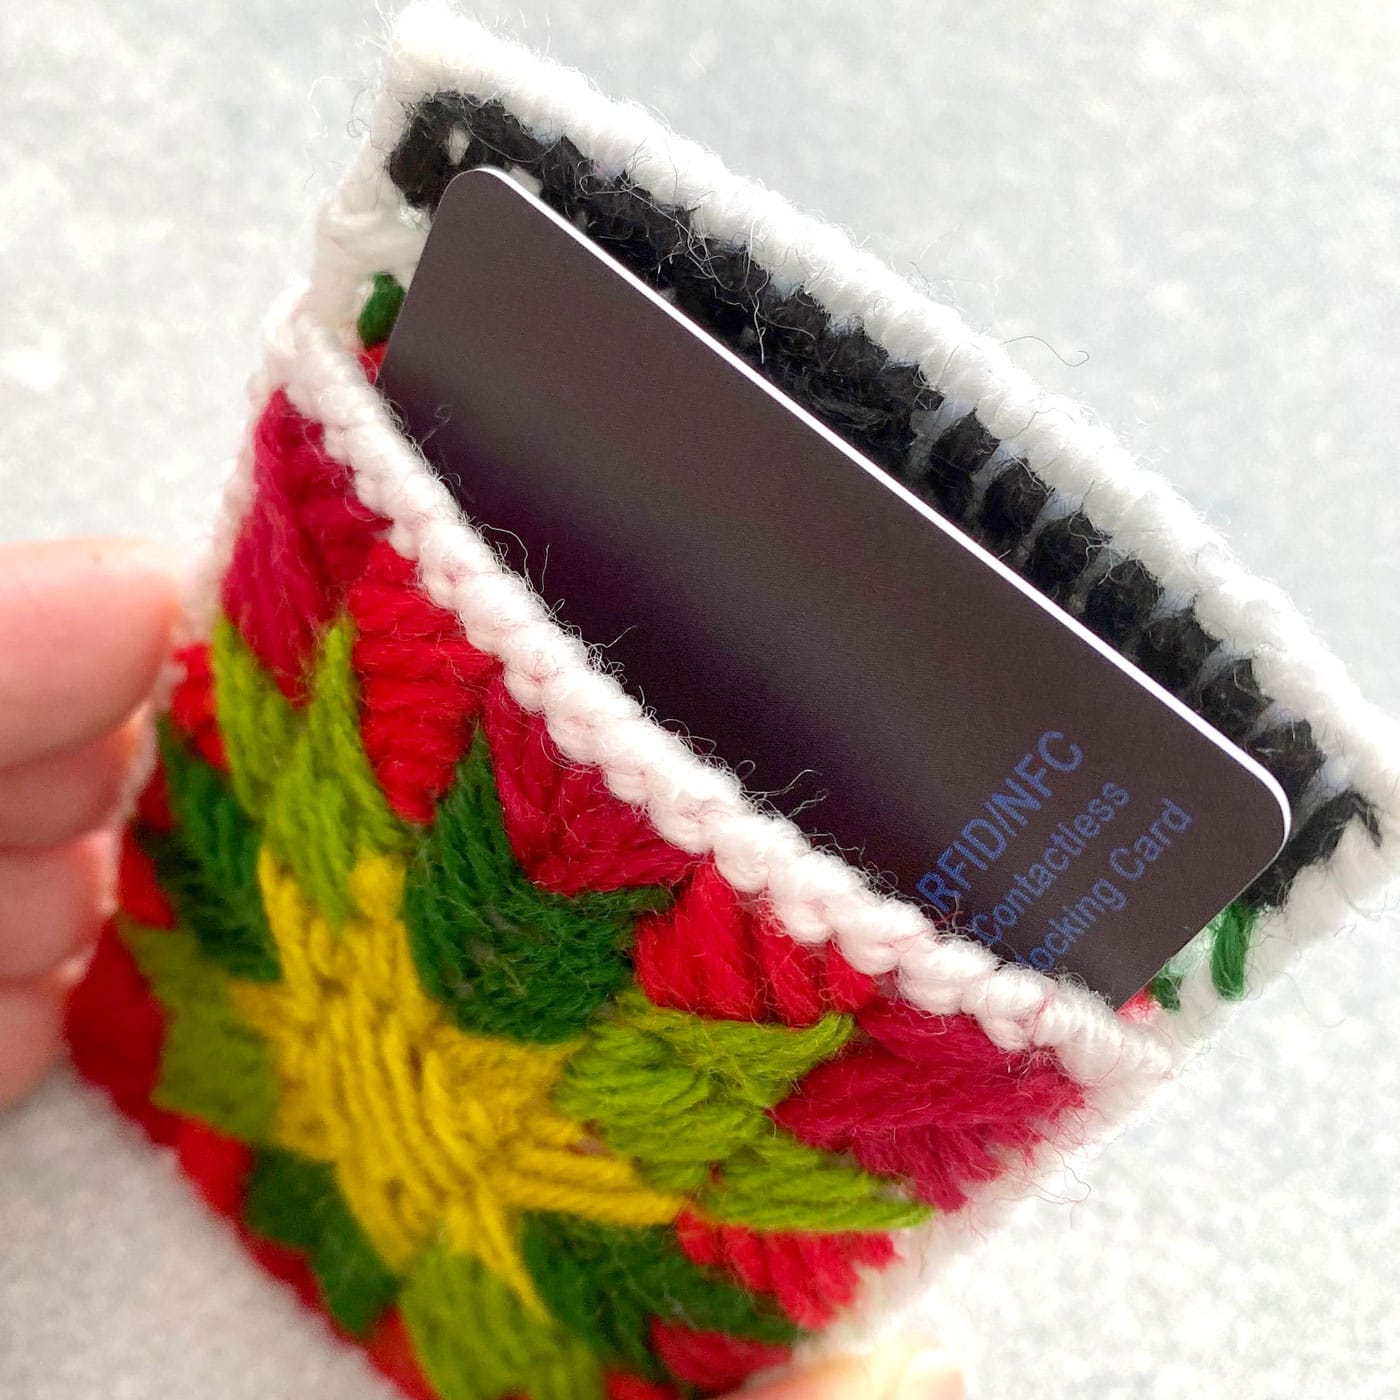
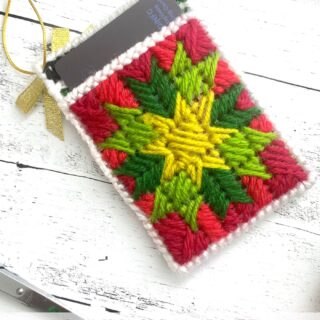
Thinking of that bag, I decided to design a little handmade project my kids could look forward to seeing each year at Christmas. This little envelope is designed to hold either a gift card or cash and can be hung as an ornament on a Christmas tree or used as a stocking stuffer.
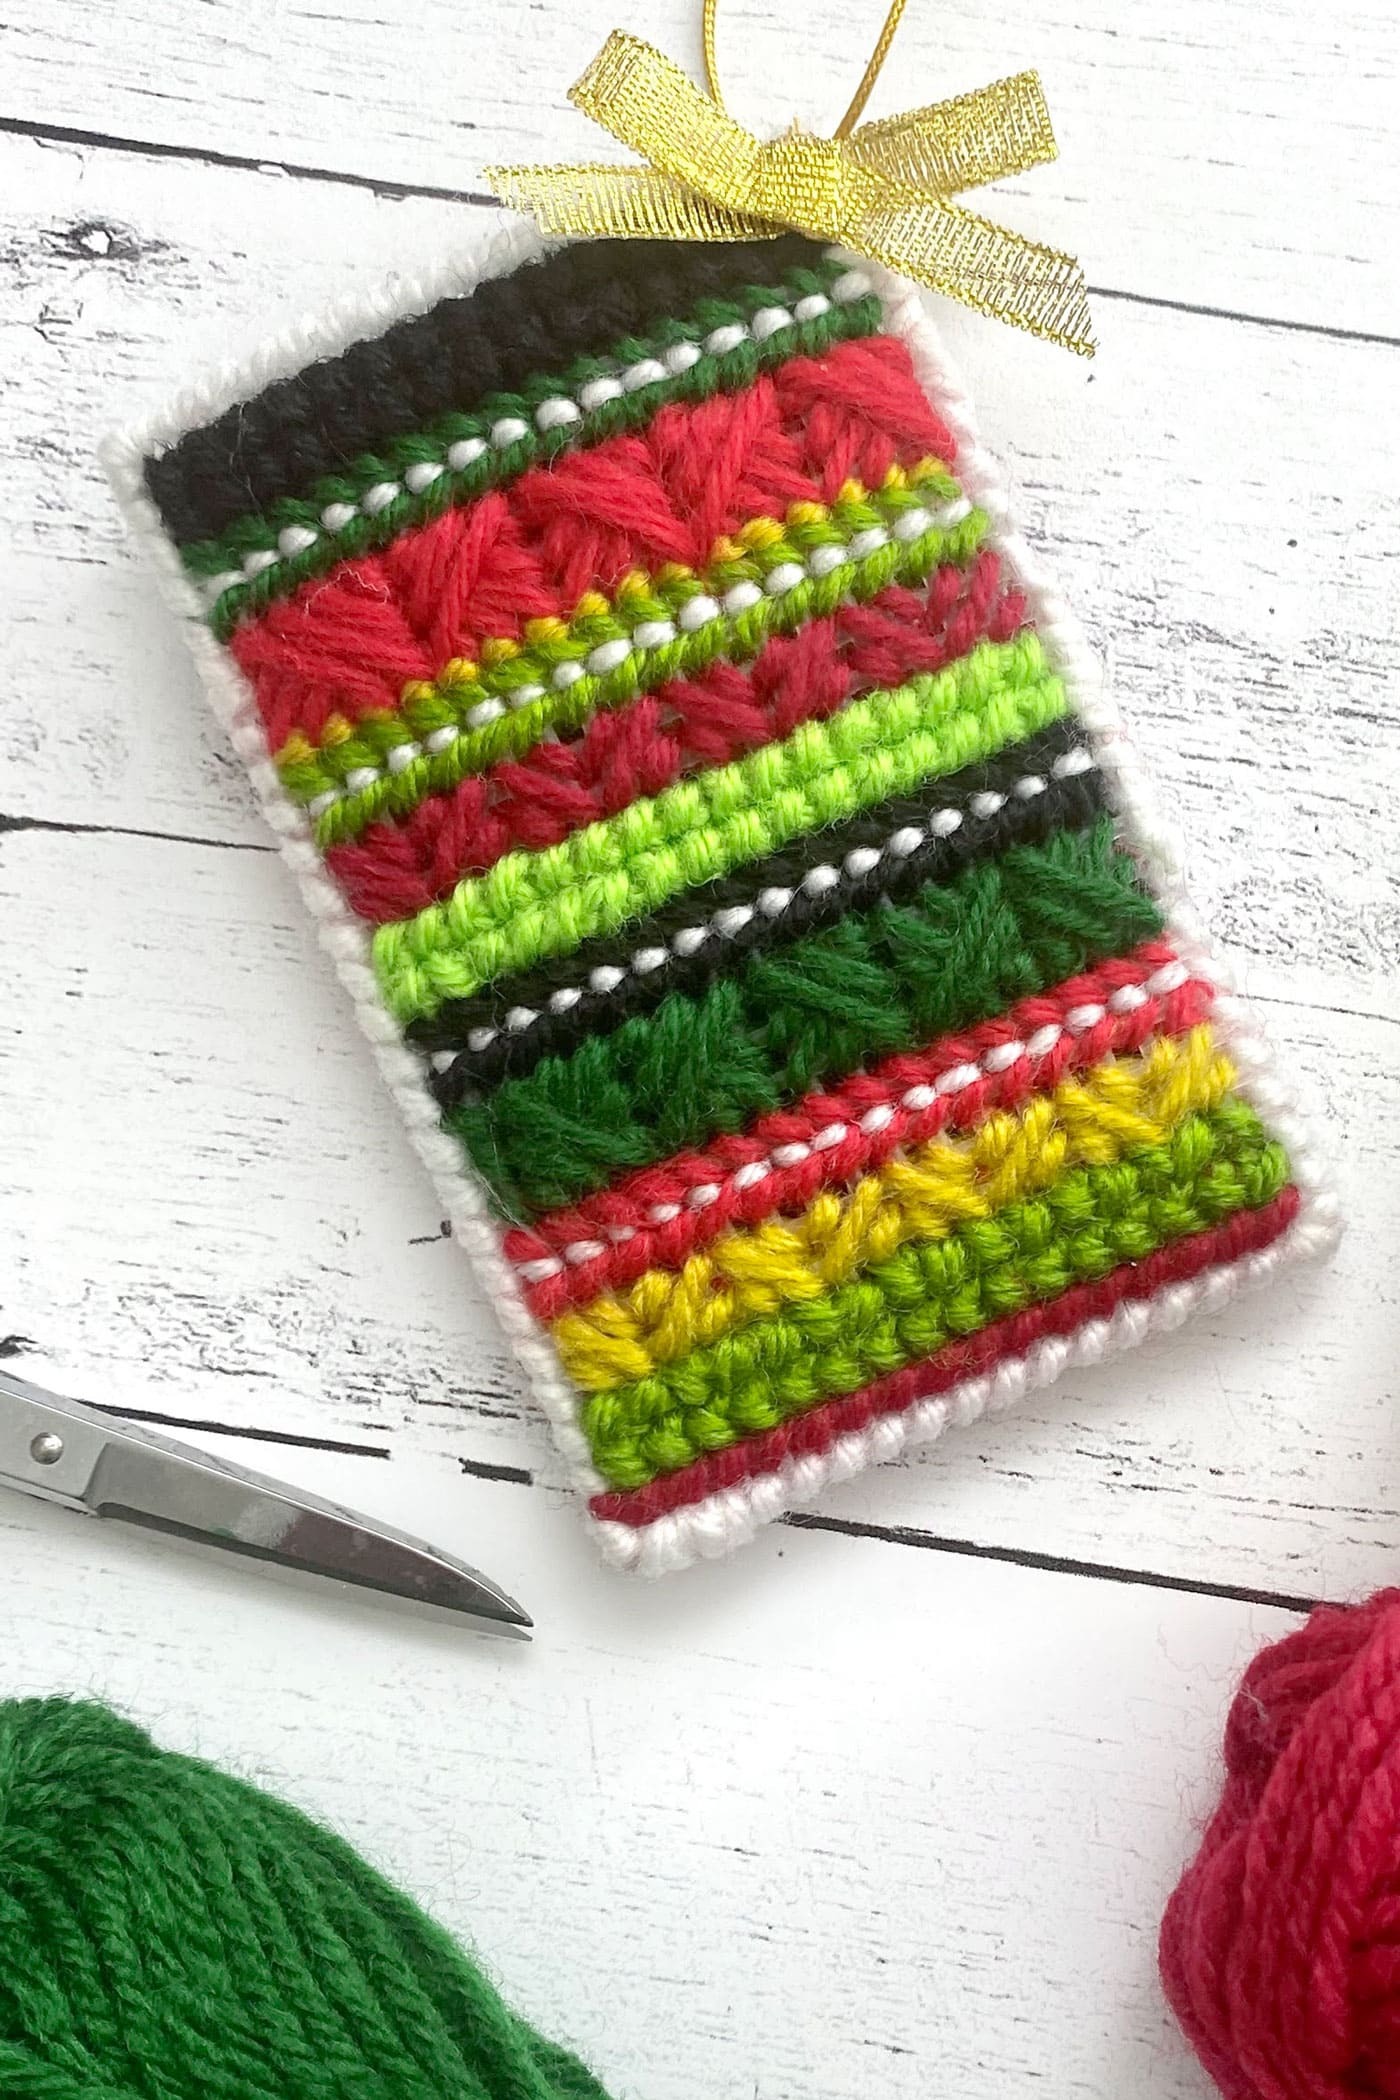
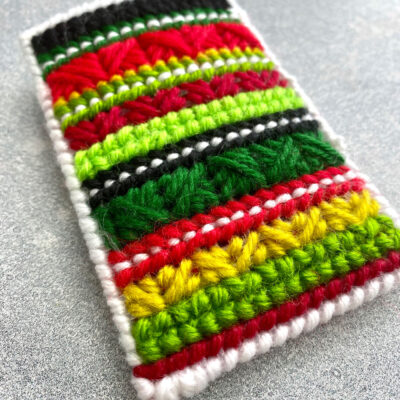
I stitched up the back of this gift card holder in a sampler style, and I will show you how I did these rows.
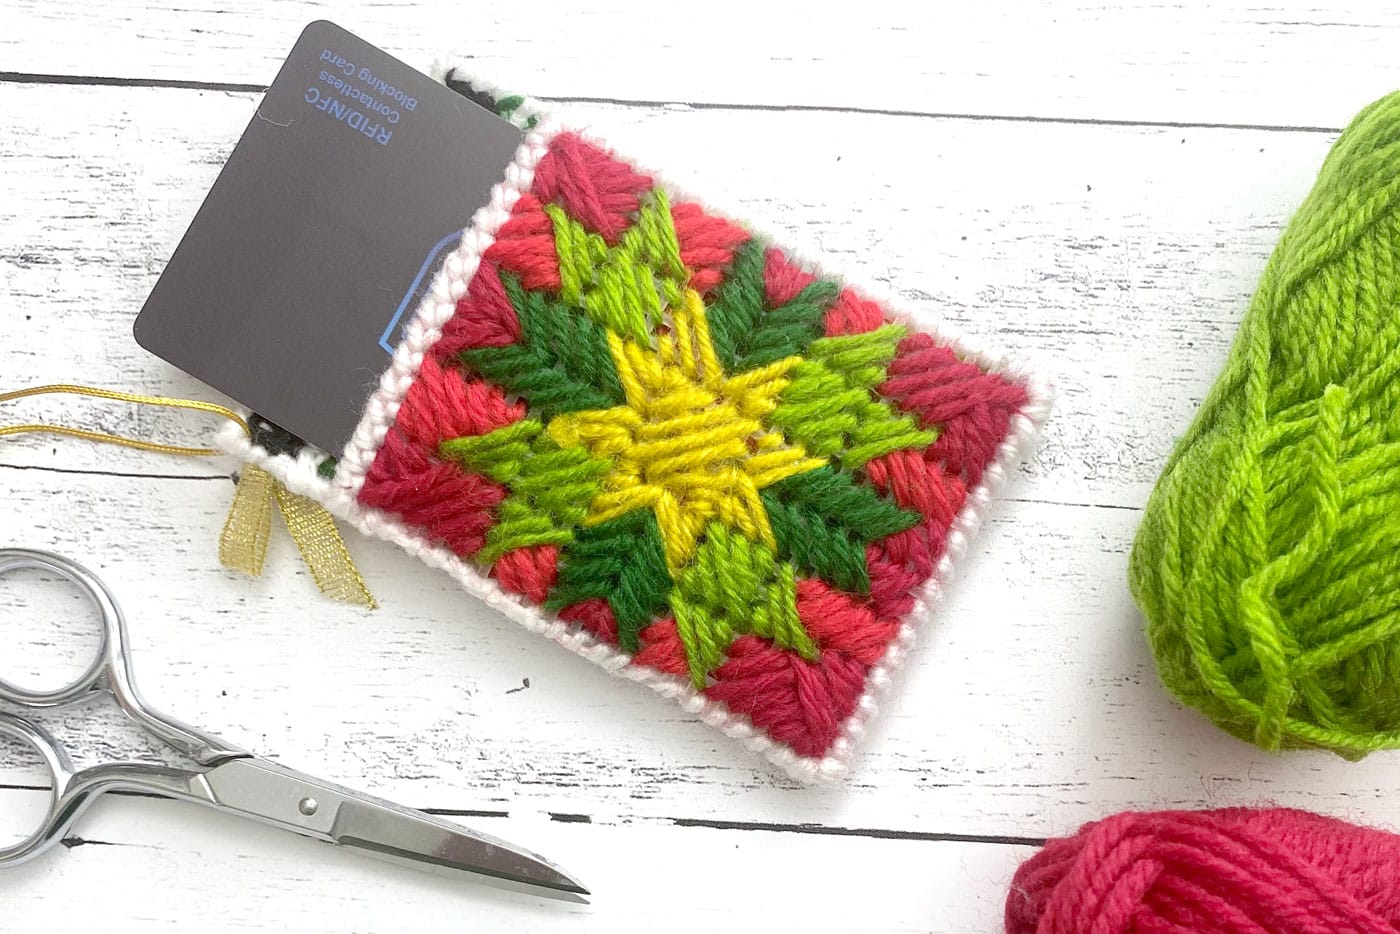
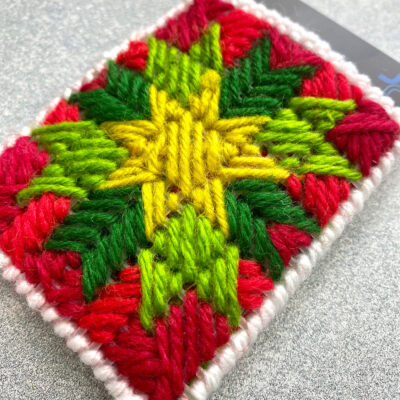
The front features a star pattern that looks like a classic quilt block. I won’t give the step-by-step for the front, but I will share a basic grid pattern so you can copy this design, or you can repeat the sampler stripes on the front.
Additional Ornament Tutorials
- July: Paper Poinsettia Ornaments
- August: Paper Memory Christmas Ornaments
- September: Kimekomi Fabric Ornaments
- November: Granny Rocker Christmas Ornaments
- December: String Christmas Ornaments
- January: Retro Diorama Ornaments
- February: DIY Splatter Paint Glass Ornaments
- March: Blown Egg Ornament
- April: Retro Photo Ornament Tutorial
- May: Vintage Folded Fabric Ornament
- June: Patchwork Heart Ornament
- July: Improv Pieced Heart Ornaments
- October: Plastic Canvas Gift Card Holder
- November: Yarn Stitched Jingle Bell Ornament
Supplies
To make this project, you will need:
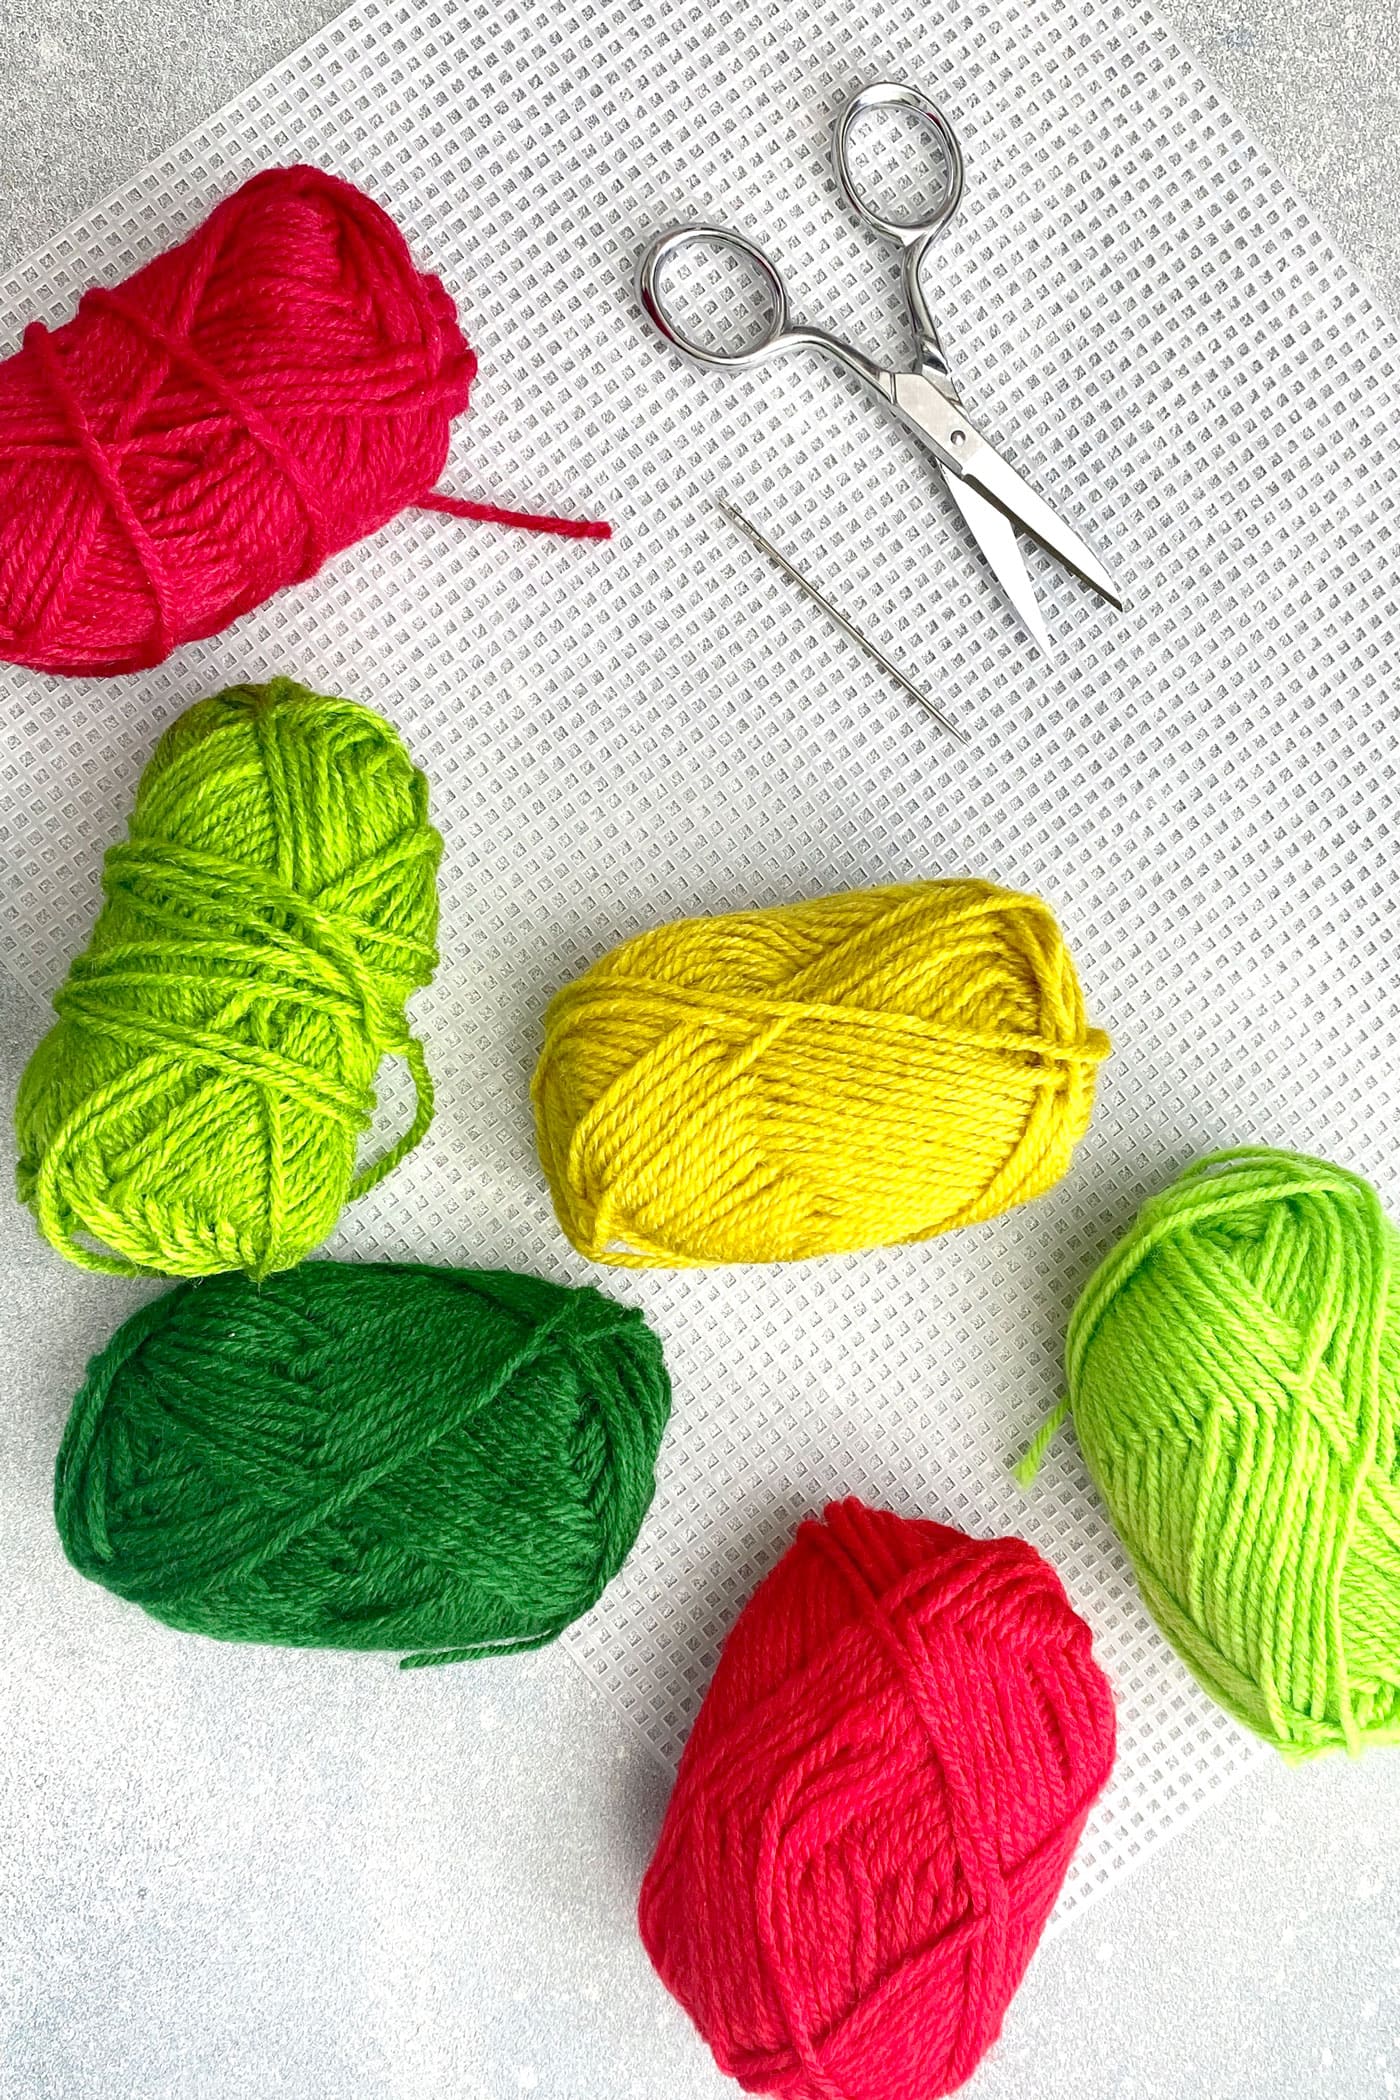
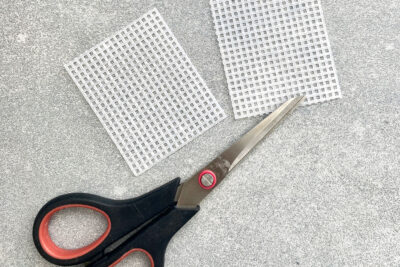
- A sheet of plastic canvas
- Various colors of yarn
- A needle with a large enough eye to work with yarn
- Scissors
- (Optional), Gold string and ribbon to make it into an ornament
Instructions
Holiday Sampler Gift Card Holder
Equipment
- Needle with eye opening large enough to work with yarn
supplies
- 1 sheet plastic canvas
- 2-4 skiens Various colors of yarn
- Optional, Gold string and ribbon to make it into an ornament
Instructions
- To begin, cut 2 rectangles. The larger rectangle should measure 17 squares across and 26 squares down. The smaller square should measure 17 squares across and 21 squares down. Clip the excess lines close to your outer row to minimize bumps along the perimeter.

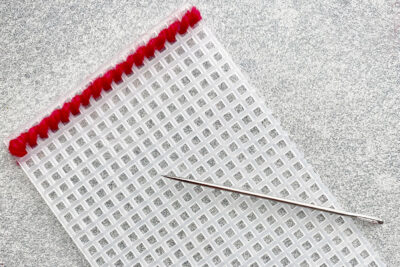
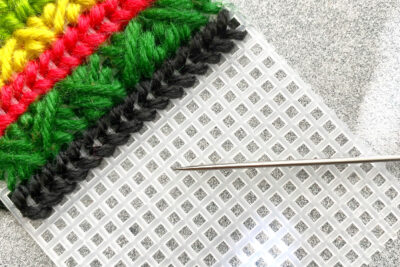
- Starting with the back piece, I stitched the top row with a simple diagonal stitch, also called a half-cross stitch.
- To do this stitch, guide the yarn over the diagonal; on the back, go down one square, then up the diagonal, and repeat.

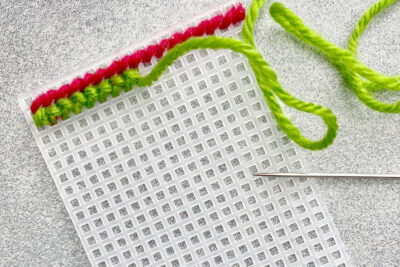
- Next, I stitched 2 rows of cross stitches. To make these, you simply sew “x’s” along the whole row, then repeat for one more row.
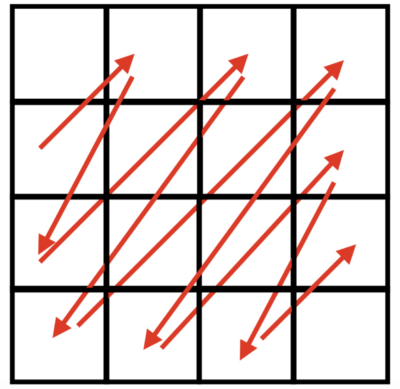
- For the 3rd set of stitches, I did a mosaic stitch. To do this stitch, you’ll use 3 squares across and 3 squares down.
- Start at one corner with a regular diagonal stitch in one corner, then make a longer diagonal stitch from corner to corner, and finish it off with a small diagonal in the last corner.

- For the next two rows, I did a simple diagonal stitch going in one direction, then switching to the opposite direction for the second row.
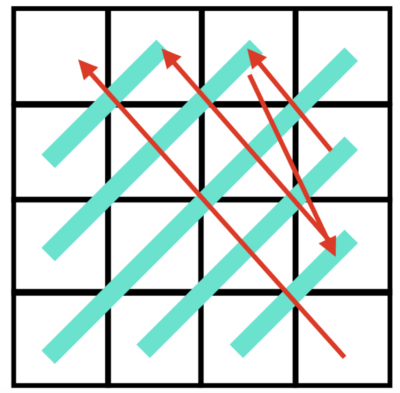
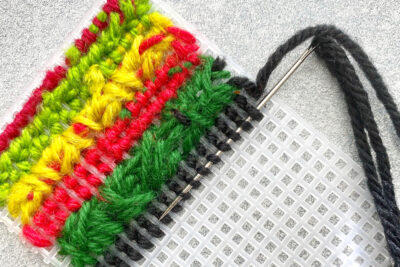
- Next, I did something similar to the mosaic stitch above but with a slight variation. I don’t know if there is a name for this stitch, but I will call it a layered mosaic for now. You’ll work with 4 squares across and 4 squares down and stitch on the diagonals just like you did for the mosaic.

- Once you have formed a square, stitch over the mosaic on the opposite diagonal, starting from any corner, and stop at the midpoint (the longest stitch, which reaches corner to corner). This creates a fun overlapping pattern and lots of nice texture.

- The next two rows are a repeat of the diagonal stitch I did earlier.
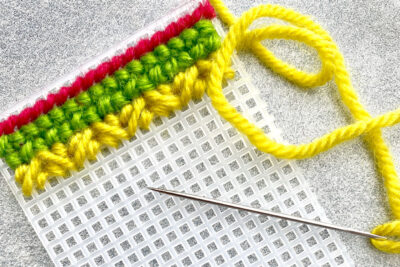
- I should mention that changing colors is super easy. Just thread your yarn through the loops on the back of the fabric and snip off the end. Done! I like to start a new color this same way to ensure the yarn is secure.
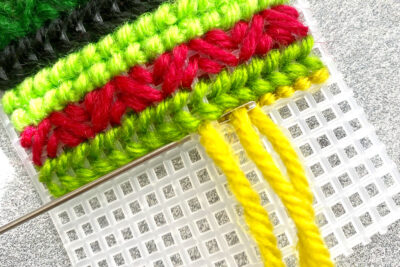
- Continue repeating these stitches to create a row in a variety of colors. I did add one more stitch right here – a simple backstitch.
- To do a backstitch, you’ll pull your yarn up through the 2nd square, then go back one square, then pull it up through the 3rd square. Repeat this pattern – pull the yarn up through the 3rd square, go back one, then pull the yarn up through the 4th square, and so on. This stitch looks really pretty as a filler between rows, as you’ll see in the next photo.

- I decided I wanted to add a splash of white, so I added a row of white backstitching in between each of the diagonal stitch rows. I love how it looks!

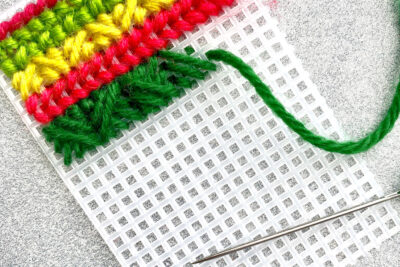
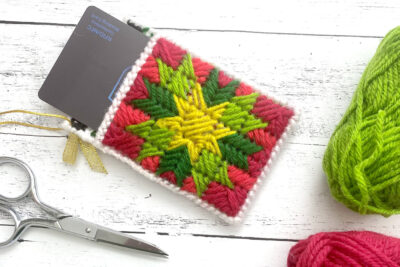
- Once I finished the back, I stitched a pretty star onto the front, mimicking the look of a quilt block.
- I only used basic diagonal stitches to create this look – super easy!

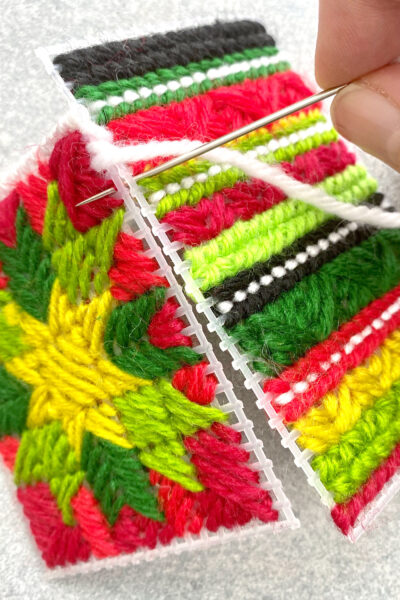
- After finishing the front, do a simple whipstitch around the top front corners and across the top front.
- Next, align the sides and bottoms of the front and back pieces. Whipstitch around the side, bottom, up the other side, around the top of the back, and down the first side until you meet up with the beginning stitches. Bury the yarn through the stitches.
- The whipstitching adds a nice finishing touch to the edges while binding the front and back together.

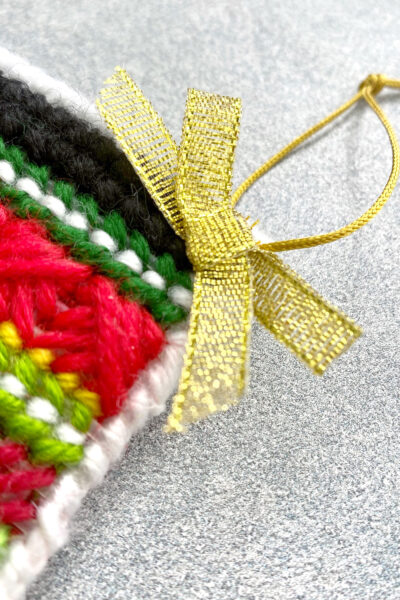
- Here is a closer look at the back. You can use this as a stocking stuffer the way it is or follow the next steps to turn it into an ornament for the tree.
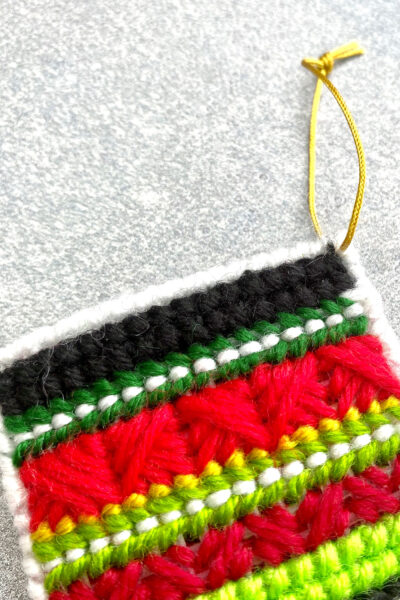
- To turn this into an ornament, thread some gold nylon cord through the top corner of the back rectangle. Tie a knot.
- Next, add a bow made from any gold ribbon you like. I used this loose weave ¼” gold ribbon.


Using plastic canvas is a great way for beginners to get comfortable with embroidery stitches, and it’s very forgiving. If you make a mistake, you can easily remove the thread and start again.
And finally, I love working with plastic canvas because I can keep my hands busy while enjoying a movie, and I am always rewarded with fun, functional projects! I’d be thrilled if you would tag me @bayhillstudio on Instagram so I can see all of your projects.
Thank you for stopping by! Be sure to follow me on Instagram and subscribe to my YouTube Channel for more creative content and project inspiration. Have a blessed day!
About the Designer

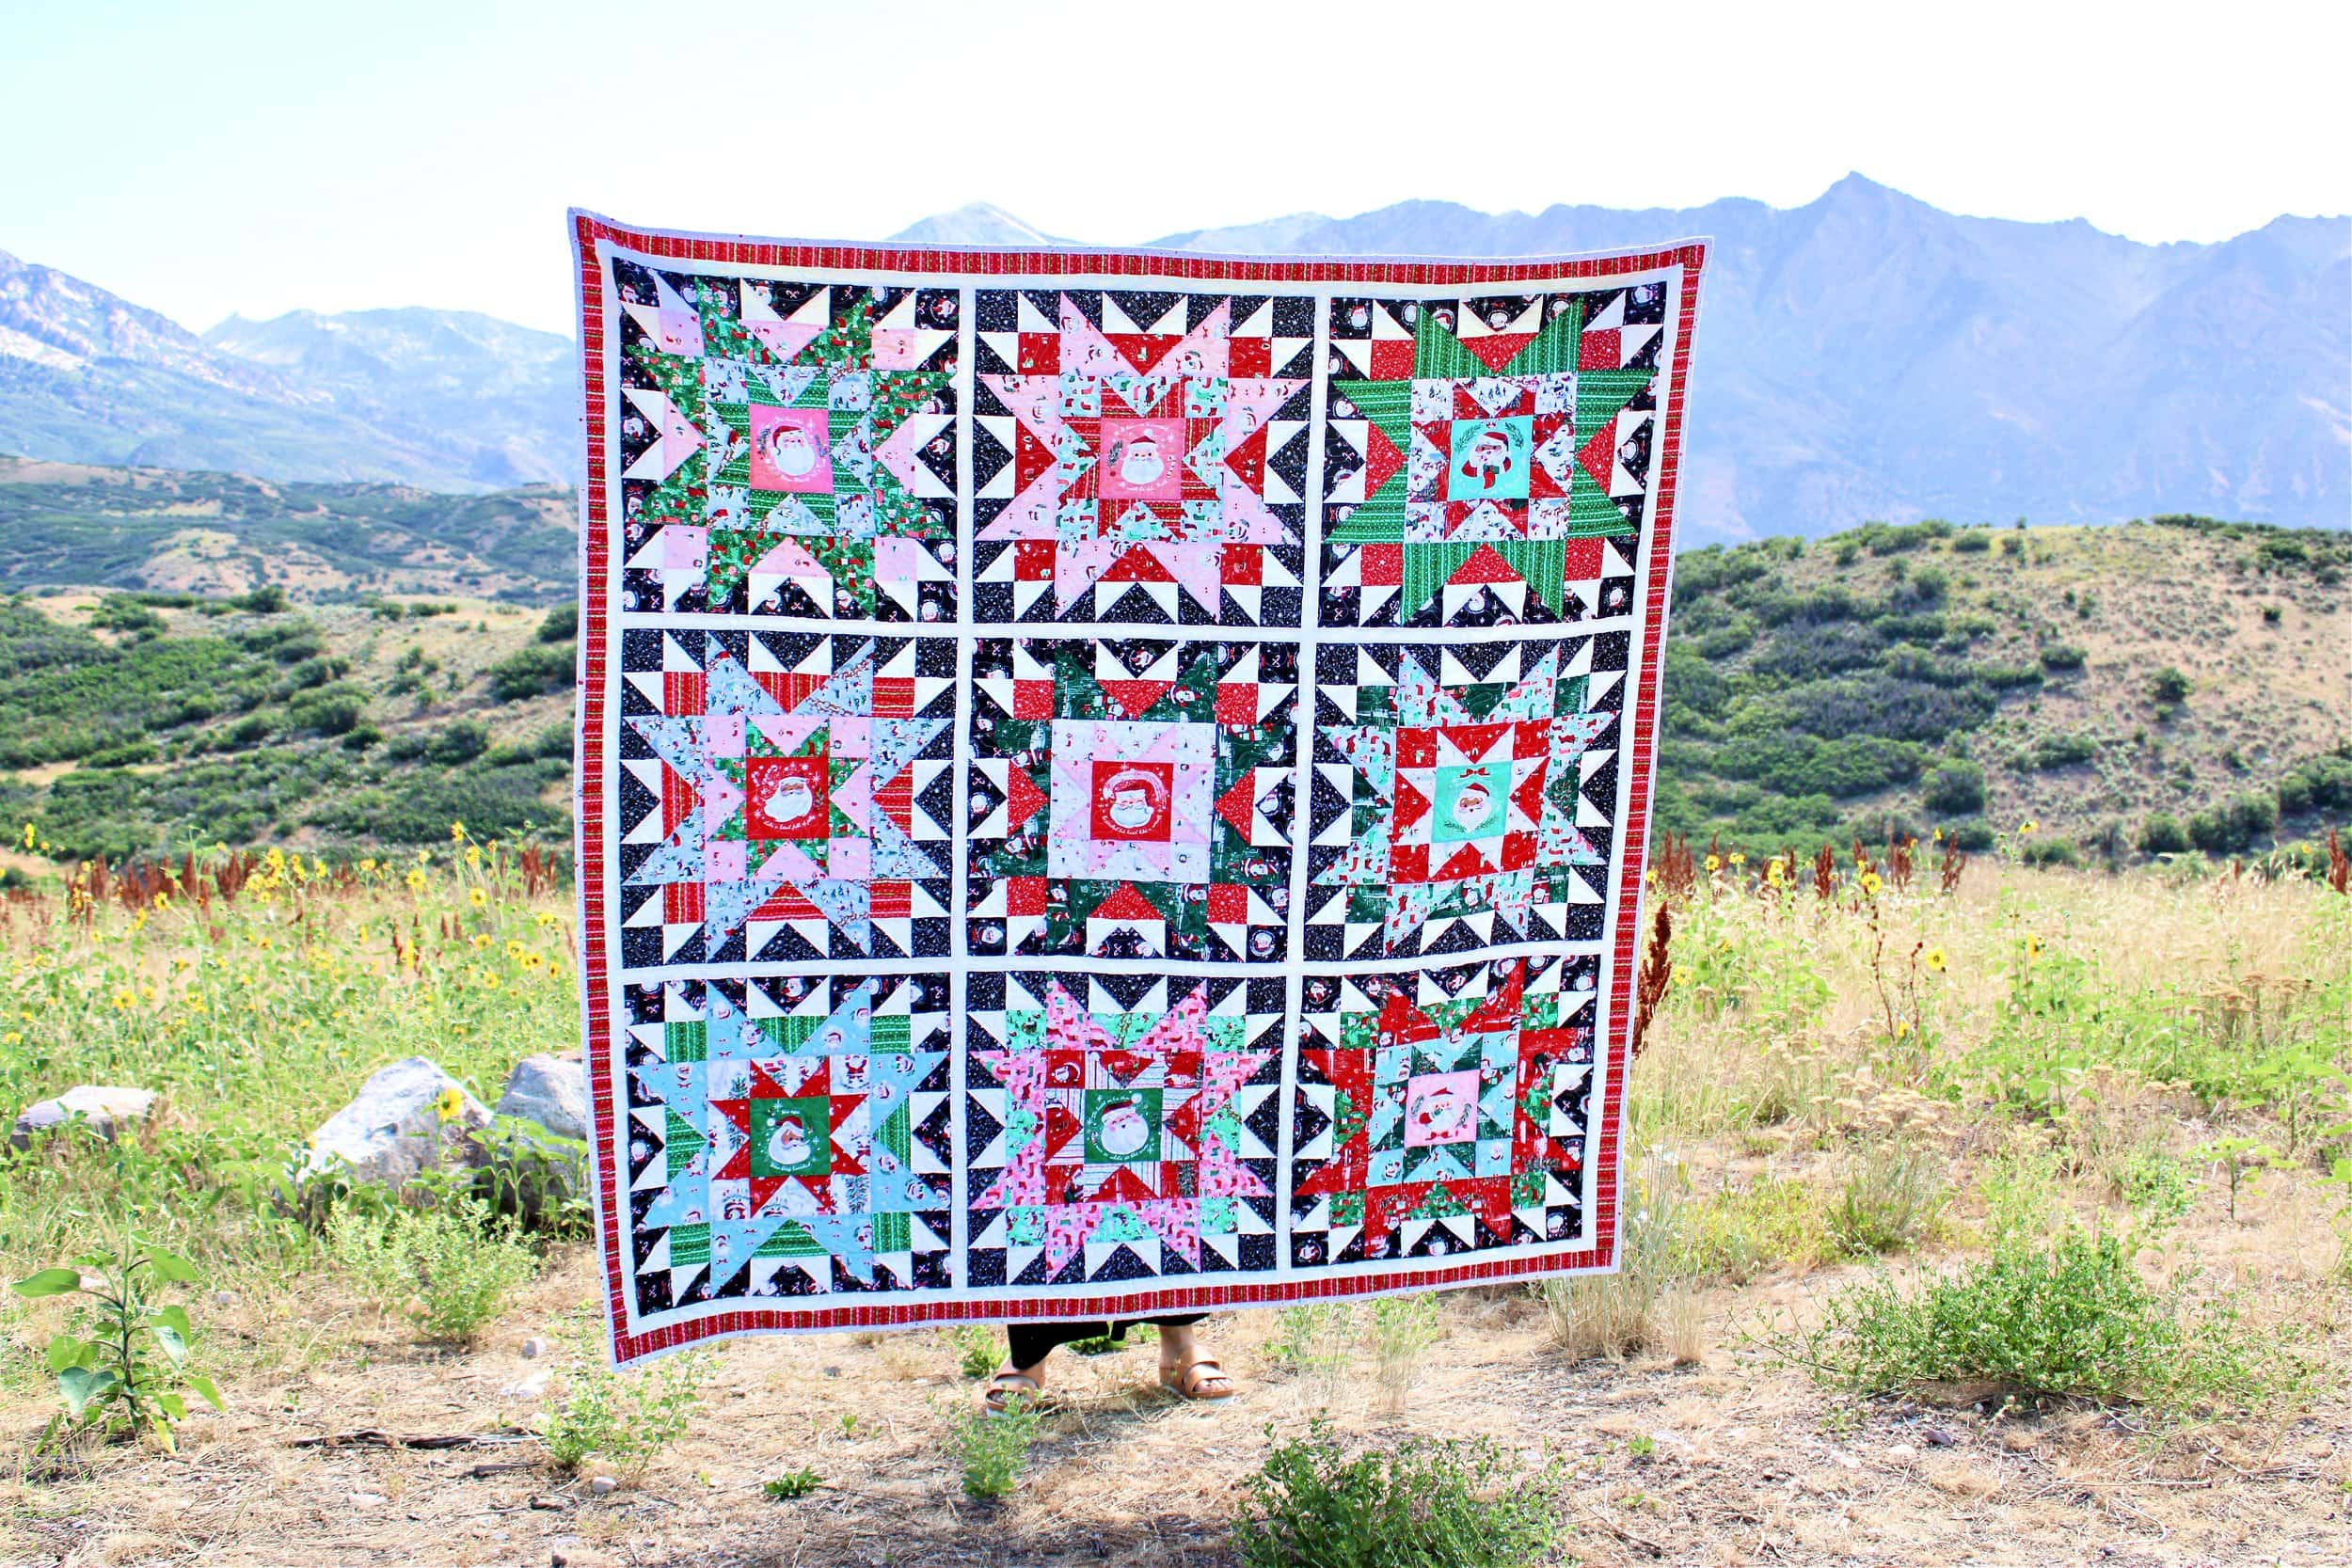
Julia Frazier is the founder of Bayhill Studio. Julia designs quilts and projects geared toward beginner quilters and crafters. You’ll usually find her at her sewing machine or hiking in the nearby mountains. Follow Julia on Instagram @bayhillstudio, and subscribe to her YouTube channel for new and exciting projects and tutorials. Be sure to check out her Bayhill Studio website for a growing list of tutorials and patterns.
Also by Julia
Grandmothers Groovy Garden Quilt
Free Tutorial for Quilted Dopp Kit