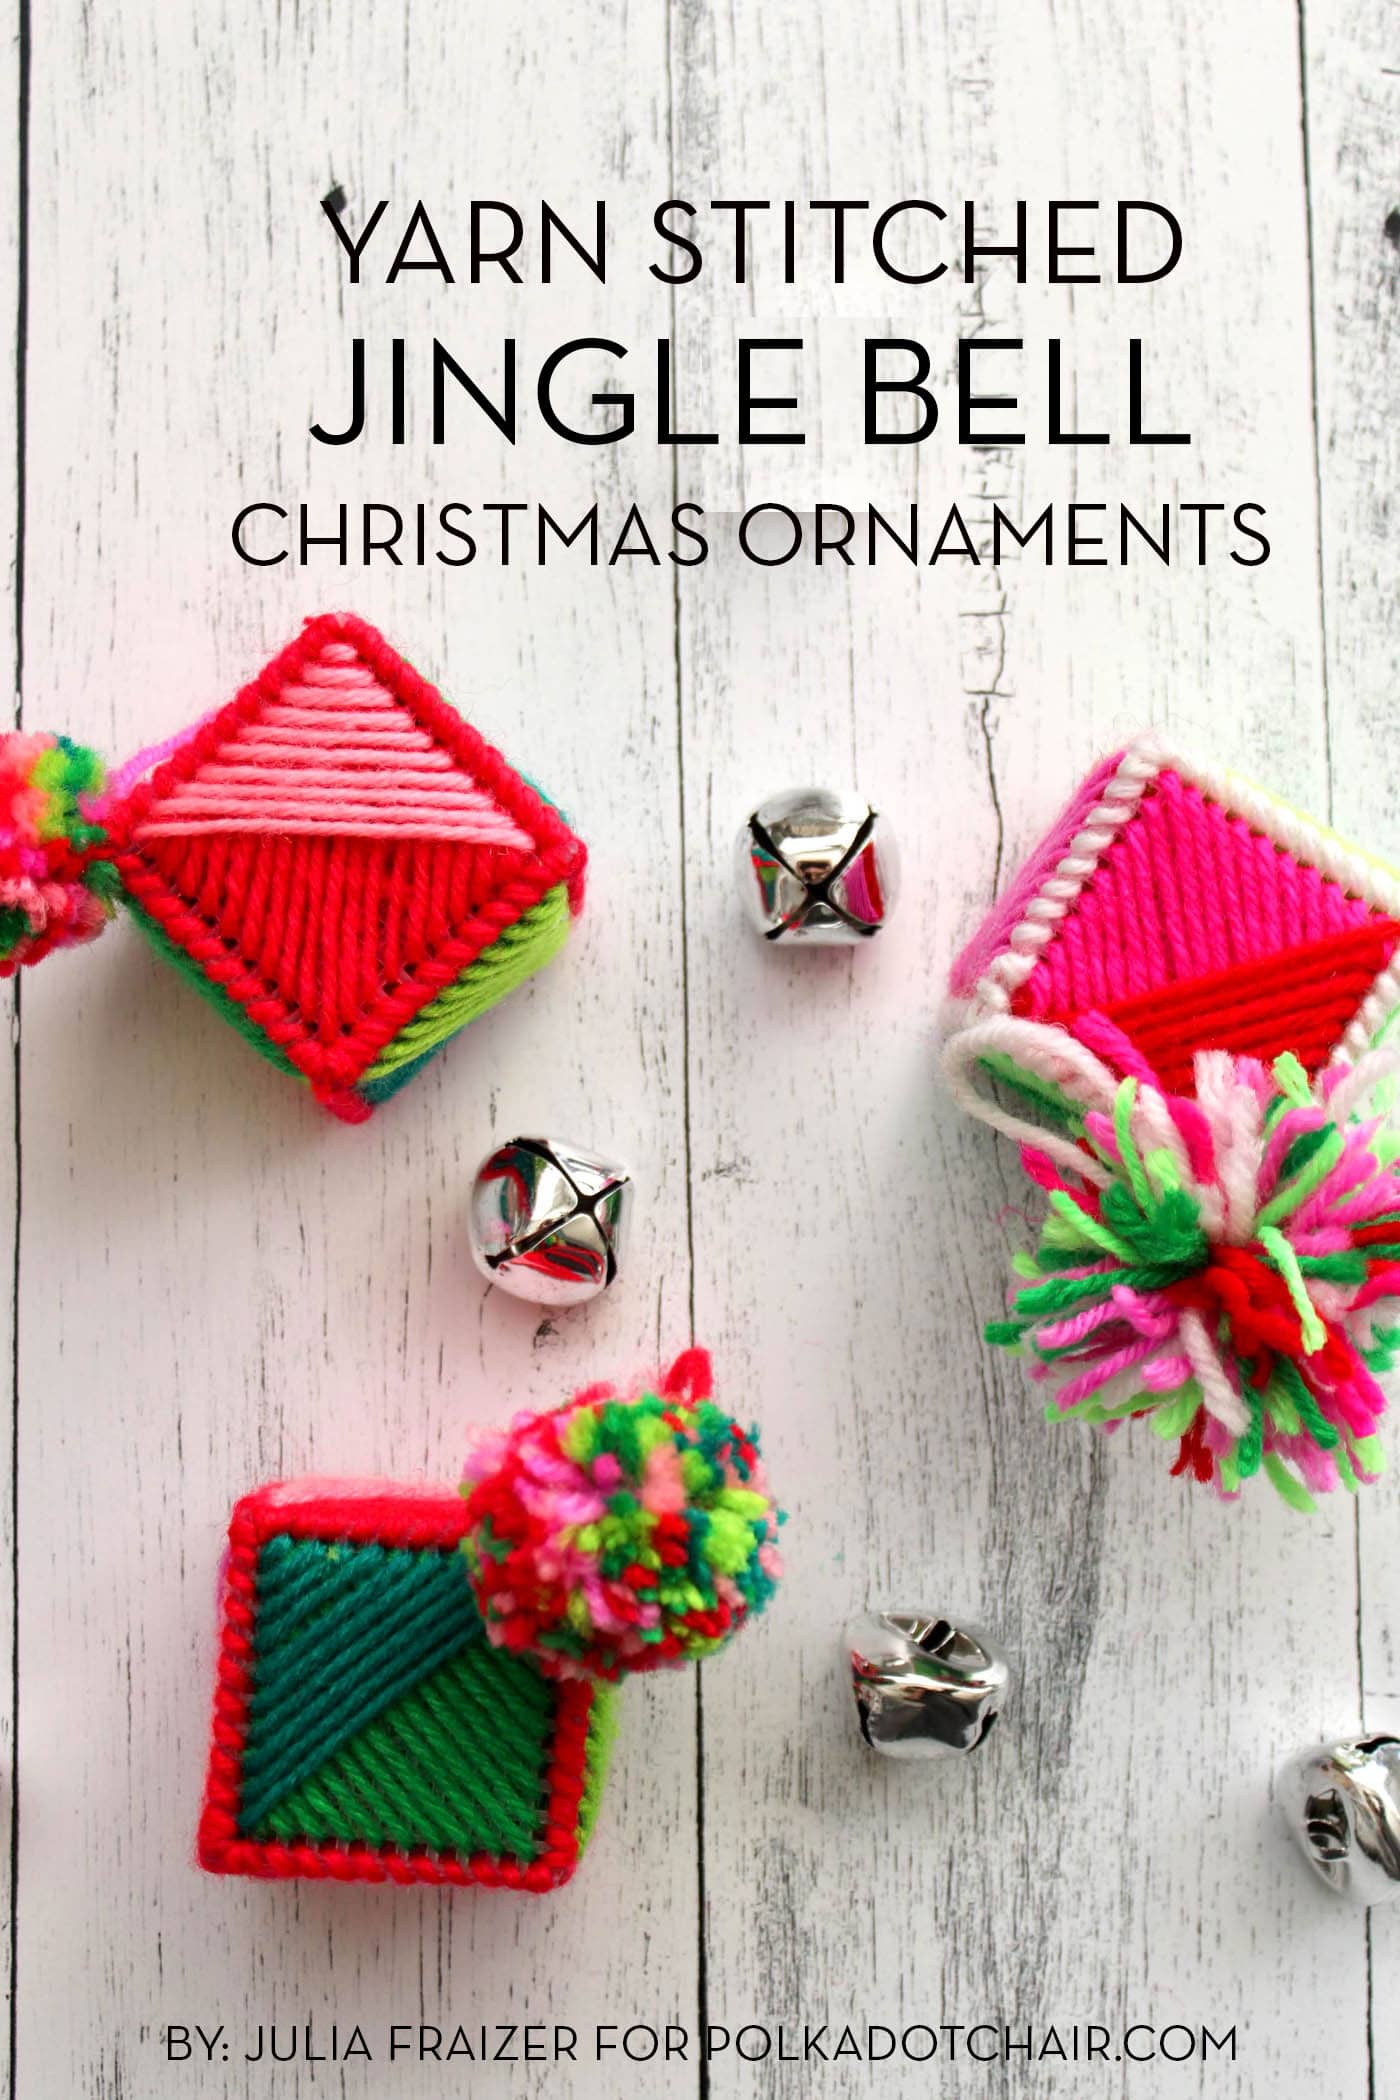
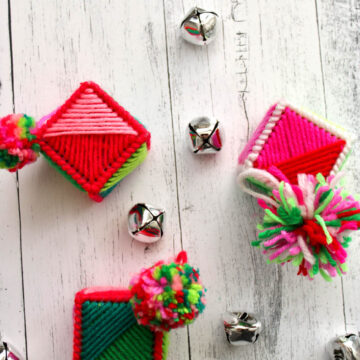
Yarn Stitched Jingle Ball Ornament Tutorial
Learn to make a festive, beginner-friendly Yarn Stitched Jingle Bell Cube Ornament using just plastic canvas and yarn!
Each year, I make my kids a new ornament to add to our tree with the idea that when they eventually have homes of their own, they’ll have a handful of simple, handmade ornaments to bring color and cheer to their first Christmas trees.
With the weather getting cold and the nights getting longer, I’ve been on a big plastic canvas kick because I can do it with my hands while sitting in front of the fireplace in the evenings. I love how easy it is to work with and how forgiving it is for those learning basic stitches for the first time.

I decided to play with the idea of a simple, modern cube with a fun, optional pom pom embellishment. In this tutorial, you will learn to do a basic slanted long stitch, join edges, and make your very own pom poms!
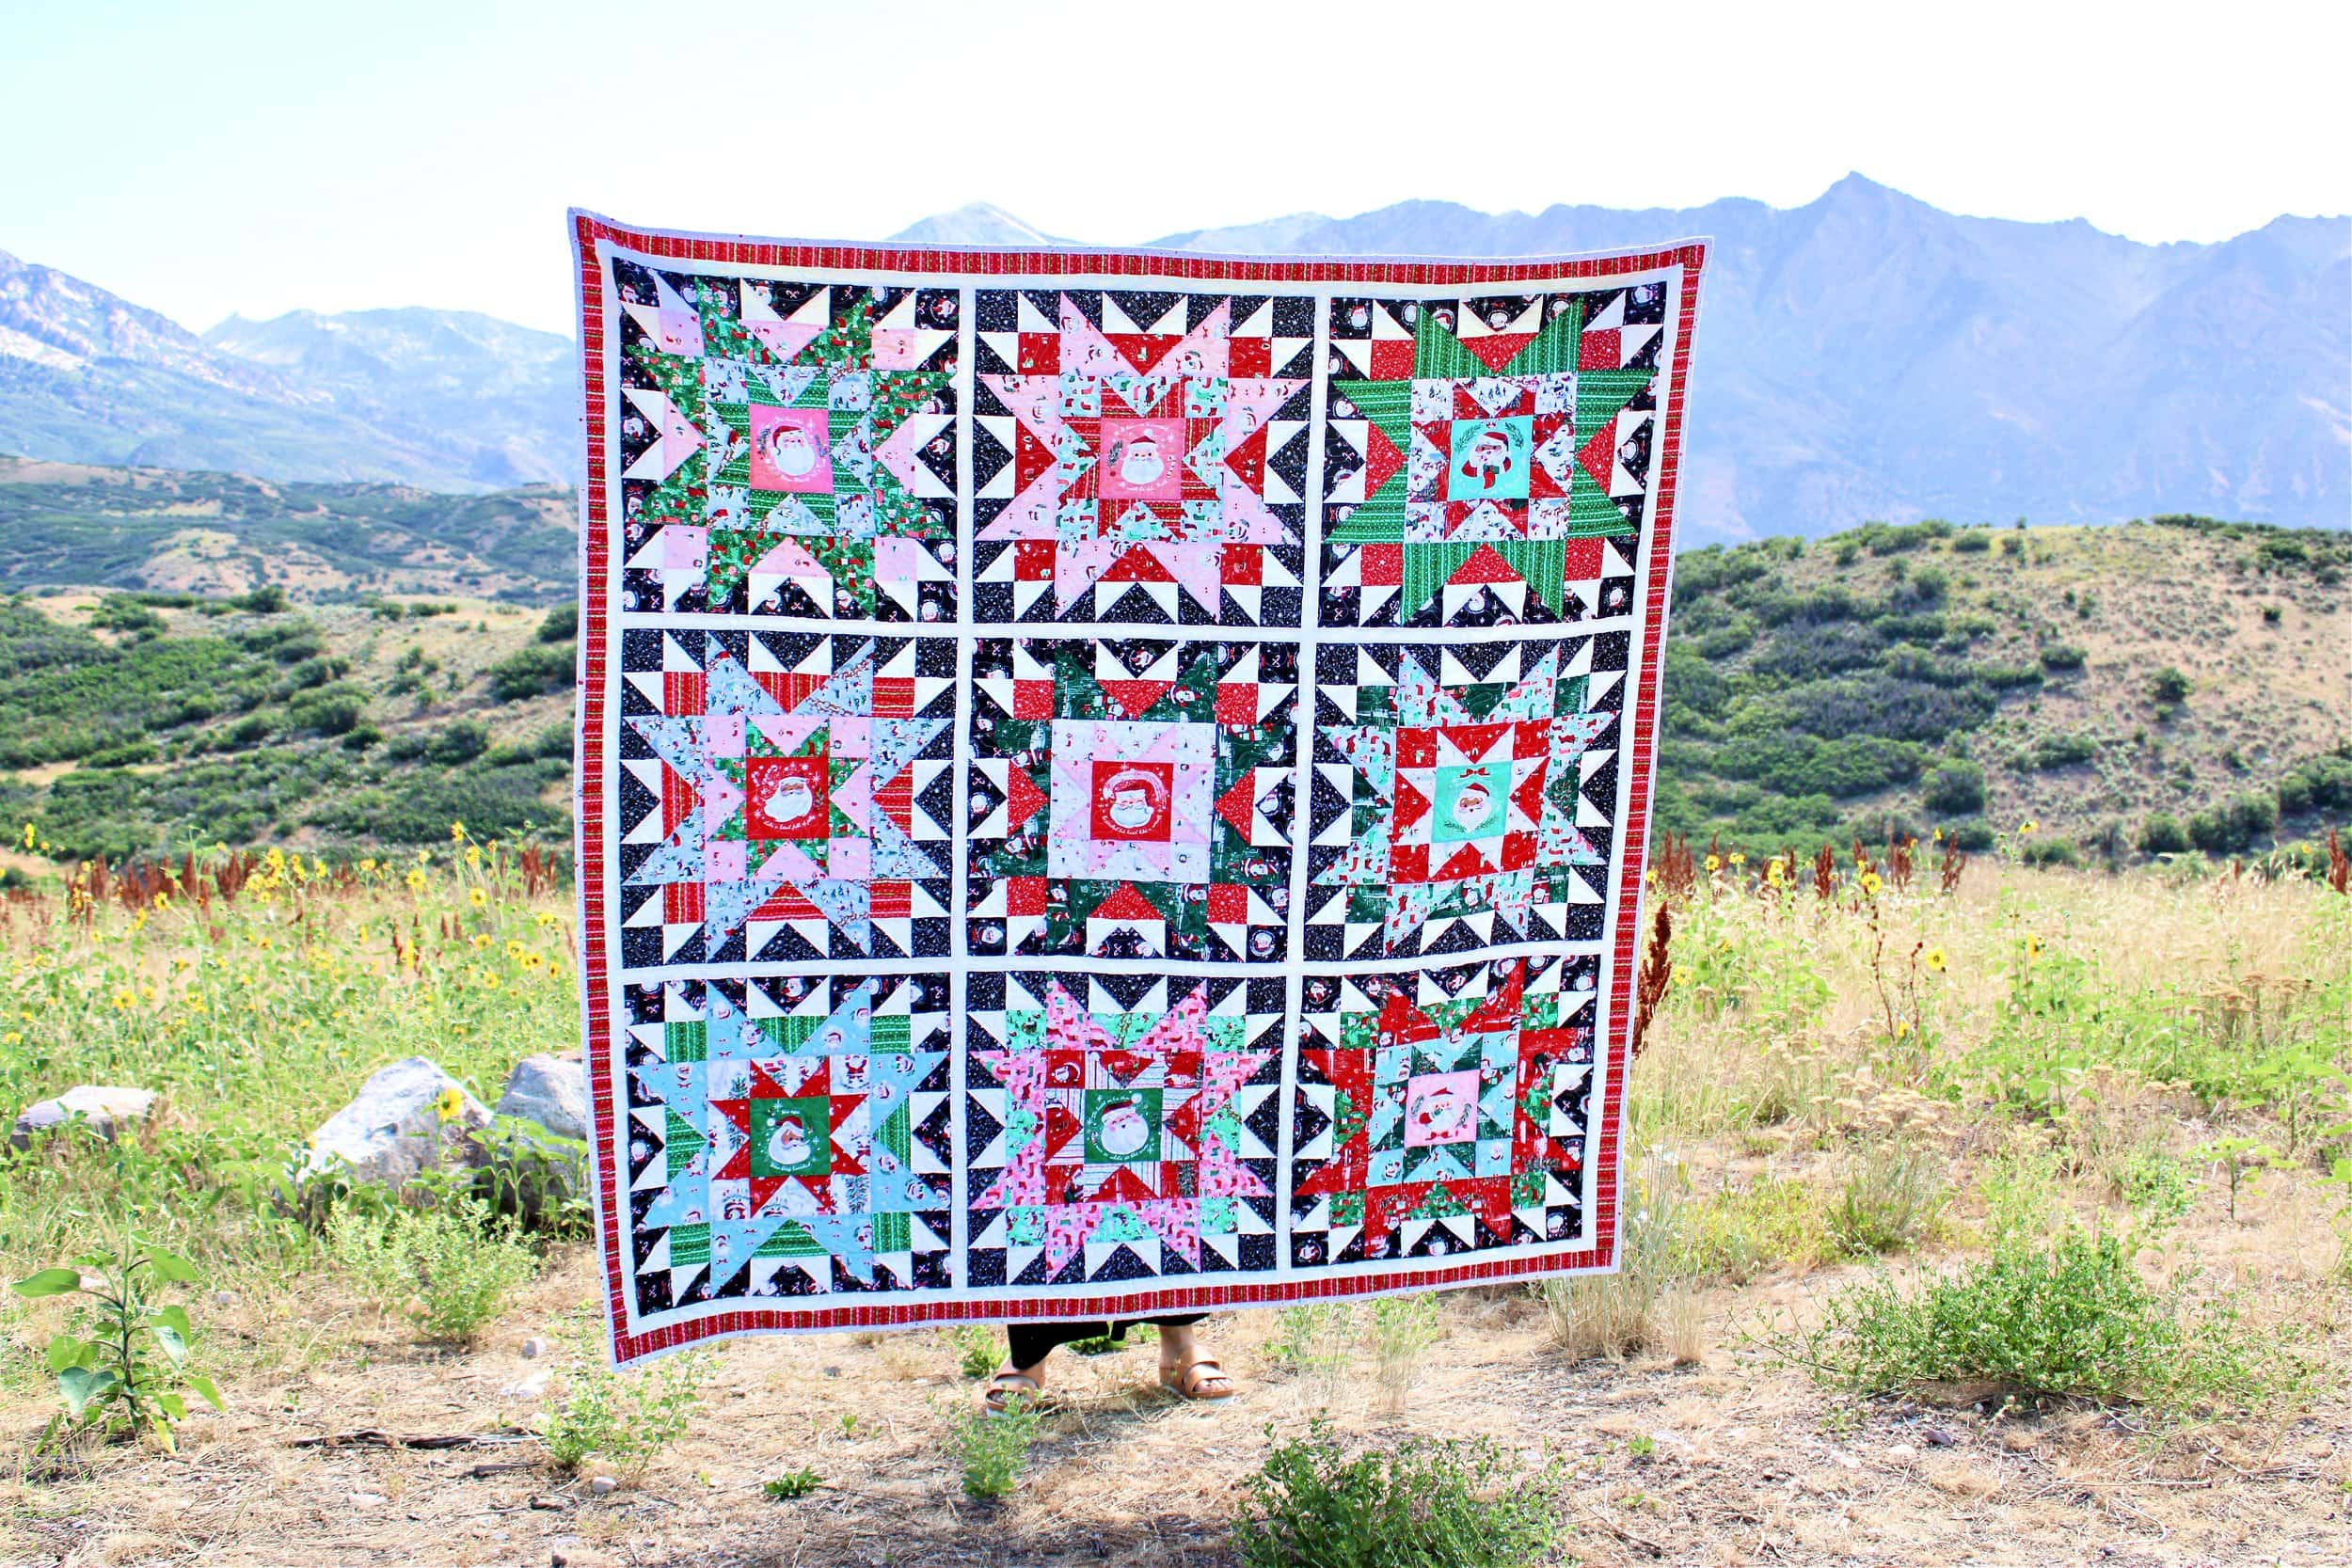
Additional Christmas Ornament Tutorials by Julia
- July: Paper Poinsettia Ornaments
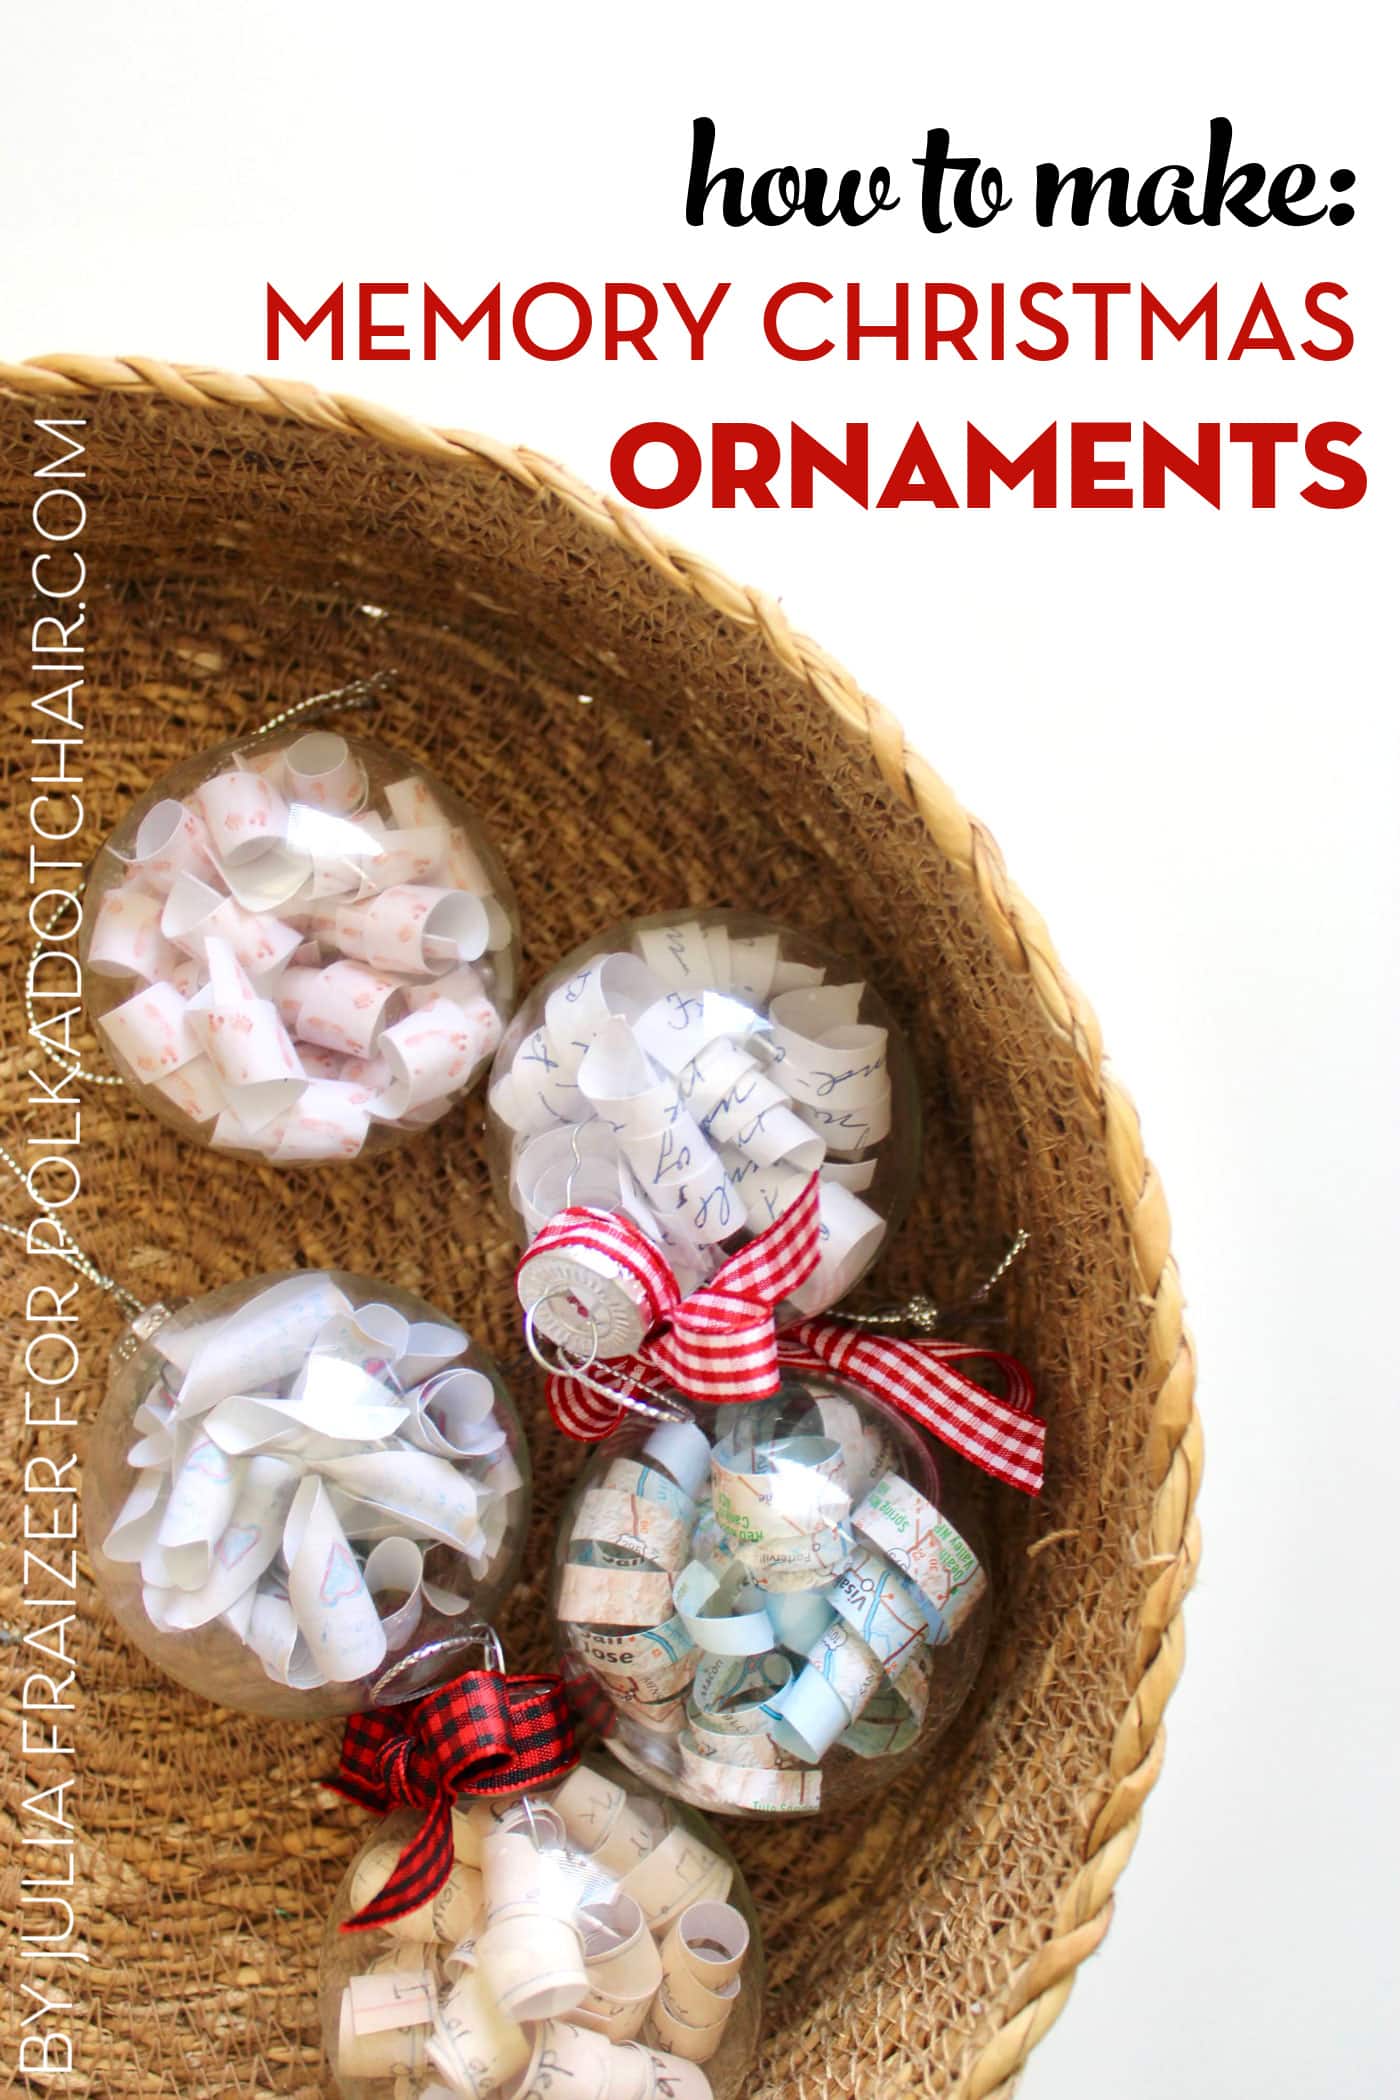
- August: Paper Memory Christmas Ornaments
- September: Kimekomi Fabric Ornaments
- November: Granny Rocker Christmas Ornaments
- December: String Christmas Ornaments
- January: Retro Diorama Ornaments
- February: DIY Splatter Paint Glass Ornaments
- March: Blown Egg Ornament
- April: Retro Photo Ornament Tutorial
- May: Vintage Folded Fabric Ornament
- June: Patchwork Heart Ornament
- July: Improv Pieced Heart Ornaments
- October: Plastic Canvas Gift Card Holder
- November: Yarn Stitched Jingle Bell Ornament
Supplies
To get started, you will need:
- Yarn (I used six different colors – you can use more or fewer colors)
- One sheet of plastic canvas
- #16 needle
- Fork (for optional pom pom)
Instructions
Yarn Stitched Jingle Bell Cube Ornament
supplies
- 6 skiens Yarn I used six different colors – you can use more or fewer colors
- 1 sheet plastic canvas
- 1 #16 needle
- 1 Fork for optional pom pom
Instructions
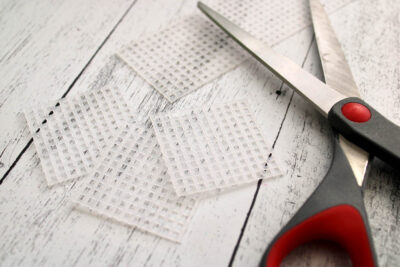
Step 1: Prepare Plastic Canvas
- Cut six squares with 11 vertical and horizontal holes. As you go, trim the little plastic nibs off the ends.

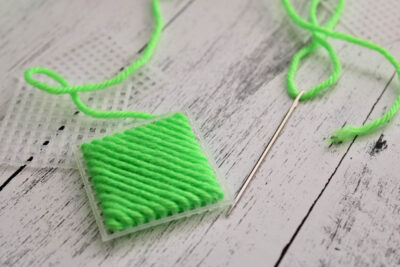
Step 2: Stitch Base Layer
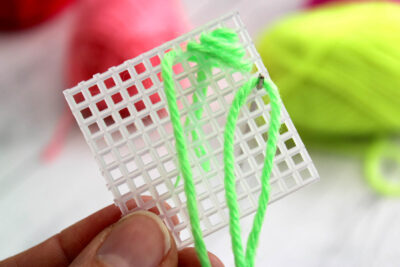
- Thread about 1 yard of your first yarn color through the needle. Stitch from the back, up to the top side through the 2nd hole from the end while holding a 1” tail of yarn in the back. Now stitch down towards the back side through the opposite 2nd hole.
- Repeat across the entire square. *Notice the yarn tail in the back. This will be encased with the yarn stitches as you go, securing the yarn in place. No need to tie knots to secure it.
- Here is what the finished square will look like.
- Run the extra yarn through the back of the square to secure it. Trim excess.
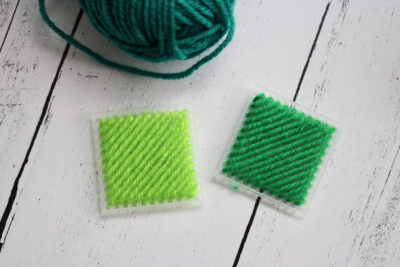
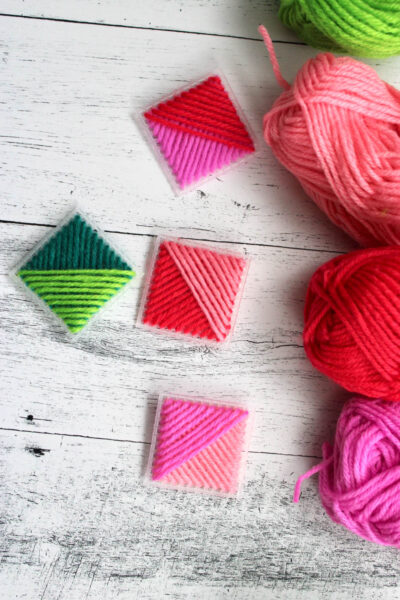
- Repeat until you have made a total of six squares. They will look like this. I did three squares in red/pink tones and three squares in shades of green. You can use any combination of colors you want.

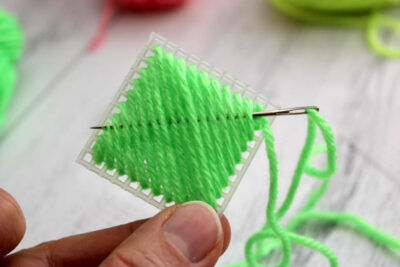
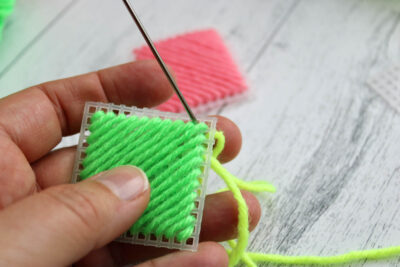
Step 3: Add Top Half Layer
- Slide the second contrasting color through the back of the square, securing the thread.
- Our stitches for this layer will run in the opposite direction of the base layer. Pull the needle up through the 2nd hole from the end and down through the opposite 2nd hole, just like you did with the base layer.
- Continue stitching through opposite holes until you reach the two corner holes at the halfway point.
- Run the extra yarn through the back side of the square, securing the yarn. Trim excess.
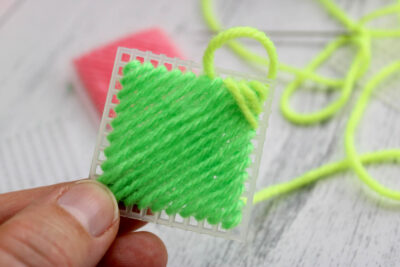
- Continue until you have finished all six squares. They will look like this.

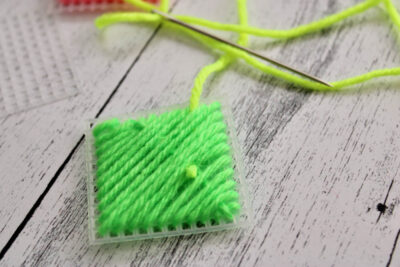
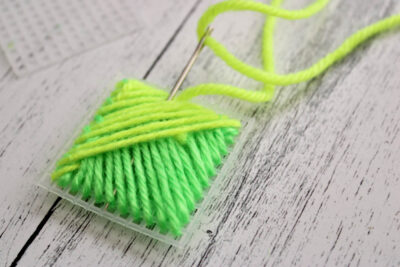
Step 4: Adding the Loop
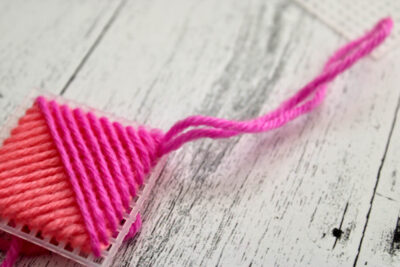
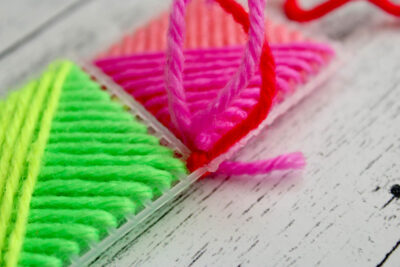
- Thread a piece of yarn, measuring about 10” through your needle. Pull the yarn through a corner hole from the bottom to the top. Leave several inches of loose yarn on the backside.
- Run the yarn down through the second hole (just next to the corner hole), leaving a loop measuring several inches on the top.
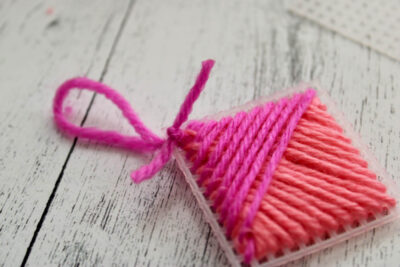
- Knot the loop, making the opening any size you want. I made my loop about 3”. Pull the rest of the yarn tight so the loop knot sits against the canvas.
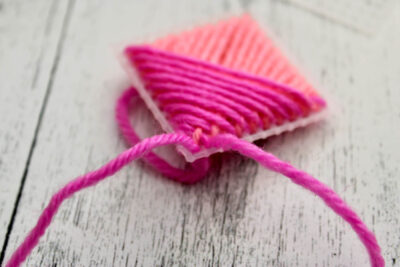
- This is the view from the back of the square. Secure the two strings into a knot. I like to use a square knot, which I repeat twice.
- Trim the loose ends of yarn about 1” from the back knot.


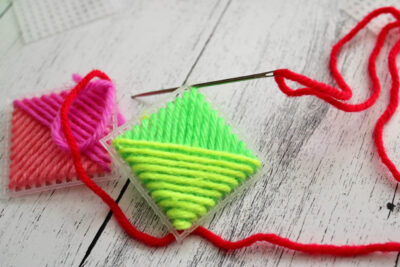
Step 5: Joining the Squares
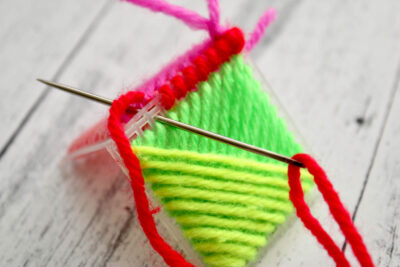
- Pick any color you want to use for the edges. We’ll use this color around all of the edges as we join the squares.
- To secure the yarn, thread the yarn through the back of the first square, leaving a 1” tail tucked in the back.
- With the yarn secured, run the needle up through the corner hole of the first square (pink square), then run it down through the corner hole of the second square (green square).
- Run the needle back up through the corner hole on the first square (pink square).
- Now, begin wrapping the yarn around the edges by crossing over to the opposite square (green square) and through the corresponding hole on the first (pink) square.
- Continue doing this all the way along the edge.
- Your edge will look like this. From here, keep adding more squares and finishing the edges in the same way until you reach the last edge. At that point, you can add the optional jingle bell by slipping it in through the opening.
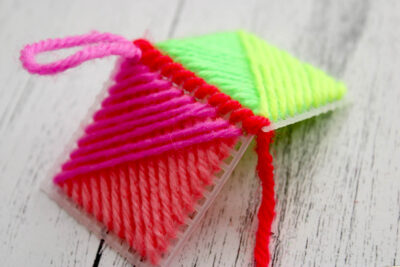
- After you have finished stitching up the last edge, run the needle and thread through the inside of the square (catching inside yarn to make it more secure) and out the other side. Trim close to plastic canvas so the yarn disappears.
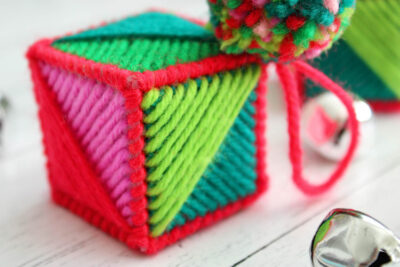
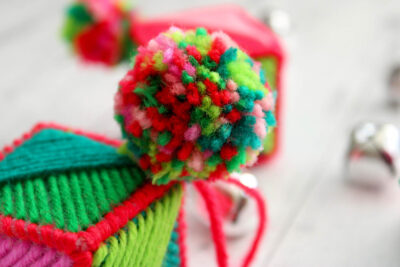
- This is what your finished cube will look like. If you would like to add the decorative pom pom, keep reading!
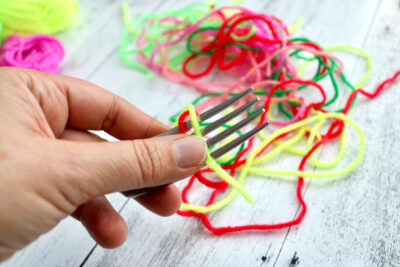
- To make the pom pom, gather up your yarn scraps left over from making the cube. If you don’t have scraps, just cut more yarn pieces. You will also need a fork.

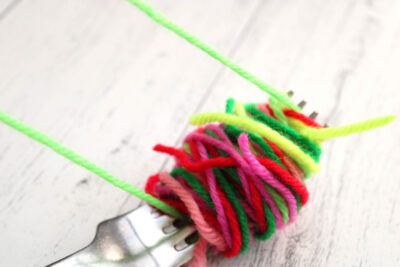
Step 6: Making the Pom Pom
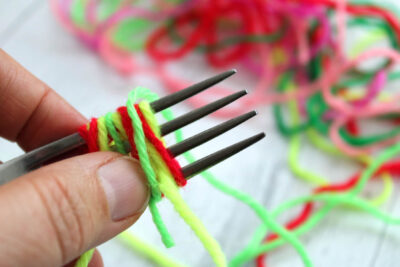
- Begin by wrapping one or two yarn colors around the fork a few times. NOTE: If you want a really speckled looking pom pom, wrap more than one color at a time. If you want the colors to be grouped together in the pom pom, wrap one color at a time. I am demonstrating the speckled pom pom here.
- After wrapping 2-3 times, add another color.
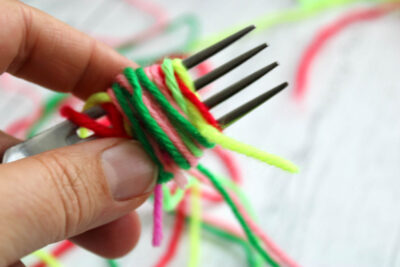
- Continue adding colors this way until you have a thick, maybe ½”, mass of yarn wrapped around the fork.
- Here is what it looks like from the side.
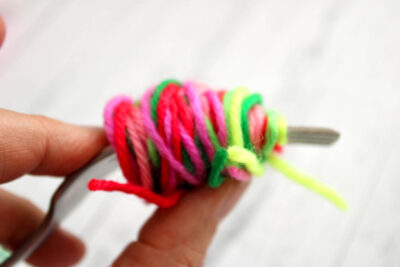
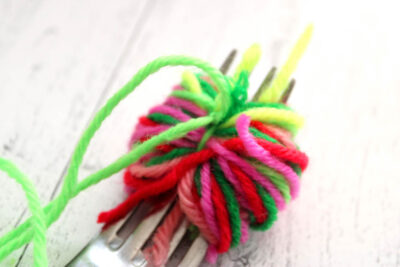
- To secure this unruly mass of yarn scraps, take a length of yarn measuring about 12”, and run it down through the center tine of the fork, around the base of the yarn, and back up through the center fork tine on the opposite side.
- Tie a square knot (again, I like to tie more than one knot to really secure it). When you tie the knot, be sure to pull the yarn as tight as you can. We don’t want our pom pom to fall apart!
- Slide the pom pom off the fork and hold onto it by holding the length of the knotted yarn. IMPORTANT: Always hold these two yarn tails (green in photo) in the next steps because we don’t want to cut the tails accidentally.

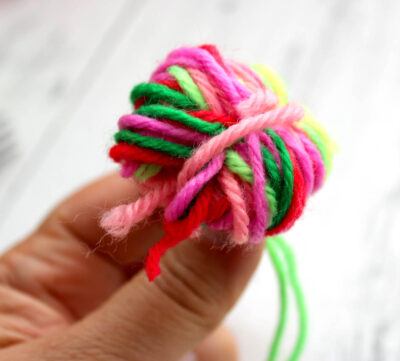
- With a sharp pair of scissors, carefully cut through all of the loops at the center midpoint of the loops.
- You’ll end up with a very wonky bed head looking pom pom like this.
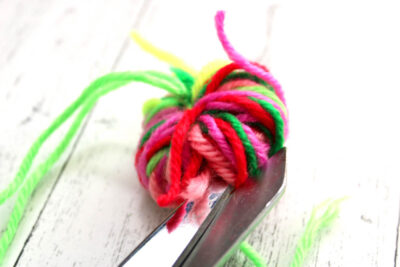
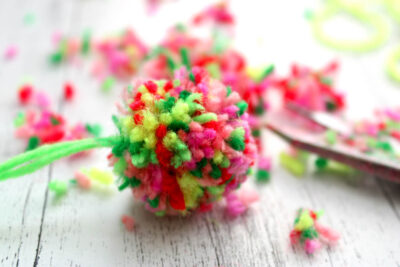
- Now for the fun part! Slowly trim away at the yarn until you have formed a nice ball shape that you are happy with. Note that the closer you trim to the center, the tighter the pom pom will be.
- If you want a really loose, shaggy pom pom, like this, wrap the yarn around your fingers instead of the fork.

Step 7: Secure the Pom Pom
- Secure the pom pom by threading one of the yarn tails through the needle. Run the threaded needle down through the same corner hole that your loop is knotted to, and with the needle still in that hole, run the needle through the opposite corner hole and back up. Now grab the other yarn tail and use both tails to tie a secure knot.
- These easy little ornaments make a lovely keepsake for kids, or a fun, thoughtful neighbor gift. Enjoy!
Video
About the Designer

Julia Frazier is the founder of Bayhill Studio. Julia designs quilts and projects geared toward beginner quilters and crafters. You’ll usually find her at her sewing machine or hiking in the nearby mountains. Follow Julia on Instagram @bayhillstudio, and subscribe to her YouTube channel for new and exciting projects and tutorials. Be sure to check out her Bayhill Studio website for a growing list of tutorials and patterns.
Also by Julia