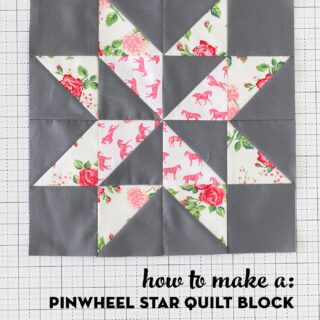
Learn How to make a Pinwheel Star Quilt Block with our Free Pattern
Learn how to make a unique Pinwheel Star Quilt block with our free 12-inch quilt block pattern.
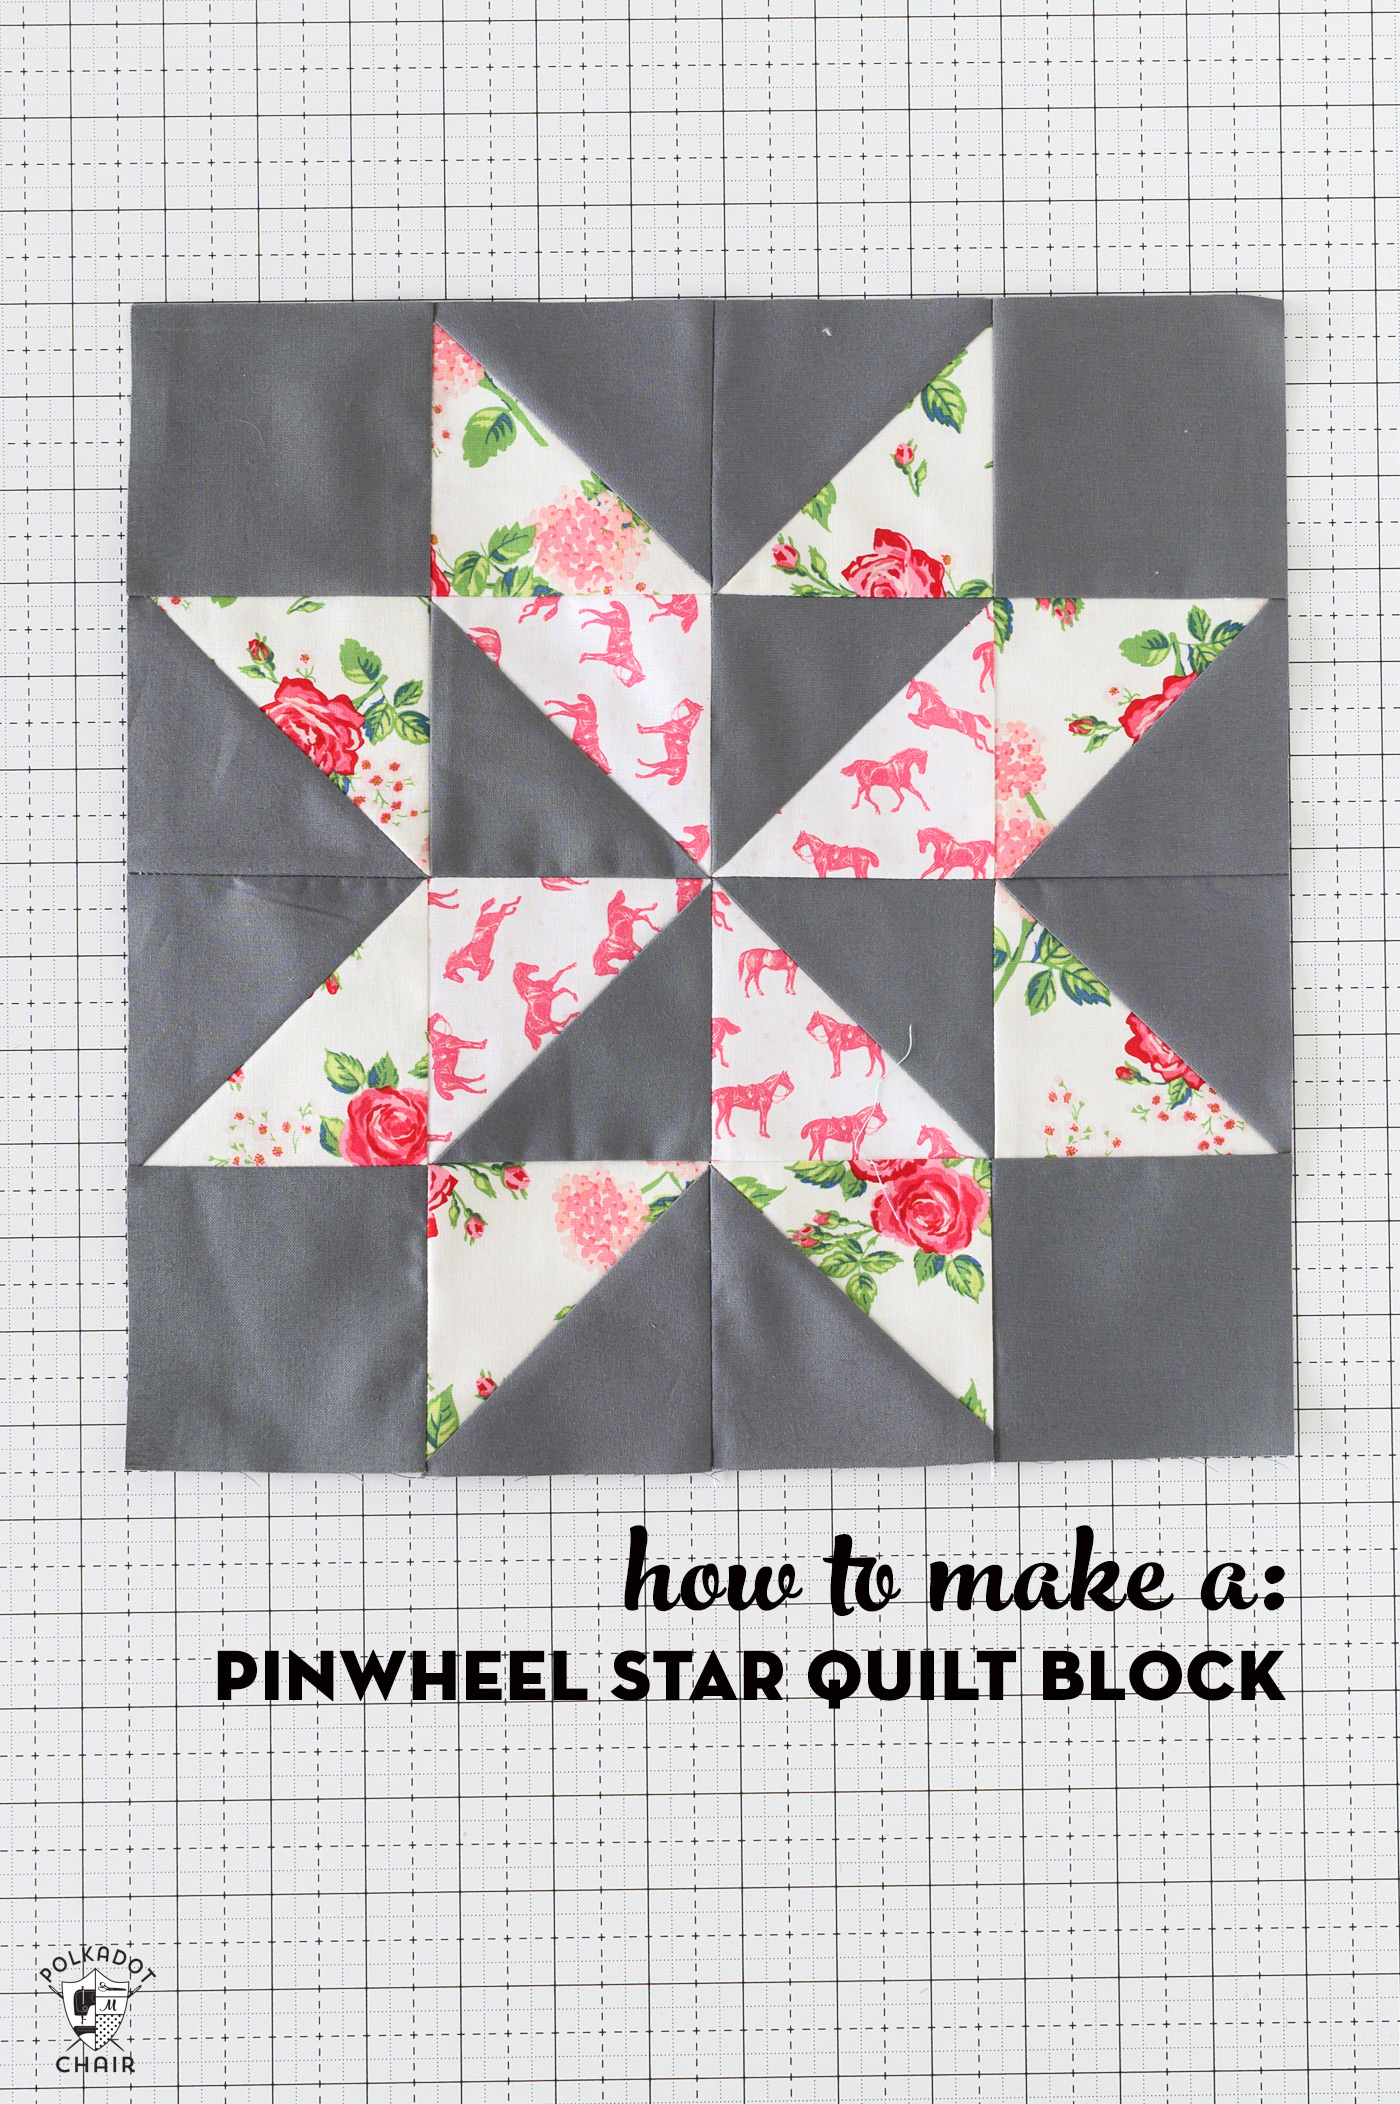
The Pinwheel Star quilt block combines two classic quilt designs into one unique block, a Pinwheel and a Sawtooth Star.
It’s an excellent choice for adding movement and contrast to your quilt, and it looks especially striking in bold prints with high contrast.
In this tutorial, you’ll learn how to sew a 12″ finished Pinwheel Star block using the 8-at-a-time half-square triangles piecing technique!
What is Eight at a Time HST Piecing?
The eight-at-a-time piecing technique is one of my favorite ways to make a lot of half-square triangles (HST) fast. I used it to create my Herrinbgone Baby Quilt and the Pinwheel Fold Over Clutch tutorial I shared last month.
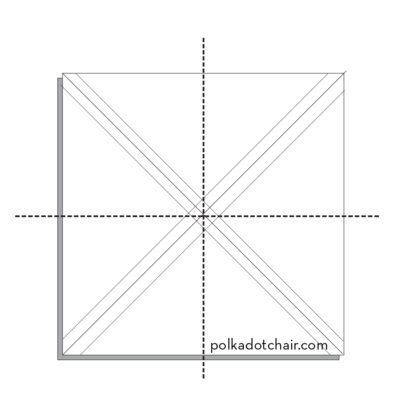
To make eight half-square triangles at once, you begin with two large squares of fabric. Mark diagonal lines on one of the pieces, then sew 1/4″ on each side of those diagonal lines.
After that, cut the piece into eight units and square up to the desired size. This method is so much faster than the traditional method for creating half-square triangles!
This block requires twelve half-square triangles, so we will make eight using the quick piece method and four using the traditional HST method.
Supplies Required to Create the Block
- Basic Quilting Supplies
- 1 Fat Quarter Background Fabric
- 1 Fat Quarter Print Fabric (I used two different prints)
Twelve Inch Pinwheel Star Quilt Block Pattern
Equipment
- Basic Quilting Supplies
supplies
- 1 Fat Quarter Background Fabric Mine is Iron by Riley Blake Designs
- 1 Fat Quarter Print Fabric I used two different prints
Instructions
Cutting Directions:
- Background Fabric:1 piece 8 1/4" x 8 1/4"2 pieces 4" x 4"4 pieces 3 1/2" x 3 1/2"
- Print Fabric:1 piece 8 1/4" x 8 1/4"2 pieces 4" x 4"
Step One: Create the Eight at a Time Half Square Triangles HST
- Draw an X diagonally on the wrong side of the 8 1/4” x 8 1/4” print fabric.

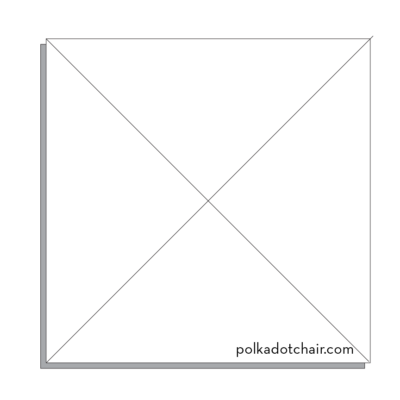
Step Two: Pin
- Pin the marked fabric square with the 8 1/4” square of background fabric, right sides facing.
Step Three: Sew
- Ensure you know the 1/4″ seam mark on your sewing machine foot. Stitching exactly 1/4″ on each side of the line is essential for these steps.
- Stitch 1/4″ on each side of the line you drew in both directions.
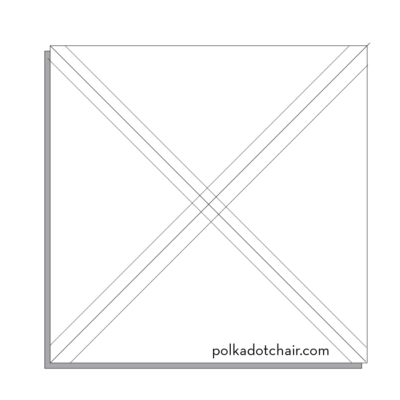
Step Four: Cut
- Using your rotary cutter and quilt ruler, make four cuts.
- First, cut a line horizontally across your block precisely in the center. Next, make a vertical cut also in the center.
- The last cuts are made diagonally along the line you drew in step one.
Step Five: Press & Trim
- You should now have eight pieces of fabric. Open up the HSTs and press the seams towards the darker fabric.
- Trim up each sewn HST to 3 1/2″ x 3 1/2″. I like to use a Bloc-Loc ruler to trim and square up my HSTs.

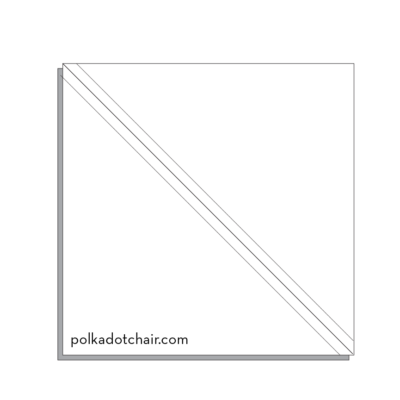
Step Six: Create Four More HST
- Draw a diagonal line on the wrong side of the two 4” x 4” of print fabric.
- Layer one 4” x 4” piece of print fabric with one 4” x 4” piece of background fabric.
- Sew 1/4” on each side of the drawn line. Cut apart along the drawn line.
- Open up the pieces and press.
- Trim and square up to 3 1/2” x 3 1/2”

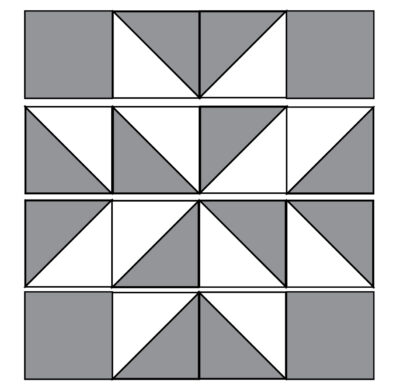
Step Seven: Assemble the Block
- There are a few ways to assemble this block; I think it’s easiest to sew it together by rows.
- Sew the rows together as shown, and sew the rows to each other to complete the block.

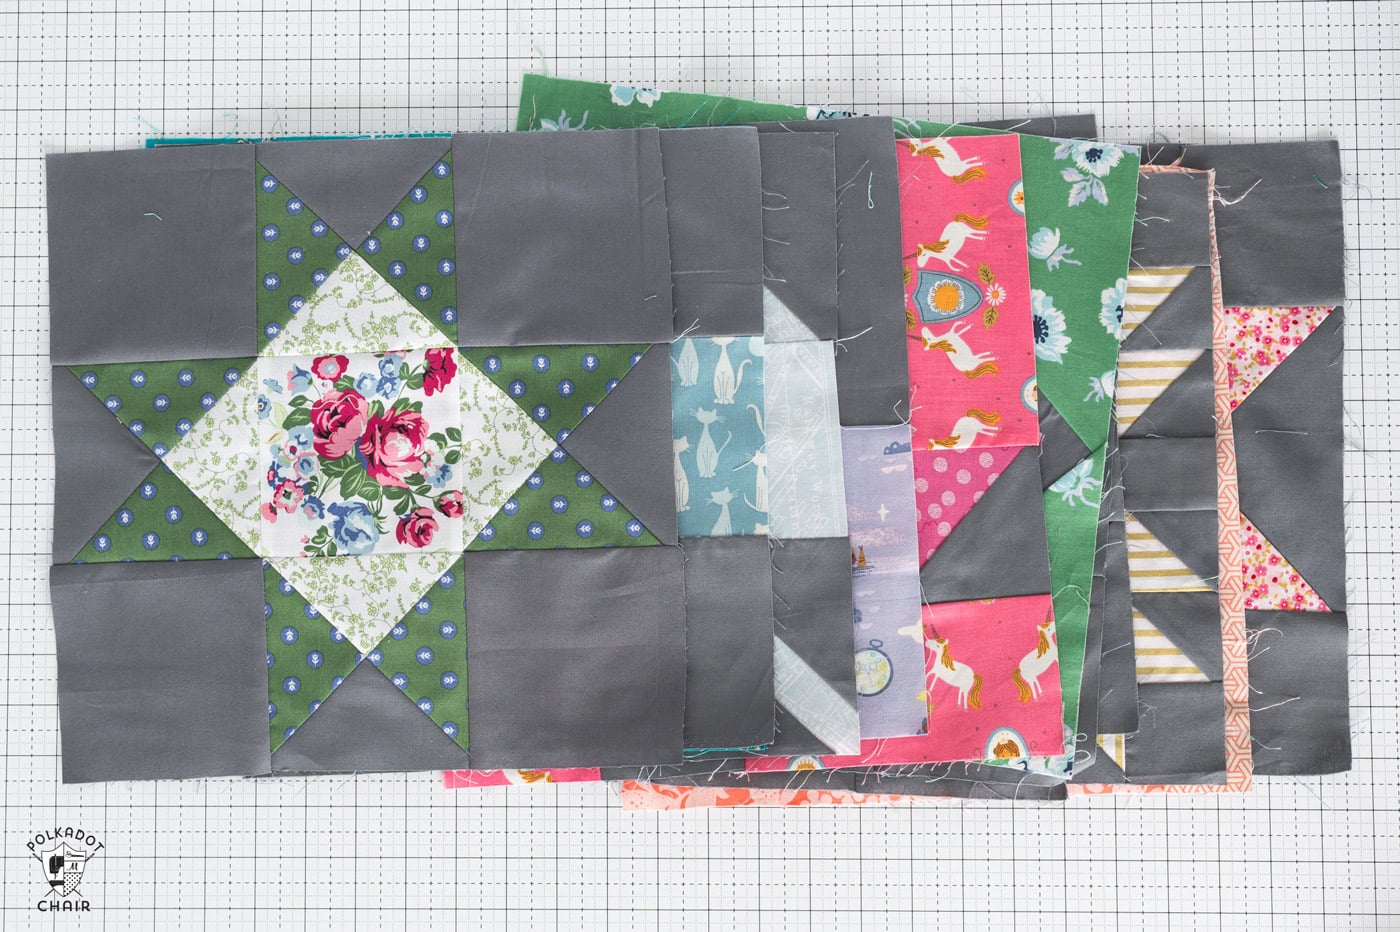
The quilt block will be used in my colorful, scrappy sampler quilt. I’ve linked the other blocks I’m using below.
More Free Twelve-Inch Quilt Block Tutorials
- Churn Dash Quilt Block
- Log Cabin Quilt Block
- Friendship Star Quilt Block
- Economy Block
- Shoo-Fly Quilt Block
- Bear Paw Quilt Block
- Maple Leaf Quilt Block
- Maple Star Quilt Block
- Nine Patch Quilt Block
- Turnstile Quilt Block
- Sawtooth Star Quilt Block
- Bow Tie Quilt Block
- Ohio Star Quilt Block
- Pinwheel Star Quilt Block
- Basket Quilt Block
- Heart Quilt Block
- Rail Fence Quilt Block
- Annie’s Choice Quilt Block
- Butterfly Cross Quilt Block
Non car je dois tout transformer en cm, et c’est très désagréable. Tout le texte est traduit en français, pourquoi pas les mesures.
Bonne journée.
I love pinwheels and this how to is very inspiring to try one. I am a beginner/ long time quilter and these straight forward instructions are great. Looking forward to digging into some scraps and try.