12″ Triangle of Squares Quilt Block Pattern
Today, I’m sharing a pattern for a 12″ Triangle of Squares quilt block. It’s a geometric design that gives you plenty of opportunities to play with color and contrast.
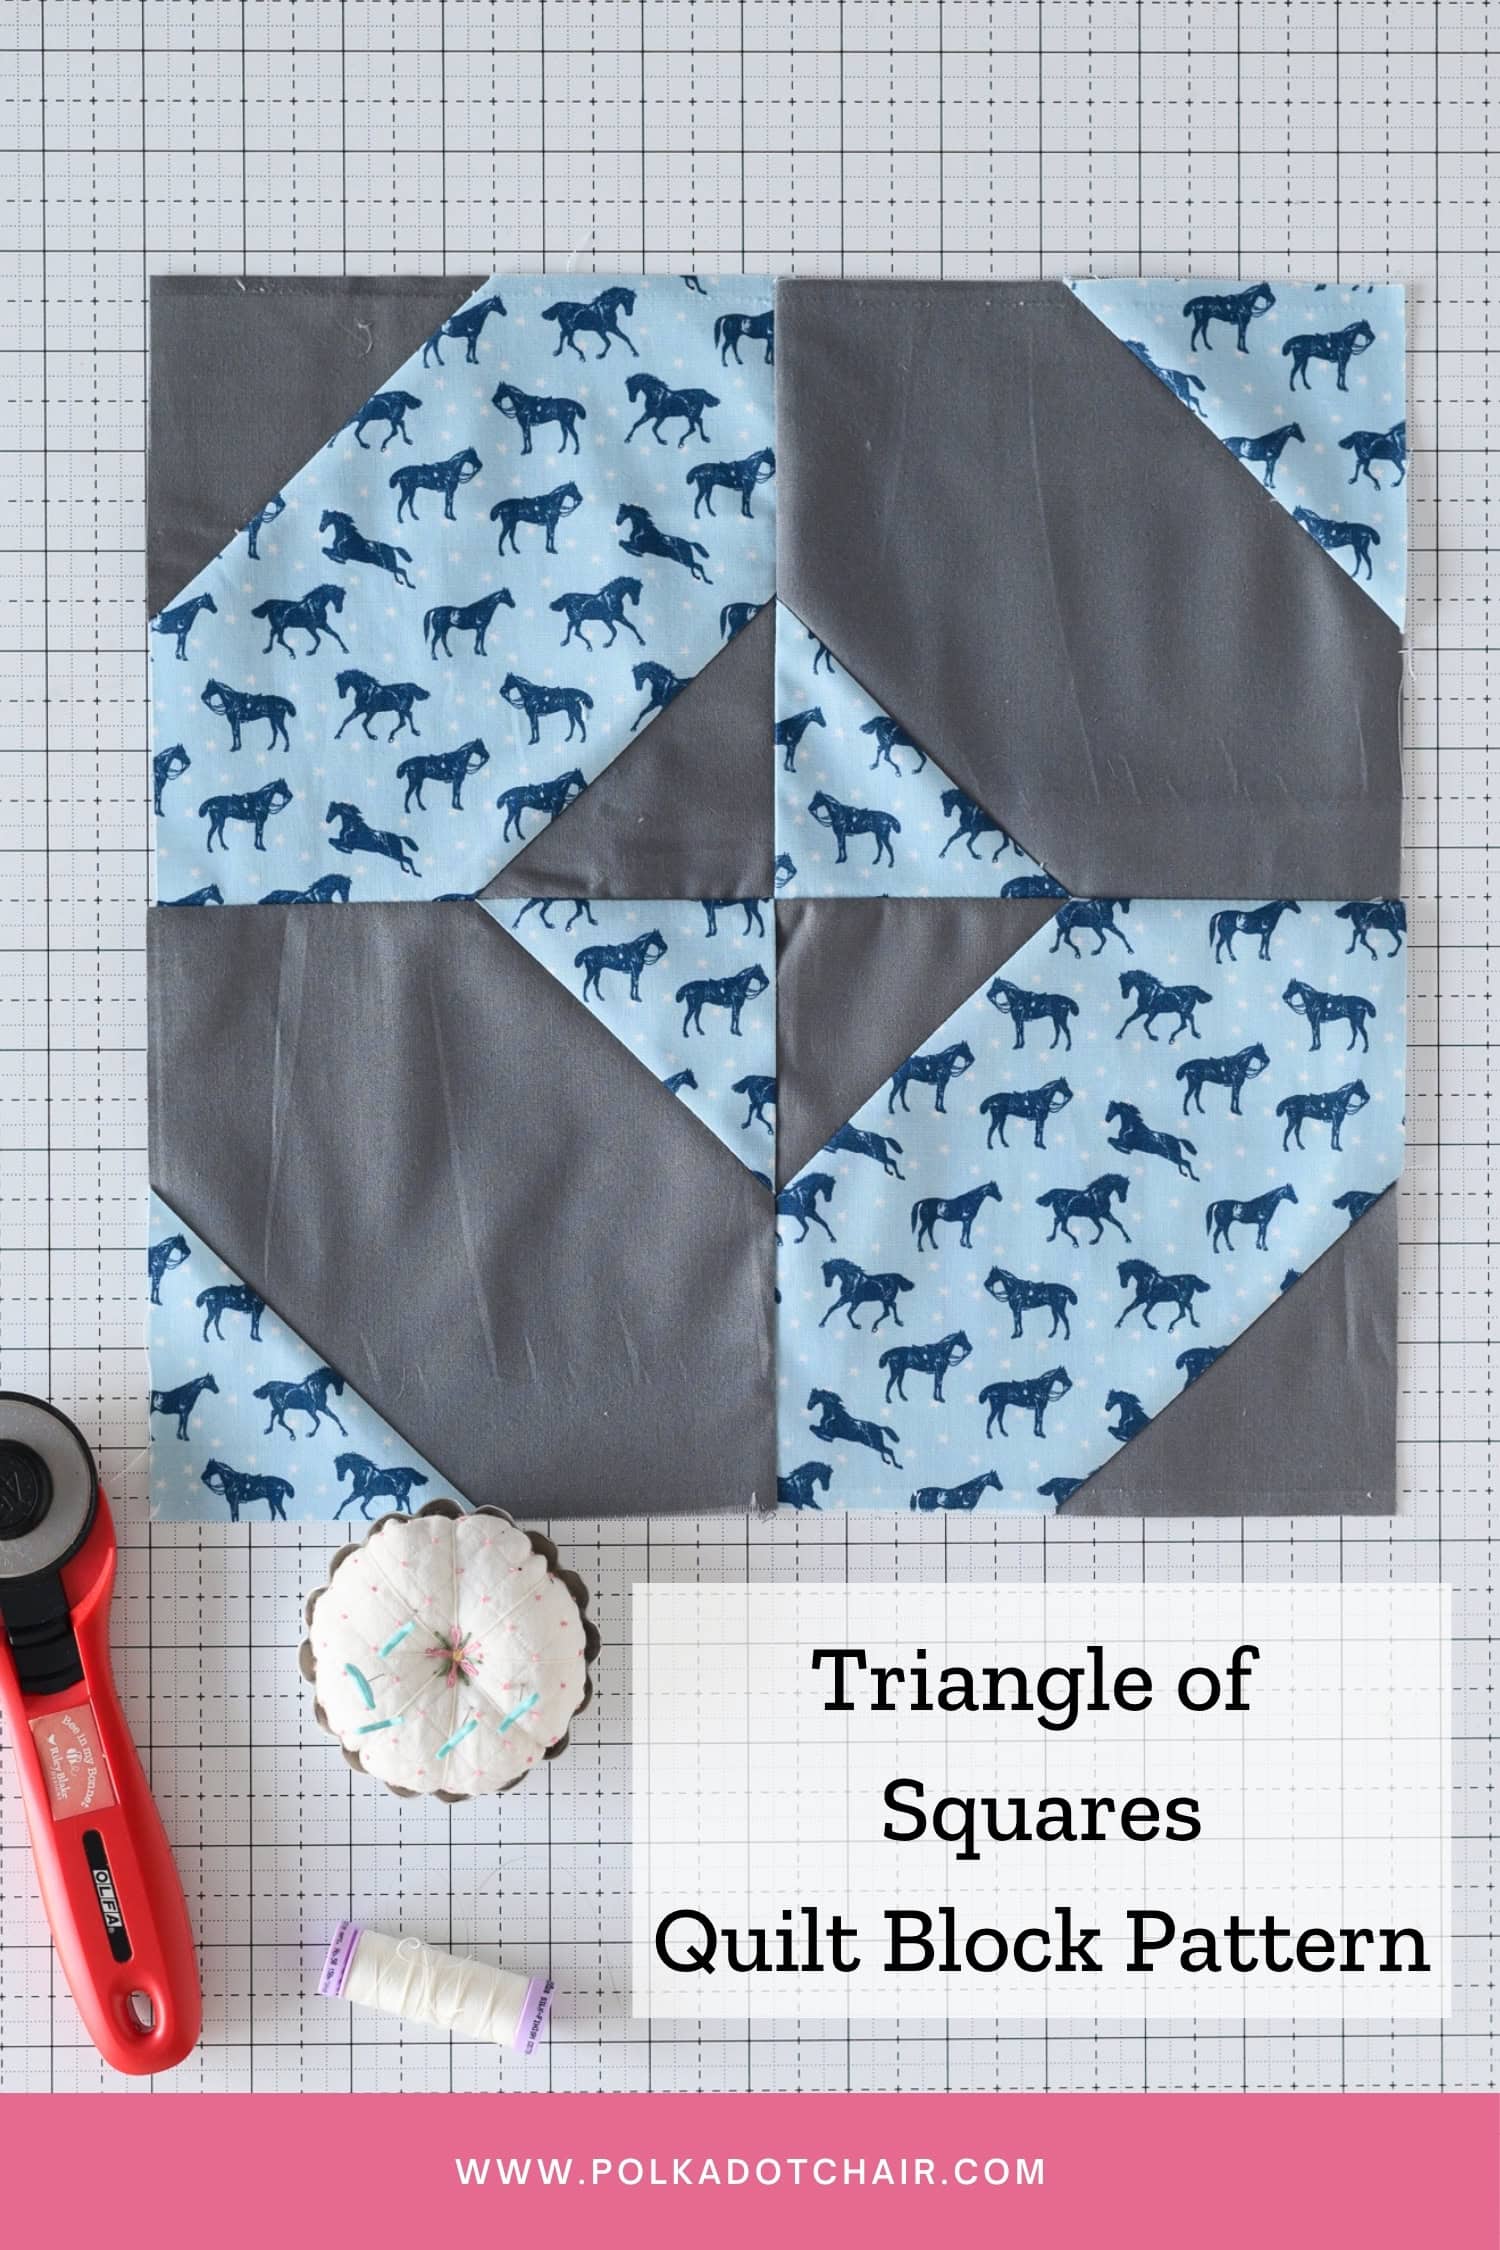
Sometimes a single quilt block is all you need for a little creative reset. You can pull a few fabrics, spend some time at your sewing machine, and try a different color combination without committing to an entire quilt.
For this block tutorial, you can make one to add to a sampler quilt, or repeat the block for a project with a completely different look. I’ll show you ideas for both today!
Choosing Fabrics for Your Block
One of my favorite parts of making individual quilt blocks is choosing the fabrics. It’s a good excuse to pull out a few favorite prints and see how they work together.

For this block, pay attention to the contrast between your patchwork fabrics and your background. If everything is similar in color and value, the piecing can blend together. That can be pretty, but if you want the design to stand out, choose a background that gives the other fabrics a little room to shine.
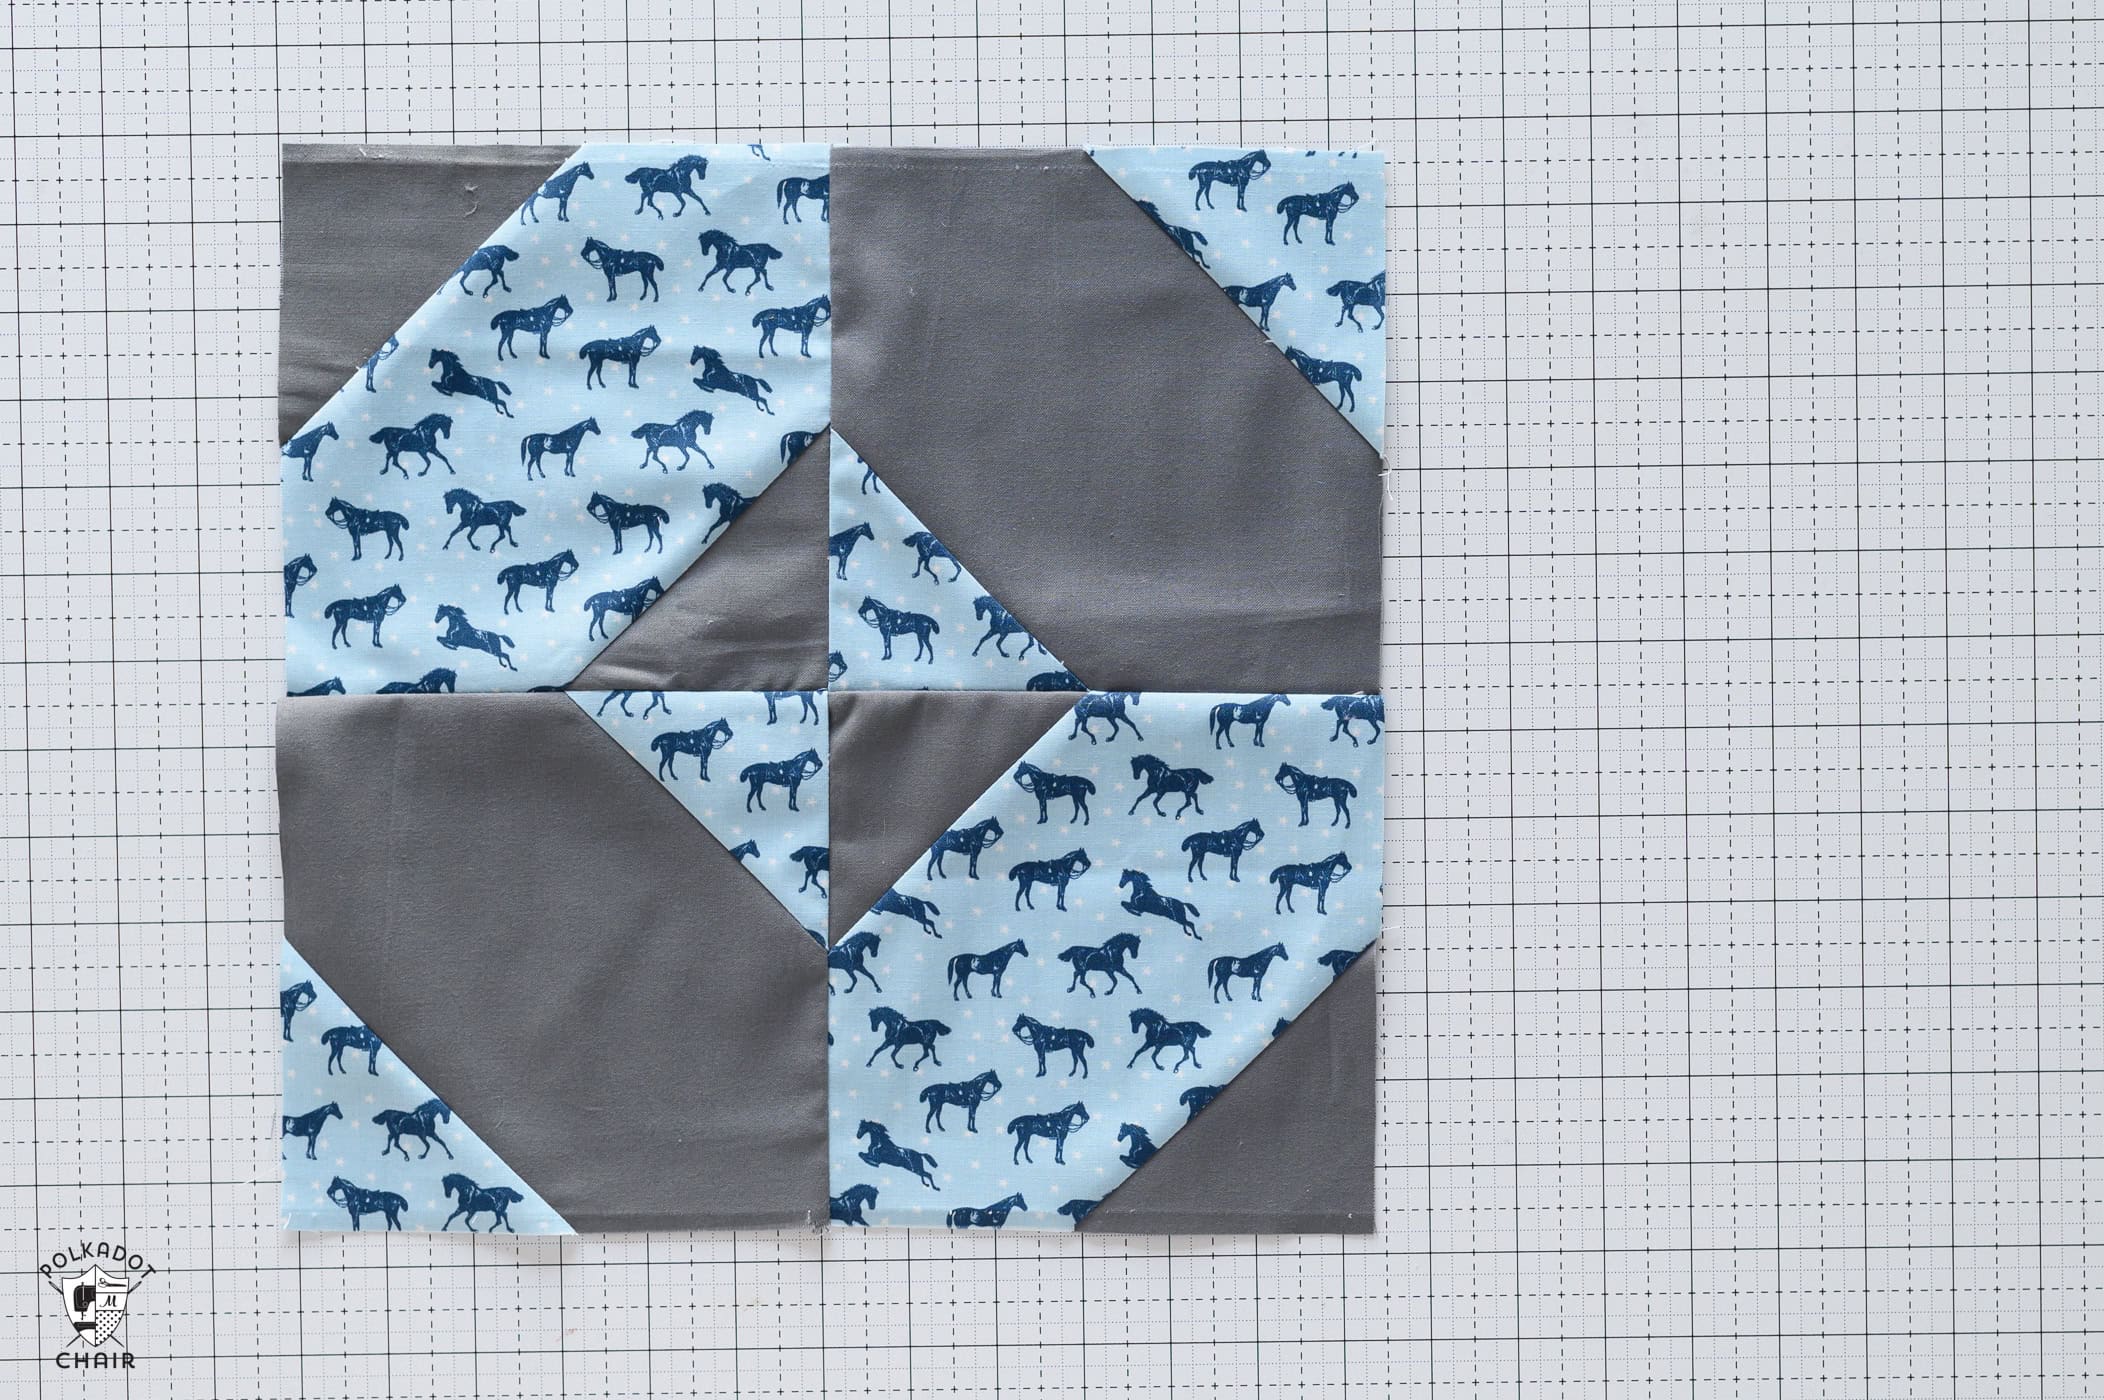
One of the things that I like best about this block is that you can use directional fabrics and keep the fabrics all going the right direction as the block is sewn!
To do this, place your print fabrics for the block at a 45-degree angle to how they will appear on the block. This will keep them facing the right direction after the block is sewn.
TIP: If you’re not sure they are placed correctly, pin the fabric along the proposed stitching line, then flip it up to check the direction.
Completed Quilt Top
The placement of darks and lights for this block gives it a fun “secondary ” pattern when sewn into a quilt top with only these blocks!
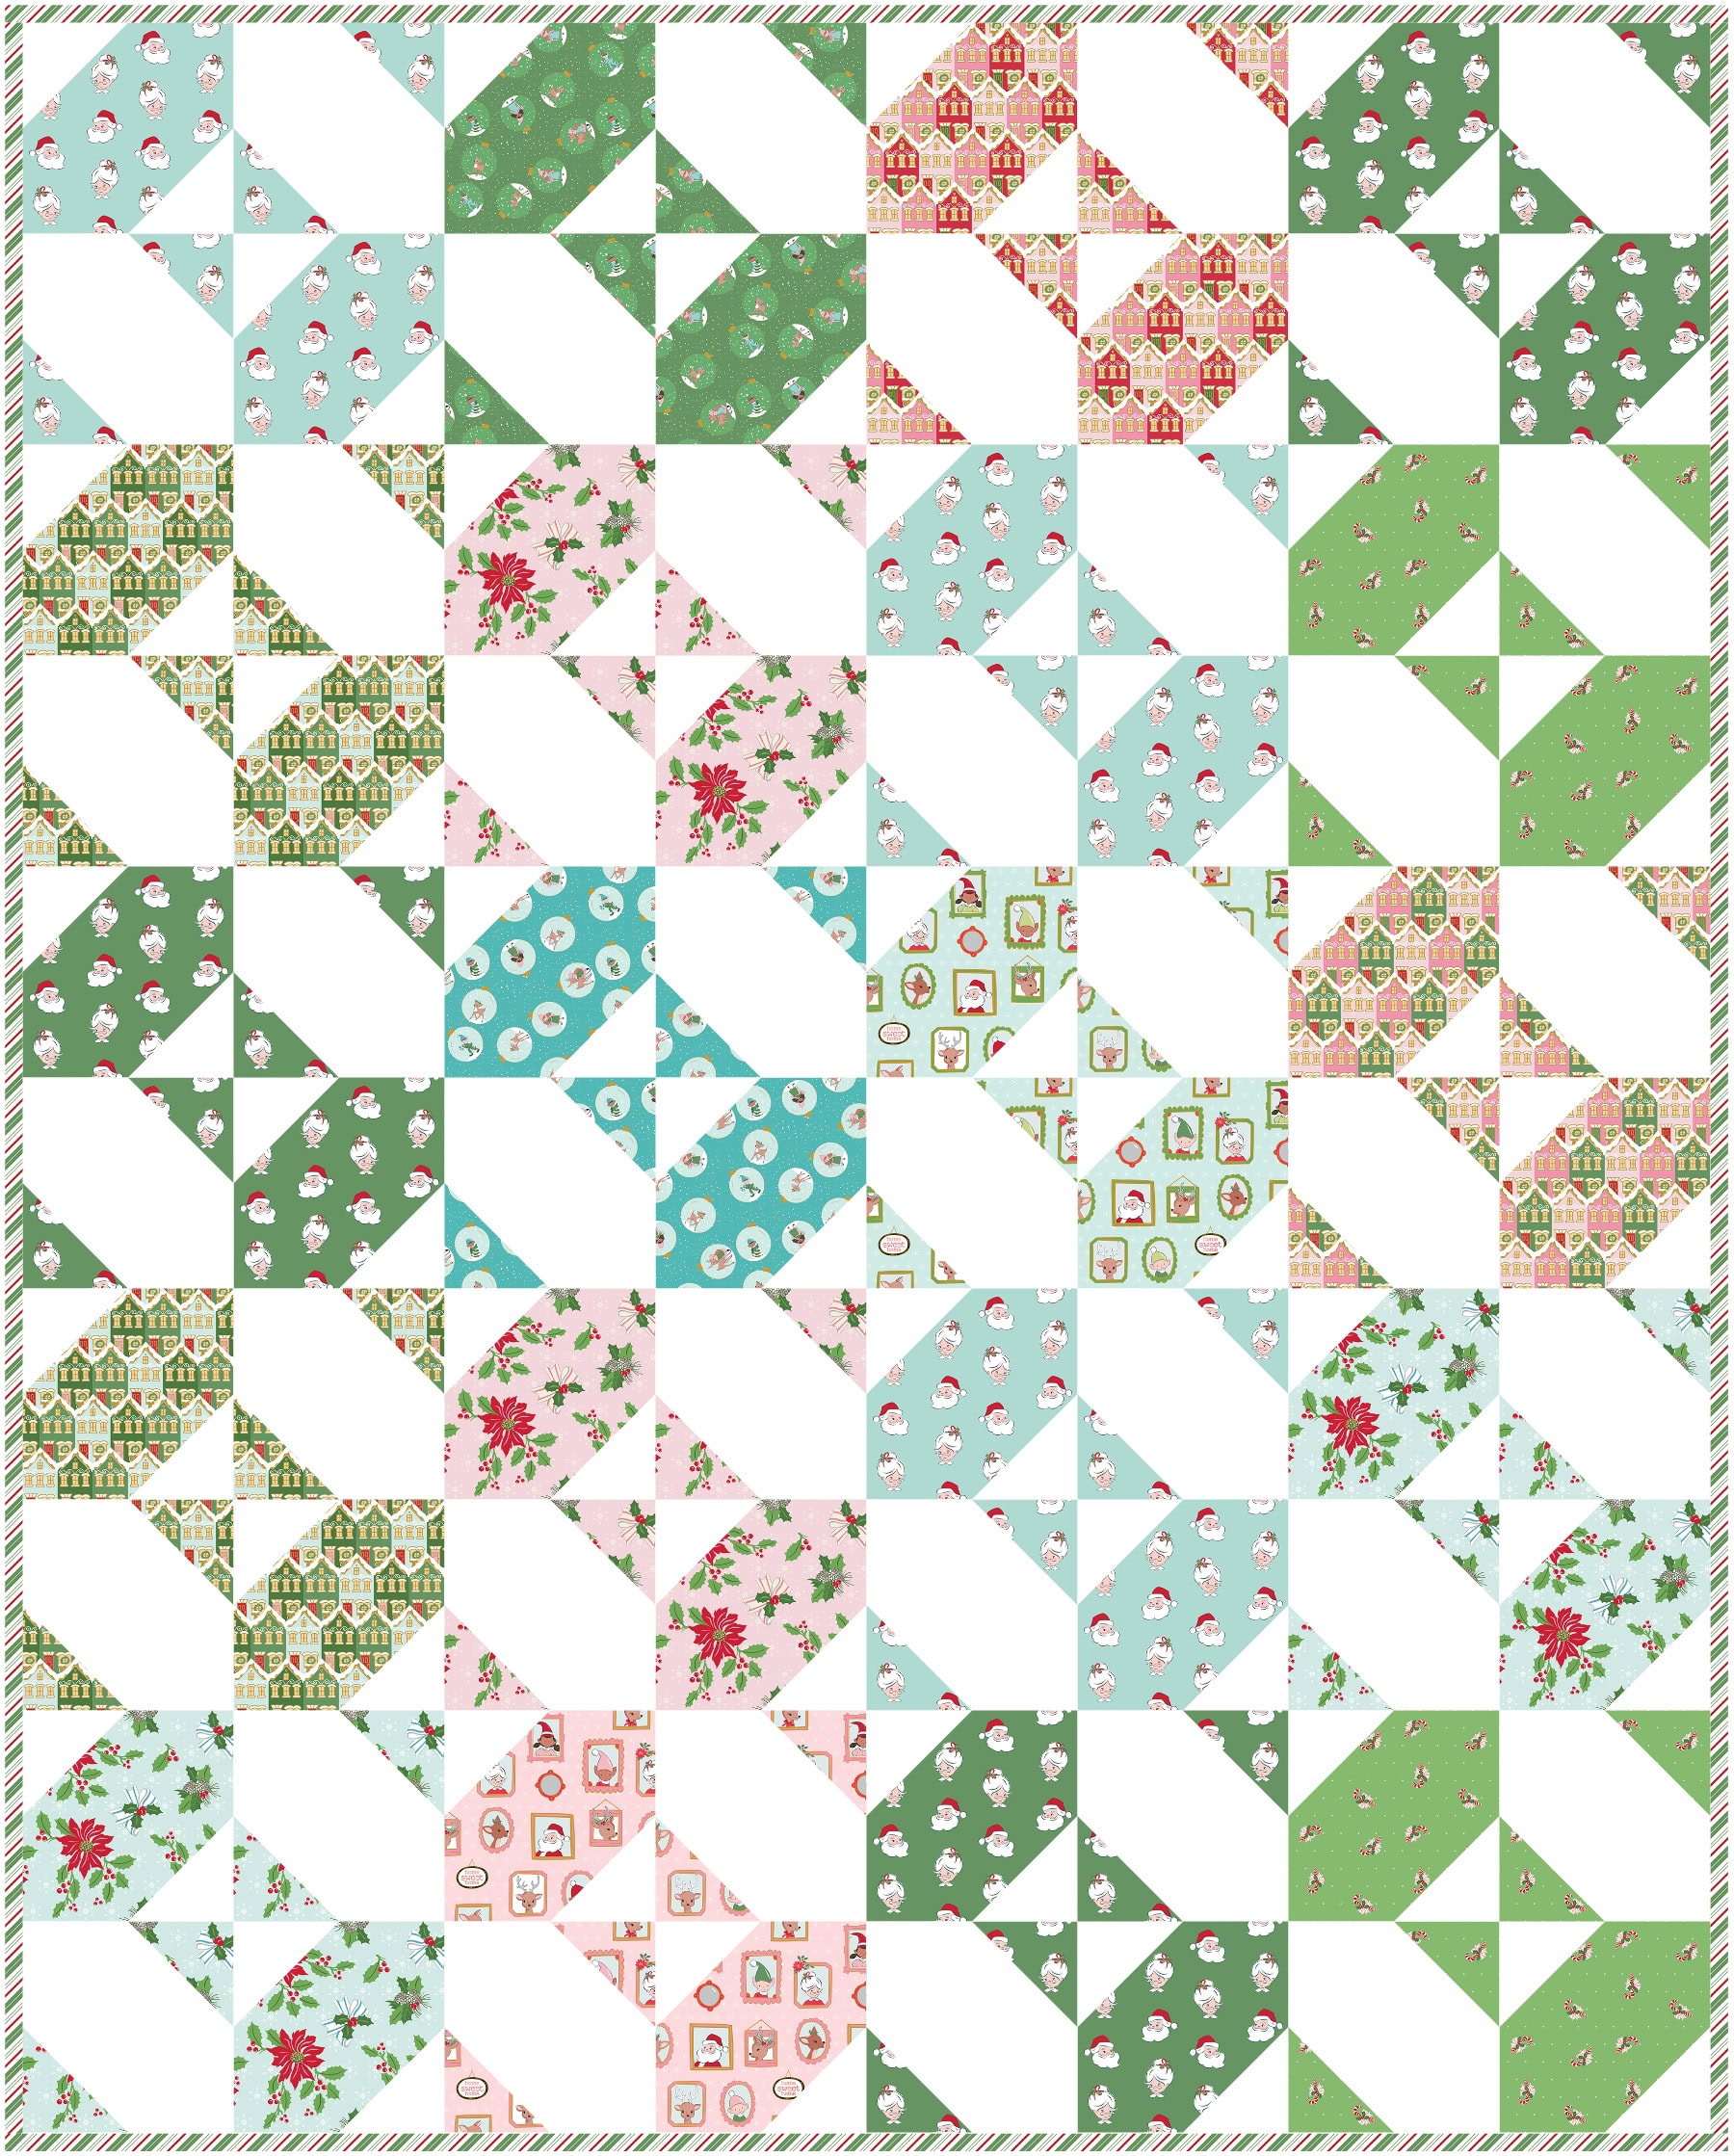
Here’s a mockup with 20 (4 across and 5 down) blocks, all made with this pattern, in my Claus & Co. Fabric collection.
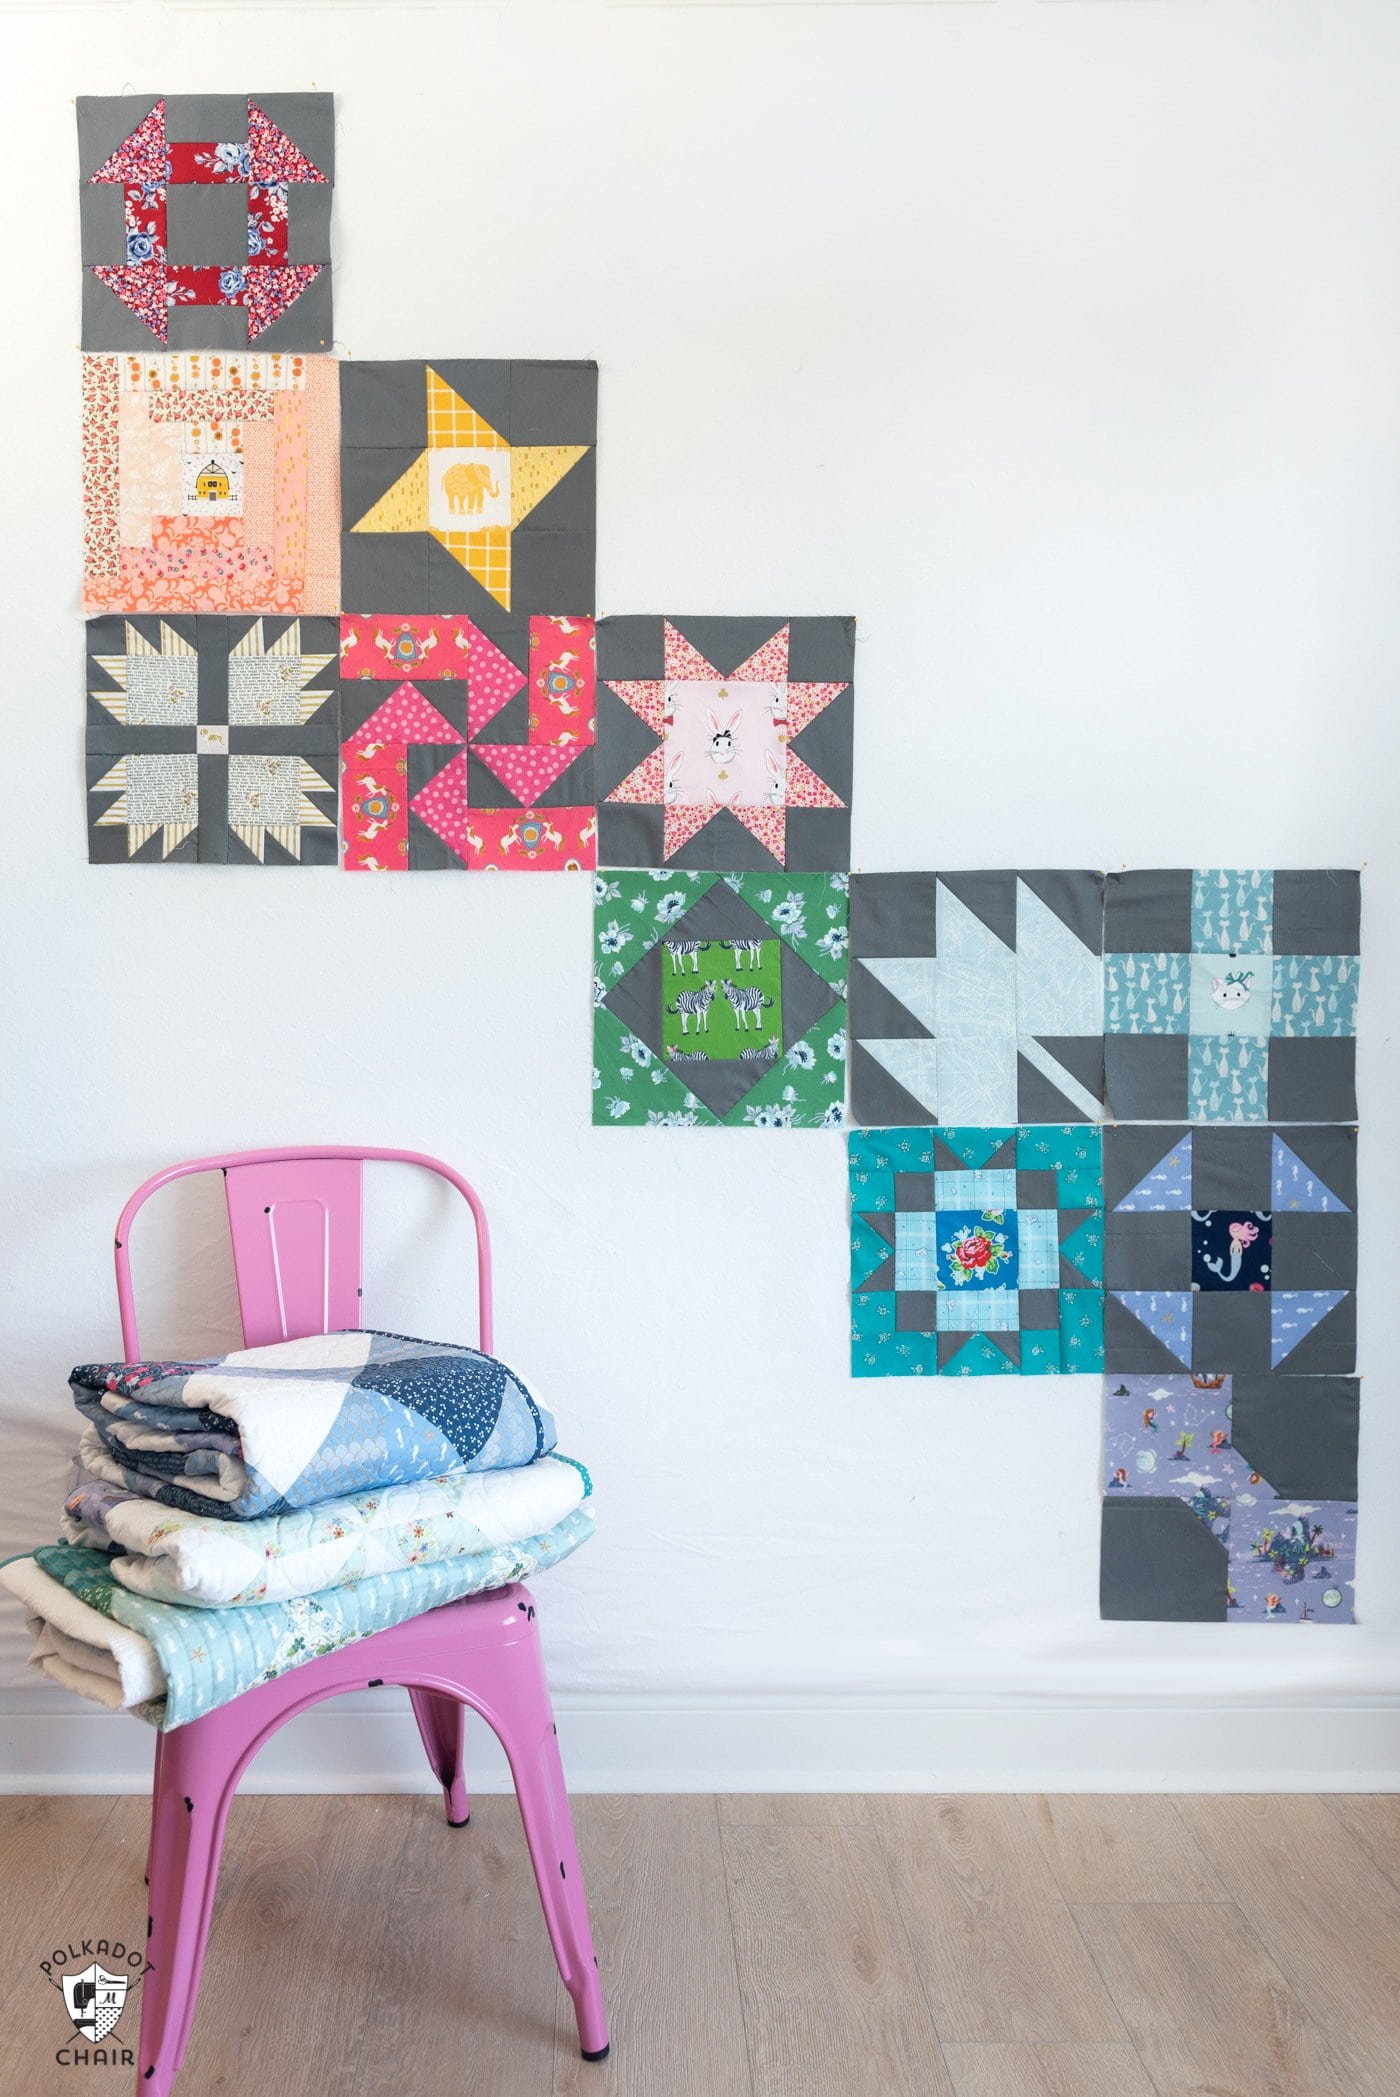
I’ll use my block to complete my Sampler Quilt, which I’ve been working on for a few years! I think it’s time to lay out all the blocks to see what I’m still missing and start planning a finishing layout! I think this is block 17, and I plan to go to 20, so I need 3 more!
A Few Tips Before You Start Sewing
-Before you begin, read through the pattern and organize your cut pieces. I like to use design boards to keep all of my cut pieces together as I sew.

-Take another look before joining each section. It’s much easier to turn a piece around while it’s still on the table than to reach for the seam ripper later!
-Use a consistent ¼” seam allowance, and press carefully as you go. Lift and lower your iron instead of sliding it across the patchwork, especially where you have exposed bias edges.
-For a block that finishes at 12″ square, the unfinished block should measure 12½” × 12½”. That extra ½” accounts for the seam allowances when you sew it into a quilt or another project.
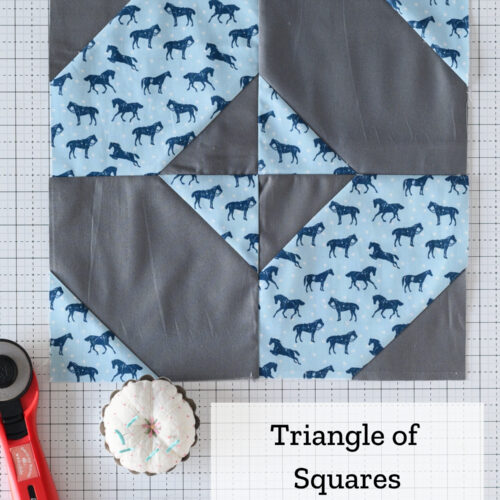
Triangle of Squares Quilt Block Pattern; 12″ Finished Size
Equipment
supplies
- Note: You can get 2 quilt blocks from one Fat Quarter of Fabric A and one Fat Quarter of Fabric B
- 1 Fabric A: 1 Fat Quarter
- 1 Fabric B: 1 Fat Quarter
Instructions
Stitch and Flip Method Directions
- The stitch-and-flip method is a quilting technique that adds a triangle to the corner of a fabric square or rectangle without cutting and sewing individual triangles first. It’s often used for snowball corners and flying geese.
- Mark the square. Draw a diagonal line from corner to corner on the wrong side of the smaller fabric square.
- Position the fabrics. Place the square right sides together on a corner of the larger piece, aligning the raw edges. The marked line should run across the corner you’ll replace.
- Stitch on the line. Sew along the marked diagonal line.
- Check the corner. Fold the small square back along the stitching line. It should cover the original corner, with its edges matching the larger piece.
- Trim and press. Fold the square back into its original position, then trim away the excess fabric from both layers, leaving a ¼” seam allowance beyond the stitching. Flip the remaining triangle open and press.
- Tip: Check that the flipped triangle covers the corner before trimming. If it comes up a little short, try stitching just beside the marked line, toward the corner you’ll cut away, to allow room for the fabric to fold over the seam.
Step One:
- Cutting Directions:Fabric A: 2 pieces 6 1/2” x 6 1/2”4 pieces 3 1/2” x 3 1/2”Fabric B: 2 pieces 6 1/2” x 6 1/2”4 pieces 3 1/2” x 3 1/2”
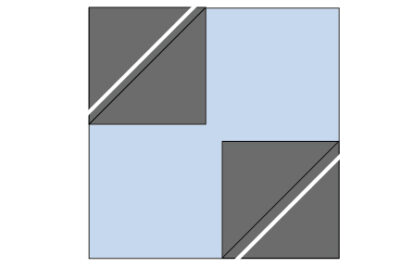
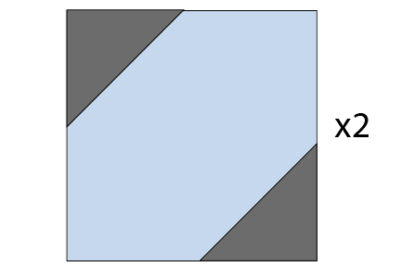
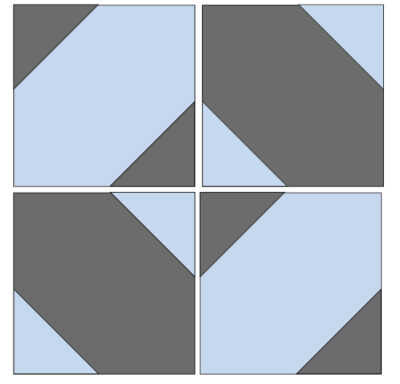
- Using the Stitch and Flip Method, piece two 3 1/2” x 3 1/2” pieces of Fabric A onto opposite corners of one 6 1/2” x 6 1/2” piece of Fabric B as shown in the diagram.

- Repeat one more time to have two sewn units.
Step Two:
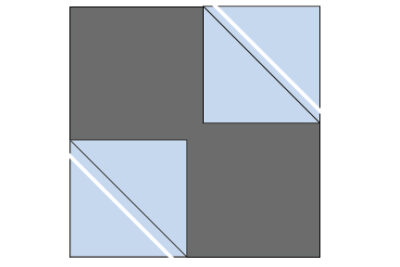
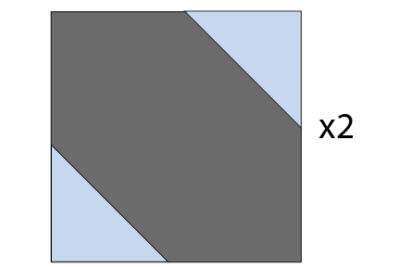
- Using the Stitch and Flip Method, piece two 3 1/2” x 3 1/2” pieces of Fabric B onto opposite corners of one 6 1/2” x 6 1/2” piece of Fabric B as shown in the diagram. Note the placement of the squares and the direction of the stitching line.
- Repeat one more time to have two sewn units.
Step Three:
- Sew the four completed units together as shown in the diagram to complete your block.

Whether you choose a coordinated group of prints or a handful of scraps, this 12″ Triangle of Squares quilt block is a chance to experiment. Start with one, see how you like the fabrics together, and decide what you’d like to make next.
More 12″ Quilt Block Patterns
- Churn Dash Quilt Block
- Log Cabin Quilt Block
- Friendship Star Quilt Block
- Economy Block
- Shoo-Fly Quilt Block
- Bear Paw Quilt Block
- Maple Leaf Quilt Block
- Maple Star Quilt Block
- Nine Patch Quilt Block
- Turnstile Quilt Block
- Sawtooth Star Quilt Block
- Bow Tie Quilt Block
- Ohio Star Quilt Block
- Pinwheel Star Quilt Block
- Basket Quilt Block
- Heart Quilt Block
- Rail Fence Quilt Block
- Annie’s Choice Quilt Block
- Butterfly Cross Quilt Block